Battle of Maida
The Battle of Maida, fought on 4 July 1806 was a battle between the British expeditionary force and a French force outside the town of Maida in Calabria, Italy during the Napoleonic Wars. John Stuart led 5,236 Anglo-Sicilian troops to victory over about 5,400 Franco-Italian-Polish troops under the command of French general Jean Reynier, inflicting significant losses while incurring relatively few casualties. Maida is located in the toe of Italy, about 30 kilometres (19 mi) west of Catanzaro.
In early 1806, the French invaded and overran the Kingdom of Naples, forcing King Ferdinand I of the Two Sicilies and his government to flee to Sicily. The Calabrians revolted against their new conquerors and Stuart's expeditionary force tried to exploit the unrest by raiding the coast. While ashore, the British encountered Reynier's division and the two sides engaged in battle. The 19th-century historians presented the action as a typical fight between French columns and British lines. This view of the battle has been called into doubt by at least one modern historian who argued that the French deployed into lines. Nobody questions the result which was a one-sided British victory.
After the battle, Stuart captured some isolated garrisons in Calabria and was transported back to Sicily by the Royal Navy. Two weeks after the battle, the city of Gaeta fell to the French after a long siege. While Stuart succeeded in preventing a French invasion of Sicily and sustained the revolt in Calabria, he missed an opportunity to assist the defenders of Gaeta.
Background
Following the decision by King Ferdinand to side with the Third Coalition against Napoleon I of France, French forces had invaded the Kingdom of Naples in the spring of 1806, after the British and Russian forces supposedly defending the kingdom evacuated Italy altogether: the British to Sicily and the Russians to Corfu. The Neapolitan-Sicilian army was crushed at the Battle of Campo Tenese, forcing Ferdinand to flee to Sicily and concede the Neapolitan crown to the French. Napoleon then installed his brother Joseph Bonaparte on the Neapolitan throne.
By July 1806, the French had crushed all Neapolitan resistance except for the uprising in Calabria and a garrison at Gaeta. There, André Masséna's force become embroiled in a lengthy siege. The British decided to organise an expedition into Calabria to further the insurrection against the French, and prevent any potential invasion of Sicily.
Battle

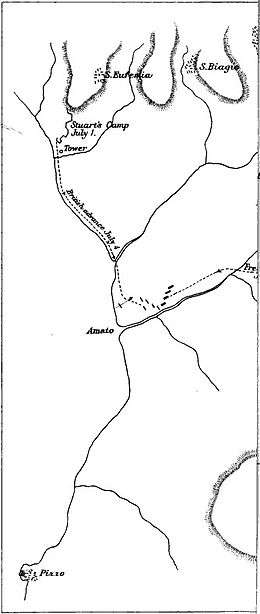
A British force of over 5,000 men commanded by Major-General John Stuart sailed from Messina on 27 June, landing in the Gulf of Sant'Eufemia three days later. At the same time a French force under the command of General Jean Reynier, the only French force in Calabria, moved to confront them. The exact size of the French force is unknown.[1] Contemporary French sources range between 5050 and 5450.[1] Some later historians have suggested a force as large as 6400 but the most recent estimates are closer to 5400.[1]
On the morning of 4 July, Reynier broke camp and advanced toward level terrain along the shallow Lomato River. Believing his army superior in numbers, Stuart marched toward the same location nearly parallel to the French column. As both forces deployed from march column, they ended up in echelon formation. On the French side, the left flank was leading, while on the British side the right flank was leading. On the French left, General of Brigade Louis Fursy Henri Compère was echeloned forward, with the 1st Light Infantry Regiment on the left and the 42nd Line Infantry Regiment to its right. The center, commanded by General of Brigade Luigi Gaspare Peyri, included two battalions of Poles and the 4th battalion of the 1st Swiss Regiment. On the right flank, General of Brigade Antoine Digonet trailed the other two formations. Digonet's command comprised the 23rd Light Infantry and 9th Chasseurs à Cheval Regiments and the field guns. Opposing the French was Colonel James Kempt's Advanced Guard on the British right flank, echeloned forward. To Kempt's left rear was Colonel Wroth Palmer Acland's 2nd Brigade. Well to Acland's left rear marched Colonel John Oswald's 3rd Brigade, which formed the center. Colonel Lowry Cole's 1st Brigade deployed on the left flank with the artillery. Cole was closer to the French than Oswald. Off conducting diversionary actions was the 20th Foot, which would be late.[2]

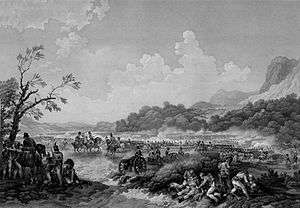
Only when the armies were nearly in contact did Stuart realize that he was outnumbered, but he allowed the battle to commence without changing any orders. Kempt detached the Royal Corsican Rangers and Sicilians as skirmishers. These got into a brawl with Compère's voltigeurs (light companies) and fell back. Kempt sent the flankers of the 35th Foot and the light company of the 20th Foot to help. Once the British troops halted the French skirmishers, they rejoined Kempt. At this time, Compère launched the 1st Light at Kempt, while the 42nd Line aimed to strike Acland. Since it had a head start, 1st Light's attack columns met Kempt's troops first. At 150 yards, the Advanced Guard fired its first volley but the 1st Light continued to advance. Kempt's second volley was fired at a range of 80 yards, wounding Compère, who nevertheless urged his men on. Though disordered by their losses, the French closed to 20 yards, where they absorbed a third volley. This fire completely broke up the 1st Light and its soldiers turned and fled. Compère, who literally rode into the British line, and others were captured in the brief melée that followed.[3]

As the 1st Light's attack collapsed, Kempt's men charged their shaken enemies. As the French formation disintegrated, the Advanced Guard went out of control, chasing the fleeing French as far as Maida. Meanwhile, the 42nd advanced on Acland in two battalion columns. The British fired at a range of 300 yards and blazed away until the French attack ground to a halt. Aware that their neighboring regiment was fleeing from the battlefield, the 42nd also decamped.[3] Seeing his left wing in rout, Reynier sent Peyri's brigade to face Acland. After a brisk action, the Poles were routed at bayonet point. The Swiss, however, maintained order and gave a good account of themselves. After Stuart sent reinforcements into the fight, the Swiss battalion fell back to join Digonet's brigade. Acland and Cole now advanced on Digonet and the Swiss. The 9th Chasseurs charged, forcing the British battalions to form square. Oswald's brigade appeared on the scene, but Digonet still held his ground, supported by the cavalry and the guns. Finally, the 20th Foot arrived from the coast and began firing at the exposed right flank of the 23rd Light. At this, Digonet and the Swiss began an orderly retreat and the battle was over.[4]
Stuart's 5,196-man force suffered 45 killed and 282 wounded for a total of 327 casualties. Out of a total of 6,440 soldiers, Reynier lost 490 killed and 870 wounded. In addition, the British captured 722 French soldiers and four cannon.[5] Another authority asserts that the French saved their guns. The 1st Light Infantry lost 50% of its strength between killed, wounded, and prisoners.[4] The action involving the 1st Light Infantry lasted only fifteen minutes.[6]
Aftermath
_-_Louis-Marie_Autissier.jpg)
Stuart ordered Kempt's Advanced Guard to observe Reynier's withdrawal while he and Sidney Smith discussed future actions. On 6 July, they decided to move south and pick off Reynier's garrisons.[4] That day, a half-battalion of the Polish-Italian Legion in the town of Vibo Valentia (Monteleone di Calabria) surrendered to Stuart.[7] On 7 July, three more companies of Poles laid down their arms in Tropea when summoned by Captain Edward Fellowes in the frigate HMS Apollo.[8] Reggio Calabria surrendered on 9 July to Brigadier General Broderick with 1,200 British and Neapolitan troops. The allies were transported from Sicily in the frigate HMS Amphion under Captain William Hoste. On this occasion, 632 soldiers from the 1st Light and 42nd Line Infantry Regiments were captured.[9]
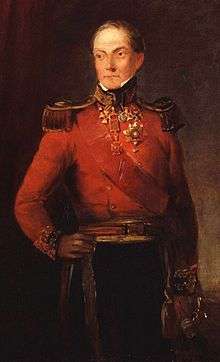
Marching south, Stuart reached Reggio on 23 July. Before returning to Sicily, he and Smith mopped up all of Reynier's garrisons in southern Calabria.[10] On 24 July, the fortress of Scilla and 281 soldiers of the 23rd Light Infantry surrendered to Oswald. The British had one battalion each of the 10th Foot, 21st Foot, and Chasseurs Britanniques. The 3rd battalion of the Polish-Italian Legion, 500 strong, surrendered to Captain Hoste in the Amphion and the 78th Foot at Crotone on 28 July.[9] Stuart received the Order of the Bath and an annuity of £1,000 a year from the British crown, and the title Count of Maida from King Ferdinand, for the victory.[6]
The allies suffered a major setback on 18 July when the long Siege of Gaeta ended. After the French siege artillery breached Gaeta's walls, the Neapolitan garrison capitulated. By marching south, Stuart and Smith missed a chance to intervene in the siege or to land at Naples and attempt to overthrow Joseph's government. The surrender freed Masséna's force for operations in Calabria. In Stuart's defence, his expedition had successfully accomplished its main objective, which was to prevent any early invasion of Sicily. He also lengthened the revolt, which the French would not bring under control until 1807.[10]
The political situation in southern Italy would remain unchanged until 1815, with the British and Sicilian troops guarding the Bourbon King Ferdinand in Sicily and the Napoleonic King of Naples controlling the mainland. The British failed to use their naval superiority around Italy and did little to harass the French on the mainland. In 1808, Joachim Murat became the King of Naples after Joseph Bonaparte was sent to govern Spain. Murat made various attempts to cross the Strait of Sicily, which all ended in failure, despite once managing to secure a foothold in Sicily. It was not until Austria defeated Murat in the Neapolitan War in 1815, that King Ferdinand was finally restored to the Neapolitan throne.
Legacy
Maida Hill and Maida Vale in London are both named after this battle.
The Royal Navy named the recently (in 1806) captured Jupiter HMS Maida.
Orders of battle
| British order of battle[7][11] | French order of battle[7][12] |
|---|---|
|
Major General John Stuart (236 officers, 4,960 men)
.png) British Army Order of Battle (Battle of Maida) |
Général de Division Jean Reynier (6,029 men)
.png) French Army Order of Battle (Battle of Maida) |
Historical reanalysis
It is traditionally thought that in the Battle of Maida the British deployed in a line while the French attacked in columns, allowing the British to fire full strength volleys into the French columns, while only the first two ranks of the French could fire, similar to Crossing the T in naval combat. However, modern historians dispute this claim. The military historian James R. Arnold argues that:
- "The writings of Sir Charles Oman and Sir John Fortescue dominated subsequent English-language Napoleonic history. Their views [that the French infantry used heavy columns to attack lines of infantry] became very much the received wisdom. ... By 1998 a new paradigm seemed to have set in with the publication of two books devoted to Napoleonic battle tactics. Both claimed that the French fought in line at Maida and both fully explored French tactical variety. The 2002 publication of The Battle of Maida 1806: Fifteen Minutes of Glory, appeared to have brought the issue of column versus line to a satisfactory conclusion: "The contemporary sources are...the best evidence and their conclusion is clear: General Compère's brigade formed into line to attack Kempt's Light Battalion." The decisive action at Maida took place in less than fifteen minutes. It had taken 72 years to rectify a great historian's error about what transpired during those minutes."[13][14]
The British fired volleys then charged with the bayonet, and the French, failing to withstand the onslaught, broke and fled, suffering heavily in the rout.
References
- Hopton, Richard (2002). The Battle of Maida 1806 Fifteen Minutes of Glory. Leo Cooper. p. 111. ISBN 0-85052-845-3.
- Schneid, Frederick C. Napoleon's Italian Campaigns: 1805-1815. Westport, Conn.: Praeger Publishers, 2002. ISBN 0-275-96875-8. pp. 52-53
- Schneid, p 53
- Schneid, p 54
- Smith, p 221
- Chandler, David, Dictionary of the Napoleonic Wars, Wordsworth, 1999. ISBN 1-84022-203-4. p 261
- Smith, Digby. The Napoleonic Wars Data Book. London: Greenhill Books, 1998. ISBN 1-85367-276-9. p 221. Smith assigns 1/35th to grenadiers, Schneid gives 1/36th. Smith lists Flankers of 35th; Schneid lists 5th. Smith was used in both cases.
- Smith, pp 221-222
- Smith, p 222
- Schneid, p 55
- Schneid, p 176. Strengths are from Schneid.
- Schneid, pp 175-176
- Arnold, James R. "A Reappraisal of Column Versus Line in the Peninsular War Oman and Historiography", The Napoleon Series, August 2004.
- Arnold, James. "A Reappraisal of Column Versus Line in the Napoleonic Wars" Journal of the Society for Army Historical Research LX no. 244 (Winter 1982): pp. 196-208.
Sources
- War Monthly Issue 12
- "Details of battle". Archived from the original on 17 March 2004.
- Details of battle at Clash of Steel
- Schneid, Frederick C. Napoleon's Italian Campaigns: 1805–1815. Westport, Conn.: Praeger Publishers, 2002. ISBN 0-275-96875-8
- Smith, Digby. The Napoleonic Wars Data Book. London: Greenhill Books, 1998. ISBN 1-85367-276-9
