Siege of Malta (World War II)
The Siege of Malta in World War II was a military campaign in the Mediterranean Theatre. From June 1940 to November 1942, the fight for the control of the strategically important island of the British Crown Colony of Malta, which pitted the air forces and navies of Fascist Italy and Nazi Germany against the Royal Air Force (RAF) and the Royal Navy.
The opening of a new front in North Africa in June 1940 increased Malta's already considerable value. British air and sea forces based on the island could attack Axis ships transporting vital supplies and reinforcements from Europe; Churchill called the island an "unsinkable aircraft carrier".[10] General Erwin Rommel, in de facto field command of Axis forces in North Africa, recognised its importance quickly. In May 1941, he warned that "Without Malta the Axis will end by losing control of North Africa".[1]
The Axis resolved to bomb or starve Malta into submission, by attacking its ports, towns, cities, and Allied shipping supplying the island. Malta was one of the most intensively bombed areas during the war. The Luftwaffe (German Air Force) and the Regia Aeronautica (Italian Royal Air Force) flew a total of 3,000 bombing raids, dropping 6,700 tons of bombs on the Grand Harbour area alone,[11] over a period of two years in an effort to destroy RAF defences and the ports.[12] Success would have made possible a combined German–Italian amphibious landing (Operation Herkules) supported by German airborne forces (Fallschirmjäger), but this did not happen. In the event, Allied convoys were able to supply and reinforce Malta, while the RAF defended its airspace, though at great cost in material and lives. In November 1942 the Axis lost the Second Battle of El Alamein, and the Allies landed forces in Vichy French Morocco and Algeria under Operation Torch. The Axis diverted their forces to the Battle of Tunisia, and attacks on Malta were rapidly reduced. The siege effectively ended in November 1942.[1]
In December 1942, air and sea forces operating from Malta went over to the offensive. By May 1943, they had sunk 230 Axis ships in 164 days, the highest Allied sinking rate of the war.[13] The Allied victory in Malta played a major role in the eventual Allied success in North Africa.
Background
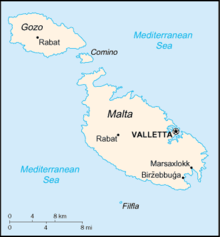
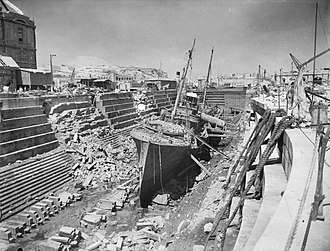
Malta was a military and naval fortress, being the only Allied base between Gibraltar and Alexandria, Egypt. In peacetime it was a way station along the British trade route to Egypt and the Suez Canal to India and the Far East. When the route was closed Malta remained a forward base for offensive action against Axis shipping and land targets in the central Mediterranean. Owing to its exposed position close to Italy, the British had moved the headquarters of the Royal Navy Mediterranean Fleet from Valletta, Malta in the mid-1930s to Alexandria in October 1939.[15]
Malta is 27 km × 14 km (17 mi × 9 mi) with area of just under 250 km2 (97 sq mi).[16] It had a population of around 250,000 in June 1940, all but 3% or 4% of them native Maltese.[17] According to the 1937 census, most of the inhabitants lived within 6.4 kilometres (4 mi) of Grand Harbour, where the population density was more than six times that of the island average. Amongst the most congested spots was Valletta, the capital and political, military and commercial centre, where 23,000 people lived in an area of around 0.65 km2 (0.25 sq mi). Across Grand Harbour, in the Three Cities, where the Malta Dockyard and the Admiralty headquarters were located, 28,000 people were packed into 1.3 km2 (0.50 sq mi). It was these small areas that suffered the heaviest, most sustained and concentrated aerial bombing in history.[18]
There were hardly any defences on Malta because of a pre-war conclusion that the island was indefensible. The Italian and British surface fleets were evenly matched in the region but the Italians had far more submarines and aircraft. The Admiralty had to protect the Suez Canal with the Mediterranean Fleet (Admiral Andrew Cunningham) and Gibraltar with Force H (Vice-Admiral James Somerville).[19] In October 1939, the Mediterranean Fleet was transferred eastwards to Egypt, stripping the island of its naval protection. Only the monitor HMS Terror and a few British submarines were still based at the island. When the Maltese government questioned British reasoning, they were told that the island could be defended just as adequately from Alexandria as from Grand Harbour, which was untrue. This led the Maltese to doubt the British commitment to defend the island.[20]
Despite concerns that the island, far from Britain and close to Italy, could not be defended, the British decided in July 1939 to increase the number of anti-aircraft guns and fighter aircraft on Malta.[21] The British leadership had further doubts about whether to hold the island in May 1940, when during the Battle of France the French Prime Minister Paul Reynaud suggested that the Italian prime minister and dictator Benito Mussolini might be appeased by concessions, including Malta. After some discussion, Winston Churchill convinced the British War Cabinet that no concessions should be made.[22] With the British home islands in danger, the defence of Malta was not the priority and it was lightly protected. Only six obsolete Gloster Sea Gladiator biplanes were stationed on the island, with another six in crates when, on 10 June 1940, Mussolini declared war on the United Kingdom and France.[19] In the 1930s, Italy had sought to expand in the Mediterranean and Africa, regions dominated by the British and French. The Allied defeat in France from May–June 1940 removed the French Navy from the Allied order of battle and tilted the balance of naval and air power in Italy's favour.[23][24]
Upon declaring war, Mussolini called for an offensive throughout the Mediterranean and within hours, the first bombs had dropped on Malta. After the French surrender on 25 June, Mussolini tried to exploit the situation, conducting Operazione E the Italian invasion of Egypt in September. The 10th Army was crushed in Operation Compass, a British counter-stroke, and Adolf Hitler decided to come to the aid of his ally. In February 1941, the Deutsches Afrikakorps (DAK, German Africa Corps under General Erwin Rommel) was sent to North Africa as a blocking detachment (Sperrverband).[25] RAF and Royal Navy anti-shipping squadrons and submarines on Malta threatened the Axis supply line to North Africa and both sides recognised the importance of Malta in controlling the central Mediterranean.[19]
In 1940, an Italian assault on Malta stood a reasonable chance of gaining control of the island, an action giving the Italians naval and air supremacy in the central Mediterranean.[26] The Mediterranean would have been split in two, separating the British bases at Gibraltar and Alexandria. The reluctance of the Italians to act directly against Malta throughout 1940 was strengthened by the Battle of Taranto, in which much of the Italian surface fleet was put out of action by Royal Navy Fleet Air Arm torpedo bombers.[19] The Italians adopted an indirect approach and cut off the island. To the Italians (and later the Germans), air power was the key weapon against Malta.[19]
Italian siege (June–December 1940)
Italian air actions
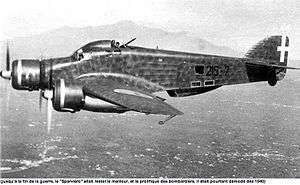
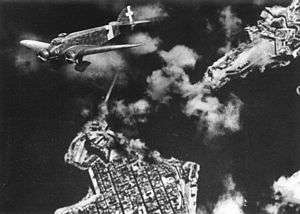
Air power was the method chosen to attack Malta. The Regia Aeronautica began the aerial bombardment of the island from airbases in Sicily. On the first day, 55 Italian bombers and 21 fighters flew over Malta and dropped 142 bombs on the three airfields at Luqa, Hal Far and Ta Qali.[27] Later, 10 Italian Savoia-Marchetti SM.79s and 20 Macchi C.200s flew over the island, with no air opposition. At the time of these first air raids, the defending fighters on Malta consisted of obsolete Gloster Sea Gladiators, in the Hal Far Fighter Flight. Ten Gladiators in crates for transit were assembled and as no more than three aircraft flew at once, were called 'Faith', 'Hope' and 'Charity'. The pilots were flying-boat and other fliers with no experience of fighter operations. One Gladiator was shot down but the rest managed to shoot down several Italian aircraft.[28][29]
The Italians flew at around 6,100 metres (20,000 ft) and the monitor HMS Terror and gunboats HMS Aphis and Ladybird opened fire. In the afternoon, another 38 bombers escorted by 12 fighters raided the capital. The raids were designed to affect the morale of the population rather than inflict damage to dockyards and installations. A total of eight raids were flown on that first day. The bombing did not cause much damage and most of the casualties suffered were civilian. No interception of the raiders was made because there was no RAF force ready to meet them.[30] No RAF airfield on Malta was operational at that time; one, at Luqa, was near to completion.[5]
Despite the absence of any operational airfields, at least one RAF Gladiator flew against a raid of 55 Savoia Marchetti SM 79 and their 20 escorting fighters on 11 June. It surprised the Italians, but the defences, almost non-existent on the ground and in the air, failed to impede the Italian force.[31] On 12 June an Italian aircraft on a reconnaissance flight over Malta was shot down.[32]
An odd development took place on 19 June. Twelve Fairey Swordfish torpedo bombers flew into the Fleet Air Arm (FAA) base at Hal Far, 767 (Training) NAS, having escaped from southern France following the French capitulation. They flew to the French colony of Tunisia, but insecurity compelled them to seek friendlier surroundings. The FAA aircraft were to form the nucleus of what was to become 830 Naval Air Squadron, providing Malta with its first offensive strike aircraft. Before June was out, they raided Sicily and sank one Italian destroyer, damaged a cruiser and destroyed oil storage tanks in the port of Augusta.[31]
By the start of July, the Gladiators had been reinforced by Hawker Hurricanes and the defences organised into No. 261 Squadron RAF in August. Twelve aircraft were delivered by HMS Argus in August, the first of several batches ferried to the island by the carrier. A further attempt to fly 12 Hurricanes into Malta on 17 November, led by a FAA Blackburn Skua, (Operation White) ended in disaster with the loss of eight Hurricanes; they took off too far west of the island due to the presence of the Italian fleet and ran out of fuel, and several pilots were lost.[33] A further two Hurricanes crashed, with one of the pilots rescued by a Short Sunderland flying boat.[34] The arrival of more fighters was welcome. After eight weeks, the original force of Hurricane units was grounded owing to a lack of spare parts.[35]
By the year's end, the RAF claimed 45 Italian aircraft had been shot down. The Italians admitted the loss of 23 bombers and 12 fighters, with a further 187 bombers and seven fighters having suffered damage, mainly to anti-aircraft artillery.[33]
Invasion plan DG10/42
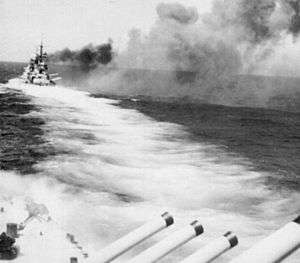
In 1938 Mussolini had considered an invasion of Malta under Plan DG10/42, in which a force of 40,000 men would capture the island. Nearly all 80 purpose-built sea craft that would land the Italian Army ashore were expected to be lost but landings would be made in the north, with an attack upon the Victoria Lines, across the centre of the island. A secondary landing would be made on Gozo, north-west of Malta and the islet of Comino, between the two. All of the Italian navy and 500 aircraft would be involved, but the lack of supplies led the planners to believe that the operation could not be carried out. With the German success in the Battle of France from May–June 1940, the plan was reduced to 20,000 men with the addition of tanks. The Allied defeat in France gave the Italians an opportunity to seize Malta but Italian intelligence overestimated the Maltese defences and Mussolini thought that an invasion would be unnecessary once Britain made peace. Mussolini also expected Francoist Spain to join the Axis and capture Gibraltar, which would close the Mediterranean to the British from the west.[36]
War at sea
The reluctance of the Italian Admiralty to act was also due to other considerations. The Italians believed they could keep the Royal Navy's fleet of ageing battleships bottled up in Alexandria. Another factor was the lack of crude oil (the Italians did not discover the large reserves in Libya during their occupation of the country). The Germans took most of the oil from Romania and left few resources for Italy to pursue large-scale operations in the Mediterranean. Not only did this preclude any large-scale naval operations, it also left the Italians without adequate fuel for combat training at sea. By the start of 1941, a limited petroleum stockpile meant only seven months of fuel could be guaranteed.[37] On the other hand, British confidence was eroded when aircraft began to dominate the actions at sea later on in 1941 and 1942, as the Royal Navy had long been expected to be the principal defender of the island.[38]
Cunningham brought to light the reluctance of the Italian Navy to engage by probing their defences. On 9 July 1940, the Battle of Calabria was the only time the main Italian and British (with supporting Royal Australian Navy vessels) fleets engaged each other. Both sides claimed victory, but in fact the battle was inconclusive, and everyone returned to their bases as soon as possible. It confirmed to the Maltese people that the British still controlled the seas, if not from the Grand Harbour.[39] This was confirmed again in March 1941, when the Royal Navy decisively defeated the Italian Navy in the Battle of Cape Matapan. The Italians had been heading to intercept the British convoys transporting reinforcements to aid Greece in the Greco-Italian War.[40]
The naval contest in the Mediterranean between the British and the Italian navies is generally considered to have been a draw.[41][42]
British counter-attacks
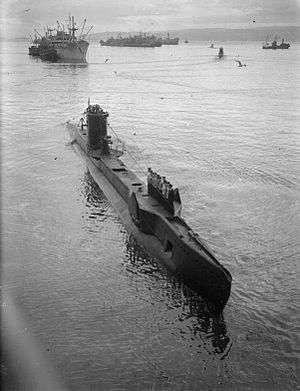
When it became clear to the British that the Italian air forces were limited and having little impact on the population, which could endure, a steady stream of reinforcements arrived. The potential of the base was realised and Whitehall ordered further aircraft into the island; including Hurricane fighters, Martin Marylands, Sunderlands, Vickers Wellingtons, more Swordfish and submarines. It provided an increasingly potent offensive arm.[43] The Wellingtons arrived in October, from No. 148 Squadron RAF.[44][33]
Meanwhile, the Italian invasion of Egypt had failed to achieve its goals and the British counter-offensive, Operation Compass, destroyed several divisions of the Italian army at Cyrenaica. The diversion of the North African Campaign drew away significant Italian air units which were rushed from Italy and Sicily to deal with the disasters and support the Italian ground forces embattled in Egypt and Libya. The relief on Malta was significant as the British could now concentrate their forces for offensive, rather than defensive operations. In November 1940, after months of poorly coordinated Italian air strikes, the FAA and Royal Navy struck at Italian naval forces in the Battle of Taranto, a victory for sea-air power and definite proof that aircraft could wreak havoc on naval vessels without air cover. Fairey Swordfish torpedo bombers disabled a number of Italian heavy units during the battle. The withdrawal of the Italian fleet to Naples, out of reach of British aircraft, was a strategic victory which handed naval supremacy to the British for the time being.[45]
The Royal Navy's submarines also began a period of offensive operations. British U-class submarines began operations as early as June. Larger submarines also began operations, but after 50% losses per mission, they were withdrawn. U-class submarines operated from the Manoel Island Base known as HMS Talbot. Unfortunately no bomb-proof pens were available as the building project had been scrapped before the war, owing to cost-cutting policies. The new force was named the Tenth Submarine Flotilla and was placed under Flag Officer Submarines, Admiral Max Horton, who appointed Commander G.W.G. Simpson to command the unit. Administratively, the Tenth Flotilla operated under the First Submarine Flotilla at Alexandria, itself under Cunningham. In reality, Cunningham gave Simpson and his unit a free hand. Until U-class vessels could be made available in numbers, British T-class submarines were used. They had some successes, but suffered heavy losses when they began operations on 20 September 1940. Owing to a shortage of torpedoes, enemy ships could not be attacked unless the target in question was a warship, tanker or other "significant vessel".[46][47]
The performance of the fleet was mixed at first. They sank 37,000 long tons (38,000 t) of Italian shipping, half of which was claimed by one vessel, HMS Truant. It accounted for one Italian submarine, nine merchant vessels and one motor torpedo boat (MTB). The loss of nine submarines and their trained crews and commanders was serious. Most of the losses were due to mines.[48] On 14 January 1941, U-class submarines arrived, and the submarine offensive began in earnest.[49]
Luftwaffe arrives (January–April 1941)
German intervention
German intervention over Malta was more a result of the Italian defeats in North Africa than Italian failures to deal with the island. Hitler had little choice other than to rescue his Italian ally or lose the chance of taking the Middle Eastern oilfields in Arabia. The Deutsche Afrika Korps (DAK or Africa Corps) under Erwin Rommel was dispatched to secure the Axis front in Africa in February 1941. Operation Colossus signalled a dramatic turn around. The Germans launched Operation Sonnenblume, which reinforced the Italians in North Africa. They then began a counter-offensive and drove the British back into Egypt. But operating overseas in Africa meant most of the supplies to Axis forces would come via the sea. This made Malta a dangerous threat to Axis logistical concerns. In response, the Oberkommando der Luftwaffe (OKL or Air Force High Command) sent Fliegerkorps X (Flying Corps Ten) to Sicily, which arrived in January 1941, to strike at naval forces in and around Malta, and RAF positions on the island, to ease the passage of supplies.[50]
The British submarines failed to interdict the German ships transporting the German forces to Libya. The damaging of the 7,889-ton German ship Duisburg was the only noteworthy attack. On 9 February 1941, three submarines missed the same convoy bringing supplies to Tripoli, the principal Italian port in Libya. The port facilities could unload six ships at a time, making the port the best facility west of Alexandria, 1,600 km (990 mi) to the east.[51] A large part of the Axis defensive success was due to naval mines. The Italians deployed 54,000 mines around Malta to prevent it being supplied. These mines were the bane of the Royal Navy's submarines. Around 3,000 mines were laid off Tunisia's coast by Italian naval forces as well.[52]
The failure to intercept Axis shipping was evident in the figures which extended far beyond February 1941. From January–April, the Axis sent 321,259 tons to Libya and all but 18,777 tons reached port. This amounted to a 94% success rate for convoy safety running the British interdiction. Of the 73,991 men sent by sea, 71,881 (97%), arrived in Africa.[53] On 10 December 1940, Fliegerkorps X, under the command of Hans Ferdinand Geisler, and with support of his chief of staff Major Martin Harlinghausen, was ordered to Sicily to attack Allied shipping in the Mediterranean. By the start of the first German operation, Geisler had 95 aircraft and 14,389 men in Sicily. Geisler persuaded the OKL to give him four more dive-bomber gruppen (Groups). On 10 January, he could muster 255 (179 serviceable) aircraft including 209 dive and medium bombers.[54]
By 2 January 1941, the first German units reached Trapani on Sicily's southern coast. The Luftwaffe's two units were both Junkers Ju 87 Stuka Gruppen (Groups). The first was I./Sturzkampfgeschwader 1 and II./Sturzkampfgeschwader 2 (I and II Group Dive Bomber Wings 1 and 2). The units numbered some 80 Ju 87s. This led to a notable increase in the bombing of Malta. A Stabsstaffel of Sturzkampfgeschwader 3 (StG 3) arrived. Oberstleutnant Karl Christ, Geschwaderkommodore of StG 3 gave orders to intercept heavy units. One particular target was aircraft carriers. Days later, he ordered the Ju 87 gruppen to sink the new carrier HMS Illustrious. It had played the key role in the Battle of Taranto, handing naval supremacy to the British, hence it became top of the Axis' target list.[55]
Excess and Illustrious "blitz"
The Luftwaffe crews believed four direct hits would sink the ship and began practice operations on floating mock-ups off the Sicilian coast. The vast flight deck offered a target of 6,500 square metres. An opportunity to attack the vessel came on 6 January. The British Operation Excess was launched, which included a series of convoy operations by the British across the Mediterranean Sea. On 10 January they were within range of the Ju 87 bases. II./StG 2 sent 43 Ju 87s with support from I./StG 1. Ten Italian SM 79s had drawn off the carrier's Fairey Fulmar fighters while the escorting cruiser HMS Bonaventure sank the Italian torpedo boat Vega. Some 10 Ju 87s attacked the carrier unopposed. Witnessed by Andrew Cunningham, C-in-C of the Fleet from the battleship HMS Warspite, the Ju 87s scored six hits. One destroyed a gun, another hit near her bow, a third demolished another gun, while two hit the lift, wrecking the aircraft below deck, causing explosions of fuel and ammunition. Another went through the armoured deck and exploded deep inside the ship. Two further attacks were made without result. Badly damaged, but with her main engines still intact, she steered for the now dubious haven of Malta.[56][57][58] The attack lasted six minutes;[59] killed 126 crew members and wounded 91.[60] Within sight of Malta, Italian torpedo bombers also attacked the carrier, but were driven off by intense anti-aircraft fire.[61]
The British operation should not have been launched: Ultra had informed the Air Ministry of Fliegerkorps X's presence on Sicily as early as 4 January. They did not pass on the intelligence to the Admiralty, who probably would not have sailed within range of the Ju 87s if they had known.[62] The RAF was in no condition to prevent a major German air attack, with only 16 Hurricanes and a couple of Gladiator aircraft serviceable.[63] On 11 January 1941, 10 more Ju 87s were sent to sink Illustrious. They chanced upon the light cruisers HMS Southampton and Gloucester. Hits were scored on both; Southampton was so badly damaged her navy escorts scuttled her. Over the next 12 days, the workers at the shipyard in the Grand Harbour repaired the carrier under determined air attack so that she might make Alexandria. On 13 January, the Ju 87s, now equipped with SC 1000 bombs failed to achieve a hit. On 14 January, 44 Ju 87s scored a hit on the ill-fated after lift. On 18 January, the Germans switched to attacking the airfields at Hal Far and Luqa in an attempt to win air superiority before returning to Illustrious. On 20 January, two near misses breached the hull below the water line and hurled her hull against the wharf. Nevertheless, the engineers won the battle. On 23 January, she slipped out of Grand Harbour, and arrived in Alexandria two days later. The carrier later sailed to America where she was kept out of action for a year.[64]
The Luftwaffe had failed to sink the carrier. However, their losses were few—three aircraft on 10 January and four Ju 87s over several weeks—and the Germans had impressed the British with the effectiveness of land-based air power. They withdrew their fleet's heavy units from the central Mediterranean and risked no more than trying to send cruisers through the Sicilian Narrows. Both the British and Italian navies digested their experiences over Taranto and Malta.[65]
German and Italian air superiority
The appearance in February of Messerschmitt Bf 109 E-7 fighters of 7. Staffel (squadron) Jagdgeschwader 26 (26th Fighter Wing or JG 26), led by Oberleutnant Joachim Müncheberg, quickly led to a rise in RAF losses; the German fighter pilots were experienced, confident, tactically astute, better-equipped and well-trained.[66] The Allied pilots on Malta had little combat experience and their Hawker Hurricanes were worn-out and for four months, JG 26 had few losses.[67][68] The Luftwaffe claimed 42 air victories, 20 of them (including one over Yugoslavia) credited to Müncheberg.[69] The RAF Hurricanes were kept operational by being patched up and cannibalised and their performance, already inferior to the Bf 109E-7, deteriorated. Five Hurricanes arrived at Malta in early March, another six on 18 March. but five Hurricanes and five pilots were lost.[70]
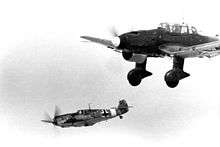
On 1 March, the Luftwaffe attacks on airfields destroyed all of the Wellingtons brought in in October. Royal Navy warships and Sunderland flying boats could not use the island for offensive operations, and the main fighter squadrons, Nos. 261 and 274, were put under severe pressure.[33] There were several raids per day and over 107 Axis attacks took place in February and 105 in March, with Bf 109 fighters strafing any signs of movement on the ground. By February around 14,600 men, 1⁄6a sixth of the island's work force, had volunteered, rationing began reducing morale even more. and all males from ages 16 to 56 were conscripted to join the volunteers, the Royal Malta Artillery guarding Grand Harbour.[71][72]
The Allies had a success in April, with victory in the Battle of the Tarigo Convoy.[73] Allied surface forces managed to sink only one small Axis convoy in daylight hours during the whole North African Campaign but on the night of 15/16 April, Axis ships were intercepted by Commander P. J. Mack's 14th Destroyer Flotilla, comprising HMS Janus, Jervis, Mohawk, Juno and Nubian.[74] The destroyers sank Sabaudia (1,500 tons), Aegina (2,447 tons), Adana (4,205 tons), Isetlhon (3,704 tons) and Arta. The Italian destroyers Tarigo, Lampo and Baleno were sunk for the loss of Mohawk.[75]
The flotilla had been officially formed on 8 April 1941, in response to the need for a Malta Strike Force. This formation was to interdict Axis convoys. Commander Lord Louis Mountbatten's 5th Destroyer Flotilla was later ordered to merge with Mack's fleet to increase its striking power. The destroyers HMS Jackal, Kashmir, Kipling, Kelly, Kelvin and Jersey were a part of Mountbatten's fleet. The cruisers HMS Dido and Gloucester accompanied the ships as part of the force. The strike force had considerable success, which justified basing it at Malta despite the danger from air attack. On 21 May, the force was sent to join the Battle of Crete. It was several months before the depleted strike force returned.[76]
Further success was had by the Malta Convoys. An urgent supply convoy from Gibraltar to Alexandria (Operation Tiger) coincided with reinforcements for the Mediterranean Fleet, two small convoys from Egypt to Malta and 48 more Hurricanes flew off HMS Ark Royal and Furious in Operation Splice, with only the loss of the SS Empire Song, which hit a mine and sank with 10 Hurricane fighters and 57 tanks on board.[77] Convoy Tiger transported 295 Matilda II tanks, new Crusader tanks and 24,000 tons of oil for operations in North Africa.[78] They were completed on 12 May. I., II., and III.; StG 1 made a determined effort against Tiger and Malta without result.[79]
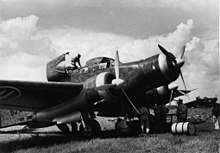
The Axis air forces maintained air superiority; Hitler ordered Fliegerkorps X to protect Axis shipping, prevent Allied shipping passing through the central Mediterranean and neutralise Malta as an Allied base. Around 180 German and 300 Italian aircraft carried out the operation, and the RAF struggled to fly more than six or eight fighter sorties. Occasionally, 12 Hurricanes were flown in from British carriers but the replacements were soon used up. By mid-May, the central Mediterranean was again closed to Allied shipping and the DAK in North Africa was able to receive reinforcements, only 3% of its supplies, personnel and equipment being lost en route. From 11 April – 10 May, 111 Axis raids were carried out against military installations on Malta. Most of the heavy equipment in Grand Harbour was destroyed and the dry-docks could only be operated by hand. Efficiency of most workshops was reduced to 25% – 50%.[80]
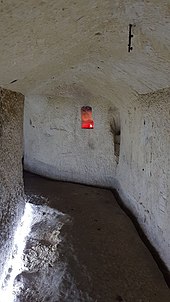
During the first four months of German operations, the Luftwaffe dropped 2,500 tons of high explosives on Malta. It was many more times the tonnage dropped by the Italians, but far short of the amount dropped the following year. More than 2,000 civilian buildings were destroyed as opposed to only 300 during the Italian siege. Civilian casualties were low, and after the bombing of HMS Illustrious most civilians moved to safer surroundings in the countryside; by May 1941, nearly 60,000 people had left the cities, some 11,000 people (2⁄3 or 66% of the population) leaving Valletta.[81] The British had concentrated on protecting military targets and few shelters were available for civilians. Eventually, 2,000 miners and stonemasons were recruited to build public shelters but the pay was poor and the miners threatened to strike, and were threatened with conscription into the army. The workers capitulated but instituted a go-slow, trebling the cost of the work.[82]
German withdrawal
In April, Hitler was forced to intervene in the Balkans which led to the campaign of that name; it was also known as the German invasion of Yugoslavia and included the Battle of Greece. The subsequent campaign and the heavy German losses in the Battle of Crete convinced Hitler that air drops behind enemy lines, using paratroopers, were no longer feasible unless surprise was achieved. He acknowledged that the chances of success in an air operation of that kind were low; German airborne forces did not undertake any such operations again. This had important consequences for Malta, as it indicated the island was only at risk from an Axis siege. When, in June, Hitler attacked the Soviet Union under Operation Barbarossa, Fliegerkorps X departed for the Eastern Front, and the Regia Aeronautica was left to continue its highly effective air campaign against Malta in the coming months.[83] Geisler, commanding the remnants of Fliegerkorps X, could only count upon mine-laying aircraft from Kampfgeschwader 4 (KG 4) and Ju 87s in night operations. Supply issues were bad, the small German force left was forced to abandon operations on 22 April 1941. By early May 1941, the Luftwaffe had flown 1,465 bomber, 1,144 fighter and 132 reconnaissance missions for just 44 losses.[84] III./Kampfgeschwader 30 (KG 30) and III./Lehrgeschwader 1 (KG 1) flew sporadic night attacks during April.[85]
Allied recovery (April–October 1941)
Hugh Lloyd
On 1 June, Air Vice Marshal Forster Maynard, Malta's Air Officer Commanding, was replaced by Air Commodore Hugh Lloyd.[86] When he arrived on the island Lloyd found little to work with. Still, he had every intention of taking the offensive. Outside his office, in the underground headquarters at Lascaris, he hung a sign outside; "Less depends on the size of the dog in the fight than on the size of the fight in the dog".[87]
Within a few hours Lloyd had made an inspection tour of the airfields and the main workshops at Kalafrana. The state of the island was worse than he expected. The slackening of German air activity had allowed the number of aircraft to increase, but the RAF still had fewer than 60 machines of all types. Maintenance was difficult. Hardly any spare or replacement parts were available—spares had to be obtained by sifting through the debris of wrecks or by cannibalising undamaged aircraft. Furthermore, the airfields were too small; there was no heavy equipment to work with; and even the commonest sorts of tools, such as hammers and wrenches, were all but impossible to find. All refuelling had to be done by hand from individual drums. The shelter was also inadequate, so there was little protection for what equipment they did have. Most aircraft were clustered together on open runways, presenting tempting targets. At Kalafrana, all the buildings were close together and above ground. The single engine-repair facility on Malta was located right next to the only test benches. Lloyd himself said, "a few bombs on Kalafrana in the summer of 1941 would have ruined any hope of Malta ever operating an air force".[88]
Usually, the protection of air defences and naval assets on the island would have had priority. Certainly bringing in more supplies would have made greater strategic sense, before risking going on to the offensive and thus in turn risking the wrath of the enemy. But the period was an eventful one. In North Africa, the DAK was on the move and Rommel was pressing his army towards the Suez Canal and Alexandria in Egypt. RAF forces on Malta could not afford to sit idle; they could prevent Rommel's advance, or slow it down, by striking at his supply lines. Malta was the only place from where British strike aircraft could launch their attacks. Lloyd's bombers and a small flotilla of submarines were the only forces available to harass Rommel's supply lines into the autumn. Only then did the surface fleets return to Malta to support the offensive.[89]
Allied reinforcement
With the exception of coal, fodder, kerosene and essential civilian supplies were such that a reserve of 8–15 months was built up. Operation Substance was particularly successful in July 1941. The supplies included spares and aircraft. Around 60 bombers and 120 Hurricanes were now available.[90] Around 65,000 tons eventually reached Malta in July despite heavy damage inflicted by the Italian navy and air forces. No supplies were sent in August, but Operation Halberd in September 1941 brought in 85,000 tons of supplies, shipped by nine merchant vessels escorted by one aircraft carrier, five cruisers and 17 destroyers. One cargo ship, the Imperial Star was sunk, and the battleship HMS Nelson was damaged by a torpedo. This convoy proved critical to saving Malta, as its supplies were deemed to be essential when the Germans returned in December.[91]
In mid-1941, new squadrons—No. 185 and No. 126—were formed and the defenders received the first cannon-armed Hurricane Mk IICs. Naval carriers flew in a total of 81 more fighters in April–May. By 12 May, there were 50 Hurricanes on the island. On 21 May, No. 249 Squadron RAF arrived, taking over from No. 261. 46 Squadron arrived in June, to be renumbered 126 Squadron.[92] In May 1941, 47 Hurricanes were flown into the island.[93] From May–December, the first Bristol Blenheim units (No. 113 Squadron RAF and 115 Squadron) began to arrive[94] and Bristol Beaufighter units, 252 and 272 Squadrons.[92] Malta was now being used as a base for supplying Egypt. Between July and December 1941, 717 RAF fighters passed through Malta and 514 left for North Africa. By early August, Malta now had 75 fighters and 230 anti-aircraft guns. Bristol Blenheim bombers also joined the defenders and began offensive operations.[95]
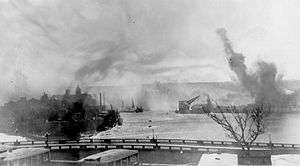
Besides preparing for offensive operations and reinforcing the RAF on the island, Lloyd also rectified many of the deficiencies. Thousands of Maltese and 3,000 British Army soldiers were drafted in to better protect the airfields. Even technical staff, clerks and flight crews helped when required. Dispersal strips were built, repair shops were moved underground from dockyards and airfields. Underground shelters were also created in the belief that the Luftwaffe would soon return.[96] On 26 July, a night attack was carried out by Italian fast attack craft of the elite Decima Flottiglia MAS unit.[97] The force was detected early on by a British radar facility, and the coastal artillery at Fort Saint Elmo opened fire on the Italians. In the attack, 15 men were killed and 18 captured, and most of the boats were lost. An MT boat hit St Elmo Bridge, which collapsed. The bridge was never restored, and it was only in 2011 that a new one was built in its place.
Allied offensive
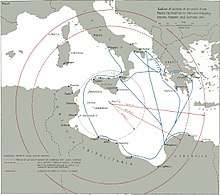
The Allies were able to launch offensive operations from Malta and some 60% of Axis shipping was sunk in the second half of 1941. The DAK and its partners were not receiving the 50,000 short tons (45,000 t) of supplies a month they needed, and as a result they were unable to resist a strong counter-offensive by British forces in Operation Crusader.[1]
In July 62,276 tons of supplies were landed by the Axis, half of the figure in June.[98] In September 1941, 830 Naval Air Squadron sank or damaged the ships Andrea Gritti (6,338 tons) and the Pietro Barbaro (6,330 tons). Ultra intercepts found that 3,500 tons of aerial bombs, 4,000 tons of ammunition, 5,000 tons of food, one entire tank workshop, 25 Bf 109 engines and 25 cases of glycol coolant for their engines were lost.[99] Further success was had later in the month, although British losses from anti-aircraft fire from Italian ships were often heavy.[100] One reason for accepting heavy losses was the difficulty in bombing accurately. Lloyd asked his bombers to attack at mast-height, increasing accuracy but making them easier targets for Italian anti-aircraft defences. Losses averaged 12% during this time.[101] 38 Squadron, 40 Squadron and 104 Squadron, equipped with Wellington bombers, hit Axis convoys in Tripoli.[102] In concert with Royal Navy submarines, the RAF and FAA sank 108 Axis ships (300,000 grt) between June and September.[95] In September, 33% of the 96,000 tons of supplies dispatched were lost to British submarine and air attack.[103]
Part of the reason for this favourable outcome in November 1941, was the arrival of Force K of the Royal Navy, which during the Battle of the Duisburg Convoy sank all the ships, which practically blockaded Libyan ports.[104] Soon after, Force K was reinforced by the arrival in Malta of Force B with the light cruisers HMS Ajax and Neptune and the K-class destroyers, Kimberley and Kingston, on 27 November.[105] Joint operations with the RAF were so effective that during November 1941, Axis fuel losses amounted to 49,365 tons out of 79,208 tons.[106] Among the contributors to the sinking of Axis shipping was 828 Naval Air Squadron, 830 Naval Air Squadron, the British 10th Naval Flotilla and 69 Squadron which shadowed convoys with their Maryland aircraft.[107] Special flights of RAF Wellingtons fitted with air-to-surface vessel (ASV) radar, were important to Force K operations, and Ultra intelligence reached Malta on Axis convoy movements. The RAF Malta Command would then dispatch the ASV-Wellingtons to sweep the seas and direct the British naval forces to the convoy.[108]
On 13 November, the carrier HMS Ark Royal— returning to Gibraltar after transporting aircraft to Malta—was sunk by a U-boat.[109] Twelve days later, the battleship HMS Barham was sunk by a U-boat, followed by the light cruiser HMS Galatea on 15 December.[110] On 19 December, ships from both forces ran into a minefield while pursuing an Italian convoy. Damage from the mines sank the cruiser HMS Neptune and damaged the cruiser Aurora. The destroyer HMS Kandahar was also mined while attempting to assist Neptune.[111] Kandahar was scuttled the next day by the destroyer HMS Jaguar. Following the disaster and with a resurgence of the Axis aerial bombardment of Malta, surface ships were withdrawn from the central Mediterranean in January 1942.[112]
While Italian bombing was again proving successful against the British, the Luftwaffe returned in force in December 1941 to renew intensive bombing.[113] The Kriegsmarine sent nearly half of all the German U-boats on operations in the Atlantic Ocean to the Mediterranean to support the effort against Malta and by 15 December, half of these vessels were either in the Mediterranean, or en route, having to run the gauntlet past the RAF and the navy based in Gibraltar.[114] Until the return of the Luftwaffe over Malta, the RAF defenders had claimed 199 aircraft shot down from June 1940 – December 1941, while losses were at least 90 Hurricanes, three Fairey Fulmars and one Gladiator in air combat; 10 more Hurricanes and one Gladiator destroyed in accidents and many more destroyed on the ground. Eight Marylands, two other aircraft, three Beaufighters, one Blenheim fighter and many bombers were also lost.[115] No. 185 Squadron claimed 18 destroyed, seven probable victories and 21 damaged for 11 killed or missing. Among those losses was Squadron Leader Peter "Boy" Mould.[116] Actual Axis losses amounted to 135 bombers (80 German) and 56 fighters plus a number of other aircraft.[115]
Luftwaffe returns (December 1941 – August 1942)
Kesselring (OB Süd)
By June 1941, Geisler had been moved to Libya to support the DAK in the North African Campaign. In the Mediterranean and on Malta, the Allies recovered and began offensive operations against Axis shipping bringing supplies to the DAK in North Africa. The mounting shipping supply losses affected Geisler's ability to support Erwin Rommel and his forces, which caused tension between the Wehrmacht and the Luftwaffe. Geisler was to be returned to Sicily with his remaining air strength to solve the issue. However, the Germans backed down over Italian protests. On 6 October Geisler did extend his air sector responsibilities to cover the Tripoli-Naples sea route to curtail losses.[95] On 2 October, Hermann Göring, commander-in-chief of the Luftwaffe met with his Regia Aeronautica counterpart Francesco Pricolo, to discuss reinforcements. Hans Jeschonnek, Goring's chief of staff, suggested sending Luftflotte 2 and its commander Albert Kesselring to Sicily from the Eastern Front. Göring agreed, and was willing to send 16 Gruppen to Sicily, anticipating a Soviet collapse in the east; Fliegerkorps II (Bruno Loerzer), arrived in January 1942, with Kesselring as Oberbefehlshaber Süd (OB Süd, Commander-in-Chief South) from 1 December 1941.[117]
German pressure, Spitfire arrival
Messerschmitt Bf 110s and Ju 88 night fighters from Zerstörergeschwader 26 (ZG 26, or Destroyer Wing 26) and Nachtjagdgeschwader 1 (NJG 1 or Night Fighter Wing 1), were flown into Sicily to support Fliegerkorps II. They quickly eliminated Malta's striking force, which was beyond the range of fighter escort while over the Mediterranean. In the first two months, around 20 RAF bombers and reconnaissance aircraft were shot down.[115] The success against Axis shipping soon dried up. The only notable triumph was the sinking of the 13,089-ton Victoria merchant ship, one of the fastest merchantmen afloat, by a Fairey Albacore of 826 Squadron, flown by Lieutenant Baxter Ellis, on 23 January.[118]
Over the island, the defensive arm of the RAF was also put under pressure. Kesselring began 1942 with a raid on New Year's Day, the 1,175th raid of the war.[119] In January the RAF lost 50 Hurricanes on the ground and another eight shot down in combat. Of the 340 fighters that had passed through or stayed on the island since the war began, only 28 remained.[120] The Axis conducted 263 raids in that month, compared to 169 in December 1941.[121] Fliegerkorps II was recovering from its losses in the Soviet Union, and could only contribute 118 aircraft in January, but grew to 390 in March, reaching a peak strength of 425 aircraft.[122]
One-third of all raids were directed against airfields. At Ta' Qali, 841 tons of bombs were dropped, because the Germans believed the British were operating an underground hangar; the Germans used rocket-assisted PC 18000RS Panther bombs. The usual tactic involved a sweep ahead of the bombers by German fighters to clear the skies; this worked, and air superiority was maintained. Only slight losses were suffered by the bombers. One notable loss was the Geschwaderkommodore of KG 77, Arved Crüger. Around 94% of the strikes were made in daylight and the Italians supported the Luftwaffe by flying 2,455 sorties in February and March.[123]
Dobbie and the British naval and air commanders argued for modern aircraft, particularly Spitfires, to be sent to Malta. The AOC Middle East, Arthur Tedder, sent Group Captain Basil Embry to Malta to assess the situation. The pilots told Embry that the Hurricanes were useless and that the Spitfire was their only hope. They claimed that the Germans purposely flew in front of the Hurricanes in their Bf 109Fs to show off the performance superiority of their fighters. The squadron leaders argued the inferiority of their aircraft was affecting morale. Embry agreed and recommended that Spitfires be sent; the type began arriving in March 1942.[124]
Axis invasion plan
On 29–30 April 1942, a plan for the invasion of the island was approved by Adolf Hitler and Benito Mussolini during a meeting at Berchtesgaden. It envisaged an airborne assault with one German and one Italian airborne division, under the command of German General Kurt Student. This would have been followed by a seaborne landing of two or three divisions protected by the Regia Marina. The Italians, in agreement with Kesselring, made the invasion of Malta the priority in the region. However, two major factors stopped Hitler from giving the operation the green light. The first was Erwin Rommel. Due to Kesselring's pounding of the island the supply lines to North Africa had been secured. He was able to gain the ascendancy in North Africa once again. Although Rommel believed Malta should be invaded, he insisted the conquest of Egypt and the Suez Canal, not Malta, was the priority. The second was Hitler himself. After the Battle of Crete in May–June 1941, Hitler was nervous about using paratroopers to invade the island since the Crete campaign had cost this arm heavy losses, and he started to procrastinate in making a decision. Kesselring complained. Hitler proposed a compromise. He suggested that if the Egyptian border was reached once again in the coming months (the fighting at the time was taking place in Libya), the Axis could invade in July or August 1942 when a full moon would provide ideal conditions for a landing. Although frustrated, Kesselring was relieved the operation had seemingly been postponed rather than shelved.[125]
RAF air superiority
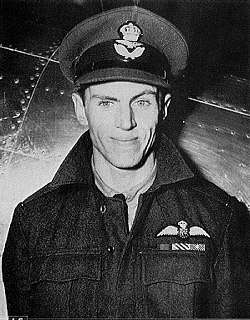
Before the Spitfires arrived, other attempts were made to reduce losses. In February 1942, Squadron Leader Stan Turner arrived to take over 249 Squadron. Lloyd had requested a highly experienced combat leader be sent and Turner's experience flying with Douglas Bader over Europe meant he was qualified to lead the unit.[126] He began the adoption of the loose finger-four formation in an attempt to cut RAF losses by introducing more flexible tactics to compensate for technical inferiority. The outmoded Hurricanes still struggled against the very latest Bf 109Fs of Jagdgeschwader 53 (JG 53) and Italian Macchi C.202s; the Junkers Ju 88 bomber also proved a difficult enemy.[127] However, the Hurricanes did record occasional victories against the Bf 109Fs, during one attack in February 1942 only three managed to break up a raid by fifty Bf 109s.[128]
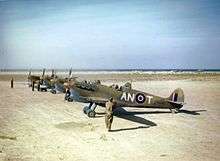
On 7 March 1942, a contingent of 16 Supermarine Spitfire Mk Vs flew to Malta from the aircraft carrier HMS Eagle as part of Operation Spotter.[129] A further run by Eagle delivered nine Spitfires.[130] The Club Run (delivery of aircraft to Malta by carrier) became more frequent through 1942. Then, USS Wasp despatched 47 more aircraft (Operation Calendar) on 13 April 1942. All but one reached the island.[131] While the Spitfires were a match for the Axis aircraft, many of those delivered in March and April were destroyed on the ground and in the air, where they were outnumbered; for five days in April there was just one Spitfire available to defend the island, for two days there was none.[132] The Germans had watched their delivery and pressed home heavy attacks. By 21 April 1942 just 27 Spitfires were still airworthy, and by evening that had fallen to 17.[133]
The overwhelming Axis bombardments had also substantially eroded Malta's offensive naval and air capabilities.[134] By March–April 1942, it was clear the Luftwaffe had achieved a measure of air superiority.[135] The Regia Aeronautica also pressed home attacks with determination. Often, three to five Italian bombers would fly very low over their targets and drop their bombs with precision, regardless of the RAF attacks and ground fire.[136]
Along with the advantage in the air, the Germans soon discovered that British submarines were operating from Manoel Island, not Grand Harbour, and exploited their air superiority to eliminate the threat. The base came under attack, the vessels had to spend most of their time submerged, and the surrounding residences where crews had enjoyed brief rest periods were abandoned.[137] Mine-laying by Axis aircraft also caused a steady rise in submarine losses.[138] By the end of March 1942, 19 submarines had been lost.[139] The effectiveness of the air attacks against Allied naval assets was apparent in the Italian naval records. In April, 150,389 tons of supplies that were sent to North Africa from Italy reached their destination out of a total of 150,578. Hitler's strategy of neutralising Malta by siege seemed to be working.[140] Kesselring reported to the German High Command that "There is nothing left to bomb."[141][142] The determination of the Axis effort against Malta is indicated in the sorties flown. Between 20 March and 28 April 1942, the Germans flew 11,819 sorties against the island and dropped 6,557 tons of bombs (3,150 tons on Valletta). The Germans lost 173 aircraft in the operations.[143]
The Allies moved to increase the number of Spitfires on the island. On 9 May, Wasp and Eagle delivered 64 more Spitfires (Operation Bowery).[144][145] Malta now had five full Spitfire squadrons; No. 126, 185, 249, 601 and 603 Squadrons.[146] The impact of the Spitfires was apparent. On 9 May, the Italians announced 37 Axis losses. On 10 May, the Axis lost 65 aircraft destroyed or damaged in large air battles over the island. The Hurricanes were able to focus on the Axis bombers and dive-bombers at lower heights, while the Spitfires, with their superior rate of climb, engaged enemy aircraft at higher levels.[147] From 18 May – 9 June, Eagle made three runs carrying another 76 Spitfires to Malta. With such a force established, the RAF had the firepower to deal with any Axis attacks.[148]
By the spring of 1942, the Axis air forces ranged against the island were at their maximum strength. The main adversaries for the defenders were the 137 Bf 109Fs of JG 53 and II./JG 3 'Udet' and the 80 Macchi C.202s of the 4th and 51st Stormo. Bomber units included 199 Junkers Ju 88s of II./Lehrgeschwader 1,[149] II and III./Kampfgeschwader 77,[150] I./Kampfgeschwader 54,[151] and 32–40 Ju 87s.[152][153] However, in May the numerical and technical improvements in the RAF defences wrested air superiority from the Luftwaffe. By the end of May 1942, Kesselring's forces had been reduced to just 13 serviceable reconnaissance aircraft, six Bf 110s, 30 Bf 109s and 34 bombers (mostly Ju 88s): a total of 83 compared with several hundred aircraft two months earlier.[154]
Axis target convoys
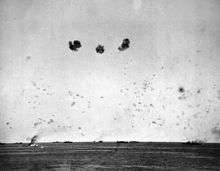
After the battles of May and June, the air attacks were much reduced in August and September.[155] While air superiority had been won back by the RAF, German pressure had allowed Axis convoys to re-supply the Panzer Army Africa. The island appeared to the Axis forces to be neutralised as a threat to their convoys. Rommel could now look forward to offensive operations with the support of the Luftwaffe in North Africa. At the Battle of Gazala he won a major victory, while the Battle of Bir Hakeim was less successful. Even so, he was soon back in Egypt fighting at El Alamein.
Despite the reduction in direct air pressure over Malta itself, the situation on the island was serious. It was running out of all essential commodities, particularly food and water, as the bombing had crippled pumps and distribution pipes. Clothing was also hard to come by. All livestock had been slaughtered, and the lack of leather meant people were forced to use curtains and used tyres to replace clothing and shoe soles. Although the civilian population was enduring, the threat of starvation was very real.[156] Poor nutrition and sanitation led to the spread of disease. Soldiers’ rations were also reduced, from four to two thousand calories a day and the British prepared to supply the island with two convoy operations.[157]
In June, the Royal Navy sent two convoys, Operation Harpoon from Gibraltar and Operation Vigorous from Haifa and Port Said, to Malta. The move was designed to split Axis naval forces attempting to intervene.[158] Lloyd the AOC, wanted to give No. 601 Squadron over to convoy escort duty. Although he could afford this diversion, he could maintain a standing patrol of only four Spitfires over the convoy. If Axis aircraft attacked as they were withdrawing, they had to stay and fight. Baling out if the pilots ran low on fuel was the only alternative to landing on Malta. The pilots had to hope that they would be picked up by the ships.[159] The eastern convoy was forced to turn back after a series of naval and air engagements, despite the British ships still having 20% of their ammunition left—it was considered insufficient to see them into Malta. The losses of the convoy were heavy. Among the British losses was the cruiser HMS Hermione. Three destroyers and 11 merchant vessels were also sunk. Malta sent Bristol Beauforts to engage the Italian fleet and German U-boats attacking the convoy. They torpedoed and sank the heavy cruiser Trento and damaged the battleship Littorio. Two freighters of the western convoy reached Malta and delivered supplies, making them the only ships out of a total of 17 to deliver their loads, 25,000 tons of supplies. A further 16 Malta-based pilots were lost in the operations.[160]
In August, the Operation Pedestal convoy brought vital relief to the besieged island, but at heavy cost. It was attacked from the sea and from the air. Some 146 Ju 88s, 72 Bf 109s, 16 Ju 87s, 232 Italian fighters, and 139 Italian bombers (a large number being the highly effective Savoia-Marchetti SM.79 torpedo bomber) took part in the action against the convoy.[161] Out of the 14 merchant ships sent, nine were sunk. Moreover, the aircraft carrier HMS Eagle, one cruiser and three destroyers were sunk by a combined effort from the Italian Navy, Kriegsmarine and Luftwaffe. Nevertheless, the operation though costly in lives and ships, was vital in bringing in much-needed war materials and supplies.[162] British destroyers saved 950 of Eagle's crew.[163] The Regia Aeronautica had played the central role against the convoy. Indeed, according to Sadkovich and others, to pretend that the air offensive against Malta had been a purely German affair is misleading.[164] According to Sadkovich,
from 1940 to 1943 the Italians flew 35,724 sorties against the island and the Germans 37,432 – but 31,391 of the Luftwaffe's missions were completed in 1942. The Italians must thus get some share of the credit for the destruction of 575 British fighters on Malta, and the sinking of 23 of 82 merchantmen dispatched to the island. But the RAF preferred to credit its losses to the Germans, even though the Italians flew more fighter missions over the island, had almost as many fighters on Sicily (184) as the Germans in the whole Mediterranean (252) in November 1942, and seem to have been better pilots, losing one aircraft per 63 sorties, compared to a German loss rate of one per 42 sorties.
— Sadkovitch[164]
The surface fleets were not the only supply line to Malta. British submarines also made a substantial effort. The submarine HMS Clyde was converted into an underwater supply ship. She could not go as deep or dive as quickly as the T- and U-class types, but she still made nine supply missions to Malta, which was more than any other vessel of its type. The ability of the submarine to carry large loads enabled it to be of great value in the campaign to lift the siege.[165]
Arrival of Keith Park
In July, Hugh Lloyd was relieved of RAF command on Malta. It was felt that a man with past experience of fighter defence operations was needed. For some reason, the Air Staff did not choose to do this earlier, when the bombing ceased in 1941, and the RAF forces on Malta became primarily fighter-armed while the principal aim changed to one of air defence. Air Vice Marshal Keith Park replaced Lloyd as AOC. Park arrived on 14 July 1942 by flying boat. He landed in the midst of a raid although Lloyd had specifically requested he circle the harbour until it had passed. Lloyd met Park and admonished him for taking an unnecessary risk.[166]
Park had faced Kesselring before during the Battle of Britain. During that battle, Park had advocated sending small numbers of fighters into battle to meet the enemy. There were three fundamental reasons for this. First, there would always be fighters in the air covering those on the ground if one did not send their entire force to engage at once. Second, small numbers were quicker to position and easier to move around. Third, the preservation of his force was critical. The fewer fighters he had in the air (he advocated 16 at most), the smaller target the numerically superior enemy would have. Over Malta, he reversed these tactics owing to changed circumstances. With plenty of Spitfires to operate, Park sought to intercept the enemy and break up his formations before the bombers reached the island. Until this point, the Spitfires had fought defensively. They scrambled and headed south to gain height, then turned around to engage the enemy over the island.
Now, with improved radar and quicker take off times (two to three minutes) and improved air-sea rescue, more offensive action became possible. Using three squadrons, Park asked the first to engage the escorting fighters by 'bouncing them' out of the sun. The second would strike at the close escort, or, if unescorted, the bombers themselves. The third was to attack the bombers head-on.[167] The impact of Park's methods was instant. His Forward Interception Plan, issued officially on 25 July 1942, forced the Axis to abandon daylight raids within six days. The Ju 87s were withdrawn from operations over Malta altogether. Kesselring responded by sending in fighter sweeps at even higher altitudes to gain the tactical advantage. Park retaliated by ordering his fighters to climb no higher than 6,100 feet (1,900 m). While this did give away a considerable height advantage, it forced the Bf 109s to descend to altitudes more suitable for the Spitfire than the German fighter. The methods would have great effect in October when Kesselring returned.[168]
Allied victory (October–November 1942)
British offensive operations
While the RAF and Royal Navy defensive operations dominated for the most part, offensive strikes were still being carried out.[169] The year 1942 was particularly impressive for offensive operations as well. Two-thirds of the Italian merchant fleet was sunk; 25% by British submarines, 37% by Allied aircraft. Axis forces in North Africa were denied around half of their supplies and two-thirds of their oil.[170]
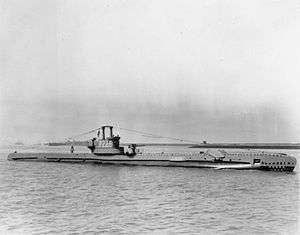
The submarines of Simpson's 10th Flotilla were on patrol constantly, except for the period May–July 1942, when Kesselring made a considerable effort against their bases. Their success was not easy to achieve, given most of them were the slow U-class types. Supported by S- and T-class vessels, they dropped mines. British submarine commanders became aces while operating from Malta. Commanders Ian McGeoch (commanding HMS Splendid),[171] Hugh "Rufus" Mackenzie and David Wanklyn[172] had particular success. Lieutenant Commander Lennox Napier sank the German tanker Wilhelmsburg (7,020 tons). It was one of the few German tankers exporting oil from Romania. The loss of the ship led Hitler to complain directly to Karl Dönitz, while comparing the Kriegsmarine unfavourably with the Royal Navy. Dönitz argued that he did not have the resources to protect the convoy, though the escort of the ship exceeded that which the Allies could have afforded to give a large convoy in the Atlantic at that point in the war. It was fortunate for Dönitz that Hitler did not probe the defence of the ship further.[173]
The submarine proved to be one of the most potent weapons in the British armoury when combating Axis convoys. Simpson, and George Phillips, who replaced him on 23 January 1943, had much success. The estimated tonnage sunk by British U-class submarines alone was 650,000 tons, with another 400,000 tons damaged. The island base, HMS Talbot, supplied 1,790 torpedoes at that time. The number fired by the 10th Flotilla was 1,289, with a hit rate of 30%.[174] The Chief of Staff of the DAK, Fritz Bayerlein once claimed: "We should have taken Alexandria and reached the Suez Canal had it not been for the work of your submarines".[175]
Wing Commander Patrick Gibbs and 39 Squadron, flew their Beauforts against shipping and increased the pressure on Rommel by attacking his supply lines in September. Rommel's position was now critical. The army in North Africa was starved of supplies while the British reinforced their lines in Egypt, prior to the Second Battle of El Alamein. He complained to the OKW that he was severely short of ammunition and fuel for offensive action. The Axis organised a convoy to relieve the difficulties. Ultra intercepted the Axis communications, and Wellingtons of 69 Squadron confirmed the Axis operation was real. Gibbs's Beauforts sank two ships and one of Simpson's submarines sank a third. Rommel still hoped another tanker, San Andreas, would deliver the 3,198 tons of fuel needed for the Battle of Alam el Halfa. Rommel did not wait for it to dock, and launched the offensive before its arrival. The ship was sunk by an attack led by Gibbs.[176] Of the nine ships sent, five were sunk by Malta's forces. The Beauforts were having a devastating impact on Axis fuel supplies which were now nearly used up. On 1 September, Rommel was forced to retreat. Kesselring handed over Luftwaffe fuel, but this merely denied the German air units the means to protect the ground forces, thereby increasing the effectiveness of British air superiority over the frontline.[177][178]
In August, Malta's strike forces had contributed to the Axis' difficulties in trying to force an advance into Egypt. In that month, 33% of supplies and 41% of fuel were lost.[179] In September 1942, Rommel received only 24% of the 50,000 tons of supplies needed monthly to continue offensive operations. During September, the Allies sank 33,939 tons of shipping at sea. Many of these supplies had to be brought in via Tripoli, many kilometres behind the battle front. The lack of food and water caused a sickness rate of 10% among Axis soldiers.[180] The British air-submarine offensive ensured no fuel reached North Africa in the first week of October 1942. Two fuel-carrying ships were sunk, and another lost its cargo despite the crew managing to salvage the ship. As the British offensive at El Alamein began on 23 October 1942, Ultra intelligence was gaining a clear picture of the desperate Axis fuel situation. On 25 October, three tankers and one cargo ship carrying fuel and ammunition were sent under heavy air and sea escort, and were likely to be the last ships to reach Rommel while he was at El Alamein. Ultra intelligence intercepted the planned convoy route, and alerted Malta's air units. The three fuel-carrying vessels were sunk by 28 October. It cost the British one Beaufighter, two Beauforts, three (out of six) Blenheims and one Wellington. Rommel lost 44% of his supplies on October, a jump from the 20% lost in September.[181]
Siege lifted
By August 1942, 163 Spitfires were on hand to defend Malta; 120 were serviceable.[182] On 11 and 17 August and 24 October 1942, under the respective actions, Operation Bellows, Operation Baritone and Operation Train, HMS Furious brought another 85 Spitfires to Malta.[183] Often, the Spitfires were asked to undertake flights of five and a half hours; this was achieved using 170-gallon ferry tanks. The ferry tanks, combined with a 29-gallon tank in the rear fuselage, brought the total tank capacity up to 284 gallons.[183]
Despite the success of Allied convoys in getting through, the month was as bad as any other, combining bombing with food shortages. In response to the threat Malta was now posing to Axis supply lines, the Luftwaffe renewed its attacks on Malta in October 1942. Recognising the critical battle was approaching in North Africa (Second Battle of El Alamein), Kesselring organised Fliegerkorps II in Sicily to neutralise the threat once and for all.[184] On 11 October, the defenders were mass equipped with Spitfire Mk VB/Cs. Over 17 days, the Luftwaffe suffered 34 Ju 88s and 12 Bf 109s destroyed and 18 damaged. RAF losses amounted to 23 Spitfires shot down and 20 crash-landed. The British lost 12 pilots killed.[185] On 16 October, it was clear to Kesselring that the defenders were too strong. He called off the offensive. The situation in North Africa required German air support, so the October offensive marked the last major effort by the Luftwaffe against Malta.[186]
Aftermath
The losses left the Axis air forces in a depleted state. They could not offer the air support needed at the frontline. The situation on the island was still stringent going into November, but Park's victory in the air battle was soon followed by news of a major success at the front. At El Alamein in North Africa the British had broken through on land, and by 5 November were advancing rapidly westward. News soon reached Malta of Operation Torch, the Allied landing in Vichy French Morocco and French Algeria on 8 November. Some 11 days later, news of the Soviet counterattack during the Battle of Stalingrad increased morale even more. The extent to which the success in North Africa benefited Malta was apparent when a convoy (Operation Stoneage) reached Malta from Alexandria on 20 November virtually unscathed. This convoy is seen as the end of the two-year siege of Malta. On 6 December, another supply convoy under the codename Operation Portcullis reached Malta without suffering any losses. After that, ships sailed to Malta without joining convoys. The capture of North African airfields and the bonus of having air protection all the way to the island enabled the ships to deliver 35,000 tons. In early December, another 55,000 tons arrived. The last air raid over Malta occurred on 20 July 1943. It was the 3,340th alert since 11 June 1940.[12][187]
Allied warship losses

Allied casualties in warships:
- One battleship:
- Two aircraft carriers:[4]
- Five cruisers:[4]
HMS Cairo, Hermione, Manchester, Neptune, Southampton
- 19 destroyers:[4]
HMS Airedale, Bedouin, Fearless, Foresight, Gallant, Gurkha, Hasty, Hyperion, Jersey, Kandahar, Kingston, Kujawiak (Polish Navy), Lance, Legion, Maori, Mohawk, HMAS Nestor (Royal Australian Navy), HMS Pakenham and Southwold.[4]
- 38 submarines
HMS Cachalot, Grampus, Odin, Olympus, Orpheus, Oswald, Undaunted, Union, P36, P38, P48, P222, P311, Pandora, Parthian, Perseus, Rainbow, Regent, Regulus, Saracen, Splendid, Talisman, Tempest, Tetrarch, Thunderbolt, Tigris, Traveller, Triad, Triton, Triumph, Trooper, Turbulent, Upholder, Urge, Usk and Utmost. The Free French Narval and Greek Navy vessel Glaukos, were also lost.[3]
Infrastructure damage

In the densely populated island, 5,524 private dwellings were destroyed, 9,925 were damaged but repairable and 14,225 damaged by bomb blast. In addition 111 churches, 50 hospitals, institutions or colleges, 36 theatres, clubs, government offices, banks, factories, flour mills and other commercial buildings suffered destruction or damage, a total of 30,000 buildings in all.[6] The Royal Opera House, Auberge d'Auvergne, Auberge de France and Palazzo Correa in Valletta, the Birgu Clock Tower, Auberge d'Allemagne and Auberge d'Italie in Birgu, parts of the fortifications of Senglea, and the Governor's House of Fort Ricasoli were destroyed. Other buildings such as Auberge de Castille, Auberge de Bavière, the Casa del Commun Tesoro and parts of Fort Manoel also suffered extensive damage but were rebuilt after the war.
Axis shipping losses
Total Axis losses in the Mediterranean were moderate. Human casualties amounted to 17,240 personnel at sea. In supplies, the Axis lost 315,090 tons. This was more than reached Malta. The Allied navies sank 773 Axis ships, totalling 1,364,337 t (1,342,789 long tons). Mines sank another 179 ships of 214,109 tons in total. The navies and air forces shared in the destruction of 25 ships for 106,050 tons and aircraft sank 1,326 ships, for a total of 1,466,208 tons. Mines and naval craft shared a further ship destroyed between them, of 1,778 tons. In all, 2,304 Axis ships were sunk, with a combined tonnage of 3,130,969.[8]
Table of Axis ships escorted to Libya, June 1940 – January 1943:
- periods the Regia Aeronautica was the only enemy air force in action against Malta
- periods the Luftwaffe made significant efforts against Malta
- influence of the Royal Navy Force K operations against Axis shipping
- influence of Bristol Beaufighter operations against Axis shipping
| Month | Personnel shipped |
Personnel reached |
Supplies shipped |
Supplies reached |
|---|---|---|---|---|
| Jun | 1,358 | 1,308 | 3,618 | 3,608 |
| Jul | 6,407 | 6,407 | 40,875 | 40,875 |
| Aug | 1,221 | 1,221 | 50,669 | 50,669 |
| Sep | 4,602 | 4,602 | 53,669 | 53,669 |
| Oct | 2,823 | 2,823 | 29,306 | 29,306 |
| Nov | 3,157 | 3,157 | 60,778 | 60,778 |
| Dec | 9,731 | 9,731 | 65,556 | 58,574 |
| Month | Personnel shipped |
Personnel reached |
Supplies shipped |
Supplies reached |
|---|---|---|---|---|
| Jan | 12,491 | 12,214 | 50,505 | 49,084 |
| Feb | 19,557 | 19,557 | 80,357 | 79,173 |
| Mar | 20,975 | 20,184 | 101,800 | 92,753 |
| Apr | 20,698 | 19,926 | 88,597 | 81,472 |
| May | 12,552 | 9,958 | 73,367 | 69,331 |
| Jun | 12,886 | 12,886 | 133,331 | 125,076 |
| Jul | 16,141 | 15,767 | 77,012 | 62,276 |
| Aug | 18,288 | 16,753 | 96,021 | 83,956 |
| Sep | 12,717 | 6,603 | 94,115 | 67,513 |
| Oct | 4,046 | 3,541 | 92,449 | 73,614 |
| Nov | 4,872 | 4,628 | 79,208 | 29,843 |
| Dec | 1,748 | 1,074 | 47,680 | 39,092 |
| Month | Personnel shipped |
Personnel reached |
Supplies shipped |
Supplies reached |
|---|---|---|---|---|
| Jan | 2,840 | 1,355 | 66,214 | 66,170 |
| Feb | 531 | 531 | 59,468 | 58,965 |
| Mar | 391 | 284 | 57,541 | 47,588 |
| Apr | 1,349 | 1,349 | 151,578 | 150,389 |
| May | 4,396 | 4,241 | 93,188 | 86,439 |
| Jun | 1,474 | 1,249 | 41,519 | 32,327 |
| Jul | 4,566 | 4,435 | 97,794 | 91,491 |
| Aug | 1,281 | 790 | 77,134 | 51,655 |
| Sep | 1,367 | 959 | 96,903 | 77,526 |
| Oct | 1,011 | 631 | 83,695 | 46,698 |
| Nov | 1,031 | 1,031 | 85,970 | 63,736 |
| Dec | 5 | 5 | 12,981 | 6,151 |
In popular culture
In film
- The war propaganda short film Malta G.C. was commissioned in 1942 by the British government to popularise the endurance of the Maltese people and the awarding of the George Cross. It features real footage of the bombings and their effects.
- The 1953 British film Malta Story is the fictional story of a photo reconnaissance RAF pilot in Malta during the siege. It features real footage and re-enactments with authentic aircraft.
In literature
In his novel The Kappillan of Malta (1973) Nicholas Monsarrat gives an account of the Siege of Malta from June 1940 to August 1942 as experienced by the fictional Catholic priest Father Salvatore.[188] The novel is interspersed with brief episodes from other periods of Maltese history.
Thomas Pynchon’s 1963 debut “V.” features a chapter devoted to life during the Siege of Malta.
In his 2016 novel Everyone Brave is Forgiven, Chris Cleave presents the misery and horror of the siege through the eyes of British officers whose experiences are loosely based on those of his grandfather David Hill, who served in the Royal Artillery.
See also
- Malta Convoys
- Operation Herkules
- Malta Command
- Military history of Gibraltar during World War II
- Military history of the British Commonwealth in the Second World War
- Adrian Warburton
- George Beurling
Notes
- Taylor 1974, p. 182.
- Bungay 2002, p. 64.
- Spooner 1996, p. 5.
- Spooner 1996, p. 3.
- Spooner 1996, p. 8.
- Spooner 1996, p. 11.
- Bungay 2002, p. 66.
- Spooner 1996, p. 343.
- Spooner 1996, p. 326.
- Nora Boustany (July 13, 2001). "The Consummate Diplomat Wants Malta on the Map". The Washington Post. Retrieved 6 July 2017.
- "BBC – WW2 People's War – MALTA – WORLD WAR II". www.bbc.co.uk. Retrieved 2019-05-06.
- Holland 2003, p. 417.
- Spooner 1996, p. 337.
- "Allied shipping losses".
- Jellison 1984, pp. 6, 21, 51–52.
- Rix 2015, p. 2.
- Holland 2003, pp. 22, 17.
- Jellison 1984, p. 11.
- Taylor 1974, p. 181.
- Jellison 1984, p. 21.
- Holland 2003, p. 22.
- Holland 2003, p. 30.
- Spooner 1996, pp. 12–13.
- Jellison 1984, p. 51.
- Cooper 1978, pp. 354–355.
- Mallett 1998, p. 194.
- Bungay 2002, pp. 50–51.
- Bungay 2002, p. 51.
- Woodman 2003, pp. 32–33.
- Bradford 2003, pp. 3–4.
- Spooner 1996, p. 15.
- Bradford 2003, p. 5.
- Shores 1985, p. 81.
- Terraine 1985, pp. 366–367.
- Holmes 1998, p. 112.
- Spooner 1996, pp. 16–17.
- Mallett 1998, p. 171.
- Bradford 2003, p. 15.
- Bradford 2003, pp. 22–26.
- Holland 2003, p. 136.
- Sadkovich 1988, pp. 455–466.
- Caravaggio 2006, pp. 103–122.
- Bradford 2003, p. 29.
- Holland 2003, p. 70.
- Bradford 2003, p. 31.
- Spooner 1996, pp. 26–27.
- Holland 2003, pp. 84–85.
- Spooner 1996, p. 29.
- Spooner 1996, p. 30.
- Spooner 1996, p. 33.
- Spooner 1996, pp. 34–35.
- Spooner 1996, p. 35.
- Spooner 1996, pp. 38–39.
- Hooton 1997, pp. 128–129.
- Weal 1998, pp. 6–7.
- Weal 1998, pp. 8–9.
- Ward 2004, p. 112.
- Shores, Cull & Malizia 1987, p. 110.
- Holland 2003, p. 87.
- Holland 2003, p. 90.
- Holland 2003, p. 89.
- Ward 2004, p. 113.
- Holland 2003, p. 91.
- Weal 1998, pp. 9–10.
- Weal 1998, p. 10.
- Shores, Cull & Malizia 1987, p. 149.
- Scutts 1994, pp. 6–7.
- Shores, Cull & Malizia 1987, p. 362.
- Rogers 2005, pp. 3–4.
- Holland 2003, pp. 128–129.
- Holland 2003, pp. 137–138.
- Jellison 1984, p. 114.
- Holland 2003, p. 142.
- Cocchia 1958, p. 109.
- Spooner 1996, pp. 41–43.
- Smith 1974, pp. 17–38.
- Smith 1974, pp. 46.
- Smith 1974, pp. 34.
- Weal 1998, p. 14.
- Jellison 1984, pp. 102–103.
- Jellison 1984, p. 106.
- Jellison 1984, pp. 111–113.
- Jellison 1984, pp. 121–123.
- Hooton 1997, p. 129.
- Weal 1998, p. 46.
- Rogers 2005, p. 19.
- Jellison 1984, pp. 137–138.
- Jellison 1984, p. 138.
- Jellison 1984, pp. 138–139.
- Jellison 1984, pp. 124–125, 139.
- Spooner 1996, p. 65.
- Shores 1985, p. 82.
- Nichols 2008, p. 11.
- Shores, Cull & Malizia 1987, p. 270.
- Hooton 1997, p. 134.
- Jellison 1984, p. 141.
- Canada 2013.
- Spooner 1996, p. 58.
- Spooner 1996, p. 66.
- Spooner 1996, p. 68.
- Jellison 1984, p. 139.
- Spooner 1996, pp. 72–73.
- Spooner 1996, p. 327.
- Spooner 1996, pp. 81, 74.
- Spooner 1996, p. 88.
- Smith 1974, pp. 39.
- Spooner 1996, p. 87.
- Holland 2003, pp. 220–221.
- Wingate 1991, p. 121.
- Smith 1974, pp. 87.
- Spooner 1996, pp. 103–104.
- Holland 2003, p. 221.
- Smith 1974, pp. 182.
- Spooner 1996, p. 82.
- Shores 1985, p. 85.
- Rogers 2005, pp. 103–104.
- Hooton 1997, pp. 135–136.
- Spooner 1996, p. 107.
- Holland 2003, p. 211.
- Holland 2003, p. 214.
- Spooner 1996, p. 105.
- Hooton 1997, p. 210.
- Hooton 1997, p. 211.
- Holland 2003, p. 215.
- Holland 2003, pp. 292–293.
- Nichols 2008, p. 14.
- Shores 1985, p. 84.
- Holland 2003, p. 234.
- Price 1997, p. 47.
- Price 1997, p. 49.
- Price 1997, pp. 50–51.
- Holland 2003, p. 256.
- Price 1997, p. 51.
- Holland 2003, p. 268.
- Spooner 1996, p. 93.
- Spooner 1996, p. 95.
- Spooner 1996, p. 111.
- Spooner 1996, p. 112.
- Spooner 1996, p. 114.
- Spooner 1996, p. 119.
- Holland 2003, p. 304.
- Spooner 1996, p. 122.
- Hooton 1997, p. 212.
- Price 1997, p. 52.
- Delve 2007, p. 103.
- Price 1997, p. 54.
- Holland 2003, p. 308.
- Price 1997, pp. 54–55.
- de Zeng 2007, pp. vol 2, 266–267.
- de Zeng 2007, p. Vol. 2, pp. 257–262.
- de Zeng 2007, p. 1, p. 182.
- Spooner 1996, pp. 115–116.
- Nichols 2008, p. 13.
- Spooner 1996, pp. 122, 154.
- Holland 2003, p. 382.
- Holland 2003, pp. 315–316.
- Spooner 1996, p. 154.
- Spooner 1996, p. 155.
- Holland 2003, p. 321.
- Holland 2003, pp. 322–323.
- Spooner 1996, p. 179.
- Hogan 1978, p. 140.
- Hogan 1978, p. 142.
- Sadkovich 1989, p. 48.
- Spooner 1996, p. 201.
- Holland 2003, p. 337.
- Holland 2003, pp. 338–339.
- Holland 2003, pp. 339–340.
- Spooner 1996, p. 178.
- Overy 1995, p. 52.
- Wingate 1991, p. 297.
- Hooton 1997, p. 217.
- Spooner 1996, pp. 187–188, 190–197.
- Spooner 1996, pp. 204–205.
- Spooner 1996, p. 187.
- Holland 2003, pp. 386–387.
- Spooner 1996, p. 185.
- Holland 2003, p. 388.
- Levine 2008, p. 28.
- Spooner 1996, pp. 214–215.
- Levine 2008, p. 30.
- Delve 2007, p. 104.
- Price 1997, p. 56.
- Spooner 1996, p. 228.
- Scutts 1994, p. 35.
- Hooton 1997, p. 213.
- Spooner 1996, pp. 229–230.
- The Kappillan of Malta, Kirkus Reviews. 25 March 1974.
References
- Bradford, Ernle (2003) [1986]. Siege: Malta 1940–1943. Pen & Sword. ISBN 978-0-85052-930-2.
- Bragadin, Marc'Antonio (1957). The Italian Navy in World War II. Annapolis, MD: United States Naval Institute. ISBN 978-0-405-13031-1.CS1 maint: ref=harv (link)
- Bungay, Stephen (2002). Alamein. Aurum Press. ISBN 1-85410-929-4.CS1 maint: ref=harv (link)
- Canada, Kevin (2013). "The Unfortunate Action". Irondale, AL: Avalanche Press. Retrieved 20 March 2016.CS1 maint: ref=harv (link)
- Caravaggio, Angelo N. (Summer 2006). "The Attack at Taranto: Tactical Success, Operational Failure". Naval War College Review. Newport, RI. 59 (3). ISSN 0028-1484.
- Cocchia, Aldo (1958). The Hunters and the Hunted. Navies and Men. Annapolis, MD: Naval Institute Press. ISBN 0-405-13030-9.CS1 maint: ref=harv (link)
- Cooper, Matthew (1978). The German Army 1933–1945: Its Political and Military Failure. Briarcliff Manor, NY: Stein and Day. ISBN 0-8128-2468-7.
- Delve, Ken (2007). The Story of the Spitfire: An Operational and Combat History. London: Greenhill books. ISBN 978-1-85367-725-0.CS1 maint: ref=harv (link)
- de Zeng, H. L.; Stanket, D. G.; Creek, E. J. (2007). Bomber Units of the Luftwaffe 1933–1945: A Reference Source. I. London: Ian Allan. ISBN 978-1-85780-279-5.
- de Zeng, H. L.; Stanket, D. G.; Creek, E. J. (2007). Bomber Units of the Luftwaffe 1933–1945: A Reference Source. II. London: Ian Allan. ISBN 978-1-903223-87-1.
- Halley, James J. (1988). The Squadrons of the Royal Air Force & Commonwealth 1918–1988. Tonbridge: Air Britain (Historians). ISBN 0-85130-164-9.CS1 maint: ref=harv (link)
- Hogan, George (1978). Malta: The Triumphant Years, 1940–1943. London: Robert Hale. ISBN 978-0-7091-7115-7.CS1 maint: ref=harv (link)
- Holmes, Tony (1998). Hurricane Aces 1939–40. Aircraft of the Aces. 18. Oxford: Osprey. ISBN 1-85532-597-7.CS1 maint: ref=harv (link)
- Holland, James (2003). Fortress Malta: An Island Under Siege, 1940–1943. London: Miramax Books. ISBN 1-4013-5186-7.
- Hooton, E. R. (1997). Eagle in Flames: The Fall of the Luftwaffe. London: W&N. ISBN 978-1-85409-343-1.
- Jellision, Charles Albert (1984). Besieged: The World War II Ordeal of Malta, 1940–1942. Hanover, NH: for University of New Hampshire by University Press of New England. ISBN 978-0-87451-313-4.
- Levine, Alan (2008). The War Against Rommel's Supply Lines, 1942–43. Stackpole Books. ISBN 978-0-8117-3458-5.CS1 maint: ref=harv (link)
- Mallett, Robert (1998). The Italian Navy and Fascist Expansionism, 1935–1940. London: Frank Cass. ISBN 0-7146-4432-3.CS1 maint: ref=harv (link)
- Marinangeli, Ugo (2013). "Lo sviluppo della Pesca meccanizzata sambenedettese -ilQuotidiano.it" (in Italian). www.ilquotidiano.it. Retrieved 2017-02-11.
- Nichols, Steve (2008). Malta Spitfire Aces. Aircraft of the Aces. 83. Oxford: Osprey. ISBN 978-1-84603-305-6.CS1 maint: ref=harv (link)
- Overy, Richard (1995). War and Economy in the Third Reich. London: Oxford University Press. ISBN 978-0-19-820599-9.CS1 maint: ref=harv (link)
- Price, Alfred (1997). Spitfire Mark V Aces 1941–45. Oxford: Osprey Aerospace. ISBN 1-85532-635-3.CS1 maint: ref=harv (link)
- Rix, Juliet (2015). Malta and Gozo. Bradt Travel Guides. ISBN 1784770256.CS1 maint: ref=harv (link)
- Rogers, Anthony (2005). 185: The Malta Squadron. London: Spellmount. ISBN 1-86227-274-3.CS1 maint: ref=harv (link)
- Sadkovich, James J. (Jan 1989). "Understanding Defeat: Reappraising Italy's Role in World War II". Journal of Contemporary History. London: Sage. 24 (1): 27–61. doi:10.1177/002200948902400102. ISSN 0022-0094. JSTOR 260699.CS1 maint: ref=harv (link)
- Sadkovich, James J. (1988). "Re-evaluating Who Won the Italo-British Naval Conflict, 1940–42". European History Quarterly. 18 (4): 455–471. doi:10.1177/026569148801800405. ISSN 0265-6914.
- Scutts, Jerry B. (1994). Bf 109 Aces of North Africa and the Mediterranean. London: Osprey. ISBN 1-85532-448-2.CS1 maint: ref=harv (link)
- Shores, Christopher; Cull, Brian; Malizia, Nicola (1987). Malta: The Hurricane Years. London: Grub Street. ISBN 0-948817-06-2.CS1 maint: ref=harv (link)
- Shores, Christopher (1985). Duel for the Sky: Ten Crucial Battles of World War II. London: Grub Street. ISBN 978-0-7137-1601-6.
- Smith, Peter C. (1974). The Battles of the Malta Striking Forces. Littlehampton. ISBN 978-0-7110-0528-0.
- Spooner, Tony (1996). Supreme Gallantry: Malta's Role in the Allied Victory, 1939–1945. London. ISBN 978-0719557064.CS1 maint: ref=harv (link)
- Taylor, A. J. P. (1974). Mayer, S. L. (ed.). A History Of World War Two. London: Octopus Books. ISBN 0-7064-0399-1.
- Terraine, John (1985). The Right of the Line: The Royal Air Force in the European War, 1939–1945. London: Sceptre. ISBN 0-340-41919-9.
- Ward, John (2004). Hitler's Stuka Squadrons: The Ju 87 at War, 1936–1945. Eagles of War. London: Spellmount. ISBN 1-86227-246-8.CS1 maint: ref=harv (link)
- Weal, John (1998). Junkers Ju 87 Stukageschwader 1937–41. Oxford: Osprey. ISBN 1-85532-636-1.
- Wingate, John (1991). The Fighting Tenth: The Tenth Submarine Flotilla and the Siege of Malta. Barnsley: Pen & Sword. ISBN 978-0-85052-891-6.CS1 maint: ref=harv (link)
- Woodman, R. (2003). Malta Convoys 1940–1943 (pbk. ed.). London: John Murray. ISBN 978-0-7195-6408-6.
Further reading
- Crawford, Alex (2002). Gloster Gladiator. Redbourn: Mushroom Model Publications. ISBN 83-916327-0-9.
- Hammond, R. J. (2011). The British Anti-shipping Campaign in the Mediterranean 1940–1944: Comparing Methods of Attack (PhD). registration. University of Exeter. OCLC 798399582. Docket uk.bl.ethos.548977. Retrieved 31 October 2016.
- Keegan, John (2005). The Oxford Companion to World War Two. London: Oxford University Press. ISBN 0-19-280666-1.
- Mallett, Robert (2008). The Italian Navy and Fascist Expansionism, 1935–1940. London: Frank Cass. ISBN 978-0714644325.
- Rogers, Anthony (2000). Battle Over Malta: Aircraft Losses and Crash Sites, 1940–42. London: Sutton Books. ISBN 978-0-7509-2392-7.
- Thomas, Andrew (2002). Gloster Gladiator Aces. Oxford: Osprey. ISBN 1-84176-289-X.

