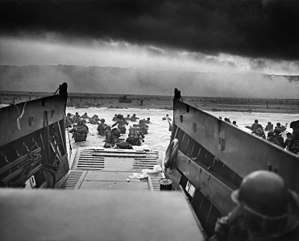
Normandy landings
The Normandy landings were the landing operations and associated airborne operations on Tuesday, 6 June 1944 of the Allied invasion of Normandy in Operation Overlord during World War II. Codenamed Operation Neptune and often referred to as D-Day, it was the largest seaborne invasion in history. The operation began the liberation of German-occupied France (and later western Europe) and laid the foundations of the Allied victory on the Western Front.
Planning for the operation began in 1943. In the months leading up to the invasion, the Allies conducted a substantial military deception, codenamed Operation Bodyguard, to mislead the Germans as to the date and location of the main Allied landings. The weather on D-Day was far from ideal, and the operation had to be delayed 24 hours; a further postponement would have meant a delay of at least two weeks, as the invasion planners had requirements for the phase of the moon, the tides, and the time of day that meant only a few days each month were deemed suitable. Adolf Hitler placed Field Marshal Erwin Rommel in command of German forces and of developing fortifications along the Atlantic Wall in anticipation of an Allied invasion.
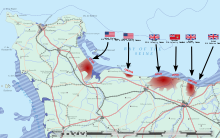
The amphibious landings were preceded by extensive aerial and naval bombardment and an airborne assault—the landing of 24,000 American, British, and Canadian airborne troops shortly after midnight. Allied infantry and armoured divisions began landing on the coast of France at 06:30. The target 50-mile (80 km) stretch of the Normandy coast was divided into five sectors: Utah, Omaha, Gold, Juno, and Sword. Strong winds blew the landing craft east of their intended positions, particularly at Utah and Omaha. The men landed under heavy fire from gun emplacements overlooking the beaches, and the shore was mined and covered with obstacles such as wooden stakes, metal tripods, and barbed wire, making the work of the beach-clearing teams difficult and dangerous. Casualties were heaviest at Omaha, with its high cliffs. At Gold, Juno, and Sword, several fortified towns were cleared in house-to-house fighting, and two major gun emplacements at Gold were disabled using specialised tanks.
The Allies failed to achieve any of their goals on the first day. Carentan, St. Lô, and Bayeux remained in German hands, and Caen, a major objective, was not captured until 21 July. Only two of the beaches (Juno and Gold) were linked on the first day, and all five beachheads were not connected until 12 June; however, the operation gained a foothold that the Allies gradually expanded over the coming months. German casualties on D-Day have been estimated at 4,000 to 9,000 men. Allied casualties were documented for at least 10,000, with 4,414 confirmed dead. Museums, memorials, and war cemeteries in the area now host many visitors each year.
Background
After the German Army invaded the Soviet Union in June 1941, the Soviet leader Joseph Stalin began pressing his new allies for the creation of a second front in western Europe.[12] In late May 1942 the Soviet Union and the United States made a joint announcement that a "... full understanding was reached with regard to the urgent tasks of creating a second front in Europe in 1942."[13] However, British Prime Minister Winston Churchill persuaded US President Franklin D. Roosevelt to postpone the promised invasion as, even with US help, the Allies did not have adequate forces for such an activity.[14]
Instead of an immediate return to France, the western Allies staged offensives in the Mediterranean Theatre of Operations, where British troops were already stationed. By mid-1943 the campaign in North Africa had been won. The Allies then launched the invasion of Sicily in July 1943, and subsequently invaded the Italian mainland in September the same year. By then, Soviet forces were on the offensive and had won a major victory at the Battle of Stalingrad. The decision to undertake a cross-channel invasion within the next year was taken at the Trident Conference in Washington in May 1943.[15] Initial planning was constrained by the number of available landing craft, most of which were already committed in the Mediterranean and Pacific.[16] At the Tehran Conference in November 1943, Roosevelt and Churchill promised Stalin that they would open the long-delayed second front in May 1944.[17]
The Allies considered four sites for the landings: Brittany, the Cotentin Peninsula, Normandy, and the Pas-de-Calais. As Brittany and Cotentin are peninsulas, it would have been possible for the Germans to cut off the Allied advance at a relatively narrow isthmus, so these sites were rejected.[18] With the Pas-de-Calais being the closest point in continental Europe to Britain, the Germans considered it to be the most likely initial landing zone, so it was the most heavily fortified region.[19] But it offered few opportunities for expansion, as the area is bounded by numerous rivers and canals,[20] whereas landings on a broad front in Normandy would permit simultaneous threats against the port of Cherbourg, coastal ports further west in Brittany, and an overland attack towards Paris and eventually into Germany. Normandy was hence chosen as the landing site.[21] The most serious drawback of the Normandy coast—the lack of port facilities—would be overcome through the development of artificial Mulberry harbours.[22] A series of modified tanks, nicknamed Hobart's Funnies, dealt with specific requirements expected for the Normandy Campaign such as mine clearing, demolishing bunkers, and mobile bridging.[23]
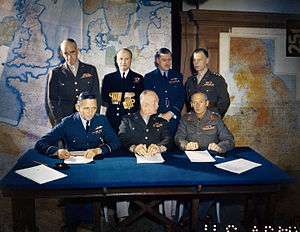
The Allies planned to launch the invasion on 1 May 1944.[20] The initial draft of the plan was accepted at the Quebec Conference in August 1943. General Dwight D. Eisenhower was appointed commander of Supreme Headquarters Allied Expeditionary Force (SHAEF).[24] General Bernard Montgomery was named as commander of the 21st Army Group, which comprised all land forces involved in the invasion.[25] On 31 December 1943 Eisenhower and Montgomery first saw the plan, which proposed amphibious landings by three divisions with two more divisions in support. The two generals immediately insisted that the scale of the initial invasion be expanded to five divisions, with airborne descents by three additional divisions, to allow operations on a wider front and to hasten the capture of Cherbourg.[26] The need to acquire or produce extra landing craft for the expanded operation meant that the invasion had to be delayed to June.[26] Eventually, thirty-nine Allied divisions would be committed to the Battle of Normandy: twenty-two US, twelve British, three Canadian, one Polish, and one French, totalling over a million troops[27] all under overall British command.[28]
Operations
Operation Overlord was the name assigned to the establishment of a large-scale lodgement on the Continent. The first phase, the amphibious invasion and establishment of a secure foothold, was codenamed Operation Neptune.[22] To gain the air superiority needed to ensure a successful invasion, the Allies undertook a bombing campaign (codenamed Operation Pointblank) that targeted German aircraft production, fuel supplies, and airfields.[22] Elaborate deceptions, codenamed Operation Bodyguard, were undertaken in the months leading up to the invasion to prevent the Germans from learning the timing and location of the invasion.[29]
The landings were to be preceded by airborne operations near Caen on the eastern flank to secure the Orne River bridges and north of Carentan on the western flank. The Americans, assigned to land at Utah Beach and Omaha Beach, were to attempt to capture Carentan and St. Lô the first day, then cut off the Cotentin Peninsula and eventually capture the port facilities at Cherbourg. The British at Sword and Gold Beaches and Canadians at Juno Beach would protect the US flank and attempt to establish airfields near Caen on the first day.[30][31] (A sixth beach, code-named "Band", was considered to the east of the Orne.[32]) A secure lodgement would be established with all invading forces linked together, and an attempt made to hold all territory north of the Avranches-Falaise line within the first three weeks.[30][31] Montgomery envisaged a ninety-day battle, lasting until all Allied forces reached the River Seine.[33]
Deception plans
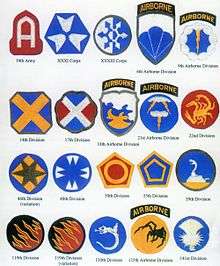
Under the overall umbrella of Operation Bodyguard, the Allies conducted several subsidiary operations designed to mislead the Germans as to the date and location of the Allied landings.[34] Operation Fortitude included Fortitude North, a misinformation campaign using fake radio traffic to lead the Germans into expecting an attack on Norway,[35] and Fortitude South, a major deception involving the creation of a fictitious First United States Army Group under Lieutenant General George S. Patton, supposedly located in Kent and Sussex. Fortitude South was intended to deceive the Germans into believing that the main attack would take place at Calais.[29][36] Genuine radio messages from 21st Army Group were first routed to Kent via landline and then broadcast, to give the Germans the impression that most of the Allied troops were stationed there.[37] Patton was stationed in England until 6 July, thus continuing to deceive the Germans into believing a second attack would take place at Calais.[38]
Many of the German radar stations on the French coast were destroyed in preparation for the landings.[39] In addition, on the night before the invasion, a small group of Special Air Service (SAS) operators deployed dummy paratroopers over Le Havre and Isigny. These dummies led the Germans to believe that an additional airborne landing had occurred. On that same night, in Operation Taxable, No. 617 Squadron RAF dropped strips of "window", metal foil that caused a radar return which was mistakenly interpreted by German radar operators as a naval convoy near Le Havre. The illusion was bolstered by a group of small vessels towing barrage balloons. A similar deception was undertaken near Boulogne-sur-Mer in the Pas de Calais area by No. 218 Squadron RAF in Operation Glimmer.[40][4]
Weather
The invasion planners determined a set of conditions involving the phase of the moon, the tides, and the time of day that would be satisfactory on only a few days in each month. A full moon was desirable, as it would provide illumination for aircraft pilots and have the highest tides. The Allies wanted to schedule the landings for shortly before dawn, midway between low and high tide, with the tide coming in. This would improve the visibility of obstacles on the beach, while minimising the amount of time the men would be exposed in the open.[41] Eisenhower had tentatively selected 5 June as the date for the assault. However, on 4 June, conditions were unsuitable for a landing: high winds and heavy seas made it impossible to launch landing craft, and low clouds would prevent aircraft from finding their targets.[42]
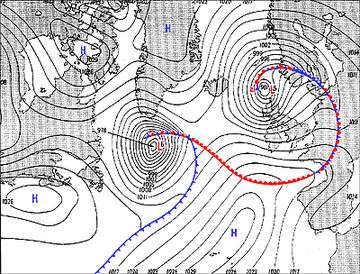
Group Captain James Stagg of the Royal Air Force (RAF) met Eisenhower on the evening of 4 June. He and his meteorological team predicted that the weather would improve enough for the invasion to proceed on 6 June.[43] The next available dates with the required tidal conditions (but without the desirable full moon) would be two weeks later, from 18 to 20 June. Postponement of the invasion would have required recalling men and ships already in position to cross the Channel, and would have increased the chance that the invasion plans would be detected.[44] After much discussion with the other senior commanders, Eisenhower decided that the invasion should go ahead on the 6th.[45] A major storm battered the Normandy coast from 19 to 22 June, which would have made the beach landings impossible.[42]
Allied control of the Atlantic meant German meteorologists had less information than the Allies on incoming weather patterns.[39] As the Luftwaffe meteorological centre in Paris was predicting two weeks of stormy weather, many Wehrmacht commanders left their posts to attend war games in Rennes, and men in many units were given leave.[46] Field Marshal Erwin Rommel returned to Germany for his wife's birthday and to meet with Hitler to try to obtain more Panzers.[47]
German order of battle
Nazi Germany had at its disposal fifty divisions in France and the Low Countries, with another eighteen stationed in Denmark and Norway. Fifteen divisions were in the process of formation in Germany.[48] Combat losses throughout the war, particularly on the Eastern Front, meant that the Germans no longer had a pool of able young men from which to draw. German soldiers were now on average six years older than their Allied counterparts. Many in the Normandy area were Ostlegionen (eastern legions)—conscripts and volunteers from Russia, Mongolia, and other areas of the Soviet Union. They were provided mainly with unreliable captured equipment and lacked motorised transport.[49][50] Many German units were under strength.[51]
In early 1944, the German Western Front (OB West) was significantly weakened by personnel and materiel transfers to the Eastern Front. During the Soviet Dnieper–Carpathian Offensive (24 December 1943 – 17 April 1944), the German High Command was forced to transfer the entire II SS Panzer Corps from France, consisting of the 9th and 10th SS Panzer Divisions, as well as the 349th Infantry Division, 507th Heavy Panzer Battalion and the 311th and 322nd StuG Assault Gun Brigades. All told, the German forces stationed in France were deprived of 45,827 troops and 363 tanks, assault guns, and self-propelled anti-tank guns.[52] It was the first major transfer of forces from France to the east since the creation of Führer Directive 51, which no longer allowed any transfers from the west to the east.[53]
The 1st SS Panzer Division Leibstandarte SS Adolf Hitler, 9th, 11th, 19th and 116th Panzer divisions, alongside the 2nd SS Panzer Division "Das Reich", had only arrived in March–May 1944 to France for extensive refit after being badly damaged during Dnieper-Carpathian operation. Seven of the eleven panzer or panzergrenadier divisions stationed in France were still not fully operational or only partially mobile in early June 1944.[54]
German Supreme commander: Adolf Hitler
- Oberbefehlshaber West (Supreme Commander West; OB West): Field Marshal Gerd von Rundstedt
- (Panzer Group West: General Leo Geyr von Schweppenburg)
- Army Group B: Field Marshal Erwin Rommel
- 7th Army: Generaloberst Friedrich Dollmann
- LXXXIV Corps under General der Artillerie Erich Marcks
- 7th Army: Generaloberst Friedrich Dollmann
Cotentin Peninsula
Allied forces attacking Utah Beach faced the following German units stationed on the Cotentin Peninsula:
Grandcamps Sector
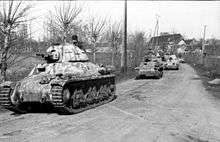
Americans assaulting Omaha Beach faced the following troops:

Allied forces at Gold and Juno faced the following elements of the 352nd Infantry Division:
Forces around Caen
Allied forces attacking Gold, Juno, and Sword Beaches faced the following German units:


- 100th Panzer Regiment[59] (at Falaise under Hermann von Oppeln-Bronikowski; renamed 22nd Panzer Regiment in May 1944 to avoid confusion with 100th Panzer Battalion) [63]
- 125th Panzergrenadier Regiment[59](under Hans von Luck from April 1944)[64]
- 192nd Panzergrenadier Regiment[59]
- 155th Panzer Artillery Regiment[59]
Atlantic Wall
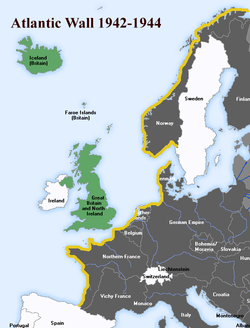
Alarmed by the raids on St Nazaire and Dieppe in 1942, Hitler had ordered the construction of fortifications all along the Atlantic coast, from Spain to Norway, to protect against an expected Allied invasion. He envisioned 15,000 emplacements manned by 300,000 troops, but shortages, particularly of concrete and manpower, meant that most of the strongpoints were never built.[65] As it was expected to be the site of the invasion, the Pas de Calais was heavily defended.[65] In the Normandy area, the best fortifications were concentrated at the port facilities at Cherbourg and Saint-Malo.[26] Rommel was assigned to oversee the construction of further fortifications along the expected invasion front, which stretched from the Netherlands to Cherbourg,[65][66] and was given command of the newly re-formed Army Group B, which included the 7th Army, the 15th Army, and the forces guarding the Netherlands. Reserves for this group included the 2nd, 21st, and 116th Panzer divisions.[67][68]
Rommel believed that the Normandy coast could be a possible landing point for the invasion, so he ordered the construction of extensive defensive works along that shore. In addition to concrete gun emplacements at strategic points along the coast, he ordered wooden stakes, metal tripods, mines, and large anti-tank obstacles to be placed on the beaches to delay the approach of landing craft and impede the movement of tanks.[69] Expecting the Allies to land at high tide so that the infantry would spend less time exposed on the beach, he ordered many of these obstacles to be placed at the high water mark.[41] Tangles of barbed wire, booby traps, and the removal of ground cover made the approach hazardous for infantry.[69] On Rommel's order, the number of mines along the coast was tripled.[26] The Allied air offensive over Germany had crippled the Luftwaffe and established air supremacy over western Europe, so Rommel knew he could not expect effective air support.[70] The Luftwaffe could muster only 815 aircraft[71] over Normandy in comparison to the Allies' 9,543.[72] Rommel arranged for booby-trapped stakes known as Rommelspargel (Rommel's asparagus) to be installed in meadows and fields to deter airborne landings.[26]
Nazi armaments minister Albert Speer notes in his 1969 autobiography that the German high command, concerned about the susceptibility of the airports and port facilities along the North Sea coast, held a conference on 6–8 June 1944 to discuss reinforcing defenses in that area.[73] Speer wrote:
In Germany itself we scarcely had any troop units at our disposal. If the airports at Hamburg and Bremen could be taken by parachute units and the ports of these cities seized by small forces, invasion armies debarking from ships would, I feared, meet no resistance and would be occupying Berlin and all of Germany within a few days.[74]
Armoured reserves
Rommel believed that Germany's best chance was to stop the invasion at the shore. He requested that the mobile reserves, especially tanks, be stationed as close to the coast as possible. Rundstedt, Geyr, and other senior commanders objected. They believed that the invasion could not be stopped on the beaches. Geyr argued for a conventional doctrine: keeping the Panzer formations concentrated in a central position around Paris and Rouen and deploying them only when the main Allied beachhead had been identified. He also noted that in the Italian Campaign, the armoured units stationed near the coast had been damaged by naval bombardment. Rommel's opinion was that because of Allied air supremacy, the large-scale movement of tanks would not be possible once the invasion was under way. Hitler made the final decision, which was to leave three Panzer divisions under Geyr's command and give Rommel operational control of three more as reserves. Hitler took personal control of four divisions as strategic reserves, not to be used without his direct orders.[75][76][77]
Allied order of battle

Commander, SHAEF: General Dwight D. Eisenhower
Commander, 21st Army Group: General Bernard Montgomery[78]
US zones
Commander, First Army (United States): Lieutenant General Omar Bradley[78]
The First Army contingent totalled approximately 73,000 men, including 15,600 from the airborne divisions.[79]
- Utah Beach



- Omaha Beach

.svg.png)

British and Canadian zones
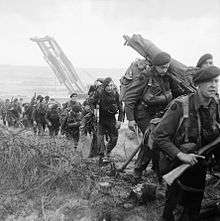
Commander, Second Army (Britain and Canada): Lieutenant General Sir Miles Dempsey[78]
Overall, the Second Army contingent consisted of 83,115 men, 61,715 of them British.[79] The nominally British air and naval support units included a large number of personnel from Allied nations, including several RAF squadrons manned almost exclusively by overseas air crew. For example, the Australian contribution to the operation included a regular Royal Australian Air Force (RAAF) squadron, nine Article XV squadrons, and hundreds of personnel posted to RAF units and RN warships.[83] The RAF supplied two-thirds of the aircraft involved in the invasion.[84]
- Gold Beach


- Juno Beach
.png)
- Sword Beach


![]()
Coordination with the French Resistance
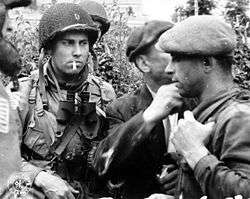
Through the London-based État-major des Forces Françaises de l'Intérieur (French Forces of the Interior), the British Special Operations Executive orchestrated a campaign of sabotage to be implemented by the French Resistance. The Allies developed four plans for the Resistance to execute on D-Day and the following days:
- Plan Vert was a 15-day operation to sabotage the rail system.
- Plan Bleu dealt with destroying electrical facilities.
- Plan Tortue was a delaying operation aimed at the enemy forces that would potentially reinforce Axis forces at Normandy.
- Plan Violet dealt with cutting underground telephone and teleprinter cables.[89]
The resistance was alerted to carry out these tasks by messages personnels transmitted by the BBC's French service from London. Several hundred of these messages, which might be snatches of poetry, quotations from literature, or random sentences, were regularly transmitted, masking the few that were actually significant. In the weeks preceding the landings, lists of messages and their meanings were distributed to resistance groups.[90] An increase in radio activity on 5 June was correctly interpreted by German intelligence to mean that an invasion was imminent or underway. However, because of the barrage of previous false warnings and misinformation, most units ignored the warning.[91][92]
A 1965 report from the Counter-insurgency Information Analysis Center details the results of the French Resistance's sabotage efforts: "In the southeast, 52 locomotives were destroyed on 6 June and the railway line cut in more than 500 places. Normandy was isolated as of 7 June."[93]
Naval activity
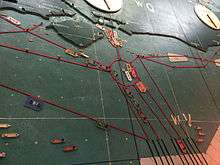
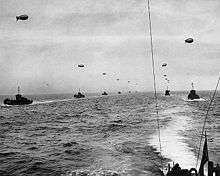
Naval operations for the invasion were described by historian Correlli Barnett as a "never surpassed masterpiece of planning".[94] In overall command was British Admiral Sir Bertram Ramsay, who had served as Flag officer at Dover during the Dunkirk evacuation four years earlier. He had also been responsible for the naval planning of the invasion of North Africa in 1942, and one of the two fleets carrying troops for the invasion of Sicily the following year.[95]
The invasion fleet, which was drawn from eight different navies, comprised 6,939 vessels: 1,213 warships, 4,126 landing craft of various types, 736 ancillary craft, and 864 merchant vessels.[79] The majority of the fleet was supplied by the UK, which provided 892 warships and 3,261 landing craft.[84] In total there were 195,700 naval personnel involved; of these 112,824 were from the Royal Navy with another 25,000 from the Merchant Navy, 52,889 were American, and 4,998 sailors from other allied countries.[79][7] The invasion fleet was split into the Western Naval Task Force (under Admiral Alan G Kirk) supporting the US sectors and the Eastern Naval Task Force (under Admiral Sir Philip Vian) in the British and Canadian sectors.[96][95] Available to the fleet were five battleships, 20 cruisers, 65 destroyers, and two monitors.[97] German ships in the area on D-Day included three torpedo boats, 29 fast attack craft, 36 R boats, and 36 minesweepers and patrol boats.[98] The Germans also had several U-boats available, and all the approaches had been heavily mined.[41]
Naval losses
At 05:10, four German torpedo boats reached the Eastern Task Force and launched fifteen torpedoes, sinking the Norwegian destroyer HNoMS Svenner off Sword beach but missing the British battleships HMS Warspite and Ramillies. After attacking, the German vessels turned away and fled east into a smoke screen that had been laid by the RAF to shield the fleet from the long-range battery at Le Havre.[99] Allied losses to mines included the American destroyer USS Corry off Utah and submarine chaser USS PC-1261, a 173-foot patrol craft.[100] In addition, many landing craft were lost.[101]
Bombardment
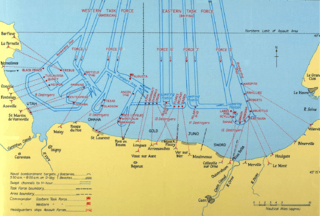
Bombing of Normandy began around midnight with more than 2,200 British, Canadian, and US bombers attacking targets along the coast and further inland.[41] The coastal bombing attack was largely ineffective at Omaha, because low cloud cover made the assigned targets difficult to see. Concerned about inflicting casualties on their own troops, many bombers delayed their attacks too long and failed to hit the beach defences.[102] The Germans had 570 aircraft stationed in Normandy and the Low Countries on D-Day, and another 964 in Germany.[41]
Minesweepers began clearing channels for the invasion fleet shortly after midnight and finished just after dawn without encountering the enemy.[103] The Western Task Force included the battleships Arkansas, Nevada, and Texas, plus eight cruisers, 28 destroyers, and one monitor.[104] The Eastern Task Force included the battleships Ramillies and Warspite and the monitor Roberts, twelve cruisers, and thirty-seven destroyers.[3] Naval bombardment of areas behind the beach commenced at 05:45, while it was still dark, with the gunners switching to pre-assigned targets on the beach as soon as it was light enough to see, at 05:50.[105] Since troops were scheduled to land at Utah and Omaha starting at 06:30 (an hour earlier than the British beaches), these areas received only about 40 minutes of naval bombardment before the assault troops began to land on the shore.[106]
Airborne operations
The success of the amphibious landings depended on the establishment of a secure lodgement from which to expand the beachhead to allow the buildup of a well-supplied force capable of breaking out. The amphibious forces were especially vulnerable to strong enemy counter-attacks before the arrival of sufficient forces in the beachhead could be accomplished. To slow or eliminate the enemy's ability to organise and launch counter-attacks during this critical period, airborne operations were used to seize key objectives such as bridges, road crossings, and terrain features, particularly on the eastern and western flanks of the landing areas. The airborne landings some distance behind the beaches were also intended to ease the egress of the amphibious forces off the beaches, and in some cases to neutralise German coastal defence batteries and more quickly expand the area of the beachhead.[107][108]
The US 82nd and 101st Airborne Divisions were assigned to objectives west of Utah Beach, where they hoped to capture and control the few narrow causeways through terrain that had been intentionally flooded by the Germans. Reports from Allied intelligence in mid-May of the arrival of the German 91st Infantry Division meant the intended drop zones had to be shifted eastward and to the south.[109] The British 6th Airborne Division, on the eastern flank, was assigned to capture intact the bridges over the Caen Canal and River Orne, destroy five bridges over the Dives 6 miles (9.7 km) to the east, and destroy the Merville Gun Battery overlooking Sword Beach.[110] Free French paratroopers from the British SAS Brigade were assigned to objectives in Brittany from 5 June until August in Operations Dingson, Samwest, and Cooney.[111][112]
BBC war correspondent Robert Barr described the scene as paratroopers prepared to board their aircraft:
Their faces were darkened with cocoa; sheathed knives were strapped to their ankles; tommy guns strapped to their waists; bandoliers and hand grenades, coils of rope, pick handles, spades, rubber dinghies hung around them, and a few personal oddments, like the lad who was taking a newspaper to read on the plane ... There was an easy familiar touch about the way they were getting ready, as though they had done it often before. Well, yes, they had kitted up and climbed aboard often just like this—twenty, thirty, forty times some of them, but it had never been quite like this before. This was the first combat jump for every one of them.[113]
US
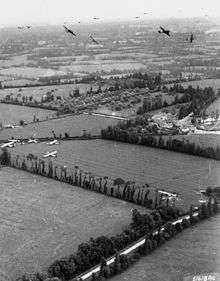
The US airborne landings began with the arrival of pathfinders at 00:15. Navigation was difficult because of a bank of thick cloud, and as a result only one of the five paratrooper drop zones was accurately marked with radar signals and Aldis lamps.[114] Paratroopers of the US 82nd and 101st Airborne Divisions, numbering over 13,000 men, were delivered by Douglas C-47 Skytrains of the IX Troop Carrier Command.[115] To avoid flying over the invasion fleet, the planes arrived from the west over the Cotentin Peninsula and exited over Utah Beach.[116][114]
Paratroops from 101st Airborne were dropped beginning around 01:30, tasked with controlling the causeways behind Utah Beach and destroying road and rail bridges over the Douve River.[117] The C-47s could not fly in a tight formation because of thick cloud cover, and many paratroopers were dropped far from their intended landing zones. Many planes came in so low that they were under fire from both flak and machine gun fire. Some paratroopers were killed on impact when their parachutes did not have time to open, and others drowned in the flooded fields.[118] Gathering together into fighting units was made difficult by a shortage of radios and by the bocage terrain, with its hedgerows, stone walls, and marshes.[119][120] Some units did not arrive at their targets until afternoon, by which time several of the causeways had already been cleared by members of the 4th Infantry Division moving up from the beach.[121]
Troops of the 82nd Airborne began arriving around 02:30, with the primary objective of capturing two bridges over the River Merderet and destroying two bridges over the Douve.[117] On the east side of the river, 75 per cent of the paratroopers landed in or near their drop zone, and within two hours they captured the important crossroads at Sainte-Mère-Église (the first town liberated in the invasion[122]) and began working to protect the western flank.[123] Because of the failure of the pathfinders to accurately mark their drop zone, the two regiments dropped on the west side of the Merderet were extremely scattered, with only four per cent landing in the target area.[123] Many landed in nearby swamps, with much loss of life.[124] Paratroopers consolidated into small groups, usually a combination of men of various ranks from different units, and attempted to concentrate on nearby objectives.[125] They captured but failed to hold the Merderet River bridge at La Fière, and fighting for the crossing continued for several days.[126]
Reinforcements arrived by glider around 04:00 (Mission Chicago and Mission Detroit), and 21:00 (Mission Keokuk and Mission Elmira), bringing additional troops and heavy equipment. Like the paratroopers, many landed far from their drop zones.[127] Even those that landed on target experienced difficulty, with heavy cargo such as Jeeps shifting during landing, crashing through the wooden fuselage, and in some cases crushing personnel on board.[128]
After 24 hours, only 2,500 men of the 101st and 2,000 of the 82nd Airborne were under the control of their divisions, approximately a third of the force dropped. This wide dispersal had the effect of confusing the Germans and fragmenting their response.[129] The 7th Army received notification of the parachute drops at 01:20, but Rundstedt did not initially believe that a major invasion was underway. The destruction of radar stations along the Normandy coast in the week before the invasion meant that the Germans did not detect the approaching fleet until 02:00.[130]
British and Canadian
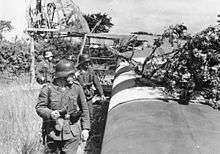
The first Allied action of D-Day was Operation Deadstick, a glider assault at 00:16 at Pegasus Bridge over the Caen Canal and the bridge (since renamed Horsa Bridge) over the Orne, half a mile (800 metres) to the east. Both bridges were quickly captured intact, with light casualties, by members of the 5th Parachute Brigade and the 7th (Light Infantry) Parachute Battalion.[131][132] The five bridges over the Dives were destroyed with minimal difficulty by the 3rd Parachute Brigade.[133][134] Meanwhile, the pathfinders tasked with setting up radar beacons and lights for further paratroopers (scheduled to begin arriving at 00:50 to clear the landing zone north of Ranville) were blown off course, and had to set up the navigation aids too far east. Many paratroopers, also blown too far east, landed far from their intended drop zones; some took hours or even days to be reunited with their units.[135][136] Major General Richard Gale arrived in the third wave of gliders at 03:30, along with equipment, such as antitank guns and jeeps, and more troops to help secure the area from counter-attacks, which were initially staged only by troops in the immediate vicinity of the landings.[137] At 02:00, the commander of the German 716th Infantry Division ordered Feuchtinger to move his 21st Panzer Division into position to counter-attack. However, as the division was part of the armoured reserve, Feuchtinger was obliged to seek clearance from OKW before he could commit his formation.[138] Feuchtinger did not receive orders until nearly 09:00, but in the meantime on his own initiative he put together a battle group (including tanks) to fight the British forces east of the Orne.[139]
Only 160 men out of the 600 members of the 9th Battalion tasked with eliminating the enemy battery at Merville arrived at the rendezvous point. Lieutenant Colonel Terence Otway, in charge of the operation, decided to proceed regardless, as the emplacement had to be destroyed by 06:00 to prevent it firing on the invasion fleet and the troops arriving on Sword Beach. In the Battle of Merville Gun Battery, Allied forces disabled the guns with plastic explosives at a cost of 75 casualties. The emplacement was found to contain 75 mm guns rather than the expected 150 mm heavy coastal artillery. Otway's remaining force withdrew with the assistance of a few members of the 1st Canadian Parachute Battalion.[140]
With this action, the last of the D-Day goals of the British 6th Airborne Division was achieved.[141] They were reinforced at 12:00 by commandos of the 1st Special Service Brigade, who landed on Sword Beach, and by the 6th Airlanding Brigade, who arrived in gliders at 21:00 in Operation Mallard.[142]
Beach landings
Tanks
Some of the landing craft had been modified to provide close support fire, and self-propelled amphibious Duplex-Drive tanks (DD tanks), specially designed for the Normandy landings, were to land shortly before the infantry to provide covering fire. However, few arrived in advance of the infantry, and many sank before reaching the shore, especially at Omaha.[143][144]
Utah Beach
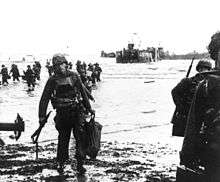
Utah Beach was in the area defended by two battalions of the 919th Grenadier Regiment.[145] Members of the 8th Infantry Regiment of the 4th Infantry Division were the first to land, arriving at 06:30. Their landing craft were pushed to the south by strong currents, and they found themselves about 2,000 yards (1.8 km) from their intended landing zone. This site turned out to be better, as there was only one strongpoint nearby rather than two, and bombers of IX Bomber Command had bombed the defences from lower than their prescribed altitude, inflicting considerable damage. In addition, the strong currents had washed ashore many of the underwater obstacles. The assistant commander of the 4th Infantry Division, Brigadier General Theodore Roosevelt, Jr., the first senior officer ashore, made the decision to "start the war from right here", and ordered further landings to be re-routed.[146][147]
The initial assault battalions were quickly followed by 28 DD tanks and several waves of engineer and demolition teams to remove beach obstacles and clear the area directly behind the beach of obstacles and mines. Gaps were blown in the sea wall to allow quicker access for troops and tanks. Combat teams began to exit the beach at around 09:00, with some infantry wading through the flooded fields rather than travelling on the single road. They skirmished throughout the day with elements of the 919th Grenadier Regiment, who were armed with antitank guns and rifles. The main strongpoint in the area and another 1,300 yards (1.2 km) to the south were disabled by noon.[148] The 4th Infantry Division did not meet all of their D-Day objectives at Utah Beach, partly because they had arrived too far to the south, but they landed 21,000 troops at the cost of only 197 casualties.[149][150]
Pointe du Hoc
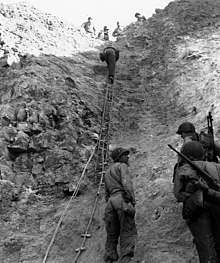
Pointe du Hoc, a prominent headland situated between Utah and Omaha, was assigned to two hundred men of the 2nd Ranger Battalion, commanded by Lieutenant Colonel James Rudder. Their task was to scale the 30 m (98 ft) cliffs with grappling hooks, ropes, and ladders to destroy the coastal gun battery located at the top. The cliffs were defended by the German 352nd Infantry Division and French collaborators firing from above.[151] Allied destroyers Satterlee and Talybont provided fire support. After scaling the cliffs, the Rangers discovered that the guns had already been withdrawn. They located the weapons, unguarded but ready to use, in an orchard some 550 metres (600 yd) south of the point, and disabled them with explosives.[151]
The now-isolated Rangers fended off numerous counter-attacks from the German 914th Grenadier Regiment. The men at the point became isolated and some were captured. By dawn on D+1, Rudder had only 90 men able to fight. Relief did not arrive until D+2, when members of the 743rd Tank Battalion and others arrived.[152][153] By then, Rudder's men had run out of ammunition and were using captured German weapons. Several men were killed as a result, because the German weapons made a distinctive noise, and the men were mistaken for the enemy.[154] By the end of the battle, the Rangers casualties were 135 dead and wounded, while German casualties were 50 killed and 40 captured. An unknown number of French collaborators were executed.[155][156]
Omaha Beach
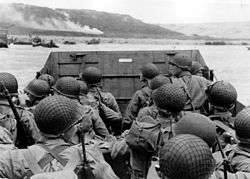
Omaha, the most heavily defended beach, was assigned to the 1st Infantry Division and 29th Infantry Division.[157] They faced the 352nd Infantry Division rather than the expected single regiment.[158] Strong currents forced many landing craft east of their intended position or caused them to be delayed.[159] For fear of hitting the landing craft, US bombers delayed releasing their loads and, as a result, most of the beach obstacles at Omaha remained undamaged when the men came ashore.[160] Many of the landing craft ran aground on sandbars and the men had to wade 50–100m in water up to their necks while under fire to get to the beach.[144] In spite of the rough seas, DD tanks of two companies of the 741st Tank Battalion were dropped 5,000 yards (4,600 m) from shore; however, 27 of the 32 flooded and sank, with the loss of 33 crew.[161] Some tanks, disabled on the beach, continued to provide covering fire until their ammunition ran out or they were swamped by the rising tide.[162]
Casualties were around 2,000, as the men were subjected to fire from the cliffs above.[163] Problems clearing the beach of obstructions led to the beachmaster calling a halt to further landings of vehicles at 08:30. A group of destroyers arrived around this time to provide fire support so landings could resume.[164] Exit from the beach was possible only via five heavily defended gullies, and by late morning barely 600 men had reached the higher ground.[165] By noon, as the artillery fire took its toll and the Germans started to run out of ammunition, the Americans were able to clear some lanes on the beaches. They also started clearing the gullies of enemy defences so that vehicles could move off the beach.[165] The tenuous beachhead was expanded over the following days, and the D-Day objectives for Omaha were accomplished by D+3.[166]
Gold Beach
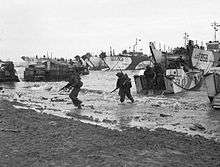
The first landings on Gold beach were set for 07:25 due to the differences in the tide between there and the US beaches.[167] High winds made conditions difficult for the landing craft, and the amphibious DD tanks were released close to shore or directly on the beach instead of further out as planned.[168] Three of the four guns in a large emplacement at the Longues-sur-Mer battery were disabled by direct hits from the cruisers Ajax and Argonaut at 06:20. The fourth gun resumed firing intermittently in the afternoon, and its garrison surrendered on 7 June.[169] Aerial attacks had failed to hit the Le Hamel strongpoint, which had its embrasure facing east to provide enfilade fire along the beach and had a thick concrete wall on the seaward side.[170] Its 75 mm gun continued to do damage until 16:00, when a modified Armoured Vehicle Royal Engineers (AVRE) tank fired a large petard charge into its rear entrance.[171][172] A second casemated emplacement at La Rivière containing an 88 mm gun was neutralised by a tank at 07:30.[173]
Meanwhile, infantry began clearing the heavily fortified houses along the shore and advanced on targets further inland.[174] The No. 47 (Royal Marine) Commando moved toward the small port at Port-en-Bessin and captured it the following day in the Battle of Port-en-Bessin.[175] Company Sergeant Major Stanley Hollis received the only Victoria Cross awarded on D-Day for his actions while attacking two pillboxes at the Mont Fleury high point.[176] On the western flank, the 1st Battalion, Hampshire Regiment captured Arromanches (future site of Mulberry "B"), and contact was made on the eastern flank with the Canadian forces at Juno.[177] Bayeux was not captured the first day due to stiff resistance from the 352nd Infantry Division.[174] Allied casualties at Gold Beach are estimated at 1,000.[79]
Juno Beach
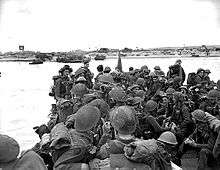
The landing at Juno was delayed because of choppy seas, and the men arrived ahead of their supporting armour, suffering many casualties while disembarking. Most of the offshore bombardment had missed the German defences.[178] Several exits from the beach were created, but not without difficulty. At Mike Beach on the western flank, a large crater was filled using an abandoned AVRE tank and several rolls of fascine, which were then covered by a temporary bridge. The tank remained in place until 1972, when it was removed and restored by members of the Royal Engineers.[179] The beach and nearby streets were clogged with traffic for most of the day, making it difficult to move inland.[101]
Major German strongpoints with 75 mm guns, machine-gun nests, concrete fortifications, barbed wire, and mines were located at Courseulles-sur-Mer, St Aubin-sur-Mer, and Bernières-sur-Mer.[180] The towns themselves also had to be cleared in house-to-house fighting.[181] Soldiers on their way to Bény-sur-Mer, 3 miles (5 km) inland, discovered that the road was well covered by machine gun emplacements that had to be outflanked before the advance could proceed.[182] Elements of the 9th Canadian Infantry Brigade advanced to within sight of the Carpiquet airfield late in the afternoon, but by this time their supporting armour was low on ammunition so the Canadians dug in for the night. The airfield was not captured until a month later as the area became the scene of fierce fighting.[183] By nightfall, the contiguous Juno and Gold beachheads covered an area 12 miles (19 km) wide and 7 miles (10 km) deep.[184] Casualties at Juno were 961 men.[185]
Sword Beach
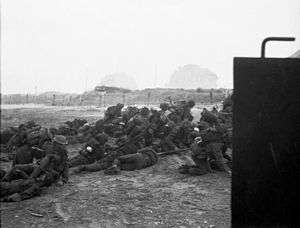
On Sword, 21 of 25 DD tanks of the first wave were successful in getting safely ashore to provide cover for the infantry, who began disembarking at 07:30.[186] The beach was heavily mined and peppered with obstacles, making the work of the beach clearing teams difficult and dangerous.[187] In the windy conditions, the tide came in more quickly than expected, so manoeuvring the armour was difficult. The beach quickly became congested.[188] Brigadier Simon Fraser, 15th Lord Lovat and his 1st Special Service Brigade arrived in the second wave, piped ashore by Private Bill Millin, Lovat's personal piper.[189] Members of No. 4 Commando moved through Ouistreham to attack from the rear a German gun battery on the shore. A concrete observation and control tower at this emplacement had to be bypassed and was not captured until several days later.[190] French forces under Commander Philippe Kieffer (the first French soldiers to arrive in Normandy) attacked and cleared the heavily fortified strongpoint at the casino at Riva Bella, with the aid of one of the DD tanks.[190]
The 'Morris' strongpoint near Colleville-sur-Mer was captured after about an hour of fighting.[188] The nearby 'Hillman' strongpoint, headquarters of the 736th Infantry Regiment, was a large complex defensive work that had come through the morning's bombardment essentially undamaged. It was not captured until 20:15.[191] The 2nd Battalion, King's Shropshire Light Infantry began advancing to Caen on foot, coming within a few kilometres of the town, but had to withdraw due to lack of armour support.[192] At 16:00, the 21st Panzer Division mounted a counter-attack between Sword and Juno and nearly succeeded in reaching the Channel. It met stiff resistance from the British 3rd Division and was soon recalled to assist in the area between Caen and Bayeux.[193][194] Estimates of Allied casualties on Sword Beach are as high as 1,000.[79]
Aftermath
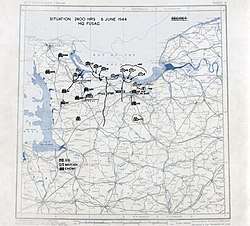
The Normandy landings were the largest seaborne invasion in history, with nearly 5,000 landing and assault craft, 289 escort vessels, and 277 minesweepers participating.[195] Nearly 160,000 troops crossed the English Channel on D-Day,[28] with 875,000 men disembarking by the end of June.[196] Allied casualties on the first day were at least 10,000, with 4,414 confirmed dead.[197] The Germans lost 1,000 men.[11] The Allied invasion plans had called for the capture of Carentan, St. Lô, Caen, and Bayeux on the first day, with all the beaches (other than Utah) linked with a front line 10 to 16 kilometres (6 to 10 mi) from the beaches; none of these objectives were achieved.[31] The five beachheads were not connected until 12 June, by which time the Allies held a front around 97 kilometres (60 mi) long and 24 kilometres (15 mi) deep.[198] Caen, a major objective, was still in German hands at the end of D-Day and would not be completely captured until 21 July.[199] The Germans had ordered French civilians other than those deemed essential to the war effort to leave potential combat zones in Normandy.[200] Civilian casualties on D-Day and D+1 are estimated at 3,000.[201]
The Allied victory in Normandy stemmed from several factors. German preparations along the Atlantic Wall were only partially finished; shortly before D-Day Rommel reported that construction was only 18 per cent complete in some areas as resources were diverted elsewhere.[202] The deceptions undertaken in Operation Fortitude were successful, leaving the Germans obliged to defend a huge stretch of coastline.[203] The Allies achieved and maintained air supremacy, which meant that the Germans were unable to make observations of the preparations underway in Britain and were unable to interfere via bomber attacks.[204] Infrastructure for transport in France was severely disrupted by Allied bombers and the French Resistance, making it difficult for the Germans to bring up reinforcements and supplies.[205] Some of the opening bombardment was off-target or not concentrated enough to have any impact,[160] but the specialised armour worked well except on Omaha, providing close artillery support for the troops as they disembarked onto the beaches.[206] Indecisiveness and an overly complicated command structure on the part of the German high command were also factors in the Allied success.[207]
Post D-Day operations
War memorials and tourism
At Omaha Beach, parts of the Mulberry harbour are still visible, and a few of the beach obstacles remain. A memorial to the US National Guard sits at the location of a former German strongpoint. Pointe du Hoc is little changed from 1944, with the terrain covered with bomb craters and most of the concrete bunkers still in place. The Normandy American Cemetery and Memorial is nearby, in Colleville-sur-Mer.[208] A museum about the Utah landings is located at Sainte-Marie-du-Mont, and there is one dedicated to the activities of the US airmen at Sainte-Mère-Église. Two German military cemeteries are located nearby.[209]
Pegasus Bridge, a target of the British 6th Airborne, was the site of some of the earliest action of the Normandy landings. The bridge was replaced in 1994 by one similar in appearance, and the original is now housed on the grounds of a nearby museum complex.[210] Sections of Mulberry Harbour B still sit in the sea at Arromanches, and the well-preserved Longues-sur-Mer battery is nearby.[211] The Juno Beach Centre, opened in 2003, was funded by the Canadian federal and provincial governments, France, and Canadian veterans.[212]

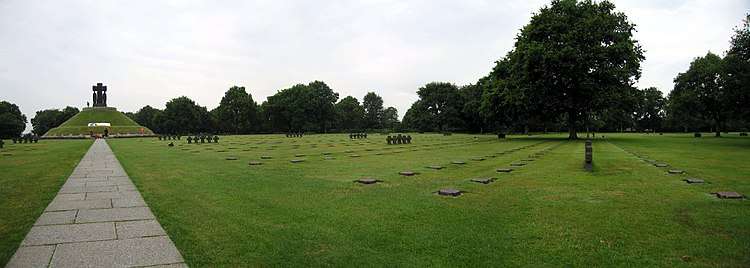 The La Cambe German war cemetery, near Bayeux
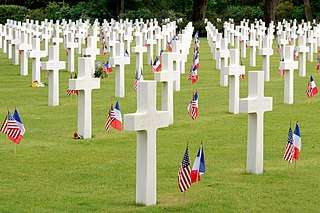 The Normandy American Cemetery and Memorial, overlooking Omaha Beach
In popular culture
Books
- The Longest Day by Cornelius Ryan (1959 book)
- D-Day: The Battle for Normandy by Antony Beevor (2009 book)
- Neptune: The D-Day Landings and the Allied Invasion of Europe by Craig Symonds (2014 book)
Film and television
- The Longest Day (1962 film)
- The Big Red One (1980 film)
- Saving Private Ryan (1998 film)
- Band of Brothers (2001 miniseries)
Video games
- Medal of Honor: Allied Assault (2002)
- Medal of Honor: Frontline (2002)
- Call of Duty (video game) (2003)
- Call of Duty 2 (2005)
- Call of Duty 3 (2006)
- Company of Heroes (2006)
- Call of Duty: WWII (2017)
See also
- Commonwealth War Graves Commission
- D-Day Daily Telegraph crossword security alarm
- List of Allied warships in the Normandy landings
- Martha Gellhorn, the only woman to land at Normandy on D-Day
References
Notes
- The official British history gives an estimated figure of 156,115 men landed on D-Day. This comprised 57,500 Americans and 75,215 British and Canadians from the sea and 15,500 Americans and 7,900 British from the air. Ellis, Allen & Warhurst 2004, pp. 521–533.
- The original estimate for Allied casualties was 10,000, of which 2,500 were killed. Research under way by the National D-Day Memorial has confirmed 4,414 deaths, of which 2,499 were American and 1,915 were from other nations. Whitmarsh 2009, p. 87.
Citations
- Ford & Zaloga 2009, p. 342.
- Ford & Zaloga 2009, p. 25.
- Beevor 2009, p. 82.
- Beevor 2009, p. 76.
- Beevor 2009, p. 492.
- Ford & Zaloga 2009, p. 7.
- Morison 1962, p. 67.
- Ford & Zaloga 2009, pp. 60, 63, 118–120.
- Zaloga & Johnson 2005, p. 29.
- Napier 2015, p. 72.
- Ford & Zaloga 2009, p. 335.
- Ford & Zaloga 2009, pp. 8–9.
- Folliard 1942.
- Ford & Zaloga 2009, p. 10.
- Ford & Zaloga 2009, pp. 10–11.
- Wilmot 1997, pp. 177–178, chart p. 180.
- Churchill 1951, p. 404.
- Ford & Zaloga 2009, pp. 13–14.
- Beevor 2009, pp. 33–34.
- Wilmot 1997, p. 170.
- Ambrose 1994, pp. 73–74.
- Ford & Zaloga 2009, p. 14.
- Wilmot 1997, p. 182.
- Gilbert 1989, p. 491.
- Whitmarsh 2009, pp. 12–13.
- Whitmarsh 2009, p. 13.
- Weinberg 1995, p. 684.
- Ellis, Allen & Warhurst 2004, pp. 521–533.
- Beevor 2009, p. 3.
- Churchill 1951, pp. 592–593.
- Beevor 2009, Map, inside front cover.
- Caddick-Adams 2019, p. 136.
- Weinberg 1995, p. 698.
- Weinberg 1995, p. 680.
- Brown 2007, p. 465.
- Zuehlke 2004, pp. 71–72.
- Whitmarsh 2009, p. 27.
- Beevor 2009, p. 282.
- Whitmarsh 2009, p. 34.
- Bickers 1994, pp. 19–21.
- Whitmarsh 2009, p. 31.
- Whitmarsh 2009, p. 33.
- Beevor 2009, p. 21.
- Wilmot 1997, p. 224.
- Wilmot 1997, pp. 224–226.
- Ford & Zaloga 2009, p. 131.
- Beevor 2009, pp. 42–43.
- Wilmot 1997, p. 144.
- Francois 2013, p. 118.
- Goldstein, Dillon & Wenger 1994, pp. 16–19.
- Ford & Zaloga 2009, p. 37.
- Liedtke 2015, pp. 227–228, 235.
- Liedtke 2015, p. 225.
- Liedtke 2015, pp. 224–225.
- Ford & Zaloga 2009, p. 118.
- Ford & Zaloga 2009, p. 122.
- Ford & Zaloga 2009, pp. 60, 63.
- Ford & Zaloga 2009, p. 63.
- Ford & Zaloga 2009, p. 275.
- Ford & Zaloga 2009, p. 60.
- Ford & Zaloga 2009, p. 206.
- Whitmarsh 2009, p. 73.
- Margaritis 2019, pp. 414–418.
- Margaritis 2019, p. 321.
- Ford & Zaloga 2009, p. 30.
- Beevor 2009, p. 33.
- Goldstein, Dillon & Wenger 1994, p. 12.
- Whitmarsh 2009, p. 12.
- Ford & Zaloga 2009, pp. 54–56.
- Murray 1983, p. 263.
- Murray 1983, p. 280.
- Hooton 1999, p. 283.
- Speer 1971, pp. 483–484.
- Speer 1971, p. 482.
- Ford & Zaloga 2009, p. 31.
- Whitmarsh 2009, p. 15.
- Wilmot 1997, p. 192.
- Whitmarsh 2009, Map, p. 12.
- Portsmouth Museum Services.
- Ford & Zaloga 2009, p. 125.
- Whitmarsh 2009, p. 53.
- Ford & Zaloga 2009, p. 66.
- Stanley 2004.
- Holland 2014.
- Ford & Zaloga 2009, p. 271.
- Ford & Zaloga 2009, p. 270.
- Ford & Zaloga 2009, p. 200.
- Ford & Zaloga 2009, p. 201.
- Douthit 1988, p. 23.
- Escott 2010, p. 138.
- Beevor 2009, p. 43.
- Wilmot 1997, p. 229.
- Special Operations Research Office 1965, pp. 51–52.
- Yung 2006, p. 133.
- Goldstein, Dillon & Wenger 1994, p. 6.
- Churchill 1951, p. 594.
- Whitmarsh 2009, p. 30.
- Ford & Zaloga 2009, p. 205.
- Ford & Zaloga 2009, p. 233.
- Weigley 1981, pp. 136–137.
- Wilmot 1997, p. 275.
- Wilmot 1997, p. 255.
- Goldstein, Dillon & Wenger 1994, p. 82.
- Beevor 2009, pp. 81, 117.
- Ford & Zaloga 2009, p. 69.
- Whitmarsh 2009, pp. 51–52, 69.
- Ford & Zaloga 2009, p. 114.
- Wilmot 1997, p. 175.
- Ford & Zaloga 2009, pp. 125, 128–129.
- Wilmot 1997, p. 234.
- Corta 1952, p. 159.
- Corta 1997, pp. 65–78.
- Barr 1944.
- Ford & Zaloga 2009, p. 133.
- Ford & Zaloga 2009, p. 134.
- Beevor 2009, p. 27.
- Wilmot 1997, p. 243.
- Beevor 2009, pp. 61–64.
- Ford & Zaloga 2009, pp. 166–167.
- Beevor 2009, p. 116.
- Ford & Zaloga 2009, p. 139.
- Beevor 2009, p. 67.
- Wilmot 1997, p. 244.
- Ford & Zaloga 2009, p. 145.
- Beevor 2009, p. 69.
- Ford & Zaloga 2009, pp. 149–150.
- Ford & Zaloga 2009, p. 151.
- Beevor 2009, p. 71.
- Ford & Zaloga 2009, p. 167.
- Wilmot 1997, p. 246–247.
- Beevor 2009, pp. 52–53.
- Wilmot 1997, pp. 238–239.
- Wilmot 1997, p. 240.
- Beevor 2009, p. 57.
- Wilmot 1997, p. 239.
- Ford & Zaloga 2009, p. 222.
- Ford & Zaloga 2009, pp. 228, 230.
- Ford & Zaloga 2009, p. 230.
- Wilmot 1997, p. 282.
- Beevor 2009, pp. 56–58.
- Wilmot 1997, p. 242.
- Ford & Zaloga 2009, Map, pp. 216–217.
- Goldstein, Dillon & Wenger 1994, p. 84.
- Ford & Zaloga 2009, p. 73.
- Ford & Zaloga 2009, p. 130.
- Ford & Zaloga 2009, pp. 131, 160–161.
- Whitmarsh 2009, pp. 50–51.
- Ford & Zaloga 2009, pp. 158–159, 164.
- Whitmarsh 2009, p. 51.
- Ford & Zaloga 2009, p. 165.
- Beevor 2009, p. 102.
- Ford & Zaloga 2009, pp. 95–104.
- Wilmot 1997, p. 263.
- Beevor 2009, p. 155.
- Zaloga 2009, p. 50.
- Beevor 2009, p. 106.
- Ford & Zaloga 2009, pp. 64–65, 334.
- Ford & Zaloga 2009, p. 45.
- Ford & Zaloga 2009, pp. 76–77.
- Beevor 2009, p. 91.
- Beevor 2009, p. 90.
- Beevor 2009, p. 99.
- Ford & Zaloga 2009, pp. 333–334.
- Ford & Zaloga 2009, pp. 90–91.
- Ford & Zaloga 2009, pp. 56, 83.
- Ford & Zaloga 2009, p. 337.
- Ford & Zaloga 2009, pp. 276–277.
- Ford & Zaloga 2009, pp. 281–282.
- Ford & Zaloga 2009, p. 299.
- Ford & Zaloga 2009, p. 286.
- Ford & Zaloga 2009, pp. 298–299.
- Wilmot 1997, p. 272.
- Ford & Zaloga 2009, p. 292.
- Whitmarsh 2009, p. 70.
- Ford & Zaloga 2009, pp. 289–290.
- Beevor 2009, p. 129.
- Wilmot 1997, pp. 272–273.
- Wilmot 1997, pp. 274–275.
- Ford & Zaloga 2009, pp. 312–313.
- Ford & Zaloga 2009, Map, pp. 314–315.
- Ford & Zaloga 2009, p. 317.
- Beevor 2009, pp. 133–135.
- Beevor 2009, p. 135.
- Wilmot 1997, p. 276.
- Beevor 2009, p. 131.
- Wilmot 1997, p. 277.
- Ford & Zaloga 2009, pp. 239–240.
- Beevor 2009, p. 143.
- Beevor 2009, p. 138.
- Ford & Zaloga 2009, pp. 244–245.
- Ford & Zaloga 2009, pp. 248–249.
- Beevor 2009, pp. 143, 148.
- Ford & Zaloga 2009, pp. 326–327.
- Wilmot 1997, p. 283.
- Beevor 2009, p. 74.
- Whitmarsh 2009, p. 104.
- Whitmarsh 2009, p. 87.
- Horn 2010, p. 13.
- Wilmot 1997, p. 360.
- Flint 2009, p. 102.
- Flint 2009, p. 336.
- Wilmot 1997, p. 290.
- Ford & Zaloga 2009, p. 343.
- Wilmot 1997, p. 289.
- Ford & Zaloga 2009, p. 36.
- Wilmot 1997, p. 291.
- Wilmot 1997, p. 292.
- Ford & Zaloga 2009, p. 346.
- Ford & Zaloga 2009, pp. 346–348.
- Mémorial Pegasus.
- Ford & Zaloga 2009, p. 352.
- Zuehlke 2004, pp. 349–350.
Bibliography
- Ambrose, Stephen (1994) [1993]. D-Day June 6, 1944: The Climactic Battle of World War II. New York: Simon & Schuster. ISBN 978-0-671-67334-5.CS1 maint: ref=harv (link)
- Beevor, Antony (2009). D-Day: The Battle for Normandy. New York; Toronto: Viking. ISBN 978-0-670-02119-2.CS1 maint: ref=harv (link)
- Bickers, Richard Townshend (1994). Air War Normandy. London: Leo Cooper. ISBN 978-0-85052-412-3.CS1 maint: ref=harv (link)
- Brown, Anthony Cave (2007) [1975]. Bodyguard of Lies: The Extraordinary True Story Behind D-Day. Guilford, CT: Globe Pequot. ISBN 978-1-59921-383-5.CS1 maint: ref=harv (link)
- Caddick-Adams, Peter (2019). Sand and Steel: A New History of D-Day. London: Hutchinson. ISBN 978-1-84794-8-281.CS1 maint: ref=harv (link)
- Churchill, Winston (1951) [1948]. Closing the Ring. The Second World War. V. Boston: Houghton Mifflin. OCLC 396150.CS1 maint: ref=harv (link)
- Corta, Henry (1952). Les bérets rouges [The Red Berets] (in French). Paris: Amicale des anciens parachutistes SAS. OCLC 8226637.CS1 maint: ref=harv (link)
- Corta, Henry (1997). Qui ose gagne [Who dares, wins] (in French). Vincennes, France: Service Historique de l'Armée de Terre. ISBN 978-2-86323-103-6.CS1 maint: ref=harv (link)
- "D-Day and the Battle of Normandy: Your Questions Answered". ddaymuseum.co.uk. Portsmouth Museum Services. Archived from the original on 21 June 2013. Retrieved 18 April 2014.
- Douthit, Howard L. III (1988). The Use and Effectiveness of Sabotage as a Means of Unconventional Warfare – An Historical Perspective from World War I Through Vietnam (PDF) (M.Sc. thesis). Wright-Patterson Air Force Base, Ohio: Air Force Institute of Technology. Archived (PDF) from the original on 8 January 2020. Retrieved 8 January 2020.CS1 maint: ref=harv (link)
- Ellis, L.F.; Allen, G.R.G.; Warhurst, A.E. (2004) [1962]. Butler, J.R.M (ed.). Victory in the West, Volume I: The Battle of Normandy. History of the Second World War United Kingdom Military Series. London: Naval & Military Press. ISBN 978-1-84574-058-0.CS1 maint: ref=harv (link)
- Escott, Beryl E. (2010). The Heroines of SOE: Britain's Secret Women in France. Stroud, Gloucestershire: History Press. ISBN 978-0-7524-5661-4.CS1 maint: ref=harv (link)
- Flint, Edward R (2009). The development of British civil affairs and its employment in the British Sector of Allied military operations during the Battle of Normandy, June to August 1944 (Ph.D. thesis). Cranfield, Bedford: Cranfield University; Cranfield Defence and Security School, Department of Applied Science, Security and Resilience, Security and Resilience Group. OCLC 757064836.CS1 maint: ref=harv (link)
- Folliard, Edward T. (12 June 1942). "Molotov's Visit to White House, Postwar Amity Pledge Revealed". Washington Post.CS1 maint: ref=harv (link)
- Ford, Ken; Zaloga, Steven J. (2009). Overlord: The D-Day Landings. Oxford; New York: Osprey. ISBN 978-1-84603-424-4.CS1 maint: ref=harv (link)
- Francois, Dominique (13 October 2013). Normandy: From D-Day to the Breakout: June 6 – July 31, 1944. Minneapolis: Voyageur Press. ISBN 978-0-7603-4558-0.CS1 maint: ref=harv (link)
- Gilbert, Martin (1989). The Second World War: A Complete History. New York: H. Holt. ISBN 978-0-8050-1788-5.CS1 maint: ref=harv (link)
- Goldstein, Donald M.; Dillon, Katherine V.; Wenger, J. Michael (1994). D-Day: The Story and Photographs. McLean, Virginia: Brassey's. ISBN 978-0-02-881057-7.CS1 maint: ref=harv (link)
- Holland, James (5 June 2014). "D-Day: Exploding the myths of the Normandy landings". edition.cnn.com. CNN.CS1 maint: ref=harv (link)
- Hooton, Edward (1999) [1997]. Eagle in Flames: The Fall of the Luftwaffe. London: Arms and Armour. ISBN 978-1-86019-995-0.CS1 maint: ref=harv (link)
- Horn, Bernd (2010). Men of Steel: Canadian Paratroopers in Normandy, 1944. Toronto: Dundurn Press. ISBN 978-1-55488-708-8.CS1 maint: ref=harv (link)
- Liedtke, Gregory (2 January 2015). "Lost in the Mud: The (Nearly) Forgotten Collapse of the German Army in the Western Ukraine, March and April 1944". The Journal of Slavic Military Studies. 28 (1): 215–238. doi:10.1080/13518046.2015.998134. ISSN 1351-8046.CS1 maint: ref=harv (link)
- Margaritis, Peter (2019). Countdown to D-Day: The German Perspective: The German High Command in Occupied France, 1944. Philadelphia; Oxford, UK: Casemate. ISBN 978-1-61200-769-4.CS1 maint: ref=harv (link)
- Morison, Samuel Eliot (1962). History of United States Naval Operations in World War II. 11. The invasion of France and Germany, 1944–1945. Boston: Little, Brown. OCLC 757924260.CS1 maint: ref=harv (link)
- Murray, Williamson (1983). Strategy for Defeat: The Luftwaffe, 1933–45. Washington: Brassey's. ISBN 978-1-57488-125-7.CS1 maint: ref=harv (link)
- Napier, Stephen (2015). The Armoured Campaign in Normandy June–August 1944. Stroud: The History Press. ISBN 978-0-7509-6473-9.CS1 maint: ref=harv (link)
- "Pegasus Bridge: The Bridge of the Longest Day". memorial-pegasus.org. Mémorial Pegasus D-Day Commemoration Committee. Archived from the original on 7 April 2014. Retrieved 6 September 2019.
- Special Operations Research Office, Counter-insurgency Information Analysis Center, United States Army (1965). A Study of Rear Area Security Measures. Washington: American University.CS1 maint: multiple names: authors list (link)
- Speer, Albert (1971) [1969]. Inside the Third Reich. New York: Avon. ISBN 978-0-380-00071-5.CS1 maint: ref=harv (link)
- Staff (5 June 2014). "D-Day: In the words of the BBC journalists". bbc.com. BBC News. Retrieved 10 June 2014.
- Stanley, Peter (6 June 2004). "Australians and D-Day". Anniversary talks. Australian War Memorial. Archived from the original on 26 April 2014. Retrieved 8 January 2020.CS1 maint: ref=harv (link)
- Weigley, Russell F. (1981). Eisenhower's Lieutenants: The Campaign of France and Germany 1944–1945. I. Bloomington, Indiana: Indiana University Press. ISBN 978-0-253-13333-5.CS1 maint: ref=harv (link)
- Weinberg, Gerhard (1995) [1993]. A World At Arms: A Global History of World War II. Cambridge: Cambridge University Press. ISBN 978-0-521-55879-2.CS1 maint: ref=harv (link)
- Whitmarsh, Andrew (2009). D-Day in Photographs. Stroud: History Press. ISBN 978-0-7524-5095-7.CS1 maint: ref=harv (link)
- Wilmot, Chester (1997) [1952]. The Struggle For Europe. Ware, Hertfordshire: Wordsworth Editions. ISBN 978-1-85326-677-5.CS1 maint: ref=harv (link)
- Yung, Christopher D. (2006). Gators of Neptune: Naval Amphibious Planning for the Normandy Invasion. Annapolis: Naval Institute Press. ISBN 978-1-59114-997-2.CS1 maint: ref=harv (link)
- Zaloga, Steven J; Johnson, Hugh (2005). D-Day Fortifications in Normandy. Oxford; New York: Osprey. ISBN 978-1-4728-0382-5.CS1 maint: ref=harv (link)
- Zaloga, Steven J. (2009). Rangers Lead the Way: Pointe-du-Hoc, D-Day 1944. Oxford: Osprey. ISBN 978-1-84603-394-0.CS1 maint: ref=harv (link)
- Zuehlke, Mark (2004). Juno Beach: Canada's D-Day Victory: June 6, 1944. Vancouver: Douglas & McIntyre. ISBN 978-1-55365-050-8.CS1 maint: ref=harv (link)
Further reading
- Badsey, Stephen (1990). Normandy 1944: Allied Landings and Breakout. Osprey Campaign Series. 1. Botley, Oxford: Osprey. ISBN 978-0-85045-921-0.
- Buckley, John (2006). The Normandy Campaign: 1944: Sixty Years On. London; New York: Routledge. ISBN 978-1-134-20303-1.
- D'Este, Carlo (1983). Decision in Normandy: The Unwritten Story of Montgomery and the Allied Campaign. London: William Collins Sons. ISBN 978-0-00-217056-7.
- Dolski, Michael; Edwards, Sam; Buckley, John, eds. (2014). D-Day in History and Memory: The Normandy Landings in International Remembrance and Commemoration. Denton: University of North Texas Press. ISBN 978-1-57441-548-3.
- Holderfield, Randal J.; Varhola, Michael J. (2001). The Invasion of Normandy, June 6, 1944. Mason City, Iowa: Savas. ISBN 978-1-882810-45-1.
- Holland, James (2019). Normandy '44: D-Day and the Epic 77-Day Battle for France. New York: Grove Atlantic. ISBN 978-0-8021-4709-7.
- Keegan, John (1994). Six Armies in Normandy: From D-Day to the Liberation of Paris. New York: Penguin. ISBN 978-0-14-023542-5.
- Milton, Giles (2018). D-Day: The Soldiers' Story. London: John Murray. ISBN 978-1473649019.
- Neillands, Robin (2002). The Battle of Normandy, 1944. London: Cassell. ISBN 978-0-304-35837-3.
- Ryan, Cornelius (1959). The Longest Day. New York: Simon & Schuster. ISBN 978-0-671-20814-1.
- Stacey, C.P. (1946). Canada's Battle in Normandy: The Canadian Army's Share in the Operations, 6 June – 1 September 1944. Ottawa: King's Printer. OCLC 39263107.
- Stacey, C.P. (1960). Volume III. The Victory Campaign, The Operations in North-West Europe 1944–1945 (PDF). Official History of the Canadian Army in the Second World War. Ottawa: Department of National Defence.
- Tute, Warren; Costello, John; Hughes, Terry (1975). D-Day. London: Pan Books. ISBN 978-0-330-24418-3.
- Whitlock, Flint (2004). The Fighting First: The Untold Story of The Big Red One on D-Day. Boulder: Westview Press. ISBN 978-0-8133-4218-4.
- Zetterling, Niklas (2000). Normandy 1944: German Military Organisation, Combat Power and Organizational Effectiveness. Winnipeg: J.J. Fedorowicz Publishing. ISBN 978-0-921991-56-4.
External links
| Wikivoyage has a travel guide for D-Day beaches. |
| Wikimedia Commons has media related to Battle of Normandy landing sites. |
- Boire, Michael (2003). "Lest We Forget: A Review of Books Marking the 60th Anniversary of D-Day". Canadian Military Journal. 5 (2).
- The Normandy Invasion at the US Army Center of Military History
- Neptune Operations Plan
- Naval details for Overlord at Naval-History.Net
- Documents on World War II: D-Day, The Invasion of Normandy at the Dwight D. Eisenhower Presidential Library, Museum and Boyhood Home
- Lt. General Omar Bradley FUSAG 12TH AG: June 6, 1944 D-Day Maps Omar Bradley D-Day Maps restored, preserved and Displayed at Historical Registry
- Allied veterans remember D-Day
- Naval History and Heritage Command
- The short film Big Picture: D-Day Convoy to Normandy is available for free download at the Internet Archive
- Complete Broadcast Day: D-Day (June 6, 1944) from CBS Radio News, available at the Internet Archive
