Second Battle of Fort Fisher
The Second Battle of Fort Fisher was a successful assault by the Union Army, Navy and Marine Corps against Fort Fisher, south of Wilmington, North Carolina, near the end of the American Civil War in January 1865. Sometimes referred to as the "Gibraltar of the South" and the last major coastal stronghold of the Confederacy, Fort Fisher had tremendous strategic value during the war, providing a port for blockade runners supplying the Army of Northern Virginia.[7]
Background
Wilmington was the last major port open to the Confederacy on the Atlantic seacoast. Ships leaving Wilmington via the Cape Fear River and setting sail for the Bahamas, Bermuda or Nova Scotia to trade cotton and tobacco for needed supplies from the British were protected by the fort.[8] Based on the design of the Malakoff redoubt in Sevastopol, Russian Empire, Fort Fisher was constructed mostly of earth and sand. This made it better able to absorb the pounding of heavy fire from Union ships than older fortifications constructed of mortar and bricks. Twenty-two guns faced the ocean, while twenty-five faced the land. The sea face guns were mounted on 12-foot-high (3.7 m) batteries with larger, 45-and-60-foot (14 and 18 m) batteries at the southern end of the fort. Underground passageways and bombproof rooms existed below the giant earthen mounds of the fort.[9] The fortifications kept Union ships from attacking the port of Wilmington and the Cape Fear River.
On December 23, 1864, Union ships under Rear Admiral David D. Porter commenced a naval bombardment of the fort, to little effect. On December 25, Union troops under Major General Benjamin F. Butler began landing in preparation for a ground assault, but Butler withdrew them upon word of approaching Confederate reinforcements.[10]
Opposing forces
Union
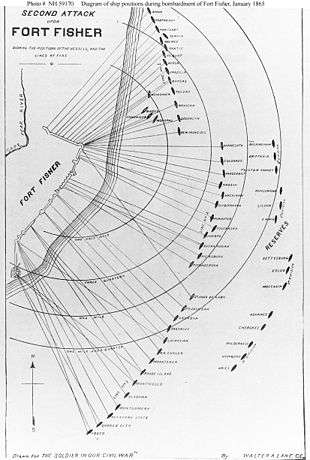
The Union Army[11] returned in January, this time under Major General Alfred Terry. Terry was chosen by Lieutenant General Ulysses S. Grant to lead a provisional corps of 9,000 troops from the Army of the James. Rear Admiral David D. Porter returned with almost 60 vessels of the North Atlantic Blockading Squadron to the North Carolina coast after the failed December attempt.[7]
Confederate
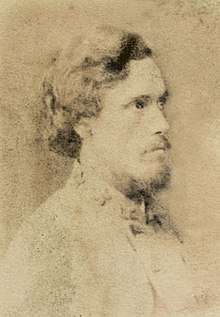
Confederate Major General W.H.C. Whiting commanded the District of Cape Fear and pleaded with the department commander, General Braxton Bragg to send reinforcements.[12] Bragg was unwilling to reduce his forces, which he felt were necessary to defend Wilmington. He finally sent reinforcements from Hagood's brigade to Colonel William Lamb's garrison bringing the total at Fort Fisher to 1,900.[13] A division of 6,400 troops under Major General Robert Hoke was stationed on the peninsula north of the fort. Whiting personally arrived at the fort and told the commander: "Lamb my boy, I have come to share your fate. You and your garrison are to be sacrificed."[14]
Battle
Alfred Terry had previously commanded troops during the Second Battle of Charleston Harbor and understood the importance of coordinating with the Union Navy. He and Admiral Porter made well laid out plans for the joint attack. Terry would send one division of United States Colored Troops under Charles J. Paine to hold off Hoke's division on the peninsula. Terry's other division under Adelbert Ames, supported by an independent brigade under Colonel Joseph Carter Abbott, would move down the peninsula and attack the fort from the land face, striking the landward wall on the river side of the peninsula. Porter organized a landing force of 2,000 sailors and marines to land and attack the fort's sea face, on the seaward end of the same wall.[15]
On January 13, Terry landed his troops in between Hoke and Fort Fisher. Hoke was unwilling to risk opening the route to Wilmington and remained unengaged while the entire Union force landed safely ashore. The next day Terry moved south towards the fort to reconnoiter the fort and decided that an infantry assault would succeed.[7]
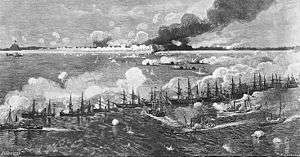
On January 15, Porter's gunboats opened fire on the sea face of the fort and by noon they succeeded in silencing all but four guns.[16] During this bombardment Hoke sent about 1,000 troops from his line to Fort Fisher, however only about 400 were able to land and make it into the defense while the others were forced to turn back. Around this time the sailors and marines, led by Lieutenant Commander Kidder Breese, landed and moved against the point where the fort's land and sea faces met, a feature known as the Northeast Bastion. The Union Army's original plan was for the naval force, armed with revolvers and cutlasses, to attack in three waves with the marines providing covering fire, but instead, the assault went forward in a single unorganized mass. General Whiting personally led the defense and routed the assault, with heavy casualties in the naval force.[17]
The attack, however, drew Confederate attention away from the river gate, where Ames prepared to launch his attack. At 2:00 p.m. he sent forward his first brigade, under the command of Brevet Brigadier Newton Martin Curtis, as Ames waited with the brigades of colonels Galusha Pennypacker and Louis Bell. An advance guard from Curtis's brigade used axes to cut through the palisades and abatis. Curtis's brigade took heavy casualties as it overran the outer works and stormed the first traverse. At this point Ames ordered Pennypacker's brigade forward, which he accompanied into the fort. As Ames marched forward, Confederate snipers zeroed in on his party, and cut down a number of his aides from around him. Pennypacker's men fought their way through the riverside gate, and Ames ordered a portion of his men to fortify a position within the interior of the fort. Meanwhile, the Confederates turned the cannons in Battery Buchanan at the southern tip of the peninsula and fired on the northern wall as it fell into Union hands. Ames observed that Curtis's lead units had become stalled at the fourth traverse, and he ordered forward Bell's brigade, but Bell was killed by sharpshooters before ever reaching the fort.[18] Seeing the Union attackers crowd into the breach and interior, Whiting took the opportunity to personally lead a counterattack. Charging into the Union soldiers, Whiting received multiple demands to surrender, and when he refused he was shot down, severely wounded.[19]
Porter's gunboats helped maintain the Federal momentum. His gunners' aim proved to be deadly accurate and began clearing out the defenders as the Union troops approached the sea wall. Curtis's troops gained the heavily contested fourth traverse. Lamb began gathering up every last soldier in the fort, including sick and wounded from the hospital, for a last-ditch counterattack. Just as he was about to order a charge, he fell severely wounded and was brought next to Whiting in the fort's hospital. Ames made a suggestion for the Union troops to entrench in their current positions. Upon hearing this notion, a frenzied Curtis grabbed a spade and threw it over Confederate trenches and shouted, "Dig Johnnies, for I'm coming for you." About an hour into the battle, Curtis fell wounded while going back to confer with Ames. Pennypacker also fell wounded before the battle ended.[20]
The grueling battle lasted for hours, long after dark, as shells plunged in from the sea and Ames struggled with a division that became increasingly disorganized as his regimental leaders and all of his brigade commanders fell dead or wounded. Terry sent forward Abbott's brigade to reinforce the attack, then joined Ames in the interior of the fortress. Meanwhile, in Fort Fisher's hospital, Lamb turned over command to Major James Reilly, and Whiting sent one last plea to General Bragg to send reinforcements. Still believing the situation in Fort Fisher was under control and tired of Whiting's demands, Bragg instead dispatched General Alfred H. Colquitt to relieve Whiting and assume command at Fort Fisher. At 9:30 p.m. Colquitt landed at the southern base of the fort just as Lamb, Whiting and the Confederate wounded were being evacuated to Battery Buchanan.[21]
At this point, the Confederate hold on Fort Fisher was untenable. The seaward batteries had been silenced, almost all of the north wall had been captured, and Ames had fortified a bastion within the interior. Terry, however, had concluded to finish the battle that night. Ames, ordered to maintain the offensive, organized a flanking maneuver, sending some of his men to advance outside the land wall, and come up behind the Confederate defenders of the last traverse. Within a few minutes the Confederate defeat was unmistakable.[22] Colquitt and his staff rushed back to their rowboats just moments before Abbott's men seized the wharf. Major Reilly held up a white flag and walked into the Union lines to announce the fort would surrender. Just before 10:00 p.m. Terry rode to Battery Buchanan to receive the official surrender of the fort from Whiting.[23]
Aftermath
.jpg)

The loss of Fort Fisher compromised the safety and usefulness of Wilmington, the Confederacy's last remaining sea port. The South was now cut off from global trade. Many of the military supplies which the Army of Northern Virginia depended upon came through Wilmington; there were no remaining seaports near Virginia that the Confederates could use practically. Potential European recognition of the Confederacy was likely already impossible, but now became entirely unrealistic; the fall of Fort Fisher was "the final nail in the Confederate coffin."[24] A month later, a Union army under General John M. Schofield would move up the Cape Fear River and capture Wilmington.[25]
On January 16, Union celebrations were dampened when the fort's magazine exploded, killing and wounding 200 Union soldiers and Confederate prisoners who were sleeping on the roof of the magazine chamber or nearby. U.S. Navy Ensign Alfred Stow Leighton died in the explosion while in charge of a squad trying to recover bodies from the fort parapet. Although several Union soldiers initially thought Confederate prisoners were responsible, an investigation opened by Terry concluded that unknown Union soldiers (possibly drunken Marines) had entered the magazine with torches and ignited the powder.[26]
Lamb survived the battle but spent the next seven years on crutches.[27] Whiting was taken prisoner and died while in Federal captivity.[28] Pennypacker's wounds were thought to have been fatal and Terry assured the young man he would receive a brevet promotion (where the person promoted would be authorized to wear the insignia of the new rank, but was paid the wages of his original rank) to brigadier general. Pennypacker did receive a brevet promotion as Terry had promised, but on February 18, 1865, he received a full promotion to brigadier general of volunteers at age 20. He remains the youngest person to have held the rank of general in the U.S. Army[29] (apart from the Marquis de Lafayette). Newton Martin Curtis also received a full promotion to brigadier general, and both he and Pennypacker received the Medal of Honor for their part in the battle. Secretary of War Edwin M. Stanton made an unexpected visit to Fort Fisher where Terry presented him with the garrison's flag.[30]
Medals of Honor
During the Battle of Fort Fisher, fifty-one soldiers, sailors and marines received the Medal of Honor for their actions.[31]
Gallery
 Exterior view of Ft Fisher tranverses
 Interior view of the first three Transveres of the Northwest salient adjoing the River road [32]
_(14576053798).jpg) View of the landfront from the second transverse of the Northwest salient-the indentionof the palisiades in the middle ground marks the position of the sally port; beyond is seen the northeast salient overlooking the sea[33]
View of the landfront from the second transverse of the Northwest salient-the indentionof the palisiades in the middle ground marks the position of the sally port; beyond is seen the northeast salient overlooking the sea[33]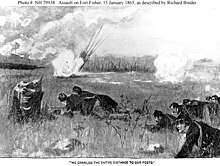 Advance of the navy sharpshooters' unit during the sailors' and marines' assault
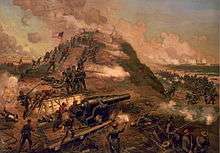 Sailors Assault of the fort
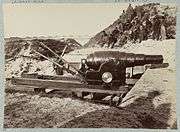 The Armstrong gun at the fort
 Exterior view of the Northeast salient showing at left where the Sailors charged[34]
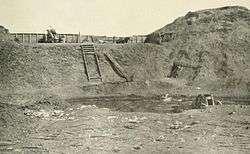 cropped Interior view of the northeast angle Showing the site of the reserve powder magazine that exploded;[35]
 The interior view of the first six tranverses of the sea-faces of Fort Fisher;[36]
 Transverse of Fort Fisher
_(14591070790).jpg) Transverse of Fort Fisher
Transverse of Fort Fisher Interior view of Fort Fisher after bombardment
_(14576311639).jpg) Cannon with muzzle shot away
Cannon with muzzle shot away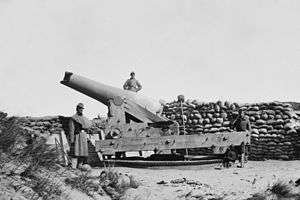 Cannon with muzzle shot away
 The bombardment as seen from the "mound battery" at the south end of the fort
 View of the "Mound" on which sat the only light allowed by the Confederates to guide blockade runners
 The "Pulpit" after capture
 Ft Fisher "bombproofs"
 Interior of Ft Fisher
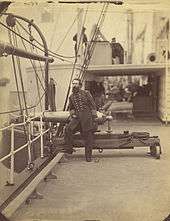 Admiral Porter on USS Malvern after the victory
.jpg) The USS Wabash
The USS Wabash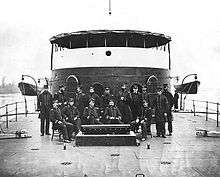 Officers of the USS Mahopac, probably on the James River, in the spring of 1865
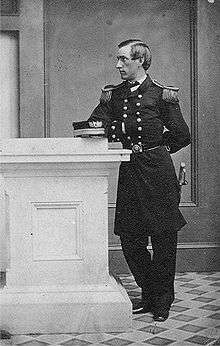 Lt. Samuel W. Preston USN killed at the Battle of Ft Fisher
 Lt. Benjamin Porter USN,[37] killed at the Battle of Ft Fisher
See also
- Wilmington, North Carolina in the American Civil War
- Captain Carlo Lombardi, an Italian expatriate who died in the detonation of the powder magazine.
- Bibliography of early American naval history
Notes
- National Park Service.
- Further information: Official Records, Series I, Volume XLVI, Part 1, pages 403–405
- Further information: Official Records of the Union and Confederate Navies, Series I, Volume XLVI, Part 1, page 265.
- Further information: Official Records, Series I, Volume XLVI, Part 1, page 403.
- North Carolina Historic Sites: Fort Fisher casualties.
- Further information: Official Records, Series I, Volume XLVI, Part 1, page 405
- Kennedy, p. 402.
- Gragg, p. 4.
- Chaitan, p. 158.
- Kennedy, p. 401.
- Further information: Organization of Union Forces
- Further information: Organization of Confederate Forces
- Gragg, p. 131.
- Gragg, p. 121.
- Chaitain, p. 160.
- Gragg, p. 135.
- Gragg, pp. 158–167; Chaitin, pp. 167–168
- Gragg, pp. 197–198.
- Gragg, p. 192.
- Fonvielle, p. 249.
- Fonvielle, pp. 267–269.
- Gragg, pp. 216–217.
- Gragg, p. 226, 228.
- Gragg, p. 243.
- Kennedy, p. 403.
- Fonvielle, pp. 303–306.
- Gragg, p. 269.
- Gragg, pp. 249, 252.
- Gragg, p. 264.
- Gragg, pp. 254–255.
- "Civil War Medal of Honor Citations". history.army.mil. Retrieved January 3, 2009.
- P. 648 Battles and Leaders of the Civil War
- Battles and Leaders of the Civil war Vol IV .p.647
- Volume 4 of Battles and Leaders of the Civil War series p,659
- Volume 4 of Battles and Leaders of the Civil War series p,649 for a larger view of this site
- Volume 4 of Battles and Leaders of the Civil War series p,655
- Battles and Leaders of the Civil war Vol IV.p.660]
References
- Chaitin, Peter M., ed. (1984). The Coastal War: Chesapeake to the Rio Grande. Alexandria, Va: Time-Life Books. ISBN 0-8094-4732-0.
- Fonvielle, Chris E. Jr. (1997). Last Rays of Departing Hope: The Wilmington Campaign. Campbell, Calif.: Savas Publishing Company. ISBN 1-882810-09-0.
- Gragg, Rod (1994). Confederate Goliath: The Battle of Fort Fisher. Baton Rouge: Louisiana State University Press. ISBN 9780807119174.
- Kennedy, Frances H., ed. (1998). The Civil War Battlefield Guide (2nd ed.). New York: Houghton Mifflin Company. ISBN 0-395-74012-6.
- "Battle Summary: Fort Fisher". Civil War Sites Advisory Commission Report on the Nation's Civil War Battlefields. American Battlefield Protection Program, National Park Service.
- "Update to the Civil War States Advisory Commission Report on the Nation's Civil War Battlefields, Final Draft – State of North Carolina" (PDF). American Battlefield Protection Program, National Park Service.
External links
- North Carolina Historical Sites: Fort Fisher
- Storming the Ramparts
- Second Battle of Fort Fisher
- "In Search of My Son Account" by Stillman K. Wightman, American Heritage, February 1963, Volume 14, Issue 2—Account of recovering the body of his son killed at Ft. Fisher January 1865

.svg.png)