Operation Tonga
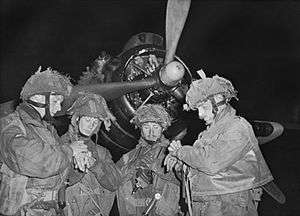
Operation Tonga was the codename given to the airborne operation undertaken by the British 6th Airborne Division between 5 June and 7 June 1944 as a part of Operation Overlord and the D-Day landings during World War II.
The paratroopers and glider-borne airborne troops of the division, commanded by Major-General Richard Nelson Gale, landed on the eastern flank of the invasion area, near to the city of Caen, tasked with a number of objectives. The division was to capture two strategically important bridges over the Caen Canal and Orne River which were to be used by Allied ground forces to advance once the seaborne landings had taken place, destroy several other bridges to deny their use to the Germans and secure several important villages. The division was also assigned the task of assaulting and destroying the Merville Gun Battery, an artillery battery that Allied intelligence believed housed a number of heavy artillery pieces, which could bombard the nearest invasion beach (codenamed Sword) and possibly inflict heavy casualties on the Allied troops landing on it. Having achieved these objectives, the division was then to create and secure a bridgehead focused around the captured bridges until they linked up with advancing Allied ground forces.
The division suffered from a combination of bad weather and poor pilot navigation, which caused many of the airborne troops to be dropped inaccurately throughout the divisional operational area causing a number of casualties and making conducting operations much more difficult. In particular, the 9th Parachute Battalion, which was assigned the task of destroying the Merville artillery battery, was only able to gather up a fraction of its strength before it had to attack the battery, with the result that the depleted force suffered heavy casualties. However, the battery was successfully assaulted and the guns inside it disabled. The division's other objectives were also achieved despite the problems encountered.
A small force of glider-borne troops, from the 2nd Battalion Oxfordshire and Buckinghamshire Light Infantry, secured two bridges over the Caen Canal and River Orne in a coup-de-main operation. The other bridges were destroyed by the division, and a number of villages were occupied. A bridgehead was formed by the division, and it successfully repulsed a number of German counter-attacks until Allied ground forces from the invasion beaches reached its positions. The actions of the division severely limited the ability of the German defenders to communicate and organise themselves, ensuring that the seaborne troops could not be attacked during the vital first few hours after landing when they were most vulnerable.
Background
Operation Tonga originated in the planning of Operation Overlord, the Allied plan for the eventual invasion and liberation of German-occupied France. Invasion planning begun in May 1943, when President of the United States Franklin Delano Roosevelt and British Prime Minister Winston Churchill met during the Washington Conference.[4] The two Allied leaders decided that all available Allied forces should be concentrated in the United Kingdom, and that planning for the invasion of North-Western Europe should begin. A provisional target date of May 1944 was set with the code-name 'Overlord' decided upon. A joint Anglo-American planning staff was created under Lieutenant-General Frederick E. Morgan, who was given the title of Chief of Staff to the Supreme Allied Commander (COSSAC).[4]

Early drafts of Overlord called for the commitment of airborne forces to support the ground forces and protect their landing areas. Operation Skyscraper, for example, called for the deployment of two airborne divisions to support the beach landings that would be made by five infantry divisions. One airborne division would land near Caen, and another on the east coast of the Cotentin Peninsula.[5] "Plan C", an ambitious proposal put forward by General George Marshall, would have involved a large airborne drop on the River Seine, aiming to cut the German forces in half during D-Day itself.[6][7] Morgan and his staff finally decided that the invasion should take place along a thirty-mile front from the River Orne westwards.[8] The final plan would utilise three divisions in the first assault, with airborne forces being dropped onto the town of Caen early on the first day to seize the first breakout route.[9]
Following the appointment of General Bernard Montgomery to the command of the 21st Army Group and overall command of all ground forces to land in Normandy, the plan underwent a number of further revisions. On 21 January 1944, a revised Overlord plan was presented to General Dwight D. Eisenhower, who had been chosen as the Supreme Allied Commander for the invasion. Montgomery's revised plan widened the landing area to include all of the coastline between the River Orne and the eastern coast of the Cotentin Peninsula; five divisions would land on the beaches, and supported by three airborne divisions to land on either side of the landing areas to secure their flanks and protect the landing troops from counterattack. The British airborne forces were assigned to the eastern flank, and the American airborne forces the west.[10]
Prelude
British preparation
The 6th Airborne Division, which was under the command of Major-General Richard Gale, was chosen to conduct the airborne operations on the eastern flank of the invasion area.[11] The division was new, having been activated in April 1943, and Operation Overlord would be its first experience of combat.[12] The division was the first to be established for the sole purpose of undertaking division-level airborne operations rather than contributing to a range of smaller operations, and there was considerable debate over what the unit should do.[13]
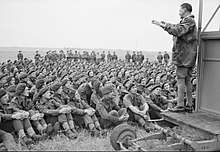
As late as January 1944, Gale noted that he had "no indication as yet of a definite airborne task" for his unit and continued to keep all options open,[14] reflecting the ongoing discussions at the strategic level over the wider plan for D-Day. On 17 February 1944, Major-General Frederick Arthur Montague Browning (commander of all British airborne forces) arrived at the 6th Airborne Division's headquarters to brief Gale on what the division was expected to achieve during the invasion; their role codenamed Operation Tonga.[11] The original plan for Tonga did not involve the entire division, instead only called for a single parachute brigade and an anti-tank battery to be attached to the British 3rd Infantry Division. This force would be tasked with seizing bridges over the Caen Canal and the River Orne near the towns of Bénouville and Ranville.[15] Gale objected to this small-scale operation, arguing that a single brigade would not be able to achieve these objectives with such limited manpower, and asked for the entire division to be deployed. After consultation with his superiors, Browning agreed to the request and ordered Gale to begin planning for the operation.[16]
The division was allotted three specific tasks to achieve as a part of Tonga, apart from protecting the eastern flank of the Allied seaborne landings and taking control of the areas of strategic importance to the east of Caen. First, it was to capture intact the two bridges over the Caen Canal and the Orne River at Bénouville and Ranville. The bridges then would be defended against counterattacks. Gale knew that the capture of the bridges would be critical for the resupply and reinforcement of his division, but he did not know that the bridges were incapable of supporting tanks. Second, the division was to destroy the heavily fortified Merville coastal artillery battery located at Franceville Plage, to ensure that it could not shell the British forces landing in the area codenamed Sword. The third mission was to destroy several bridges which spanned the River Dives, located near the towns of Varaville, Robehomme, Bures and Troarn. The division would then hold the territory that it had seized, until it could be relieved by advancing British ground forces.[16]
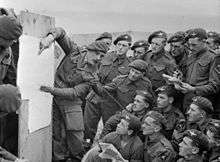
Detailed planning for Tonga began in February, starting with the number of transport aircraft assigned to the operation being expanded rapidly to accommodate the entire division. Two Royal Air Force (RAF) air groups were provided for the operation to ensure that the division could be deployed in just two airlifts. The pilots and crew of these transport aircraft then began formation flying training and specialised aircrew training to ensure that they were as familiar with what the operation required of them.[17] The 6th Airborne Division carried out several large-scale airborne exercises, using them to find the most efficient way to deploy a brigade group on one or multiple landing-zones. On 6 February, the 3rd Parachute Brigade undertook an exercise in which the entire brigade was dropped by 98 transport aircraft. At the end of March, 284 aircraft were used in Exercise 'Bizz II' in which the entire division was deployed by parachute or glider. Finally, between 21 April and 26 April, Exercise 'Mush' utilised approximately 700 aircraft to deploy the British 1st Airborne Division and the Polish 1st Parachute Brigade against the 6th Airborne Division, who moved by road, in a simulation of a full-scale airborne operation.[18]
As the date of the operation approached, training became more intensive. Glider units spent hours aloft every day circling over airfields as they practiced the manoeuvers required to land the airborne forces next to the bridges over the Orne River, the Caen canal, the Dives, and the Merville battery. Once the pilots had practiced this sufficiently during the day, they were then switched to night operations. In the landing grounds used by the division for their operations, dozens of poles similar to those in Normandy were erected, with engineering units then timed on how fast they could demolish the obstacles.[18] The battalion assigned to neutralising Merville spent two weeks at a special camp, where they built a replica of the battery and carried out several rehearsal exercises in and around it. The force assigned to the coup-de-main operation, to capture the bridges over the Orne River and Caen canal, were transferred to Exeter. There, they conducted intensive exercises around the River Exe and the nearby canal that stood in place for their real objective.[19] The pilots of the gliders and transport aircraft were also constantly briefed with thousands of maps and photographs of the landing zones and the surrounding areas, as well as dozens of scale models of the zones and the primary objectives, such as the bridges and the Merville battery. A coloured film was produced from aerial reconnaissance photographs which, when played at the correct speed and height over the scale models, realistically simulated the paths the glider pilots would take towards their landing-zones.[20]
German preparation
The 6th Airborne Division would be opposed by German Army (Heer) formations stationed in the area around Caen and the River Orne. By June 1944, this consisted of the 711th and 716th Infantry Divisions; both of which were static formations whose manpower consisted of medically downgraded troops and conscripts recruited from the Soviet Union or Eastern Europe.[11] Both divisions also had a miscellaneous collection of anti-tank guns and artillery pieces, as well as a small number of German and French tanks and self-propelled guns. Neither division was rated as being highly efficient, with Allied intelligence rating them at a forty per-cent efficiency compared to a first-class line infantry division in a static role, and fifteen percent in a counter-attack role. Allied intelligence also indicated that two companies of armour were in the area, as were a number of ad hoc infantry formations formed from training establishments.[21] Based near Caen, in support of the static divisions, was the 21st Panzer Division. The 125th Panzergrenadier Regiment was billeted at Vimont, just east of Caen, and the 2nd Battalion, 192nd Panzergrenadier Regiment was based at Cairon to the west of the Caen canal and the River Orne bridges.[22][23][24] Although a new formation equipped with an assortment of older tanks and other armoured vehicles, the core of the division were Afrika Korps veterans. [25] Further afield was the Panzer Lehr Division, based at Chartres, which was less than a day's march from the area.[26] Also considered a threat to the airborne forces was the Waffen SS 12th SS Panzer Division Hitlerjugend, based at Lisieux and believed capable of arriving in the vicinity of the airborne landings within twelve hours. The division possessed a large number of tanks and self-propelled guns, including the Panther.[21][26]
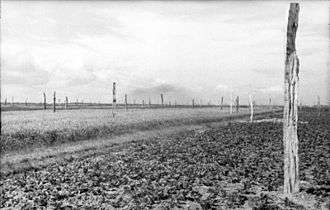
Under the orders of Field Marshal Erwin Rommel, German forces had constructed a large number of static defensive positions and obstacles. Rommel had been appointed Inspector General of Coastal Defences and commander of Army Group B, in November 1943, by order of Adolf Hitler. On his arrival he had assessed the existing defences in the region and immediately began the process of improving them, particularly those situated inland as he believed no more than thirty percent of the German defences were adequate.[27] These anti-airborne measures consisted of planting a large number of mines to create minefields, as well as the erection of so-called Rommel's asparagus; a system of wire-braced poles up to two metres in height, a great many of which were laced with mines or other booby-traps aimed at destroying gliders and killing or wounding airborne troops.[28] Rommel noted in his diary, following an inspection of one area, that a division had placed over 300,000 stakes in the ground to deter airborne landings, and a corps had erected over 900,000.[29] The Merville artillery battery was a particularly heavily fortified position. From the beach, it was protected by two strongpoints that included approximately thirty bunkers as well as an observation post, and the battery itself consisted of a bunker containing the battery's command post, two blockhouses, a light flak emplacement and four casemates able to contain artillery pieces up to dimensions of 150 mm. The entire battery covered an area roughly four hundred metres in diameter and was surrounded by an inner perimeter of barbed wire, a minefield, and an outer perimeter of barbed wire as well as an anti-tank ditch.[30]
Battle
Fly-in
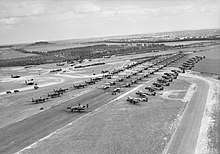
Operation Tonga began at 22:56 on the night of 5 June, when six Handley Page Halifax heavy bombers took off from RAF Tarrant Rushton towing six Horsa gliders carrying the coup-de-main force; this consisted of D Company, 2nd Battalion Oxfordshire and Buckinghamshire Light Infantry (part of the 6th Airlanding Brigade, but attached to the 5th Parachute Brigade for the initial invasion) reinforced with two extra platoons from B Company and a party of Royal Engineer sappers under the overall command of Major John Howard, who were tasked with capturing the bridges over the Caen Canal and the River Orne.[31] A few minutes later, between 23:00 and 23:20, six Armstrong Whitworth Albemarle transports took off carrying pathfinders of the 22nd Independent Parachute Company, who were to mark the three drop-zones to be used by the airborne troops of the division.[32] Another sixteen Albemarles followed the transports carrying the pathfinders, these transported elements of the 9th Parachute Battalion, 1st Canadian Parachute Battalion, and 3rd Parachute Brigade Headquarters.[33]
Thirty minutes later, the remainder of the transports carrying the division began to take off. This wave was divided into three groups. The first consisted of 239 Douglas Dakota and Short Stirling transports as well as seventeen Horsa gliders, carrying the bulk of the 3rd and 5th Parachute Brigades and their heavy equipment. These forces were due to land in their respective drop-zones at 00:50. The second group was destined to land at 03:20, and consisted of sixty-five Horsa and four Hamilcar gliders transporting the divisional headquarters and an anti-tank battery. The final group was formed of three Horsa gliders carrying sappers and men from the 9th Parachute Battalion, who were to land atop Merville Battery at 04:30.[33]
Operation Deadstick
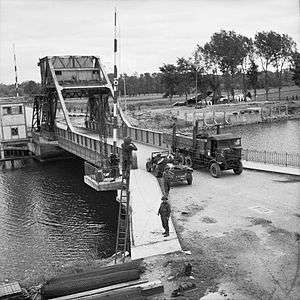
The first unit of the 6th Airborne Division to land in Normandy, was Howard's coup-de-main force.[35] The coup-de-main force landed in six gliders, over a five-minute period (00:15–00:20); three landing near the Caen canal bridge and two near the Orne River bridge and the third destined for the Orne River bridge some seven miles away due to a navigational error.[36][37] Once on the ground, the troops emerged and assaulted the German positions. At the Caen canal bridge, troops assaulted German trench positions, attacked sentries, and threw grenades into a concrete bunker believed to hold the triggering equipment for the bridge demolition charges.[38] At the Orne River bridge, a machine-gun nest was suppressed with mortar fire but no other defenders were found, and the two platoons captured the bridge before radioing Howard and informing him of their success. Both bridges had been secured within fifteen minutes, at the cost of only a small number of casualties.[39] It was also discovered that the bridges had not been rigged with explosives as believed.[38]
While the force waited for the rest of the division to land, and for the 7th Parachute Battalion to arrive to reinforce their position, they had to repel several spontaneous attempts by the Germans to re-take the bridges. At 01:30, two German tanks attempted to drive onto the bridge, but were repelled with the loss of one tank to a PIAT anti-tank weapon.[40]
Pathfinders
The coup-de-main force had been followed closely by the pathfinders of the 22nd Independent Parachute Company, tasked with marking out the drop-zones and landing-zones to be used by the rest of the division. However, due to a combination of heavy cloud cover and poor navigation, only one pathfinder team was dropped correctly. The aircraft carrying the remainder had to make between two and three runs over their respective drop-zones before their teams jumped.[41] Pathfinders assigned to DZ N were dropped wide, and did not manage to get to the drop-zone for thirty minutes. One of the teams assigned to DZ K accidentally dropped onto DZ N without realising their error, and set up radio beacons and markers that caused a number of airborne troops to drop in the wrong area. The Pathfinders 'stick' on DZ K commanded by Ltn Bob Midwood were successful. A pathfinder team belonging to 9th Parachute Battalion, assigned to mark out the drop-zone area for the unit tasked with destroying the Merville artillery battery, was all but wiped out when an air-raid by RAF Avro Lancaster heavy bombers missed the artillery battery itself and bombed the area the team was in.[42]
5th Parachute Brigade
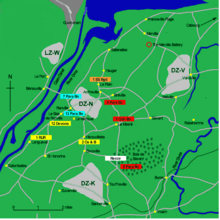
Due to the above factors, Brigadier Nigel Poett's 5th Parachute Brigade was scattered and dropped incorrectly. The constituent units of 7th Parachute Battalion were so badly scattered that, by 03:00, the battalion's commander could only command around 40 per cent of the battalion, although more men arrived throughout the night and day. Relatively few supply containers had been found by the airborne troops, meaning that they possessed few heavy weapons or radio sets.[43] However, the 7th Battalion managed to rendezvous with 2nd Oxfordshire and Buckinghamshire Light Infantry, and establish a defence against German counter-attacks. The first organised German responses to the capture of the bridges came between 05:00 and 07:00, and consisted of isolated and often uncoordinated attacks by tanks, armoured cars, and infantry that grew in intensity throughout the day.[44][45] At 10:00, the German Air Force (Luftwaffe) attempted to destroy the Caen bridge. A lone aircraft dropped a 1,000 lb (450 kg) bomb, which failed to detonate. Furthermore, two German coastal craft attempted to attack the bridge and were repelled.[44][46]
As the day progressed, the 2nd Battalion, 192nd Panzergrenadier Regiment counterattacked in the Bénouville area in an attempt to get through to the bridges. The coup-de-main force and the 7th Parachute Battalion held their position, knocking out 13 of the 17 tanks trying to get through. The British troops moved forward into Bénouville and cleared the Germans in house to house fighting. By midday, most of the missing men from the 7th Parachute Battalion had arrived at the bridges.[24] Despite the ferocity of the attacks, the battalion and the coup-de-main force were able to hold the bridges until 19:00, when the leading elements of the British 3rd Infantry Division arrived and began to relieve the airborne troops, a process that was completed around 01:00 7 June.[44]
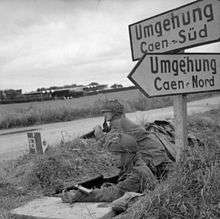
The brigade's other two battalions, the 12th and 13th, were also badly scattered when they were dropped at 00:50. When both units moved away from their rendezvous points neither had more than sixty percent of their strength, although individual airborne troops and small groups would join the battalions throughout the day.[47] Both of the battalions had been tasked with securing the area around DZ N and the two bridges captured by the coup-de-main force, a task which was made much more difficult by being scattered throughout the area. The 12th Parachute Battalion's mission was to secure the village of Le Bas de Ranville, which it did so by 04:00. The 13th Parachute Battalion was to capture the town of Ranville, which it achieved around the same time albeit against heavier resistance than that encountered by the other battalion.[48] One company from 13th Parachute Battalion was detailed to remain at the battalion drop-zone in order to provide protection for a company of sappers. The latter were to demolish the poles and explosives that were present in the area, so that the 6th Airborne Division headquarters could land safely.[49] The two battalions held their respective areas until relieved by ground forces advancing from the beaches. The 12th Parachute Battalion was bombarded with heavy mortar and artillery fire, and repelled two German counter-attacks by the 125th Panzer Grenadier Regiment; the first was defeated after destroying a tank and taking a number of prisoners, and the second was repulsed with the help of an air-landed anti-tank battery which had recently arrived.[50]
3rd Parachute Brigade
The 3rd Parachute Brigade (Brigadier James Hill) began to land at the same time as the main elements of 5th Parachute Brigade, and suffered from the same problems. All of its constituent units were scattered throughout the area due to poor navigation, heavy cloud cover, and several of the drop-zones either not being marked correctly or marked correctly but incorrectly positioned due to pathfinder error.[51]
The 8th Parachute Battalion, tasked with destroying two bridges near Bures and a third by Troarn, was widely scattered with a number of its paratroopers landing in the operational area of 5th Parachute Brigade.[52] When the commanding officer, Alastair Pearson, arrived at the battalion rendezvous point at 01:20, he found only thirty paratroopers and a small group of sappers with a Jeep and trailer. By 03:30, this number had increased to just over 140 paratroopers yet there were still no sign of the sappers who would be required to demolish the bridges.[53] Pearson therefore decided to send a small force to demolish the bridges at Bures, and lead the rest of the battalion to a crossroad north of Troarn where it would await more reinforcements before it attacked. The force sent to Bures discovered that the two bridges had already been demolished by a group of sappers, who had reached the bridges a few hours earlier, and so rejoined the battalion near Troarn that had now increased in numbers after another fifty men had arrived.[53] A reconnaissance party, and a party of sappers, was sent into Troarn to ascertain the status of the bridge. These troops came under fire, from a German-occupied house near the bridge. After a brief fire-fight, the paratroopers captured a number of Germans from the 21st Panzer Division. The airborne troops then made their way to the bridge, which they discovered had been partially demolished already. Once the sappers had widened the length of the bridge demolished, using their explosives, the reconnaissance force withdrew back to the rest of the battalion at the crossroad.[54] Having achieved its objective, the battalion then moved north and took up positions near Le Mesnail to widen the airborne bridgehead formed by the division.[52]
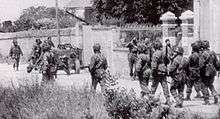
The 1st Canadian Parachute Battalion was allotted, as its primary task, the demolition of two bridges: one at Varaville and another at Robehomme.[52] Much like the rest of the units in the division, the battalion was scattered throughout the operational area. One group of paratroopers landed 10 miles (16 km) away from their drop-zone, and another landed only a short distance from the invasion beaches. A number were dropped in flooded areas around Varaville, and several drowned when they were dragged under the surface of the water due to the weight of their equipment.[54] A group of paratroopers moved towards the Robehomme bridge, encountering and gathering together several other groups of airborne troops and sappers en route, before reaching the bridge where they discovered it was still intact. By 03:00, the sappers tasked with the demolition of the bridge had failed to arrive, and so the paratroopers gathered together the small amount of explosives they possessed and set them off, weakening the bridge. The sappers finally arrived at 06:00, and completed the demolition of the bridge whilst the paratroopers protected them.[41] Meanwhile, another company of the battalion had been attempting to complete the tasks it had been ordered to fulfill; it was to clear the enemy garrison from Varaville and destroy a gun emplacement, demolish a bridge over the River Divette, and also destroy a radio transmitter near Varaville. However, the company was severely understrength, with only a fraction of its 100 men available.[55] A small group, led by the company commander, assaulted the fortifications outside Varaville that were manned by approximately ninety-six Germans supported by several machine-gun nests and an artillery piece. The artillery piece inflicted a number of casualties on the small Canadian force, killing the company commander, and a stalemate ensued until 10:00 when the enemy garrison surrendered after being subjected to mortar bombardment. The paratroopers were then relieved by British Commandos from the 1st Special Service Brigade.[56]
Battle of Merville Gun Battery
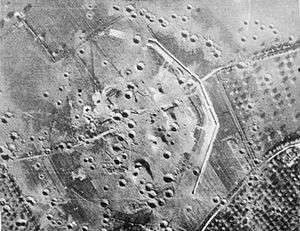
The 3rd Parachute Brigade's 9th Parachute Battalion was assigned a number of objectives: the destruction of the Merville artillery battery, the capture of the village of Le Plein, block the roads leading to that village, and capture a German Navy (Kriegsmarine) headquarters at Sallenelles near the River Orne.[51] However, the battalion was scattered throughout the area with a number of paratroopers landing a considerable distance from the designated DZ. Lieutenant-Colonel Terence Otway, the commander of the battalion, landed with the rest of his stick 400 yards (370 m) away from the drop-zone in a farmhouse being used as a command post by a German battalion. After a brief fire-fight and helping other scattered paratroopers, Otway arrived at the drop-zone at 01:30.[57] By 02:35, only 110 paratroopers had assembled with only a single machine-gun and a small number of Bangalore torpedoes recovered. This was a significant set-back for the battalion, as the plan to assault the artillery battery relied on having the entire battalion present with a number of sappers, as well as a large quantity of heavy equipment.[58] Under strict orders that the battery was to be destroyed no later than 05:30, Otway felt that he could no longer wait for any more men to arrive and set off for the battery with 150 paratroopers (following the arrival of another small group of stragglers at 02:45).[59]
The battalion arrived at the battery at 04:00. They linked up with the survivors of the pathfinder group, who had been earlier hit by an RAF raid against the battery, and began readying for an assault whilst the pathfinders marked out areas for the bangalore torpedoes to be placed.[58] The battalion was divided into four assault groups, one for each of the casemates of the battery, and was ready by 04:30, when the gliders carrying the sappers arrived over the battery.[60]
Of the three gliders assigned to the operation, only two arrived in Normandy; one having to abort and land in England. The remaining two were hit by anti-aircraft fire on their run-in. One landed around 2 miles (3.2 km) away, the other at the edge of the battery's minefield. The troops from this glider became involved in a fire fight with German troops heading to reinforce the battery garrison.[61][62] Otway launched the assault as soon as the first glider overshot the battery, ordering the explosives to be detonated to form two paths through the outer perimeter, through which the paratroopers attacked. The defenders were alerted by the explosions and opened fire, inflicting heavy casualties. Only four men assigned to assault Casemate Four survived long enough to reach it, which they disabled by firing into apertures and throwing grenades into air vents. The other casemates were cleared with fragmentation and white phosphorus grenades as the German crews had neglected to lock the doors leading into the battery.[63] A number of prisoners were taken by the paratroopers, and explosives were then readied to disable the artillery pieces inside the battery. It was discovered that the pieces were not modern 150 mm calibre weapons, but were instead Czechoslovakian First World War-era 100 mm field howitzers.[62] The paratroopers did the best with the explosives they had, using Gammon bombs to disable one gun and jamming shells into the muzzles of the others. However, the job was less than thorough as at least one gun went back into action when the Germans later re-occupied the battery.[63] Having completed the assault, the paratroopers gathered the German prisoners and their wounded and withdrew, having no wish to remain by the battery. The battalion possessed no radio and if no signal were received by the light cruiser HMS Arethusa, by 05:30, it would begin shelling the battery as a contingency.[64]
The paratroopers had achieved their primary objective, but at a heavy cost, with fifty dead and twenty-five wounded; a casualty rate of exactly fifty percent. The battalion then attacked Le Plein, securing the village by expelling the platoon-sized German garrison.[64] The survivors retired to a planned rendezvous point at 05:30, the battalion too understrength to achieve its other objectives.[63]
Divisional HQ, Operation Mallard, and days end
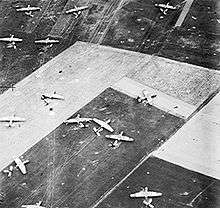
At 03:35, the 6th Airborne Division headquarters landed by glider in the landing-zone cleared by sappers. Only a few gliders missed the landing-zone, due to the poor weather and errors in navigation. Once the headquarters staff and accompanying airborne troops had been gathered together, the headquarters was moved to the Le Bas de Ranville area and set up there. Contact was established with the headquarters of 5th Parachute Brigade at 05:00, and with the headquarters of 3rd Parachute Brigade at 12:35, and the division linked up with 1st Special Service Brigade as it advanced from the invasion beaches at 13:53.[52]
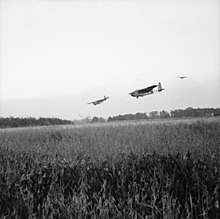
At 21:00, Operation Mallard began. Mallard was the final wave of the 6th Airborne Division's landings and consisted of 220 Horsa and Hamilcar gliders, carrying the 6th Airlanding Brigade and other units. The gliders arrived at their landing-zone, coming under heavy small-arms and mortar fire from nearby German positions as they landed. Casualties were light and within ninety minutes the glider-borne troops had gathered at their rendezvous points.[33][65] By 00:00 7 June, the entire 6th Airborne Division had been fully deployed on the eastern flank of the invasion beaches (with the exception of 12th Battalion, Devonshire Regiment – part of 6th Airlanding Brigade – that was due to arrive by sea on 7 June).
The division ended the day with the 3rd Parachute Brigade holding a 4 miles (6.4 km) front, with 9th Parachute Battalion at Le Plein, 1st Canadian Parachute Battalion at Les Mesneil, and the 8th Parachute Battalion in the southern part of the Bois de Bavent. The 5th Parachute Brigade had the 12th Parachute Battalion occupying Le Bas de Ranville, and the 13th Parachute Battalion holding Ranville while the 7th Parachute Battalion had been moved into reserve. The 6th Airlanding Brigade was poised to commit its two battalions to extend the bridgehead. The 1st Special Service Brigade, which had temporarily came under the command of the division, was holding villages to the north and north-east of DZ N.[66]
Aftermath
Analysis
Operation Tonga was a success, with all of the tasks allotted to 6th Airborne Division being achieved within the time limits imposed on the individual units of the division. These tasks had been achieved despite the problems caused by a large number of the airborne troops being scattered throughout the operational area assigned, due to a combination of bad weather and poor navigation on the part of the pilots of the transport aircraft carrying them. Glider-borne airborne troops also suffered from navigational errors, with ten of the eighty-five gliders assigned to the division landing more than 2 miles (3.2 km) from their landing-zones. However, an unintended but beneficial result of these scattered drops was that the Germans were greatly confused as to area and extent of the airborne landings.[67]
Casualties
The 6th Airborne Division suffered a total of 800 casualties between 5 June and 7 June, out of the 8,500 men deployed.[3] German losses are estimated to be estimated 400 dead and a further 400 captured. In addition, fourteen tanks were lost during counterattacks around the Orne River and Caen canal bridges. Other losses include one gunboat on the Caen canal.[68]
Subsequent role
Between 7 June and 10 June, the 6th Airborne Division repulsed a number of German attacks.[69] The division retained control of the area between the Rivers Orne and Dives until 14 June, when the 51st (Highland) Infantry Division took over the southern part of the Orne bridgehead.[35]
On 10 June, the decision was taken to expand the bridgehead to the east of the River Orne, with 6th Airborne Division tasked with achieving this. However, the division was deemed not to be strong enough to achieve its objective; the 3rd Parachute Brigade was reinforced with the 5th Battalion, Black Watch (Royal Highland Regiment). On 11 June, the 5th Black Watch launched an attack on the town of Bréville, but was met with extremely heavy resistance and was repulsed after suffering a number of casualties. The next day, the 3rd Parachute Brigade's entire front was subjected to fierce artillery bombardment and assaults by German tanks and infantry, with the Germans particularly focusing on the positions held by 9th Parachute Battalion.[70][71] Both the 9th Parachute Battalion and the remnants of the Black Watch defended Chateau Saint Come, but were gradually forced to retreat. However, after Lieutenant-Colonel Otway stated that his battalion would be unable to defend its position for much longer, Brigadier Hill gathered together a number of paratroopers from 1st Canadian Parachute Battalion and led a counter-attack that forced the Germans to withdraw.[72][73]
In the weeks that followed, the 6th Airborne Division was reinforced with the Dutch Princess Irene Brigade and the 1st Belgian Infantry Brigade.[35] On 7 August, following a period of static warfare, the division began preparations for offensive operations. On the night of 16/17 August, the division began to advance against stiff German opposition. This advance continued until 26 August, when the division reached its objective – the mouth of the River Seine. In nine days of fighting, it had advanced 45 miles (72 km)[74] despite, as Gale put it, the infantry units being "quite inadequately equipped for a rapid pursuit".[75] The advanced resulted in the liberation of 400 square miles (1,000 km2) of German-occupied France, and the capture of over 1,000 German soldiers.
Between 6 June and 26 August, casualties amounted to 4,457 men of which 821 were killed, 2,709 wounded, and 927 were reported missing.[76][77] The division was finally withdrawn from the frontline on 27 August, and embarked for England at the beginning of September.[76]
| Wikimedia Commons has media related to Operation Tonga. |
References
Citations
- The Parachute Regiment (26 March 2004). "D-Day – The Normandy Landings". Ministry of Defense. Archived from the original on 1 November 2006. Retrieved 11 June 2008.CS1 maint: BOT: original-url status unknown (link)
- Niklas Zetterling. "German Order of Battle". Archived from the original on 13 July 2008. Retrieved 24 July 2008.
- Air Ministry 2013, p. 89.
- Otway 1990, p. 156.
- Buckingham 2005, p. 24.
- Crookenden 1976, p. 67.
- Hand 1995, p. 87.
- Buckingham 2005, pp. 24–25.
- Otway 1990, p. 157.
- Buckingham 2005, p. 27.
- Harclerode 2005, p. 305.
- Tugwell 1971, p. 202.
- Buckingham 2005, p. 16.
- Gale 1948, pp. 23–24.
- Harclerode 2005, pp. 305–307.
- Harclerode 2005, p. 307.
- Otway 1990, p. 168.
- Otway 1990, p. 169.
- Otway 1990, p. 170.
- Otway 1990, p. 171.
- Otway 1990, p. 174.
- Fowler 2010, p. 11.
- Ford 2002, p. 47.
- Ambrose 2003, pp. 155–159, 162, 168.
- Fowler 2010, pp. 11–12.
- Ford & Zaloga 2009, p. 204.
- Buckingham 2005, p. 37.
- Harclerode 2005, p. 308.
- Devlin 1979, p. 369.
- Buckingham 2005, p. 41.
- Harclerode 2005, p. 309.
- Buckingham 2005, p. 119.
- Buckingham 2005, p. 120.
- Moreman et al. 2007, p. 227.
- Air Ministry 2013, p. 73.
- Buckingham 2005, pp. 120–121.
- Harclerode 2005, pp. 312–313.
- Buckingham 2005, p. 122.
- Harclerode 2005, p. 313.
- Buckingham 2005, p. 129.
- Buckingham 2005, p. 123.
- Buckingham 2005, p. 125.
- Harclerode 2005, p. 314.
- Otway 1990, p. 178.
- Harclerode 2005, pp. 314–316.
- Fowler 2010, p. 55.
- Otway 1990, p. 179.
- Buckingham 2005, p. 127.
- Harclerode 2005, p. 315.
- Harclerode 2005, p. 316.
- Otway 1990, p. 180.
- Otway 1990, p. 181.
- Harclerode 2005, p. 321.
- Harclerode 2005, p. 322.
- Harclerode 2005, p. 324.
- Harclerode 2005, pp. 324–325.
- Buckingham 2005, pp. 142–143.
- Buckingham 2005, p. 143.
- Harclerode 2005, p. 318.
- Buckingham 2005, pp. 143–144.
- Nigl 2007, p. 71.
- Harclerode 2005, p. 319.
- Buckingham 2005, p. 145.
- Harclerode 2005, p. 320.
- Harclerode 2005, pp. 326-327.
- Harclerode 2005, p. 327.
- Otway 1990, p. 182.
- Ambrose 2003, pp. 130–131, 153–159, 162, 168.
- Harclerode 2005, pp. 328–330.
- Otway 1990, p. 185.
- Harclerode 2005, p. 334.
- Harclerode 2005, p. 335.
- Saunders 1971, p. 196.
- Otway 1990, pp. 187–188, 191.
- Gale 1948, p. 126.
- Otway 1990, p. 191.
- Harclerode 2005, p. 363.
Bibliography
- Air Ministry (2013) [1945]. Carruthers, Bob (ed.). By Air to Battle: The Official History of the British Paratroops in World War II. Barnsley: Pen and Sword Books. ISBN 9780117083462.CS1 maint: ref=harv (link)
- Ambrose, Stephen E. (2003). Pegasus Bridge. London: Pocket Books. ISBN 9780743450683.CS1 maint: ref=harv (link)
- Barber, Neil (2002). The Day The Devils Dropped In: The 9th Parachute Battalion in Normandy. Pen & Sword. ISBN 9781844150458.CS1 maint: ref=harv (link)
- Brereton, Lewis H. (1946). The Brereton Diaries: The War in the Air in the Pacific, Middle East and Europe, 3 October 1941 – 8 May 1945. Morrow. ISBN 9781782898757.CS1 maint: ref=harv (link)
- Buckingham, William F. (2005). D-Day: The First 72 Hours. Tempus Publishing. ISBN 9780752428420.CS1 maint: ref=harv (link)
- Crookenden, Napier (1976). Dropzone Normandy. Ian Allan. ISBN 9780711006607.CS1 maint: ref=harv (link)
- Devlin, Gerard M. (1979). Paratrooper! The Saga of Parachute and Glider Combat Troops. Robson Books. ISBN 9780312596545.CS1 maint: ref=harv (link)
- Ellis, Lionel F.; et al. (2004) [1962]. Victory in the West: The Battle of Normandy. History of the Second World War. I. Naval & Military Press. ISBN 9781845740580.CS1 maint: ref=harv (link)
- Ford, Ken (2002). D-Day 1944: Sword Beach & British Airborne Landings. Campaign. III. Oxford: Osprey. ISBN 9781841763668.CS1 maint: ref=harv (link)
- Ford, Ken; Zaloga, Steven J (2009). Overlord the D-Day Landings. Oxford United Kingdom: Osprey. ISBN 9781846034244.CS1 maint: ref=harv (link)
- Fowler, Will (2010). Pegasus Bridge: Bénouville D-Day 1944. Raid. Oxford: Osprey. ISBN 9781846038488.CS1 maint: ref=harv (link)
- Gale, Richard N. (1948). With the 6th Airborne Division in Normandy. Ian Allan. OCLC 4447265.CS1 maint: ref=harv (link)
- Hand, Roger (1995). "Overlord and Operational Art". Military Review. Fort Leavenworth, Kansas: Combined Arms Center. 75 (3): 86–92. ISSN 0026-4148.CS1 maint: ref=harv (link)
- Harclerode, Peter (2005). Wings of War – Airborne Warfare 1918–1945. Weidenfeld & Nicolson. ISBN 9780304367306.CS1 maint: ref=harv (link)
- Moreman, Tim; et al. (2007). Airborne: World War II Paratroopers in Combat. Bloomsbury: Osprey. ISBN 9781846031960.CS1 maint: ref=harv (link)
- Nigl, Alfred J. (2007). Silent Wings Savage Death. Santa Anna, CA: Graphic Publishers. ISBN 9781882824311.CS1 maint: ref=harv (link)
- Otway, Terence B. H. (1990). The Second World War 1939–1945 Army – Airborne Forces. Imperial War Museum. ISBN 9780901627575.CS1 maint: ref=harv (link)
- Saunders, Hilary A. St. G. (1971). The Red Beret: The Story of The Parachute Regiment at War, 1940–1945. London: New English Library. ISBN 9781786259257.CS1 maint: ref=harv (link)
- Tugwell, Maurice (1971). Airborne to battle: a History of Airborne Warfare, 1918–1971. London: Kimber. ISBN 9780718302627.CS1 maint: ref=harv (link)
Further reading
- Harclerode, Peter (2002). Go To It! The Illustrated History of the 6th Airborne Division. Caxton. ISBN 184067136X.
- Stacey, C. C. J. (1960). The Victory Campaign: The Operations in North-West Europe 1944–1945 (PDF). Official History of the Canadian Army in the Second World War. III. Ottawa: The Queen's Printer and Controller of Stationery. OCLC 58964926.
