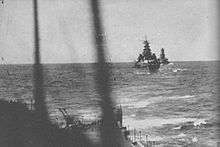
Naval Battle of Guadalcanal
The Naval Battle of Guadalcanal, sometimes referred to as the Third and Fourth Battles of Savo Island, the Battle of the Solomons, the Battle of Friday the 13th, or, in Japanese sources, the Third Battle of the Solomon Sea (第三次ソロモン海戦, Dai-san-ji Soromon Kaisen), took place from 12–15 November 1942, and was the decisive engagement in a series of naval battles between Allied (primarily American) and Imperial Japanese forces during the months-long Guadalcanal Campaign in the Solomon Islands during World War II. The action consisted of combined air and sea engagements over four days, most near Guadalcanal and all related to a Japanese effort to reinforce land forces on the island. The only two U.S. Navy admirals to be killed in a surface engagement in the war were lost in this battle.
| Naval Battle of Guadalcanal | |||||||
|---|---|---|---|---|---|---|---|
| Part of the Pacific Theater of World War II | |||||||
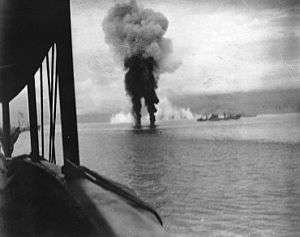 Smoke rises from two Japanese aircraft shot down off Guadalcanal on 12 November 1942. Photographed from USS President Adams; ship at right is USS Betelgeuse. | |||||||
| |||||||
| Belligerents | |||||||
|
|
| ||||||
| Commanders and leaders | |||||||
| |||||||
| Strength | |||||||
|
| ||||||
| Casualties and losses | |||||||
|
First phase (13 Nov): 3 destroyers 1 battleship moderately damaged Plus (13–15 Nov): 36 aircraft for a total of 1,732 killed[1] |
First phase: 1 battleship 1 heavy cruiser 2 destroyers 7 transports Second phase: 1 battleship 1 destroyer 4 transports (beached first) Plus: 64 aircraft for a total of 1,900 killed (exclusive of transport losses)[2] | ||||||
Allied forces landed on Guadalcanal on 7 August 1942 and seized an airfield, later called Henderson Field, that was under construction by the Japanese military. There were several subsequent attempts to recapture the airfield by the Imperial Japanese Army and Navy using reinforcements delivered to Guadalcanal by ship, efforts which ultimately failed. In early November 1942, the Japanese organized a transport convoy to take 7,000 infantry troops and their equipment to Guadalcanal to attempt once again to retake the airfield. Several Japanese warship forces were assigned to bombard Henderson Field with the goal of destroying Allied aircraft that posed a threat to the convoy. Learning of the Japanese reinforcement effort, U.S. forces launched aircraft and warship attacks to defend Henderson Field and prevent the Japanese ground troops from reaching Guadalcanal.
In the resulting battle, both sides lost numerous warships in two extremely destructive surface engagements at night. Nevertheless, the U.S. succeeded in turning back attempts by the Japanese to bombard Henderson Field with battleships. Allied aircraft also sank most of the Japanese troop transports and prevented the majority of the Japanese troops and equipment from reaching Guadalcanal. Thus, the battle turned back Japan's last major attempt to dislodge Allied forces from Guadalcanal and nearby Tulagi, resulting in a strategic victory for the U.S. and its allies and deciding the ultimate outcome of the Guadalcanal campaign in their favor.
Background
The six-month Guadalcanal campaign began on 7 August 1942, when Allied (primarily U.S.) forces landed on Guadalcanal, Tulagi, and the Florida Islands in the Solomon Islands, a pre-war colonial possession of Great Britain. The landings were meant to prevent the Japanese using the islands as bases from which to threaten the supply routes between the U.S. and Australia, and to secure them as starting points for a campaign to neutralize the major Imperial Japanese military base at Rabaul and support of the Allied New Guinea campaign. The Japanese had occupied Tulagi in May 1942 and began constructing an airfield on Guadalcanal in June 1942.[3]
By nightfall on 8 August, the 11,000 Allied troops secured Tulagi, the nearby small islands, and a Japanese airfield under construction at Lunga Point on Guadalcanal (later renamed Henderson Field). Allied aircraft operating out of Henderson were called the "Cactus Air Force" (CAF) after the Allied code name for Guadalcanal. To protect the airfield, the U.S. Marines established a perimeter defense around Lunga Point. Additional reinforcements over the next two months increased the number of U.S. troops at Lunga Point to more than 20,000 men.[4]
In response, the Japanese Imperial General Headquarters assigned the Imperial Japanese Army's 17th Army, a corps-sized command based at Rabaul and under the command of Lieutenant-General Harukichi Hyakutake, with the task of retaking Guadalcanal. Units of the 17th Army began to arrive on Guadalcanal on 19 August, to drive Allied forces from the island.[5]
Because of the threat posed by CAF aircraft based at Henderson Field, the Japanese were unable to use large, slow transport ships to deliver troops and supplies to the island. Instead, they used warships based at Rabaul and the Shortland Islands. The Japanese warships—mainly light cruisers or destroyers from the Eighth Fleet under the command of Vice Admiral Gunichi Mikawa—were usually able to make the round trip down "The Slot" to Guadalcanal and back in a single night, thereby minimizing their exposure to air attack. Delivering the troops in this manner, however, prevented most of the soldiers' heavy equipment and supplies—such as heavy artillery, vehicles, and much food and ammunition—from being carried to Guadalcanal with them. These high-speed warship runs to Guadalcanal occurred throughout the campaign and came to be known as the "Tokyo Express" by Allied forces and "Rat Transportation" by the Japanese.[6]
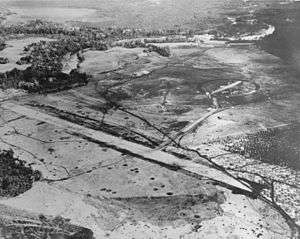
The first Japanese attempt to recapture Henderson Field failed when a 917-man force was defeated on 21 August in the Battle of the Tenaru. The next attempt took place from 12 to 14 September, ending in the defeat of the 6,000 men under the command of Major General Kiyotake Kawaguchi at the Battle of Edson's Ridge.[7]
In October, the Japanese again tried to recapture Henderson Field by delivering 15,000 more men—mainly from the Army's 2nd Infantry Division – to Guadalcanal. In addition to delivering the troops and their equipment by Tokyo Express runs, the Japanese also successfully pushed through one large convoy of slower transport ships. Enabling the approach of the transport convoy was a nighttime bombardment of Henderson Field by two battleships on 14 October that heavily damaged the airfield's runways, destroyed half of the CAF's aircraft, and burned most of the available aviation fuel. In spite of the damage, Henderson personnel were able to restore the two runways to service and replacement aircraft and fuel were delivered, gradually restoring the CAF to its prebombardment level over the next few weeks.[8]
The next Imperial attempt to retake the island with the newly arrived troops occurred from 20 to 26 October and was defeated with heavy losses in the Battle for Henderson Field.[9] At the same time, Admiral Isoroku Yamamoto (the commander of the Japanese Combined Fleet) engaged U.S. naval forces in the Battle of the Santa Cruz Islands, which resulted in a tactical victory for the Japanese. However, the Americans won a strategic victory as the Japanese navy failed in its objectives and the Japanese carriers were forced to retreat because of losses to carrier aircraft and aircrewmen.[10] Thereafter, Yamamoto's ships returned to their main bases at Truk in Micronesia, where he had his headquarters, and Rabaul while three carriers returned to Japan for repairs and refitting.[11]
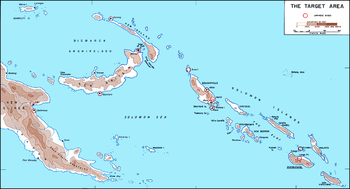
The Japanese Army planned another attack on Guadalcanal in November 1942, but further reinforcements were needed before the operation could proceed. The Army requested assistance from Yamamoto to deliver the needed reinforcements to the island and to support their planned offensive on the Allied forces guarding Henderson Field. Yamamoto provided 11 large transport ships to carry 7,000 army troops from the 38th Infantry Division, their ammunition, food, and heavy equipment from Rabaul to Guadalcanal. He also sent a warship support force from Truk on 9 November which included the battleships Hiei and Kirishima. Equipped with special fragmentation shells, they were to bombard Henderson Field on the night of 12–13 November and destroy it and the aircraft stationed there in order to allow the slow, heavy transports to reach Guadalcanal and unload safely the next day.[12] The warship force was commanded from Hiei by recently promoted Vice Admiral Hiroaki Abe.[13] Because of the constant threat posed by Japanese aircraft and warships, it was difficult for Allied forces to resupply their forces on Guadalcanal, which often came under attack from Imperial land and sea forces in the area.[14] In early November 1942, Allied intelligence learned that the Japanese were preparing again to try to retake Henderson Field.[15] Therefore, the U.S. sent Task Force 67 (TF 67)—a large reinforcement and re-supply convoy, split into two groups and commanded by Rear Admiral Richmond K. Turner—to Guadalcanal on 11 November. The supply ships were protected by two task groups—commanded by Rear Admirals Daniel J. Callaghan and Norman Scott—and aircraft from Henderson Field on Guadalcanal.[16] The transport ships were attacked several times on 11 and 12 November near Guadalcanal by Japanese aircraft based at Buin, Bougainville, in the Solomons, but most were unloaded without serious damage. Twelve Japanese aircraft were shot down by antiaircraft fire from the U.S. ships or by fighter aircraft flying from Henderson Field.[17]
First Naval Battle of Guadalcanal, 13 November
Prelude
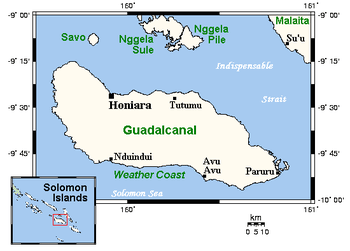
Abe's warship force assembled 70 nmi (81 mi; 130 km) north of Indispensable Strait and proceeded towards Guadalcanal on 12 November with an estimated arrival time for the warships of early morning of 13 November. The convoy of slower transport ships and 12 escorting destroyers, under the command of Raizō Tanaka, began its run down "The Slot" (New Georgia Sound) from the Shortlands with an estimated arrival time at Guadalcanal during the night of 13 November.[18] In addition to the battleships Hiei (Abe's flagship) and Kirishima, Abe's force included the light cruiser Nagara and 11 destroyers (Samidare, Murasame, Asagumo, Teruzuki, Amatsukaze, Yukikaze, Ikazuchi, Inazuma, Akatsuki, Harusame, and Yūdachi).[19] Three more destroyers (Shigure, Shiratsuyu, and Yūgure) would provide a rear guard in the Russell Islands during Abe's foray into the waters of "Savo Sound" around and near Savo Island off the north coast of Guadalcanal that would soon be nicknamed "Ironbottom Sound" as a result of the numerous ships sunk in this succession of battles and skirmishes.[20] U.S. reconnaissance aircraft spotted the approach of the Japanese ships and passed a warning to the Allied command.[21] Thus warned, Turner detached all usable combat ships to protect the troops ashore from the expected Japanese naval attack and troop landing and ordered the supply ships at Guadalcanal to depart by the early evening of 12 November. Callaghan was a few days senior to the more experienced Scott, and therefore was placed in overall command.[22]
Callaghan prepared his force to meet the Japanese that night in the sound. His force consisted of two heavy cruisers (San Francisco and Portland), three light cruisers (Helena, Juneau, and Atlanta), and eight destroyers: Cushing, Laffey, Sterett, O'Bannon, Aaron Ward, Barton, Monssen, and Fletcher. Admiral Callaghan commanded from San Francisco.[23]
During their approach to Guadalcanal, the Japanese force passed through a large and intense rain squall which, along with a complex formation plus some confusing orders from Abe, split the formation into several groups.[24] The U.S. force steamed in a single column in Ironbottom Sound, with destroyers in the lead and rear of the column, and the cruisers in the center. Five ships had the new, far-superior SG radar, but Callaghan's deployment put none of them in the forward part of the column, nor did he choose one for his flagship. Callaghan did not issue a battle plan to his ship commanders.[25]
Action
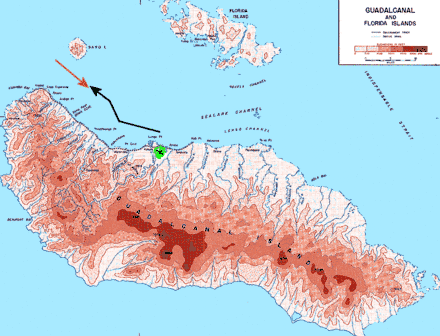
At about 01:25 on 13 November, in near-complete darkness due to the bad weather and dark moon,[26] the ships of the Imperial Japanese force entered the sound between Savo Island and Guadalcanal and prepared to bombard Henderson Field with the special ammunition loaded for the purpose.[27] The ships arrived from an unexpected direction, coming not down the slot but from the west side of Savo Island, thus entering the sound from the northwest rather than the north.[27] Unlike their American counterparts, the Japanese sailors had drilled and practiced night fighting extensively, conducting frequent live-fire night gunnery drills and exercises. This experience would be telling in not only the pending encounter, but in several other fleet actions off Guadalcanal in the months to come.[27]
Several of the U.S. ships detected the approaching Japanese on radar, beginning at about 01:24, but had trouble communicating the information to Callaghan due to problems with radio equipment, lack of discipline regarding communications procedures, and general inexperience in operating as a cohesive naval unit.[28] Messages were sent and received but did not reach the commander in time to be processed and used. With his limited understanding of the new technology,[29] Callaghan wasted further time trying to reconcile the range and bearing information reported by radar with his limited sight picture, to no avail. Lacking a modern combat information center (CIC), where incoming information could be quickly processed and co-ordinated, the radar operator was reporting on vessels that were not in sight, while Callaghan was trying to coordinate the battle visually, from the bridge.[29] (Post battle analysis of this and other early surface actions would lead directly to the introduction of modern CICs early in 1943.[29])
Several minutes after initial radar contact the two forces sighted each other, at about the same time, but both Abe and Callaghan hesitated ordering their ships into action. Abe was apparently surprised by the proximity of the U.S. ships, and with decks stacked with San Shiki special bombardment (rather than armor penetrating) munitions, was momentarily uncertain if he should withdraw to give his battleships time to rearm, or continue onward. He decided to continue onward.[29][30] Callaghan apparently intended to attempt to cross the T of the Japanese, as Scott had done at Cape Esperance, but—confused by the incomplete information he was receiving, plus the fact that the Japanese formation consisted of several scattered groups—he gave several confusing orders on ship movements, and delayed too long in acting.[29]
The U.S. ship formation began to fall apart, apparently further delaying Callaghan's order to commence firing as he first tried to ascertain and align his ships' positions.[31] Meanwhile, the two forces' formations began to overlap as individual ship commanders on both sides anxiously awaited permission to open fire.[29]
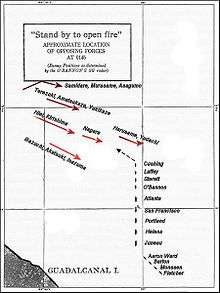
At 01:48, Akatsuki and Hiei turned on large searchlights and illuminated Atlanta only 3,000 yd (2,700 m) away—almost point-blank range for the battleship's main guns. Several ships on both sides spontaneously began firing, and the formations of the two adversaries quickly disintegrated.[32] Realizing that his force was almost surrounded by Japanese ships, Callaghan issued the confusing order, "Odd ships fire to starboard, even ships fire to port",[29][32] though no pre-battle planning had assigned any such identity numbers to reference, and the ships were no longer in coherent formation.[29] Most of the remaining U.S. ships then opened fire, although several had to quickly change their targets to attempt to comply with Callaghan's order.[33] As the ships from the two sides intermingled, they battled each other in an utterly confused and chaotic short-range mêlée in which superior Japanese optic sights and well-practiced night battle drill proved deadly effective. An officer on Monssen likened it afterwards to "a barroom brawl after the lights had been shot out".[34]
At least six of the U.S. ships—including Laffey, O'Bannon, Atlanta, San Francisco, Portland, and Helena—fired at Akatsuki, which drew attention to herself with her illuminated searchlight. The Japanese destroyer was hit repeatedly and blew up and sank within a few minutes.[35]
Perhaps because it was the lead cruiser in the U.S. formation, Atlanta was the target of fire and torpedoes from several Japanese ships—probably including Nagara, Inazuma, and Ikazuchi—in addition to Akatsuki. The gunfire caused heavy damage to Atlanta, and a type 93 torpedo strike cut all of her engineering power.[36] The disabled cruiser drifted into the line of fire of San Francisco, which accidentally fired on her, causing even greater damage. Scott and many of the bridge crew were killed.[37] Without power and unable to fire her guns, Atlanta drifted out of control and out of the battle as the Japanese ships passed her by. The lead U.S. destroyer, Cushing, was also caught in a crossfire between several Japanese destroyers and perhaps Nagara. She too was hit heavily and stopped dead in the water.[38]
Hiei, with her nine lit searchlights, huge size, and course taking her directly through the U.S. formation, became the focus of gunfire from many of the U.S. ships. The destroyer Laffey passed so close to Hiei that they missed colliding by 20 ft (6 m).[39] Hiei was unable to depress her main or secondary batteries low enough to hit Laffey, but Laffey was able to rake the Japanese battleship with 5 in (127.0 mm) shells and machine gun fire, causing heavy damage to the superstructure and bridge, wounding Abe and killing his chief of staff.[40] Abe was thus limited in his ability to direct his ships for the rest of the battle.[41] Sterett and O'Bannon likewise fired several salvos into Hiei's superstructure from close range, and perhaps one or two torpedoes into her hull, causing further damage before both destroyers escaped into the darkness.[42]
.jpg)
Unable to fire her main or secondary batteries at the three destroyers causing her so much trouble, Hiei instead concentrated on San Francisco, which was passing by only 2,500 yd (2,300 m) away.[43] Along with Kirishima, Inazuma, and Ikazuchi, the four ships made repeated hits on San Francisco, disabling her steering control and killing Callaghan, Captain Cassin Young, and most of the bridge staff. The first few salvos from Hiei and Kirishima consisted of the special fragmentation bombardment shells, which reduced damage to the interior of San Francisco and may have saved her from being sunk outright. Not expecting a ship-to-ship confrontation, it took the crews of the two Japanese battleships several minutes to switch to armor-piercing ammunition, and San Francisco, almost helpless to defend herself, managed to momentarily sail clear of the melee.[44] She had landed at least one shell in Hiei's steering gear room during the exchange, flooding it with water, shorting out her power steering generators, and severely inhibiting Hiei's steering capability.[45] Helena followed San Francisco to try to protect her from further harm.[46]
Two of the U.S. destroyers met a sudden demise. Either Nagara or the destroyers Teruzuki and Yukikaze came upon the drifting Cushing and pounded her with gunfire, knocking out all of her systems.[34][47] Unable to fight back, Cushing's crew abandoned ship. Cushing sank several hours later.[48] Laffey, having escaped from her engagement with Hiei, encountered Asagumo, Murasame, Samidare, and, perhaps, Teruzuki.[49][50] The Japanese destroyers pounded Laffey with gunfire and then hit her with a torpedo which broke her keel. A few minutes later fires reached her ammunition magazines and she blew up and sank.[51]
Portland—after helping sink Akatsuki—was hit by a torpedo from Inazuma or Ikazuchi, causing heavy damage to her stern and forcing her to steer in a circle. After completing her first loop, she was able to fire four salvos at Hiei but otherwise took little further part in the battle.[52]
Yūdachi and Amatsukaze independently charged the rear five ships of the U.S. formation. Two torpedoes from Amatsukaze hit Barton, immediately sinking her with heavy loss of life.[53] Amatsukaze turned back north and later also hit Juneau with a torpedo while the cruiser was exchanging fire with Yūdachi, stopping her dead in the water, breaking her keel, and knocking out most of her systems. Juneau then turned east and slowly crept out of the battle area.[54]
Monssen avoided the wreck of Barton and steamed onward looking for targets. She was noticed by Asagumo, Murasame, and Samidare who had just finished blasting Laffey. They smothered Monssen with gunfire, damaging her severely and forcing the crew to abandon ship. The ship sank some time later.[55]
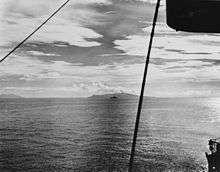
Amatsukaze approached San Francisco with the intention of finishing her off. While concentrating on San Francisco, Amatsukaze did not notice the approach of Helena, which fired several full broadsides at Amatsukaze from close range and knocked her out of the action. The heavily damaged Amatsukaze escaped under cover of a smoke screen while Helena was distracted by an attack by Asagumo, Murasame, and Samidare.[56][57]
Aaron Ward and Sterett, independently searching for targets, both sighted Yūdachi, which appeared unaware of the approach of the two U.S. destroyers.[58] Both U.S. ships hit Yūdachi simultaneously with gunfire and torpedoes, heavily damaging the destroyer and forcing her crew to abandon ship.[49] The ship did not sink right away, however. Continuing on her way, Sterett was suddenly ambushed by Teruzuki, heavily damaged, and forced to withdraw from the battle area to the east.[59] Aaron Ward wound up in a one-on-one duel with Kirishima, which the destroyer lost with heavy damage. She also tried to retire from the battle area to the east but soon stopped dead in the water because the engines were damaged.[60]
Robert Leckie, a Marine private on Guadalcanal, described the battle:
The star shells rose, terrible and red. Giant tracers flashed across the night in orange arches. ... the sea seemed a sheet of polished obsidian on which the warships seemed to have been dropped and were immobilized, centered amid concentric circles like shock waves that form around a stone dropped in mud.[61]
Ira Wolfert, an American war correspondent, was with the Marines on shore and wrote of the engagement:
The action was illuminated in brief, blinding flashes by Jap searchlights which were shot out as soon as they were turned on, by muzzle flashes from big guns, by fantastic streams of tracers, and by huge orange-colored explosions as two Jap destroyers and one of our destroyers blew up... From the beach it resembled a door to hell opening and closing ... over and over.[62]
After nearly 40 minutes of brutal, close-quarters fighting, the two sides broke contact and ceased fire at 02:26, after Abe and Captain Gilbert Hoover (the captain of Helena and senior surviving U.S. officer) ordered their respective forces to disengage.[63] Abe had one battleship (Kirishima), one light cruiser (Nagara), and four destroyers (Asagumo, Teruzuki, Yukikaze, and Harusame) with only light damage and four destroyers (Inazuma, Ikazuchi, Murasame, and Samidare) with moderate damage. The U.S. had only one light cruiser (Helena) and one destroyer (Fletcher) that were still capable of effective resistance. Although perhaps unclear to Abe, the way was now open for him to bombard Henderson Field and finish off the U.S. naval forces in the area, thus allowing the troops and supplies to be landed safely on Guadalcanal.[64]
At this crucial juncture, Abe chose to abandon the mission and depart the area. Several reasons are conjectured as to why he made this decision. Much of the special bombardment ammunition had been expended in the battle. If the bombardment failed to destroy the airfield, then his warships would be vulnerable to CAF air attack at dawn. His own injuries and the deaths of some of his staff from battle action may have affected Abe's judgement. Perhaps he was also unsure as to how many of his or the U.S. ships were still combat-capable because of communication problems with the damaged Hiei. Furthermore, his own ships were scattered and would have taken some time to reassemble for a coordinated resumption of the mission to attack Henderson Field and the remnants of the U.S. warship force. For whatever reason, Abe called for a disengagement and general retreat of his warships, although Yukikaze and Teruzuki remained behind to assist Hiei.[65] Samidare picked up survivors from Yūdachi at 03:00 before joining the other Japanese ships in the retirement northwards.[66]
Aftermath
_in_a_drydock_at_the_Cockatoo_Island_Dockyard%2C_circa_in_late_1942_(NH_81992).jpg)
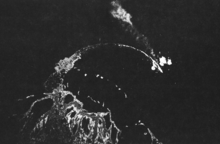
At 03:00 on 13 November, Admiral Yamamoto postponed the planned landings of the transports, which returned to the Shortlands to await further orders.[66] Dawn revealed three crippled Japanese (Hiei, Yūdachi, and Amatsukaze), and three crippled U.S. ships (Portland, Atlanta, and Aaron Ward) in the general vicinity of Savo Island.[67] Amatsukaze was attacked by U.S. dive bombers but escaped further damage as she headed to Truk, and eventually returned to action several months later. The abandoned hulk of Yūdachi was sunk by Portland, whose guns were still functioning despite other damage to the ship.[68] The tugboat Bobolink motored around Ironbottom Sound throughout the day of 13 November, assisting the damaged U.S. ships and rescuing U.S. survivors from the water.[69]
During the morning and early afternoon, IJN carrier Jun'yō under the command of Vice Admiral Kakuji Kakuta, which was located about 200 miles north of the Solomons, dispatched several combat air patrols, consisting of Mitsubishi A6M Zero fighters and Nakajima B5N and Aichi D3A bombers (for navigational aid), to cover the crippled Hiei. In addition, several more patrols were dispatched from ground bases at Rabaul and Buin. While these patrols engaged U.S. aircraft that were sent from Henderson Field and from the aircraft carrier Enterprise to finish off the battleship, the Japanese did not manage to save their big ship in the end.[70]
Hiei was attacked repeatedly by Marine Grumman TBF Avenger torpedo planes from Henderson Field, Navy TBFs, and Douglas SBD Dauntless dive-bombers from Enterprise, which had departed Nouméa on 11 November, as well as Boeing B-17 Flying Fortress bombers of the U.S. Army Air Forces' 11th Bombardment Group from Espiritu Santo. Abe and his staff transferred to Yukikaze at 08:15. Kirishima was ordered by Abe to take Hiei under tow, escorted by Nagara and its destroyers, but the attempt was cancelled because of the threat of submarine attack and Hiei's increasing unseaworthiness.[71] After sustaining more damage from air attacks, Hiei sank northwest of Savo Island, perhaps after being scuttled by her remaining crew, in the late evening of 13 November.[72]
Portland, San Francisco, Aaron Ward, and Sterett were eventually able to make their way to rear-area ports for repairs. Atlanta, however, sank near Guadalcanal at 20:00 on 13 November.[73] Departing from the Solomon Islands area with San Francisco, Helena, Sterett, and O'Bannon later that day, Juneau was torpedoed and sunk by Japanese submarine I-26 (9°11′10″S 159°53′42″E). Juneau's 100+ survivors (out of a total complement of 697) were left to fend for themselves in the open ocean for eight days before rescue aircraft belatedly arrived. While awaiting rescue, all but ten of Juneau's crew had died from their injuries, the elements, or shark attacks. The dead included the five Sullivan brothers.[74]
Most historians appear to agree that Abe's decision to retreat represented a strategic victory for the United States. Henderson Field remained operational with attack aircraft ready to deter the slow Imperial transports from approaching Guadalcanal with their precious cargoes.[75][76] Plus, the Japanese had lost an opportunity to eliminate the U.S. naval forces in the area, a result which would have taken even the comparatively resource-rich U.S. some time to recover from. Reportedly furious, Admiral Yamamoto relieved Abe of command and later directed his forced retirement from the military. However, it appears that Yamamoto may have been more angry over the loss of one of his battleships (Hiei) than he was over the abandonment of the supply mission and failure to completely destroy the U.S. force.[77] Shortly before noon, Yamamoto ordered Vice Admiral Nobutake Kondō, commanding the Second Fleet at Truk, to form a new bombardment unit around Kirishima and attack Henderson Field on the night of 14–15 November.[78]
Including the sinking of Juneau, total U.S. losses in the battle were 1,439 dead. The Japanese suffered between 550 and 800 dead.[79] Analyzing the effect of this engagement, historian Richard B. Frank states:
This action stands without peer for furious, close-range, and confused fighting during the war. But the result was not decisive. The self-sacrifice of Callaghan and his task force had purchased one night's respite for Henderson Field. It had postponed, not stopped, the landing of major Japanese reinforcements, nor had the greater portion of the (Japanese) Combined Fleet yet been heard from."[80]
Other actions, 13–14 November
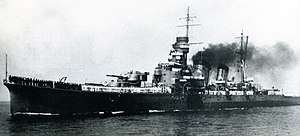
Although the reinforcement effort to Guadalcanal was delayed, the Japanese did not give up trying to complete the original mission, albeit a day later than originally planned. On the afternoon of 13 November, Tanaka and the 11 transports resumed their journey toward Guadalcanal. A Japanese force of cruisers and destroyers from the 8th Fleet (based primarily at Rabaul and originally assigned to cover the unloading of the transports on the evening of 13 November) was given the mission that Abe's force had failed to carry out—the bombardment of Henderson Field. The battleship Kirishima, after abandoning its rescue effort of Hiei on the morning of 13 November, steamed north between Santa Isabel and Malaita Islands with her accompanying warships to rendezvous with Kondo's Second Fleet, inbound from Truk, to form the new bombardment unit.[81]
The 8th Fleet cruiser force, under the command of Mikawa, included the heavy cruisers Chōkai, Kinugasa, Maya, and Suzuya, the light cruisers Isuzu and Tenryū, and six destroyers. Mikawa's force was able to slip into the Guadalcanal area uncontested, the battered U.S. naval force having withdrawn. Suzuya and Maya, under the command of Shōji Nishimura, bombarded Henderson Field while the rest of Mikawa's force cruised around Savo Island, guarding against any U.S. surface attack (which in the event did not occur).[82] The 35-minute bombardment caused some damage to various aircraft and facilities on the airfield but did not put it out of operation.[83] The cruiser force ended the bombardment around 02:30 on 14 November and cleared the area to head towards Rabaul on a course south of the New Georgia island group.[84]
At daybreak, aircraft from Henderson Field, Espiritu Santo, and Enterprise—stationed 200 nmi (230 mi; 370 km) south of Guadalcanal—began their attacks, first on Mikawa's force heading away from Guadalcanal, and then on the transport force heading towards the island.[85] The attacks on Mikawa's force sank Kinugasa, killing 511 of her crew, and damaged Maya, forcing her to return to Japan for repairs.[86] Repeated air attacks on the transport force overwhelmed the escorting Japanese fighter aircraft, sank six of the transports, and forced one more to turn back with heavy damage (it later sank). Survivors from the transports were rescued by the convoy's escorting destroyers and returned to the Shortlands. A total of 450 army troops were reported to have perished. The remaining four transports and four destroyers continued towards Guadalcanal after nightfall of 14 November, but stopped west of Guadalcanal to await the outcome of a warship surface action developing nearby (see below) before continuing.[87]
Kondo's ad hoc force rendezvoused at Ontong Java on the evening of 13 November, then reversed course and refueled out of range of Henderson Field's bombers on the morning of 14 November. The U.S. submarine Trout stalked but was unable to attack Kirishima during refueling. The bombardment force continued south and came under air attack late in the afternoon of 14 November, during which they were also attacked by the submarine Flying Fish, which launched five torpedoes (but scored no hits) before reporting its contact by radio.[88][89]
Second Naval Battle of Guadalcanal, 14–15 November
Prelude

Kondo's force approached Guadalcanal via Indispensable Strait around midnight on 14 November, and a quarter moon provided moderate visibility of about 7 km (3.8 nmi; 4.3 mi).[91] The force included Kirishima, heavy cruisers Atago and Takao, light cruisers Nagara and Sendai, and nine destroyers, some of the destroyers being survivors (along with Kirishima and Nagara) of the first night engagement two days prior. Kondo flew his flag in the cruiser Atago.[92]
Low on undamaged ships, Admiral William Halsey, Jr., detached the new battleships Washington and South Dakota, of Enterprise's support group, together with four destroyers, as TF 64 under Admiral Willis A. "Ching" Lee to defend Guadalcanal and Henderson Field. It was a scratch force; the battleships had operated together for only a few days, and their four escorts were from four different divisions—chosen simply because, of the available destroyers, they had the most fuel.[93] The U.S. force arrived in Ironbottom Sound in the evening of 14 November and began patrolling around Savo Island. The U.S. warships were in column formation with the four destroyers in the lead, followed by Washington, with South Dakota bringing up the rear. At 22:55 on 14 November, radar on South Dakota and Washington began picking up Kondo's approaching ships near Savo Island, at a distance of around 18,000 m (20,000 yd).[94]
Action
Kondo split his force into several groups, with one group—commanded by Shintaro Hashimoto and consisting of Sendai and destroyers Shikinami and Uranami ("C" on the maps)—sweeping along the east side of Savo Island, and destroyer Ayanami ("B" on the maps) sweeping counterclockwise around the southwest side of Savo Island to check for the presence of Allied ships.[95] The Japanese ships spotted Lee's force around 23:00, though Kondo misidentified the battleships as cruisers. Kondo ordered the Sendai group of ships—plus Nagara and four destroyers ("D" on the maps)—to engage and destroy the U.S. force before he brought the bombardment force of Kirishima and heavy cruisers ("E" on the maps) into Ironbottom Sound.[90] The U.S. ships ("A" on the maps) detected the Sendai force on radar but did not detect the other groups of Japanese ships. Using radar targeting, the two U.S. battleships opened fire on the Sendai group at 23:17. Admiral Lee ordered a cease fire about five minutes later after the northern group disappeared from his ship's radar. However, Sendai, Uranami, and Shikinami were undamaged and circled out of the danger area.[96]
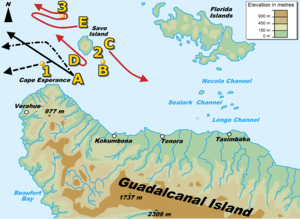
Meanwhile, the four U.S. destroyers in the vanguard of the U.S. formation began engaging both Ayanami and the Nagara group of ships at 23:22. Nagara and her escorting destroyers responded effectively with accurate gunfire and torpedoes, and destroyers Walke and Preston were hit and sunk within 10 minutes with heavy loss of life. The destroyer Benham had part of her bow blown off by a torpedo and had to retreat (she sank the next day), and destroyer Gwin was hit in her engine room and put out of the fight.[98] However, the U.S. destroyers had completed their mission as screens for the battleships, absorbing the initial impact of contact with the enemy, although at great cost. Lee ordered the retirement of Benham and Gwin at 23:48.[99]
Washington passed through the area still occupied by the damaged and sinking U.S. destroyers and fired on Ayanami with her secondary batteries, setting her afire. Following close behind, South Dakota suddenly suffered a series of electrical failures, reportedly during repairs when her chief engineer locked down a circuit breaker in violation of safety procedures, causing her circuits repeatedly to go into series, making her radar, radios, and most of her gun batteries inoperable. However, she continued to follow Washington towards the western side of Savo Island until 23:35, when Washington changed course left to pass to the southward behind the burning destroyers. South Dakota tried to follow but had to turn to starboard to avoid Benham, which resulted in the ship being silhouetted by the fires of the burning destroyers and made her a closer and easier target for the Japanese.[100]
Receiving reports of the destruction of the U.S. destroyers from Ayanami and his other ships, Kondo pointed his bombardment force towards Guadalcanal, believing that the U.S. warship force had been defeated. His force and the two U.S. battleships were now heading towards each other.[101]
Almost blind and unable to effectively fire her main and secondary armament, South Dakota was illuminated by searchlights and targeted by gunfire and torpedoes by most of the ships of the Japanese force, including Kirishima, beginning around midnight on 15 November. Although able to score a few hits on Kirishima, South Dakota took 26 hits—some of which did not explode—that completely knocked out her communications and remaining gunfire control operations, set portions of her upper decks on fire, and forced her to try to steer away from the engagement. All of the Japanese torpedoes missed.[102] Admiral Lee later described the cumulative effect of the gunfire damage to South Dakota as to, "render one of our new battleships deaf, dumb, blind, and impotent".[97] South Dakota's crew casualties were 39 killed and 59 wounded, and she turned away from the battle at 00:17 without informing Admiral Lee, though observed by Kondo's lookouts.[103][104]
_firing_during_the_Second_Naval_Battle_of_Guadalcanal%2C_14_November_1942.jpg)
The Japanese ships continued to concentrate their fire on South Dakota and none detected Washington approaching to within 9,000 yd (8,200 m). Washington was tracking a large target (Kirishima) for some time but refrained from firing since there was a chance it could be South Dakota. Washington had not been able to track South Dakota's movements because she was in a blind spot in Washington's radar and Lee could not raise her on the radio to confirm her position. When the Japanese illuminated and fired on South Dakota, all doubts were removed as to which ships were friend or foe. From this close range, Washington opened fire and quickly hit Kirishima with at least nine (and possibly up to 20) main battery shells and at least seventeen secondary ones, disabling all of Kirishima's main gun turrets, causing major flooding, and setting her aflame.[N 1] Kirishima was hit below the waterline and suffered a jammed rudder, causing her to circle uncontrollably to port.[107]
At 00:25, Kondo ordered all of his ships that were able to, to converge and destroy any remaining U.S. ships. However, the Japanese ships still did not know where Washington was, and the other surviving U.S. ships had already departed the battle area. Washington steered a northwesterly course toward the Russell Islands to draw the Japanese force away from Guadalcanal and the presumably damaged South Dakota. The Imperial ships finally sighted Washington and launched several torpedo attacks, but she avoided all of them and also avoided running aground in shallow waters. At length, believing that the way was clear for the transport convoy to proceed to Guadalcanal (but apparently disregarding the threat of air attack in the morning), Kondo ordered his remaining ships to break contact and retire from the area about 01:04, which most of the Japanese warships complied with by 01:30.[108]
Aftermath
Ayanami was scuttled by Uranami at 2:00, while Kirishima capsized and sank by 03:25 on 15 November.[109] Uranami rescued survivors from Ayanami and destroyers Asagumo, Teruzuki, and Samidare rescued the remaining crew from Kirishima.[110] In the engagement, 242 U.S. and 249 Japanese sailors died.[111] The engagement was one of only two battleship-against-battleship surface battles in the entire Pacific campaign of World War II, the other being at the Surigao Strait during the Battle of Leyte Gulf.
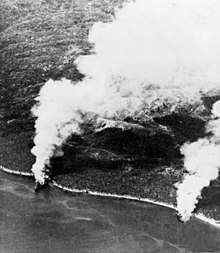
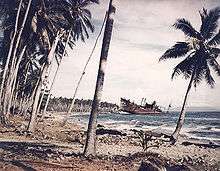
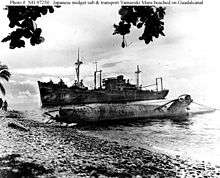
The four Japanese transports beached themselves at Tassafaronga on Guadalcanal by 04:00 on 15 November, and Tanaka and the escort destroyers departed and raced back up the Slot toward safer waters. The transports were attacked, beginning at 05:55, by U.S. aircraft from Henderson Field and elsewhere, and by field artillery from U.S. ground forces on Guadalcanal. Later, destroyer Meade approached and opened fire on the beached transports and surrounding area. These attacks set the transports afire and destroyed any equipment on them that the Japanese had not yet managed to unload. Only 2,000 to 3,000 of the embarked troops made it to Guadalcanal, and most of their ammunition and food were lost.[112]
Yamamoto's reaction to Kondo's failure to accomplish his mission of neutralizing Henderson Field and ensuring the safe landing of troops and supplies was milder than his earlier reaction to Abe's withdrawal, perhaps because of Imperial Navy culture and politics.[113] Kondo, who also held the position of second in command of the Combined Fleet, was a member of the upper staff and battleship "clique" of the Imperial Navy while Abe was a career destroyer specialist. Admiral Kondo was not reprimanded or reassigned but instead was left in command of one of the large ship fleets based at Truk.[114]
Significance
The failure to deliver to Guadalcanal most of the troops and especially supplies in the convoy prevented the Japanese from launching another offensive to retake Henderson Field. Thereafter, the Imperial Navy was only able to deliver subsistence supplies and a few replacement troops to Japanese Army forces on Guadalcanal. Because of the continuing threat from Allied aircraft based at Henderson Field, plus nearby U.S. aircraft carriers, the Japanese had to continue to rely on Tokyo Express warship deliveries to their forces on Guadalcanal. However, these supplies and replacements were not enough to sustain Japanese troops on the island, who – by 7 December 1942 – were losing about 50 men each day from malnutrition, disease, and Allied ground and air attacks. On 12 December, the Japanese Navy proposed that Guadalcanal be abandoned. Despite opposition from Japanese Army leaders, who still hoped that Guadalcanal could be retaken from the Allies, Japan's Imperial General Headquarters—with approval from the Emperor—agreed on 31 December to the evacuation of all Japanese forces from the island and establishment of a new line of defense for the Solomons on New Georgia.[115]
Thus, the Naval Battle of Guadalcanal was the last major attempt by the Japanese to seize control of the seas around Guadalcanal or to retake the island. In contrast, the U.S. Navy was thereafter able to resupply the U.S. forces at Guadalcanal at will, including the delivery of two fresh divisions by late December 1942. The inability to neutralize Henderson Field doomed the Japanese effort to successfully combat the Allied conquest of Guadalcanal.[75] The last Japanese resistance in the Guadalcanal campaign ended on 9 February 1943, with the successful evacuation of most of the surviving Japanese troops from the island by the Japanese Navy in Operation Ke. Building on their success at Guadalcanal and elsewhere, the Allies continued their campaign against Japan, which culminated in Japan's defeat and the end of World War II. U.S. President Franklin Roosevelt, upon learning of the results of the battle, commented, "It would seem that the turning point in this war has at last been reached."[116]
Historian Eric Hammel sums up the significance of the Naval Battle of Guadalcanal this way:
On November 12, 1942, the (Japanese) Imperial Navy had the better ships and the better tactics. After November 15, 1942, its leaders lost heart and it lacked the strategic depth to face the burgeoning U.S. Navy and its vastly improving weapons and tactics. The Japanese never got better while, after November 1942, the U.S. Navy never stopped getting better.[117]
General Alexander Vandegrift, the commander of the troops on Guadalcanal, paid tribute to the sailors who fought the battle:
We believe the enemy has undoubtedly suffered a crushing defeat. We thank Admiral Kinkaid for his intervention yesterday. We thank Lee for his sturdy effort last night. Our own aircraft has been grand in its relentless hammering of the foe. All those efforts are appreciated but our greatest homage goes to Callaghan, Scott and their men who with magnificent courage against seemingly hopeless odds drove back the first hostile attack and paved the way for the success to follow. To them the men of Cactus lift their battered helmets in deepest admiration.[118]
Notes
Footnotes
- The number of actual hits is a matter of conjecture. USS Washington observed eight main battery hits. The US Strategic Bombing Survey estimated nine major caliber and 40 secondary battery hits based on one postwar interview with a junior officer. Kirishima's damage control officer identified twenty main battery hits and 17 five inch hits on a schematic drawing, including several underwater hits which would have been invisible to Washington. Examination of the wreck has confirmed the location of three of these underwater hits, lending credence to his account.[106]
Citations
- Frank, Guadalcanal, p. 490; and Lundstrom, Guadalcanal Campaign, p. 523.
- Frank, Guadalcanal, p. 490. Frank's breakdown of Japanese losses includes only 450 soldiers on the transports, "a figure no American flier would have believed", p. 462, but cites Japanese records for this number.
Miller, in Guadalcanal: The First Offensive (1948) Archived 23 July 2010 at the Wayback Machine, cites "USAFISPA, Japanese Campaign in the Guadalcanal Area, 29–30, estimates that 7,700 troops had been aboard, of whom 3,000 drowned, 3,000 landed on Guadalcanal, and 1,700 were rescued." Frank's number is used here instead of Miller. Aircraft losses from Lundstrom, Guadalcanal Campaign, p. 522. - Hogue, Pearl Harbor to Guadalcanal, pp. 235–236.
- Morison, Struggle for Guadalcanal, pp. 14–15; Miller, Guadalcanal: The First Offensive, p. 143; Frank, Guadalcanal, p. 338; and Shaw, First Offensive, p. 18.
- Griffith, Battle for Guadalcanal, pp. 96–99; Dull, Imperial Japanese Navy, p. 225; Miller, Guadalcanal: The First Offensive, pp. 137–138.
- Frank, Guadalcanal, pp. 202, 210–211.
- Frank, Guadalcanal, pp. 141–143, 156–158, 228–246, & 681.
- Frank, Guadalcanal, pp. 315–3216; Morison, Struggle for Guadalcanal, pp. 171–175; Hough, Pearl Harbor to Guadalcanal, pp. 327–328.
- Frank, Guadalcanal, 337–367.
- Hara, Japanese Destroyer Captain, 134–135.
- Hammel, Guadalcanal: Decision at Sea, pp. 44–45.
- Morison, Struggle for Guadalcanal, pp. 225–238; Hammel, Guadalcanal: Decision at Sea, pp. 41–46. The 11 transport ships provided to carry the troops, equipment, and provisions included Arizona Maru, Kumagawa Maru, Sado Maru, Nagara Maru, Nako Maru, Canberra Maru, Brisbane Maru, Kinugawa Maru, Hirokawa Maru, Yamaura Maru, and Yamatsuki Maru.
- Hammel, Guadalcanal: Decision at Sea, p. 93.
- Hammel, Guadalcanal: Decision at Sea, p. 28.
- Hammel, Guadalcanal: Decision at Sea, p. 37.
- Kilpatrick, Naval Night Battles, pp. 79–80; Hammel, Guadalcanal: Decision at Sea, pp. 38–39; Morison, Struggle for Guadalcanal, pp. 227–233, 231–233; Frank, Guadalcanal, pp. 429–430. The American reinforcements totaled 5,500 men and included the 1st Marine Aviation Engineer Battalion, replacements for ground and air units, the 4th Marine Replacement Battalion, two battalions of the U.S. Army's 182nd Infantry Regiment, and ammunition and supplies. The first transport group, TF 67.1, was commanded by Captain Ingolf N. Kiland and included McCawley, Crescent City, President Adams, and President Jackson. The second transport group, part of Task Group 62.4 (TG 62.4), consisted of Betelgeuse, Libra, and Zeilin.
- Frank, Guadalcanal, p. 432; Hammel, Guadalcanal: Decision at Sea, pp. 50–90; Morison, Struggle for Guadalcanal, pp. 229–230.
- Morison, Struggle for Guadalcanal, p. 234; Frank, Guadalcanal, p. 428; Hammel, Guadalcanal: Decision at Sea, pp. 92–93. Morison lists only 11 destroyers in Tanaka's convoy escort group, namely: Hayashio, Oyashio, Kagerō, Umikaze, Kawakaze, Suzukaze, Takanami, Makinami, Naganami, Amagiri, and Mochizuki. Tanaka states that there were 12 destroyers (Evans, Japanese Navy, p. 188).
- Morison, Struggle for Guadalcanal, pp. 233–234; Hammel, Guadalcanal: Decision at Sea, pp. 103–105. Rear Admiral Susumu Kimura commanded Destroyer Squadron 10, including Amatsukaze, Yukikaze, Akatsuki, Ikazuchi, Inazuma, and Teruzuki from Nagara. Rear Admiral Tamotsu Takama commanded Destroyer Squadron 4 which included Asagumo, Murasame, Samidare, Yūdachi, and Harusame.
- Frank, Guadalcanal, p. 429.
- Morison, Struggle for Guadalcanal, p. 235; Hara, Japanese Destroyer Captain, p. 137.
- Kilpatrick, Naval Night Battles, pp. 83–85; Morison, Struggle for Guadalcanal, pp. 236–237; Hammel, Guadalcanal: Decision at Sea, p. 92. Turner and the transport ships safely reached Espiritu Santo on 15 November.
- Hammel, Guadalcanal: Decision at Sea, p. 99–107.
- Hara, Japanese Destroyer Captain, pp. 137–140; Morison, Struggle for Guadalcanal, pp. 238–239.
- Kilpatrick, Naval Night Battles, p. 85; Morison, Struggle for Guadalcanal, p. 237; Hammel, Guadalcanal: Decision at Sea, pp. 106–108. In Callaghan's column the distance between the destroyers and cruisers was 800 yd (730 m); between cruisers 700 yd (640 m); between destroyers 500 yd (460 m)
- Calendar-12.com; moon phases, 1942. http://www.calendar-12.com/moon_phases/1942 Archived 6 April 2016 at the Wayback Machine retvd 10 26 15
- Frank, Guadalcanal, pp. 437–438.
- Kilpatrick, Naval Night Battles, pp. 86–89; Hammel, Guadalcanal: Decision at Sea, pp. 124–126; Morison, Struggle for Guadalcanal, pp. 239–240.
- Frank, Guadalcanal, p. 438.
- Hara, Japanese Destroyer Captain, p. 140.
- Kilpatrick, Naval Night Battles, pp. 89–90; Morison, Struggle for Guadalcanal, pp. 239–242; Hammel, Guadalcanal: Decision at Sea, p. 129.
- Frank, Guadalcanal, p. 439.
- Kilpatrick, Naval Night Battles, pp. 90–91; Hammel, Guadalcanal: Decision at Sea, pp. 132–137; Morison, Struggle for Guadalcanal, pp. 242–243.
- Frank, Guadalcanal, p. 441.
- Morison, Struggle for Guadalcanal, pp. 242–243; Hammel, Guadalcanal: Decision at Sea, pp. 137–183; and Frank, Guadalcanal, p. 449. Only eighteen crewmen out of a total complement of 197 (combinedfleet.com) survived the sinking of Akatsuki and were later captured by U.S. forces. One of Akatsuki's survivors, Michiharu Shinya, wrote a book called The Path From Guadalcanal which states that his ship did not fire a torpedo before sinking. Shinya's book has not been translated into English from Japanese.
- Hammel, Guadalcanal: Decision at Sea, pp. 150–159.
- Kilpatrick, Naval Night Battles, pp. 96–97, 103; Morison, Struggle for Guadalcanal, pp. 246–247; Frank, Guadalcanal, p. 443.
- Morison, Struggle for Guadalcanal, p. 244; Hammel, Guadalcanal: Decision at Sea, pp. 132–136.
- Morison, Struggle for Guadalcanal, p. 244; Hammel, Guadalcanal: Decision at Sea, pp. 137–141. Jameson, The Battle of Guadalcanal, p. 22 says, "Only by speeding up did the Laffey manage to cross the enemy's bows with a few feet (metres) to spare."
- Morison, Struggle for Guadalcanal, p. 244; Hara, Japanese Destroyer Captain, p. 146.
- Hara, Japanese Destroyer Captain, p. 148.
- Hammel, Guadalcanal: Decision at Sea, pp. 142–149; Morison, Struggle for Guadalcanal, pp. 244–245.
- Frank, Guadalcanal, p. 444.
- Hammel, Guadalcanal: Decision at Sea, pp. 160–171; Morison, Struggle for Guadalcanal, p. 247.
- Hiei ship history at CombinedFleet.com Archived 14 May 2019 at the Wayback Machine, 0154 13 November 1942 entry
- Hammel, Guadalcanal: Decision at Sea, p. 234.
- Hammel, Guadalcanal: Decision at Sea, p. 246; and Hara, Japanese Destroyer Captain, p. 146.
- Hammel, Guadalcanal: Decision at Sea, pp. 180–190.
- Hammel, Guadalcanal: Decision at Sea.
- Hara, Japanese Destroyer Captain, pp. 146–147.
- Morison, Struggle for Guadalcanal, p. 244; Hammel, Guadalcanal: Decision at Sea, pp. 191–201.
- Morison, Struggle for Guadalcanal, pp. 247–248; Hammel, Guadalcanal: Decision at Sea, pp. 172–178.
- Hara, Japanese Destroyer Captain, pp. 144–146; Morison, Struggle for Guadalcanal, p. 249.
- Kilpatrick, Naval Night Battles, p. 94; Morison, Struggle for Guadalcanal, p. 248; Hammel, Guadalcanal: Decision at Sea, pp. 204–212.
- Kilpatrick, Naval Night Battles, p. 95; Morison, Struggle for Guadalcanal, pp. 249–250; Hammel, Guadalcanal: Decision at Sea, pp. 213–225, 286.
- Frank, Guadalcanal, p. 449.
- Hara, Japanese Destroyer Captain, p. 149.
- Hara, Japanese Destroyer Captain, p. 147.
- Hammel, Guadalcanal: Decision at Sea, pp. 246–249.
- Hammel, Guadalcanal: Decision at Sea, pp. 250–256.
- Frank, Guadalcanal pp. 451, quoting Leckie's Helmet for my Pillow.
- Miller, The Story of World War II pp. 134–135.
- Frank, Guadalcanal, p. 451.
- Frank, Guadalcanal, pp. 449–450.
- Hara, Japanese Destroyer Captain, p. 153.
- Frank, Guadalcanal, p. 452.
- Hammel, Guadalcanal: Decision at Sea, p. 270.
- Hammel, Guadalcanal: Decision at Sea, p. 272.
- Kilpatrick, Naval Night Battles, p. 98; Frank, Guadalcanal, p. 454.
- Lundstrom, Guadalcanal Campaign
- Kilpatrick, Naval Night Battles, pp. 79 and 97–100; Hammel, Guadalcanal: Decision at Sea, pp. 298–308.
- Hammel, Guadalcanal: Decision at Sea, pp. 298–308; Morison, Struggle for Guadalcanal, pp. 259–160. Enterprise and her escorting warships were designated Task Force 16 (TF 16) and was commanded by Rear Admiral Thomas C. Kinkaid. TF 16 consisted of Enterprise plus battleships Washington and South Dakota, cruisers Northampton and San Diego, and ten destroyers.
- Hammel, Guadalcanal: Decision at Sea, pp. 274–275.
- Kurzman, Left to Die, Frank, Guadalcanal, p. 456; Morison, Struggle for Guadalcanal, p. 257; Kilpatrick, Naval Night Battles, pp. 101–103.
- Hammel, Guadalcanal: Decision at Sea, p. 400.
- Morison, Struggle for Guadalcanal, p. 258.
- Hara, Japanese Destroyer Captain, p. 156.
- Hammel, Guadalcanal: Decision at Sea, p. 401; Hara, Japanese Destroyer Captain, p. 156.
- Frank, Guadalcanal, pp. 459–460.
- Frank, Guadalcanal, p. 461.
- Evans, Japanese Navy, p. 190; Frank, Guadalcanal, p. 465; Hammel, Guadalcanal: Decision at Sea, pp. 298–308, 312; Morison, Struggle for Guadalcanal, p. 259.
- Kilpatrick, Naval Night Battles, pp. 108–109; Morison, Struggle for Guadalcanal, pp. 234, 262; Hammel, Guadalcanal: Decision at Sea, p. 313, combinedfleet.com.
- Hammel, Guadalcanal: Decision at Sea, p. 316; Morison, Struggle for Guadalcanal, p. 263. One dive-bomber and 17 fighter aircraft were destroyed on Henderson Field by the bombardment.
- Kilpatrick, Naval Night Battles, p. 109; Hammel, Guadalcanal: Decision at Sea, p. 318.
- Frank, pp. 465–474; Hammel, pp. 298–345.
- Kilpatrick, Naval Night Battles, p. 110; Morison, Struggle for Guadalcanal, pp. 264–266; Frank, Guadalcanal, p. 465, Hammel, Guadalcanal: Decision at Sea, p. 327; combinedfleet.com. An SBD Dauntless accidentally crashed into Maya, killing 37 of her crewmen and causing heavy damage. Maya was under repair in Japan until 16 January 1943. Kinugasa sank 15 nmi (17 mi; 28 km) south of Rendova Island.
- Evans, Japanese Navy, pp. 191–192; Hammel, Guadalcanal: Decision at Sea, p. 345; Frank, Guadalcanal, pp. 467–468; Morison, Struggle for Guadalcanal, pp. 266–269; Jersey, Hell's Islands, p. 446. In the attacks on the transports the U.S. lost five dive bombers and two fighters and the Japanese lost 13 fighters. The transports sunk were Arizona, Shinanogawa, Sado, Canberra, Nako, Nagara, and Brisbane. Canberra and Nagara were sunk first, with Sado forced to turn back for the Shortlands escorted by Amagiri and Mochizuki. Next, Brisbane was sunk, followed by Shinanogawa, Arizona and Nako. The seven transports totaled 44,855 tons and carried a total of 20 antiaircraft guns.
- "Senkan! IJN Kirishima: Tabular Record of Movement". combined fleet.com. Archived from the original on 25 January 2012. Retrieved 27 November 2006.
- Morison, Struggle for Guadalcanal, p. 271; Frank, Guadalcanal, p. 469, and footnote to Chapter 18, p. 735. Frank states that Morison attributed both submarine contacts to Trout but was in error.
- Frank, Guadalcanal, p. 474.
- Evans, Japanese Navy, p. 193; Hammel, Guadalcanal: Decision at Sea, p. 351, 361.
- Morison, Struggle for Guadalcanal, p. 234; Hammel, Guadalcanal: Decision at Sea, pp. 349–350, 415. The complete Imperial order of battle: battleship Kirishima, heavy cruisers Atago and Takao, light cruisers Nagara and Sendai, and destroyers Hatsuyuki, Asagumo, Teruzuki, Shirayuki, Inazuma, Samidare, Shikinami, Uranami, and Ayanami. Rear Admiral Shintarō Hashimoto commanded Destroyer Squadron 3, consisting of Uranami, Shikiname, and Ayanami from Sendai.
- Morison, Struggle for Guadalcanal, pp. 270–272; Hammel, Guadalcanal: Decision at Sea, pp. 351–352; Frank, Guadalcanal, p. 470.
- Hammel, Guadalcanal: Decision at Sea, pp. 352, 363; Morison, Struggle for Guadalcanal, pp. 270–272.
- Morison, Struggle for Guadalcanal, pp. 234, 273–274; Frank, Guadalcanal, p. 473.
- Kilpatrick, Naval Night Battles, pp. 116–117; Morison, Struggle for Guadalcanal, p. 274; Hammel, Guadalcanal: Decision at Sea, pp. 362–364; Frank, Guadalcanal, p. 475.
- Frank, Guadalcanal, p. 480.
- Kilpatrick, Naval Night Battles, pp. 118–121; Frank, Guadalcanal, pp. 475–477; Morison, Struggle for Guadalcanal, pp. 274–275; Hammel, Guadalcanal: Decision at Sea, p. 368–383.
- Frank, Guadalcanal, p. 478.
- Lippman, Second Naval Battle of Guadalcanal, Frank, Guadalcanal, pp. 477–478; Hammel, Guadalcanal: Decision at Sea, pp. 384–385; Morison, The Struggle for Guadalcanal, pp. 275–277.
- Frank, Guadalcanal, p. 479.
- Morison, The Struggle for Guadalcanal, pp. 277–279, Scan of original report Archived 26 March 2009 at the Wayback Machine. The "Gunfire Damage Report" made by the Bureau of Ships showed 26 damaging hits and can be found at 6th and succeeding photos Archived 22 September 2008 at the Wayback Machine, Hammel, Guadalcanal: Decision at Sea, pp. 385–389.
- Frank, Guadalcanal, p. 482.
- Lippman, Second Naval Battle of Guadalcanal, p. 9. Lee stated he felt "relief", but Capt. Davis of Washington said South Dakota "pulled out" without a word.
- "Photo of Washington firing on Kirishima at NavSource.org". Archived from the original on 31 March 2019. Retrieved 31 March 2019.
- Lundgren, Robert. "Kirishima Damage Analysis" (PDF). www.navweapons.com. The Naval Technical Board. Archived (PDF) from the original on 5 November 2015. Retrieved 20 September 2015. pp. 5–8
- Kilpatrick, Naval Night Battles, pp. 123–124; Morison, The Struggle for Guadalcanal, p. 278; Hammel, Guadalcanal: Decision at Sea, pp. 388–389; Frank, Guadalcanal, p. 481.
- Frank, Guadalcanal, p. 483–484.
- Morison, The Struggle for Guadalcanal, p. 281; Hammel, Guadalcanal: Decision at Sea, p. 391.
- Frank, Guadalcanal, p. 484; Atago, Takao, and Nagara returned to Japan for repairs, with all three being out of action for about one month. Chōkai was repaired at Truk and returned to Rabaul on 2 December 1942. (combinedfleet.com). Gwin and South Dakota were repaired and returned to action a few months later: Gwin in April 1943, and South Dakota in February 1943.
- Frank, Guadalcanal, p. 486.
- Evans, Japanese Navy, pp. 195–197; Morison, The Struggle for Guadalcanal, pp. 282–284; Hammel, Guadalcanal: Decision at Sea, pp. 394–395; Frank, Guadalcanal, pp. 488–490; Jersey, Hell's Islands, pp. 307–308. Morison and Jersey state that 2,000 Japanese soldiers landed with 260 cases of ammunition and 1,500 bags of rice. Lost were provisions for 30,000 men for 20 days, 22,000 artillery shells, thousands of cases of small-arms ammunition, and 76 large and seven small landing craft. Realizing that the transports would not have enough time to unload before daybreak, Tanaka asked permission to run them aground. Mikawa rejected his request, but Kondo accepted it, so Tanaka ordered the transport captains to run their ships aground. The American artillery that shelled the beached transports was from the 244th Coast Artillery Battalion and 3rd Defense Battalion, including two 155 mm (6.1 in) guns and several 5-inch guns.
- Hara, Japanese Destroyer Captain, p. 157.
- Hara, Japanese Destroyer Captain, pp. 157, 171.
- Dull, Imperial Japanese Navy, p. 261; Frank, Guadalcanal, p. 527; Morison, The Struggle for Guadalcanal, pp. 286–287.
- Frank, Guadalcanal, pp. 428–92; Dull, Imperial Japanese Navy, pp. 245–69; Morison, The Struggle for Guadalcanal, pp. 286–287.
- Hammel, Guadalcanal: Decision at Sea, p. 402.
- The wording varies slightly from source to source: USS Cushing Archived 5 February 2007 at the Wayback Machine, Late November 1942 to February 1943: The endgame Archived 30 April 2006 at the Wayback Machine, Commendations for the Men who fought in the Naval Battle for Guadalcanal on November 13th, 1942., Communiqués Archived 29 September 2007 at the Wayback Machine
References
- Dull, Paul S. (1978). A Battle History of the Imperial Japanese Navy, 1941–1945. Naval Institute Press. ISBN 0-87021-097-1.
- Evans, David C. (Editor); Raizo Tanaka (1986). "The Struggle for Guadalcanal". The Japanese Navy in World War II: In the Words of Former Japanese Naval Officers (2nd ed.). Annapolis, Maryland: Naval Institute Press. ISBN 0-87021-316-4.CS1 maint: extra text: authors list (link)
- Frank, Richard B. (1990). Guadalcanal: The Definitive Account of the Landmark Battle. New York: Penguin Group. ISBN 0-14-016561-4.
- Griffith, Samuel B. (1963). The Battle for Guadalcanal. Champaign, Illinois: University of Illinois Press. ISBN 0-252-06891-2.
- Hammel, Eric (1988). Guadalcanal: Decision at Sea: The Naval Battle of Guadalcanal, November 13–15, 1942. (CA): Pacifica Press. ISBN 0-517-56952-3.
- Hara, Tameichi (1961). "Part Three, The "Tokyo Express"". Japanese Destroyer Captain. New York & Toronto: Ballantine Books. ISBN 0-345-27894-1. – Firsthand account of the first engagement of the battle by the captain of the Japanese destroyer Amatsukaze.
- Jameson, Colin G. (1944). "The Battle of Guadalcanal, 11–15 November 1942". Publications Branch, Office of Naval Intelligence, United States Navy (Somewhat inaccurate on the details of actual damage done to and actions by Japanese ships). Retrieved 8 April 2006.
- Jersey, Stanley Coleman (2007). Hell's Islands: The Untold Story of Guadalcanal. College Station, Texas: Texas A&M University Press. ISBN 978-1-58544-616-2.
- Kilpatrick, C. W. (1987). Naval Night Battles of the Solomons. Exposition Press. ISBN 0-682-40333-4.
- Kurzman, Dan (1994). Left to Die: The Tragedy of the USS Juneau. New York: Pocket Books. ISBN 0-671-74874-2.
- Lippman, David H. (2006). "Second Naval Battle of Guadalcanal: Turning Point in the Pacific War". The HistoryNet.com. World War II magazine. Retrieved 26 November 2006.
- Lundgren, Robert (2008). "Question 39/43: Loss of HIJMS Kirishima". Warship International. XLV (4): 291–296. ISSN 0043-0374.
- Lundstrom, John B. (2005). First Team And the Guadalcanal Campaign: Naval Fighter Combat from August to November 1942 (New ed.). Naval Institute Press. ISBN 1-59114-472-8.
- Miller, Donald L.; Commager, Henry Steele (2001). The Story of World War II. New York: Simon and Schuster. ISBN 978-0743227186.
- Morison, Samuel Eliot (1958). "The Naval Battle of Guadalcanal, 12–15 November 1942". The Struggle for Guadalcanal, August 1942 – February 1943, vol. 5 of History of United States Naval Operations in World War II. Boston: Little, Brown and Company. ISBN 0-316-58305-7.
Further reading
- Barham, Eugene Alexander (1988). The 228 days of the United States Destroyer Laffey, DD-459. OCLC 17616581.
- Calhoun, C. Raymond (2000). Tin Can Sailor: Life Aboard the USS Sterett, 1939–1945. Naval Institute Press. ISBN 1-55750-228-5.
- Coombe, Jack D. (1991). Derailing the Tokyo Express. Harrisburg, Pennsylvania: Stackpole. ISBN 0-8117-3030-1.
- D'Albas, Andrieu (1965). Death of a Navy: Japanese Naval Action in World War II. Devin-Adair Pub. ISBN 0-8159-5302-X.
- Fuquea, David C. (18 June 2004). "Commanders and Command Decisions: The Impact on Naval Combat in the Solomon Islands, November 1942" (Academic report). Center for Naval Warfare Studies, Naval War College. Retrieved 4 August 2009.
- Generous, William Thomas, Jr. (2003). Sweet Pea at War: A History of USS Portland (CA-33). University Press of Kentucky. ISBN 0-8131-2286-4.: Online views of selections of the book
- Grace, James W. (1999). Naval Battle of Guadalcanal: Night Action, 13 November 1942. Annapolis, Maryland: Naval Institute Press. ISBN 1-55750-327-3.
- Hone, Thomas C. (1981). "The Similarity of Past and Present Standoff Threats". Proceedings of the U.S. Naval Institute (Vol. 107, No. 9, September 1981). Annapolis, Maryland. pp. 113–116. ISSN 0041-798X.
- Hornfischer, James D. (2011). Neptune's Inferno: The U.S. Navy at Guadalcanal. New York: Bantam Books. ISBN 978-0-553-80670-0.
- Lacroix, Eric; Linton Wells (1997). Japanese Cruisers of the Pacific War. Naval Institute Press. ISBN 0-87021-311-3.
- McGee, William L. (2002). The Solomons Campaigns, 1942–1943: From Guadalcanal to Bougainville – Pacific War Turning Point, Volume 2 (Amphibious Operations in the South Pacific in WWII). BMC Publications. ISBN 0-9701678-7-3.
- Parkin, Robert Sinclair (1995). Blood on the Sea: American Destroyers Lost in World War II. Da Capo Press. ISBN 0-306-81069-7.
- Stafford, Edward P.; Paul Stillwell (Introduction) (2002). The Big E: The Story of the USS Enterprise (reissue ed.). Naval Institute Press. ISBN 1-55750-998-0.
External links
| Wikimedia Commons has media related to Naval Battle of Guadalcanal. |
- Chen, C. Peter (2006). "Guadalcanal Campaign". World War II Database. Archived from the original on 11 December 2008. Retrieved 27 October 2008.
- Hough, Frank O.; Ludwig, Verle E., and Shaw, Henry I., Jr. "Pearl Harbor to Guadalcanal". History of U.S. Marine Corps Operations in World War II. Retrieved 27 October 2008.CS1 maint: multiple names: authors list (link)
- Lippman, David H. (2006). "Battle of Guadalcanal: First Naval Battle in the Ironbottom Sound". HistoryNet.com. World War II magazine. Archived from the original on 16 March 2008. Retrieved 27 October 2008.
- Miller, Jr., John (1949). "Chapter 7. Decision at Sea". Guadalcanal: The First Offensive. United States Army in World War II: The War in the Pacific. United States Army Center of Military History. CMH Pub 5-3. Retrieved 27 October 2008.
- Mohl, Michael (1996–2008). "BB-57 USS South Dakota 1942". NavSource Online Photo Archive. NavSource Naval History. Archived from the original on 22 September 2008. Retrieved 27 October 2008.
- Tully, Anthony P. (1997). "Death of Battleship Hiei: Sunk by Gunfire or Air Attack?". Retrieved 27 October 2008. Article on the battle of Friday the 13th that gives additional details on the demise of Hiei.
