12th Anti-Aircraft Brigade (United Kingdom)
12th Anti-Aircraft Brigade (12 AA Bde) was an air defence formation of the British Army during World War II. It specialised in providing anti-aircraft (AA) protection for forward airfields, for the Advanced Air Striking Force in the Battle of France and the Desert Air Force in the North African Campaign. It landed at Salerno in 1943 and fought through the Italian Campaign, its guns often engaging ground targets as well as aircraft. It was reformed postwar and continued for a few years in Anti-Aircraft Command.
| 12th Anti-Aircraft Brigade | |
|---|---|
| Active | 9 October 1939–20 November 1945 1 January 1947–31 October 1955 |
| Country | |
| Branch | |
| Type | Anti-Aircraft Brigade |
| Role | Air Defence |
| Part of | British Expeditionary Force Eighth Army Anti-Aircraft Command |
| Engagements |
|
| Commanders | |
| Notable commanders | Brigadier Mortimer Wheeler |
Origin
On 9 October 1939 the War Office ordered the formation of a brigade headquarters (HQ) to be responsible for defending the airfields of the Advanced Air Striking Force (AASF) then being assembled in France by the Royal Air Force (RAF). Brigadier W.T.O Crewdson, at that time commanding the Territorial Army's 38th Light Anti-Aircraft Brigade in the London area, was appointed to form the new HQ, which became 12th Anti-Aircraft Brigade. Crewdson and his immediate staff left for France on 11 October while the rest of the HQ assembled at the Duke of York's Headquarters, Chelsea, (HQ of 38 LAA Bde) and landed at Cherbourg on 18 October. By 23 October Brigade HQ was established at Chateau Polignac near the AASF's HQ at Reims. A brigade workshop section of the Royal Army Ordnance Corps (RAOC) was set up at Épernay and a brigade transport section of the Royal Army Service Corps (RASC) was at Reims. The brigade had no signal section yet, its communications being handled by 2nd Air Formation Signals of the Royal Corps of Signals attached to AASF HQ. The first two units to come under 12 AA Bde's command were the 53rd (City of London) and 73rd Anti-Aircraft Regiments of the Royal Artillery, TA units recruited from London and Birmingham respectively. Both units were equipped with semi-mobile 3-inch guns of 1918 pattern[lower-alpha 1] and were deployed to defend the initial five airfields round Reims from which Bristol Blenheims of the AASF began reconnoitring and raiding over Germany.[2][3][4][5][6][7]
Phoney War
There was no action while the British forces in France (the British Expeditionary Force, with its Air Component, and the independent AASF) were building up through the winter of 1939–40. Crewdson deployed 53rd AA Rgt to protect the AASF's northern airfields while 73rd took the southern group. Early in 1940 12 AA Bde was reinforced by 5 AA Battery from 2nd AA Regiment with the new 3.7-inch heavy AA (HAA) guns, and 162 Bty from 54th (Argyll and Sutherland Highlanders) Light AA Regiment with the new Bofors 40 mm light AA (LAA) guns. A battery of searchlights (S/Ls) was distributed across the airfields. The first four GL Mk. I gunlaying radar sets also arrived amidst much secrecy.[8][9]
The first intimation that the Phoney War was about to end came in late April when a lone Junkers Ju 88 bombed a hospital next to Reims Cathedral; it was engaged by British and French AA guns but escaped. From then on bombing raids were frequent. The joint AASF/12 AA Bde HQ received some damage, and 5 AA Bty was deployed to defend AASF HQ.[2]
Order of Battle May 1940
12 AA Brigade had the following dispositions when the Battle of France began in May 1940:[8][10][11][12][13]
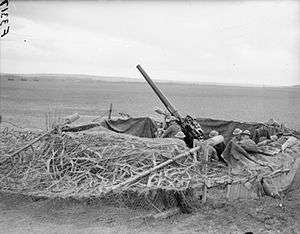
- 53rd (City of London) AA Regiment
- RHQ – Reims
- 157 Bty – 6 x 3-inch at Auberive and Vraux
- 158 Bty – 8 x 3-inch at Juvincourt, La Malmaison and Berry-au-Bac
- 159 Battery – 10 x 3-inch at Bétheniville, La Neuvillette (Reims) and Hauviné
- 73rd AA Regiment
- RHQ – Chouilly
- 209 Battery – 8 x 3-inch at Écury and Athis
- 311 Battery – 8 x 3-inch at Matougues, Saint-Mard-lès-Rouffy and Le Mesnil-sur-Oger
- 210 Bty – detached to 2 AA Bde with the BEF, covering airfields north of the River Somme
- 5 (Independent) AA Bty – 8 x 3.7-inch at Sogny-aux-Moulins and Moutire
- 162/54 LAA Bty – 12 x 40 mm at Rouvres and Vassincourt
- 7 S/L Bty – from 2nd S/L Regiment
- Workshop Section, RAOC – Épernay
- Transport Section, RASC – at Reims
Battle of France
When the German offensive in the west opened on 10 May, 12 AA Bde was not involved in the BEFs advance into Belgium and subsequent retreat after the German Army broke through the Ardennes. However, the AASF flew many missions and took heavy casualties against the Ardennes breakthrough, while its airfields were subjected to dive-bombing and low-level attacks with which the old 3-inch guns and their Vickers Predictor No 1 and height-finders could not cope. At Condé Vraux the Luftwaffe destroyed six of 114 Squadron's Blenheims and damaged the remaining 12, as well as the airfield and petrol dump, putting the whole squadron and airfield out of service at the beginning of the battle, although the ground defences accounted for over half the attacking aircraft.[14] By late May the BEF was cut off and was being evacuated from Dunkirk, while the AASF's airfields were being rolled up by German Army Group A as it advanced to the Somme. The AASF then became a mobile force, moving south to Troyes to continue supporting the French, followed by a further move back to the Blois area. 12 AA Brigade redeployed to defend these new airfields.[2][15]
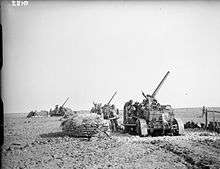
Even after the Dunkirk evacuation ended a number of fighting formations and a large number of rear echelon units were still in France south of the Somme, and fresh British forces were being landed at France's western ports, covered by 3 AA Bde. The AASF's remaining bombers flew back to the UK, while its fighters moved to Nantes to cover this new concentration. 12 AA Brigade set off towards Nantes, its regiments 'trundling their old 3-inch guns at their maximum speed of 10 to 12 mph, though Vendôme, Le Mans and Rennes on the long haul westwards'. Sections of 53rd and 73rd AA Rgts provided temporary cover along the line of retreat.[16][17] On arrival at Nantes 157 and 159 Btys, each with seven guns, and 7 S/L Bty (without searchlights), occupied positions on either side of the River Loire.[18]
On 6 June the brigade was ordered to detach part of 53rd AA Rgt to southern France for an unspecified task. Together with a Troop of 162/54 LAA Bty, 157 and 159 Btys moved 630 miles (1,010 km) to Marseille where they joined 'Haddock Force', manning airfields to launch bombing raids by RAF Wellingtons against Italian targets. However, the surrender of France meant that Haddock Force was evacuated from Marseille to Gibraltar aboard a merchant ship with the remaining Bofors guns mounted on its decks.[18][19]
The situation in France was now beyond remedy, and the British government decided to evacuate its remaining troops from the Atlantic ports between 15 and 17 June (Operation Ariel). Detachments of 73rd AA Rgt maintained temporary cover for 72 hours along the route of the evacuation, and two of its precious GL radar sets were got away from Saint-Nazaire by 79th (Hertfordshire Yeomanry) AA Rgt of 3 AA Bde, but the rest of the equipment had to be destroyed on the dockside. Half of 12 AA Bde HQ embarked at Nantes, the remainder went to La Rochelle where the last vehicles and two GL sets were destroyed.[2][17][16][20]
Personnel embarked under air attack and the RMS Lancastria, with thousands of servicemen and civilians aboard, including half of 12 AA Bde HQ and parties of 53rd and 73rd AA Rgts, was sunk off Saint-Nazaire with heavy loss of life. Three of brigade HQ's men were killed while 15 were pulled from the water, several of them wounded.[2][17][16][20]
Home Defence
The surviving personnel of 12 AA Bde HQ landed at Plymouth and Swansea. Crewdson was ordered to reassemble the HQ at Towyn in North Wales; then moved to Tadcaster in North Yorkshire, where it joined the brigade signal section that had been formed too late for service in France. At Tadcaster the brigade was under Northern Command, which gave it responsibility for some anti-invasion defence measures in Lincolnshire between the Humber and the Wash.[2]
In October 1940 12 AA Bde HQ was ordered to proceed to Paignton and re-mobilise for overseas service. However, embarkation was postponed, and the HQ was instead sent to Coventry to reorganise the AA defences after the devastating air raid of 14/15 November. Embarkation orders were finally received on 1 February 1941 and the headquarters, including the signal section and RASC company, embarked at Gourock, without Brig Crewdson, who had been injured in an accident.[2]
Western Desert

12 AA Brigade HQ arrived at Suez on 23 April and moved up to the Nile Delta. On 5 May Brig B.E. Floyd arrived from Malta, where he had been Brigadier, AA (BAA), to take command. The plan had been for the brigade to go to Greece, but the troops there had already been evacuated, and instead it was given the task of administering the AA personnel returning from Greece and Crete. Finally, on 16 July, 12 AA Bde moved up to join the Western Desert Force (WDF). Floyd was appointed BAA of the WDF, and his brigade was given responsibility for AA defence of the port of Mersa Matruh and several airfields. Air raids took place almost nightly, and the AA defences available were wholly inadequate:[2][4][21][22]
- 23 AA Bty, Hong Kong and Singapore Royal Artillery (HKSRA)
- 63 HAA Bty, RA[lower-alpha 2]
- One S/L Bty
It was later joined by 94th HAA Rgt.
In September 1941 the WDF made a small advance to Halfaya Pass and 12 AA Bde moved up to Sidi Barrani to protect nearby landing grounds (LGs), with 2nd LAA Rgt coming under its command. Eighth Army was now formed to take over from the WDF, and 12 AA Bde became directly responsible to Army HQ. Shortly afterwards the newly-formed Desert Air Force took over the air units. In October 12 AA Bde HQ moved to Sanyat Amad Ali, where it was also given responsibility for protecting the railway that was being extended across the desert. 88th HAA and 27th LAA Rgts came under its command, while Axis aircraft continued to raid. Brigadier Floyd was evacuated sick and replaced by Brig E.G. Campbell.[2][4][23]
Operation Crusader
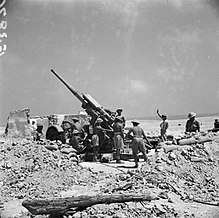
Eighth Army's new offensive into Libya (Operation Crusader) began on 18 November. 12 AA Brigade HQ moved up to Fort Maddelena on the Libyan–Egyptian frontier, and Troops of 2nd LAA Rgt took up positions on new LGs occupied west of the frontier while 27th LAA Rgt covered the Desert Rail Head. General Erwin Rommel's counter-attack caused confusion, with retreating units driving through the LGs and both Eighth Army and 12 AA Bde's HQs. The LGs were evacuated, one Troop of 2nd LAA driving in convoy with advancing German troops, thinking them to be Afrikaans-speaking South Africans. The front was re-established while brigade HQ's clerks manned Boys anti-tank rifles for local defence and Brig J.N. Slater, BAA of Eighth Army, organised a temporary mobile column of LAA guns and light trucks (known as 'Slatforce') to operate behind enemy lines and cause disruption.[2][22][24]
Eighth Army attacked again, capturing Sidi Rezegh and the LGs around Gambut on 23 November. 12 AA Brigade set up at Sidi Rezegh, with HQ personnel assisting in burying the dead. During the move the brigade HQ pennant was lost, so a pair of PT shorts was flown as a marker flag. The garrison of Tobruk, including 4 AA Bde, was relieved a few days later. 12 AA Brigade HQ moved up to an abandoned German camp (nicknamed 'Sidi Loot') on the coast about 20 miles from Tobruk, and its defence platoon combed the coast for stray Germans.[2][22]
In December the brigade left 68th HAA Rgt (ex-4 AA Bde) to defend Benghazi and moved forward to Antelat. Here in mid-January 1942 the LG suffered the fiercest air attack of the campaign so far when 10 German fighter-bombers attacked, destroying several RAF fighters, though the AA guns shot down three attackers. Because of heavy rain, the RAF decided to evacuate Antelat and concentrate at Msus. Brigade HQ was just pulling out when Rommel launched his counter-offensive on 20 January, and the HQ convoy came under shellfire; two troops of 261/94 HAA Bty were unable to move their guns in the mud and they were captured. Reaching Msus that evening, the brigade found the enemy already approaching, so the retreat continued: 12 AA Bde had to abandon the forward LGs and Benghazi, moving back through Gambut to the airfield at El Adem, which was one of the fortified 'boxes' in Eighth Army's Gazala Line.[2][22]
Battle of Gazala

The Battle of Gazala began on 26 May, and Rommel's Axis forces quickly broke into the British position. As 12 AA Bde fell back from the advanced LGs in a series of defensive deployments, its guns joined the garrisons of the boxes, eight 3.7-inch guns of 88th HAA Rgt and Bofors troops of 2nd LAA Rgt joining 29th Indian Infantry Brigade in El Adem. Although the box was isolated by Axis troops, it held out, with the HAA guns in two-gun detachments engaging tanks, vehicles and guns at close range with High explosive, Armour-piercing and Shrapnel shells. The brigade also lent troops of Bofors guns to roving 'Jock columns'. Eventually, Eighth Army was forced to evacuate the boxes and retreat towards Egypt, the garrison of El Adem slipping away during the night of 17 June. Tobruk was captured on 21 June, including 4 AA Bde HQ and a number of 12 AA Bde's detached units (RHQ, 277 and 282 Btys of 88th HAA Rgt, 107 Bty of 27th LAA Rgt). Conversely, 14th (West Lothian, Royal Scots) LAA Rgt of 4 AA Bde was outside the perimeter and. escaped capture: it was 'picked up' by 12 AA Bde during the retreat.[25][26][27][28]
During the long retreat to the El Alamein position, 12 AA Bde, now under Brig Percy Calvert-Jones[4][29] fell back in a series of rearguard actions at LGs, in the course of which it concentrated a sizeable body of troops: 88th and 94th HAA Rgts, 2nd, 14th, 15th (Isle of Man), 16th, 27th and 42nd LAA Rgts, two S/L troops and some motorised infantry. Eighth Army seized upon this collection to act as a blocking force, giving Calvert-Jones two infantry brigades in addition. 'Calforce' held defensive positions at 10 LGs, providing its own artillery support from AA guns sited for ground tasks. It also developed dummy LGs, complete with fake AA positions. Calforce remained in position during the First Battle of El Alamein, had 9th Independent Armoured Bde under its command from 26 August to 8 September, and was not withdrawn from the front line until later in September.[30][31]
Order of Battle, October 1942
After 12 AA Bde was withdrawn from its front line commitments, it reorganised for the planned offensive (the Second Battle of El Alamein) as follows:[32][33][34]
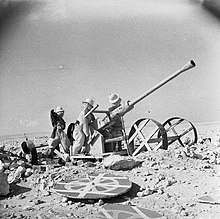
- 88th HAA Rgt
- 281, 283 HAA Btys – 16 x 3.7-inch
- 94th HAA Rgt
- 291 & 292 HAA Btys –16 x 3.7-inch
- 14th LAA Rgt
- 39, 40, 57 LAA Btys – 48 x Bofors
- 16th LAA Rgt
- 45, 46, 83 LAA Btys – 48 x Bofors
- 27th LAA Rgt
- 82, 274 Btys – 32 x Bofors
- 37/13 LAA Bty
- 2 Tps 390 S/L Bty
- 9 Indian Field Company, Indian Engineers
- 12 AA Bde Co, RASC
- 12 AA Bde Workshops, Royal Electrical and Mechanical Engineers (REME) (and regimental workshops)
12 AA Bde was directly subordinate to Eighth Army, which placed 21 Indian Infantry Bde under its command:[34][lower-alpha 3]
- 3/7th Rajput Regiment
- 1/6th Rajput Rifles
- 2/8th Gurkha Rifles
- 21 Indian Infantry Brigade Transport Co, Royal Indian Army Service Corps
- 29 Indian Field Ambulance, Indian Medical Service
- 21 Indian Infantry Brigade Ordnance Co, Indian Army Ordnance Corps
- 49 Indian Field Post Office
Alamein to Tunis
12 AA Brigade's role once again was to move up behind Eighth Army's advance and defend the DAF's LGs as they came into use, with batteries working under the command of the DAF tactical wing to which they were allocated. The 11-day battle to break through the Axis lines opened on 23 October, and after the break-out the airfields at Gambut and El Adem were quickly secured, 12 AA Bde's units following close behind. The brigade developed an efficient system of providing rolling support for the DAF's tactical wings as they made long shifts forwards to maintain contact with the advancing army. This involved the RAF, Royal Engineers (RE) airfield construction teams, and local ground defence units as well as the AA units; all were represented in the joint reconnaissance parties that followed closely behind the leading battalions. They selected new sites for landing strips or renovated old ones, maintaining radio contact through RAF or RA channels with the main body so that movement orders could be passed to the following AA batteries. Movement was usually by 'leap frogging' from previously occupied LGs, though sometimes an AA battery was waiting in a hidden concentration area ready to move forward. RAF transport aircraft flew ground staff, equipment and battery staffs to the new locations. Within a few hours the AA positions were manned and the fighter squadrons would arrive. 12 AA Brigade had 20–30 separate convoys moving on any given day, and by November it was providing cover for six RAF wings and one US Army Air Force (USAAF) Group, and also manning dummy airstrips, compete with flare-paths, aircraft, flash simulators and people. As the advance progressed the retreating Germans took greater pains to make abandoned LGs unusable; at one field near 'Marble Arch', 2000 mines had to be lifted by the RA/RE/RAF teams. On 21 January two squadrons of RAF Kittyhawk fighters prevented the enemy from ploughing up Castel Benito airfield.[2][35][36]
12 AA Brigade followed Eighth Army all the way to Tripoli, which fell on 23 January 1943. By now, the brigade had 57th (Wessex) HAA Rgt (16 x 3-inch; 8 x 3.7-inch), 88th HAA Rgt (16 x 3.7-inch), 14th LAA Rgt (36 x Bofors), 16th LAA Rgt (24 x Bofors) and 27th LAA Rgt (48 x Bofors), with responsibility for Castel Benito, Buerat, Hamriet and various LGs, while 2 AA Bde followed up behind to protect the lines of communication, taking over responsibility for 94th HAA Rgt in Tripoli.[36]
The last phase of Eighth Army's operations in North Africa was the advance from Tripoli into Tunisia. 12 AA Brigade continued to conduct airfield defence, against increasing opposition. The typical mobile group allocated to an airfield contained one HAA and two LAA batteries. To avoid detection, the groups moved by night, being allotted special priority for routes. For the Battle of the Mareth Line in late March 1943 12 AA Bde covered nine forward LGs for five RAF wings, all within 20 miles (32 km) of enemy positions. The AA batteries were sited to engage potential attacks by tanks as well as aircraft, and to be tightly integrated with the ground defence units. If the airfield was considered especially vulnerable to enemy ground attack, an inner 'Keep' was formed between the runways with HAA guns in two-gun positions interlaced with Bofors guns. Air raid engagements could be complicated by the presence of friendly aircraft using the airfield. After Mareth the units of 12 AA Bde also began to take on responsibility for ports on the Tunisian coast. The RA regimental historian records that '[i]t became a point of honour for AA batteries to be among the first in; at Gabès, for instance, RHQ 88th HAA Regiment, with one HAA and three LAA batteries, entered the town two hours after its capture'. The advance ended with 12 AA Bde at Enfidaville when the Axis surrendered on 13 May 1943, after seven months and 1,500 miles (2,400 km) of continuous movement. The AA gunners began a programme of rest and refitting, while contributing to the AA defence of the ports from which the Allied invasion of Sicily (Operation Husky) was launched. 12 AA Brigade was not involved in 'Husky', but under the command of the leading archaeologist and TA gunner officer, Brig Mortimer Wheeler, who took over from Calvert-Jones on 30 April, it was given a leading role in Operation Buttress (later renamed Operation Avalanche), the Allied landings at Salerno on mainland Italy in September.[2][4][37][38]
Italy
Order of Battle September 1943
On 25 July 1943 12 AA Bde came under the command of X Corps and began to concentrate around Tripoli. By the time 'Avalanche' was launched on 9 September the brigade had the following organisation:[39][40]
- 9th (Londonderry) HAA Rgt
- 57th HAA Rgt
- 87th HAA Rgt
- 13th LAA Rgt
- 14th LAA Rgt
- 52nd (East Lancashire) LAA Rgt
- Nos 1 and 2 AA Operations Rooms (AAORs)
In addition, the following units were under command for the initial stages of the operation:
- RHQ and 305 Bty, 100th HAA Rgt – 3.7-inch
- 252/80 HAA Bty – 3-inch
- 258/47 LAA Bty
- 329/99 LAA Bty
- 807 Mobile Smoke Co, Pioneer Corps
- 1991 Smoke Co, Pioneer Corps
Operation Avalanche
The brigade (except 52nd LAA Rgt, due to arrive from the Nile Delta) underwent intensive training in combined operations. X Corps had the task of capturing the Port of Salerno and Montecorvino Airfield, then turning north to capture Naples; 12 AA Bde was to begin landing in the first wave to provide AA cover for the beaches and objectives. For this the brigade organised a number of beach groups:[39][40][41]
- No 3 Beach Group: 279/87 HAA Bty; 122/13 LAA Bty, 1991 Smoke Co
- No 4 Beach Group: 280/87 HAA Bty; 37/13 LAA Bty
- No 21 Beach Group: 252/80 Haa Bty; 258/47 LAA Bty
- No 35 Beach Group: 305/100 HAA Bty; 328/99 LAA Bty, 807 Mobile Smoke Co
- No 2 AAOR to be sited centrally for beach defence
Mindful of problems reported after the Sicily landings, Wheeler ordered his HAA units to take all their GL radar sets with them and to pay particular attention to waterproofing the guns and radar sets. All the equipment was transported on Landing Craft Tank (LCTs) while some of the personnel travelled on Landing Craft Infantry (LCIs). The brigade's convoy sailed from Tripoli on 3 September. The 'Avalanche' convoys were located by the Luftwaffe and attacked from the air during their approach to the beaches. When they began landing on 9 September there was no surprise, and with good observation the German shore defences opened heavy fire on the landing craft, causing casualties and delays in unloading. An LST carrying one of the brigade's batteries was among those hit. All the AA beach groups landed successfully, however, with the first LAA guns reported in action within 20 minutes, and the first HAA battery 2 hours later.[2][39][40][42]
The landings had not been easy. No 35 Beach Group, for example, was landed on 'Sugar Beach', 2,500 yards (2,300 m) long, but with only two 200 yards (180 m) stretches suitable for disembarkation from LSTs. The infantry landed at 03.30, the first AA reconnaissance parties at 05.30, but at dawn it was obvious that one of the two landing stretches was still being contested. Nonetheless, the first AA LST came in at 07.00, the first Bofors came ashore and went straight into action on the beach under shellfire; the first 3.7s came in around midday. USAAF Lightning long-range fighters kept off the early air attacks, but small numbers of Focke-Wulf Fw 190 fighter-bombers made low-level attacks at noon and in the afternoon, one of which was destroyed by 328/99 LAA Bty. A night bombing raid at 22.30 was engaged with barrage fire by 305/100 HAA Bty. By 23.00, 35 Beach Group had 17 Bofors guns ashore, three of them deployed in anti-tank positions, and six 3.7s without radar. That night the rest of the 3.7s arrived and the area behind the beach was cleared for 3,000 yards (2,700 m).[39]
57th HAA Regiment was to land after the beach groups to secure the immediate objectives along with the infantry divisions' LAA:[40]
- Montecorvino Airfield: 214/57 HAA Bty; 331/100 LAA Bty (less one Trp) from 56th (London) Infantry Division and one Trp 379/115 LAA Bty from 46th Infantry Division
- Bridges over the Sele River: One Trp 330/100 LAA Bty (56th (L) Division)
- Salerno Port: 213/57 HAA Bty; No 1 AAOR; reinforced by LAA from the beaches
- Mobile reserve: 215/57 HAA Bty
The first major hitch occurred when Montecorvino Airfield was not captured in the first rush, and continued to be fought over for the next four days. Among the follow-up units on D+1, 14th LAA Rgt's task had been to take over defence of the airfield, but it was not able to deploy its guns there until 13 September (D+4). For 10 days the beachhead battle raged within 3,000 yards (2,700 m) of the shore and it was impossible to implement the second stage of the planned AA deployment. Enemy fighter-bombers attacked in small numbers day and night, and those batteries already in position were heavily engaged in warding off multiple attacks delivered with little warning. The AAOR received inadequate reports from RAF and Royal Navy radar, and had to rely on the batteries' own GL radar plots. 12 AA Brigade's HQ radar instructor controlled AA concentrations covering the inland approaches, and a ring of concentrations over the bay was prepared against torpedo-dropping aircraft. Smokescreens laid by 12 AA Bde's pioneers eased the situation.[2][39][40][43]
In the meantime two batteries of 57th HAA and one of 87th HAA Rgt joined in the fighting to supplement the field and medium artillery with ground fire directed by the infantry divisions' Observation Post (OP) parties. 57th HAA Regiment fired 6000 rounds on enemy positions, road junctions, buildings and troops. The AA gunners proved expert at placing their rounds to burst at tree-top height. When a German armoured counter-thrust broke through the right flank of X Corps during the night of 15/16 September, 12 AA Bde was urgently called upon to help out. Wheeler went down to the beach where 9th HAA and 52nd LAA Rgts were landing, and formed a 400-strong infantry force ('Gunnerforce') from them, equipped with rifles and a large number of automatic weapons, under the command of Lt-Col Patrick Dayrell-Browning of 52nd LAA Rgt. This group moved up near Montecorvino and deployed along the road and railway. At 03.00 the 25 HAA Bty group under Maj Sir Basil McFarland opened fire on enemy patrols infiltrating along the railway. The situation having been restored, Gunnerforce was relieved the following morning but remained on hand for the next four days as a mobile reserve, attached first to the motorised 1/6th Battalion Queen's Regiment and then to 5th Royal Tank Regiment. 12 AA Brigade's Tactical HQ moved next to X Corps' HQ at Pontecagnano, but on 16 September it was mortared out of this position.[2][39][40][44]
On 17 September the brigade sent 195/52 LAA Bty to protect landing beaches at Maiori where 23rd Armoured Brigade was making a 'left hook' round the Sorrento Peninsula, and next another was placed to protect the medium guns of 2nd Army Group Royal Artillery (AGRA).[39][40] The battle for the Salerno beachhead went on for 10 days before the Germans began to withdraw slowly to a position north of the Volturno river.[39][45]
According to the RA regimental history, 'the regiments of 12th AA Brigade were, by now, raring to go on the long-planned move to Naples. Brigadier Wheeler, indeed, prepared a scheme to break out with a column of AA troops along the coast to Pompeii', but the bold plan was vetoed by X Corps.[46] On 26 September 12 AA Bde was relieved at Salerno by 45th US AA Brigade and left for Naples. Part of the brigade drove through the traffic-clogged Maiori Pass, suffering casualties from mortar fire, while the remainder re-embarked on LSTs for the short voyage to Castellammare di Stabia.[2][39][40]
Defence of Naples
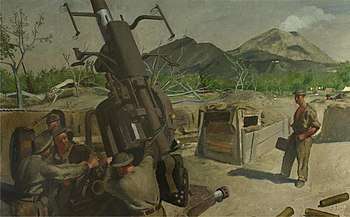
The brigade's units began to arrive in Naples on 1 October and by 5 October they were deployed around the Bay of Naples in the area Naples–Castellammare–Torre Annunziata, with brigade HQ in the Royal Palace in Naples.[2] As well as the vital port, the vulnerable area included the airfields at Pomigliano and Capodichino, for which the resources available were inadequate:
Naples
- AA Defence Commander (AADC): Lt-Col Lachlan Aitken (9th HAA Rgt)
- 9th HAA Rgt
- 215/57 HAA Bty
- 52nd LAA Rgt
- 37/13 LAA Bty
- 1 AAOR
- 807 Smoke Co
- 997 Barrage Ballon Squadron, RAF
Capodichino and Pomigliano
- AADC: Lt-Col William McEwan Younger (14th LAA Rgt)
- 213 and 214/57 HAA Btys
- 14th LAA Rgt
- 258/47 LAA Bty
- 2 AAOR
The brigade experienced difficulties in finding suitable gun and GL radar sites, some of which had to be bulldozed, and in establishing communications. The airfields were not cleared of the enemy until 6 October. For the first few days early warning depended on the batteries' own GL radar sets; later the HQ ship HMS Hilary arrived in the bay and was able to pass naval radar information to the AAOR. When Hilary left, the brigade put its own personnel into the local RAF fighter wing's operations room.[39][40]
While at Naples the brigade only experienced one serious raid, of 20+ aircraft. They were kept to the north and west of the harbour by the AA barrage and scored no damage to vital targets but a direct hit on an HAA gun, with 16 killed and 8 wounded; four enemy aircraft were shot down by guns and fighters and a further one by 87th HAA Rgt further north on the River Volturno. The defence of Naples was only intended to be a temporary task for the brigade and lasted three weeks, when 2 AA Bde arrived to relieve it. 12 AA Brigade then moved forwards to rejoin X Corps along the Volturno.[2][39][40]
Volturno to Garigliano
87th HAA Regiment had already moved up to the river on 10 October, with 278 and 279 Btys occupying camouflaged gun pits to conduct counter-battery (CB) fire, joined by 280 Bty on 12 October, the day X Corps began crossing. During the assault crossing, LAA guns were used to sweep the crossing points. Half the smoke company's pioneers were withdrawn to help the RE with bridging, but two US smoke companies were later added. Next, 87th HAA Rgt's batteries moved up to provide AA protection to the engineers' bridges, with 252/80 HAA Bty arriving on 17 October to cross the bridge at Capua and take up AA positions on the far side. The Luftwaffe was very active in trying to prevent X Corps' crossing, particularly using Bf 109s and Fw 190s as fighter-bombers, and 252/80 HAA Bty, with its 3-inch guns, was sent to 56th (L) Division's area to deal with Bf 109's flying reconnaissance missions above the range of the division's Bofors guns. On 23 October another air raid on Naples developed, with some bombers taking evasive action over Capua, where three were destroyed by 12 AA Bde's guns. After the rest of the brigade completed its move on 1 November, as well as providing AA cover for routes, bridges, LGs, field gun positions and the Aversa railway yards, it also took on ground firing tasks, 214/57 HAA Bty with 2nd AGRA and 215/57 HAA Bty with 7th Armoured Division laying down harassing fire on the coast road.[2][40][47][48]
Between the landing at Salerno and 1 November, the brigade destroyed 17 enemy aircraft and claimed another 6 'probables', at a cost of 32 killed, 90 wounded, and three missing.[2][40] When Wheeler left on 6 November for an important archaeological posting in India, Lt-Col Gerald Eastwood was promoted from 14th LAA Rgt to command 12 AA Bde.[4][49]
Once across the Volturno, operations slowed down as the Allies faced the German Winter Line. 12 AA Brigade then had a comparatively stable period of deployment until the end of the year, based on Capua, Cancello and Grazzanise, its batteries frequently engaging corps' targets in the forward area with ground fire. In January 1944 the brigade moved forward to cover the assembly areas and ferry sites for the crossing of the Garigliano, while 87th HAA Rgt left, crossing Italy to reinforce 62 AA Bde defending the ports of Bari and Brindisi. On 16 March 12 AA Bde moved up to Venafro, taking over two additional HAA regiments and coming under the command of Eighth Army once more. Its units were still defending the Garigliano bridges against Luftwaffe fighter-bomber attacks, now with GL sets[lower-alpha 4] deployed well forward to supplement the new Local Warning (LW) radar sets in providing the only AA early warning coverage across the front. 57th HAA Regiment, operating in a dual AA/field role, reported a particularly busy time involving 16 AA engagements, in which there were two Category 1 'kills' for the expenditure of 222 rounds, intermixed with firing 10,880 rounds against counter-bombardment and opportunity targets on the ground. Continuous rapid fire led to overheating and twice the usual amount of barrel wear for the guns.[2][48][50]
Cassino to Rome
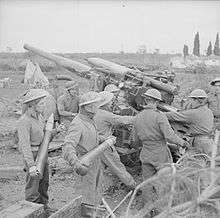
During March and April 1944 12 AA Bde was regrouped for the final assault on Monte Cassino:[2]
Left (Cassino area): XIII Corps
- 5 HAA Btys (dual role)
- 1 LAA Bty
Centre: II Polish Corps
- Polish HAA and LAA
Right (Isernia area): X Corps
- 2 HAA Btys (dual role)
Dumps and routes
- 1 HAA Bty
- 2 LAA Btys
Airfields and routes
- 1 HAA Bty
- 3 LAA Btys
Gun positions along the Garigliano front were under direct enemy observation and had to be screened by smoke. Communications in the mountainous area were difficult, and on X Corps' front the HAA batteries were strung out in a line with gun positions about 5 miles (8.0 km) apart. At one point the gunners of an LAA battery carried supplies up to these gun positions at night and under mortar fire. The guns were also in need of maintenance and spares were short: REME artificers cut the pintles out of the wrecked Naples-Rome express train to replace worn gun pintles, while other spares were fabricated by Royal Navy workshops at Naples.[2]
The renewed attack on Cassino began on the night of 11/12 May, with HAA guns supplementing the artillery barrage (one regiment fired 23,000 rounds in a week), particularly for counter-mortar shoots. The brigade's LAA regiments were committed to bridges, defiles, assembly areas and artillery positions, and enemy aircraft were active in low-level strafing and bombing. There were severe problems in getting the AA guns forward along the heavily congested routes. X Corps in the mountains had little use for HAA guns, requiring LAA to defend vital bridges. XIII Corps, on the other hand, after crossing the Rapido river, advanced along Highway 6 up the Liri Valley (Operation Diadem) on a narrow front, with continual demands for HAA guns in the medium artillery role. 12 AA Bde found itself stretched along 80 miles (130 km) of roads protecting the long 'tail', though the Luftwaffe made only a few nuisance raids. After the breakout from the Anzio beachhead and the capture of Rome in early June, the Germans pulled back to the Gothic Line.[2][48][51]
Order of Battle July 1944
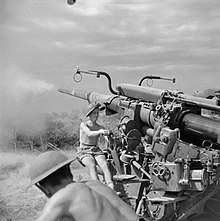
After the capture of Rome, 12 AA Bde provided one HAA battery to each divisional artillery in X Corps, the remainder guarding airfields and river crossings in the Tiber Valley, with the following organisation.[48][52][53]
- 1st HAA Rgt – left by October
- 57th HAA Rgt
- 97th (London Scottish) HAA Rgt
- 14th LAA Rgt
- 52nd LAA Rgt
- 99th LAA Rgt – left by October
- 49 AAOR
In August, 12 AA Bde and its units were transferred to Eighth Army on the Adriatic front. Over the next six months the army advanced only 100 miles (160 km), finally reaching the main Gothic Line positions. During this period the brigade mainly supported II Polish Corps. AA units were hampered by lack of early warning radar, while enemy aircraft were initially very active. However, Luftwaffe activity declined towards the end of the year, and the Allied forces in Italy were suffering an acute manpower shortage, so surplus AA gunners were transferred to other roles (97th HAA and 99th LAA Rgts became infantry) and several units disbanded.[2][48][53][54]
In January 1945 12 Bde HQ moved up to Forli. Its remaining units were spread thinly to defend a large number of roads, ports and railheads for Eighth Army and landing grounds for the DAF. Luftwaffe intrusions were rare, but from April were increasingly made by jet aircraft which were difficult AA targets (the necessary advanced radar, predictors, fuse setters etc all being sent to AA units in North West Europe to deal with V-1 flying bombs).[2]
Order of Battle January 1945
The brigade's organisation during the final months of the war was as follows:[2][53]
- 55th (Kent) HAA Rgt
- 57th HAA Rgt
- 79th HAA Rgt – left by April
- 14th LAA Rgt
- 30th LAA Rgt
- 52nd LAA Rgt
- 323/30 S/L Bty
- 567/30 S/L Bty – joined by April
- 49 AAOR
In addition, 12 AA Bde also had II Polish Corps' HAA and LAA, three Italian LAA batteries and an RAF Regiment LAA battery.
Spring Offensive
Eighth Army began its Spring offensive Operation Grapeshot on 6 April with carpet bombing by aircraft guided by a line of HAA bursts at 15,000 feet (4,600 m) fired by 12 AA Bde's guns. Attacks by the Luftwaffe were now rare, and the AA guns were primarily used for ground firing. Because of an general shortage of ammunition, the 40 mm Bofors guns were tried in ground roles, proving useful in hitting pinpoint targets such as enemy OPs, sniper or mortar positions, and buildings. On 22 April the brigade was given the responsibility for protecting the pontoon bridge built across the River Po. The defence force comprised one HAA and one LAA battery for AA protection, one LAA battery to destroy concrete barges floated down by the Germans to damage the bridge, 12 0.5-inch Brownings manned by HAA gunners, and an S/L troop. Attached to it were an anti-tank battery and a platoon of Vickers guns, while Bren guns and PIATs were deployed to increase firepower. One LAA battery was formed into 'Mystery Force', manning Brownings on landing craft to simulate a night armoured landing operation on the German flank, but this was called off. Another LAA battery after a single week's training manned Oerlikon 20 mm cannons mounted on LVT amphibious vehicles known as 'Fantails' in support of 9th Armoured Brigade's operations around the Comacchio lagoon in Operation Roast.[2][48][55]
As Eighth Army advanced rapidly through northern Italy, 12 AA Brigade moved up to Ferrara where it was ordered to stand down on 1 May; hostilities on the Italian front ended with the Surrender of Caserta the following day. Immediately, the brigade formed a transport column to bring up supplies for the army and collect Prisoners of War (PoWs). From 11 May this was based at Padua, where brigade HQ was also given responsibility for an assortment of other RA units in the area. The AA units settled down to traffic control and guarding installations and PoWs while awaiting demobilisation.[2][48][56] 12 AA Brigade began disbanding at Spilimbergo on 15 November 1945 and the process was complete by 20 November.[3]
Postwar
12 AA Brigade was reformed on 1 January 1947 at South Queensferry to command the Regular units in AA Command's 3 AA Group covering the Clyde and Forth areas of Scotland. (These units had been under 36th (Scottish) AA Bde, which reformed in the TA as 62 AA Bde.) It had the following organisation:[57][58][59]
- 46 LAA Rgt – from RHQ of the wartime 14th LAA Rgt, which had previously served in 12 AA Bde[60][lower-alpha 5]
- 69 HAA Rgt – the wartime 5th HAA Rgt, at Redford Barracks, Edinburgh[62]
- 82 HAA Rgt – the wartime 3rd HAA Rgt, at Edinburgh[63]
- 17 and 18 Fire Control Troops
The 1947 plan was never fully implements. In 1948, 46 LAA Rgt was reformed in the south of England as an HAA regiment[60] and 82 HAA Rgt was disbanded.[63] After AA Command was disbanded on 10 March 1955,[64] 12 AA Bde was placed in suspended animation on 31 October,[3] leaving 69 HAA Rgt to be converted into a medium artillery regiment.[62] 12 AA Brigade was formally disbanded on 31 December 1957.[3]
Footnotes
- At this stage of the war the 3-inch was used in both HAA and LAA roles; airfield protection was normally considered an LAA role, but the old-fashioned manual laying gear of the 3-inch was not suitable for engaging fast targets.[1]
- From the summer of 1940, AA units equipped with 3-inch or 3.7-inch guns were termed Heavy AA (HAA) to distinguish them from the growing number of LAA units.
- This brigade was reforming, and was employed for protecting HQs, camouflage and guard duties.[32]
- These radar sets were spare while their parent HAA gun troops were engaged in ground fire tasks.[2]
- Presumably from war service elements of the regiment, since 14th LAA Rgt was being reformed in the TA as 514th (West Lothian Royal Scots) LAA Rgt.[61]
Notes
- Routledge, p. 50.
- 'The History of HQ 12 AA Brigade 1939–1945', The National Archives (TNA), Kew, file WO 204/7254.
- Frederick, p. 1048.
- Farndale, Annex J.
- Monthly Army List, May 1939.
- Crewdson at General of World War II
- Routledge, pp. 114–6.
- Farndale, pp. 19–20.
- Routledge, Table XVII, p. 125.
- Ellis, Appendix I.
- Farndale, Annex A.
- AASF at RA 39–45.
- Routledge, Table XVIII, p. 126.
- Ellis, Chapter III.
- Routledge, p. 118.
- Ellis, Chapter XXI.
- Routledge, p. 123.
- 53 HAA Regt War Diary 1939–40, TNA file WO 167/617.
- Ellis, Chapter XX.
- Sainsbury, pp. 67–9.
- Floyd at Generals of World War II.
- Routledge, pp. 135–6.
- Campbell at Generals of World War II.
- 27th LAA Rgt War Diary, August–December 1941, TNA file WO 169/1637.
- 107 LAA Bty War Diary January–May 1942, TNA file 169/4937.
- 'List of units captured in Tobruk 21 June 1942', TNA file WO 201/690.
- Playfair, Vol III, pp. 253–5, 273–4.
- Routledge, p. 137.
- Calvert-Jones at Generals of WWII.
- Routledge, pp. 139–40.
- Joslen, pp. 162–3.
- Joslen, p. 566.
- Routledge, Table XXIII, p. 161.
- 'Eighth Army – Order of Battle 5 October 1942', TNA file WO 201/693.
- Playfair & Molony, Vol IV, p. 237.
- Routledge, pp. 155–8; Table XXIV, pp. 162–3.
- Joslen, p. 485.
- Routledge, pp. 159–60, 270; Table XXV, p. 164.
- Routledge, pp. 271–4.
- Brig Mortimer Wheeler, '12 AA Brigade, Report on Operations 1 May 43 to 1 Nov 43: The Salerno Landings and the Advance to the Volturno', TNA file WO 204/7254.
- Molony, p. 259.
- Molony, pp. 273–5.
- Molony, Vol V, p. 298.
- Doherty, pp. 131–2.
- Molony, pp. 289–90.
- Routledge, pp. 273–4.
- Molony, pp. 443–4.
- Routledge, pp. 283–4.
- Eastwood at Generals of WWII.
- Molony, Vol V, pp. 447, 609–12.
- Molony, Vol VI, Pt I, pp, 76–84, 115–26.
- Routledge, Table XLIV, p. 293.
- Routledge, Table XLVII, pp. 296–7.
- Jackson, Vol VI, Pt II, pp. 371–2.
- Jackson, Vol VI, Pt III, pp.215–28, 262–73; Map 16.
- Jackson, Vol VI, Pt III, pp. 315–28.
- Routledge, Table LXXIV, p. 441.
- Watson, TA 1947.
- AA Groups at British Army 1945 on.
- 46 Rgt RA at British Army 1945 on.
- 474–519 Rgts RA at British Army 1945 on.
- 68–75 Rgts RA at British Army 1945 on.
- 81–93 Rgts RA at British Army 1945 on.
- Routledge pp. 439–40.
References
- Richard Doherty, Wall of Steel: The History of 9th (Londonderry) Heavy Anti-Aircraft Regiment, Royal Artillery (Supplementary Reserve), Limavady, Co Londonderry: North-West Books, 1988, ISBN 0-907528-13-9.
- Maj L.F. Ellis, History of the Second World War, United Kingdom Military Series: The War in France and Flanders 1939–1940, London: HM Stationery Office, 1954/Uckfield, Naval & Military Press, 2004.
- Gen Sir Martin Farndale, History of the Royal Regiment of Artillery: The Years of Defeat: Europe and North Africa, 1939–1941, Woolwich: Royal Artillery Institution, 1988/London: Brasseys, 1996, ISBN 1-85753-080-2.
- J.B.M. Frederick, Lineage Book of British Land Forces 1660–1978, Vol II, Wakefield, Microform Academic, 1984, ISBN 1-85117-009-X.
- Gen Sir William Jackson, History of the Second World War, United Kingdom Military Series: The Mediterranean and Middle East, Vol VI: Victory in the Mediterranean, Part I|: June to October 1944, London: HM Stationery Office, 1987/Uckfield, Naval & Military Press, 2004, ISBN 1-845740-71-8.
- Gen Sir William Jackson, History of the Second World War, United Kingdom Military Series: The Mediterranean and Middle East, Vol VI: Victory in the Mediterranean, Part I|I: November 1944 to May 1945, London: HM Stationery Office, 1988/Uckfield, Naval & Military Press, 2004, ISBN 1-845740-72-6.
- Lt-Col H.F. Joslen, Orders of Battle, United Kingdom and Colonial Formations and Units in the Second World War, 1939–1945, London: HM Stationery Office, 1960/Uckfield: Naval & Military Press, 2003, ISBN 1-843424-74-6.
- Brig C.J.C. Molony,History of the Second World War, United Kingdom Military Series: The Mediterranean and Middle East, Vol V: The Campaign in Sicily 1943 and the Campaign in Italy 3rd September 1943 to 31st March 1944, London: HM Stationery Office, 1973/Uckfield, Naval & Military Press, 2004, ISBN 1-845740-69-6.
- Maj-Gen I.S.O. Playfair, History of the Second World War, United Kingdom Military Series: The Mediterranean and Middle East, Vol III: (September 1941 to September 1942) British Fortunes reach their Lowest Ebb, London: HM Stationery Office, 1960 /Uckfield, Naval & Military Press, 2004, ISBN 1-845740-67-X
- Maj-Gen I.S.O. Playfair & Brig C.J.C. Molony, History of the Second World War, United Kingdom Military Series: The Mediterranean and Middle East, Vol IV: The Destruction of the Axis forces in Africa, London: HM Stationery Office, 1966/Uckfield, Naval & Military Press, 2004, ISBN 1-845740-68-8.
- Brig N.W. Routledge, History of the Royal Regiment of Artillery: Anti-Aircraft Artillery 1914–55, London: Royal Artillery Institution/Brassey's, 1994, ISBN 1-85753-099-3
- Col J.D. Sainsbury, The Hertfordshire Yeomanry Regiments, Royal Artillery, Part 2: The Heavy Anti-Aircraft Regiment 1938–1945 and the Searchlight Battery 1937–1945; Part 3: The Post-war Units 1947–2002, Welwyn: Hertfordshire Yeomanry and Artillery Trust/Hart Books, 2003, ISBN 0-948527-06-4.