4th Anti-Aircraft Brigade (United Kingdom)
4th Anti-Aircraft Brigade (4 AA Bde) was an air defence formation of the British Army during World War II. It was formed just before the Battle of France to protect the British Expeditionary Force's bases. After the Dunkirk evacuation it was reformed in Egypt as a mobile formation with the Western Desert Force. It played a distinguished part in the Defence of Tobruk in 1941, but its headquarters was captured in the Fall of Tobruk the following year. It was reconstituted as a training formation in Persia and Iraq Command for the rest of the war.
| 4th Anti-Aircraft Brigade | |
|---|---|
| Active | 1 March 1940–1 July 1944 |
| Country | |
| Branch | |
| Type | Anti-Aircraft Brigade |
| Role | Air Defence |
| Part of | British Expeditionary Force Eighth Army |
| Engagements | Battle of France Dunkirk evacuation Western Desert Campaign Siege of Tobruk |
| Commanders | |
| Notable commanders | Brigadier J.N. Slater Brigadier John Muirhead |
Battle of France
As the British Expeditionary Force (BEF) in France expanded during the Phoney War period of early1940, new headquarters (HQs) were formed to control the various groups of anti-aircraft (AA) guns and searchlights (S/Ls) that were deployed to defend its field formations and base installations. 4th Anti-Aircraft Brigade HQ was formed at Camberley on 1 March 1940 and sent to France shortly before the Battle of France began on 10 May.[1][2] It was commanded by Brigadier J.N. Slater.[3][4][5][6] The major subordinate unit in the brigade was 4th AA Regiment, Royal Artillery, a Regular Army unit that had been based at Bulford Camp in Southern Command on the outbreak of war.[7] It had deployed to France in November 1939 equipped with 3-inch and 3.7-inch heavy anti-aircraft (HAA) guns. Since then it had moved between AA brigades and had suffered a constant turnover of batteries exchanged with other regiments, leading to complaints from the commanding officer (CO). The other units assigned to 4 AA Bde were two detached HAA batteries (from the part-time units of the Supplementary Reserve (SR) and Territorial Army (TA))and an independent light anti-aircraft (LAA) battery equipped with Bofors 40 mm guns. Coming directly under General Headquarters (GHQ) the brigade's role was to protect supply points and airfields behind the BEF's frontline forces.[8][9][10]
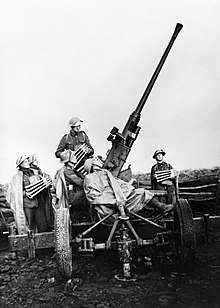
Order of Battle May 1940
During the Battle of France the brigade had the following composition:[8][3][11][12]
- 4th AA Rgt
- 1, 3, 27 AA Btys
- 21 AA Bty – from 8th (Belfast) AA Rgt (SR)
- 220 AA Bty – from 85th (Tees) AA Rgt (TA)
- 1 LAA Bty – independent
- 52nd (East Lancashire) LAA Rgt (TA) – joined after 4 AA Bde was attached to I Corps
- 154, 155, 156 LAA Btys
Following the German invasion of the Low Countries the BEF followed the pre-arranged Plan D and advanced into Belgium to take up defences along the Dyle. However the collapse of the Dutch forces and the German Army's rapid breakthrough in the Ardennes soon threatened the BEF's positions. It withdrew to the Escaut line under frequent air attack. 4th AA Regiment had been defending airfields around Aubigny and Arras, and then followed the BEF into Belgium, taking up positions around Tournai. Here it was in action for six days as the town was bombed by formations of Heinkel He 111s and Dornier Do 17s. On 18 May it was ordered back to Douai and Seclin airfields, the regimental HQ (RHQ) being bombed during the move. The next day it was ordered to move immediately to Templeuve between Orchies and Lille, a move involving great difficulty and much shooting.[13][14]
Retreat to Dunkirk
On 20 May Army Group A swung north to the English Channel and cut the BEF off. Forced to retire towards Dunkirk, the BEF's AA brigades were sucked into the ground battles, split into sub-units in rearguard actions, or moved back to cover successive key points.[13][15] 4 AA Brigade's units were used by I Corps, with 4th AA Rgt engaging a series of attacks by 20–30 bombers escorted by fighters. The Gun-Laying (GL) radar sets were sent back, and I Corps employed the regiment's batteries on bridges and routes to cover its withdrawal against high level and dive-bombing attacks. The next six days saw alternate moves and deployments in small units of Troop and Section size at Armentières, Hazebrouck, Poperinghe and other places under shellfire and Stuka attack. When the supply chain failed, a search party found a stock of ammunition on a loaded train in a railway siding. 21/8th AA Battery fought hard until on 27 May it was surrounded by Panzers and engaged them at close range. The gunners were forced to remove their breechblocks and disable their guns under machine gun fire before assisting the infantry with their rifles while retreating to Dunkirk.[13][14]
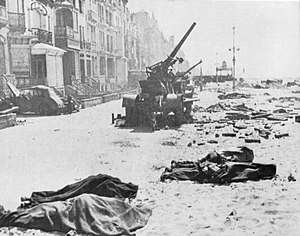
By 26 May the decision had been made to evacuate the BEF from Dunkirk (Operation Dynamo), with I Corps controlling the rearguard including 4 AA Bde. The Corps LAA regiment (52nd (East Lancashire) LAA Rgt) came under 4 AA Bde for the last part of the operation, and moved down to deploy on the Dunkirk beaches. The rest of the brigade was ordered to disable or destroy all equipment and prepare for evacuation.[14][16][17][18][19] 4th AA Regiment assembled on the beach at Bray-Dunes on 29 May, where the men lay under air attack for 36 hours. On 31 May the regiment was allowed to organise its own evacuation by means of small boats and a 'pier' of abandoned trucks.[14]
On arrival in England the AA troops were sent to various training camps to reform. Most were then deployed to reinforce Anti-Aircraft Command in defending the UK during the Battle of Britain and The Blitz.[20][21] Others, including Brigadier Slater and his 4 AA Bde HQ, were sent to reinforce Middle East Forces (MEF).[22]
Western Desert Campaign
Order of Battle January 1941
On arrival in Egypt, 4 AA Bde assembled as a mobile formation in the rear areas under British Troops Egypt (BTE). The Western Desert Force (WDF) had begun its campaign against the Italians in Libya (Operation Compass) and in the last weeks of January 1941 the Italians began a long retreat through Tobruk, Derna and Benghazi. By 31 January 1941, 4 AA Bde had moved up to join XIII Corps (formerly the WDF) at Mersa Matruh in the Western Desert with the following organisation:[22][23][24][25]
- HQ 4 AA Bde
- 51st (London) HAA Rgt
- RHQ, 152, 153 HAA Btys
- 16 HAA Bty – attached from 2nd HAA Rgt
- 13th LAA Rgt
- RHQ, 37, 38 LAA Btys
- 155 LAA Bty – attached from 52nd (East Lancashire) LAA Rgt
- 1 Independent LAA Bty
- Detachment 5 Independent LAA Bty
- B squadron, Royal Wiltshire Yeomanry – organised as an AA/SL Bty
Siege of Tobruk
Almost as soon as it arrived, 4 AA Bde had to send forward part of its strength to catch up with XIII Corps' advance. Two batteries of 51st HAA Rgt with 16/2 HAA Bty and 8th Australian LAA Bty went on to Derna and Benghazi, while 51st HAA Rgt's Royal Army Ordnance Corps (RAOC) workshop detachment remained at Tobruk and set about restoring some of the captured Italian AA guns to working order. 1 LAA Bty moved up as separate Troops attached to columns of 7th Armoured Division, covering 150 miles (240 km) of rough going in 30 hours. There was virtually no enemy air activity as the Italian Tenth Army collapsed, with many thousands surrendering, but within a few days aircraft of the Regia Aeronautica joined by the Luftwaffe began bombing the British forward supply point that had been established at Benghazi.[22][26]
Meanwhile, MEF had to provide AA cover for the campaign in Greece: 2nd and 51st HAA and 13th and 52nd LAA Rgts had already sent individual batteries; now 16/2 HAA Bty was recalled from Benghazi to embark at Alexandria, a journey of 736 miles (1,184 km), followed by 155/52 LAA Bty.[22][27][28]
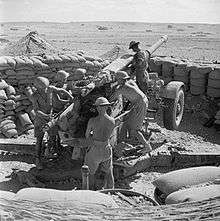
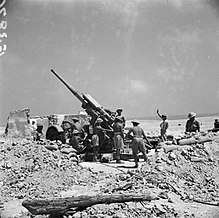
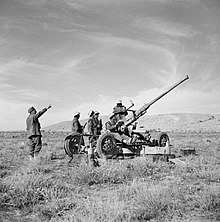
German intervention in the shape of General Erwin Rommel and his Afrika Korps quickly turned the tide in Libya. A swift breakthrough pushed British forces backwards. The two batteries of 51st HAA Rgt and 8 Australian LAA Bty at Benghazi were recalled, retiring first to Derna and then to Tobruk, in action most of the way. The German columns, heading for the Egyptian frontier, bypassed Tobruk, whose garrison prepared to defend the port. This was invested from 11 April, beginning the epic Siege of Tobruk lasting 240 days. 4 AA Brigade was a major element of the garrison, and had been reinforced just before the ring closed, with the arrival of 14th (West Lothian, Royal Scots) LAA Rgt (less one battery) and 235 (Kent) Battery of 89th (Cinque Ports) HAA Rgt (to replace the absent battery of 51st HAA Rgt). Eight static 3.7-inch guns had also been delivered by sea, making a total of 24 guns available, (although two were disabled early in the siege by premature bursts and the static guns had to be assembled and emplaced), and 152 and 235 Batteries each had an Italian 102mm gun in addition.[29][30][31]
Each mobile HAA troop established at least one alternative site and the guns were regularly switched between them, the empty sites being rigged up as dummies. The two available gun-laying (GL) radar sets had to be positioned away from the vulnerable gun sites and used for early warning to supplement the single RAF radar, and a close ring of searchlights operated round the harbour at night, able to illuminate enemy minelayers. Harbour defence was by pre-arranged barrages by five of the six HAA troops, the sixth troop remaining on watch for other raiders. Later a mobile troop was moved to one or other GL site to engage 'unseen' targets at night. Telephone lines were laid from the Gun Operations Room (GOR) near the harbour to Fortress HQ, all gun positions and all radars, and radio links were set up to any warships in the harbour or lying offshore.[30]
Rommel made his first attack on the perimeter before dawn on 14 April but was driven out by a counter-attack. During this battle RHQ and 153 HAA Bty of 51st (London) HAA Rgt were attacked by Stukas; Lieutenant-Colonel Murray McIntyre was among those wounded, and RHQ was evacuated by sea to Alexandria that night. RHQ of 13th LAA Regiment took over command of the harbour area, while RHQ of 14th LAA Rgt commanded the perimeter area. Brigadier Slater acted as AA Defence Commander (AADC) for the whole Tobruk area, with RHQ 13th LAA Rgt providing the AADC for the harbour area.[30][32][33]
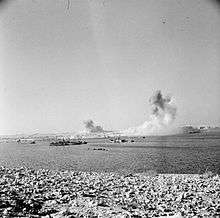
The Official History records that the AA artillery in Tobruk was 'incessantly in action against attacks of all kinds, from all heights, but especially by dive-bombers'.[34] The LAA gunners needed quick reactions to deal with low-level fighter attacks and dive-bombers. The regimental historian notes that these Stuka attacks concentrated on gun positions, which was a serious threat to HAA sites, whose instruments could not cope with the rapid height changes. The gunners devised a tactic of opening fire with short Fuzes just before the dive started, to force the pilots to fly through a ring of bursts. The battery cooks, drivers and clerks then joined in, firing machine-guns and captured 20mm Breda guns. This aggressive method was known as 'Porcupine', and was so effective that the Luftwaffe changed to high-level bombing, where the GL radar could direct concentrations. The harbour could not be completely defended against air attack by day, but was always usable by night. Aircraft attempting to lay parachute mines in the approaches were usually driven off by a low-level concentration of all available guns into a searchlight-illuminated target area. The searchlights were only switched on once the GL radar had located the target.[30][33]
Luftwaffe casualties were heavy: 53 aircraft shot down and 43 damaged in April, 45 and 56 in May. 152 HAA Battery, dug in west of the harbour, alone engaged 1000 enemy aircraft in a six-month period. Whereas there were 21 attacks by a total of 386 aircraft in April, by July this had fallen to just four attacks by 79 aircraft. 4 AA Brigade recorded that there was a steady decline in numbers of aircraft attacking as the siege went on, with the attackers switching to high-level and night attacks. In the last two months of the siege, troops of HAA guns took it in turn to move out to the perimeter and take on ground targets under the control of 9th Australian Division. Their long-range harassing fire made up for the shortage of medium artillery. Apart from the two HAA guns disabled by premature bursts, 51 HAA and 13 LAA Workshops kept the remainder serviceable; despite hits on the gun positions, no gun was out of action for more than a few hours.[30][35]
Order of Battle, April 1941
The composition and dispositions of the brigade in the early part of the siege were as follows:[29][30][36]
- HQ 4 AA Bde
Harbour defended area:
- RHQ 13th LAA Rgt
- 152/51 HAA Bty
- 153/51 HAA Bty
- 235/89 HAA Bty
- 40/14 LAA Bty
- B Sqn, Royal Wiltshire Yeomanry, temporary S/L unit
- 2 Trps 306 S/L Bty, 27th (London Electrical Engineers) S/L Rgt, arrived in April
- GOR
- 51 HAA Rgt Workshop, RAOC
- 51 HAA Rgt Signal Section, Royal Corps of Signals
Perimeter defended area
- RHQ 14th LAA Rgt
- Trp, 38/13 LAA Bty
- 39/13 LAA Bty
- 57/14 AA Bty
- 1 LAA Bty
- 8 Australian LAA Bty
- 13 LAA Rgt Workshop, RAOC
- 13 LAA Rgt Signal Section, RCS
Total equipment:
- 24 x 3.7-inch HAA Guns (16 mobile, 8 static)
- 2 x 102 mm HAA guns (Italian)
- 2 x 149 mm HAA guns (Italian)
- 18 x Bofors 40 mm LAA guns (6 mobile, 12 static)
- 42 x Breda 20 mm LAA guns (Italian)
- 10 x S/Ls (8 90 cm, 2 Italian)
- 2 x GL Mk I radar sets
During September and October 1941 the whole of 9th Australian Division was relieved by sea and replaced by the British 70th Division and the Polish Independent Carpathian Brigade. At the same time some of the AA units and personnel were also relieved: for example, 152 HAA Bty left for rest and refit in Palestine, and RHQ and one battery of 69th (Royal Warwickshire Regiment) HAA Rgt arrived, while 5 Independent LAA Bty replaced 8 Australian LAA Bty. However, 153 and 235 HAA Btys, RHQ 14th LAA Rgt and 39, 40 and 57 LAA Btys saw the whole siege through.[36][34][37]
Also in September Slater went back to Egypt to take up the post of Brigadier, AA Middle East. He was awarded a CBE in the 1942 New Year Honours and later that year commanded 7th AA Division at home in AA Command. Slater's work at Tobruk was later singled out for praise by the Australian Official History.[4][5][33][34][38] He was replaced as commander of 4 AA Bde by Brevet Colonel John Muirhead, the CO of 74th (City of Glasgow) HAA Rgt, who had just been promoted to command 2 AA Bde but was transferred to Tobruk on 3 September.[4][34][39][40] During the main part of the siege (10 April to 9 October), 40 AA gunners were killed and 128 wounded.[35]
Relieved
In November 1941 the British Eighth Army began a new offensive in the Western Desert (Operation Crusader), which succeeded in ending the Siege of Tobruk. 68th (North Midland) HAA Regiment was moved up to defend the recaptured port of Benghazi. The first phase of 'Crusader' lasted until January 1942, when Rommel counter-attacked. Benghazi was lost again on 29 January and Eighth Army fell back and dug in along the Gazala Line.[41][42][43]
There was then a lull in the fighting while both sides reorganised.[44] The situation by 12 May 1942 was that 4 AA Bde was defending Tobruk with 68th (NM) HAA Rgt as its major subordinate unit, though some batteries were detached to 12 AA Bde defending fighter landing grounds for the Desert Air Force and the army's railhead at Fort Capuzzo.[45] On 22 May the brigade was joined by 107 LAA Bty from 27th LAA Rgt, which formed the sole LAA defence of Tobruk harbour.[46]
Fall of Tobruk
During the Battle of Gazala, beginning on 26 May, Rommel's Axis forces quickly broke into the British position and began attacking the defensive 'boxes'. After bitter fighting in the Gazala Line and the 'Cauldron', Eighth Army was forced to retreat. The British hoped to defend Tobruk as in the previous siege, but this time the Axis forces reached it before the defences were ready.[43][47]
The attack on Tobruk began on 20 June. After the preliminary air bombardment, Axis tanks made rapid progress through the perimeter defences. The 3.7-inch HAA guns had been deeply dug in for protection against dive-bombing, but a four-gun troop of 277 HAA Bty found themselves faced with action at short notice against Panzer III and Panzer IV tanks of 21st Panzer Division driving down the escarpment from 'King's Cross' towards the harbour. The gunners stripped down the walls of their emplacements to permit low-angle fire and engaged the tanks with armour-piercing and high explosive rounds. Together with some South African field guns and medium guns the position held up a Panzer battalion for four hours and knocked out four tanks, but the outcome was inevitable and the AA positions were 'overrun by swarms of enemy infantry'. Rommel himself referred to the 'extraordinary tenacity' of the strongpoint.[48][49]
Tobruk surrendered the following day, and around 33,000 Allied troops were captured, including 4 AA Bde.[50][51] After the fall of Tobruk, the Eighth Army retreated in confusion beyond the Egyptian frontier until the Axis advance was finally halted at El Alamein.[43][52]
Order of Battle 21 June 1942
The composition of 4 AA Bde when it was captured at Tobruk was as follows:[53]
- HQ 4 AA Bde
- 68th (North Midland) HAA Rgt
- RHQ
- 277 HAA Bty
- 282 HAA Bty – attached from 88th HAA Rgt
- 68 HAA Rgt Sigs
- 68 HAA Rgt Royal Army Service Corps (RASC)
- 68 HAA Workshop Section RAOC
- 5 LAA Bty
- 107/27 LAA Bty
- A & B Trps 43 LAA Bty, 61st LAA Rgt
- 135 Z Bty
- Dets 305/27 S/L Bty
- 5 GOR
- 4 AA Bde Sigs RCS
- 4 AA Bde Company RASC
- 4 AA Bde Workshops RAOC
Reformed
4 AA Brigade HQ was reformed in Persia and Iraq Command (PAIFORCE) in August 1942, where General Henry Maitland Wilson was trying to build up the AA resources of Tenth Army to meet a possible German advance on the vital oilfields via the Caucasus. At first it had the following order of battle:[54][55]
- 75th (Home Counties) (Cinque Ports) HAA Rgt
- 80th LAA Rgt
- 99th LAA Rgt
- 100th LAA Rgt
However, the latter two regiments were soon sent forward as divisional troops and Wilson's planned AA defences never reached their full extent. After the German defeat at the Battle of Stalingrad the Luftwaffe was never in a position to attack Iraq or Persia and from April 1943 the AA defences were run down. 4 AA Brigade concentrated on defending RAF Habbaniya, Basra and a few oilfields, but it was given two important training tasks in addition to its operational commitments. The first was to organise and train four Polish AA regiments from the thousands of former Prisoners of War (Anders' Army) released by the Soviet Union to form II Polish Corps under British command. Their technical training was assigned to 83rd (Blythswood) HAA Rgt. The second task was for 83rd HAA Rgt to provide 258 HAA Bty as a cadre to form the basis of 25th Indian HAA Rgt. By May 1943 the first battery of 25th Indian HAA Rgt was ready for duty and posted to Habbaniya. This regiment was complete by March 1944, and in May the Indian Army took full responsibility for AA tasks under Tenth Army. 4 AA Brigade with 75th and 83rd HAA Rgts returned to Middle East Forces, where the AA organisation was being run down.[55][56] 4 AA Brigade was disbanded on 1 July 1944.[1]
4 AA Brigade was not reformed in the postwar British Army.[57]
See also
Notes
- Frederick, p. 1048.
- Routledge, pp. 114–6.
- Farndale, Annex A.
- Farndale, Annex J.
- Slater at Generals of WWII.
- Photos of Slater at National Portrait Gallery.
- Southern Command 3 September 1939 at Patriot Files.
- Ellis, Appendix I.
- Farndale. p. 13.
- Routledge, Table XVII, p. 125.
- Routledge, Table XVIII, p. 126.
- "GHQ Troops May 1940 at RA 39–45". Archived from the original on 2010-06-08. Retrieved 2010-06-08.
- Farndale, pp. 43–4.
- Routledge, pp. 120–1.
- Routledge, pp. 116–7.
- Ellis, Chapter XI.
- Ellis, Chapter XIV.
- Farndale, p. 63.
- Routledge, pp. 117–8.
- Farndale, Annex D.
- Routledge, Table LXV, pp. 396–7.
- Routledge, pp. 128–9.
- Farndale, p. 130.
- Joslen, p. 478.
- Routledge, Table XIX, p. 141.
- Playfair Vol I, pp. 365, 374.
- Playfair Vol I, pp. 375–6.
- Routledge, pp. 144–5.
- Farndale, p. 162.
- Routledge, pp. 130–3, Table XX, p. 141.
- "Order of Battle at Rats of Tobruk Tribute site". Archived from the original on 2018-06-29. Retrieved 2018-06-28.
- Farndale, p. 167.
- Farndale, p. 188.
- Playfair, Vol II, p. 158.
- Routledge, Table XXI, p. 142.
- Farndale, p. 165.
- Farndale, pp. 204–5.
- London Gazette 30 December 1941.
- 2 AA Bde War Diary, Middle East, 1941, The National Archives (TNA), Kew, file WO 169/1560.
- Muirhead at Generals of WWII.
- Farndale, pp. 214–5.
- Playfair, Vol III, pp. 78, 140, 151, 197.
- Routledge, pp. 135–7.
- Playfair, Vol III, pp. 197–205.
- Order of Battle, Eighth Army, May–June 1942, TNA file WO 201/692.
- 107 LAA Bty War Diary 1942, TNA file WO 169/4937.
- Playfair, Vol III, pp. 223–67.
- Routledge, p. 140.
- Playfair, Vol III, pp. 267–9.
- List of units captured in Tobruk 21 June 1942, TNA file WO 201/690.
- Playfair, Vol III, pp. 273–4.
- Playfair, Vol III, pp. 281, 288–97, 331–5.
- 'List of units captured at Tobruk 21 June 1942', TNA file WO 201/690.
- Joslen, p. 489.
- Routledge, p. 200.
- Routledge, Table XXVI, p. 165.
- Routledge, Table LXXIV. p. 441.
References
- Maj L.F. Ellis, History of the Second World War, United Kingdom Military Series: The War in France and Flanders 1939–1940, London: HM Stationery Office, 1954/Uckfield, Naval & Military Press, 2004.
- Gen Sir Martin Farndale, History of the Royal Regiment of Artillery: The Years of Defeat: Europe and North Africa, 1939–1941, Woolwich: Royal Artillery Institution, 1988/London: Brasseys, 1996, ISBN 1-85753-080-2.
- J.B.M. Frederick, Lineage Book of British Land Forces 1660–1978, Vol II, Wakefield, Microform Academic, 1984, ISBN 1-85117-009-X.
- Lt-Col H.F. Joslen, Orders of Battle, United Kingdom and Colonial Formations and Units in the Second World War, 1939–1945, London: HM Stationery Office, 1960/Uckfield: Naval & Military Press, 2003, ISBN 1-843424-74-6.
- Maj-Gen I.S.O. Playfair, "History of the Second World War, United Kingdom Military Series: The Mediterranean and Middle East, Vol I: The Early Successes against Italy (to May 1941), London: HMSO, 1954/Uckfield, Naval & Military Press, 2004 ISBN 1-845740-65-3.
- Maj-Gen I.S.O. Playfair, "History of the Second World War, United Kingdom Military Series: The Mediterranean and Middle East, Vol II: The Germans come to the aid of their Ally (1941), London: HMSO, 1956/Uckfield, Naval & Military Press, 2004 ISBN 1-845740-66-1.
- Maj-Gen I.S.O. Playfair, History of the Second World War, United Kingdom Military Series: The Mediterranean and Middle East, Vol III: (September 1941 to September 1942) British Fortunes reach their Lowest Ebb, London: HMSO, 1960 /Uckfield, Naval & Military
- Brig N.W. Routledge, History of the Royal Regiment of Artillery: Anti-Aircraft Artillery 1914–55, London: Royal Artillery Institution/Brassey's, 1994, ISBN 1-85753-099-3