Attack on Convoy BN 7
The Attack on Convoy BN 7 (20–21 October 1940) was a naval engagement in the Red Sea during the Second World War between a British force defending a convoy of merchant ships and a flotilla of Italian destroyers. The Italian attack failed, with only one merchant ship being slightly damaged. After a chase, the British destroyer HMS Kimberley torpedoed the Italian destroyer Francesco Nullo which was beached on Harmil Island. Kimberley was hit, disabled by Italian shore batteries on the island and towed to safety by the cruiser HMS Leander.
Manoeuvring in two groups to increase the chance of intercepting the convoy had succeeded but sacrificed the benefits of concentration against the escorts and a destroyer was lost for no result. The British command at Aden criticised the escorts (excepting Kimberley) for a lack of aggression but leaving the convoy defenceless to chase ships at night and in misty weather was risky. The Italians made another fruitless sortie on 3 December, cancelled one in January 1941 after the destroyer Daniele Manin was damaged by a bomb and on 24 January sortied again with no result.
Background
Red Sea
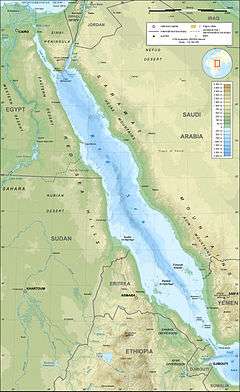
The Red Sea is an area of high temperatures and humidity, its coasts vary from desert to high mountain ranges and navigation is fraught with danger from offshore reefs and false horizons caused by atmospheric refraction.[1] From May to June 1939, French and British military officials met at Aden to devise a common strategy to retain control of the waters around Italian East Africa if Italy declared war. It was expected that Italy could close the Mediterranean to Allied traffic and that supplies to the Middle East would have to be transported via the Red Sea. Control of the Gulf of Aden, the Red Sea and the Gulf of Suez at the northern terminus and the maintenance of the bases at Aden and French Somaliland (Djibouti) was equally important but a withdrawal from French and British Somaliland had also be contemplated.[2]
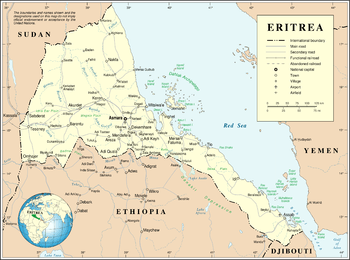
The British-controlled Port Sudan, lay on the west coast of the Red Sea, about half way [600 nmi (690 mi; 1,100 km)] between Suez and the Bab-el-Mandeb Strait (باب المندب, Gate of Tears). The Italian port of Massawa in Eritrea was about 350 nmi (400 mi; 650 km) north and Aden about 100 nmi (120 mi; 190 km) east of the Bab-el-Mandeb.[2] The ports along the coast of Italian Somaliland and the entrance to the Red Sea were to be blockaded (Operation Begum) to prevent the Italians from receiving supplies and reinforcements. Allied merchant ships in the Indian Ocean and the Red Sea were to proceed in escorted convoys. Naval ships were to sweep mines, patrol the Gulf of Aden and the Bab-el-Mandeb to isolate the Italian Red Sea Flotilla and protect Aden from sorties by Italian ships; the Italian naval bases in Eritrea were to be attacked.[3]
Red Sea Force
In April 1940 the Royal Navy established the Red Sea Force with the light cruisers HMS Liverpool and HMAS Hobart (Senior Naval Officer Red Sea, Rear-Admiral Murray); HMS Leander (New Zealand Division) replaced Liverpool on 26 May. By September the Force comprised the cruisers Hobart, Leander, Caledon and the anti-aircraft cruiser Carlisle; the destroyers HMS Kimberley, Kingston and Kandahar; the sloops HMS Flamingo, Auckland, Shoreham and Grimsby; HMIS Clive, Indus and Hindustan; and HMAS Parramatta. Aden was the base for two minesweepers, two small Armed Merchant Cruisers and two armed trawlers. Ships attached temporarily included the light cruisers HMS Ceres and Colombo, the 8-inch cruisers HMS Dorsetshire and Shropshire.[3]
Red Sea Flotilla
The Italian naval and air bases in East Africa were convenient for attacks on shipping in the Red Sea and the Indian Ocean. Massawa was the home port of the Red Sea Flotilla (Rear-Admiral [Contrammiraglio] Mario Bonetti, December 1940 – April 1941) which had been fortified and lay behind numerous islands and reefs with mined approaches; there was a smaller base at Assab.[3] The scout cruisers (esploratori, also Leone-class destroyers) Pantera and Leone (Commander Paolo Aloisi) had an unusually powerful armament of eight 4.7 in (120 mm) guns, in four turrets on the centre line. Only two turrets could aim fore and aft but the eight-gun broadside was unique for destroyers. The class also carried two 40 mm pom-pom anti-aircraft guns, four 20 mm machine-guns, four 533 mm (21.0 in) torpedo tubes and 60 mines. The Sauro-class destroyers had an armament of four 120 mm (4.7 in) guns, two 40 mm pom-poms, two 13.2 mm machine-guns, six 53.3 cm (21 in) torpedo tubes and 52 mines.[4] Once war was declared, the fuel stored for the Italian ships based at Massawa could only diminish under the British blockade.[5] The accumulation of mechanical faults, fuel depletion and the enervating effect of the climate, exercised severe constraints on the operations of the Red Sea Flotilla.[6]
Prelude
Red Sea convoys

In June four of the eight Italian submarines based at Massawa were lost. The Regia Aeronautica (Italian Royal Air Force) commenced operations over the Red Sea and on 11 June a Savoia-Marchetti SM.81 flew a reconnaissance sortie.[7] On 16 June, the Italian submarine Galileo Galilei sank the Norwegian tanker James Stove (8,215 Gross register tonnage (GRT), sailing independently about 12 nmi (14 mi; 22 km) south of Aden.[8] On 19 June, Hobart sent its Supermarine Walrus amphibian to bomb an Italian wireless station on Centre Peak Island between Massawa and the Arabian coast.[9] On 2 July, Convoy BN 1, comprising six tankers and three freighters, assembled in the Gulf of Aden.[8] On 8 July, an SM.81 of 10° Squadriglia flew a long range reconnaissance sortie over southern Sudan and the Red Sea and was attacked by a Vickers Wellesley. The SM.81 was damaged hit an island trying to force land, bounced into the air and flew on at wave top height, with the Wellesley flying above and to one side for its gunners to keep firing. After ten minutes the Italian aircraft hit the sea and shed its wings.[10][lower-alpha 1]
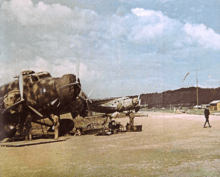
From 26 to 31 July, Guglielmotti failed to find two Greek merchantmen and a sortie by the torpedo boats Cesare Battisti and Francesco Nullo came to nothing. Guglielmotti sortied from 21 to 25 August, Galileo Ferraris (25–31 August), Francesco Nullo and Nazario Sauro from 24 to 25 August and the destroyers Pantera and Tigre (28–29 August) failing to find ships, despite agent reports and sightings by air reconnaissance.[11] On 4 September, Italian bombers attacked SS Velko and inflicted serious damage and on the next day, five SM.79s attacked Convoy BS 3A. A Blenheim IVF convoy escort attacked the bombers but was damaged. On 6 September the convoy was attacked again by a SM.79.[12] Convoy BN 4 was spotted by air reconnaissance and on the night of 5/6 September, Cesare Battisti, Daniele Manin and Nazario Sauro sailed. The destroyers Leone and Tigre followed on 6/7 September but the destroyers found nothing.[13]
The submarines Galileo Ferraris and Guglielmotti patrolling further to the north, also failed to find BN 4 but Guglielmotti torpedoed the Greek tanker Atlas (4,008 GRT) straggling behind the convoy south of the Farasan Islands. Air reconnaissance also found Convoy BN 5 of 23 ships but Leone, Pantera, Cesare Battisti and Daniele Manin, with the submarines Archimede and Gugliemotti failed to find the convoy. MV Bhima (5,280 GRT) was damaged in an Italian air attack, one man was killed and the ship was towed to Aden and beached for repairs.[13] On 19 September five SM.79s attacked a convoy and outpaced two Gloster Gladiator fighters which tried to intercept them. On the next day, Italian bombers were driven off by Blenheim fighters. On 15 October three SM.79s attempted to attack a convoy but were prevented by two Gladiators and a Blenheim. Five days later, individual SM.79s attacked Convoy BN 7.[14]
Convoy BN 7
.jpg)
Convoy BN 7 was northbound through the Red Sea and consisted of 32 British, Norwegian, French, Greek and Turkish merchant ships. The escort consisted of the light cruiser HMS Leander (Commander James Rivett-Carnac), the destroyer Kimberley (Commander J. S. M. Richardson), the Egret-class sloop Auckland, the Grimsby-class sloops HMAS Yarra and Indus and the Hunt-class minesweepers HMS Derby and Huntley.[6][lower-alpha 2] Convoy BN 7 was nearing Perim, a volcanic island off the south-west coast of Yemen in the Bab-el-Mandeb, on the afternoon of 19 October, when an aircraft dropped four bombs close astern of one of the merchantmen. Leander and Auckland opened fire on the aircraft as it flew off to the west; shortly before dark, an undercarriage wheel of an Italian aircraft was picked up 15 nmi (17 mi; 28 km) south of the island. Next morning, Italian aircraft dropped four bombs, two of which fell ahead of the convoy and two bombs harmlessly astern of the French liner Felix Roussel, carrying New Zealand troops to Suez. At dusk Leander took station on the port beam of the convoy between it and the Italian base at Massawa, which flanked the line of advance; the convoy zig-zagged through the night.[16]
Battle
Italian sortie
The Italian flotilla sailed on 20 October, the destroyers operating in pairs, Section I, comprised the faster Nazario Sauro (Commander Moretti degli Adimari) and Francesco Nullo (Lieutenant Commander Costantino Borsini). Section II, the slower, more heavily armed Pantera and Leone were to divert the convoy escort and would then attack the convoy with torpedoes. At 21:15 the two sections separated and at 23:21, Pantera sighted smoke from the convoy.[17] Pantera signalled Sauro and moved ahead of the convoy to intercept, with Leone following 875 yd (800 m) behind.[17] The convoy was about 35 nmi (40 mi; 65 km) north-north-west of Jabal al-Tair Island at 02:19 on 21 October, when Leander sighted two patches of smoke bearing north.[17]
Auckland reported two destroyers 4 nmi (4.6 mi; 7.4 km) off and Leander altered course to intercept, the captain assuming that they would run for home through the South Massawa Channel. After a challenge from Auckland, Pantera fired over Yarra at the convoy, inflicting some splinter damage to a lifeboat on the convoy commodore's ship. Auckland opened fire and the Italian ships separated and turned away at full speed, west-south-west, towards Massawa, firing their aft guns. The destroyers were broad on the port bow of Yarra when Pantera fired two torpedoes at 23:31 and another pair at 23:34.[17] Yarra avoided two torpedoes by turning towards them and combing their tracks.[16] Observers in Yarra thought that the leading enemy vessel was hit by their fourth or fifth salvo.[18]
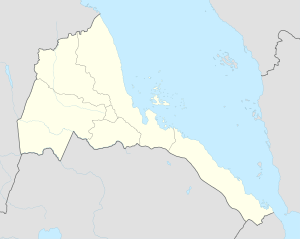
Sauro and Nullo had been manoeuvring to a more favourable position after receiving the sighting report from Pantera, turned towards the convoy and spotted Leander at 01:48 (21 October). Sauro fired a torpedo at Leander which missed and Leander opened fire but lost sight of Sauro after two minutes. Sauro made another torpedo attack at 02:07 and turned away towards Massawa. (Nullo was not able to attack after its rudder jammed for several minutes and it went round in circles, losing contact with Sauro.)[17] Borsini ordered Nullo towards the Italian batteries on Harmil Island off Massawa. When the gunfire ceased, Leander altered course to north-west to intercept the ships at the South Massawa Channel (the Harmil Island Passage) and at 02:45, opened fire with 6-inch HE and star shells on a ship that was firing red and green tracer. The range was increasing and the ship was lost to sight after the first salvoes.[19]
Leander altered course westwards to bring all guns to bear if the ships were making for the South Massawa Channel. At 02:20 Leander spotted Nullo by searchlight and exchanged fire for about ten minutes at about 4,600 yd (2.3 nmi; 4.2 km), Leander scoring several hits which damaged Nullo's gyrocompass and gunnery director. At 02:51, Leander lost contact in the haze and ceased fire (having fired a hundred and twenty-nine 6-inch rounds).[20] Nullo headed toward Harmil Island with Leander in pursuit and at 03:00, Leander challenged a destroyer which turned out to be Kimberley, also in pursuit. After five minutes, the cruiser altered course east to rejoin the convoy, since the Italian ship was drawing away at the rate of 7 kn (8.1 mph; 13 km/h) and the convoy would still be vulnerable to attack during a pursuit.[21]
Battle of Harmil Island
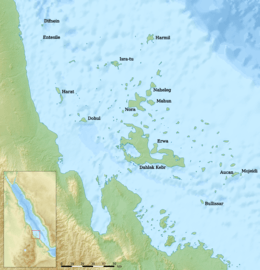
In the early hours of 21 October, Kimberley continued at maximum speed and at 03:50 sighted smoke ahead, apparently from two ships retiring at high speed. At 05:40, off Harmil Island, lookouts on Kimberley and Nullo spotted each other at 7 nmi (8.1 mi; 13 km) range. Borsini assumed that the ship was Sauro and when Kimberley opened fire at 05:53, Nullo was taken by surprise, not returning fire for four minutes.[22] Kimberley closed the range to 5,000 yd (2.5 nmi; 4.6 km) and at 06:20, Nullo scraped a reef, which damaged a propeller and sprung a leak. As Nullo rounded Harmil Island at about 06:25, it was hit once in the forward engine room and once in aft engine room.[22]
Nullo lost all power; Borsini gave the order to abandon ship and steered towards Harmil Island. The upper works were hit by shell splinters and the crew abandoned ship, while Borsini tried to run Nullo aground on the island. Nullo was then hit by the second of two torpedoes at 06:35, which broke it in two.[22] (Borsini and his assistant declined to leave the ship and were drowned.)[5][lower-alpha 3] At 06:15 the four 120 mm guns on Harmil Island engaged Kimberley and hit the engine-room, wounding three men and holing the steam pipes. While adrift 10,000 yd (4.9 nmi; 9.1 km) from the shore battery, Kimberley silenced two of the guns and wounding four gunners with 45 HE shells from No. 3 mount.[23]
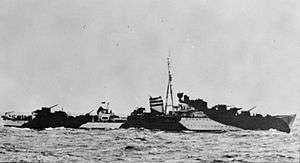
Kimberley managed to get under way, its speed reduced to 15 kn (17 mph; 28 km/h) and the shore battery ceased fire when Kimberley was 19,000 yd (9.4 nmi; 17 km) away. Kimberley had fired 596 rounds of Semi-Armour Piercing and 97 High Explosive shells. Leander left the convoy and at 06:54 increased speed to 26 kn (30 mph; 48 km/h). By 07:34, Leander was making 28.7 kn (33.0 mph; 53.2 km/h) and soon after, Kimberley reported that it was steaming east at 15 kn (17 mph; 28 km/h) on one engine.[23] At 08:25, Leander was 16 nmi (18 mi; 30 km) east by north of the Harmil South beacon and slowed to 10 kn (12 mph; 19 km/h). Leander circled near Kimberley to keep freedom of manoeuvre, in case Italian bombers appeared. Kimberley had lost water in its boilers and Leander sent a boat with three shipwrights and an engine-room artificer; a wounded rating was transferred to the cruiser for medical attention. At about 10:00, Leander took Kimberley in tow.[24]
Aftermath
Analysis
In August the British had run four BN convoys and four BS convoys, five in September and seven in October, the BN convoys comprising 86 ships and the BS (southbound) convoys 72 ships. Despite agent reports and sightings by the Regia Aeronautica, Italian submarines and ships had frequently failed to make contact with the convoys, only six air attacks was achieved in October and none after 4 November.[25] During the Attack on Convoy BN 7, the British found that they were at a disadvantage in night fighting as they were temporarily blinded by the flash of their guns, while the Italian ships used flashless cordite and had good tracer ammunition.[18] The British convoy escorts were blamed for a lack of aggression, except for Kimberley, despite the danger of abandoning the convoy at night and in poor visibility. The Italians had managed to make two torpedo attacks as planned but the division of the destroyers into two sections, after previous sorties had failed to find any ships, meant that neither section had the firepower to face the British escorts.[26]
Casualties
Of the 120 crew of Nullo, Borsini declined to abandon ship and when his assistant Seaman Vincenzo Ciaravolo realised, jumped from his lifeboat to accompany his captain and both were drowned. Of the ship's company 12 men were killed and 106 were rescued by sailors of the Harmil Island battery.[27] Kimberley was out of action until 31 October, then returned to service capable of a reduced maximum speed, until fully repaired in the spring of 1941.[28]
Subsequent operations
At 10:00 on 21 October, Leander opened fire on three aircraft at 13,000 ft (4,000 m), which bombed about 200 yd (180 m) ahead of the ship, two more bombs turning out to be duds. No damage was done and Leander and Kimberley re-joined Convoy BN 7 just after noon. (As they passed Felix Roussel they were cheered by hundreds of New Zealand soldiers.) In the afternoon, Leander transferred the tow to Kingston which left the convoy with Kimberley next morning, for Port Sudan. The southbound convoy BS 7 with 20 ships, was met by the convoy escorts in the afternoon of 23 October and after an uneventful passage, dispersed east of Aden on 28 October.[29] Later on 21 October, three Blenheim bombers of 45 Squadron found and bombed the wreck of Francesco Nullo.[25] The Italians made another fruitless sortie on 3 December, cancelled one in January 1941 after Daniele Manin was damaged by a bomb and on 24 January, sortied again with no result.[26]
Attack on Convoy BN 14
On the night of 2/3 February 1941, the Italian destroyers Pantera, Tigre and Nazario Sauro sailed from Massawa, to intercept a convoy known to be in the area. BN 14 consisted of 39 merchant ships escorted by the cruiser Caledon, the destroyer Kingston and the sloops Indus and Shoreham. Sauro sighted the convoy and fired three torpedoes, then fired again at a ship seen in a cloud of smoke, before turning away at high speed. The two other ships did not receive the sighting report from Sauro but ten minutes later Pantera saw the ships and fired torpedoes, hearing explosions and claiming probables on two merchantmen; Tigre failed to find the convoy. Close to the Massawa in the South Channel, Nazario Sauro ran into Kingston but had run out of torpedoes. Fearful that the British were trying to spring ambush, the other Italian ships converged on Nazario Sauro and called by wireless for air cover at dawn, reaching port unharmed. Local Italian press reports claimed that two ships had been hit but this report was mistaken.[30]
Notes
- Three survivors got into a life raft and the observer Sottotenente (Sub-Lieutenant) Goffredo Franchini in command of the sortie climbed onto one of the wings. Franchini realised that if he joined the others, the life raft would be swamped and ordered the crew to make for the island nearby without him. The men in the raft decided to make for Dahlak Island and collected birds' eggs before setting off. The three men arrived after two weeks, were rescued by local civilians and collected by a destroyer, reaching Massawa three weeks after being shot down.[10]
- After joining the Red Sea Force, Yarra had escorted convoys in the Red Sea and intercepted blockade-running dhows.[15]
- Borsini and his attendant Vincenzo Ciaravolo were awarded the Gold Medal by the Italian Navy, which then ordered that thenceforth, captains were to abandon ship.
Footnotes
- Gill 1957, pp. 133, 199.
- Gill 1957, p. 133.
- Gill 1957, pp. 134, 201.
- Campbell 1985, pp. 335–338.
- Bragadin 1957, p. 41.
- O'Hara 2009, p. 102.
- Shores 1996, p. 17.
- O'Hara 2009, p. 101.
- Gill 1957, p. 201.
- Shores 1996, p. 33.
- Rohwer & Hümmelchen 1992, pp. 29, 32.
- Shores 1996, pp. 58, 73.
- Rohwer & Hümmelchen 1992, pp. 33, 35.
- Sutherland & Canwell 2009, pp. 55–56.
- Gill 1957, p. 227.
- Waters 1956, p. 89.
- O'Hara 2009, p. 103.
- Gill 1957, pp. 227–228.
- Waters 1956, p. 90.
- Waters 1956, pp. 89–90.
- Waters 1956, p. 90; O'Hara 2009, p. 103.
- O'Hara 2009, p. 104.
- Waters 1956, p. 90; O'Hara 2009, p. 105.
- Waters 1956, pp. 90–91.
- Playfair 1959, p. 248.
- O'Hara 2009, p. 105.
- Bragadin 1957, p. 41; O'Hara 2009, p. 103.
- Mason 2011.
- Waters 1956, p. 91.
- O'Hara 2009, pp. 106–107.
References
- Bragadin, Marc' Antonio (1957). The Italian Navy in World War II. Translated by Hoffman, G. Annapolis Maryland: Naval Institute Press. LCCN 57-6515. OCLC 924029600.
- Campbell, John (1985). Naval Weapons of World War Two. Annapolis, Maryland: Naval Institute Press. ISBN 978-0-87021-459-2.
- Gill, G. Hermon (1957). "Chapter 5, R. A. N. Ships Overseas June–December 1940" (PDF). Royal Australian Navy, 1939–1942. Australia in the War of 1939–1945, Series 2. I (online ed.). Canberra, ACT: Australian War Memorial. pp. 140–246. OCLC 848228. Retrieved 28 February 2016.
- Mason, G. B. (3 August 2011). Smith, G. (ed.). "HMS Kimberley (F 50) K-class Destroyer including Convoy Escort Movements". World War 2 1939–1945. Naval-History.Net. Retrieved 28 April 2020.
- O'Hara, Vincent P. (2009). "Chapter 6: The Red Sea, 1940–41". Struggle for the Middle Sea: The Great Navies at War in the Mediterranean Theater, 1940–1945. London: Conway. pp. 99–107. ISBN 978-1-84486-102-6.
- Playfair, I. S. O.; et al. (1959) [1954]. Butler, J. R. M. (ed.). The Mediterranean and Middle East: The Early Successes Against Italy (to May 1941). History of the Second World War, United Kingdom Military Series. I (4th impr. ed.). HMSO. OCLC 494123451. Retrieved 3 September 2015.
- Rohwer, Jürgen; Hümmelchen, Gerhard (1992) [1972]. Chronology of the War at Sea, 1939–1945: The Naval History of World War Two (2nd rev. ed.). Annapolis, MD: Naval Institute Press. ISBN 978-1-55750-105-9.
- Shores, Christopher (1996). Dust Clouds in the Middle East: The Air War for East Africa, Iran, Syria, Iran and Madagascar, 1940–42. London: Grub Street. ISBN 978-1-898697-37-4.
- Sutherland, J.; Canwell, D. (2009). Air War East Africa 1940–41: The RAF Versus the Italian Air Force. Barnsley: Pen & Sword Aviation. ISBN 978-1-84415-816-4.
- Waters, S. D. (1956). The Royal New Zealand Navy. Official History of New Zealand in the Second World War 1939–45 (online ed.). Wellington, NZ: War History Branch, Dept. of Internal Affairs. OCLC 11085179. Retrieved 27 February 2016 – via New Zealand Electronic Text Centre.
Further reading
- O'Hara, Vincent P. (2012). "Red Sea, Naval Operations in". In Tucker, Spencer C. (ed.). World War II at Sea: An Encyclopedia. Santa Barbara, CA: ABC-CLIO. ISBN 978-1-59884-458-0.
- Roskill, S. W. (1957) [1954]. Butler, J. R. M. (ed.). The Defensive. History of the Second World War United Kingdom Military Series: The War at Sea 1939–1945. I (4th impr. online ed.). London: HMSO. OCLC 881709135. Retrieved 28 February 2016 – via Hyperwar.
- Waters, S. D. (1950). "Protection of Red Sea Convoys". Leander. The Official History of New Zealand in the Second World War 1939–1945 (online ed.). Wellington, NZ: Historical Publications Branch, Department of Internal Affairs, Government of New Zealand. pp. 1–7. OCLC 1003719. Retrieved 28 February 2016 – via New Zealand Electronic Text Centre.
