Battle of Crysler's Farm
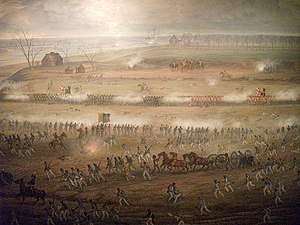
The Battle of Crysler's Farm, also known as the Battle of Crysler's Field,[5] was fought on 11 November 1813, during the Anglo-American War of 1812 (the name Chrysler's Farm is sometimes used for the engagement, but Crysler is the proper spelling). A British and Canadian force won a victory over a US force which greatly outnumbered them. The US defeat prompted them to abandon the St. Lawrence Campaign, their major strategic effort in the autumn of 1813.
Saint Lawrence Campaign
The American plan
The battle arose from a United States military campaign which was intended to capture Montreal. The resulting military actions, including the Battle of the Chateauguay, the Battle of Crysler's Field and a number of skirmishes, are collectively known as the St. Lawrence Campaign.
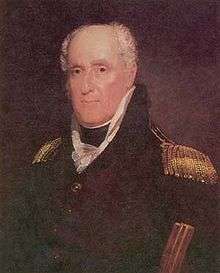
The US plan was devised by United States Secretary of War John Armstrong Jr., who originally intended taking the field himself.[6] Because it was difficult to concentrate the necessary force in one place due to the initially scattered disposition of the troops and inadequate lines of communication, it involved two forces which would combine for the final assault. Major General James Wilkinson's division of 8,000 would concentrate at Sackett's Harbor on Lake Ontario, and proceed down the Saint Lawrence River in gunboats, batteaux and other small craft. At some point, they would rendezvous with another division of 4,000 under Major General Wade Hampton advancing north from Plattsburgh on Lake Champlain, to make the final attack on Montreal.
Even as preparations proceeded, it was apparent that the plan had several shortcomings. Until the last minute, it was uncertain that Montreal was to be the objective, as Armstrong originally intended to attack Kingston, where the British naval squadron on Lake Ontario was based. However, Commodore Isaac Chauncey, commanding the US Navy squadron on the lake, refused to risk his ships in any attack against Kingston.[7] There was mistrust between the US Army officers concerned; Wilkinson had an unsavoury reputation as a scoundrel, and Hampton originally refused to serve in any capacity in the same army as Wilkinson.[6] The troops lacked training and uniforms, sickness was rife and there were too few experienced officers. Chiefly though, it appeared that neither force could carry sufficient supplies to sustain itself before Montreal, making a siege or any prolonged blockade impossible.
American preliminary moves
Hampton began his part of the campaign on 19 September with an advance down the Richelieu River, which flows north from Lake Champlain. He decided that the defences on this obvious route were too strong and instead shifted westward to Four Corners, on the Chateauguay River near the border with Canada. He was forced to wait there for several weeks as Wilkinson's force was not ready, which cost him some of his initial advantage in numbers as Canadian troops were moved to the Chateauguay, and reduced his supplies.
Armstrong had intended that Wilkinson's force would set out on 15 September. On 2 September, Wilkinson himself had gone to Fort George, which the Americans had captured in May, to arrange the movement of Brigadier General John Parker Boyd's division from Fort George to rendezvous with the troops from Sackett's Harbor.[7] Possibly because he was ill, he delayed around Fort George for nearly a month. He returned to Sackett's Harbor, and Boyd's division began its movement, only in the first week in October.
The poor prospects for success (and possibly his own illness)[6] led Armstrong to abandon his intention of leading the final assault himself. He handed overall command of the expedition to Wilkinson and departed Sackett's Harbor on his way to Washington on 16 October, just before Wilkinson's part of the campaign was at last launched. Armstrong's letter to Hampton, notifying him of the change in command and also throwing much of the burden of supplying the combined force onto him, arrived the evening before Hampton's army fought the Battle of the Chateauguay. Although Hampton nevertheless attacked, as part of his force was already committed to an outflanking move, he immediately sent his resignation, and fell back when his first attack was repulsed.[8]
Wilkinson's moves
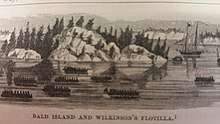
Wilkinson's force left Sackett's Harbor in 300 batteaux and other small craft[9] on 17 October, bound at first for Grenadier Island at the head of the St. Lawrence. Mid-October was very late in the year for serious campaigning in the Canadas and the American force was hampered by bad weather, losing several boats and suffering from sickness and exposure. It took several days for the last stragglers to reach Grenadier Island.[10]
On 1 November, the first boats set out from the island, and reached French Creek (near present-day Clayton, New York) on 4 November. Here, the first shots of the campaign were fired. British brigs and gunboats under Commander William Mulcaster had left Kingston to rendezvous with and escort batteaux and canoes carrying supplies up the Saint Lawrence. The aggressive Mulcaster bombarded the American anchorages and encampments during the evening. The next morning, American artillerymen under Lieutenant Colonel Moses Porter drove him away, using hastily heated "hot shot".[10] (The red-hot American cannonballs set fire to the brig Earl of Moira, and the crew intentionally scuttled the brig to extinguish the fire. The brig was later salvaged and returned to service.)[12]
From French Creek, Wilkinson proceeded down the river. On 6 November, while at the settlement of Hoags, he received the news that Hampton had been repulsed at the Chateauguay River on 26 October. He sent fresh instructions to Hampton to march westward from his present position at Four Corners, New York and meet him at Cornwall.[10]
Wilkinson's force successfully bypassed the British post at Prescott late on 7 November. The troops and ammunition were disembarked and marched around Ogdensburg on the south bank of the river, while the lightened boats ran past the British batteries under cover of darkness and poor visibility. Only one boat was lost, with two killed and three wounded. The next day, while the main body re-embarked, an advance guard battalion commanded by Colonels Alexander Macomb and Winfield Scott, followed by a battalion of riflemen under Major Benjamin Forsyth were landed on the Canadian side of the river to clear the river bank of harassing Canadian militia, which were reported to have turned "every narrow stretch of the waterway" from Leeds to Glengarry into "a shooting gallery".[13][14]
On the following day (9 November), Wilkinson held a council of war. All his senior officers appeared to be determined to proceed with the expedition, regardless of the difficulties and alarming reports of enemy strength.[15] The advance guard was reinforced with the 2nd Brigade (6th, 15th and 22nd U.S. Infantry) under Brigadier General Jacob Brown, who took command of the force which numbered 2.500.[16] Brown's force marched eastward along the northern bank of the river, clearing a small British garrison from Fort Matilda, at the river's narrowest point. Before the main body could follow by water, Wilkinson learned that a British force was pursuing him. He landed almost all the other troops as a rearguard, under Brigadier General John Parker Boyd. Late on 10 November, after a day spent marching under intermittent fire from British gunboats and field guns, Wilkinson set up his headquarters in Cook's Tavern, with Boyd's troops bivouacked in the surrounding woods.
British counter-moves
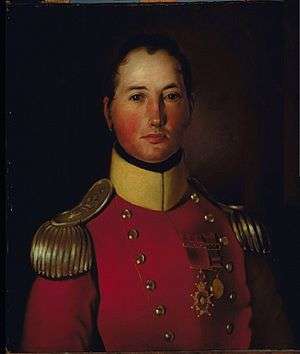
The British had been aware of the American concentration at Sackett's Harbor, but for a long time they had believed, with good reason, that their own main naval base at Kingston was the intended target of Wilkinson's force. Major General Francis de Rottenburg, the Lieutenant Governor of Upper Canada, had massed his available troops there. When Mulcaster returned from French Creek late on 5 November with news that the Americans were heading down the Saint Lawrence, de Rottenburg dispatched a Corps of Observation after them, in accordance with orders previously issued by Governor General Sir George Prevost.[17]
The corps initially numbered 650 men, and was commanded by Lieutenant Colonel Joseph Wanton Morrison, the commanding officer of the 2nd Battalion, the 89th Regiment. They were embarked in the schooners Beresford and Sir Sydney Smith, accompanied by seven gunboats and several small craft, all commanded by Mulcaster. They departed from Kingston in thick weather late on 7 November[18] and evaded the ships of Commodore Isaac Chauncey, which were blockading the base, among the Thousand Islands at the head of the Saint Lawrence River. On 9 November, they reached Prescott, where the troops disembarked as the schooners could proceed no farther (although Mulcaster continued to accompany them with three gunboats and some batteaux). Morrison was reinforced by a detachment of 240 men from the garrison of Prescott, to a total strength of about 900 men.[17]
Marching rapidly, they caught up with Boyd's rearguard on 10 November. That evening they encamped near Crysler's Farm, two miles upstream from the American positions. The terrain was mainly open fields, which gave full scope to British tactics and musketry, while the muddy ground (planted with fall wheat) and the marshy nature of the woods surrounding the farm would hamper the American manoeuvres. Morrison was keen to accept battle here if offered.[19]
Battle
As dawn broke on 11 November, it was cold and raining, though the rain later eased. Firing broke out in two places. On the river, Mulcaster's gunboats began shooting at the American boats clustered around Cook's Point, while a Mohawk fired a shot at an American party scouting near their encampment, who replied with a volley.[20] Half a dozen Canadian militia dragoons bolted back to the main British force, calling that the Americans were attacking. The British force dropped its half-cooked breakfast and formed up, which caused American sentries to report that the British were attacking, and forced the Americans in turn to form up and stand to arms.
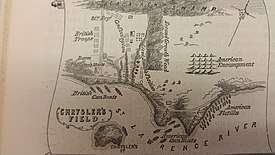
At about 10:30 in the morning, Wilkinson received a message from Jacob Brown, who reported that the previous evening he had defeated 500 Stormont, Dundas and Glengarry Highlanders Militia at Hoople's Creek and the way ahead was clear. To proceed however, the American boats would next have to face the Long Sault rapids and Wilkinson determined to drive Morrison off before tackling them. He himself had been ill for some time, and could not command the attack himself. His second-in-command, Major General Morgan Lewis, was also "indisposed". This left Brigadier General Boyd in command. He had immediately available the 3rd Brigade under Brigadier General Leonard Covington (9th, 16th and 25th U.S. Infantry) and the 4th Brigade under Brigadier General Robert Swartwout (11th, 14th and 21st U.S. Infantry), with two 6-pounder guns. Some distance down-river were part of Boyd's own 1st Brigade under the brigade's second-in-command, Colonel Isaac Coles, (12th and 13th U.S. Infantry), four more 6-pounder guns and a squadron of the 2nd U.S. Dragoons. In all, Boyd commanded perhaps 2,500 men[21] (though some sources put the figure at 4,000).[22]
British dispositions
The British were disposed in echelon, with their right wing thrown forward:
- Lining a ravine close to the American positions and in the woods on the left was the skirmish line under Major Frederick Heriot of the Canadian Voltigeurs, consisting of three companies of the Voltigeurs and around two dozen Mohawks from Tyendinaga[23] under Interpreter-Lieutenant Charles Anderson. (A small rifle company of the Leeds Militia may also have been present.)
- The right wing was part of the detachment from Prescott under its commandant, Lieutenant Colonel Thomas Pearson.[24] It consisted of the flank (i.e. light and grenadier) companies of the 49th Regiment and a detachment of the Canadian Fencibles (perhaps 150 men in total) with a 6-pounder gun of the Canadian Provincial Artillery. They occupied some buildings on the river bank near the Americans, with a small gully protecting their front.
- Behind their left flank were three companies (150 men) of the 2/89th under Captain G. W. Barnes.
- Behind Barnes's left flank in turn was the British main body; the centre companies of the 49th (160 men) under Lieutenant Colonel Charles Plenderleath on the right and six companies (300 men) of the 2/89th on the left under Morrison himself.
- Morrison himself stated that he disposed one each of his three 6-pounder guns to support each of his three detachments (Pearson, Barnes and the main body). However, various sources state that while the militia gun was posted with Pearson, the two 6-pounder guns of the Royal Artillery under Captain H. G. Jackson occupied a small hillock behind the 49th, and fired over their heads during the engagement.[25]
Action
Boyd did not order an assault until the middle of the afternoon. On the American right, the 21st U.S. Infantry under Colonel Eleazer Wheelock Ripley advanced and drove the British skirmish line back through the woods, for almost a mile. Here they paused to draw breath, and were joined by the 12th and 13th U.S. Infantry from Coles' brigade.[22] (Where Swartwout's other two regiments were at this point is unclear). Ripley and Coles resumed their advance along the edge of the woods, but were startled to see a line of redcoats (the 2nd/89th, on Morrison's left flank) rise up out of concealment and open fire. The American soldiers dived behind tree stumps and bushes to return fire, and their attack lost all order and momentum. As ammunition ran short, they began to retreat out of line.[26]
Meanwhile, Covington's brigade struggled across the ravine and deployed into line, under musket and shrapnel fire. Legend has it that at this point, Covington mistook the battle-hardened 49th Regiment in their grey greatcoats for Canadian militia and called out to his men, "Come on, my lads! Let us see how you will deal with these militiamen!"[27] A moment later, he was mortally wounded. His second-in-command took over, only to be killed almost immediately. The brigade quickly lost order and began to retreat.
Boyd could not bring all his six guns into action until his infantry were already falling back. When they did open fire from the road along the river bank, they were quite effective. Morrison's second-in-command, Lieutenant Colonel John Harvey, ordered the 49th to capture them. The 49th made a charge in awkward echelon formation, suffering heavy casualties from the American guns as they struggled across several rail fences. The United States Dragoons (under Wilkinson's Adjutant General, Colonel John Walbach) now intervened, charging the exposed right flank of the 49th.[21] The 49th halted their own advance, reformed line from echelon formation and wheeled back their right. Under heavy fire from the 49th, Pearson's detachment and Jackson's two guns, the dragoons renewed their charge twice but eventually fell back, leaving 18 killed and 12 wounded (out of 130).[21] They had bought time for all but one of the American guns to be removed. Barnes's companies of the 2/89th overtook the 49th and captured the one gun which had become bogged down and been abandoned.
It was now about half past four. Almost all of the American army was in full retreat. The 25th U.S. Infantry under Colonel Edmund P. Gaines and the collected boat guards under Lieutenant Colonel Timothy Upham held the ravine for a while, but Pearson threatened to get round their left flank, and they too fell back.[28] As it was growing dark and the weather was turning stormy, the British halted their advance. The American Army meanwhile retreated in great confusion to their boats and crossed to the south (American) bank of the river, although the British did not stand down from battle stations for some time, wary of the Americans renewing the attack. An American witness stated that 1,000 American stragglers had made their way across the river during the battle itself.[29]
Casualties
Although the British casualties were reported in Morrison's despatches as 22 killed, 148 wounded and 9 missing, it has been demonstrated that a further 9 men were killed and an additional 4 men were missing,[2] giving a revised total of 31 killed, 148 wounded and 13 missing. The American casualties, from the official return, were 102 killed, and 237 wounded including Brigadier General Covington.[30] No figures were given for men missing or captured but the official return notes that three of the sixteen officers listed as wounded were also captured.[31] The number of American prisoners taken was initially reported as "upwards of 100" by Morrison but he wrote that more were still being brought in.[32] The final tally was 120.[4] Most of these were severely wounded men who had been left on the field but fourteen unwounded enlisted men were captured after trying to hide in a swamp.[33] A Canadian who rode across the battlefield on the morning of 12 November remembered it being "covered with Americans killed and wounded".[34]
Aftermath

On 12 November, the sullen American flotilla successfully navigated the Long Sault rapids. That evening, they reached a settlement known as Barnhardt's, 3 miles (4.8 km) above Cornwall, where they rendezvoused with Brown's detachment. There was no sign of Hampton's force, but Colonel Henry Atkinson, one of Hampton's staff officers, brought Hampton's reply to Wilkinson's letter of 6 November. Hampton stated that shortage of supplies had forced him to retire to Plattsburgh. Wilkinson used this as pretext to call another council of war, which unanimously opted to end the campaign.[35] The defeat of American forces at the Battle of Crysler's Farm and, on 26 October, at the Battle of the Chateauguay ended the American threat to Montreal in the late fall of 1813 and with it the risk that Canada would have been cut into two parts.
The army went into winter quarters at French Mills, 7 miles (11 km) from the Saint Lawrence, but the roads were almost impassable at this season, and Wilkinson was also forced by lack of supplies and sickness among his army to retreat to Plattsburg. He was later dismissed from command shortly after a failed attack on a British outpost at Lacolle Mills. He subsequently faced a court martial on various charges of negligence and misconduct during the St. Lawrence campaign, but was exonerated. Lewis was retired, while Boyd was sidelined into rear-area commands. Brown, Macomb, Ripley and Gaines were subsequently promoted.
On the British side, Mulcaster was promoted to post-captain to take command of a frigate but lost a leg in 1814 during the Raid on Fort Oswego, ending his active career. Morrison also was severely wounded later in 1814 at the Battle of Lundy's Lane. Morrison, Harvey and Pearson all eventually became generals, as did Major James B. Dennis, who commanded the militia which fought Brown at Hoople's Creek. Twelve rank and file survived to claim a Military General Service Medal in 1847 for serving at the battle, although others may not have bothered to do so.[36]
Legacy

The battle site was designated a National Historic Site of Canada in 1920.[37][38] The area of Crysler's Farm was permanently submerged in 1958 as a result of the construction of the Moses-Saunders Power Dam for the St. Lawrence Seaway. A monument (erected in 1895) commemorating the battle was moved from Crysler's Farm to Upper Canada Village in Morrisburg. See also the Lost Villages.
Ten active regular battalions of the United States Army (1–2 Inf, 2-2 Inf, 1–4 Inf, 2–4 Inf, 3–4 Inf, 1–5 Inf, 2–5 Inf, 1–6 Inf, 2–6 Inf and 4–6 Inf) perpetuate the lineages of a number of American infantry regiments (the old 9th, 11th, 13th, 14th, 16th, 21st, 22nd, 23rd and 25th Infantry Regiments) that took part in the battle.
The British Army did not award a battle honour for Crysler's Farm. The 49th Regiment of Foot is perpetuated in the British Army by the Rifles Regiment, while the 89th is perpetuated by the Royal Irish Regiment (1992).
Three regiments of the Canadian Army (the Royal 22e Régiment, the Stormont, Dundas and Glengarry Highlanders and Les Voltigeurs de Québec) do carry the Battle Honour "Crysler's Farm", awarded by the Canadian Government in 2012 to Canadian Army regiments that are the successor units of regular and militia units that took part in the battle. The honour commemorates both the significance of the battle for the defence of Canada as well as the sacrifices made by regular and militia units during the engagement.
On the occasion of the bicentennial of the battle (11 November 2013) Prime Minister Stephen Harper visited the Crysler's Farm Battlefield Park on Remembrance Day and laid a wreath at the Cenotaph in the presence of contingents from the Royal 22e Régiment, the Stormont, Dundas and Glengarry Highlanders and Les Voltigeurs de Québec as well as representatives from First Nations who fought there. American and British diplomatic representatives also attended the ceremony and laid wreaths.[39]
Notes
- Feltoe, pp.143
- Graves, pp. 268–269; notes 6 and 7, p. 403
- Elting, p. 150
- Cruikshank, p. 220
- Lossing, p. 654
- Elting (1995), p. 137
- Elting (1995), p. 138
- Elting, p. 146
- Ashdown, Dana William. ""Wilkinson's Invasion Flotilla of 1813: A paper examining the American flotilla of Major-General James Wilkinson, and its potential survival in the Salmon River at Fort Covington, New York."" (PDF). napoleon-series.org. Retrieved 20 May 2020.
- Elting, p. 142
- Lossing, Benson (1868). The Pictorial Field-Book of the War of 1812. Harper & Brothers, Publishers. p. 650.
- Malcomson, Robert (1998). Lords of the Lake:The Naval War on Lake Ontario 1812–1814. Toronto: Robin Brass Studio. ISBN 1-896941-08-7.
- Way, in Zaslow, p.67
- https://www.canadiangeographic.ca/sites/cgcorp/files/images/web_articles/magazine/jf12/cryslers_farm.pdf
- Hitsman, p. 189
- Elting, p.148
- Hitsman, pp. 188–189
- Way, in Zaslow, p. 66
- Way, in Zaslow, p. 69
- Way, in Zaslow, p. 73
- Elting, p. 149
- Way, in Zaslow, p. 74
- Hitsman, p.190
- Graves, Donald E. (September–October 2011). "Forgotten Hero in a Forgotten War". Humanities. Archived from the original on 2012-02-26. Retrieved 2012-01-01.
- Way, in Zaslow, p. 72
- Narrative of Ripley, in Way, in Zaslow, p. 76
- Way, in Zaslow, p. 75
- Hitsman, p. 191
- Way, in Zaslow, p. 81
- Elting, p. 150
- Cruikshank, p. 174
- Cruikshank, p. 170
- Graves, p. 257
- Graves, p. 272
- Elting, pp. 150–151
- Way, in Zaslow, p. 82
- Battle of Crysler's Farm, Directory of Designations of National Historic Significance of Canada
- "Battle of Crysler's Farm National Historic Site of Canada". Canada's Historic Places. Archived from the original on 9 June 2012. Retrieved 13 June 2017., National Register of Historic Places
- Goodman, Le-Anne (11 November 2013). "Remembrance Day 2013: Harper Marks 200th Anniversary Of Key War Of 1812 Battle". Huffington Post Canada. The Canadian Press. Retrieved 13 June 2017.
Sources
- Borneman, Walter R. (2004). 1812: The War That Forged a Nation. New York: Harper Perennial. ISBN 978-0-06-053112-6.
- Cruikshank, Ernest A. (1971) [1907]. The Documentary History of the Campaign upon the Niagara Frontier in the Year 1813. Part IV: October to December 1813 (Reprint ed.). by Arno Press. ISBN 0-405-02838-5.
- Elting, John R. (1991). Amateurs to Arms. New York: Da Capo Press. ISBN 0-306-80653-3.
- Graves, Donald E. (1999). Field of Glory: The Battle of Crysler's Farm, 1813. Toronto: Robin Brass Studio. ISBN 1-896941-10-9.
- Hitsman, J. Mackay (1999) [1968]. The Incredible War of 1812. Robin Brass Studio. ISBN 1-896941-13-3.
- Latimer, Jon (2007). 1812: War with America. Harvard University Press. ISBN 0-674-02584-9.
- Lossing, Benson John (1976). The Pictorial Fieldbook of the War of 1812: A facsimile of the 1869 edition with a foreword by John T. Cunningham. Somerworth, NH: New Hampshire Publishing Company. ISBN 0-912274-31-X.
- Way, Ronald L. (1964). Morris Zaslow (ed.). The Defended Border. Macmillan of Canada. ISBN 0-7705-1242-9.
- Feltoe, Richard (2012). Redcoated Ploughboys: The Volunteer Battalion of Incorporated Militia of Upper Canada, 1813–1815. Dundurn. ISBN 1554889987.
External links
| Wikimedia Commons has media related to Battle of Crysler's Farm. |
