HMS King George V (1911)
HMS King George V was the lead ship of her class of four dreadnought battleships built for the Royal Navy in the early 1910s. She spent the bulk of her career assigned to the Home and Grand Fleets, often serving as a flagship. Aside from participating in the failed attempt to intercept the German ships that had bombarded Scarborough, Hartlepool and Whitby in late 1914, the Battle of Jutland in May 1916 and the inconclusive Action of 19 August, her service during the First World War generally consisted of routine patrols and training in the North Sea.
.jpg) A postcard of King George V underway, about 1913 | |
| History | |
|---|---|
| Name: | King George V |
| Namesake: | King George V |
| Builder: | HM Dockyard, Portsmouth |
| Cost: | £1,961,096 |
| Laid down: | 16 January 1911 |
| Launched: | 9 October 1911 |
| Commissioned: | 16 November 1912 |
| Decommissioned: | 26 October 1926 |
| Fate: | Sold for scrap, December 1926 |
| General characteristics (as built) | |
| Class and type: | King George V-class dreadnought battleship |
| Displacement: | 25,420 long tons (25,830 t) (normal) |
| Length: | 594 ft 4 in (181.2 m) (o/a) |
| Beam: | 89 ft 1 in (27.2 m) |
| Draught: | 28 ft 8 in (8.7 m) |
| Installed power: |
|
| Propulsion: | 4 × shafts; 2 × steam turbine sets |
| Speed: | 21 knots (39 km/h; 24 mph) |
| Range: | 5,910 nmi (10,950 km; 6,800 mi) at 10 knots (19 km/h; 12 mph) |
| Complement: | 869–1,114 |
| Armament: |
|
| Armour: | |
After the war, King George V became flagship of the Home Fleet and then of the Reserve Fleet before she was assigned to the Mediterranean Fleet in late 1920. The ship evacuated refugees during the Great fire of Smyrna in September 1922 before returning home at the beginning of 1923. King George V was reduced to reserve and used as a training ship until late 1926 and was sold for scrap later in the year in accordance with the terms of the Washington Naval Treaty.
Design and description
The King George V-class ships were designed as enlarged and improved versions of the preceding Orion-class battleship.[1] King George V had an overall length of 594 feet 4 inches (181.2 m), a beam of 89 feet 1 inch (27.2 m) and a draught of 28 feet 8 inches (8.7 m). She displaced 25,420 long tons (25,830 t) at normal load and 27,120 long tons (27,560 t) at deep load; by 1918, the ship's deep displacement had increased to 28,422 long tons (28,878 t). Her crew numbered 869 officers and ratings upon completion and 1,114 in 1916.[2]
The ships of the King George V class were powered by two sets of Parsons direct-drive steam turbines, each driving two shafts, using steam provided by 18 Babcock & Wilcox boilers. The turbines were rated at 27,000 shaft horsepower (20,000 kW) and were intended to give the battleships a speed of 21 knots (39 km/h; 24 mph).[3] During her sea trials on 4 November 1912, King George V reached a maximum speed of 22.4 knots (41.5 km/h; 25.8 mph) from 33,022 shp (24,625 kW). She carried enough coal and fuel oil to give her a range of 5,910 nautical miles (10,950 km; 6,800 mi) at a cruising speed of 10 knots (19 km/h; 12 mph).[4]
Armament and armour
Like the Orion class, the King George Vs were equipped with 10 breech-loading (BL) 13.5-inch (343 mm) Mark V guns in five hydraulically powered twin-gun turrets, all on the centreline. The turrets were designated 'A', 'B', 'Q', 'X' and 'Y', from front to rear. Their secondary armament consisted of 16 BL 4-inch (102 mm) Mark VII guns. Eight of these were mounted in the forward superstructure, four in the aft superstructure, and four in casemates in the side of the hull abreast of the forward main gun turrets, all in single mounts. Four 3-pounder (1.9 in (47 mm)) saluting guns were also carried. The ships were equipped with three 21-inch (533 mm) submerged torpedo tubes, one on each broadside and another in the stern, for which 14 torpedoes were provided.[5]
The King George V-class ships were protected by a waterline 12-inch (305 mm) armoured belt that extended between the end barbettes. Their decks ranged in thickness between 1 inch (25 mm) and 4 inches with the thickest portions protecting the steering gear in the stern. The main battery turret faces were 11 inches (279 mm) thick, and the turrets were supported by 10-inch-thick (254 mm) barbettes.[2]
Modifications

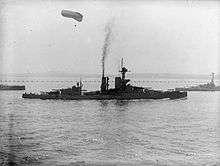
A fire-control director was installed on the roof of the spotting top in 1914, before the start of the war in August; her original pole foremast was reinforced by flanged girders to stiffen it and allow it to bear the weight of the director.[6] By October 1914, a pair of 3-inch (76 mm) anti-aircraft (AA) guns had been added.[7] The torpedo nets were removed in 1915–1916. Approximately 80 long tons (81 t) of additional deck armour was added after the Battle of Jutland and a medium-length rangefinder was added atop the conning tower. Around the same time, the ship was modified to use a kite balloon. By April 1917, the 4-inch guns had been removed from the hull casemates as they were frequently unusable in heavy seas. The casemates were plated over and some of the compartments were used for accommodations. That same year, the spotting top was enlarged and the foremast was fitted with full-sized tripod legs to handle the additional weight. Her stern torpedo tube was removed in 1917–1918 and flying-off platforms were fitted on the roofs of 'B' and 'Q' turrets during 1918.[8]
Construction and career

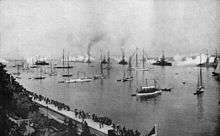
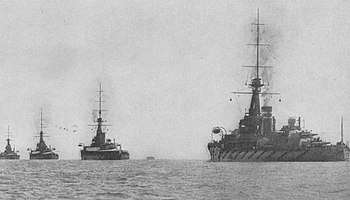
King George V, named after the reigning King of England, George V,[9] was the first ship of her name to serve in the Royal Navy. The ship was initially going to be named Royal George, but was renamed in 1910.[10] She was laid down at HM Dockyard, Portsmouth on 16 January 1911 and launched on 9 October.[11] She was completed just over a year later, in November 1912, at a cost of £1,961,096[2] and was commissioned on 16 November. King George V was assigned to the 2nd Battle Squadron, commanded by Vice-Admiral Sir George Warrender, and was the squadron flagship by 18 February 1913.[12] She was later joined by her three sister ships and they represented the Royal Navy during the celebrations of the re-opening of the Kaiser Wilhelm Canal in Kiel, Germany, 23–30 June 1914, held in conjunction with Kiel Week.[13] Princess Irene of Hesse and by Rhine and her sons visited King George V on 24 June, followed by Kaiser Wilhelm II the next day. An "at home" was held on board on the 26th to which all the notables of Kiel were invited, with Admiral Warrender's wife, Maude, acting as hostess. On 29 June, Warrender hosted a lunch for many of the senior admirals of the Imperial German Navy, including Großadmiral (Grand Admiral) Alfred von Tirpitz, and Admirals Friedrich von Ingenohl and Carl von Coerper.[14]
First World War
Between 17 and 20 July 1914, King George V took part in a test mobilisation and fleet review as part of the British response to the July Crisis. Arriving in Portland on 25 July, she was ordered to proceed with the rest of the Home Fleet to Scapa Flow four days later[15] to safeguard the fleet from a possible surprise attack by the Imperial German Navy.[16] In August 1914, following the outbreak of the First World War, the Home Fleet was reorganised as the Grand Fleet, and placed under the command of Admiral Sir John Jellicoe.[17] Repeated reports of submarines in Scapa Flow led Jellicoe to conclude that the defences there were inadequate and he ordered that the Grand Fleet be dispersed to other bases until the defences be reinforced. On 16 October the 2nd BS was sent to Loch na Keal on the western coast of Scotland. The squadron departed for gunnery practice off the northern coast of Ireland on the morning of 27 October and her sister Audacious struck a mine, laid a few days earlier by the German auxiliary minelayer SS Berlin. Thinking that the ship had been torpedoed by a submarine, the other dreadnoughts were ordered away from the area, while smaller ships rendered assistance. In late November 1914, King George V developed problems with her condensers, even though she had just returned from a refit. This forced the ship to be withdrawn from operations while her port condenser had its tubes replaced, which took until 12 December.[18]
Bombardment of Scarborough, Hartlepool, and Whitby

The Royal Navy's Room 40 had intercepted and decrypted German radio traffic containing plans for a German attack on Scarborough, Hartlepool and Whitby in mid-December using the four battlecruisers of Konteradmiral (Rear-Admiral) Franz von Hipper's I Scouting Group. The radio messages did not mention that the High Seas Fleet with fourteen dreadnoughts and eight pre-dreadnoughts would reinforce Hipper. The ships of both sides departed their bases on 15 December, with the British intending to ambush the German ships on their return voyage. They mustered the six dreadnoughts of the 2nd Battle Squadron, including King George V and her sisters Ajax and Centurion, and stood with the main body in support of Vice-Admiral David Beatty's four battlecruisers.[19]
The screening forces of each side blundered into each other during the early morning darkness of 16 December in heavy weather. The Germans got the better of the initial exchange of fire, severely damaging several British destroyers, but von Ingenohl, commander of the High Seas Fleet, ordered his ships to turn away, concerned about the possibility of a massed attack by British destroyers in the dawn's light. A series of miscommunications and mistakes by the British allowed Hipper's ships to avoid an engagement with Beatty's forces.[20]
1915–1916
Retubing of the ship's starboard condenser took from late December to 4 January 1915. Jellicoe's ships, including King George V, conducted gunnery drills on 10–13 January west of the Orkneys and the Shetland Islands. On the evening of 23 January, the bulk of the Grand Fleet sailed in support of Beatty's battlecruisers, but the fleet was too far away participate in the ensuing Battle of Dogger Bank the following day. On 7–10 March, the Grand Fleet conducted a sweep in the northern North Sea, during which it conducted training manoeuvres. Another such cruise took place on 16–19 March. On 11 April, the Grand Fleet conducted a patrol in the central North Sea and returned to port on 14 April; another patrol in the area took place on 17–19 April, followed by gunnery drills off Shetland on 20–21 April.[21]
The Grand Fleet conducted sweeps into the central North Sea on 17–19 May and 29–31 May without encountering any German vessels. During 11–14 June, the fleet conducted gunnery practice and battle exercises west of Shetland[22] and more training off Shetland beginning on 11 July. The 2nd BS conducted gunnery practice in the Moray Firth on 2 August and then returned to Scapa Flow. On 2–5 September, the fleet went on another cruise in the northern end of the North Sea and conducted gunnery drills. Throughout the rest of the month, the Grand Fleet conducted numerous training exercises. The ship, together with the majority of the Grand Fleet, conducted another sweep into the North Sea from 13 to 15 October. Almost three weeks later, King George V participated in another fleet training operation west of Orkney during 2–5 November and repeated the exercise at the beginning of December.[23] Warrender was relieved by Vice-Admiral Sir Martyn Jerram on 16 December.[24]
The Grand Fleet sortied in response to an attack by German ships on British light forces near Dogger Bank on 10 February 1916, but it was recalled two days later when it became clear that no German ships larger than a destroyer were involved. The fleet departed for a cruise in the North Sea on 26 February; Jellicoe had intended to use the Harwich Force to sweep the Heligoland Bight, but bad weather prevented operations in the southern North Sea. As a result, the operation was confined to the northern end of the sea. Another sweep began on 6 March, but had to be abandoned the following day as the weather grew too severe for the escorting destroyers. On the night of 25 March, King George V and the rest of the fleet sailed from Scapa Flow to support Beatty's battlecruisers and other light forces raiding the German Zeppelin base at Tondern. By the time the Grand Fleet approached the area on 26 March, the British and German forces had already disengaged and a strong gale threatened the light craft, so the fleet was ordered to return to base. On 21 April, the Grand Fleet conducted a demonstration off Horns Reef to distract the Germans while the Imperial Russian Navy relaid its defensive minefields in the Baltic Sea.[25] The fleet returned to Scapa Flow on 24 April and refuelled before proceeding south in response to intelligence reports that the Germans were about to launch a raid on Lowestoft, but only arrived in the area after the Germans had withdrawn. On 2–4 May, the fleet conducted another demonstration off Horns Reef to keep German attention focused on the North Sea.[26]
Battle of Jutland

In an attempt to lure out and destroy a portion of the Grand Fleet, the High Seas Fleet, composed of sixteen dreadnoughts, six pre-dreadnoughts and supporting ships, departed the Jade Bight early on the morning of 31 May. The fleet sailed in concert with Hipper's five battlecruisers. Room 40 had intercepted and decrypted German radio traffic containing plans of the operation. In response the Admiralty ordered the Grand Fleet, totalling some 28 dreadnoughts and 9 battlecruisers, to sortie the night before to cut off and destroy the High Seas Fleet.[27]
On 31 May, King George V, under the command of Captain Frederick Field, was the lead ship of the battle line after deployment.[28] She fired two salvoes for a total of nine common pointed, capped shells at the battlecruiser SMS Derfflinger about 19:17,[Note 1] but had to turn away at 19:22 to avoid an attack by destroyers and then had to turn to avoid the ships of the 1st Light Cruiser and 2nd Cruiser Squadrons. That was the only time that the ship fired her guns during the battle.[29]
Subsequent activity

The Grand Fleet sortied on 18 August to ambush the High Seas Fleet while it advanced into the southern North Sea, but a series of miscommunications and mistakes prevented Jellicoe from intercepting the German fleet before it returned to port. Two light cruisers were sunk by German U-boats during the operation, prompting Jellicoe to decide to not risk the major units of the fleet south of 55° 30' North due to the prevalence of German submarines and mines. The Admiralty concurred and stipulated that the Grand Fleet would not sortie unless the German fleet was attempting an invasion of Britain or there was a strong possibility it could be forced into an engagement under suitable conditions.[30] Vice-Admiral Sir John de Robeck relieved Jerram on 3 December.[31]
In April 1918, the High Seas Fleet again sortied, to attack British convoys to Norway. They enforced strict wireless silence during the operation, which prevented Room 40 cryptanalysts from warning the new commander of the Grand Fleet, Admiral Beatty. The British only learned of the operation after an accident aboard the battlecruiser SMS Moltke forced her to break radio silence to inform the German commander of her condition. Beatty then ordered the Grand Fleet to sea to intercept the Germans, but he was not able to reach the High Seas Fleet before it turned back for Germany.[32] The ship was present at Rosyth, Scotland, when the High Seas Fleet surrendered there on 21 November[33] and she remained part of the 2nd Battle Squadron through 1 March 1919.[34]
Postwar activities

By 1 May, King George V had been assigned to the 3rd Battle Squadron and was serving as the flagship for Vice-Admiral Sir Henry Oliver, commanding both the Home Fleet and the squadron; he had assumed command on 22 March.[35] On 1 November, the 3rd Battle Squadron was disbanded and King George V was transferred to the Reserve Fleet at Portsmouth. She was still Oliver's flagship, although he was now commander of the Reserve Fleet.[36] The ship was relieved as the flagship of the Reserve Fleet by Orion on 14 September 1920[37] and began a refit in preparation for her assignment to the 4th Battle Squadron of the Mediterranean Fleet.[33]
King George V recommissioned on 31 October and sailed for the Mediterranean. In February 1921, together with the dreadnought Benbow and several destroyers, she conducted training exercises in the Sea of Marmara. While passing between Mytilene and the Turkish mainland during the night of 2/3 September 1922, the ship struck an uncharted rock that flooded one of her boiler rooms. The Rear-Admiral of the squadron was forced to transfer his flag to the dreadnought Marlborough and King George V had to transfer some crewmen to bring the former ship up to strength at Smyrna, Turkey. She was present during the Great Fire of Smyrna in mid-September and evacuated 130 refugees to Malta on 16 September as she proceeded there for permanent repairs.[38]
In January 1923, the ship returned home and became a gunnery training ship at Devonport. She was relieved of that duty in November and King George V was reduced to reserve. She was then assigned to the training establishment HMS Impregnable. On 28 September 1926, the ship was taken out of service and was listed for disposal on 1 December to meet the tonnage limitations of the Washington Naval Treaty. Later that month, King George V was sold to the Alloa Shipbreaking Company and arrived at Rosyth on 27 January 1927 to be broken up.[33]
Notes
Citations
- Burt, pp. 169–70
- Burt, p. 176
- Parkes, p. 538
- Burt, pp. 176, 179
- Burt, pp. 175–76
- Brooks, p. 168; Burt, p. 170
- Friedman, p. 199
- Burt, pp. 170, 179–80
- Silverstone, p. 247
- Colledge, p. 188
- Gardiner & Gray, p. 30
- "The Navy List" (PDF). National Library of Scotland. London: His Majesty's Stationery Office. 18 February 1913. p. 269. Retrieved 29 March 2017.
- Burt, p. 186
- von Hase, pp. 35, 40, 49, 58
- Burt, p. 188
- Massie, p. 19
- Gardiner & Gray, p. 32
- Burt, p. 183; Goldrick, p. 156; Jellicoe, pp. 167–68, 173
- Tarrant, pp. 28–30
- Goldrick, pp. 200–14
- Jellicoe, pp. 185, 190–91, 194–96, 206, 211–12
- Jellicoe, pp. 217–19, 221–22
- Jellicoe, pp. 228, 234–35, 243, 246, 250, 253, 257–58
- "Supplement to the Monthly Navy List Showing the Organisation of the Fleet, Flag Officer's Commands, &c" (PDF). National Library of Scotland. Admiralty. February 1915. p. 5. Retrieved 27 March 2017.
- Jellicoe, pp. 270–71, 275, 279–80, 284, 286
- Jellicoe, pp. 286–90
- Tarrant, pp. 54–55, 57–58
- Corbett, frontispiece map and p. 428
- Campbell, pp. 204, 208
- Halpern 1995, pp. 330–32
- "Supplement to the Monthly Navy List Showing the Organisation of the Fleet, Flag Officer's Commands, &c" (PDF). National Library of Scotland. Admiralty. March 1917. p. 5. Retrieved 27 March 2017.
- Halpern 1995, pp. 418–20
- Burt, p. 187
- "Supplement to the Monthly Navy List Showing the Organisation of the Fleet, Flag Officer's Commands, &c". National Library of Scotland. Admiralty. 1 March 1919. p. 10. Retrieved 17 March 2017.
- "Supplement to the Monthly Navy List Showing the Organisation of the Fleet, Flag Officer's Commands, &c". National Library of Scotland. Admiralty. 1 May 1919. pp. 5, 12. Retrieved 17 March 2017.
- "The Navy List" (PDF). National Library of Scotland. London: His Majesty's Stationery Office. 18 December 1919. pp. 694, 707. Retrieved 17 March 2017.
- "The Navy List" (PDF). National Library of Scotland. London: His Majesty's Stationery Office. 18 October 1920. pp. 695–6, 707a, 712–13. Retrieved 17 March 2017.
- Burt, p. 187; Halpern 2011, pp. 304, 345, 378, 385
Bibliography
- Brooks, John (1996). "Percy Scott and the Director". In McLean, David; Preston, Antony (eds.). Warship 1996. London: Conway Maritime Press. pp. 150–170. ISBN 0-85177-685-X.
- Brown, David K. (2003). The Grand Fleet: Warship Design and Development 1906–1922 (reprint of the 1999 ed.). London: Caxton Editions. ISBN 1-84067-531-4.
- Burt, R. A. (1986). British Battleships of World War One. Annapolis, Maryland: Naval Institute Press. ISBN 0-87021-863-8.
- Campbell, N. J. M. (1986). Jutland: An Analysis of the Fighting. Annapolis, Maryland: Naval Institute Press. ISBN 0-87021-324-5.
- Colledge, J. J.; Warlow, Ben (2006) [1969]. Ships of the Royal Navy: The Complete Record of all Fighting Ships of the Royal Navy (Rev. ed.). London: Chatham Publishing. ISBN 978-1-86176-281-8.
- Corbett, Julian (1997). Naval Operations. History of the Great War: Based on Official Documents. III (reprint of the 1940 second ed.). London and Nashville, Tennessee: Imperial War Museum in association with the Battery Press. ISBN 1-870423-50-X.
- Friedman, Norman (2015). The British Battleship 1906–1946. Barnsley, UK: Seaforth Publishing. ISBN 978-1-84832-225-7.
- Gardiner, Robert & Gray, Randal, eds. (1985). Conway's All the World's Fighting Ships 1906–1921. Annapolis, Maryland: Naval Institute Press. ISBN 0-85177-245-5.
- Goldrick, James (2015). Before Jutland: The Naval War in Northern European Waters, August 1914–February 1915. Annapolis, Maryland: Naval Institute Press. ISBN 978-1-59114-349-9.
- Halpern, Paul, ed. (2011). The Mediterranean Fleet, 1919–1929. Publications of the Navy Records Society. 158. Farnham: Ashgate for the Navy Records Society. ISBN 978-1-4094-2756-8.
- Halpern, Paul G. (1995). A Naval History of World War I. Annapolis, Maryland: Naval Institute Press. ISBN 1-55750-352-4.
- Jellicoe, John (1919). The Grand Fleet, 1914–1916: Its Creation, Development, and Work. New York: George H. Doran Company. OCLC 13614571.
- Massie, Robert K. (2003). Castles of Steel: Britain, Germany, and the Winning of the Great War at Sea. New York: Random House. ISBN 0-679-45671-6.
- Parkes, Oscar (1990). British Battleships (reprint of the 1957 ed.). Annapolis, Maryland: Naval Institute Press. ISBN 1-55750-075-4.
- Pears, Randolph. British Battleships 1892–1957 London: Godfrey Cave Associates, Facilimile of 1957 edition, 1979. ISBN 0-906223-14-8.
- Silverstone, Paul H. (1984). Directory of the World's Capital Ships. New York: Hippocrene Books. ISBN 0-88254-979-0.
- Tarrant, V. E. (1999) [1995]. Jutland: The German Perspective: A New View of the Great Battle, 31 May 1916 (repr. ed.). London: Brockhampton Press. ISBN 1-86019-917-8.
- von Hase, Georg, Commander (1921). Kiel and Jutland. London: Skeffington and Son. OCLC 42779733.
External links
| Wikimedia Commons has media related to HMS King George V (ship, 1911). |
