Battle of Labuan
The Battle of Labuan was an engagement fought between Allied and Imperial Japanese forces on the island of Labuan off Borneo during June 1945. It formed part of the Australian invasion of North Borneo, and was initiated by the Allied forces as part of a plan to capture the Brunei Bay area and develop it into a base to support future offensives.
| Battle of Labuan | |||||||
|---|---|---|---|---|---|---|---|
| Part of the Battle of North Borneo, World War II | |||||||
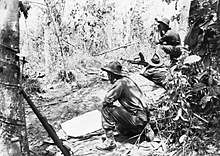
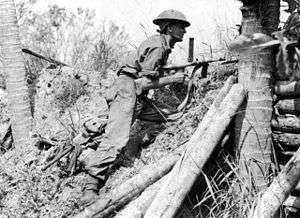 An infantryman from the Australian 2/43rd Battalion in a bomber dispersal bay at Labuan airstrip on 10 June 1945 | |||||||
| |||||||
| Belligerents | |||||||
|
|
| ||||||
| Commanders and leaders | |||||||
|
|
| ||||||
| Units involved | |||||||
|
|
| ||||||
| Strength | |||||||
| One brigade group | c. 550 | ||||||
| Casualties and losses | |||||||
|
34 killed 93 wounded | 389 killed, 11 captured | ||||||
Following several weeks of air attacks and a short naval bombardment, soldiers of the Australian 24th Brigade were landed on Labuan from American and Australian ships on 10 June. The Australians quickly captured the island's harbour and main airfield. The greatly outnumbered Japanese garrison was mainly concentrated in a fortified position in the interior of Labuan, and offered little resistance to the landing. The initial Australian attempts to penetrate the Japanese position in the days after the invasion were not successful, and the area was subjected to a heavy bombardment. A Japanese raiding force also attempted to attack Allied positions on 21 June, but was defeated. Later that day, Australian forces assaulted the Japanese position. In the following days, Australian patrols killed or captured the remaining Japanese troops on the island. A total of 389 Japanese personnel were killed on Labuan and 11 were captured. Australian casualties included 34 killed.
After securing the island, the Allied forces developed Labuan into a significant base. The 24th Brigade left from the island to capture the eastern shore of Brunei Bay in late June, and the island's airfield was repaired and expanded to host Royal Australian Air Force units. While occupying Labuan, the Allies had to reconstruct the island's infrastructure and provide assistance to thousands of civilians who had been rendered homeless by the pre-invasion bombardment. Following the war, a major Commonwealth War Graves Commission cemetery was established on Labuan.
Background
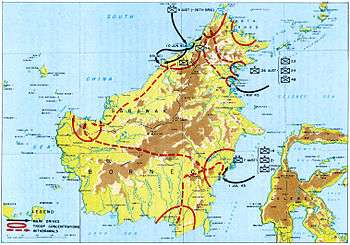
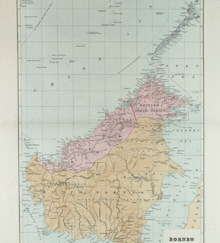
Labuan is a small island in the mouth of Brunei Bay with an area of 35 square miles (91 km2). Before the Pacific War, it formed part of the British-administered Straits Settlements and had a population of 8,960.[1] The island had a town, Victoria, on its south coast which fronted onto Victoria Harbour, with a population of 8,500 and limited port facilities. Aside from a 1,500-yard (1,400 m) beach just to the east of Victoria, the coast was ringed by coral.[2]
On 3 January 1942, Japanese forces captured Labuan unopposed during the Battle of Borneo.[3] The Japanese developed two airfields (Labuan and Timbalai) on the island, which were built by labourers who had been conscripted from the Lawas and Terusan regions of mainland Borneo.[4] The island population was also subjected to harsh occupation policies.[2][5] After Japanese forces suppressed a revolt at the town of Jesselton in late 1943, which was led by Chinese-ethnic civilians, 131 of the rebels were held on Labuan. Only nine rebels survived to be liberated by Australian forces in 1944.[6] Until mid-1944, few Japanese combat units were stationed in Borneo.[7]
In March 1945 the Australian Army's I Corps, whose main combat elements were the veteran 7th and 9th Divisions, was assigned responsibility for liberating Borneo. Planning for the offensive was undertaken over the following weeks. While invading the Brunei Bay area did not form part of the initial iteration of the plans, it was added in early April after a proposed landing on Java was cancelled.[8] The main purpose of attacking Brunei Bay was to secure it as a base for the British Pacific Fleet (BPF), and gain control of oil fields and rubber plantations in the area.[9][10] Labuan was to be developed as an airbase and form part of a string of strategic positions which would allow the Allies to control the seas off the Japanese-occupied coast between Singapore and Shanghai.[11]
While the liberation of the Brunei area had been authorised by the United States Joint Chiefs of Staff, it was not supported by the British Chiefs of Staff Committee. The British leadership did not want the BPF to be diverted from the main theatre of operations off Japan and preferred to establish a base for the fleet in the Philippines. In response to a suggestion from the Joint Chiefs of Staff that Brunei Bay could support future operations in south-east Asia, the Chiefs of Staff Committee judged that it would take too long to establish facilities there, especially as Singapore might have been recaptured by the time they were complete.[12]
Preparations
Allied planning
The plans for the invasion of Borneo evolved considerably during April. Initially, the offensive was to commence on 23 April with the landing of a brigade from the 6th Division on the island of Tarakan, off the east coast of Borneo. The 9th Division would then assault Balikpapan followed by Banjarmasin in south-east Borneo. These positions would be used to support the invasion of Java by the remainder of I Corps. After the attack on Java was cancelled, it was decided to employ two brigades of the 7th Division at Brunei Bay, and I Corps conducted further preparations on this basis. However, on 17 April General Douglas MacArthur's General Headquarters (to which I Corps reported) swapped the roles of the 7th and 9th Divisions. Accordingly, the final plan for the attack against Borneo specified that one of the 9th Division's brigades would land on Tarakan island on 29 April (later postponed to 1 May), with the remainder of the division to invade the Brunei Bay area on 23 May. The 7th Division was scheduled to assault Balikpapan on 1 July.[8] The Borneo campaign was designated the "Oboe" phase of the Allied offensive through the southern Philippines towards the Netherlands East Indies, and the landings at Tarakan, Brunei Bay and Balikpapan were designated Operations Oboe One, Six and Two respectively.[13]

The 9th Division began to move from Australia to the island of Morotai in the Netherlands East Indies, where the Borneo campaign would be staged, in March 1945. The division had seen extensive combat in North Africa and New Guinea, and its officers and enlisted men were well trained for amphibious operations and jungle warfare.[14] However, the 9th Division had been out of action since early 1944, leading to poor morale among its combat units.[15] A large number of support, logistics and Royal Australian Air Force (RAAF) units were assigned to the division for the operations at Brunei Bay, taking its strength to over 29,000 personnel (including 1,097 in United States and British units).[16]
Final preparations for the landings in the Brunei Bay area took place in May 1945. After shortages of shipping delayed I Corps' movement from Australia to Morotai, General Headquarters agreed on 8 May to reschedule the operation from 23 May to 10 June.[17] The 9th Division's staff completed their plans for operations in the Brunei Bay area on 16 May.[14] The 24th Brigade Group was assigned responsibility for capturing Labuan, and the 20th Brigade Group was tasked with securing Brunei and Muara Island. Both brigades were to land simultaneously on the morning of 10 June. The invasion of the Brunei Bay region was to be preceded by attacks on Japanese bases and transport infrastructure across western and northern Borneo by United States and Australian air units, as well as three days of minesweeping operations in the bay itself.[18]
The 24th Brigade Group was commanded by Brigadier Selwyn Porter. His main combat units for operations on Labuan were the 2/28th and 2/43rd Battalions, the 2/11th Commando Squadron and the 2/12th Field Regiment. In addition, a squadron from the 2/9th Armoured Regiment (equipped with Matilda II tanks), a company of the 2/2nd Machine Gun Battalion and a range of engineer, signals and logistics units formed part of the brigade group.[19] A party of 13 officers from the British Borneo Civil Affairs Unit (BBCAU) was also attached to the 24th Brigade and were tasked with restoring the colonial government on the island and distributing supplies to its civilian population.[20] The 24th Brigade's third infantry battalion, the 2/32nd Battalion, was assigned to the 9th Division's reserve force.[21] Porter and the 2/28th Battalion's commander, Lieutenant Colonel Hugh Norman, had a difficult relationship which generated ill-feeling between the two men and their respective headquarters. Porter considered relieving Norman of command before the landing on Labuan in the belief that he was exhausted and not capable of effectively leading his battalion, but decided against doing so after Norman made an emotional appeal to remain in his position.[22]
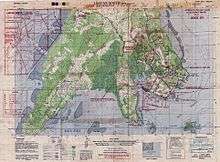
The plans for the capture of Labuan specified that the 24th Brigade Group's two infantry battalions were to land simultaneously on the beach near Victoria (designated Brown Beach) at 9:15 am, with the 2/28th Battalion coming ashore on the western side of the beach and the 2/43rd to the east.[19] The 2/11th Commando Squadron was to be initially held in reserve on board the invasion fleet.[23] The brigade group's objectives were to secure a beachhead, capture the main airfield (located north of Victoria and designated "No. 1 Strip" by the Australians), destroy the Japanese garrison, and prepare for further operations on the eastern shore of Brunei Bay.[19] Priority was given to rapidly opening the port and airfield so that they could be used to support other operations.[24]
Porter expected that fighting for the main objectives would begin soon after the landing, and decided to begin landing his artillery and heavy mortars with the assault waves of infantrymen, just before the tanks came ashore. The 2/28th Battalion was initially assigned responsibility for securing Victoria and Flagstaff Hill to its north, while the 2/43rd Battalion was tasked with capturing the airfield. Once these areas were in Australian hands, the 2/28th Battalion would secure the western part of the island while the 2/11th Commando Squadron captured the western shore of Victoria Harbour.[25] Due to the Australian Army's manpower shortages, all elements of the 9th Division were under orders to minimise their casualties during the Borneo Campaign and unit commanders would rely heavily upon the available air and artillery support during operations.[26] The Australians estimated that the Japanese garrison on Labuan comprised 650 personnel, made up of 400 airfield troops, 100 naval troops and 150 other lines-of-communications personnel.[27]
Japanese preparations
As the Allies advanced towards Borneo, additional units were dispatched from Japan during the second half of 1944 and the 37th Army was established in September to coordinate the island's defence. In December 1944, Japanese staff officers deduced that it was likely that Australian troops would be landed at strategic points on the east and west coasts of Borneo in about March the next year (by which time they also expected United States forces to have liberated the Philippines). Accordingly, several Japanese units stationed in north-east Borneo were ordered to march to the western side of Borneo. This movement proceeded slowly, owing to the distances involved and disruptions caused by Allied air attacks.[28]
By June 1945 around 550 Japanese military personnel were stationed on Labuan.[29] The main unit on the island was the 371st Independent Infantry Battalion (almost in its entirety, save for one company located elsewhere) with a strength of around 350.[30] This battalion formed part of the 56th Independent Mixed Brigade, which had arrived at Tawao in north-east Borneo from Japan in July 1944 with six infantry battalions. During early 1945 the brigade headquarters, 371st Independent Infantry Battalion and three other battalions marched across the island to assume responsibility for defending the Brunei Bay area. Many of the 56th Independent Mixed Brigade's soldiers fell sick during the march, and all four combat battalions were considerably below their authorised strength by the time they arrived at Brunei Bay.[31][32] In June 1945 the 371st Independent Infantry Battalion was commanded by Captain Shichiro Okuyama.[33] A detachment of about 50 men from the 111th Airfield Battalion was also on Labuan, along with around 150 men assigned to other small units.[30] In line with Japanese doctrine, the Labuan garrison did not make preparations to contest the Allied landing force as it came ashore. Instead, it constructed defensive positions inland from the island's beaches.[34] Documents captured by Australian soldiers during the fighting on Labuan indicated that Okuyama had instructions to attempt to withdraw his force from the island if the battle went against him.[30]
Battle
Pre-invasion operations
.jpg)
Australian and United States air units began their pre-invasion attacks on north Borneo in late May. The first attack on the Brunei Bay area took place on 3 May, and included a raid targeting the town of Victoria on Labuan.[35] A large number of further attacks were conducted to suppress Japanese airfields and other facilities throughout north-western and north-eastern Borneo.[36] The plans for the invasion of Brunei Bay had specified that the landings would be supported by aircraft based at Tarakan, but delays in rebuilding the airfield there rendered this impossible and reduced the scale of the pre-invasion bombardment.[37]
United States Navy minesweepers commenced operations in Brunei Bay on 7 June, and a flotilla of four cruisers and seven destroyers (including an Australian light cruiser and destroyer) served as a covering force. The minesweeping operation was successful, though USS Salute struck a mine on 8 June and sank with the loss of four lives. Underwater demolition teams investigated all of the landing beaches on 9 June searching for obstacles which could impede the landing craft.[38] The teams assigned to clear obstacles off Labuan were endangered by an unauthorised attack on the island conducted by a force of American B-24 Liberator heavy bombers.[37] Following the landings on 10 June, American Thirteenth Air Force aircraft flying from a base on Palawan Island in the Philippines provided close air support for the forces on Labuan until RAAF units based on the island were ready to take over.[39]
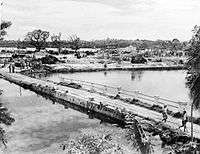
The Australian Services Reconnaissance Department (SRD) also collected intelligence on Labuan and other parts of the Brunei Bay area during May. On the first of the month several RAAF PBY Catalina aircraft carrying SRD personnel overflew Labuan. These aircraft later landed near two native prahu and questioned their crews; two sailors were flown back to an Allied base for further questioning. On 15 May two Malays working for the SRD were landed in Brunei Bay by a Catalina, and sailed to Labuan on board a prahu. These agents recruited a local civilian from Labuan, and the party was extracted by a Catalina near the mainland village of Kampong Mengalong on 19 May. The intelligence gained from these operations provided the Australians with a good understanding of Labuan's geography and infrastructure. In addition, civilians who had been recruited by the SRD's SEMUT 2 team (which had been parachuted into Borneo during April) provided intelligence on the size and movements of Labuan's garrison force.[40]
During the last days of May the 9th Division embarked at Morotai onto the ships which would transport it to Brunei Bay, and undertook rehearsals for the landing. Due to a shortage of shipping, the available vessels were heavily loaded and many soldiers were forced to endure cramped and hot conditions during the ten days before the landing. Australian official historian Gavin Long later wrote that for many troops these conditions "were as uncomfortable as any of the experiences that followed" during the campaign.[41] The 24th Brigade Group was carried by a variety of landing ships: the two large Australian LSIs HMAS Manoora and Westralia, as well the attack cargo ship USS Titania, LSD USS Carter Hall, ten LSTs, five LCIs and seven LSMs from the United States Navy. A total of 38 small LCVPs and 26 LCMs were also assigned to land the brigade once it arrived off Labuan.[42][43] Due to the coral reefs surrounding the island, the assault waves landed in LVTs of the US Army's 727th Amphibious Tractor Battalion.[19] The convoy carrying the 9th Division left Morotai on 4 June and arrived in Brunei Bay before dawn on 10 June.[44] The main body of the convoy anchored off Labuan, and the remainder proceeded to the Brunei area. A Japanese aircraft dropped a bomb near two of the transport ships off Labuan at 6:51 am, but caused no damage.[43]
Landing
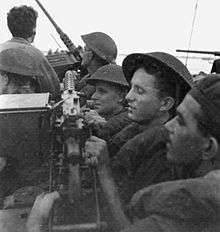
The landing of the assault troops at Labuan went well. The Allied fleet began bombarding the landing area from 8:15 am, and seven Australian B-24 Liberators dropped anti-personnel bombs in the area behind the intended beachhead.[45][46] No Japanese forces opposed the two battalions' assault forces as they came ashore in LVTs, and the landing of later waves of infantry and tanks went smoothly. The 2/43rd Battalion rapidly advanced north and captured No. 1 Strip in the evening of 10 June. Some Japanese soldiers attempted to defend the airfield area, and the 2/43rd Battalion claimed to have killed 23 Japanese for the loss of four Australians wounded.[47]
A company from the 2/28th Battalion captured Victoria shortly after coming ashore, and the battalion first met opposition at Flagstaff Hill at 10:45 am. One of the battalion's companies subsequently captured the hill, while its other companies continued to advance. The 2/28th Battalion encountered increasing opposition as the day progressed, particularly to the west of its area of responsibility. During the afternoon of 10 June the battalion engaged Japanese troops in the area west of Flagstaff Hill (at the junction of Callaghan and MacArthur Roads), with the infantrymen being supported by tanks and mortars; the Australians counted 18 Japanese dead by the end of the day, and suffered several fatalities and men wounded in this fighting.[48] After civilians reported that no Japanese were stationed on the Hamilton peninsula which formed the western side of Victoria Harbour, a troop from the 2/11th Commando Squadron was landed in the area during 10 June and secured it without opposition.[49]
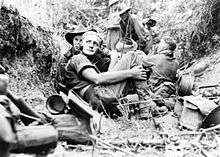
During the afternoon of 10 June a group of senior officers, including General Douglas MacArthur, his air commander General George Kenney, and Australians Lieutenant General Leslie Morshead and Air Vice Marshal William Bostock (head of RAAF Command), made an inspection tour of the Labuan beachhead.[47][50] MacArthur insisted on seeing Australian soldiers in action, and the party visited a group of infantrymen from the 2/43rd Battalion before departing. The Australians had just killed two Japanese soldiers and fighting was still taking place in the area when MacArthur and the other senior officers arrived.[51][52] The process of unloading supplies from the invasion fleet during 10 June proceeded quickly, and the ships began to depart for Morotai during the afternoon of 11 June.[53]
The 24th Brigade's goal for 11 June was to secure the airfield area. The 2/43rd Battalion patrolled to the north and west of the airfield during the day, meeting only light opposition. In contrast, the 2/28th Battalion (which was tasked with advancing into Labuan's interior) encountered entrenched Japanese forces, and it became clear that it was facing the main body of the island's garrison. Norman manoeuvred his companies to push the Japanese back, but the rate of advance was slow.[49] The airfield engineers of No. 62 Wing RAAF were also landed during 11 June to begin work on returning No. 1 Strip to service; reconstruction of the airfield began the next day.[54][55]
On the basis of the fighting on 11 June, Porter judged that the Japanese were withdrawing into a stronghold position located to the north of Victoria and about 1 kilometre (0.62 mi) to the west of the airfield.[9][49] On 12 June he directed the two battalions to patrol around the stronghold area. The 2/43rd Battalion patrolled the interior of Labuan to the west of No. 1 Strip, but located only a single Japanese position. This position was attacked and destroyed that day by the 2/43rd Battalion's C Company supported by three tanks.[56] The 2/28th Battalion sent patrols towards the stronghold area, with a company supported by a tank troop meeting heavy resistance as it pushed westwards along a track towards MacArthur Road.[57] The 2/11th Commando Squadron also advanced north, and linked up with elements of the 2/43rd Battalion near the centre of Labuan during the late afternoon.[58] The 371st Independent Infantry Battalion's main radio was destroyed during an air attack on 12 June, cutting the unit off from the 37th Army's headquarters.[59] As a result of the patrolling, by the end of 12 June the location of the Japanese position was fairly well known to the Australian force. The 24th Brigade's casualties to this point in the battle were 18 killed and 42 wounded, and the Australians believed that at least 110 Japanese had been killed.[7] The 2/32nd Battalion was also landed on Labuan during 12 June, but remained in divisional reserve.[60]
On 13 and 14 June the 24th Brigade Group continued operations aimed at forcing the Japanese garrison into the stronghold—dubbed "the Pocket" by the Australians. The 2/43rd Battalion secured the emergency airstrip at Timbalai on Labuan's west coast on 13 June, and elements of the 2/28th Battalion continued to push west into the Pocket along MacArthur Road.[7] A company from the 2/28th Battalion made another attack into the Pocket the next day after the 2/12th Field Regiment had fired 250 rounds into the area, but was forced to withdraw after being unable to overcome heavy resistance.[60] By the conclusion of 14 June the Australians judged that, aside from the Pocket, the island was now secure. Porter assessed that an attack on this position would need to be made in strength using well-coordinated forces.[7] This task was largely assigned to the 2/28th Battalion, with the 2/43rd being used to patrol the island.[61]
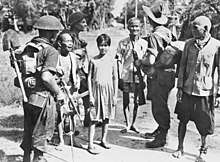
Following the landing the BBCAU detachment and 24th Brigade were faced with a significant humanitarian challenge. The Allied air and naval attacks had destroyed almost all of the buildings on Labuan, rendering large numbers of civilians homeless. Within days of the invasion, about 3,000 civilians were housed in a compound within the beachhead. The BBCAU party were unable to assist so many civilians, and the 24th Brigade needed to assign soldiers to support them and transport supplies.[20]
Destruction of the Japanese garrison
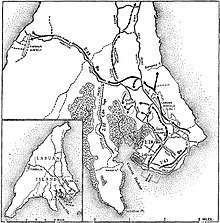
The Japanese stronghold position was about 1,200 yards (1,100 m) long from north to south, and 600 yards (550 m) wide. The terrain within this area comprised a series of small jungle-covered ridges, and the position was bordered on the western and southern sides by swamps.[7] The main terrain features within the Pocket were three areas of high ground named Lushington Ridge, Norman Ridge and Lyon Ridge by the Australians. There were only two feasible routes into the area. The first was a track which led south into the position along Lyon Ridge and Norman Ridge; this was passable by tanks but heavily mined. The other route was a track which ran into the eastern side of the Pocket from MacArthur Road along Lushington Ridge and joined the other track at Norman Ridge.[62] It is likely that around 250 Japanese personnel were initially stationed within the Pocket.[63]
In order to minimise the casualties to his brigade, Porter decided to isolate the Pocket with two infantry companies while a heavy artillery barrage was fired into the area over several days. An attempt to capture the Pocket would only be made once it was judged that the Japanese were no longer capable of resisting effectively.[64] As part of this plan, the 2/12th Field Regiment eventually fired 140 tons of shells into the Pocket between 15 and 20 June.[65]
The 2/28th Battalion probed into the Pocket on 16 June. The previous day a 2/11th Commando Squadron patrol had reported that the track along Lyon Ridge would be passable by tanks if a bomb crater was filled, and on the morning of the 16th A Company from the 2/28th Battalion accompanied by a troop of three tanks and a bulldozer began to move south along it. After the bulldozer filled the crater, the force continued along Lyon Ridge but became pinned down by heavy fire from Japanese troops on Eastman Spur to the south-east of the ridge. One of the Australian tanks was damaged. A subsequent attempt by a section from the 2/11th Commando Squadron to advance towards Eastman Spur to the east of A Company was also beaten back, with two Australians killed and another wounded. A Company resumed its advance during the afternoon, supported by a new troop of tanks. The three tanks moved ahead of the infantry, and killed eight or ten Japanese personnel, but one was damaged by a bomb and another became bogged. By the end of the day, A Company had suffered five men killed and 23 wounded.[65] Overall, 150 patients were admitted by the 24th Brigade's attached medical units during 16 June, which stretched their capacity.[66]
Due to the losses his brigade suffered on 16 June, Porter decided to continue the bombardment before undertaking further attacks. On 18 and 19 June the bombardment of the Pocket was intensified when the heavy cruiser HMAS Shropshire fired into the area.[65][67] Infantrymen supported by tanks conducted another probe into the Pocket on 19 June, and killed 10 Japanese; three Australians were wounded. On 20 June the 2/12th Field Regiment fired a particularly heavy bombardment and six Allied bombers attacked the Pocket. Porter judged that this would be sufficient to suppress the Japanese defenders, and ordered that the Pocket be attacked by two companies from the 2/28th Battalion supported by tanks (including "Frog" flamethrower variants of the Matilda II) the next day.[68]
In the early hours of 21 June a force of about 50 Japanese troops slipped out of the Pocket and attempted to attack Australian positions on Labuan. Different groups of Japanese troops attacked a prisoner of war enclosure, dock facilities and No. 1 Strip, but all were defeated by Australian and American logistics personnel and engineers. A total of 32 Japanese personnel were killed around Victoria, and another 11 were killed at the airfield. Three Americans and two Australians were killed in these engagements.[68]
The Japanese attack did not delay the Australian assault on the Pocket. At 10 am on 21 June, C Company of the 2/28th Battalion began to advance to the west along Lushington Ridge, and D Company moved south from Eastman Spur. D Company was supported by a troop of three conventional Matilda tanks and two Frog flamethrowers. C Company advanced about half of the way into the Pocket before being halted by Norman who was concerned that they might be accidentally attacked by D Company, which was also making good progress. The force built around D Company subsequently completed the occupation of the Pocket, with the flamethrower tanks playing a key role. The Japanese soldiers who had survived the artillery bombardment offered little resistance to the Australian forces. The 24th Brigade assessed that 60 Japanese personnel were killed in the final assault on the Pocket, with 117 being killed by the artillery bombardment which had preceded it.[69][70]
From 21 June, the 2/12th Commando Squadron conducted patrols of the outlying areas of Labuan to clear them of any Japanese forces; up to this point the squadron had formed part of the 9th Division's reserve. Each troop of the squadron was assigned a different sector of Labuan, and by mid-July had completed its task. During these patrols the squadron killed 27 Japanese soldiers, mainly as part of repelling a raid on the BBCAU compound on 24 June, and captured a single prisoner.[60][71] The 2/12th Commando Squadron was subsequently directed to undertake topographic work in order to improve the quality of maps of the island.[71] The 24th Brigade's total combat casualties in its operations on Labuan were 34 killed and 93 wounded. The Australian soldiers counted 389 Japanese dead and took 11 prisoners.[63]
Aftermath
.jpg)
The process of bringing No. 1 Strip back into service went well. Nos 4 and 5 Airfield Construction Squadrons were assigned the task.[72] A 4,000-by-100-foot (1,220 by 30 m) unsurfaced temporary runway was constructed at a 5° angle to the existing strip.[73] The first RAAF aircraft, two P-40 Kittyhawks from No. 76 Squadron, landed on the strip on 17 June, and commenced operations from this base the next day. No. 457 Squadron, which was equipped with Spitfires, arrived on 18 June though two of its aircraft crashed on the still-unfinished runway and had to be written off. The units based at the airfield took over responsibility for providing air support for the Army units on Labuan that day, and flew their first close air support sorties over the island on 19 June.[39] No. 86 Wing's two flying squadrons—No. 1 and No. 93—also arrived on Labuan in late July, but conducted few operations from this base before the end of the war. The wing had originally been scheduled to move to Labuan in late June, but it took longer than expected to extend No. 1 Strip's runway to the length needed by No. 1 Squadron's Mosquito light bombers.[74]
To reconstruct No. 1's existing runway as an all-weather strip, the bomb craters had to have the water pumped out of them and then be filled in. Sandstone from a quarry on northern Labuan was placed over the clay and sand subbase, and the runway was topped with crushed coral from the west coast of the island, and sealed with bitumen. The 5,000-foot (1,500 m) runway had 70 hardstandings for aircraft. With 70 also on the dry weather strip, the air base could accommodate 140 aircraft.[73] The 9th Division's engineers also undertook a wide range of construction projects on Labuan. These included building 356,000 square feet (33,100 m2) of storage, new port facilities, bridges and oil tanks as well as surfacing 29 miles (47 km) of roads.[75][73] A wharf for Liberty ships was begun on 18 June, allowing the first ship to berth on 10 July. A fuel jetty was in operation by 20 June, and a fuel tank farm with seven 2,300-US-barrel (270,000 l; 72,000 US gal; 60,000 imp gal) tanks was completed on 12 July, as was a 600-bed hospital. Work then began on a 1,200-bed general hospital.[73] The 2/4th and 2/6th Australian General Hospitals were transferred from Morotai to Labuan during July, though the later unit's hospital facilities were not completed until 17 September.[76]
Once Labuan was secured, the 24th Brigade was ordered to capture the eastern shore of Brunei Bay. On 16 June, the 2/32nd Battalion was transported from Labuan to Padas Bay. The battalion captured the town of Weston the next day.[9][63] The remainder of the 24th Brigade was transported across the bay during the last weeks of June, and the force advanced inland to capture the town of Beaufort which was defended by between 800 and 1,000 Japanese personnel. Following some heavy fighting, the town was secured on 28 June.[9] The brigade then advanced further inland to Papar in early July.[77] Later that month the 9th Division's commander, Major General George Wootten, relieved Norman from command over an incident in which he had lost control of the 2/28th Battalion during the fighting on Labuan.[78] Following the announcement of the surrender of Japan on 15 August 1945 and the formal ceremony held in Tokyo Bay on 2 September, the commander of the 37th Army, Major General Masao Baba, surrendered to Wootten on 10 September at a ceremony conducted at the 9th Division's headquarters on Labuan.[79]
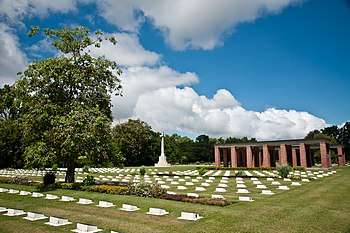
After the war, Labuan was one of several locations at which the Australian military conducted trials to prosecute suspected Japanese war criminals. A total of 16 trials were held on the island between 3 December 1945 and 31 January 1946, during which 128 men were convicted and 17 acquitted.[80] Labuan War Cemetery was also established as the burial place for all of the Commonwealth personnel killed on or near Borneo. It includes 3,900 graves, most of which are for prisoners of war who died while being held by the Japanese.[81]
Memorials have also been erected on Labuan to mark its wartime history. These include the Australian Battle Exploit Memorial at Brown Beach, a plaque marking the location of the 37th Army's surrender ceremony and a Japanese peace park.[82]
References
Citations
- Rottman 2002, p. 205.
- Long 1963, p. 453.
- Rottman 2002, p. 206.
- Gin 1999, pp. 47–48.
- Rottman 2002, p. 258.
- Gin 1999, p. 56.
- Long 1963, p. 470.
- Long 1963, pp. 49–50.
- Coulthard-Clark 2001, p. 252.
- Long 1963, p. 50.
- Odgers 1968, p. 466.
- Long 1963, pp. 50–51.
- Waters 1995, p. 42.
- Long 1963, p. 457.
- Converse 2011, p. 189.
- Long 1963, p. 458.
- Long 1963, pp. 457–458.
- Long 1963, pp. 458–459.
- Long 1963, p. 459.
- Long 1963, p. 496.
- "2/32nd Battalion". Australian War Memorial. Retrieved 4 January 2015.
- Pratten 2009, p. 249.
- Long 1963, p. 466.
- Long 1963, p. 465.
- Long 1963, pp. 465–466.
- Converse 2011, p. 219.
- 24th Brigade 1945, p. 13.
- Long 1963, pp. 470–471.
- Long 1963, pp. 471.
- 24th Brigade 1945, p. 14.
- Dredge 1998, pp. 574–575.
- Long 1963, pp. 470, 495.
- Dredge 1998, p. 581.
- Coombes 2001, p. 202.
- Odgers 1968, p. 468.
- Waters 1995, pp. 46–47.
- Odgers 1968, p. 469.
- Morison 2002, p. 264.
- Odgers 1968, p. 472.
- Gin 2002.
- Long 1963, p. 461.
- 24th Brigade 1945, p. 16.
- Gill 1968, p. 640.
- Long 1963, pp. 461–462.
- Gill 1968, p. 641.
- Odgers 1968, p. 470.
- Long 1963, p. 467.
- Long 1963, pp. 467–468.
- Long 1963, p. 468.
- Morison 2002, p. 265.
- Coombes 2001, p. 203.
- Johnston 2018, p. 369.
- Gill 1968, p. 642.
- Odgers 1968, p. 471.
- Wilson 1998, pp. 87–88.
- Long 1963, p. 469.
- Long 1963, pp. 469–470.
- Johnston 2002, p. 232.
- Dredge 1998, p. 580.
- Long 1963, p. 472.
- Johnston 2018, p. 373.
- Long 1963, pp. 472–473.
- Long 1963, p. 475.
- 24th Brigade 1945, pp. 34–35.
- Long 1963, p. 473.
- Walker 1957, p. 384.
- Gill 1968, p. 643.
- Long 1963, p. 474.
- Long 1963, pp. 474–475.
- 24th Brigade 1945, p. 36.
- "2/12th Cavalry Commando Squadron". Australian War Memorial. Retrieved 5 January 2015.
- Wilson 1998, p. 86.
- Casey 1951, pp. 381–383.
- Odgers 1968, p. 474.
- Long 1963, p. 497.
- Walker 1957, p. 386.
- Long 1963, pp. 482–483.
- Pratten 2009, p. 250.
- Long 1963, p. 562.
- Gin 2013, p. 46.
- "Labuan War Cemetery". Commonwealth War Graves Commission. Archived from the original on 17 May 2015. Retrieved 11 January 2015.
- Hutchinson 2006, p. 261.
Works consulted
| Wikimedia Commons has media related to Battle of Labuan. |
- 24th Brigade (1945). "AWM52 8/2/24/36 – June 1945, Appendices" (PDF). AWM52 8/2/24 – 24 Infantry Brigade. Australian War Memorial. Archived from the original (PDF) on 10 June 2015. Retrieved 3 January 2015. (page numbers cited are those of the PDF document on the AWM website)
- Casey, Hugh J., ed. (1951). Airfield and Base Development. Engineers of the Southwest Pacific. Washington, D.C.: United States Government Printing Office. OCLC 220327037.CS1 maint: ref=harv (link)
- Converse, Allan (2011). Armies of Empire: The 9th Australian and 50th British Divisions in Battle 1939–1945. Port Melbourne, Victoria: Cambridge University Press. ISBN 978-0-521-19480-8.CS1 maint: ref=harv (link)
- Coombes, David (2001). Morshead: Victor of Tobruk and El Alamein. South Melbourne: Oxford University Press. ISBN 0-19-551398-3.CS1 maint: ref=harv (link)
- Coulthard-Clark, Chris (2001). The Encyclopaedia of Australia's Battles. Sydney: Allen & Unwin. ISBN 1-86508-634-7.CS1 maint: ref=harv (link)
- Dredge, A.C.L. (1998). "Order of Battle: Intelligence Bulletin No. 237, 15 June 1946". In Gin, Ooi Keat (ed.). Japanese Empire in the Tropics: Selected Documents and Reports of the Japanese Period in Sarawak Northwest Borneo 1941–1945. Volume 2. Athens, Ohio: Ohio University Press. pp. 572–598. ISBN 0-89680-199-3.CS1 maint: ref=harv (link)
- Gill, G Herman (1968). Royal Australian Navy, 1942–1945. Australia in the War of 1939–1945. Series 2 – Navy. Volume II. Canberra: Australian War Memorial. OCLC 65475.CS1 maint: ref=harv (link)
- Gin, Ooi Keat (1999). Rising Sun Over Borneo: The Japanese Occupation of Sarawak, 1941–1945. Basingstoke, Hampshire: Macmillan Press. ISBN 0-333-71260-9.CS1 maint: ref=harv (link)
- Gin, Ooi Keat (2002). "Prelude to invasion: covert operations before the re-occupation of Northwest Borneo, 1944–45". Journal of the Australian War Memorial. 37. ISSN 1327-0141. Retrieved 18 April 2015.CS1 maint: ref=harv (link)
- Gin, Ooi Keat (2013). Post-War Borneo, 1945–1950: Nationalism, Empire and State-Building. London: Routledge. ISBN 0-415-55959-6.CS1 maint: ref=harv (link)
- Hutchinson, Garrie (2006). Pilgrimage: A Traveller's Guide to Australia's Battlefields. Melbourne: Black Inc. ISBN 1-86395-387-6.CS1 maint: ref=harv (link)
- Johnston, Mark (2002). That Magnificent 9th: An Illustrated History of the 9th Australian Division 1940–46. Sydney: Allen & Unwin. ISBN 1-86508-654-1.CS1 maint: ref=harv (link)
- Johnston, Mark (2018). An Australian Band of Brothers: Don Company, Second 43rd Battalion, 9th Division. Sydney: NewSouth. ISBN 9781742235721.CS1 maint: ref=harv (link)
- Long, Gavin (1963). The Final Campaigns. Australia in the War of 1939–1945. Series 1 – Army. Volume VII. Canberra: Australian War Memorial. OCLC 1297619.CS1 maint: ref=harv (link)
- Morison, Samuel Eliot (2002) [1957]. The Liberation of the Philippines – Luzon, Mindanao, the Visayas, 1944–1945. History of United States Naval Operations in World War II. Volume 13. Champaign, Illinois: University of Illinois Press. ISBN 0-252-07064-X.CS1 maint: ref=harv (link)
- Odgers, George (1968) [1957]. Air War Against Japan, 1943–1945. Australia in the War of 1939–1945. Series 3 – Air. Volume II. Canberra: Australian War Memorial. OCLC 1990609.CS1 maint: ref=harv (link)
- Pratten, Garth (2009). Australian Battalion Commanders in the Second World War. Port Melbourne, Victoria: Cambridge University Press. ISBN 0-521-76345-2.CS1 maint: ref=harv (link)
- Rottman, Gordon L. (2002). World War II Pacific Island Guide. A Geo-Military Study. Westport: Greenwood Press. ISBN 0-313-31395-4.CS1 maint: ref=harv (link)
- Walker, Allan Seymour (1957). The Island Campaigns. Australia in the War of 1939–1945. Series 5 – Medical. Volume III. Canberra: Australian War Memorial. OCLC 249848614.CS1 maint: ref=harv (link)
- Waters, Gary (1995). "The Labuan Island and Brunei Bay Operations". In Wahlert, Glenn (ed.). Australian Army Amphibious Operations in the South-West Pacific: 1942–45 (PDF). Canberra: Australian Army Doctrine Centre. pp. 42–59. ISBN 978-0-642-22667-9. Archived from the original (PDF) on 2016-03-24.CS1 maint: ref=harv (link)
- Wilson, David (1998). Always First: The RAAF Airfield Construction Squadrons 1942–1974. Canberra: Air Power Studies Centre. ISBN 0-642-26525-9.CS1 maint: ref=harv (link)
