1st Midlothian Artillery Volunteers
The 1st Midlothian Artillery Volunteer Corps was formed in 1859 as a response to a French invasion threat. Originally it served as garrison and heavy artillery but transferred to the Territorial Force (TF) in 1908 as field artillery, in which role it served through both World Wars. In World War I it fought on the Western Front with 51st (Highland) Division. In World War II it briefly saw service in France after Dunkirk and was with Eighth Army in North Africa and Italy. Its wartime duplicate regiment served with distinction in the Burma Campaign. Postwar the regiment continued in existence until amalgamation in 1967.
| 1st Midlothian Artillery Volunteers 1st Lowland Brigade Royal Field Artillery 78th (Lowland) Field Regiment, RA 278th (Lowland) Field Regiment, RA | |
|---|---|
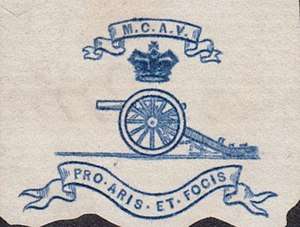 Letterhead crest for the 1st Midlothian Coast Artillery Volunteers, c1890 | |
| Active | 1859–1967 |
| Country | |
| Branch | |
| Role | Garrison Artillery Coastal Artillery Field Artillery |
| Garrison/HQ | Leith (1859–89) Edinburgh (1889–1967) |
| Engagements | Western Front (World War I) North African Campaign Italian Campaign Burma Campaign |
| Commanders | |
| Notable commanders | Colonel Sir James Baird, 7th Bt |
Artillery Volunteers 1859-1908
The enthusiasm for the Volunteer movement following an invasion scare in 1859 saw the creation of many Volunteer Corps composed of part-time soldiers eager to supplement the Regular British Army in time of need.[1][2][3][4] One such unit was the 1st Midlothian Artillery Volunteer Corps (AVC) formed on 16 September 1859 at Leith in Midlothian, near to the City of Edinburgh. In December the title was changed to Midlothian Coast AVC, but by March 1860 it had changed again to 1st Midlothian (Midlothian Coast) AVC. The Major in command was Sir James Gardiner Baird, 7th Baronet of Saughton Hall, a former Regular Army officer in the 10th Hussars, from which he had been obliged to retire because of an injury sustained in a steeplechase. He had since served with the part-time East Lothian Yeomanry.[5][6]
Within months there were four AVCs in the county:[7][8][9]
- 1st (Midlothian Coast Artillery) Midlothian AVC (four batteries) at Leith
- 2nd (Leith Artillery) Midlothian AVC (two batteries) formed at Leith 28 February 1860
- 3rd (Portobello) Midlothian AVC formed at Portobello, Edinburgh, 17 December 1859
- 4th (Musselburgh) Midlothian AVC formed at Musselburgh 28 February 1860
These were soon consolidated into a single unit (the 2nd being absorbed in 1863) of eight batteries, with Baird commanding in the rank of Lieutenant-Colonel:[8][9][6] The 1st Haddington AVC, formed at Dunbar, Haddingtonshire (or East Lothian) on 20 January 1860, which had been attached to the 1st Administrative Battalion, Haddington Rifle Volunteers, since 1864, was attached to the 1st Midlothian AVC from 1873. (A proposed 2nd Haddington AVC at North Berwick had never been formed.)[7][6][8][10]
From 1 April 1882 the unit formed part of the Scottish Division of the Royal Artillery (RA); on 1 July 1889 the Volunteer artillery were regrouped into three large divisions, the 1st Midlothian being assigned to the Southern Division.[6][11] It unit dropped the 'Midlothian Coast' subtitle in 1888, and moved its headquarters (HQ) to a new drill hall at 30 Grindlay Street in Edinburgh the following year. There were modern guns available at Portobello and Musselburgh for drill. Gun practice was carried out at the annual camp, and for carbine practice it used the Queen's Edinburgh Rifles' range at Hunter's Bog in Holyrood Park.[8][9][12][13]
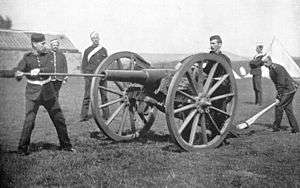
The AVCs were intended to serve as garrison artillery manning fixed coast defences, but a number of the early units manned semi-mobile 'position batteries' of smooth-bore field guns pulled by agricultural horses. In 1886 the 1st Midlothian obtained two 40-pounder rifled breech-loading (RBL) guns on travelling carriages pulled by Brewer's dray horses from Younger's and McEwan's breweries. Previously the War Office (WO) had refused to pay for the upkeep of field guns for the Volunteers, but the concept was regularised in 1888 when some Volunteer batteries were reorganised as 'position artillery' to work alongside the Volunteer infantry brigades. In 1889 the 1st Midlothian AVC was issued with two position batteries of 16-pounder rifled muzzle-loading guns, which were manned by four of the garrison batteries (referred to as Companies from 1891).[8][9][11][14] The 1st Haddington AVC was consolidated into the corps in 1897, when it became No 9 Company, with it HQ remaining at Dunbar.[8][9][12]
In 1899 the artillery Volunteers were transferred to the Royal Garrison Artillery (RGA), and the unit was redesignated 1st Midlothian RGA (V) (MRGAV) when the divisional organisation was abolished in 1902.[9][6][11] In 1901 a further battery of 16-pounders was issued to the corps and manned by the two remaining garrison companies in Edinburgh. In 1903 the RGA (V) position batteries were modernised and became heavy batteries; the 1st MRGAV reorganised as follows:[8][9]
- No 1 Heavy Battery – from Nos 1 and 2 Companies
- No 2 Heavy Battery – from Nos 3 and 4 Companies
- No 3 Heavy Battery – from Nos 5 and 6 Companies
- No 4 Garrison Company at Musselburgh – from Nos 7 and 8 Companies
- No 5 Garrison Company at Dunbar – from No 9 Company
Lieutenant A.H.M. Jamieson of the 1st Midlothian RGA (V) served during the Second Boer War as machine gun commander with the 6th (Scottish) Battalion, Imperial Yeomanry.[8]
In 1902 the unit's 1st Battery won the King's Prize for heavy artillery at the National Artillery Association meeting, and in 1905 the 2nd Bty won the prize, with the other two batteries coming second and third.[8]
Territorial Force
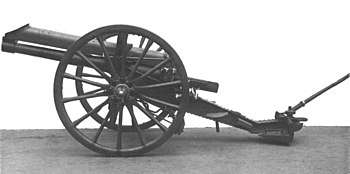
When the Volunteers were subsumed into the new Territorial Force (TF) under the Haldane Reforms of 1908,[15][16] the MRGAV was transferred to the Royal Field Artillery (RFA) and provided the bulk of the I (or 1st) Lowland Brigade, RFA, with one battery coming from the 1st Edinburgh (City) RGA (V), giving the following organisation:[9][6][17][18]
- Headquarters (HQ) at 30 Grindlay Street, Edinburgh[12]
- 1st City of Edinburgh Battery – from 1st Edinburgh RGA
- 2nd City of Edinburgh Battery
- Midlothian Battery
- 1st Lowland Ammunition Column
The unit was the senior field artillery brigade in the TF's Lowland Division. The batteries were each issued with four 15-pounder guns.[6][18][19][20][21][22][23]
World War I
Mobilisation
The order to mobilise was received at 17.25 on Tuesday 4 August 1914 when the Lowland Division was at its annual training camp on the Ayrshire coast. It immediately began guarding vulnerable points around Glasgow and the Clyde estuary. Mobilisation was complete by 10 August and the units proceeded to their designated war stations. For the I Lowland Brigade this was at Redford Barracks, Edinburgh.[20][21][23]
On the outbreak of war, units of the Territorial Force were invited to volunteer for Overseas Service: the majority of men in every unit of the Lowland Division did so. On 15 August the WO issued instructions to separate those men who had signed up for Home Service only, and form these into reserve units. Then on 31 August the formation of a reserve or 2nd Line unit was authorised for each 1st Line unit where 60 per cent or more of the men had volunteered for Overseas Service. The titles of these 2nd Line units would be the same as the original, but distinguished by a '2/' prefix. In this way duplicate batteries, brigades and divisions were created, mirroring those TF formations being sent overseas.[20][21][23][24]
1/I Lowland Brigade

During the winter of 1914–15 the division underwent war training and served in the Forth defences. It was warned for overseas service on 5 April and on 11 May 1915 it was officially numbered as the 52nd (Lowland) Division. However, the division was destined for the Dardanelles Campaign and it was decided that the difficulties of operating artillery on the Gallipoli Peninsula precluded taking all the divisional artillery. 1/1st Lowland Brigade was therefore left behind when the division embarked, and remained in the Forth defences.[20][21][22][25]
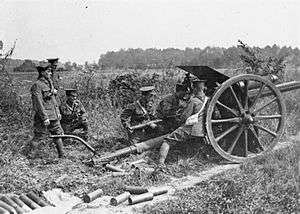
The brigade finally went overseas in October 1915, when it landed at Le Havre to join the British Expeditionary Force (BEF) on the Western Front. On arrival in France the batteries were rearmed with modern 18-pounder guns, and on 10 November the brigade joined the 51st (Highland) Division, with which it would serve for the rest of its career in World War I.[20][26][27][28][29]
In May 1916 the TF brigades of the RFA received numbers, the 1/I Lowland becoming CCLVII (257) Brigade – though this was changed to CCLX (260) Brigade within a few days – and the batteries became A, B, C and D.[lower-alpha 1] D Battery was then exchanged for 2nd Renfrewshire Howitzer Bty from the 1/III Highland (CCLVIII) Howitzer Bde, which became D (H) Bty, equipped with 4.5-inch howitzers. The brigade ammunition columns were abolished at the same time, and absorbed within the divisional ammunition column.[18][26][28][29]
Somme
In July 51st (Highland) Division joined in the Somme Offensive.[26][27][28] An attack on 14 July had failed to capture the dominating ground of High Wood, and 51st (H) Division was tasked with renewing the attack on High Wood a week later. A night attack was to be tried: the bombardment began at 19.00 on 22 July, under the direction of low-flying artillery observation aircraft. German sources reported that the shelling was of 'painful accuracy' and prevented the troops in High Wood from being relieved, despite the number of casualties.[30] At 01.30 the following morning the division attacked, but by 03.00 they were back on their start line having suffered heavy casualties. British gunners had difficulty supporting attacks on High Wood, because they had to fire over Bazentin Ridge. The low elevation of the guns meant that shells skimmed the British trenches, the margin for error was small and numerous complaints were made that British infantry casualties were caused by friendly fire. Worn guns, defective ammunition and inaccurate information about the location of British infantry positions were blamed for short-shooting.[31] The setback seemed to confirm the division's nickname of 'Harper's Duds' (from their commander, Major-General George Harper, and their 'HD' formation badge). The division was withdrawn from the front on 7 August for rest and reorganisation. On 23 August CCLX Bde was reorganised again, with C (Midlothian) Bty being split up between A and B to bring them up to six guns each.[26][28][29]
_Division_objectives_at_Beaumont_Hamel%2C_November_1916.png)
The division returned to the front in October for the Battle of the Ancre Heights, the final series of actions of the Somme Offensive. A mass of guns was assembled, with the artillery of no less than eight divisions and eight heavy artillery groups supporting 51st (H) Division's attack on Beaumont-Hamel, which had been an uncaptured objective on the first day of the offensive on 1 July. The operation was planned for 24 October, and the batteries began firing to cut the barbed wire on 20 October, but it was postponed several times because of bad weather. Eventually 13 November was chosen. H hour was 05.45, when the 18-pounders started a Creeping barrage (a recent innovation) moving in front of the infantry at 100 yards (91 m) every five minutes. A quarter of the 18-pounders deliberately fired 100 yards (91 m) short of the barrage line – this would have suppressed German outposts sheltering in shell craters in No man's land. The attack was helped by a dense fog, which screened the infantry from retaliatory shellfire as they struggled through the mud towards their objectives. The barrage halted for an hour on the first objective before moving on. Some of the infantry were held up by machine guns in the notorious 'Y Ravine', which had caused so much trouble on 1 July, but reserves were employed and both attacking brigades had reached the third German trench line (the Purple Line) by 07.50. The Green Line was next taken, but the fourth wave of attackers lost the barrage on their way to the final (Yellow) objectives and had to pull back to the Green Line to consolidate a position in captured trenches. Beaumont Hamel had finally fallen, and 51st (Highland) Division had gone some way to shaking off the 'Harper's Duds' slur.[26][27][28][32][33]
Disbandment
On 18 November 1916 CCLX Bde was joined by the newly-formed 535 (H) Bty from the UK,[lower-alpha 2] which became C (H) Bty. However, on 28 January 1917 CCLX Bde was broken up and its batteries distributed as follows:[26][28][29]
- A (1st City of Edinburgh + half Midlothian) Bty – became C Bty, CCCXV (2/I Northumbrian) Army Field Artillery Brigade
- B (2nd City of Edinburgh + half Midlothian) Bty – became C Bty, LXXXVI Army Field Artillery Brigade
- C (535) (H) Bty – R Section made D (H) Bty, CCLV (I Highland) Bde, up to six howitzers; L Section made up D (H) CCLVI (II Highland) Bde
- D (2nd Renfrewshire) (H) Bty – became D (H) Bty, LXXXIV Army Field Artillery Brigade
Army Field Artillery (AFA) brigades were used to support different formations as required. LXXXIV and CCCXV AFA Bdes continued to support 51st (H) Division during the Arras Offensive in early 1917, but thereafter they were regularly moved around. By the Armistice in November 1918, LXXXIV and LXXXVI were with Fourth Army and CCCXV was with Third Army.[35]
2/1 Lowland Brigade
Recruiting for the 2nd Line unit was good, and 2/I Lowland completed at Grindlay Street by the end of 1914.[18][36][37][38] 2nd Lowland Division formed in January 1915 (numbered as 65th (2nd Lowland) Division in August) but the lack of equipment and need to supply drafts to 1st Line units delayed training. 2/I Lowland Brigade remained around the Edinburgh area throughout 1915. In March 1916 the division moved south to Essex and joined Southern Army (Home Forces). By May, the artillery brigades had received 18-pounders and that month they were numbered: 2/I Lowland became CCCXXV (325) Brigade and the batteries became A.B and C. Later, CCCXXVIII (2/IV Lowland) (H) Bde was broken up, with one battery joining CCCXXV as D (H) Bty.[18][37][38]
Ireland
In January 1917 the division moved to Ireland to relieve 59th (2nd North Midland) Division, which had been the first TF formation to serve in that country. Before the end of the year a decision was made to break up the 65th Division. The infantry units were transferred or disbanded, but a number of divisional units remained in Ireland after the division ceased to exist in March 1918. These included CCCXXV Bde, which stayed at Fermoy until it was disbanded on 29 December 1919.[37][39]
Interwar years
After the war, the unit was reformed and when the TF was reconstituted as the Territorial Army in 1921, it was designated the 78th (Lowland) Brigade RFA (TA) (becoming a Field Brigade, RA, in 1924 when the RFA was subsumed into the Royal Artillery). It had the following organisation:[6][18][40]
- HQ at Grindlay Street
- 309 (1st City of Edinburgh) Battery
- 310 (2nd City of Edinburgh) Battery
- 311 (Midlothian) Battery
- 312 (5th City of Glasgow) Battery (Howitzers) at Elder Street, Glasgow – from the old 4th Lowland (H) Brigade
The unit returned to the reformed 52nd (Lowland) Division in Scottish Command.[40] Royal Artillery brigades were redesignated regiments in 1938.[6][18]
World War II
Mobilisation
The Territorial Army was doubled in size following the Munich Crisis of 1938, and existing units split to form duplicates before the outbreak of World War II. 78th Field Regiment reorganised as follows:[18][41]
78th (Lowland) Field Regiment, RA[42][43]
- RHQ at Edinburgh
- 309 (1st City of Edinburgh) Field Bty at Edinburgh
- 310 (2nd City of Edinburgh) Field Bty at Edinburgh
129th Field Regiment, RA[43][44]
- RHQ at Edinburgh
- 311 (Midlothian) Field Bty at Edinburgh
- 312 (5th City of Glasgow) Field Bty at Glasgow
78th Field Rgt remained part of 52nd (L) Division, while 129th joined its duplicate, the 15th (Scottish) Division, formed on 2 September 1939.[41][45][46][47]
78th (Lowland) Field Regiment
After the British Expeditionary Force (BEF) had been evacuated from Dunkirk, 52nd (L) Division was sent to Cherbourg to form part of a reformed '2nd BEF', arriving on 10 June. However, the situation of the French armies was hopeless and the division was evacuated again after only a week.[45][48][49]
As one of the few formations that still had its guns and equipment, the division became part of Home Forces' mobile reserve around London. Its field regiments had an almost complete establishment of modern Mk II 25-pounders.[45][50] 52nd (L) Division returned to Scottish Command in November 1940. In May 1942 it began mountain warfare training for a potential operation in Norway, but 78th Fd Rgt left almost immediately.[45]
North Africa
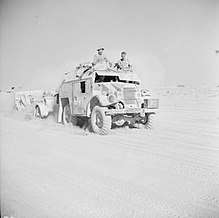
The regiment, together with a signal section of the Royal Corps of Signals and a light aid detachment of the Royal Electrical and Mechanical Engineers, came under direct WO Control in June 1942 preparatory to proceeding overseas.[lower-alpha 3] It left in August bound for Egypt as part of the reinforcements for Eighth Army.[42][53]
It arrived in time to take part in the Second Battle of El Alamein in October. The regiment was officially attached to 1st Armoured Division, but actually three Troops (12 x 25-pounders]] were with 51st Highland Division, and the other three with 2nd New Zealand Division.[43][54][55] After the pursuit across North Africa, the regiment was involved in the fighting in Tunisia. For the final advance on Tunis (Operation Vulcan) it formed part of a battle group of 4th Armoured Brigade (30 April to 21 May 1943).[42][56]
Italy
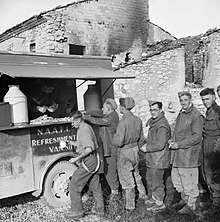
The regiment served in 5th Army Group Royal Artillery (5 AGRA) in the Allied invasion of Sicily (Operation Husky).[57] It then landed in Italy under Eighth Army's command in September 1943.[42][58] In January 1944 it formed part of 2 AGRA supporting 56th (London) Infantry Division in its assault crossing of the Garigliano on 17 January.[59]
It was then switched to the Anzio beachhead, where it supported 1st Infantry Division, firing to disrupt German preparations for a counter-offensive that was finally launched on 7 February and defeated by 12 February.[43][60]
178th (Lowland) Medium Regiment
In April 1944 the regiment was re-equipped to serve in the medium artillery role. Because there was already a 78th Medium Regiment, the new regiment took the designation 178th (Lowland) Medium Regiment in May. Medium regiments consisted of two batteries, each equipped with eight 5.5-inch guns; 309 and 310 Btys continued with the regiment.[18][42][61][62][63][lower-alpha 4]
At various times in the latter part of the Italian Campaign the regiment was in 7 AGRA and 10 AGRA serving with Fifth US Army.[57][62] For the Allies' final Spring 1945 offensive in Italy (Operation Grapeshot) the regiment fired in support of US 10th Mountain Division in its crossing of the River Po, 15–23 April.[63][62][64]
178th (Lowland) Medium Regiment was placed in suspended animation in 1946.[18]
129th (Lowland) Field Regiment
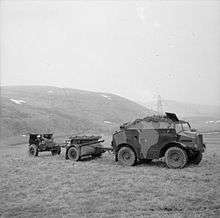
Shortly after the outbreak of war, 15th (Scottish) Division moved to training areas in the Scottish Borders, the artillery going to Selkirk and Jedburgh. After three months it went into winter quarters that were chosen for tactical considerations, with 44th Lowland Brigade and 129th Fd Rgt disposed across the River Forth. It returned to the Borders for training in April 1940, with 129th Fd Rgt at Selkirk near 44th (L) Bde at Galashiels. However, the division had to make room for units returning from the Norwegian Campaign, so it moved south to Wiltshire and then after the German invasion of France and the Low Countries in May 1940 it moved into defensive positions in Essex, which it was holding when the BF was evacuated from Dunkirk. To cover over 40 miles (64 km) of coastline the division's three field regiments each had an average of only eight 18-pounders of World War I vintage.[65]
As the threat of invasion receded, the division was able to concentrate on mobile training in 1941. In September the field regiments finally got their full complement of 25-pounders. However, in November the division was placed on a lower establishment and became purely a mobile coastal defence formation in Northumberland, with 44th (L) Bde and 129th Fd Rgt around Wooler. It was used to supply drafts and complete units for service overseas. 129th (Lowland) Field Rgt (the regiment received its 'Lowland' subtitle in 1942.[18]) left the division and came under WO Control in May 1942, and embarked in June for the Far East with 311, 312 and 493 Fd Btys.[46][66][53]
Burma
129th (Lowland) Field Rgt arrived at Bombay on 10 August 1942 and moved up to Ranchi, the base for operations in Burma, where it joined 70th Infantry Division with 24 x 25-pounders. On 21 November it moved to Chittagong, where it joined 14th Indian Infantry Division for the First Arakan Campaign.[44][43][67][68]
Since September the 14th Indian Division had been advancing into the Arakan through difficult terrain and appalling weather, road-building as it went. Its objective was Akyab, but only part of its strength could be supported at the front and 129th Fd Rgt was withdrawn on 10 January 1943 without coming into action. It moved to Imphal, on the India/Assam border, where it came under the command of 17th Indian Infantry Division, which had been refitting as a 'light' division designed for jungle fighting.[44][43][67][68][69][70]
17th Indian Division was covering the construction of the Imphal–Tiddim road. 129th Field Rgt moved up to the base at Shillong on 8 May, but guns could not be moved up the single Jeep track to the advanced posts at Fort White and Kennedy Peak in the Chin Hills, where skirmishing with the Japanese went on through the Monsoon.[68][71]
129th Jungle Field Regiment
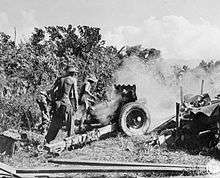
The problem of operating artillery in jungle terrain was tackled by converting field regiments into 'Jungle Field Regiments' equipped with jeep-towed 3.7-inch mountain howitzers and 3-inch mortars. 129th (Lowland) was the first unit to convert and build up experience with this equipment. However, neither weapon had sufficient range or weight of shell, but the regimental fitters under Sergeant Farrell and Bombardier Clifford Jones worked out that they could fit a jeep axle and wheels to a 25-pounder, reducing the weight and width of the whole assembly. The regiment tried it out on the Tiddim Road and found that with very few modifications to the gun carriage and trail it remained stable even when firing the highest charges. The CO, Lt-Col Younger, reported the success in October 1943 and the regiment received a gun converted to this 'jury axle' format for trials the following month. By January 1944 the gun had proved its worth and jeep-towed Jury axle 25-pounders began to be issued to one field regiment in each light division. In really rough terrain the whole gun could be broken down into jeep-sized loads like a mountain gun.[44][43][72]
Retreat from Tiddim
The regiment moved to the Manipur Road with 17th Indian Light Division on 13 November 1943, but by 8 December it was with 5th Indian Infantry Division at Kohima and Imphal. From January it was back with 17th Indian Division, with which it remained for the rest of the war. 17th Division was still skirmishing from Kennedy Peak towards Fort White with a battery of 129th Jungle Fd Rgt supporting 48th Indian Infantry Brigade. 493 Field Battery was deployed with its jury axle guns at a height of 8,871 feet (2,704 m), within 50 feet (15 m) of the crest of Kennedy Peak, claiming to be the highest guns in the world. The guns were constantly in action supporting infantry patrols, but enemy strength in the area began to increase in February as a prelude to the forthcoming Japanese offensive (Operation U-Go). 17th Division switched over to a defensive posture, with administrative units in the Imphal Plain grouped into self-contained defensive boxes.[67][68][73][74][75]
U-Go was launched in March, with the aim of cutting off 17th Indian Division. The decision to withdraw the division from Tiddim came too late, and although it successfully disengaged from Kennedy Peak it was cut off by a series of roadblocks. On 15 March it was stopped at the Taitum Saddle. Lieutenant-Colonel Younger organised a fireplan with 393 Bty firing from the north and 311 and 312 from the south, which gave the Japanese no reverse slope for protection. The first attack on the block failed, but next day, reinforced by mountain and anti-tank guns, and one 25-pounder firing directly into enemy bunkers, the position was taken on 16 March and the following day the regiment provided Defensive Fire (DF) tasks to prevent it being recaptured. Suffering heavy casualties from the artillery fire, the Japanese suddenly fell back and opened the way to the bridge over the Manipur River. For the final stage of the retreat the division had to clear a block and recapture a supply dump at Milestone 109. A first attack on 22 March failed, but the following day with 311 and 312 Btys firing in support the enemy aa driven of the positions. The regiment's Forward Observation Officers (FOOs) were able to range their guns onto the objective when their own advancing infantry were only 15 yards (14 m) away from it. By now ammunition was down to five rounds per gun (the regiment had fired 6900 in three weeks), and attempts to air-drop supplies had failed, but on 4 April the regiment marched into Imphal where it met 5th Indian Division, which had been flown in.[76][77]
Kohima–Imphal
The whole of IV Corps was now dug in on the Imphal Plain with 17th Indian Division at Imphal in Corps reserve. While the emphasis was on IV Corps' efforts to relieve the besieged base at Kohima in the north, 17th Indian Division at Bishenpur on the Tiddim Road was still under pressure from the south. The divisional artillery was disposed in two 'boxes', most in the north, but with RHQ and three troops of 129th Fd Rgt in the southern box. The gunners themselves had to defend their boxes against attacks by Japanese infantry, as well as firing in support of troops fighting to clear the hills and to counter thrusts by Japanese columns. On 23 June the siege of Imphal was broken, and the position of the Japanese troops at Bishenpur became precarious as IV Corps went over to the offensive. By 31 July 17th Indian Division was withdrawn for rest. From the retreat from Tiddim to the end of July 129th Fd Rgt was in action for 244 days in which it fired 121,253 rounds.[78][79]
On 4 September 1944 the regiment left Burma with 17th Indian Division and returned to Ranchi for extended rest and preparation for the 1945 offensive. For example, on 26 October 1944 311 Fd Bty carried out trials on firing 25-pounders from landing craft, which would be necessary for future river crossings and coastal landings. 17th Indian Division was now organised with two brigades motorised and one air-transportable. On 31 January 1945 it completed its retraining and the regiment returned to the front on 6 February.[44][68][67][80]
Meiktila
The division was to cross the Irrawaddy River and then act as a fast striking force towards Meiktila. It was ferried across the river on 18 February and drove towards Meiktila in a series of short actions.[44][67][68][81][82] During this fighting a FOO of 129th Fd Rgt was killed; his Observation Post Assistant ('OP Ack') was Lance Bombardier G.C. Huntley, who made his own fire plan to neutralise the enemy, then organised a stretcher party to bring out a wounded officer and the body of his FOO. Huntly was awarded a Distinguished Conduct Medal (DCM) but was killed a few weeks later.[83]
17th Indian Division reached Meiktila by 1 March, but the Japanese cut the road behind the division, which then had to rely on air supply. Nevertheless, the guns came into action and the town was cleared by 4 March where the division prepared to meet the expected Japanese counter-offensive (the Battle of Meiktila and Mandalay). There was bitter fighting around the perimeter during March as the Japanese tried to retake the airfield. The gunners used Airburst rounds to dislodge enemy snipers from treetops, and once again had to defend their own gun positions, but the airfield was held and the division's air-transportable brigade was successfully flown in. At the end of the month the road was opened, and reinforcements arrived on 1 April.[84][85] The regiment had fired 11,721 rounds in March.[67]
17th Indian Division then hurried forward to catch up with the rest of the corps. It took over the lead on 28 April and after running fights along the road it had captured Pegu by 30 April. Although the offensive's objective, Rangoon, was only 50 miles (80 km) away, torrential Monsoon rain halted the advance. The abandoned city was occupied by amphibious forces (Operation Dracula). Having made contact with the Dracula force, 17th Indian Division was diverted to trap the retreating Japanese in the Sittang Bend.[67][86][87][88]
The Battle of the Sittang Bend carried on through the Monsoon, with 129th Fd Rgt very active in the fighting as Japanese thrusts were stopped and pockets of resistance mopped up. The next phase of the offensive was due to be an amphibious assault on Malaya (Operation Zipper), but this was forestalled by the end of the war in mid-August. After a period with the Burma garrison,[89][90] 129th (Lowland) Field Regiment was placed in suspended animation in 1946 and disbanded in 1947.[18][43][61]
Postwar
In 1947, the unit was reformed at Edinburgh as 278th (Lowland) Field Regiment in 51st/52nd (Lowland) Infantry Division with the following organisation:[18][61][62][91][92][93]
- P (1st City of Edinburgh) Bty
- Q (2nd City of Edinburgh) Bty
- R (Midlothian) Bty
In 1961, the regiment was amalgamated with the 357th (Lowland) Light Regiment RA (TA) to form the 278th (Lowland) Field Regiment RA (The City of Edinburgh Artillery) (TA).[18][91]
When the TA was reduced to the TAVR in 1967, the regiment merged with 277th (Argyll & Sutherland Highlanders) Field Regiment and 279th (City of Glasgow and Ayr) Field Regiment and became Q (City of Edinburgh) Bty in The Lowland Regiment, RA, which was disbanded in 1975.[18][91][94][95]
Uniforms and insignia
The original uniform of the corps was dark blue tunics and trousers, the latter with broad scarlet stripes. The tunic had a scarlet collar with silver grenades embroidered on both sides, blue cuffs, five rows of black cord lace on the breast, and black cord shoulder cords and Austrian knot. The head-dress was a busby, a round forage-cap with red band being worn in undress, and the belts were black. The 2nd Midlothian at first had scarlet cuffs and collar and white belts, but on amalgamation conformed to the dress of the 1st Corps. This uniform was worn down to the spring of 1881, when the corps changed to the regulation clothing.[8][9]
In the 1930s the CO of 78th (Lowland) Fd Bde introduced silver cap badges and buttons, and trouser turn-ups, for officers in walking-out and mess dress. This custom was revived in the 1950s when white metal beret badges were issued to all ranks at regimental expense.[18]
In 1958 the sword and full-dress pouch that had belonged to Sir Joseph Noel Paton, the first CO of 1st Edinburgh Bty in 1859, was presented to 278th (Lowland) Fd Rgt by his family, They were worn by the battery commander on every Royal saluting parade until 1967.[18]
Commanding Officers
Commanding Officers (COs) included:[8][6]
- Col Sir James G Baird, Bt, 10 March 1860.
- Lt-Col Thomas E O Home, 18 July 1883.
- Col Charles G H Kinnear, 26 June 1884.
- Lt-Col David Whitelaw, VD, 29 December 1894.
- Col James A Dalmahoy, MVO, VD, 8 June 1898.
- Lt-Col J.L. Findlay, VD, 7 January 1908
- Lt-Col W.E. Anderson, TD
- Lt-Col J.M.B. Scott
- Lt-Col R.S. Reid, TD, 21 January 1928
- Lt-Col T. Sturrock, MC
- Lt-Col N.P. Cross, 2 January 1936
129th Field Regiment, India and Burma[67]
Honorary Colonels
The following served as Honorary Colonel of the unit:[8][6]
- Brevet Honorary Colonel Sir James Gardiner Baird, 7th Baronet of Saughton Hall, former CO, aide-de-camp to the Queen, appointed 18 July 1883, died 1896
- Archibald Primrose, 5th Earl of Rosebery, former Prime Minister, appointed 7 January 1903, died 21 May 1929
- John Montagu Douglas Scott, 7th Duke of Buccleuch, appointed 28 December 1929
- Brig-Gen H.S. Seligman, CMG, DSO, appointed 28 December 1934
See also
- 1st Berwickshire Artillery Volunteers
- 1st Caithness Artillery Volunteers
Footnotes
- The Official History order of battle[26] implies that the brigade had gained a fourth battery by now, though it is unclear when this was formed or joined.[28]
- Although conscription had been introduced earlier in the year, so that men were no longer recruited directly into the TF, some of the 41 new howitzer batteries authorised by Army Council Instruction (ACI) 1298 of 29 June 1916 were formed at TF artillery schools, and were then numbered and attached to TF County Associations by ACI 1717 of 4 September 1916: 535 (H) Bty was one of these, being administered the Glasgow TF Association.[34]
- In 1941 a three-battery establishment had been adopted for field regiments,[51] and now or later 78th Fd Rgt consisted of 309, 310 and 456 Fd Btys.[42] The Imperial War Museum holds the private papers of B.J. Angell, who served in 456 Fd Bty 1942–May 1944, and thereafter in 309 Med Bty.[52]
- Royal Artillery 1939–45[63] and the IWM catalogue[52] incorrectly state that 178th Med Rgt was in Second Army in the campaign in North West Europe, but this is contradicted by the Official History's orders of battle[58] and by RA 1939–45's own statement that the regiment was in the Po Valley in April 1945.
Notes
- Beckett.
- Grierson, pp. 1–12.
- Litchfield & Westlake, pp. 1–4.
- Spiers, pp. 163–8.
- Baird baronets at Landed Families Blogspot
- Army List, various dates.
- Beckett, Appendix VIII.
- Grierson, pp. 130–2.
- Litchfield & Westlake, pp. 128–30.
- Litchfield & Westlake, p. 89.
- Litchfield and Westlake, pp. 3–6.
- Osborne, p.274
- Midlothian at Great War Centenary Drill Halls.
- Beckett, pp. 178–9.
- Dunlop, Chapter 14.
- Spiers, Chapter 10.
- London Gazette 20 March 1908.
- Litchfield, pp. 295–6.
- Conrad, British Army, 1914.
- Becke, Pt 2a, pp. 109–14.
- 52 (L) Division at Long, Long Trail.
- "52 (L) Division at Regimental Warpath". Archived from the original on 28 December 2009. Retrieved 28 December 2009.
- Thompson, pp. 3–5.
- Becke, Pt 2b, p. 6.
- Thompson, pp. 7–8.
- Becke, Pt 2a, pp. 101–7.
- 51 (H) Division at Long, Long Trail.
- "51 (H) Division at Regimental Warpath". Archived from the original on 10 November 2009. Retrieved 10 November 2009.
- 51 Divisional RA at Long, Long Trail.
- Miles, p. 136.
- Miles, p. 195.
- Farndale, Western Front, pp. 154–6.
- Cave, pp. 75–98.
- WO, ACIs September 1916.
- Farndale, Western Front, p. 169; Annex M.
- Thompson, p. 6.
- Becke, Pt 2b, pp. 61–5.
- 65 (2nd L) Division at Long, Long Trail.
- Farndale, Forgotten Fronts, Annex 7.
- WO, Titles and Designations, 1927.
- Scottish Command 3 September 1939 at Patriot Files.
- 78 Fd Rgt at RA 1939–45.
- Field Rgts at British Artillery in WW2.
- 129 Fd Rgt at RA 1939–45.
- Joslen, pp. 85–6.
- Joslen, pp. 58–9.
- Martin, pp. 1–3; Appendix C.
- Ellis, Chapter XXI.
- Farndale, Years of Defeat, pp. 89–3; Annex H.
- Farndale, Years of Defeat, pp. 95–6; Annex D..
- Farndale, Years of Defeat, p. 99.
- Angell Papers, IWM catalogue ref 1030014150.
- Order of Battle of the Field Force in the United Kingdom, Part 3: Royal Artillery (Non-Divisional units), 2 April 1942, with amendments, The National Archives (TNA), Kew, file WO 212/515.
- Joslen, p. 567.
- Eighth Army Order of Battle, TNA file WO 201/693.
- Joslen, p. 154.
- AGRAs at British Artillery in WW2.
- Joslen, p. 467.
- Molony, Vol V, pp. 606–12.
- Molony, Vol V, pp. 731–6.
- Farndale, Years of Defeat, Annex M.
- Medium Rgts at British Artillery in WW2.
- "178 Med Rgt at RA 1939–45". Archived from the original on 8 July 2012. Retrieved 8 July 2012.
- Jackson, pp. 275–6, 288, 315.
- Martin, pp. 4–8.
- Martin, pp. 10–14.
- Farndale, Far East, Annex K.
- Joslen, p. 506.
- Farndale, Far East, pp. 126–8.
- Woodburn Kirby, Vol II, pp. 239, 242, 253–65.
- Woodburn Kirby, Vol II, pp. 306, 390, 405.
- Farndale, Far East, pp. 141, 172–3; Annex L.
- Woodburn Kirby, Vol III, Appendix 19; Vol IV, Appendix 18; Vol V, Appendix 29.
- Woodburn Kirby, Vol III, pp. 187–90.
- Farndale, Far East, pp. 174–6.
- Woodburn Kirby, Vol III, pp. 190–2, 195–8, 201, 235, 239–42.
- Farndale, Far East, pp. 176–9.
- Woodburn Kirby, Vol III, pp. 306–7, 329, 334, 347–9, 359, 361, 365, 371.
- Farndale, Far East, pp. 209, 213.
- Woodburn Kirby, Vol IV, pp. 173, 180–1.
- Woodburn Kirby, Vol IV, pp. 255, 266, 271.
- Farndale, Far East, p. 267.
- Farndale, Far East, p. 271.
- Woodburn Kirby, Vol IV, pp. 286, 306–9, 313.
- Farndale, Far East, pp. 274, 277, 279–81.
- Farndale, Far East, p. 292.
- Woodburn Kirby, Vol IV, pp. 357–61, 389–98.
- Woodburn Kirby, Vol V, pp. 19–22, 35, 47.
- Farndale, Far East, pp. 305–6, 311.
- Woodburn Kirby, Vol V, pp. 256–93.
- 266–288 Rgts RA at British Army 1945 onwards.
- Watson, TA 1947.
- Litchfield, Appendix 5.
- Litchfield, pp. 278–9, 294, 304.
- "Lowland Rgt RA at Regiments.org". Archived from the original on 27 December 2005. Retrieved 27 December 2005.
- de Robeck at the Peerage.com.
References
- Maj A.F. Becke,History of the Great War: Order of Battle of Divisions, Part 2a: The Territorial Force Mounted Divisions and the 1st-Line Territorial Force Divisions (42–56), London: HM Stationery Office, 1935/Uckfield: Naval & Military Press, 2007, ISBN 1-847347-39-8.
- Maj A.F. Becke,History of the Great War: Order of Battle of Divisions, Part 2b: The 2nd-Line Territorial Force Divisions (57th–69th), with the Home-Service Divisions (71st–73rd) and 74th and 75th Divisions, London: HM Stationery Office, 1937/Uckfield: Naval & Military Press, 2007, ISBN 1-847347-39-8.
- Ian F.W. Beckett, Riflemen Form: A Study of the Rifle Volunteer Movement 1859–1908, Aldershot, The Ogilby Trusts, 1982, ISBN 0-85936-271-X.
- Nigel Cave, Battleground Europe: Somme: Beaumont Hamel, Newfoundland Park, Barnsley: Leo Cooper, 1994, ISBN 978-0-85052-648-6.
- Major L.F. Ellis, History of the Second World War, United Kingdom Military Series: The War in France and Flanders 1939–1940, London: HM Stationery Office, 1954/Uckfield, Naval & Military Press, 2004.
- Gen Sir Martin Farndale, History of the Royal Regiment of Artillery: Western Front 1914–18, Woolwich: Royal Artillery Institution, 1986, ISBN 1-870114-00-0.
- Gen Sir Martin Farndale, History of the Royal Regiment of Artillery: The Forgotten Fronts and the Home Base 1914–18, Woolwich: Royal Artillery Institution, 1988, ISBN 1-870114-05-1.
- Gen Sir Martin Farndale, History of the Royal Regiment of Artillery: The Years of Defeat: Europe and North Africa, 1939–1941, Woolwich: Royal Artillery Institution, 1988/London: Brasseys, 1996, ISBN 1-85753-080-2.
- Gen Sir Martin Farndale, History of the Royal Regiment of Artillery: The Far East Theatre 1939–1946, London: Brasseys, 2002, ISBN 1-85753-302-X.
- Maj-Gen J.M. Grierson, Records of the Scottish Volunteer Force 1859–1908, Edinburgh: Blackwood, 1909.
- Gen Sir William Jackson, History of the Second World War, United Kingdom Military Series: The Mediterranean and Middle East, Vol VI: Victory in the Mediterranean, Part I|I: November 1944 to May 1945, London: HMSO, 1988/Uckfield, Naval & Military Press, 2004, ISBN 1-845740-72-6.
- Lt-Col H. F. Joslen, Orders of Battle, United Kingdom and Colonial Formations and Units in the Second World War, 1939–1945, London: HM Stationery Office, 1960/Uckfield: Naval & Military, 2003, ISBN 1-84342-474-6.
- Norman E. H. Litchfield and Ray Westlake, The Volunteer Artillery 1859–1908, Nottingham: The Sherwood Press, 1982, ISBN 0-9508205-0-4
- Norman E. H. Litchfield, The Territorial Artillery 1908–1988, Nottingham: The Sherwood Press, 1992, ISBN 0-9508205-2-0
- Lt-Gen H.G. Martin, The History of the Fifteenth Scottish Division 1939–1945, Edinburgh: Blackwood, 1948/Uckfield: Naval & Military Press, 2014, ISBN 978-1-78331-085-2.
- Capt Wilfred Miles, History of the Great War: Military Operations, France and Belgium 1916, Vol II, 2nd July 1916 to the End of the Battles of the Somme, London: Macmillan, 1938/Imperial War Museum & Battery Press, 1992, ISBN 0-89839-169-5.
- Brig C.J.C. Molony,History of the Second World War, United Kingdom Military Series: The Mediterranean and Middle East, Vol V: The Campaign in Sicily 1943 and the Campaign in Italy 3rd September 1943 to 31st March 1944, London: HMSO, 1973/Uckfield, Naval & Military Press, 2004, ISBN 1-845740-69-6.
- Mike Osborne, Always Ready: The Drill Halls of Britain's Volunteer Forces, Essex: Partizan Press, 006, ISBN 1-85818-509-2
- Edward M. Spiers, The Army and Society 1815–1914, London: Longmans, 1980, ISBN 0-582-48565-7.
- Lt-Col R.R. Thompson, The Fifty-Second (Lowland) Division 1914–1918, Glasgow: Maclehose, Jackson 1923/Uckfield: Naval & Military, 2004, ISBN 978-1-84342993-7.
- War Office, Army Council Instructions Issued During August 1916, London: HM Stationery Office, 1916.
- War Office, Titles and Designations of Formations and Units of the Territorial Army, London: War Office, 7 November 1927 (RA sections also summarised in Litchfield, Appendix IV).
- Maj-Gen S. Woodburn Kirby, History of the Second World War, United Kingdom Military Series: The War Against Japan Vol II, India's Most Dangerous Hour, London: HM Stationery Office, 1958/Uckfield: Naval & Military, 2004, ISBN 1-845740-61-0.
- Maj-Gen S. Woodburn Kirby, History of the Second World War, United Kingdom Military Series: The War Against Japan Vol III, The Decisive Battles, London: HM Stationery Office, 1961/Uckfield: Naval & Military, 2004, ISBN 1-845740-62-9.
- Maj-Gen S. Woodburn Kirby, History of the Second World War, United Kingdom Military Series: The War Against Japan Vol IV, The Reconquest of Burma, London: HM Stationery Office, 1955/Uckfield: Naval & Military, 2004, ISBN 1-845740-63-7.
- Maj-Gen S. Woodburn Kirby, History of the Second World War, United Kingdom Military Series: The War Against Japan Vol V, The Surrender of Japan, London: HM Stationery Office, 1969/Uckfield: Naval & Military, 2004, ISBN 1-845740-64-5.
External sources
- Mark Conrad, The British Army, 1914 (archive site)
- British Army units from 1945 on
- British Artillery in World War 2.
- Great War Centenary Drill Halls.
- The Long, Long Trail
- Patriot Files orders of battle
- The Regimental Warpath 1914–1918 (archive site)
- Land Forces of Britain, the Empire and Commonwealth – Regiments.org
- The Royal Artillery 1939–45
- Graham Watson, The Territorial Army 1947