2nd Light Horse Brigade
The 2nd Light Horse Brigade was a mounted infantry brigade of the Australian Imperial Force (AIF) which served in the Middle Eastern theatre of World War I. The brigade was initially formed as a part-time militia formation in the early 1900s in New South Wales. In 1914, the brigade was re-constituted as part of the AIF. The brigade first saw action while serving in the Australian and New Zealand Army Corps (ANZAC) during the Gallipoli campaign. After being withdrawn to Egypt in February 1916 they served in the ANZAC Mounted Division from March 1916 as part of the Egyptian Expeditionary Force during the Sinai and Palestine Campaign until the end of the war. After the war, the AIF light horse regiments were demobilised and disbanded; however, the brigade briefly existed as a part-time militia formation in New South Wales until 1921 when its regiments were reorganised into cavalry brigades.
| 2nd Light Horse Brigade | |
|---|---|
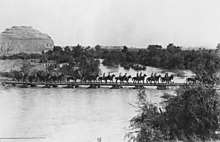 The 5th Light Horse Regiment crossing the pontoon bridge at the Ghoraniye Bridgehead, April 1918 | |
| Active | 1902–1921 |
| Country | Australia |
| Allegiance | Australian Crown |
| Branch | Australian Army |
| Type | Mounted infantry |
| Role | Light horse |
| Size | ~1,500 men |
| Part of | (1) 2nd Australian Contingent, 1914–15; (2) Australian and New Zealand Army Corps (ANZAC) 1915–16; and, (3) Anzac Mounted Division, 1916–19. |
| Equipment | Horse rifle and bayonet |
| Engagements | World War I
|
| Insignia | |
| Unit colour patch | |
History
Early formation
The 2nd Light Horse Brigade was initially raised as part of the militia in the early 1900s, being formed sometime between 1902 and 1905. That formation was raised in northern New South Wales, and consisted of three Australian Light Horse regiments – the 4th (Hunter River Lancers), 5th (Northern River Lancers) and 6th (New England Light Horse). The 4th had depots around Newcastle, Muswellbrook and Cessnock, and other smaller centres; the 5th was based in several locations including Lismore, Grafton, and Casino; and the 6th was based in several small towns including Armidale, Glen Innes and Tamworth. In 1912, an Army-wide reorganisation resulted in some regimental designations being redistributed. Largely, the 2nd Light Horse Brigade was unaffected. While it lost the 4th Light Horse Regiment to the 1st Light Horse Brigade in Queensland, part of the regiment was retained for training purposes. The other two regiments – the 5th and 6th – were retained in the 2nd Light Horse Brigade, although some of the smaller depot locations were changed.[1]
World War I
Formation and service at Gallipoli
At the outbreak of the war August 1914 the Australian Government decided to raise the all-volunteer Australian Imperial Force (AIF) consisting of 20,000 troops comprising an infantry division and a light horse brigade of three regiments to be used at the discretion of Britain.[2] These regiments were raised from volunteers for overseas service, as the provisions of the Defence Act did not allow conscripts to be deployed overseas. Nevertheless, many of the recruits were drawn from the various militia light horse formations created as a consequence of the Kitchener Report 1910 and the introduction of Universal Training, although they were assigned to freshly raised units that were separate to the light horse regiments raised as part of the militia. Initial enlistments outstripped expectations and, as a result, a total of three light horse brigades as well as two divisional cavalry regiments were formed in the early part of the war.[3]
The 2nd Light Horse Brigade was raised as part of the 2nd Contingent of the AIF,[4] which was hastily put together at the beginning of September 1914. It was organised into three regiments – the 5th, 6th and 7th – each of approximately 520 men.[5] The brigade's three regiments were drawn from Queensland (5th) and New South Wales (6th and 7th), although it had initially been proposed that the 7th would be recruited from Queensland, Western Australia and South Australia.[6][7][7] These units were raised throughout September and October, and the brigade embarked for the Middle East, departing from Sydney in December 1914.[8][9][10] The band of the 6th Light Horse Regiment played So Long, written by patriotic Australian composer May Summerbelle, as they set sail.[11]
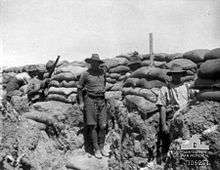
Arriving in Egypt, in February 1915, training was undertaken at Maadi Camp, during which further drafts of reinforcements were received from Australia.[4] Training focused initially on individual skills, before progressing to collective training at squadron, regimental and eventually brigade level.[12] The brigade's commander was Colonel (later Brigadier General) Granville De Laure Ryrie; he commanded the brigade throughout the war except for a temporary detachment during 1916.[13][14]
During the early part of the war, the brigade was attached to the New Zealand and Australian Division.[4] In mid-May 1915, the brigade was deployed to Gallipoli as reinforcements for the infantry that had landed in April, who had become pinned around a small perimeter around a beachhead at Anzac Cove; deployed in a dismounted role, the brigade was assigned as corps troops directly under the Australian and New Zealand Army Corps. About a quarter of the strength of each light horse regiment remained in Egypt with their horses; however, additional reinforcements were provided prior to their arrival at Gallipoli, to bring them up to strength.[15][16]
Upon arrival, the brigade was broken up due to concerns about the capacity of its staff, including its commander, Ryrie, and his brigade major; however, it was reformed in June after a new brigade major was appointed.[13] The regiments were pushed into the line, largely on the far right of the position and undertook mainly defensive roles throughout the remainder of the campaign. During this time, the light horsemen undertook patrolling operations, manned outposts, carried out sniping and worked to dig trenches and lay down wire.[13] The 5th Light Horse Regiment in particular saw hard service around a position called Wilson's Lookout during October and November, during which time it was severely depleted by illness.[17] The brigade was relieved from its forward positions by infantry from John Monash's 4th Brigade in November, by which time winter had set in and it had begun snowing.[18] By 20 December, all three regiments were withdrawn from the peninsula, as part of the general withdrawal that followed the decision to abandon the position.[8][9][10] They were subsequently returned to Egypt, sailing via Mudros.[19]
Sinai and Palestine campaign
After the evacuation from Gallipoli, the Australian and New Zealand forces in the Middle East were reorganised. There were a large number of reinforcements that had arrived in Egypt at this time, and while the infantry was to be deployed to the Western Front, the mounted units were to remain in the Middle East.[20] This resulted in the establishment of the Anzac Mounted Division, which consisted of the 1st, 2nd and 3rd Light Horse Brigades, and the New Zealand Mounted Rifles Brigade.[21] At this time, the brigade provided a British Territorial horsed artillery battery,[21] the Somerset Battery, which was detached from III Brigade, Royal Horse Artillery (T.F.).[4] Until July 1916, the brigade was supported by a machine gun section, but this was expanded to a full squadron, equipped with 12 machine guns.[4] A light horse training regiment was also established for each brigade, to provide trained reinforcements, while other supporting elements including signals, logistic, engineer, medical and veterinary support units were also assigned.[22]
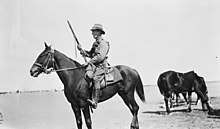
In early 1916, the Australian light horse units were deployed to defend the Suez Canal from an Ottoman attack. After a series of raids by Ottoman forces on several oasis outposts during the Battle of Katia, the 2nd Light Horse Brigade was deployed from Kantara to pursue the withdrawing Ottomans.[23] A short, but sharp fight followed, mainly involving the 5th Light Horse Regiment.[24] Patrolling operations around followed for several months, to defend avenues of approach towards northern Egypt around Katia and Romani. During this time, the brigade gained useful experience operating in desert conditions, which would stand them in good stead for their later involvement in the Sinai and Palestine campaign.[25]
The brigade fought its first major action of this campaign in early August 1916 during the Battle of Romani, which took place 35 kilometres (22 mi) to the east of the canal.[26] Ryrie was absent during the battle, attending an imperial parliamentary conference in London, and in Colonel John Royston temporarily commanded the brigade during this time.[14] Prior to the battle, the 1st Light Horse occupied several outposts, the 2nd Light Horse Brigade was deployed to carry out reconnaissance after the advanced elements of the Ottoman advance on Romani was detected by patrolling aircraft. The weight of the initial attack on 3 August fell on the 1st Light Horse, which was threatened with being outflanked until the 2nd Light Horse Brigade secured their right flank. They were pushed back further as the Ottomans secured several high features, but held the centre while other units launched a counter-attack. Early on 5 August, the 1st and 2nd Light Horse Brigades launched an attack with bayonets around Wellington Ridge.[27] As the tide of the fighting turned, in the following days, the brigade was committed to the pursuit that followed as the Ottoman forces began to withdraw, taking part in another action around Katia.[8][9][10]
After a period of rest out of the line, throughout the remainder of 1916 and into early 1917, the brigade undertook patrol work and minor raids as the British Empire forces pushed into Palestine, after reducing Ottoman garrisons throughout the Sinai. By March, they were preparing to capture Gaza, 32 kilometres (20 mi) from the border. On 26 March 1917, the Anzac Mounted Division took part in the failed First Battle of Gaza, assigned the role of attacking from the north and east while British infantry attacked from the south.[28] During the crossing of the Wadi Ghuzze, the 7th Light Horse Regiment formed the advance guard. The light horsemen then skirted around the town towards the coast while a cavalry screen was established prior to the attack. The attacking infantrymen were delayed by fog, while the light horsemen captured some of the high ground to the north. The 2nd Light Horse Brigade and New Zealand Mounted Brigade were committed late in the day. As they advanced, they were held up by thick hedges, which had to be cleared by hand, while the troopers also dealt with defending Ottoman troops. Although the northern and eastern parts of the town were penetrated, concerns about water and approaching Ottoman reinforcements resulted in the attack being called off.[29][28] A second attempt to capture the key Ottoman position came on 19 April, but it too proved unsuccessful as the defences had been strengthened after the previous attempt. During this effort, the Anzac Mounted Division’s main role was to prevent Ottoman reinforcements from breaking through,[30] although the 2nd Light Horse Brigade was warned to be prepared to launch a mounted attack. Two of its regiments – the 5th and 7th – came under attack from mounted forces while holding a position south of Wadi Imleih. They were forced to retire to cover, until their machine guns were able to check the attack.[31]
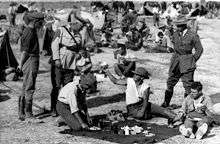
After this, British planners decided to attempt an indirect approach, focusing their efforts on Beersheba, about 50 kilometres (31 mi) from Gaza.[32] In late October, the brigade took part in the Battle of Beersheba, during which it helped to secure the Jerusalem road, and captured Tel el Sakaty.[33] The breakthrough at Beersheba then paved the way for the opening of the Southern Palestine Offensive,[34] and in early November, the brigade was involved in preliminary advances prior to the Battle of Mughar Ridge.[35] Later in the month, prior to the capture of Jerusalem, the brigade was subjected to a counter-attack from an Ottoman division, which captured the forward trenches on the right flank before collapsing with large numbers being captured by the 7th Light Horse Regiment.[36]
With the capture of Jerusalem, the brigade became involved in operations around the Jordan Valley.[8][9][10] In February 1918, the Inverness-shire Battery of XVIII Brigade, Royal Horse Artillery (T.F.), replacing the Somerset Battery.[4] The same month, during preliminary operations before the Capture of Jericho, the brigade occupied part of the line near the coast while the Anzac Mounted Division supported an infantry advance on Rujm el Bahr, near the Dead Sea.[37] At the end of the month, the brigade pushed further west and took part in the failed First Battle of Amman during the First Transjordan attack on Amman. This was followed by the raid on Es Salt in April and May.[8][9][10] On 14 July, German and Ottoman forces attacked the Anzac Mounted Division during the Battle of Abu Tellul;[38] during which the 2nd Light Horse Brigade's positions came under heavy shelling, as German infantry closed up towards their positions. In response, the 5th Light Horse Regiment launched a raid against the German infantry that resulted in numerous prisoners being taken.[39]
In late July and early August, the brigade was withdrawn to Bethlehem.[40] Following this, the Allies renewed their offensive, during which the Anzac Mounted Division was assigned to a mixed force that became known as Chaytor's Force to join the Third Transjordan attack, supporting the main drive towards Damascus further to the north.[41] While the forces of the Australian Mounted Division driving on Damascus employed cavalry tactics, having been issued swords and training in August,[42] the Anzac Mounted Division was employed in a mounted infantry role in the mountainous area to the east of the Jordan against the Ottoman Fourth Army.[43] In late September, the brigade took part in the Second Battle of Amman.[8][9][10] During the action, while the New Zealand Mounted Rifles captured Es Salt, the 2nd Light Horse Brigade began to advance on 24 September.[44] They attacked Kabr Mujahid and Tel er Rame, before advancing on Amman early on 25 September;[45] the Ottomans began evacuating the town, but left a strong rearguard. The 7th Light Horse Regiment was instrumental in securing Ottoman sangars on the right flank, after which the defence of the town was broken.[44] The brigade subsequently captured the town along with its remaining garrison. They later continued on towards Ziza, where a large Ottoman force was captured on 29/30 September. Surrounded by Bedouin forces, the Australians allowed the Ottoman troops to retain their weapons overnight for defence.[46][47] The 5th Light Horse Regiment alone secured around 4,500 prisoners in the action.[8] Despite this, the remnants of the Ottoman Fourth Army managed to escape by rail, withdrawing back towards Damascus. This was the brigade's last major action of the war, and on 30 October, the Ottomans surrendered, and the Armistice of Mudros came into effect, bringing an end to the fighting in the theatre.[48]
Disbandment and perpetuation
After the conclusion of hostilities, the Anzac Mounted Division undertook occupation duties in southern Palestine until it returned to Egypt in early 1919.[49] The brigade's individual regiments were used to quell unrest during the Egyptian revolt;[8][9][10] commencing in March the brigade, less the 7th Light Horse Regiment, moved from Kantara to Damanhour, and under the control of Damanhour Force, mobile columns were despatched to several areas.[50] By June, the brigade had concentrated at Kantara where they returned stores and equipment in preparation to return to Australia.[51] Each regiment embarked for Australia in late June 1919,[8][9][10] with most troops embarking upon the troopship HMT Madras from Port Said.[51] The horses remained behind due to cost and quarantine issues, and were either destroyed or undertook further service in Egypt or Syria.[52] The brigade's headquarters finally closed on 30 July 1919 after arriving in Melbourne.[53]
Throughout late 1918 and early 1919, the process of demobilising the AIF continued, although this would not be complete until 1921.[54] At this time, the militia formations that had remained in Australia for home service were reorganised to realign them with the recruitment areas that had contributed to the AIF regiments, and to replicate the AIF's organisational structure and designations. These formations had continued to exist alongside the AIF in Australia, albeit largely on paper only as they had been reduced significantly due to large-scale enlistment in the AIF, and a lack of funds and resources for training.[55] By 1919, a 2nd Light Horse Brigade had been formed in the militia, consisting of 15th (Northern River Lancers) and the 25th Light Horse Regiments, which were based Lismore and Taree in New South Wales.[56]
In the first couple of years after the war, plans were made to reorganise the home forces to meet the needs of peacetime while providing a strong base upon which to mobilise if necessary. By 1921, when the AIF was officially disbanded, plans were approved to raise two cavalry divisions, each of three brigades, utilising a mix of voluntary enlistment and compulsory service.[57] At this time, the brigades were designated as cavalry brigades, rather than light horse brigades,[58] and the 2nd Light Horse Brigade ceased to exist. Within the new structure, the 2nd Cavalry Brigade assumed responsibility for the 12th, 15th and 16th Light Horse Regiments, covering Armidale, Casino and West Maitland.[59]
Composition
During World War I, the 2nd Light Horse Brigade consisted of the following:[4][6][7]
- 5th Light Horse Regiment
- 6th Light Horse Regiment
- 7th Light Horse Regiment
- 2nd Light Horse Machine Gun Squadron
- 2nd Light Horse Signal Troop
- 2nd Light Horse Field Ambulance
- 2nd Light Horse Brigade Train
- 7th Mobile Veterinary Section
- Somerset Battery of III Brigade, Royal Horse Artillery (T.F.) (1916–1918)
- Inverness-shire Battery of XVIII Brigade, Royal Horse Artillery (T.F.) (1918–1919)
- 2nd Light Horse Training Regiment
- 2nd Light Horse Double Squadron
Commanders
The following officers commanded the brigade during the war:[4]
- Brigadier General Granville De Laure Ryrie (17 September 1914 – March 1919)
See also
References
Citations
- Hall 1968, p. 70.
- Grey 2008, p. 85.
- Bou 2010a, pp. 99 & 141.
- "2nd Australian Light Horse Brigade". Australian Light Horse Studies Centre. Retrieved 19 April 2009.
- Gullett 1941, p. 54.
- "5th Australian Light Horse Regiment, AIF, History". Australian Light Horse Studies Centre. Retrieved 19 April 2009.
- "6th Australian Light Horse Regiment, AIF, History". Australian Light Horse Studies Centre. Retrieved 19 April 2009.
- "5th Light Horse Regiment". First World War, 1914–1918 units. Australian War Memorial. Archived from the original on 2 February 2012. Retrieved 6 December 2011.
- "6th Light Horse Regiment". First World War, 1914–1918 units. Australian War Memorial. Archived from the original on 2 February 2012. Retrieved 29 November 2011.
- "7th Light Horse Regiment". First World War, 1914–1918 units. Australian War Memorial. Archived from the original on 12 March 2012. Retrieved 29 November 2011.
- "Mainly About People". Daily News. XLIII (15, 277). Western Australia. 7 April 1924. p. 7 (Third edition). Retrieved 14 October 2018 – via National Library of Australia.
- Bou, 2010 & a, p. 143.
- Bou 2010a, p. 146.
- Perry 2009, p. 156.
- Bou 2010a, pp. 145–146.
- Travers 2002, pp. 272–273.
- Bou 2010a, pp. 146–147.
- Perry 2009, p. 124.
- Bou 2010a, p. 149.
- Grey 2008, pp. 98–100.
- Bou 2010a, p. 150.
- Bou 2010a, pp. 149–150.
- Bou 2010b, p. 10.
- Falls 1930a, pp. 168–169.
- Bou 2010b, p. 12.
- Coulthard-Clark 1998, p. 118.
- Coulthard-Clark 1998, pp. 118–119.
- Coulthard-Clark 1998, p. 124.
- Bou 2010b, pp. 29–32.
- Coulthard-Clark 1998, p. 127.
- Falls 1930a, pp. 344–346.
- Bou 2010b, p. 41.
- Powles 1922, p. 136.
- Bou 2010b, p. 52.
- Preston 1921, pp. 59–60.
- Falls 1930b, p. 230.
- Powles 1922, p. 173.
- Bou 2010a, p. 191.
- Gullett 1941, pp. 672–673.
- Gullett 1941, p. 675.
- Bou 2010b, p. 137.
- Bou 2010b, p. 108.
- Bou 2010a, pp. 193–195.
- Bou 2010b, p. 129.
- Gullett 1941, pp. 718–719.
- Bou 2010a, p. 195.
- Bou 2010b, p. 131.
- Bou 2010a, pp. 195 & 197.
- Bou 2010a, p. 200.
- "AWM4 10/2/51 – March 1919: 2nd Light Horse Brigade". Australian Imperial Force unit war diaries, 1914–18 war. Australian War Memorial. Retrieved 10 August 2019.
- "AWM4 10/2/54 – June 1919: 2nd Light Horse Brigade". Australian Imperial Force unit war diaries, 1914–18 war. Australian War Memorial. Retrieved 10 August 2019.
- Bou 2010a, p. 201.
- "AWM4 10/2/55 – July 1919: 2nd Light Horse Brigade". Australian Imperial Force unit war diaries, 1914–18 war. Australian War Memorial. Retrieved 10 August 2019.
- Grey 2008, p. 125.
- Bou 2010a, pp. 110–111.
- Hall 1968, p. 75.
- Hall 1968, p. 47.
- Bou 2010a, p. 229.
- Hall 1968, pp. 77–78.
Bibliography
- Bou, Jean (2010a). Light Horse: A History of Australia's Mounted Arm. Port Melbourne, Victoria: Cambridge University Press. ISBN 978-0-52119-708-3.CS1 maint: ref=harv (link)
- Bou, Jean (2010b). Australia's Palestine Campaign. Australian Army Campaign Series # 7. Canberra, Australian Capital Territory: Army History Unit. ISBN 978-0-9808100-0-4.CS1 maint: ref=harv (link)
- Coulthard-Clark, Chris (1998). The Encyclopaedia of Australia's Battles (1st ed.). Sydney, New South Wales: Allen & Unwin. ISBN 1-86448-611-2.CS1 maint: ref=harv (link)
- Falls, Cyril; MacMunn, G. (1930a). Military Operations Egypt & Palestine: From the Outbreak of War With Germany to June 1917. Official History of the Great War Based on Official Documents by Direction of the Historical Section of the Committee of Imperial Defence. Volume 1. London: HM Stationery Office. OCLC 610273484.
- Falls, Cyril; MacMunn, G.; Beck, A.F. (1930b). Military Operations Egypt & Palestine from June 1917 to the End of the War. Official History of the Great War Based on Official Documents by Direction of the Historical Section of the Committee of Imperial Defence. II. Part 1. London: HM Stationery Office. OCLC 644354483.
- Grey, Jeffrey (2008). A Military History of Australia (3rd ed.). Melbourne, Victoria: Cambridge University Press. ISBN 978-0-521-69791-0.CS1 maint: ref=harv (link)
- Gullett, Henry (1941). The Australian Imperial Force in Sinai and Palestine, 1914–1918. Official History of Australia in the War of 1914–1918. Volume 7 (10th ed.). Sydney: Angus and Robertson. OCLC 220901683.CS1 maint: ref=harv (link)
- Hall, Richard John (1968). The Australian Light Horse. Blackburn, Victoria: W.D. Joynt & Co. OCLC 59504.CS1 maint: ref=harv (link)
- Perry, Roland (2009). The Australian Light Horse. Hachette Australia. Sydney. ISBN 978-0-7336-2272-4.CS1 maint: ref=harv (link)
- Powles, C. Guy; Wilkie, A. (1922). The New Zealanders in Sinai and Palestine. Official History New Zealand's Effort in the Great War. Volume III. Auckland: Whitcombe & Tombs. OCLC 2959465.
- Preston, R. M. P. (1921). The Desert Mounted Corps: An Account of the Cavalry Operations in Palestine and Syria 1917–1918. London: Constable & Co. OCLC 3900439.CS1 maint: ref=harv (link)
- Travers, Tim (2002). Gallipoli 1915. Charleston, South Carolina: Tempus. ISBN 0-7524-2551-X.CS1 maint: ref=harv (link)
External links
- Australian Light Horse Studies Centre
- Kitchener Report, 1910 – Australian National Archives
- 2nd Light Horse Brigade war diary – Australian War Memorial
