Halftone
Halftone is the reprographic technique that simulates continuous-tone imagery through the use of dots, varying either in size or in spacing, thus generating a gradient-like effect.[1] "Halftone" can also be used to refer specifically to the image that is produced by this process.[1]
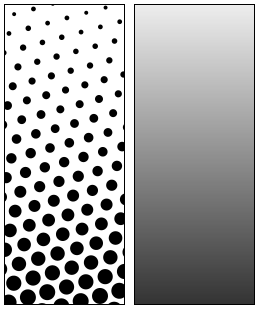
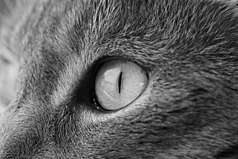
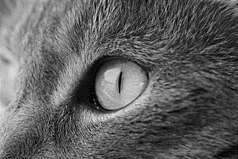
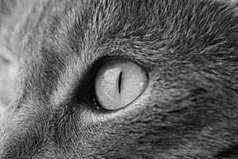
Where continuous-tone imagery contains an infinite range of colors or greys, the halftone process reduces visual reproductions to an image that is printed with only one color of ink, in dots of differing size (pulse-width modulation) or spacing (frequency modulation) or both. This reproduction relies on a basic optical illusion: when the halftone dots are small, the human eye interprets the patterned areas as if they were smooth tones. At a microscopic level, developed black-and-white photographic film also consists of only two colors, and not an infinite range of continuous tones. For details, see film grain.
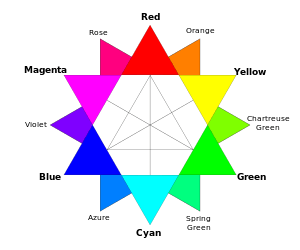
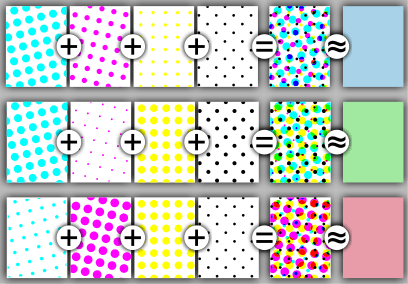
Just as color photography evolved with the addition of filters and film layers, color printing is made possible by repeating the halftone process for each subtractive color – most commonly using what is called the "CMYK color model".[2] The semi-opaque property of ink allows halftone dots of different colors to create another optical effect, full-color imagery.[1]
History
.jpg)
While there were earlier mechanical printing processes that could imitate the tone and subtle details of a photograph, most notably the Woodburytype, expense and practicality prohibited their being used in mass commercial printing that used relief printing.
Previously most newspaper pictures were woodcuts or wood-engravings made from hand-carved blocks of wood that, while they were often copied from photographs, they more resemble hand drawn sketches. Commercial printers wanted a practical way to realistically reproduce photographs onto the printed page, but most common mechanical printing processes can only print areas of ink or leave blank areas on the paper and not a photographic range of tones; only black (or coloured) ink, or nothing. The half-tone process overcame these limitations and became the staple of the book, newspaper and other periodical industry.[3]
William Fox Talbot is credited with the idea of halftone printing. In an 1852 patent he suggested using "photographic screens or veils" in connection with a photographic intaglio process.[4][5]
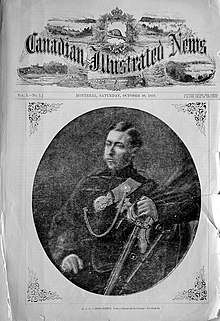
Several different kinds of screens were proposed during the following decades. One of the first attempts was by William Leggo with his leggotype while working for the Canadian Illustrated News. The first printed halftone photograph was an image of Prince Arthur published on October 30, 1869.[6] The New York Daily Graphic would later publish "the first reproduction of a photograph with a full tonal range in a newspaper" on March 4, 1880 (entitled "A Scene in Shantytown") with a crude halftone screen.[7]
The first truly successful commercial method was patented by Frederic Ives of Philadelphia in 1881.[5][7] Although he found a way of breaking up the image into dots of varying sizes, he did not make use of a screen. In 1882, the German Georg Meisenbach patented a halftone process in England. His invention was based on the previous ideas of Berchtold and Swan. He used single lined screens which were turned during exposure to produce cross-lined effects. He was the first to achieve any commercial success with relief halftones.[5]
Shortly afterwards, Ives, this time in collaboration with Louis and Max Levy, improved the process further with the invention and commercial production of quality cross-lined screens.[5]
The relief halftone process proved almost immediately to be a success. The use of halftone blocks in popular journals became regular during the early 1890s.[5]
The development of halftone printing methods for lithography appears to have followed a largely independent path. In the 1860s, A. Hoen & Co. focused on methods allowing artists to manipulate the tones of hand-worked printing stones.[8] By the 1880s, Hoen was working on halftone methods that could be used in conjunction with either hand-worked or photolithographic stones.[9][10]
Halftone photographic screening
Prior to digitised images, special photographic techniques were developed to break grayscale images down into discrete points. The earliest of these was "screening" where a coarse-woven fabric screen was suspended before the camera plate to be exposed, breaking the incoming light into a pattern of dots via a combination of interruption and diffraction effects. The photographic plate could then be developed using photo-etching techniques to create a printing plate.
Other techniques used a "screen" consisting of horizontal bars (a Ronchi ruling), which was then combined with a second exposure with a screen of vertically orientated bars. Another method again was to use a specially designed plate with horizontal lines pre-etched into the surface.
Traditional halftoning
Resolution of halftone screens
| Typical halftone resolutions | |
| Screen printing | 45–65 lpi |
| Laser printer (300dpi) | 65 lpi |
| Laser printer (600dpi) | 85–105 lpi |
| Offset press (newsprint paper) | 85 lpi |
| Offset press (coated paper) | 85–185 lpi |
The resolution of a halftone screen is measured in lines per inch (lpi). This is the number of lines of dots in one inch, measured parallel with the screen's angle. Known as the screen ruling, the resolution of a screen is written either with the suffix lpi or a hash mark; for example, "150 lpi" or "150#".
The higher the pixel resolution of a source file, the greater the detail that can be reproduced. However, such increase also requires a corresponding increase in screen ruling or the output will suffer from posterization. Therefore, file resolution is matched to the output resolution.
Multiple screens and color halftoning
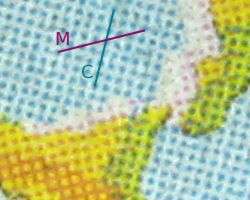
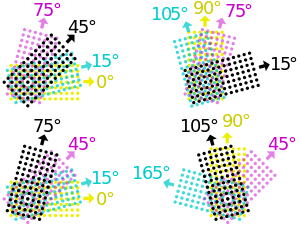
When different screens are combined, a number of distracting visual effects can occur, including the edges being overly emphasized, as well as a moiré pattern. This problem can be reduced by rotating the screens in relation to each other. This screen angle is another common measurement used in printing, measured in degrees clockwise from a line running to the left (9 o'clock is zero degrees).
Halftoning is also commonly used for printing color pictures. The general idea is the same, by varying the density of the four secondary printing colors, cyan, magenta, yellow, and black (abbreviation CMYK), any particular shade can be reproduced.[11]
In this case there is an additional problem that can occur. In the simple case, one could create a halftone using the same techniques used for printing shades of grey, but in this case the different printing colors have to remain physically close to each other to fool the eye into thinking they are a single color. To do this the industry has standardized on a set of known angles, which result in the dots forming into small circles or rosettes.
The dots cannot easily be seen by the naked eye, but can be discerned through a microscope or a magnifying glass.
Dot shapes
Though round dots are the most commonly used, many dot types are available, each having its own characteristics. They can be used simultaneously to avoid the moiré effect. Generally, the preferred dot shape is also dependent on the printing method or the printing plate.
- Round dots: most common, suitable for light images, especially for skin tones. They meet at a tonal value of 70%.
- Elliptical dots: appropriate for images with many objects. Elliptical dots meet at the tonal values 40% (pointed ends) and 60% (long side), so there is a risk of a pattern.
- Square dots: best for detailed images, not recommended for skin tones. The corners meet at a tonal value of 50%. The transition between the square dots can sometimes be visible to the human eye.[12]
Digital halftoning
Digital halftoning has been replacing photographic halftoning since the 1970s when "electronic dot generators" were developed for the film recorder units linked to color drum scanners made by companies such as Crosfield Electronics, Hell, and Linotype-Paul.
In the 1980s, halftoning became available in the new generation of imagesetter film and paper recorders that had been developed from earlier "laser typesetters". Unlike pure scanners or pure typesetters, imagesetters could generate all the elements in a page including type, photographs, and other graphic objects. Early examples were the widely used Linotype Linotronic 300 and 100 introduced in 1984, which were also the first to offer PostScript RIPs in 1985.[13]
Early laser printers from the late 1970s onward could also generate halftones but their original 300 dpi resolution limited the screen ruling to about 65 lpi. This was improved as higher resolutions of 600 dpi and above, and dithering techniques, were introduced.
All halftoning uses a high-frequency/low-frequency dichotomy. In photographic halftoning, the low-frequency attribute is a local area of the output image designated a halftone cell. Each equal-sized cell relates to a corresponding area (size and location) of the continuous-tone input image. Within each cell, the high-frequency attribute is a centered variable-sized halftone dot composed of ink or toner. The ratio of the inked area to the non-inked area of the output cell corresponds to the luminance or graylevel of the input cell. From a suitable distance, the human eye averages both the high-frequency apparent gray level approximated by the ratio within the cell and the low-frequency apparent changes in gray level between adjacent equally spaced cells and centered dots.
Digital halftoning uses a raster image or bitmap within which each monochrome picture element or pixel may be on or off, ink or no ink. Consequently, to emulate the photographic halftone cell, the digital halftone cell must contain groups of monochrome pixels within the same-sized cell area. The fixed location and size of these monochrome pixels compromises the high-frequency/low-frequency dichotomy of the photographic halftone method. Clustered multi-pixel dots cannot "grow" incrementally but in jumps of one whole pixel. In addition, the placement of that pixel is slightly off-center. To minimize this compromise, the digital halftone monochrome pixels must be quite small, numbering from 600 to 2,540, or more, pixels per inch. However, digital image processing has also enabled more sophisticated dithering algorithms to decide which pixels to turn black or white, some of which yield better results than digital halftoning. Digital halftoning based on some modern image processing tools such as nonlinear diffusion and stochastic flipping has also been proposed recently.[14]
Modulation
The most common method of creating screens, amplitude modulation, produces a regular grid of dots that vary in size. The other method of creating screens, frequency modulation, is used in a process also known as stochastic screening. Both modulation methods are named by analogy with the use of the terms in telecommunications.[15]
Inverse halftoning
Inverse halftoning or descreening is the process of reconstructing high-quality continuous-tone images from the halftone version. Inverse halftoning is an ill-posed problem because different source images can produce the same halftone image. Consequently, one halftone image has multiple plausible reconstructions. Additionally, information like tones and details are discarded during halftoning and thus irrecoverably lost. Due to the variety of different halftone patterns, it is not always obvious which algorithm to use for the best quality.
There are many situations where reconstruction is desired. For artists, it is a challenging task to edit halftone images. Even simple modifications like altering the brightness usually work by changing the color tones. In halftone images, this additionally requires preservation of the regular pattern. The same applies to more complex tools like retouching. Many other image processing techniques are designed to operate on continuous-tone images. For example, image compression algorithms are more efficient for those images.[16] Another reason is the visual aspect since halftoning degrades the quality of an image. Sudden tone changes of the original image are removed due to the limited tone variations in halftoned images. It can also introduce distortions and visual effects like moiré patterns. Especially when printed on newspaper, the halftone pattern becomes more visible due to the paper properties. By scanning and reprinting these images moiré patterns are emphasized. Thus, reconstructing them before reprinting is important to provide a reasonable quality.
Spatial and frequency filtering
The main steps of the procedure are the removal of halftone patterns and reconstruction of tone changes. In the end, it may be necessary to recover details to improve image quality. There are many halftoning algorithms which can be mostly classified into the categories ordered dithering, error diffusion, and optimization-based methods. It is important to choose a proper descreening strategy since they generate different patterns and most of the inverse halftoning algorithms are designed for a particular type of pattern. Time is another selection criteria because many algorithms are iterative and therefore rather slow.
The most straightforward way to remove the halftone patterns is the application of a low-pass filter either in spatial or frequency domain. A simple example is a Gaussian filter. It discards the high-frequency information which blurs the image and simultaneously reduces the halftone pattern. This is similar to the blurring effect of our eyes when viewing a halftone image. In any case, it is important to pick a proper bandwidth. A too-limited bandwidth blurs edges out, while a high bandwidth produces a noisy image because it does not remove the pattern completely. Due to this trade-off, it is not able to reconstruct reasonable edge information.
Further improvements can be achieved with edge enhancement. Decomposing the halftone image into its wavelet representation allows to pick information from different frequency bands.[17] Edges are usually consisting of highpass energy. By using the extracted highpass information, it is possible to treat areas around edges differently to emphasize them while keeping lowpass information among smooth regions.
Optimization-based filtering
Another possibility for inverse halftoning is the usage of machine learning algorithms based on artificial neural networks.[18] These learning-based approaches can find the descreening technique that gets as close as possible to the perfect one. The idea is to use different strategies depending on the actual halftone image. Even for different content within the same image, the strategy should be varied. Convolutional neural networks are well-suited for tasks like object detection which allows a category based descreening. Additionally, they can do edge detection to enhance the details around edge areas. The results can be further improved by generative adversarial networks.[19] This type of network can artificially generate content and recover lost details. However, these methods are limited by the quality and completeness of the used training data. Unseen halftoning patterns which were not represented in the training data are rather hard to remove. Additionally, the learning process can take some time. By contrast, computing the inverse halftoning image is fast compared to other iterative methods because it requires only a single computational step.
Lookup table
Unlike other approaches, the lookup table method does not involve any filtering.[20] It works by computing a distribution of the neighborhood for every pixel in the halftone image. The lookup table provides a continuous-tone value for a given pixel and its distribution. The corresponding lookup table is obtained before using histograms of halftone images and their corresponding originals. The histograms provide the distribution before and after halftoning and make it possible to approximate the continuous-tone value for a specific distribution in the halftone image. For this approach, the halftoning strategy has to be known in advance for choosing a proper lookup table. Additionally, the table needs to be recomputed for every new halftoning pattern. Generating the descreened image is fast compared to iterative methods because it requires a lookup per pixel.
See also
Significant academic research groups
References
- Campbell, Alastair. The Designer's Lexicon. ©2000 Chronicle, San Francisco.
- McCue, Claudia. Real World Print Production. ©2007, Peachpit Berkeley.
- Hannavy, John (2008), Encyclopedia of nineteenth-century photography, Taylor & Francis Group, ISBN 978-0-203-94178-2
- The Repertory of patent inventions |1853. 1853.
- Twyman, Michael. Printing 1770–1970: an illustrated history of its development and uses in England. Eyre & Spottiswoode, London 1970.
- "The First Half-Tones". Library and Archives of Canada. Archived from the original on 2009-08-17. Retrieved September 17, 2007.
- Meggs, Philip B. A History of Graphic Design. John Wiley & Sons, Inc. 1998. p 141. ISBN 0-471-29198-6.
- August Hoen, Composition for etching stone, U.S. Patent 27,981, Apr 24, 1860.
- August Hoen, Lithographic Process, U.S. Patent 227,730, May 15, 1883.
- August Hoen, Lithographic Process, U.S. Patent 227,782, May 18, 1880.
- Halftone Line Screens in Printing "Use of halftone line screens for printing digital images on press". (last checked on 2009-04-20)
- Kay Johansson, Peter Lundberg & Robert Ryberg, A Guide to Graphic Print Production. 2nd ed. Hoboken: Wiley & Sons, p. 286f. (2007).
- Linotype History - 1973–1989
- Shen, Jackie (Jianhong) (2009). "Least-square halftoning via human vision system and Markov gradient descent (LS-MGD): Algorithm and analysis". SIAM Rev. 3. 51 (3): 567–589. Bibcode:2009SIAMR..51..567S. doi:10.1137/060653317.
- Gaurav Sharma (2003). Digital Color Imaging Handbook. CRC Press. p. 389. ISBN 978-0-8493-0900-7.
- Ming Yuan Ting; Riskin, E.A. (1994). "Error-diffused image compression using a binary-to-gray-scale decoder and predictive pruned tree-structured vector quantizatiosn". IEEE Transactions on Image Processing. 3 (6): 854–858. doi:10.1109/83.336256. ISSN 1057-7149.
- Zixiang Xiong; Orchard, M.T.; Ramchandran, K. (1996). "Inverse halftoning using wavelets". Proceedings of 3rd IEEE International Conference on Image Processing. IEEE. 1: 569–572. doi:10.1109/icip.1996.559560. ISBN 0780332598.
- Li, Yijun; Huang, Jia-Bin; Ahuja, Narendra; Yang, Ming-Hsuan (2016), "Deep Joint Image Filtering", Computer Vision – ECCV 2016, Springer International Publishing, pp. 154–169, doi:10.1007/978-3-319-46493-0_10, ISBN 9783319464923
- Kim, Tae-Hoon; Park, Sang Il (2018-07-30). "Deep context-aware descreening and rescreening of halftone images". ACM Transactions on Graphics. 37 (4): 1–12. doi:10.1145/3197517.3201377. ISSN 0730-0301.
- Murat., Mese (2001-10-01). Look-up table (LUT) method for inverse halftoning. The Institute of Electrical and Electronics Engineers, Inc-IEEE. OCLC 926171988.
External links
| Wikimedia Commons has media related to Halftone. |
- Dr. Daniel Lau's Website about halftoning
- "The Rasterbator": Software that allows creation of large halftone type posters
- Image Halftoning Toolbox for MATLAB by V. Monga, N. Damera-Venkata and B. L. Evans
- Halftone screens at the Wolfram Demonstrations Project
- Creating halftone shading with Adobe Photoshop
- An Easy Method for Making Custom Halftones in Adobe Photoshop
- A visual guide to traditional halftones and their creation
- A black and white halftone texture
- Photoshop tutorials about how to create and use halftone patterns
- Javascript plugin for generating halftone images
