Battle of Balaclava
The Battle of Balaclava, fought on 25 October 1854 during the Crimean War, was part of the Siege of Sevastopol (1854–55), an Allied attempt to capture the port and fortress of Sevastopol, Russia's principal naval base on the Black Sea. The engagement followed the earlier Allied victory in September at the Battle of the Alma, where the Russian General Menshikov had positioned his army in an attempt to stop the Allies progressing south towards their strategic goal.[3] Alma was the first major encounter fought in the Crimean Peninsula since the Allied landings at Kalamita Bay on 14 September, and was a clear battlefield success; but a tardy pursuit by the Allies failed to gain a decisive victory, allowing the Russians to regroup, recover and prepare their defence.
| Battle of Balaclava (Balaklava) | |||||||
|---|---|---|---|---|---|---|---|
| Part of the Siege of Sevastopol (1854–1855) during the Crimean War | |||||||
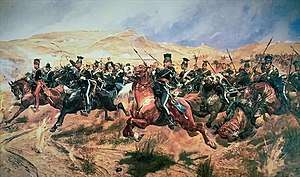 Charge of the Light Brigade by Richard Caton Woodville, Jr. | |||||||
| |||||||
| Belligerents | |||||||
|
|
| ||||||
| Commanders and leaders | |||||||
|
|
| ||||||
| Strength | |||||||
|
20,000 British, 41 guns 7,000 French 1,000 Turkish |
25,000[1] 78 guns | ||||||
| Casualties and losses | |||||||
| 615[2] | 627[2] | ||||||
The Russians split their forces. Defending within the allied siege lines was primarily the Navy manning the considerable static defenses of the city and threatening the allies from without was the mobile Army under General Menshikov.
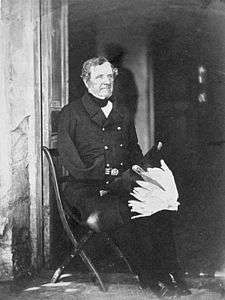
The Allies decided against a slow assault on Sevastopol and instead prepared for a protracted siege. The British, under the command of Lord Raglan, and the French, under Canrobert, positioned their troops to the south of the port on the Chersonese Peninsula: the French Army occupied the bay of Kamiesch on the west coast whilst the British moved to the southern port of Balaclava. However, this position committed the British to the defence of the right flank of the Allied siege operations, for which Raglan had insufficient troops. Taking advantage of this exposure, the Russian General Liprandi, with some 25,000 men, prepared to attack the defences around Balaclava, hoping to disrupt the supply chain between the British base and their siege lines.
The battle began with a Russian artillery and infantry attack on the Ottoman redoubts that formed Balaclava's first line of defence on the Vorontsov Heights. The Ottoman forces initially resisted the Russian assaults, but lacking support they were eventually forced to retreat. When the redoubts fell, the Russian cavalry moved to engage the second defensive line in the South Valley, held by the Ottoman and the British 93rd Highland Regiment in what came to be known as the "Thin Red Line". This line held and repulsed the attack; as did General James Scarlett's British Heavy Brigade who charged and defeated the greater proportion of the cavalry advance, forcing the Russians onto the defensive. However, a final Allied cavalry charge, stemming from a misinterpreted order from Raglan, led to one of the most famous and ill-fated events in British military history – the Charge of the Light Brigade.
Prelude
On to Sevastopol

The British and French fleets departed from the Bulgarian port of Varna on 5 September 1854, heading towards Kalamita Bay in the Crimea. By the 14th, the troops began to land; within four days the Allied force of 61,400 infantry, 1,200 cavalry and 137 guns, was ashore.[4] Thirty-three miles (~53 km) to the south of the landing zone, beyond the Bulganak, Alma, Katcha and Belbek rivers, lay the Russian naval base and fortress of Sevastopol, the key Allied objective in the Crimea. General Menshikov, aware of the Allied presence, prepared his troops on the banks of the River Alma in an effort to halt the Franco-British advance, but on 20 September he was soundly defeated in what was the first major battle in the Crimea. News of Menshikov's defeat was met with disbelief by Tsar Nicholas I in St. Petersburg – it seemed it would only be a matter of time before Sevastopol fell.[5] But Allied hesitation, first from the French commander-in-chief, Saint-Arnaud, then by Lord Raglan, allowed the dispirited Russians to escape the battlefield in relative order,[6] allowing Menshikov and his army to reach Sevastopol, reorganise and rebuild their morale.[7] "It is frightful to think what might have happened," wrote Vice-Admiral Kornilov, "had it not been for this cardinal error of the enemy's."[8]
The Allied march south finally recommenced on the morning of 23 September 1854, but there was as yet no definite plan of action;[9] it was not until they had passed the River Katcha in sight of Sevastopol itself, that the Allied commanders discussed their options.[10] The original plan had envisaged a move across the River Belbek before attacking the north side (the Severnaya) of Sevastopol harbour, defended by the Star Fort; but recent naval intelligence had revealed that the position was much stronger than had first been realised. John Burgoyne, the British Army's most experienced engineer, advocated an attack on Sevastopol from the south which, from all reports, was still an imperfectly entrenched position.[11] This was a view shared by Saint-Arnaud who, having received his own intelligence of Russian reinforcements, had refused to agree to an attack from the north. Burgoyne's proposed 'flank march' required the Allies to go round the city to the east in order to attack the harbour from the south where the defences were weakest.[12] Raglan was inclined to agree, arguing that he had always been disposed to such an operation; he knew, too, that the problem of re-supply would be eased with the seizing of the southern ports on the Chersonese Peninsula.[13]
On 24 September, Menshikov began to move his army out of Sevastopol towards Bakchi Serai and Simferopol, leaving Admirals Kornilov and Nakhimov to organise the 18,000-strong garrison (mainly sailors and marines) and prepare the port's defences.[14] By venturing into the interior of the Crimea, Menshikov would not only keep open his communications with Russia, but would also be in touch with reinforcements from Odessa or Kertch; moreover, he would be free to operate in the field and threaten the Allied flank.[15] Whilst Menshikov moved east, the Anglo-French-Turkish army, with the British in the vanguard, continued its march towards the southern coast of the peninsula. The heat was oppressive, the water sparse, and cholera rife, taking a heavy toll on the men including Saint-Arnaud who was already ill with cancer. The march had been a real trial and was not without incident. At one point, on 25 September near MacKenzie's Farm, Raglan and his staff in front of the British column stumbled across the rear of the retreating Russians; with the rest of his army strung out behind in hopeless disorder, Menshikov missed a chance to inflict a major reverse on the British.[16] By the 26th, however, Raglan had reached the village of Kadikoi, and was able to look down on the narrow inlet of Balaclava. That same day Saint-Arnaud, now critically ill, surrendered his command to General Canrobert.[17]
Opposing forces
Allied deployment
The harbour at Balaclava was too small for both Allied armies to use. By rights the French, who had claimed the honour of holding the right of the line, should have occupied Balaclava whilst the British should have moved west to the ports of Kazatch and Kamiesch. Canrobert offered the British the choice, but badly advised by Admiral Lyons, Raglan chose Balaclava for his base, not realising that the two western bays offered far better facilities as supply ports.[18] Moreover, Raglan committed the British Army to the defence of the right flank of the Allied operation, and would have to ensure the security of both Anglo-French armies against the threat posed by Menshikov's forces to the east. The decision by Raglan was a bad mistake, and one for which the British Army was to pay a terrible price.[19]

For many, the only justification for the 'flank march' was an immediate assault upon Sevastopol. George Cathcart, commander of the British 4th Division, pleaded with Raglan for instant action.[20] "I am sure I could walk into it, with scarcely the loss of a man," wrote Cathcart to Raglan on 28 September from the heights above the eastern approach to the city. "We could leave our packs, and run into it even in open day … We see people walking about the streets in great consternation ..."[21] But caution prevailed, and plans by Burgoyne for a formal siege, backed by Canrobert, were prepared. When Raglan told Cathcart that nothing would happen until the Allied siege trains had been landed, Cathcart could not hide his irritation, "Land the siege trains! But my dear Lord Raglan, what the devil is there to knock down?"[22]
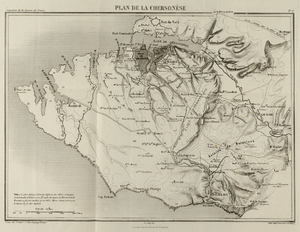
Having decided upon which port they would occupy the Allies set about deploying their forces on the Chersonese Peninsula. The peninsula is bounded to the north by Sevastopol Harbour, at the head of which the River Chernaya flows from the south-east. The eastern boundary is formed by a long escarpment, the Sapouné Heights, averaging 600 feet high, and pierced by two passes only: the metalled Worontsov road, and, at the southern end of the heights, the Col, through which ran a steeper and more difficult road leading from the west end of Sevastopol to Balaclava.[23] Sevastopol itself was divided in two by the Dockyard Creek. Two of Canrobert's four divisions, supervised by General Forey, were allotted the western siege operations around the city, from the Black Sea to the Dockyard Creek; the other two divisions, under General Bosquet, would act as a covering force along the Sapouné Heights.[24] To Bosquet's north lay the camp of the British 1st Division, and beyond this De Lacy Evans' 2nd Division guarding the extreme right of the Allied line with the Inkerman Heights to its front and the Chernaya Valley to its right.[25]
The port of Balaclava lay outside the main Allied perimeter and had to be provided with a defensive system of its own.[26] The Vorontsov Road ran down from the Sapouné Heights along a ridge, running east–west, known as the Causeway Heights, dividing the plain into two sections – the North Valley and the South Valley. Redoubts upon the Causeway Heights offered Balaclava its first line of defence: five were built upon the heights – approximately 500 yards (~450 m) apart – and one upon what came to be known as Canrobert's Hill, slightly to the south and covering the extreme right of the British defences (see map below). The redoubts housed a total of nine naval guns, all 12-pounders from HMS Diamond: three in No.1 redoubt on Canrobert's Hill; two each in redoubts 2, 3 and 4. Redoubts 5 and 6 (the two at the western end of the Causeway Heights), were still unfinished and without any guns.[27] These defences were hastily constructed, but they were not small works: No.1 redoubt held a garrison of 600 Turks, whilst redoubts 2, 3, and 4 each held 300; all were accompanied by one British artillery NCO. The inner line of defence of the British base was supplied by the 93rd Highlanders and a Royal Artillery field battery stationed at the village of Kadikoi to the north of Balaclava.[28] These were supported by Royal Marines and artillery positioned along the heights above the port, as well as additional Ottoman troops. In addition to these defences Raglan could call upon the 1,500 men of Lord Lucan's Cavalry Division camped on the western end of the South Valley, along with a troop of Royal Horse Artillery. The total force available for the immediate defence of the British base at Balaclava numbered around 4,500 men, supported by 26 guns.[27]
Russian plan
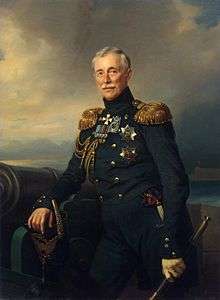
As the Allied siege guns bombarded Sevastopol the Russian reserves were moving to the Crimea. The Russians sought to relieve Sevastopol from bombardment by marching newly arrived reinforcements from the Danubian front.[29] This force of Russian reinforcements would strike at the allies' main port of supply—Balaclava.[29] At the forefront of these reinforcements was the 12th Infantry Division – part of the Russian 4th Corps – under General Pavel Liprandi.[29] This division, consisting of the Azovsky, Dnieper, Ukraine and Odessa regiments, along with four batteries of artillery, had arrived from Bessarabia; by the time the division had reached the Crimea, Menshikov had decided on the plan to use them to attack the Allied rear from Chorgun, and march on Balaclava.[30]
The vulnerability of Balaclava was well known to both sides. Undertaking the siege operations around Sevastopol whilst securing the Allies' eastern flank was stretching the resources of Raglan's dwindling forces – British casualties at the Alma had been high, and many were still suffering from the cholera epidemic; others simply fell sick from exhaustion. With the arrival of further Russian reinforcements, Menshikov's total force in theatre (including 12 Division) numbered around 65,000.[31] The remainder of 4th Corps – 10 and 11 Divisions – were also heading towards the Crimea, but Menshikov, under pressure from Nicholas I to strike back at the Allies, decided not to wait for these troops before beginning the attack.
The first move by the Russians came on the early morning of 18 October 1854, when Lieutenant Colonel Rakovitch moved against the village of Chorgun with three infantry battalions, 200 Cossacks and four guns. From here, Liprandi, Rakovitch and Major General Semyakin were able to reconnoitre the Allied redoubts along the Causeway Heights. To the Russian commanders, and, belatedly, to the Royal Engineers, the redoubts were recognised to be too far forward of the inner defensive line of Balaclava to be adequately defended and supported by the British. Russian reconnaissance reports had also indicated that these outer defences were occupied by a mixture of Tunisians, raw recruits and militia, and not of the same calibre of men that had defeated them on the Danube at the beginning of the war. To Liprandi and his generals it seemed a swift strike against the redoubts was certain of success.[32]
By 23 October Liprandi had gathered 16,000 men, known as the 'Detachment of Chorgun', comprising 17 battalions, 30 squadrons and 64 guns. The left column, commanded by Major General Gribbe, was to advance across the Chernaya River and towards the village of Kamara. The centre column, under Major General Semyakin, was divided into two wings: Semyakin himself, commanding the left wing, was to lead his troops south from Chorgun before moving against Canrobert's Hill and No.1 redoubt; Major General Levutsky, commanding the right wing of the centre column, was tasked to assault No.2 redoubt farther to the west. Meanwhile, the right column, under Colonel Skyuderi, was to advance across the Chernaya via the Tractir Bridge before moving south through the Fedyukhin Heights and across the North Valley to attack No.3 redoubt. The attacks were to be supported by Lieutenant General Ryzhov's cavalry. A further force, numbering 4,500 men and 14 guns under Major General Zhabokritsky, protected Liprandi's right from Allied interference. Once the redoubts had been captured, Zhabokritsky was to occupy the Fedioukine Heights. In total (including Zhabokritsky's force and a reserve held back at the Tractir Bridge) Liprandi had at his disposal around 25,000 men and 78 guns – not enough to threaten the siege lines, but more than enough to compromise the defences at Balaclava whose loss to the Allies would be tremendous.[33] (See map below).
Battle
Recent intelligence received by the British had indicated a major Russian attack was imminent. After a considerable number of false alarms the previous week, however, Raglan failed to act, believing that they were needlessly exhausting his men who were turned out on every report.[34] But this latest intelligence proved accurate, and early on 25 October, just before 05:00, Liprandi's troops of the 'Chorgun Detachment' left their camp and marched off in silence towards the Balaclava valleys.[35]
The village of Kamara was the most easterly picket for Allied soldiers, providing a useful observation point for Lucan's vedettes. In the dark dawn, a squadron of Russian Cossacks, followed by a host of uhlans, rode slowly towards the village. These troops were the leading elements of Gribbe's force. First to discover that the Russians had moved up under cover of dark was the duty field officer of the day, Captain Alexander Low of the 4th Light Dragoons. The picket in Kamara had not seen the advancing Cossacks (there is some suggestion that they were sleeping), and it was only through Low's timely arrival and his shouts that they managed to escape and make their way to the nearest redoubt on the Causeway Heights.[36] Behind the Cossacks and uhlans came the Dnieper Regiment along with the artillery. Immediately, Gribbe positioned his ten guns on the slopes to the west of Kamara, leaving his gunners with a clear view of No.1 redoubt on Canrobert's Hill.[37]
In accordance with his usual practice Lucan had gone forward at daybreak to inspect the redoubts and outposts, accompanied by his staff: Lord George Paget, Lord William Paulet, and Major Thomas McMahon. As they approached Canrobert's Hill, two signal flags were observed, signifying the approach of the Russians. Paget, commanding officer of the 4th Light Dragoons (and commanding officer of the Light Brigade in Cardigan's absence), later recalled the moment when they realized something was wrong:
"Hello," said Lord William, "there are two flags flying; what does it mean?" "Why, that surely is the signal that the enemy is approaching," said Major McMahon. "Are you quite sure?" we replied. Hardly were the words out of McMahon's mouth, when bang went a cannon from the redoubt in question, fired on the advancing masses of the enemy.[37]
Redoubts
The Ottoman guns from No.1 redoubt on Canrobert's hill fired on the Russians at around 06:00 – the Battle of Balaclava had begun.[37] Lucan despatched Captain Charteris to inform Raglan that the redoubts were under attack. Charteris arrived at around 07:00, but those at the British headquarters had already heard the sound of the guns.[37] Lucan himself rode quickly back towards Kadikoi to confer with Sir Colin Campbell, commander of the Balaclava defences. The two men agreed that this was not another Russian feint, but an attack in force with the intention of taking the British base. Campbell prepared his 93rd Highlanders to meet the enemy, whilst Lucan returned to the cavalry.[38] Leaving the Light Brigade where it stood, Lucan led the Heavy Brigade towards the redoubts, hoping his presence might discourage any further Russian advance on Balaclava. Realizing his show of strength had little impact, however, Lucan led the Heavies back to their original position alongside the Light Brigade. The Ottoman forces were left to face the full force of the Russian assault almost alone.[38]
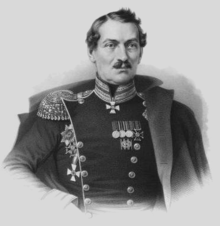
While Gribbe's artillery continued to shell No.1 redoubt, the Russian columns under Levutsky, Semyakin, and Skyuderi began to move into the North Valley. Although the Heavy Brigade had pulled back, the British did send forward their available artillery to assist the Ottoman forces on the Causeway Heights. Captain George Maude's troop of horse artillery, I Troop, unlimbered its four 6-pounder and two 12-pounder guns between redoubts 2 and 3,[39] whilst Captain Barker's battery, W Battery, of the Royal Artillery, moved out of Balaclava and took its position on Maude's left. However, the artillery duel was a very one sided affair. The heavier Russian guns (some 18-pounders), particularly No.4 battery under Lieutenant Postikov, together with the riflemen of the Ukraine regiment, took their toll on both men and ordnance.[40] Running short of ammunition and taking hits, Maude's troop was forced to retire (Maude himself was severely wounded). Their place taken by two guns from Barker's battery. As the British artillery fire slackened, Semyakin prepared to storm No. 1 redoubt, personally leading the assault together with three battalions of the Azovsky Regiment under Colonel Krudener. "I waved my hat on both sides," recalled Semyakin. "Everybody rushed after me and I was protected by the stern Azovs."[40] The Ottoman forces on Canrobert's Hill resisted stubbornly.[41] Although the attack had begun at 06:00, it was not until 07:30 when No.1 redoubt fell.[42] During that time the 600 Ottoman defenders had suffered from the heavy artillery bombardment; in the ensuing fight in the redoubt and subsequent pursuit by the Cossacks, an estimated 170 Ottomans were killed. In his first report of the action for The Times, William Russell wrote that the Turks 'received a few shots and then bolted', but afterwards admitted that he had not been a witness to the start of the battle, confessing, 'Our treatment of the Turks was unfair ... ignorant as we were that the Turkish in No.1 redoubt lost more than a fourth of their number ere they abandoned it to the enemy'.[43] Later Lucan and Campbell too acknowledged the firmness with which the assault on No 1 redoubt, which was not visible from their vantage point, had been resisted; it was not until this had been overwhelmed did the defenders abandon redoubts 2, 3 and 4.[44] Of the estimated 2,500 Russians who took part in the assault the Azovsky Regiment lost two officers and 149 men killed.[45]
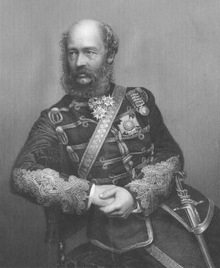
The remaining redoubts were now in danger of falling into the hands of the oncoming Russians. The battalions of the Ukraine Regiment under Colonel Dudnitsky-Lishin, attacked redoubts Nos.2 and 3, while the Odessa Regiment under Skyuderi advanced on redoubt No.4. The Ottoman forces in these positions, having already watched their compatriots flee the first redoubt and realizing that the British were not coming to their aid, retreated towards Balaclava, pursued by the Cossacks who had little trouble dispatching any stray or isolated men. The few British NCOs could do nothing but spike the guns, rendering them unusable.[46] The Ottoman forces had gained some time for the Allies, but in the end the Turks were forced to abandon the redoubts.[28] By 08:00 the Russians had occupied redoubts 1, 2 and 3, and, considering it too close to the enemy, had razed redoubt No.4.[47]
South Valley
Canrobert had been informed of the Russian attack at about 07:30, and had immediately ridden off to join Raglan. Bosquet, having been aroused by the sound of the cannon, had ordered the 2nd Brigade of the French 1st Division (under General Vinoy) to march towards Balaclava in support of the British. Additionally, the 1st Brigade under General Espinasse began to move, along with the divisional artillery and the Chasseurs d'Afrique. The French 3rd Division was put on alert, and the horse artillery of the reserve harnessed.[48] Raglan had at first thought the Russian advance a feint, possibly designed to occupy him whilst the enemy stormed out of Sevastopol to attack his army overlooking the heights above the city; but now he saw that he had been wrong.[49] With the first four redoubts on the Causeway Heights either captured or out of action, all that protected Balaclava were Lucan's Cavalry Division, together with the 550 men of the 93 Highlanders, Barker's W Battery, 100 invalids under Colonel Daveney, and some Ottomans, reinforced by their countrymen from the redoubts who had rallied and formed up alongside them.[50] It was only now that Raglan ordered the British 1st Division under the Duke of Cambridge, and Cathcart's 4th Division, to move into the plain. The 1st Division got away promptly, but when Raglan's staff officer informed Cathcart that the Russians were marching on Balaclava, he at first refused to comply, complaining that his men had only just finished their shift in the trenches before Sevastopol. In the end he did move, but the delay brought his division down 40 minutes after the Duke's.[51] It would take a least two hours to march an infantry division down from the heights overlooking Sevastopol into the plain of Balaclava. The Russians appeared to have the intentions and the means to capture the British base in a much shorter time.[49]
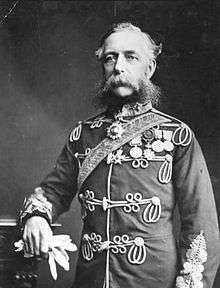
At approximately 07:45, the commander of the Light Brigade, Lord Cardigan, reached his cavalry, having arrived from his yacht moored in Balaclava harbour. Raglan, meanwhile, had taken up his position on the Sapouné Heights, 650 feet (~200 m) above the plain. Unwilling at this point to risk his cavalry without infantry support (as he had done throughout the whole campaign), Raglan issued his first order to the Cavalry Division at 08:00 – "Cavalry to take ground to the left of the second line of redoubts occupied by the Turks".[52] The order was ambiguous and misleading (there was no 'second line of redoubts' and the word 'left' is dependent on the perspective of the viewer), but on this occasion Lucan had interpreted the order correctly, and moved his cavalry to the west, placing them between No. 6 redoubt and the foot of the Sapouné Heights where they could not be seen by, or engage with, the Russians. The new position placed the Light Brigade near, but to one side, of the mouth of the North Valley; the Heavy Brigade sat on their right. However, 30 minutes after issuing his first order, Raglan now changed his mind and issued his second order at 08:30 – "Eight squadrons of heavy Dragoons to be detached towards Balaclava to support the Turks who are wavering". There was no evidence that the Turks formed up alongside the Highlanders were wavering, but Raglan thought they were, or might soon do so.[53] As each regiment comprised two squadrons, Lucan, with growing frustration, was required to move four of his five Heavy Brigade regiments back onto the open plain and the defensive line of Kadikoi. Although this order meant he had to divide his cavalry – thus reducing the effectiveness of each part – Lucan complied, and ordered General Scarlett to lead four regiments back to where they had just come from.[54]
Ryzhov's advance
.png)
Liprandi now brought forward Ryzhov's cavalry to press home his advantage. Ryzhov's force consisted of eight squadrons of the 11th Kiev Hussars, six of the 12th Ingermanland Hussars, three of the 53rd Don Cossack Regiment, and the 1st Ural Cossacks, totalling between 2,000 and 3,000 men (sources vary), and 16 guns.[55] The Russian cavalry crossed in a south-westerly direction across the Chernaya river and, at about 09:00, streamed into the North Valley. When level with the empty No.4 redoubt, Ryzhov wheeled to the left, crested the Causeway Heights, and came to a halt; before him, he could see the Heavy Brigade moving east across his front, while away to the south he could discern the Highlanders and Turks immediately to the north of Kadikoi. Ryzhov detached 400 men of the Ingermanland Hussars to turn and head straight for the Allied infantry position. Sir Colin Campbell, commander of the Highland Brigade and thus the 93rd Highlanders, brought his men forward from behind the hillock that had sheltered them from the Russian artillery. With only Balaclava and the Black Sea to their backs, he rode quickly along the line expressing his determination to resist – "Men, remember there is no retreat from here. You must die where you stand."[56] Campbell's aide, John Scott, replied "Aye Sir Colin. Needs be we'll do that." Campbell had such a poor opinion of the Russian cavalry that he did not bother telling his men to form square; instead, he lined them up in the normal two-deep firing line.[57] Raglan on the Sapouné Heights had a grandstand view, as did William Russell, who wrote furiously in his notebook:
The Russians dash at the Highlanders. The ground flies beneath their horses' feet; gathering speed at every stride, they dash on towards that thin red streak topped with a line of steel.[58]
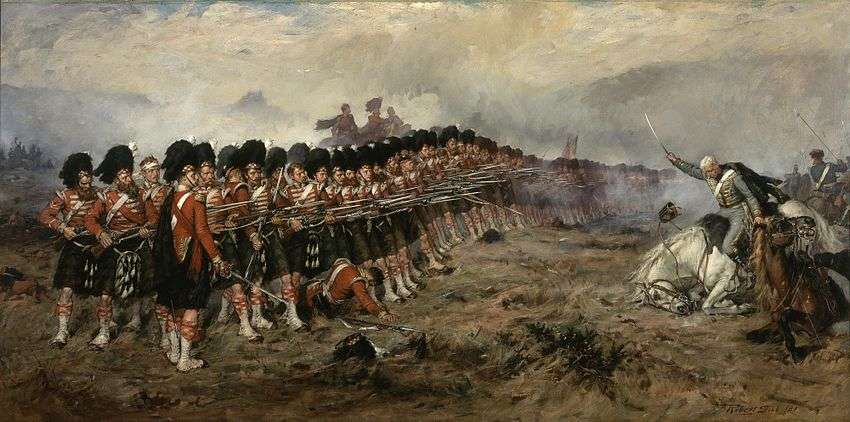
The British delivered their first volley at long range and failed to fell a single Russian.[59] A second volley thundered, supported by fire from guns of Barker's battery and those of the Marines. This caused the Russians to swerve to their left, which Campbell took as an attempt to turn his right. He sternly checked an inclination to charge with the bayonet, and instead threw forward the 93rd's right-hand, grenadier company, under Captain Ross.[60] This delivered a third volley which decided the issue. Barely five minutes after it had begun the Ingermanland Hussars were in retreat, and heading towards the Causeway Heights: the Russian commander of the brigade had reasoned that such a small, unsquared line of British infantry could not hope to hold out a cavalry charge, therefore there must be a larger force behind them.[61] It was not until later accounts that Russell's 'thin red streak', became the famous 'Thin Red Line'.[54]
Meanwhile, the main part of Ryzhov's cavalry remained static on the southern slopes of the Causeway Heights, some 800 yards (~730 m) from Scarlett's Heavy Brigade still moving south-east in the South Valley.[61] The eight squadrons of the Heavy Brigade consisted of two each from the Scots Greys, the 6th Dragoons, 4th Dragoon Guards, and the 5th Dragoon Guards; the brigade's remaining two squadrons from the 1st Royal Dragoons were left in their original position to the west of No.6 redoubt. Although outnumbering the British by two or three to one and having the advantage of the high ground, the Russians seemed shaken by the unexpected presence of Scarlett's cavalry.[62]
Scarlett, notoriously short-sighted, remained unaware that the Russians were there. However, once he had negotiated a vineyard and the sprawling tented camp of the Light Brigade, he was notified by his ADC, Lieutenant Elliot, of the proximity of the Russian cavalry on their left flank.[63] Scarlett gave the order 'Left wheel into line' which turned the two advanced regiments into line to face the enemy; these were shortly followed by the other two regiments forming a second line. Had the Russians charged at this moment they would have caught Scarlett's men completely disorganised, yet Ryzhov let the chance slip.[64] Lucan, who had also seen the Russians, rode across with his staff from the Light Brigade to join the Heavies. So impatient was he to attack that he ordered his duty trumpeter, Trumpet Major Joy, to sound the charge – but nothing happened. An attempt to attack before his men were in perfect alignment was contrary to every precept that the officers had learnt back in England, and it was only when the dressing had been completed to his satisfaction did Scarlett order his trumpeter, Trumpet Major Monks, to sound the charge.[62] The Heavy Brigade began to move against the Russian cavalrymen.
Charge of the Heavy Brigade
The charge of the Heavy Brigade was anything but a charge – the brigade had launched uphill from a standing start, and the short distance between the two combatants had hardly allowed their horses to reach the trot. Moreover, the Russians were at last moving to meet them. Scarlett was first into Ryzhov's cavalry, closely followed by his staff, and, initially, just three squadrons – two of the Scots Greys on the left, and one of the 6th (Inniskilling) Dragoons on the right, totalling 300 men.[65] The first to feel the force of the British attack were the Ingermanland Hussars, under the command of Major General Khaletsky. Staff-captain Arbuzov later described how they " … had to fight with the regiment of Queen Victoria's Dragoon Guards in their red coats … Neither we nor the English wanted to yield."[66] A British Dragoon later described the action from his own perspective – "They were so superior in numbers, they outflanked us, and we were in the middle of them … I hope God will forgive me, for I felt more like a devil than a man."[65]
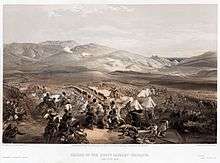
Shortly, the second squadron of the Inniskillings attacked the left flank of the Russians, followed by the 5th Dragoon Guards who crashed into the Russians as they folded around the rear of the Scots Greys. Beyond them the 4th Dragoons, in one unbroken line and to cries of Faugh A Ballagh, attacked the right rear of the Russian cavalry; the force of their impact was such that they were able to hack their way from one flank to the other with the loss of only one man.[67] Finally came the Royal Dragoons who, ignoring their orders to remain behind, attacked on their own initiative, striking the right front of the Russians.[68] Ryzhov had been caught flat-footed, allowing Scarlett's cavalry to push ahead, heaving and hacking at their opponents from all sides before gaining the ascendancy. "At length they turned and well they might," wrote Lieutenant Godman. "We pursued about 300 yards, and then called off with much difficulty, the gunners opened on them, and gave them a fine peppering."[69] These guns were from C Troop, Royal Horse Artillery under Captain Brandling, whose 24-pounders dissuaded Ryzhov's cavalry from reforming and charging again. The Russians retreated in the direction of the Causeway Heights before halting at the east end of the North Valley.
The Charge of the Heavy Brigade had lasted no more than 10 minutes. Ryzhov's cavalry suffered 40–50 killed and over 200 wounded; the British lost 10 killed and 98 wounded.[70] Scarlett's attack had been a remarkable success, yet it could have been a greater victory. When the Heavies attacked, the Earl of Cardigan's Light Brigade was less than 500 yards (~450 m) from Ryzhov's cavalry. The spectators on the Sapouné Heights, and the officers and men in the Light Brigade watching the Russians retreat in disorder, expected Cardigan to lead a pursuit and finish them off. Captain William Morris of the 17th Lancers urged his commander on, but Cardigan claimed he could not advance given the orders he had received from Lucan to remain in his position 'and to defend it against any attack'.[71] Lucan later gave a different version from Cardigan's. He confirmed he had ordered Cardigan to defend his position, but maintained that his parting orders made it quite clear that he had permission to take advantage of so obvious an opportunity.[72] Whatever the differences the Light Brigade had done nothing but look on. When Morris rode back to his regiment after confronting Cardigan, he could not hide his frustration – "My God, my God, what a chance we are losing."[73]
North Valley
It was approaching 09:30, and the first part of the battle was over. So far Liprandi had enjoyed mixed fortunes: although his cavalry had been repulsed by Campbell's 'Thin Red Line' and Scarlett's Heavies, his troops under Gribbe, Semyakin, Levutsky, and Skyuderi were still in possession of redoubts Nos. 1–3, and had destroyed redoubt No.4. In all, the Russians had 11 infantry battalions and 32 guns on the Causeway Heights, while to the north, on the Fedioukine Heights, Zhabokritsky had positioned eight battalions, four squadrons, and 14 guns (some sources state 10 guns).[71] In front of Ryzhov's cavalry – drawn up across the eastern end of the North Valley – Liprandi placed the eight guns of the 3rd Don Cossack Battery, commanded by Prince Obolensky. These guns, 6- and 9-pounders, served by 200 men, stared straight down the North Valley.[74] Liprandi now also had at his disposal six squadrons of Lancers divided into two bodies: three squadrons on the Fedioukine Heights; three others in a ravine on the side of the Causeway Heights.[75]
Raglan was anxious to exploit Scarlett's success and drive the Russians off the Causeway Heights, but Cathcart's and Cambridge's infantry divisions had still not arrived; every minute that passed gave the Russians more time to prepare their defences for the expected British counter-attack. The British commander believed that the enemy had retreated in such disorder that a show of force by his cavalry – in advance of the infantry's arrival – would be enough to persuade the Russians to abandon the Causeway Heights. At 10:00, therefore, he gave his third order of the day to the Cavalry Division: Cavalry to advance and take advantage of any opportunity to recover the Heights. They will be supported by infantry which have been ordered. Advance on two fronts.[76] Raglan wished his cavalry to advance immediately, but the ambiguity of the order had again resulted in a misunderstanding. Lucan had assumed he was first to wait for the infantry before moving forward. Accordingly, he ordered the Light Brigade into the North Valley, while the Heavy Brigade held the entrance of the South Valley, perhaps in response to the order 'Advance on two fronts'.[76] Lucan believed he had complied with the order as far as he could until the infantry arrived, but Raglan looked on with growing impatience at his immobile cavalry. It was at this moment when a staff officer (identity unknown) shouted out that the Russians in the redoubts on the Causeway Heights were dragging away the captured British guns.[77] The British infantry divisions were now only minutes away, but only the cavalry could move fast enough and prevent the loss of the guns. With growing impatience Raglan dictated to General Richard Airey the fourth and final order to Lord Lucan. This order was to be understood in conjunction with the third as an instruction to do immediately what had been previously ordered:
10:45. Lord Raglan wishes the cavalry to advance rapidly to the front – follow the enemy and try to prevent the enemy carrying away the guns – Troop Horse Artillery may accompany – French cavalry is on your left. R Airey. Immediate.[78]
Having read the order scribbled down by Airey, Raglan summoned Captain Louis Nolan of the 15th The King's Hussars, Airey's hot-tempered aide-de-camp, to deliver it to Lucan. As he turned his horse to head directly down the escarpment, Raglan called after him, "Tell Lord Lucan the cavalry is to attack immediately." These words sealed the fate of the Light Brigade.[79]
Charge of the Light Brigade
.png)
Lucan was puzzled by Raglan's imprecise order.[80] There was no mention of heights – it referred instead to the front – and gone were all references to infantry. He was to try to 'prevent the enemy carrying away the guns' but from his position he could not see any guns being carried away. When Lucan questioned the order an excited Nolan told him he was to attack immediately.
- "Attack, sir!"
- "Attack what? What guns, sir?"
- "There, my Lord, is your enemy!" said Nolan indignantly, vaguely waving his arm eastwards. "There are your guns!"[81]
Nolan's gesture was imprecise, and pointed not to the redoubts and the captured British guns but, it seemed – at least to Lucan and his staff officers present – to the Russian battery guarding Ryzhov's cavalry at the end of the valley. Seeing Lucan's confusion, Nolan could have explained what Raglan intended, perhaps making the link – if he himself knew of the connection – between the third and fourth order; however, taken aback by Nolan's insolence, Lucan refused further discussion, and rode over to Cardigan standing in front of his brigade. Both cavalry commanders knew the dangers of attacking down the valley. When Cardigan learned what was expected of his brigade, he questioned the sanity of the order as conveyed to him by Lucan: "… allow me to point out to you that there is a battery in front, battery on each flank, and the ground is covered with Russian riflemen."
"I know it," said Lucan. "But Lord Raglan will have it. We have no choice but to obey."[82]
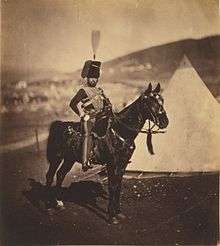
The Light Brigade had formed up in two lines. The 13th Light Dragoons, the 17th Lancers, and the 11th Hussars, formed the first line (the latter regiment was soon moved behind the Lancers to reduce the width of the front). Paget commanded the second line formed by the 4th Light Dragoons and the 8th Hussars. Once the brigade had moved off, Lucan would follow with the Heavy Brigade in support.[83]
At 11:10 the Light Brigade began their advance towards the Russians guns over a mile (~ 2 km) away.[84] When the first line was clear of the second, the order was given to 'Trot'. Initially there was nothing to indicate that Cardigan was not going to conform to Raglan's intentions, and it was only after he had travelled some 200 yards (~180 m) that the enormity of the misconstrued order became apparent to the spectators on the Sapouné Heights. Instead of inclining to the right towards the redoubts on the Causeway Heights and the captured British guns, the Light Brigade continued towards Obolensky's battery at the end of the valley.[85] But it was too late to do anything. Nolan was the first to be killed when he dashed forward ahead of Cardigan, either in an effort to force the pace, or, suddenly realising the terrible mistake that was being made (and his part in it), in an attempt to change the direction of the brigade towards Raglan's intended objective.[86] Whatever the reason, Nolan was hit by a splinter from a shell fired from one of the guns positioned on the Fedioukine Heights.
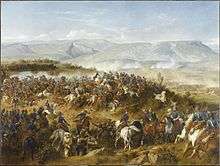
When the proper interval between themselves and the Lights had developed, Lucan led the Heavy Brigade forward. The Heavies were also hit—Lucan himself was slightly wounded, and his horse hit twice – but these men would have suffered more casualties had it not been for the charge of the 150 men of the Chasseurs d'Afrique.[87] The French cavalry had formed up to the left of the British position. When they had seen the Light Brigade cut up, Major Abdelal led an attack up the Fedioukine Heights to charge the flank of the Russian battery, forcing them to drag away their guns. Yet it was now that Lucan – concluding that the Light Brigade would be wiped out before they reached the Russians at the end of the valley[80] – ordered the Heavy Brigade to halt their advance and retire, leaving Cardigan's men without support. Turning to Lord Paulet, he justified his action and his desire to preserve at least half of his cavalry division, "They have sacrificed the Light Brigade; they shall not have the Heavy, if I can help it."[88]
At 11:15, the eight Russian guns on the Causeway Heights opened up on the Light Brigade, whose front line was now more than halfway down the valley; for the next 400 yards (~365 m) the men also came under fire from the guns to their front. At a distance of 250 yards (~ 230 m) from Obolensky's battery, Cardigan ordered his bugler to sound the 'Gallop'. "And so we went through this scene of carnage," reported Paget, "wondering each moment which would be our last … It required a deal of closing in, by this time, to fill up the vacant gaps."[89] Cardigan now ordered the 'Charge'. Some amongst the gun crews now doubted they could stop the advance – they could now see the lowered lances of the 17th Lancers. Having fired their last shot of canister some of the Russian artillerymen turned to run; others, knowing the consequences of turning their backs on cavalry, drew their swords.[90]
Mêlée and retreat

At 11:17, half of the original 250 men of the 17th and 13th reached Obolensky's battery. Some of the survivors fought with the Russians and tried to capture their guns; others reformed into small groups and prepared to charge the Russian cavalry standing 100 yards (~90 m) to the rear. Ryzhov had expected to mop up any Light Brigade survivors but his hussars and Cossacks, unnerved by the British horsemen, panicked and wheeled to escape. "Some of the men fired on their own comrades to clear a passage for themselves," wrote Lieutenant Kubitovich. "Our hussars were pressed as far as the Chernaya river where there was only one bridge by which they could escape."[91] The 11th Hussars now joined the mêlée. Colonel Douglass, with 80 survivors, charged and pushed other Russian cavalry back to the Chernaya. Paget's 4th Light Dragoons were next to reach the line of cannon, engaging in some 'fierce hand-to-hand encounters' with the surviving gunners, before he too led his regiment after the fleeing Russians. Last to reach the objective were Colonel Shewell and the 8th Hussars. The regiment missed the battery altogether, except for few on the extreme left who went amongst the remaining artillerymen stubbornly resisting; but the bulk of the regiment halted behind the guns and formed up in line.[92]
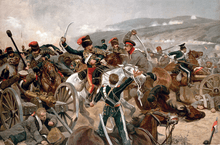
All the survivors of the Light Brigade were now behind the Russian guns in the valley, yet the turning point of the action was the realisation that Lucan and the Heavy Brigade was not following in support.[93] Russian officers, noticing how vastly superior their numbers were, managed to halt their retreat near the Chernaya, and edge forward their men. The Russian lancer regiments waiting on heights were now ordered down into the valley to form a line behind the British (the 13th, 17th, and 8th on the right of the valley, the 11th and 4th on the left) and block their route of escape. Those watching with Raglan thought the Light Brigade completely lost, but unexpectedly the two groups of survivors managed to break through the Russian trap. Still far from the British line, however, they once again came under fire from the guns and marksmen on the Causeway Heights. "The truth must be told," recorded Lieutenant Koribut Kubitovich, "that this fire hit us just as it did the enemy," but admitted that, "The English fought with astounding bravery, and when we approached their dismounted and wounded men, even these refused to surrender and continued to fight till the ground was soaked with their blood."[94]
Most of the survivors were back at the British lines by 12:00; the whole affair had lasted no more than 20 minutes. For those that returned there was a mixture of elation and anger, and questions as to what had happened to the Heavy Brigade. "And who I ask is answerable for all this?" wrote Troop Sergeant Major George Smith of the 11th Hussars. "… it was not unlike leaving the forlorn hope, after storming a town, to fight their own way out again instead of pushing on the supports. We cut their army completely in two, taking their principal battery, driving their cavalry far to the rear. What more could 670 men do?"[95] But as they thought over what had occurred, the recriminations between Raglan, Lucan, and Cardigan had already begun.[96]
Aftermath

The loss of the Light Brigade had been such a traumatic event that the allies were incapable of further action that day.[97] Of the 666 men known to have ridden in the charge (sources vary slightly),[98] 271 became casualties: 110 killed (less than 17%), 129 wounded, plus another 32 wounded and taken prisoner. Additionally, 375 horses were killed.[99] Raglan could not now risk using his infantry divisions in any attempt to move Liprandi's forces from the Causeway Heights. Even if the redoubts were retaken, they would have to be defended by men whose priority was the siege of Sevastopol, and he dared not expose his supply base at Balaclava to further Russian attacks. The British 1st and 4th Infantry Divisions, therefore, returned to the plateau, the former without its Highland regiments who were ordered to remain in the valley under Campbell's command.[100]
To the Russians the Battle of Balaclava was a victory and proved a welcome boost in morale—they had captured the British redoubts (from which seven guns were removed and taken to Sevastopol as trophies), and had gained control of the Worontsov Road.[101] The loss of the outer ring of defences severely restricted Allied movements and confined them to a narrow area between Balaclava and Sevastopol. Nearly all officers received awards. General Semyakin received the Order of St. George of the 3rd degree. Gribbe and Levutsky became cavaliers of the Order of St Stanislav of the 1st degree, and Colonel Krudener was promoted to Major General. General Liprandi was awarded a golden sabre encrusted with diamonds, and inscribed 'For Bravery'.[102] Semyakin wrote home with news of the action at Balaclava, and what he considered a great success – "Many Turks and English were killed by our Russian bayonets, and many English were pierced with lances of our Uhlans and Cossacks, and by sabres of our Hussars … God grant that the heart of the Tsar rejoices."[103]
All three armies would soon be reinforced: the British Secretary of State for War and the Colonies, The Duke of Newcastle, promised Raglan that the 3rd, 62nd, and 90th Regiments, would be despatched to the Crimea with a third battery train; Canrobert, meanwhile, was promised an additional three divisions of infantry from France. The Russians were also receiving reinforcements with the arrival of 10 and 11 Divisions which finally arrived at the beginning of November. These troops brought the strength of Menshikov's field army to some 107,000 men, but the Russian commander was under severe pressure from St Petersburg to attack the Allied lines and break the siege of Sevastopol.[104] The failure of the British and French to beat the Russians at Balaclava immediately set the stage for a much bloodier battle.[105] For weeks it had been known that the Russians would soon begin a full-scale attack on the besiegers. As a preliminary Menshikov launched a reconnaissance in force on the extreme right of the Allied line (against the British 2nd Division) on the Inkerman Heights overlooking the Chernaya river. The attack on 26 October (the battle became known as 'Little Inkerman') proved a successful action for the British, but the Russians had gleaned all they needed to know about the position. Using this intelligence, Menshikov launched his main attack on the same position one week later on 5 November in what came to be known as the Battle of Inkerman.[106]
In popular culture
- Rudyard Kipling's poem The Last of the Light Brigade
- Alfred Tennyson's poems The Charge of the Light Brigade and The Charge of the Heavy Brigade
- The Charge of the Light Brigade 1936 film
- The Charge of the Light Brigade 1968 film
- George MacDonald Fraser's 1973 novel, Flashman at the Charge
- Pearls Before Swine's album Balaklava was inspired by the Battle of Balaclava, and the Charge of the Light Brigade in particular.
- The heavy metal band Iron Maiden's song, The Trooper
- The song "Thin Red Line" from Canadian pop group Glass Tiger's album of the same name.
References
Citations
- Fletcher & Ishchenko: The Crimean War: A Clash of Empires, 159–160
- Kinglake: The Invasion of the Crimea, V, p. 350. These figures are taken from Kinglake. Sources vary slightly as to the number killed, wounded, or taken prisoner.
- Frederick Engels, "The News from Crimea" contained in the Collected Works of Karl Marx and Frederick Engels: Volume 13, p. 478.
- Fletcher & Ishchenko: The Crimean War: A Clash of Empires, 65
- Royle: Crimea: The Great Crimean War 1854–1856, 233
- Hibbert: The Destruction of Lord Raglan, 120–21. Saint-Arnaud had refused to support an immediate pursuit, insisting his troops needed time to rest and recover. Wanting to preserve the entente cordiale and lacking sufficient troops, Raglan realised he could not advance without the French. On the 22nd, however, it was Raglan who demurred, stressing the need to bury the dead and embark the wounded.
- Frederick Engels, "The Campaign in the Crimea" contained in the Collected Works of Karl Marx and Frederick Engels: Volume 13, p. 513.
- Royle: Crimea: The Great Crimean War 1854–1856, 236
- Frederick Engels, "The Campaign in the Crimea", contained in the Collected Works of Karl Marx and Frederick Engels: Volume 13, p. 513.
- Royle: Crimea: The Great Crimean War 1854–1856, 241
- Hibbert: The Destruction of Lord Raglan, 125
- Blake: The Crimean War, 64–65
- Royle: Crimea: The Great Crimean War 1854–1856, 242. The French were also concerned that the guns of the Star Fort covered the mouth of the River Belbec, the obvious landing place for siege guns and supplies.
- Fletcher & Ishchenko: The Crimean War: A Clash of Empires, 129. Royle states 25 September.
- Blake: The Crimean War, 65
- Fletcher & Ishchenko: The Crimean War: A Clash of Empires, 131. Mackenzie's Farm was once the home of a Scottish admiral who had supervised the construction of the naval defence of Sebastopol at the end of the 18th century.
- Royle: Crimea: The Great Crimean War 1854–1856, 243. Aboard the Berthellot en route to Constantinople, St. Arnaud died of heart failure.
- Blake: The Crimean War, 66. Pemberton states Canrobert courteously left the decision of choice of port to Raglan; Fletcher and Ishchenko describe Canrobert as wily and shrewd, and someone who knew that Balaclava was unfavourable as a base.
- Blake: The Crimean War, 66. By taking Balaclava as a base the British faced more difficult problems than their Allies. The distance from Balaclava to their own siege lines on the right of the French was almost 6 miles (~9.5 km) which proved even more problematic as the winter set in.
- Pemberton: Battles of the Crimean War, 74
- Kinglake: The Invasion of the Crimea, III, 238–89
- Kinglake: The Invasion of the Crimea, III, 252
- Blake: The Crimean War, 68
- The Sapouné Heights along with the Vorontsov Road can be seen on the map XXIX of Orlando Figes, The Crimean War: A History (Picador Publishing: New York, 2010).
- Fletcher & Ishchenko: The Crimean War: A Clash of Empires, 137
- Pemberton: Battles of the Crimean War, 76
- Fletcher & Ishchenko: The Crimean War: A Clash of Empires, 158
- Frederick Engels, "The War in the East" contained in the Collected Works of Karl Marx and Frederick Engels: Volume 13, p. 523.
- Orlando Figes, The Crimean War: A History, p. 241.
- Fletcher & Ishchenko: The Crimean War: A Clash of Empires, 155
- Fletcher & Ishchenko: The Crimean War: A Clash of Empires, 158. The reinforcements consisted of the Butyr Regiment, a rifle battalion, six reserve battalions of the Minsk and Volynsky regiments, a battalion of Black Sea Cossack infantry, plus a further battery of artillery.
- Fletcher & Ishchenko: The Crimean War: A Clash of Empires, 159
- Fletcher & Ishchenko: The Crimean War: A Clash of Empires, 158–60. Brighton states a higher number: 25,000 infantry, 3,400 cavalry and 2,300 artillerymen.
- Brighton: The Truth about the Charge of the Light Brigade, 75–77
- Fletcher & Ishchenko: The Crimean War: A Clash of Empires, 162. The precise objective of the Russian attack has always been disputed – it is unclear whether Menshikov’s target was Balaclava, or the area around Kadikoi in order to cut off the British army besieging Sevastopol from its supply base (Brighton 75).
- Brighton: Hell Riders: The Truth about the Charge of the Light Brigade, 82
- Fletcher & Ishchenko: The Crimean War: A Clash of Empires, 163
- Brighton: The Truth about the Charge of the Light Brigade, 84
- Pemberton states Maude's guns were placed between redoubts 2 and 3; Fletcher & Ishchenko states they were placed between 1 and 2.
- Fletcher: The Crimean War: A Clash of Empires, 165. The Russian 18-pounders had a range of 1,800 yards (~1,645 m); the three 12-pounders in the redoubt had a maximum range of just 1,200 yards (~1,000 m).
- Pemberton: Battles of the Crimean War, 81
- Brighton: The Truth about the Charge of the Light Brigade, 85
- Brighton: The Truth about the Charge of the Light Brigade, 86
- Kinglake (1868) IV:105–13
- Fletcher & Ishchenko: The Crimean War: A Clash of Empires, 166
- Pemberton: Battles of the Crimean War, 82
- Fletcher & Ishchenko: The Crimean War: A Clash of Empires, 167
- Bazancourt: The Crimean Expedition, to the Capture of Sebastopol, II, 26–27
- Brighton: The Truth about the Charge of the Light Brigade, 88
- Fletcher & Ishchenko: The Crimean War: A Clash of Empires, 167. The invalids comprised 40 convalescent Guardsmen hurried up from Balaclava, and 60 others from various regiments (Pemberton 85).
- Pemberton: Battles of the Crimean War, 83
- Brighton: The Truth about the Charge of the Light Brigade, 89
- Brighton: The Truth about the Charge of the Light Brigade, 90
- Brighton: The Truth about the Charge of the Light Brigade, 91
- Fletcher & Ishchenko: The Crimean War: A Clash of Empires, 168. Some estimates put the number as high as 3,500.
- Greenwood, ch. 8
- Brighton: The Truth about the Charge of the Light Brigade, 91. Some accounts have it that a number of the Turks fled at this point towards Balaclava. Many other Turks, however, stayed put (Fletcher & Ishchenko 169).
- Royle: Crimea: The Great Crimean War 1854–1856, 268. Russell continues, 'The Turks fire a volley at 800 yards, and run. The Russians come within 600 yards, down goes that line of steel in front, and out rings a thundering volley of Minié musketry. The distance is too great, the Russians are not checked, but still onwards with the whole force of horse and man … but ere they come within 150 yards, another deadly volley flashed from the level rifle … they wheel about, open files right and left, and fly back faster than they came.'
- Warner: The Crimean War: A Reappraisal, 63
- Pemberton: Battles of the Crimean War, 87
- Fletcher & Ishchenko: The Crimean War: A Clash of Empires, 170. Sources vary at the Russian casualty rate. Robert Portal of the Light Brigade put it at 50. Munro, the 93rd's surgeon put it at 'not more than 12' (Pemberton 86).
- Brighton: The Truth about the Charge of the Light Brigade, 93
- Brighton: The Truth about the Charge of the Light Brigade, 92–93
- Fletcher & Ishchenko: The Crimean War: A Clash of Empires, 171
- Pemberton: Battles of the Crimean War, 90
- Fletcher & Ishchenko: The Crimean War: A Clash of Empires, 173
- Pemberton: Battles of the Crimean War, 92
- Fletcher & Ishchenko: The Crimean War: A Clash of Empires, 172
- Brighton: The Truth about the Charge of the Light Brigade, 95
- Fletcher & Ishchenko: The Crimean War: A Clash of Empires, 174–75. The casualties were low for two reasons. First, the congestion made it difficult to swing a sword; second, on neither side were their sabres sharp, and on the thick overcoats worn by the Russians the British swords 'jumped off like India-rubber'.
- Royle: Crimea: The Great Crimean War 1854–1856, 270
- Hibbert: The Destruction of Lord Raglan, 174
- Pemberton: Battles of the Crimean War, 95
- Fletcher & Ishchenko: The Crimean War: A Clash of Empires, 177
- Kinglake: The Invasion of the Crimea, V, 194–95
- Brighton: The Truth about the Charge of the Light Brigade, 100. Royle puts the time of the order at 10:15.
- Brighton: The Truth about the Charge of the Light Brigade, 103. It is not certain that the Russians were in fact carrying away the guns. From Raglan's position, even through a telescope, it was unlikely that anything more specific than movement of horse teams could have been seen.
- Brighton: The Truth about the Charge of the Light Brigade, 103
- Royle: Crimea: The Great Crimean War 1854–1856, 273
- Frederick Engels, "The War in the East" contained in the Collected Works of Karl Marx and Frederick Engels: Volume 13, p. 524.
- Kinglake: The Invasion of the Crimea, V, 202–03
- Kinglake: The Invasion of the Crimea, V, 211
- Hibbert: The Destruction of Lord Raglan, 177
- Brighton: The Truth about the Charge of the Light Brigade, 112–13
- Pemberton: Battles of the Crimean War, 104
- Brighton: The Truth about the Charge of the Light Brigade, 117
- Brighton: The Truth about the Charge of the Light Brigade, 123
- Brighton: The Truth about the Charge of the Light Brigade, 124
- Brighton: The Truth about the Charge of the Light Brigade, 134
- Brighton: The Truth about the Charge of the Light Brigade, 137–38
- Brighton: The Truth about the Charge of the Light Brigade, 152
- Brighton: The Truth about the Charge of the Light Brigade, 158–59
- Brighton: The Truth about the Charge of the Light Brigade, 160
- Brighton: The Truth about the Charge of the Light Brigade, 179
- Brighton: The Truth about the Charge of the Light Brigade, 187
- Hibbert: The Destruction of Lord Raglan, 183–84
- Royle: Crimea: The Great Crimean War 1854–1856, 277
- This figure is taken from Brighton and represents the minimum number of officers and men who are known to have charged – the actual figure may have been slightly higher. Kinglake puts the number at 673. Many sources (e.g.: Blake, Hibbert, Pemberton) follow Kinglake.
- Brighton: The Truth about the Charge of the Light Brigade, 293–94
- Pemberton: Battles of the Crimean War, 121
- Brighton: The Truth about the Charge of the Light Brigade, 297
- Fletcher & Ishchenko: The Crimean War: A Clash of Empires, 184–85
- Fletcher & Ishchenko: The Crimean War: A Clash of Empires, 184
- Royle: Crimea: The Great Crimean War 1854–1856, 280–81. Hibbert puts the Russian strength at 120,000 men.
- Frederick Engels, "The War in the East" contained in the Collected Works of Karl Marx and Frederick Engels: Volume 13, p. 527.
- Hibbert: The Destruction of Lord Raglan, 202
Sources
| Wikisource has original text related to this article: |
| Wikisource has the text of the 1911 Encyclopædia Britannica article Balaklava. |
- Primary sources
- Bazancourt, the Baron de (1856). The Crimean Expedition, to the Capture of Sebastopol 2 vols. London.
- Kinglake, A. W (1863–87). The Invasion of the Crimea, 8 vols. Edinburgh
- Secondary sources
- Blake, R.L.V ffrench (1973). The Crimean War. Sphere Books.
- Brighton, Terry (2005). Hell Riders: The Truth about the Charge of the Light Brigade. Penguin Books. ISBN 978-0-14-101831-7
- Figes, Orlando (2010). The Crimean War: A History. Picador Publishing.
- Fletcher, Ian & Ishchenko, Natalia (2004). The Crimean War: A Clash of Empires. Spellmount Limited. ISBN 1-86227-238-7
- Greenwood, Adrian (2015). Victoria's Scottish Lion: The Life of Colin Campbell, Lord Clyde. UK: History Press. p. 496. ISBN 0-75095-685-2.
- Hibbert, Christopher (1963). The Destruction of Lord Raglan: A tragedy of the Crimean War 1854–55. Pelican Books
- Pemberton, W. Baring (1962). Battles of the Crimean War. Pan Books Ltd. ISBN 0-330-02181-8
- Royle, Trevor (2007). Crimea: The Great Crimean War 1854–1856. Abacus. ISBN 978-0-349-11284-8
- Warner, Philip (2001). The Crimean War: A Reappraisal. Wordsworth Editions. ISBN 1-84022-247-6