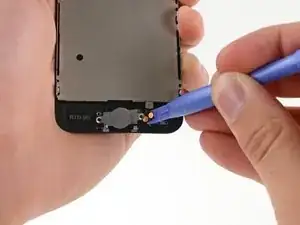
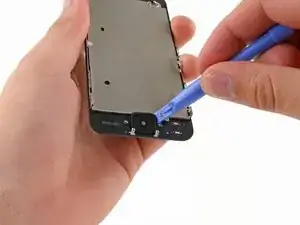
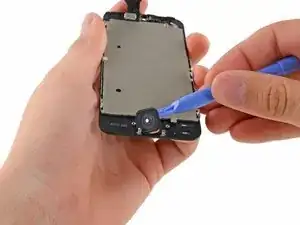
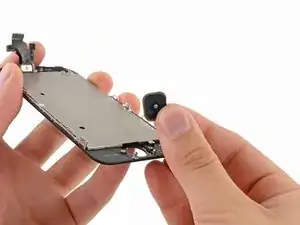
Introduction

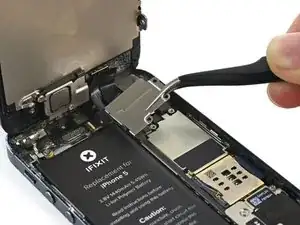
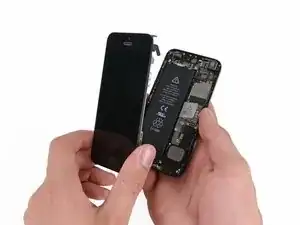
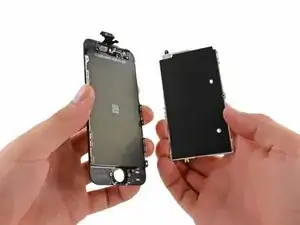
For an easier repair, use our fix kit and follow this shorter guide to replace your iPhone 5’s entire screen.

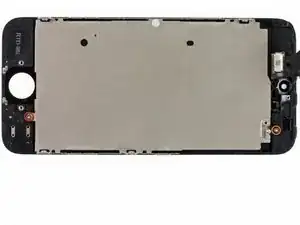
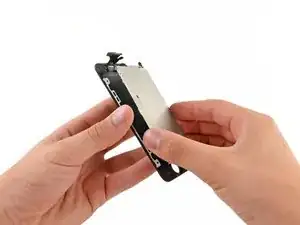
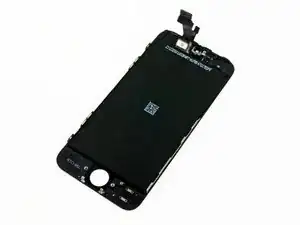
For more advanced fixers, this guide will help you replace only the iPhone’s LCD + digitizer assembly (a.k.a. the bare “front panel”). This requires you to transfer several components from your original screen to the new one before installing it—including the front-facing camera, earpiece speaker, LCD shield plate, and home button assembly.

You can also use this guide to replace the front panel assembly cable bracket.

Need a guide for the iPhone 5s LCD and digitizer instead? We got you covered!

  1. 6AnvZAceHItwcSJc
    6AnvZAceHItwcSJc
    5fbUPoMIpCTCPiKB
    yuwiORhWpNxDDFGq
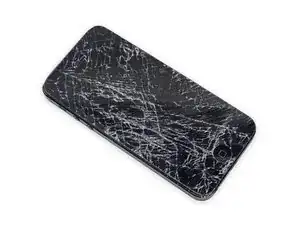
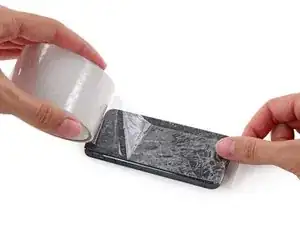
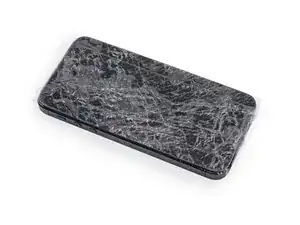
    • If your display glass is cracked, keep further breakage contained and prevent bodily harm during your repair by taping the glass.

    • Lay overlapping strips of clear packing tape over the iPhone's display until the whole face is covered.

    • Wear safety glasses to protect your eyes from any glass shaken free during the repair.

    Having completed this repair using the rear camera part from Ifixit I have to comment that the camera is noticeably lower quality. Its not huge - You don't notice it looking at the photos scaled down to fit but viewing one for one there is significant detail lost. My staff member has an Iphone 5 bough at exactly the same time as mine so I was able to take a photo side by side on his and mine after my repair and when you view 1 for 1 pixel in product boxes on mine the text was just a colored blur where on his although you couldn't read the text it was more obviously text. Overall though its still better than having a camera that wouldn't focus at all and being that Apple seem to refuse to supply genuine spare parts (Which there has to be a low against??? - Imagine if a car manufacturer did that) its still good buying one from someone who gives good support. At the end of the day its a phone camera not an SLR and its still better than the older Iphone 4 camera.

    matt -

    The majority of product manufacturers are not required to provide parts, and apple will fix items under the various warranties it offers. Car manufacturers on the other hand are required to make parts available by law. It is part of the regulation of their industry. They get a lot of protection for their business model, but have some obligations too. It's why the EV1 was pulled, they didn't want to have to make the parts, and why there are so many Delorian parts.

    William Leeper -

    This is a great guide. However, I'm having a hard time popping the screen back into place. Everything works but I'm afraid of putting too much pressure least I crack it again. Any advice?

    amciotola -

    To avoid broken screens during reassembling:

    Put the hooks of the screen in the right place in the housing, then close it loose, don't press it. Turn your phone upside down with the screen on a very flat surface (e.g. table). Now press the housing on the screen -> no more risk for braking the screen because of inhomogeneous force applied on the glass!

    mondbewohner -

    I hope folks read this comment before proceeding to attempt a Sleep/Wake button repair on the iPhone 5! Apple has an iPhone 5 Sleep/Wake button replacement program, free, for iPhone 5 devices manufactured through March 2013. See program details at https://www.apple.com/support/iphone5-sl.... Don't do this yourself if you don't need to. It's a difficult repair.

    Mark Luscher -

    I was willing to add the following important remark on top of this guide but, strangely, it has been refused! Here it is:

    ---

    *Check if your Iphone 5 is eligible to the Apple special program for a free battery replacement (devices sold between September 2012 and January 2013, within a limited serial number range).

    * If not, watch the video and use this guide [video|https://www.youtube.com/watch?v=6ogE8USs...]

    ---

    And thus, as my Iphone 5 was eligible, I went to the Apple store of Le Louvre in Paris and the battery has been changed for free instead of 65 euros. Thanks to Mark!

    revher -

    Hi every one i drop my iphone5s 16gb

    I replace 10!new screen but cant back to live i see on the "logic board" where u conect the screen i se damage HOW CANT FIX THAT WHITOUT LOST MA DATA ??? Thaks for anny hellp!!!!!

    aliroberto01 -

    Steps 12-15 seem to be not necessary for battery replacement. They are not required to remove and replace the battery and they at least DOUBLE the amount of work. Most of the time spent on this process involved working with those tiny screws and maneuvering them in place and screwing them down. Steps 12-15 are three of the five screws that you work with inside.

    Also, there should be a note at the beginning of Step 2 that if you bought the iFixit kit that you should go directly to Step 6.

    Bob Hatcher -

    please wear safety helmet too, integral helmet and cover mouth with an N95 facemask underneath, just in case the battery punctures, explodes, you knock your head back to the wall and slam it back forward hitting the screw in your eye and and inhaling toxic fumes! can never be too careful ;-)

    ibisiki -

  2. ydWPQBHZlo46eJFv
    • Before you proceed, discharge your iPhone battery below 25%. A charged lithium-ion battery can catch fire and/or explode if accidentally punctured.

    • Power off your iPhone before beginning disassembly.

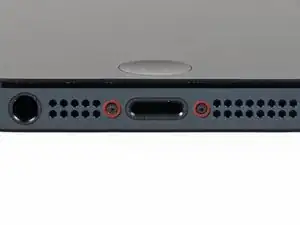
    • Remove the two 3.6 mm Pentalobe screws next to the Lightning connector.

    I would recommend keeping multiple pieces of double-sided tape for each step that requires removing screws. Also perhaps label them, or take notes, so you know which piece of tape (and the screws attached to it) go with which step number. It's easy to confuse screws, especially if you go past these instructions to remove everything required to replace the ribbon cable that is necessary for the buttons.

    irwin fletcher -

    To avoid misplacing screws or other elements, printout the instructions, apply transparent tape onto the print wherever you have colored circles marking different screws. Then, as you start removing screws, tape each one on top of its image on the instructions. At the end, to reinstall everything, proceed from the end of the instructions, removing each taped screw from its image, to return it to its original position. I have done this with many iFixit repair instructions, never losing or misplacing any screw!

    bduault -

    Ordered and received the Phillips #00 Screwdriver ($5.95 · 50+ In stock). It is a tiny Philips screwdriver. The screws next to the lightning port have tiny star-shaped holes. I will have to find a different screwdriver.

    jacklingwood -

    Unfortunately, the kit I ordered that was to come with a suction cup didn't include one; thanks for quality control, ifixit. Tape doesn't work. Now what?

    btarver -

    I'm sorry to hear that. I have a suction cup being sent out today (Tue 3/11/14) and it will be there tomorrow for you.

    Scott Dingle -

    I've managed to replace the battery successfully in my iPhone5, but something went wrong with a friend's (battery status is stuck, sometimes the phone reboots for no reason).

    So, i decided to open it up again and reseat the ribbon cables in case they came loose.

    I can't open it now. The Pentalobe screwdriver is worn out! I can't open these screws no matter what. I don't know what to do now as I can't be sure I haven't worn out the actual screws themselves, too. Any ideas?

    Saltank -

    I seem to be having a similar situation. Attempting to open the phone again and either the pentalobe screws or the screwdriver itself is stripped. Any suggestion is welcome for removing the screws.

    Battery replacement went well and works great. But I must have a loose (hopefully not damaged) display ribbon.

    pwarkolla -

    Saltank, thanks to your comment I didn't overtighten those little screws! I would try to get a better quality driver from a local hardware store to see that helps, the one ifixit sent are not very good quality. If that doesn't work, you may have stripped the screws.

    SMSHAHKHAN -

    Wish I ordered a back case as well with my repair being so easy!

    Daniel Hatton -

    my phones screen displays the dead battery sign and the plug below it sign too, when your phones battery is dead. Bought a new battery and charged overnight...... any ideas?

    Steve Freed -

    Hi Steve! I'm experiencing the same issue. Were you able to fix it? Please let me know

    Brittany Hutchinson -

    Steve. Please contact me asap re: the issue on your phone. Thank you.

    Brittany Hutchinson -

    Now here's an issue that would seem to apply to many users doing this repair: if the screen is nonfunctional, how do you power-off the device? When I dropped my iPhone, the screen went almost completely dark, midnight blue, actually. I can use the power button at the top of the phone to turn the display on and off, but I can't get the phone to power off. Seems the only way to do it is to wait until the battery is exhausted.

    dwhyink -

    Protip: take all the soda out of a case of pop and complete the repair in the empty cardboard tray. That way if you drop a screw it won't go flying off the table.

    John Penfold -

    Ok, at the end of the repair, I tried to use the new pentalobe screws that came with ifixit replacement battery but they did not seem to fit. So, reverted to the original pentalobe screws for the final step to close up the phone. Beside that, everything went smooth. I also skipped the steps about detaching the frontpanel (seems not necessary if only replacing the battery)

    Srikanth -

    Weirdly I had to use two different screw attachments to remove the pentalobe screws so possible they use different screw heads for each one sometimes.

    Sam Ashken -

    The “Pentalobe” screws require the STAR DRIVE driver, NOT a Phillips driver.

    Vard Nelson -

    I seems the P2 is too big, My Iphone 5 seems to have 0,8 pentalobe screws. I ordered the new battery and your Pro Tech Toolkit and now I find out this bit isn’t in the kit? Am I missing something?

    Naampje -

    Hi, i am trying to remove the serews, i have all the tools neded for it but when i try to unscrew them, they turn but they don’t came out, any ideas of what to do? Tank you.

    Joel -

    Hi Joel,

    Chances are, the threads may be slightly stripped. You can try to wedge the point of some tweezers behind the screw head to pry the screw out.

    Arthur Shi -

    This was the second repair in the same iphone5. First was the screen, and all the screws came easily. After a year, I wanted to change the battery. From the two Pentalobe screws, one came easy. The other just turn but did not come out. I search and tried to glue the screw with superglue to the screw-driver, but did not work. Finally, I separated the glass from the phone, removed the button, and pushed the screw from inside to outside. It came just enough I could catch it with tweezers and turned meanwhile pulling. Finally came out. I know, not the best solution, but I did not find another way. I put the battery and works.

    daniel -

  3. I4JMQdCRvELInn4X
    I4JMQdCRvELInn4X
    RpUY1lvwOsn4dRbZ
    EQJZmHRew2p2Roep
    • In the following steps you will be pulling the display up out of the phone body. The display is composed of a glass screen and a plastic bezel with metal clips.

    • Regardless of the tool you use, you need to be sure you pull up the entire display.

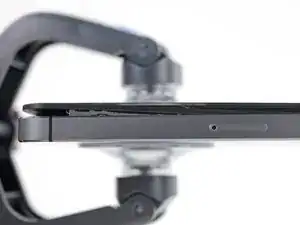
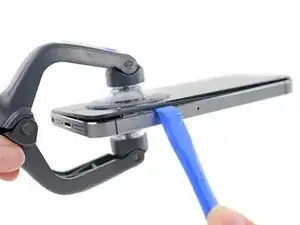
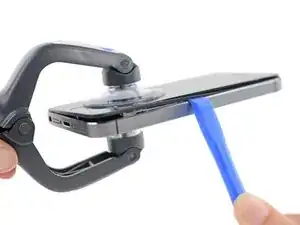
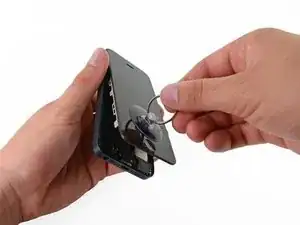
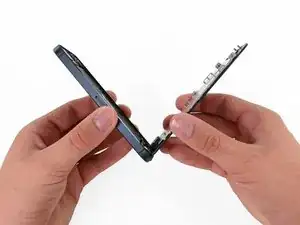
    • If the glass begins to separate from the plastic, as shown in the first image, slide a plastic opening tool between the plastic frame and the metal phone body to pry the metal clips out of the case.

    • If you are reassembling a phone with a separated display bezel, you may want to place a thin strip of adhesive between the plastic bezel and the glass to keep the phone closed.

  4. CBRhZmUFehCAvTHt
    CBRhZmUFehCAvTHt
    NpEM3P3NVP3bMtET
    vvb3nBKXDNsePExE
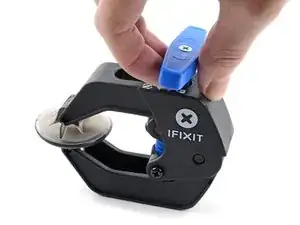
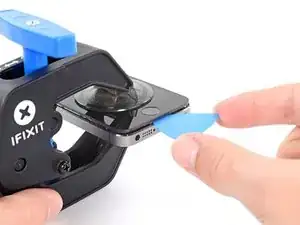
    • The next two steps demonstrate the Anti-Clamp, a tool we designed to make the opening procedure easier. If you aren't using the Anti-Clamp, skip down two steps for an alternate method.

    • For complete instructions on how to use the Anti-Clamp, check out this guide.

    • Pull the blue handle backwards to unlock the Anti-Clamp's arms.

    • Slide the arms over either the left or right edge of your iPhone.

    • Position the suction cups near the bottom edge of the iPhone just above the home button—one on the front, and one on the back.

    • Squeeze the cups together to apply suction to the desired area.

    • If you find that the surface of your iPhone is too slippery for the Anti-Clamp to hold onto, you can use tape to create a grippier surface.

    The iSclack is a marvel. I've had it in my toolkit for a while but this was its first use. I recommend this tool.

    jlwilliams03 -

  5. IgEVZBSIuqlNVysl
    IgEVZBSIuqlNVysl
    xHZPoC4au6AwGtro
    oykPWJdQhPQKuBNQ
    • Pull the blue handle forwards to lock the arms.

    • Turn the handle clockwise 360 degrees or until the cups start to stretch.

    • Make sure the suction cups remain aligned with each other. If they begin to slip out of alignment, loosen the suction cups slightly and realign the arms.

    • Insert an opening pick under the screen when the Anti-Clamp creates a large enough gap.

    • If the Anti-Clamp doesn't create a sufficient gap, apply more heat to the area and rotate the handle a quarter turn.

    • Don't crank more than a quarter turn at a time, and wait one minute between turns. Let the Anti-Clamp and time do the work for you.

    • Skip the next two steps.

    Step 4 is a bit dangerous, as the Display is pulled out very fast and (depending on the position, the suction cups are placed at) it could stress the cabels connecting display and mainboard. So, please, hold the phone with finger and thumb at the top, to avoid the display is pulled out to fast.

    Guido Dampf -

    I sure wish they did a better job showing in the video how hard it is to take of the front screen without the iSclack tool!

    CHRISMIYAMOTO -

    I had to position the suction cup _over_ the home button in order to get the screen far enough away from the frame to slide my trim tool in there. Putting it down above the home button just wasn't working at all...

    tparkinson -

    Was someone able to answer this question? I have the same issue

    Brittany Hutchinson -

    without this suction cup clamp thing, removing (and replacing) the screen was the hardest part of this job. Especially when the screen is cracked badly as the suction cup loses suction due to air leaking through the cracks. In this case, use tape over the screen to create a smooth surface. ***Also, the screens have rubber running along the side, so use a heat gun or hair dryer to make the rubber softer for removal of cracked screen and installation of replacement screen

    fakik0240 -

    I am amazed how simple this is and to make a fortune off of. Wish I had thought of it.

    Bigi44

    wayne44 -

  6. sDwuUfDXaRHP6c4b
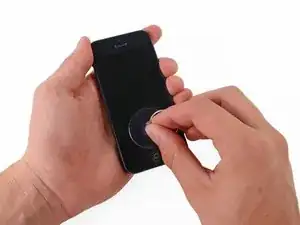
    • Press a suction cup onto the screen, just above the home button.

    • Be sure the cup is completely on the screen to get a tight seal.

    • If you're opening an iPhone with cracked glass, neatly lay a couple strips of packing tape across the front and squeeze out as many bubbles as you can. This will give the suction cup a surface to grab, and minimize the spread of broken glass.

    I found it was easier to start opening from the top left of the display and working straight down towards the home button as there are no clips in this particular area. I realize there are cables on the right side right next to the area, however, this way requires less force as a starting point. Let me know what you think.

    boxerbc -

    I think that's not a good idea as the top of the display is held in place with plastic tabs.

    If you apply to much force they can break.

    Johnny -

    This part was the most frustrating part of the guide, granted I didn't do the whole thing. I was expecting to slip the plastic separator tool in-between the case and the display. This did not happen and I ate away at the tool in the process. For me after much pushing on the top edge of the case and pulling the screen away it released all of a sudden. I managed to make a dead stop at 90 degrees, but felt like I almost ripped off the ribbon cables(I didn't).

    maxturkewitz -

    No matter how hard I tried, I could not get the screen to separate far enough to where the pry tool could get it. Reading through some of the other comments, I followed 2 other people's advice to work the bottom left corner above the headphone input and then use a pushpin at the same time. (this is not recommended, but it worked!) I made a couple of hard to see marks in the corner but was finally able to get the screen off. I also did NOT take off the connectors to the screen and skipped the next few steps all the way down to step 14. Looks like a lot of people damaged their phones that disconnected the top screen.

    CHRISMIYAMOTO -

    I'd recommend to use packaging tape to attach the upper edge of the display to the back of the phone so you won't rip off the ribbon cables if the display suddenly comes loose.

    Cupper Chopper -

    I took the suction cup off of an old navigation Tom Tom and it worked great!

    fijisomeday -

    My battery needed replacement because the battery had swollen and was warping the glass. Looking at it from the side it looks like gasket that was partly sticking to glass and partly to the case. This is actually part of the glass frame and you need to make sure to separate it from the case not the glass. I did it wrong and ended up removing the glass but there was a metal case covering the inside. I eventually got the rest of the top off but now I'll have replace it all because I can't find a good way to glue the glass to plastic.

    Wade Whitaker -

    I initially had trouble, but focusing on the area of the faceplate right above the headphone jack worked for me. There's a slight divot that allows you to slip in the prying tool earlier than in other places around the faceplate. Once I got the prying tool in there, I was able to pop out the bottom, and then continue up the sides.

    Stuart Nelson -

    IMPORTANT TO NOTE: The top of the screen is attached to delicate cables inside the phone! Pull up carefully and keep a hand on the top of the screen so it doesn't pop up.

    gobluethunder -

    My iPhone 5 only had a weak battery. Now it has a cracked glass panel. Suction cup is strong - so strong the glass breaks before the suction cup lets go. Apparently some of the tolerances in Apple's design occasionally add up to make a front panel assembly that refuses to let go. Phone not worth repairing at this point as it only cost $190 refurbished to begin with. A note of warning - you might want to have this done by an experienced tech - go ahead and spend the $100 or so to have someone experience replace the battery and keep the rest of your phone intact.

    Mark Troeller -

    The suction cup with the blue plastic handle that came with the kit did not work, but I still had the cup with the silver ring that came with an iPad repair kit and it worked nicely. Also, I found that the guitar style picks that came with the iPad kit worked best for getting the screen started.

    Bill Roughen -

    Top center worked for me best (success after 2nd attempt). Near the home button I failed constantly (I have the suction cup with the blue handle).

    Marie -

    I also found that a larger suction cup (from a Garmin GPS) which spanned the width of the glass screen worked better than the provided one.

    Robert -

    I used a heavy duty iFixIt suction cup (used for repairing an old iMac) for the job. Worked like a charm.

    Olivier Biot -

  7. t2dqO6pSUFSfqQ64
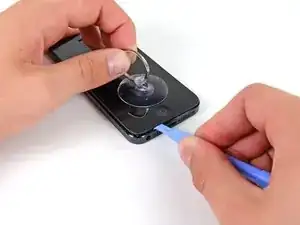
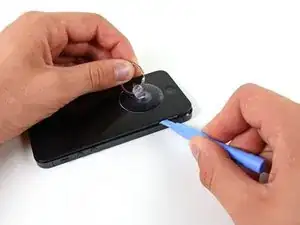
    • Make sure the suction cup is firmly attached to the front panel assembly.

    • While holding the iPhone down with one hand, pull up on the suction cup to slightly separate the front panel assembly from the rear case.

    • Take your time and apply firm, constant force. The screen is a much tighter fit than most devices.

    • With a plastic opening tool, begin to gently pry the rear case down, away from the screen, while you pull up with the suction cup.

    • There are several clips attaching the front panel assembly to the rear case, so you may need to use a combination of the suction cup and plastic opening tool to free the front panel assembly.

    The suction cup didn't work, because of my destroyed front glass.

    So i take "tesa powers trips".

    With that help, i had enough force to pull up the front display from the rear case.

    ulrichstumm -

    Suction cup didn't work for me. I tried for half hour with my nerd biceps. In the end, I inserted an xacto blade below the home button to create a gap big enough for me to put in a guitar pick and finally able to pry it open. In the process I scratched the frame so you have to be very careful if you decide to take this approach.

    Meng -

    Where can you buy "Tesa Powerstrips?

    latraelmayo -

    The glass on my phone was completely destroyed, making the suction cup entirely useless. I was pretty close to giving up when i tried putting a strip of clear packing tape on the screen and squishing out all the bubbles. Put the suction cup on this and it worked perfectly.

    chriscopass -

    Thank you. I broke the front glass with this technique..

    Olivier S -

    Used a suction cup from my Garmin Navi. The one you use to stick it to your windshield. It has a nice plastic "handle" and made things a lot easier... almost too easy that I nearly pulled the screen off the cables. Go easy on this step.

    michaelychien -

    I'd Advise Against The Suction Cup Here As It Will Separate The Glass From The Black/White Framing That You're Actually Supposed To Pry Under. I Found When Using The Suction Cup, The Glass Came Up, But The Framing Stayed Stuck. If You're Replacing The Entire Display It's Not As Much Of A Problem, But If You're Installing Any Other Part Or A Custom Housing, You'll Notice Your Screen Has A Bit Of "Play" When Pressing Down.

    Mitch -

    While holding down on the lower sides of the iPhone, I found inserting the plastic separator just to the right of the audio jack while gently applying pressure down and back from the edge popped the bottom of the display assembly up. Keep in mind to do this while pulling back on the suction cup ring, like the guide says constant, but gentle force at the same time. Another note is to have the suction cup ring vertical to align with the length of the display, that made the process much easier.

    Canis Lupis -

    You rock! I was having trouble getting the thing to budge, but the moment I put the plastic tool near the audio jack, the screen immediately popped up.

    Justin -

    This should be in the guide. The front panel is actually recessed a bit here making it much easier to get a tool in at this point. No way I would have opened it without this tip. Thanks!

    dave -

    Thank you so much! This should DEFINITELY be added to the main guide.

    After struggling for half an hour and nearly giving up, I was able to easily lift up the screen once I tried to wedge it near the headphone jack!

    Thanks so much!

    diegoholt -

    This was the key for me. Thank you so much for this tip :)

    I was having a lot of trouble. Should be in the guide.!!

    Coact -

    Thank you very much, this worked for me!

    gbmattson -

    I've been using a metal flat opening tool along with the suction cup to pop these bad boys open - remember the tape on the screen trick if you have a smashed screen - so the suction cup can grip and stops the glass going everywhere!

    Ben Watkins -

    Definitely a difficult step. Make sure not to pry the screen from framing. Also, I kept pushing the power button on while attempting separate the frame. Keep your fingers clear from the top of the phone because having it turn on while the casing is popped is a little nerve racking!

    Andrew -

    I had trouble with this step too, since I had to apply quite a lot of force on the suction cup when pulling up on the screen while holding down on the frame with my fingernails. Eventually it popped free, but came almost to 90 degrees before I was able to stop it. No damage, but nerve-wracking, and if there was a better technique, it would be good to figure it out and share the information here.

    Adam Engst -

    Be very gentle! I overdid it and, though the repair was successful, there's now a bit of play when pressing on the top right quadrant of the screen.

    plasticpool -

    When i was reassembling, the screen broke form the pressure. I recommend putting the screen towards your working surface and press your phone downwards. That way your screen is always straight.

    Kenichi Haramoto -

    My front panel flew right off after some puling on the suction cup - no prying was necessary.

    Fortunately, no cables got damaged. Take care.

    Leonid -

    I can confirm, the Garmin sucker cup worked like a charm. Within 5 seconds it popped open.

    Nolan -

    everything worked but i got a problem i hope anybody can help me very fast !

    when i lift the screen up it just lift the glass up not the whole display ....

    what should i do ??

    thanks in advance

    edis -

    Need extra careful while pulling the screen.

    Once there is a gap between the screen and the frame, insert the plastic opening tools and move it around the screen. But don't use it for top area (near to power button) as there is a location for flexible ribbon cable.

    Once the bottom part is free, the screen will pop out easily.

    Ardi Purwalaksana -

    Suction cup is very difficult with a cracked screen. Stick something in the ear jack and carefully push it and the edge of the screen will pop up. Use the plastic stick to open it.

    Julie To -

    I had trouble opening the screen due to a warped suction cup that was bent up at one spot and also due to my cracked screen. My solution: used double sided tape between the suction cup and the glass. I had some command strips, but I think any double-sided tape could work.

    earthhasassri -

    Use needle its a best way

    imran -

    I could never even get the case open. Waste of $30.

    dpetronis -

    The suction cup will hold if you put a piece of tape over the cracked screen.

    prattdesign1 -

    BE VERY, VERY CAREFUL, HERE!!

    -The repair went horribly wrong during this step, for me. I pulled-up on the suction cup, gradually increasing force. Instead of just opening a gap to get the plastic prying tool into, the whole thing gave way at once. This damaged the connection between the display assembly and the rest of the iPhone.

    -During this step, I would recommend placing a rubber band around the phone, over the home button and one near the top of the iPhone for good measure. Even better, invest in the "iSclack". In my case, it would have saved me about fifty bucks and three days without a functional iPhone.

    -When I reassembled, The screen was blank, but I could still sync with iTunes. I may have been able to replace only the cables, but I wasn't sure how extensive the damage was and I was done messing around with it. I replaced the whole display assembly, and now it works just fine.

    -This was STILL cheaper than buying a new phone, and I learned a lot. Overall, it was a good experience.

    peterthemick -

    my phones screen displays the dead battery sign and the plug below it sign too, when your phones battery is dead. Bought a new battery and charged overnight...... any ideas?

    Was someone able to answer this question? I have the same issue

    Brittany Hutchinson -

    1. This is very difficult, you have to use much more strength than it appears and it's very easy to rip out the connector cords. Mine did not rip, thankfully.

    2. Upon replacing the screen, I had to do this 3 times, I would not recommend putting the screws back in but turning on the phone and testing all screens before putting the panel back.

    3. When I finally managed to ensure all displays were working, I was pushing the screen back in and cracked the glass just below the home button. This part is very sensitive as it is the thinnest portion of the glass so be careful and ensure you push from the top and go all the way around. I also had to do this twice because after cracking the glass on the first try, I also realised the top was not fully pushed back.

    kkwang18 -

    We highly recommend using the iSclack tool for opening the phone up. It simply pops it up with very little effort, and you won't risk damaging your screen or device.

    Matt Gordon -

    My older phone had a swollen battery, it turns out it had distorted the display assembly enough that the suction cup only separated the screen from the display assembly. Not good.

    robin -

    I was in no mood to pay for the special tool and wait for it. Took the "right of headphone jack" suggestion and pushed down vertically at the edge of the frame with a "ice pick" sharp tool, " I had two of them. Who cares if you scratch the frame a little, I usually have my phone in a protective case anyhow. I kept working with this until the corner was up, and then the rest of the display was loose without any further work.

    primaljoy -

    My phone is in pristine condition for a 5 year old phone, I have no cracks to speak of on the glass and the suction cup that ifixit sent me doesn't stick to the glass.

    Mary Ellen Cammilleri -

    Holding the other side (top of the phone) down with another hand is extremely important. Plenty of people have damaged their screens by pulling the panel right off, ripping all the cables.

    Eugueny Kontsevoy -

    I made a series of gentle pulls and the front panel came up without problems. The opening started to appear next to the audio jack, as other people indicated. Then, I used the pry that came with the kit and the panel opened easily.

    Javier Buzzalino -

    Upon reassembly, I cracked the glass at this step. The top of the screen seemed to have too play in it and on my phone—I suspect from right side brackets that may have been damaged already. Was nearly finished and applied too much pressure? to the top of the screen area to get it back into position. Snap!

    Robert Innis -

    I pulled and pulled on the suction cup with no results then read the comments! Ugh! Found a kiosk at the mall that will replace battery for $15. Should have saved the cost of tools. They were very pretty and well packaged though! Good fortune to all that succeeded.

    Frank Fulchiero -

    Suction cup does not work. I also had to use the Garmin suction cup

    K G -

    This went easy. Place the opening tool in the seam near the earphone jack to pry as others have stated. Also, as insurance I wrapped a rubber band around the top end of the phone (covering the listening speaker and camera lens) so if the cover suddenly popped open when pulling the suction ring, (which it did!) the cover would not pop entirely off and damage the connector ribbon inside.

    Anthony Baldino -

    I used the suction cup that came with the replacement battery kit. It took me quite a while to get the screen loose, but ultimately it came open. They are not kidding when they said this device is tighter that most. I also use the iOpener to get the battery to let go. The iOpener worked like a charm.

    ershler -

  8. YLy5LyHkJlBoc33R
    • Continue to pry up around the sides of the front panel assembly, detaching the clips along the left and right side.

    while opening the front panel, i lose control and it gone so fast. And now, after putting it back, the screen is not working. What am I supposed to do? I dont have any other phone in hand and I need to repair it immediately.

    yakbu -

    as I wanted to close the display again, the sealing ring wasn't attached to the edge of the glass anymore. did someone have the same issue? thx for help!

    luc -

    I didn’t see any side clips! Could they have fallen out previously because my screen was bulging out from the case? Or did I miss them somewhere? I managed to separate the front panel from the body, but there is yet another metallic looking panel on the body. The back of the panel still attached to the front part is mirror shiny on the back of that panel.

    tom -

    Hey Tom! Unfortunately you only separated part of the display panel, try to reseat the display and open it again, paying special attention to step 3 which shows you where you should be prying to get those clips on the metal rail out of the phone body.

    Sam Goldheart -

    The thin glass front panel has partially separated from the plastic frame along both sides. Should I try to put a small amount of adhesive to keep it from popping out? It was pushed out by an expanding battery!

    Kevin Knoop -

  9. DC4qAlwT1EvIQjPP
    DC4qAlwT1EvIQjPP
    DXiQOlZaEivFVgDK
    GrtZSvf1ESXAdyxM
    • Do not try to completely remove the front panel assembly from the rear case, as there are several ribbon cables still attached at the top of the iPhone.

    • Once the clips have been released on the bottom and sides of the front panel assembly, pull the bottom of the assembly away from the rear case.

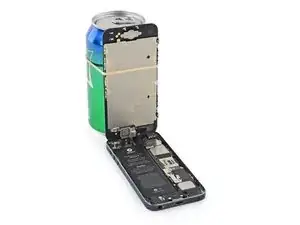
    • Open the display to about a 90º angle, and lean it against something to keep it propped up while you're working on the phone.

    • Add a rubber band to keep the display securely in place while you work. This prevents undue strain on the display cables.

    When reinserting the screen, be sure to start from the top and insert the plastic tabs on the screen into the case before advancing the rest of the screen into place, finishing at the bottom. The screen will snap into place once lined up to complete the insertion.

    jeff -

    This is actually very important, I was having trouble getting the front panel to go on by starting at the top. I started from the bottom instead and the bottom ended up secure, but not the top. I then tried to take the front panel back off, but because the top portion was already loose the force required to pull off the bottom led to one of the ribbon cables at the top of phone breaking.

    jjensik11 -

    When reattaching the screen, please start from the top. BEFORE you try to push the bottom of the screen down and snap it in, use some pressure from the bottom edge to push the screen towards the top of the phone. I suggest that by the time you get to the middle of the phone (starting from the top), you do this. It will allow for getting the clips at the bottom by the sync cable clipped in and will sit nicely and allow for you to use overall pressure to make sure the whole screen is secured. I didn't do this and I damaged the seal on the right side of the phone and almost separated my screen from the digitizer trying to reseparate it to reattach the screen. Be very carefull to follow these steps I listed. If you do this while reattaching the screen, you'll have no problem.

    zhunterzz -

    I also agree with it being not necessary to remove the complete front panel. I just kept it attached and kept it at an angle as I pulled with gentle, continuous force (at a 45 degree angle as suggested) on the battery pull tab. It eventually came loose, I set the new battery in and everything works perfectly.

    Jen Robinson -

    That's the way I did it too. I put a piece of packing tape from the screen, over the top of the phone, and onto the back. That kept me from putting any pressure on the ribbon cable should the phone slip and the whole screen try to lift away from the backing.

    Ed Chapman -

    Be careful taking the front panel off. I tried to pull it very careful but it ripped. One of the cables was damaged but luckily, it was the cable that goes out with the old front panel. It also ripped 4.1 mm Phillips screw from step 13 and it jumped to the floor. I was lucky and recovered it from the floor.

    In the end everything was fine and phone works great. But remember to be super careful.

    drummerMarkku -

    BE VERY CAREFUL!! While trying to open the phone, I was must've tried a little too much and the screen came off in one shot, and it damaged the ribbon cables. Screen didn't turn on, and it cost 100$ to repair. BE VERY CAREFUL.

    Marc -

    Hello guys, I would like to first thank iFixit for these amazing repair guides they have always worked for me! Thank you!.

    When reassembling the phone make sure to put the screen from top to bottom, but be aware there are 2 small flaps on the top left side of the screen (you can notice them using another iphone as a flashlight) if you don't put these 2 flaps first then you are going to have a little space between the top part of the screen and the aluminum frame, at least this happened to me and then I inspected the screen using a flashlight and then I found these 2 tiny flaps behind the screen near the top left corner.

    I hope it helps!

    Cesar Valenzuela -

    Was it just me or did anyone else discover a ribbon cable (or something like it) on the bottom end of the phone (under the home button)? It kept me from opening the front panel more than 30 degrees or so, making the replacement impossible. Thoughts?

    Curt Jones -

    It looks like you might actually have an iPhone 5s, that is probably the Touch ID cable, check out the iPhone 5s Display Assembly replacement here!

    Sam Goldheart -

    Thank you, Sam!

    Curt Jones -

    What the heck only the top part of the lcd came off, NOT together with the shield plate. I used the stupid islack opener but only the very top layer came up. I don't see the battery or anything underneath because the shield plate is still in there. I can't even put it back closed and resuction it open because the shield plate is solidly stuck in and there is a cable at the top not settling properly. I have an open lcd top part of this phone. IDK man, PLEASE ADVISE.

    http://imgur.com/a/Qd8gp

    Gabrielle Rivera -

    Hi Gabrielle, sorry you're having trouble! This frame step was meant to show you how to avoid that issue, however, you should be able to use it to pry up the frame and shield plate. You'll need to carefully pry the frame itself up. Insert a thin prying tool between the black or white plastic display frame, and the metal phone case, to lift the frame assembly out of the phone body. If you continue to have trouble, try posting a question in our forum for faster feedback!

    Sam Goldheart -

    Hello, I've changed the earphone piece on my iPhone5 following this guide but I've skipped from step 9 directly to step 17 without problem, just shutting down first. Once opened I've tied the iPhone's body vertically to a small box with an elastic ring, the display assembly resting horizontal at some 90 degrees allows enough place to unscrew and replace the earpiece.

    Cesar Martin -

    So easy! My biggest problem is my eyesight. LOL! Had to wear glasses and use a magnifying glass. Battery took about 20 minutes. Re-installing the cover for the screen ribbons was the toughest for me. If you cant see...have someone hold the screen while you gently wrestle the screws, while holding the plate, back in.

    James Bridges -

    Worth adding to the main tutorial that the screen re-install must start from the top.

    donaldboscoe -

    I found the suction cup to be very effective in removing the front glass. Didn't take that much force to start to see the glass separate from the frame. It's a lot easier if you have a fingernail you can insert when you start to see the glass separate from the frame so that you can let go of the suction cup ring and grab a spudger to pry down one side and then the other.

    Eclectica -

    When reassembling, be sure to work from the top down to get the screen display in place. There are three hooks at the top that need to be seated otherwise they will bend and prevent the top from popping in flush.

    Wendy -

    Add a rubber band in the picture as mentioned, I couldn’t figure out how it should be positioned, also put in instructions that front panel does not have to be disconnected as I agrree with some of the other comments it is difficult to reattach the plate, although it may be a lot easier to pry the battery out without messing with the vertical top. Otherwise, great instructions, thanks Ifixit,new iPhone battery is wonderful. Bil - 1/16/2018

    William Doherty -

    The rubber band and soda can idea for holding the display in place at the proper position as depicted works great!

    Anthony Baldino -

    Thank you to everyone that has posted comments! It has benefited so many who came after you.

    hipplayer -

  10. iUKdGY1HZglUQ3hU
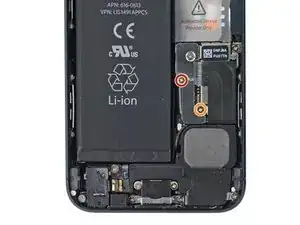
    • Remove the following two screws securing the metal battery connector bracket to the logic board:

    • One 1.8 mm Phillips screw

    • One 1.6 mm Phillips screw

    When reassembling, note the black jumper cable that runs next to the battery ribbon cable. Sometimes this jumper comes off its little groove and can make seating the battery ribbon cable tricky. The black jumper should travel up that little ramp and then curve to the right.

    DOMINIC INFERRERA -

    A note about screw management: ALWAYS remove screws from left to right if you are just putting them in order of removal on a magnetic trey, it helps with re-assembly. If you can, I recommend getting a magnetic white board and writing the size of the screws on it and categorizing by that, it makes it way easier and you won't ever have to worry about putting the wrong size screw in anywhere ever again.

    Addison Rasmussen -

    What length are these screws?

    Alberto Anaya -

    You actually need a Phillips #0000 not #000.

    Dan -

    Same for me for the 1.8mm screw.

    Sam Ashken -

    Any risk if I put wrong screw?

    syidan -

    So without ph#0000, i'm screwed, right?

    Osjua Newton -

    I managed to remove all the internal screws with PH000 that came with the ifixit battery replacement kit

    Gavin -

    It helps if you have fine pointed forceps to remove the thin delicate plate after removing the screws. long pointed forceps also help in placing the screws into their holes when you're putting everything back together at the end.

    Eclectica -

    Be very careful with the screws. I almost lost one of the battery ones. No replacement screws in the kit. You can buy them on the web, but that takes time.

    Javier Buzzalino -

    I can’t remove these screws with the tools provided. I’m returning this. Useless.

    Dorian Tireli -

    ifixit should include replacement screws in the kit. i lost one and the plate is now held with one screw. Also the video leaves ALOT out. Plus no need to take cover off; you can replace battery easily without doing that step.

    josephine ottman -

    A 0000 Phillips screwdriver did seem to fit the screw heads better.

    Robert -

    I can also confirm that the Phillips 000 that came with the kit did not work on these. I used another screwdriver from a glasses repair kit and that worked great. Seems odd they would include a tool that is unable to remove the battery connector bracket. I would have been up a creek if I didn’t have the right tool already.

    Clay Withrow -

    The PH000 worked fine for me.

    Gale Benson, April 28, 2018

    Gale Benson -

    The screws have, indeed, Phillips 000 heads. The problem can be that the Phillips 000 driver BIT supplied with the repair kit is of INFERIOR QUALITY! I have extensive experience with Phillips head screws, and no amount of firm pressure and proper driver seating would loosen the screws. I found a micro-tool kit I had for repairing computers, grabbed the Phillips 000 bit, and it worked PERFECTLY! The instructions are pretty good, but the QUALITY of the tools supplied is a real PROBLEM.

    Vard Nelson -

    I had this iPhone 5 battery changed previously at the Apple Store Manchester Trafford on opening the front it was clear that the red screw was missing and only the other screw was in place…. presumably an apple store screw up.

    ipodista -

    I used the same driver for both screws and it worked perfectly.

    Anthony Baldino -

    There must be a quality control issue with production of the PH000 bits. This is the third battery I’ve ordered, and I needed another kit because my pentalobe bit was damaged and no longer working. Anyway, the PH000 bit that came with my new kit is significantly larger than the one that came with my original kit and will under no circumstances remove the 1.6 mm screw. I pulled out the old kit, used the smaller PH000 bit and had absolutely no problem removing the screw. That would explain why some people are having zero issue with the screw and others are unable to remove it.

    Charles Czuhajewski -

    I noticed the 1.8mm screw had a slightly larger diameter than the 1.6mm screw. This may help if you (or I) get it mixed up during reassembly.

    Shannon B -

  11. iyXRDyJMpOEEGSPT
    • Remove the metal battery connector bracket from the iPhone.

    When I did this strep the battery connector (step 12) came with it. There seemed to be a bit of adhesive but it wasn't hard to separate them after the fact.

    davidmeyers -

    Note the long, thin forceps in the photo. These aren't included in every vendor's tool set that ships with the replacement battery and I found it a necessary tool not only for removing this particular plate, but also for positioning the screws back into their holes when you're putting the thing back together. If your replacement kit doesn't include that tool, they're only a couple of bucks and you can get them at any computer geek shop like Micro Center.

    Eclectica -

    When removing the connector bracket note that there is a small square black barrier pad on the undersurface of the bracket at the lower screw location. I suspect this is to prevent the metal bracket from touching the material below it. So, ensure when reinstalling the bracket that you reinstall the pad also.

    Anthony Baldino -

  12. qXDDSRXHVRxTcv5P
    • Use a plastic opening tool to gently pry the battery connector up from its socket on the logic board.

    • Be careful not to dislodge the small surface-mounted components surrounding the socket.

    • Be very careful to only pry up on the battery connector itself and not the socket on the logic board. If you pry up on the logic board socket or the board itself, you may destroy the socket or damage nearby components on the board.

    Oh my God.

    When prying, make sure you do it from the TOP or far TOP RIGHT corner using ONLY a spudger, and NOT like it is shown here on the picture.

    There is a component next to the battery connector that is easily torn off the board if you're not careful. It's a common mistake made by somebody who have never done the repair before. This will make it so the phone looks like it's charging but only ever discharges. The component is the filter for the gas gauge line which is directly to the right of the battery connector and is extremely hard to see. They look like a tiny-tiny silver cylinders and you would need a microscope to actually be able to distinguish them.

    Hope this helps.

    Haytham Alexander -

    HEED THIS WARNING!!!! Not doing so failed my entire repair. When I looked with an eye loupe, I could see one of these components by the connector had been knocked loose after I removed the connector. Pry from the top ot the connector or top right corner only.

    Rob Miller -

    The replacement battery out of the ifixit box: The connector may not fit immediately to the contact on the logic board. I needed to bend the stiff (metal-like?) cable quite a bit to find a shape of the cable that allows the connector to fit to the contact.

    Salta SMR SAS -

    Ditto the comments by Salta. I compared the iFixit battery cable to the battery cable of the one I had removed and found that I needed to kind of crimp the cable a bit where it needs to fit between the battery and the connector. It's all quite stiff. Make sure the connector snaps into place!

    gobluethunder -

    Re-attaching the battery connector was tricky. Make sure you align the pins well. Otherwise you may bend them and that could be a big problem.

    Javier Buzzalino -

    Why do I need to take the battery out? I replaced battery a few weeks ago and it seemed no need to disconnect the screen as well.

    They seem recommending taking out connections more than necessary. Anyone let me know why leaving the battery there would make a problem for replacing the screen.

    kimgcp08 -

  13. l6XiGHn1DtwMvkHW
    • Remove the following screws securing the front panel assembly cable bracket to the logic board:

    • Two 1.2 mm Phillips screws

    • One 1.6 mm Phillips screw

    • This screw tends to not be attracted to a magnetized screwdriver. Take care not to lose it when removing, and make sure it gets back into the right place—a magnetized screw may interfere with the compass.

    Anyone have any idea why the 1.6mm screw is not magnetic? Just wondering why this screw seems to be made of aluminum, its the first screw of its kind as far as iphones go.

    crevz -

    The compass is right next to it.

    Tom Chai -

    I'd recommend if they made that clearer in the guide, luckily I put them back in right, its the one with the little bit of blue on it if i recall that isn't magnetic

    Matt -

    is it necessary to disconnect the front panel assembly cables fore removing the battery ?

    or can you leave it on wile replacing the battery ?

    aardappel -

    I just finished this process using the battery replacement kit from ifixit and it went easily. I did NOT remove the entire screen but rather just had someone hold it at less than a 90 degree angle until I got the battery out. I found it took a while to slowly pry the battery out. Take your time and alternate between gently using the plastic tool and pulling on the plastic pull tab that says "for authorized use only" or something like that. It was MUCH easier than disconnecting the entire screen for the process. Hope this helps.

    david -

    Rule #1 on electronics repair methodology: to prevent damage to the electronics, power should be the first thing to be removed and the last to be restored. I'd disconnect the battery before touching anything else, a slip of the screwdriver or a loose screw could cause a fatal short circuit.

    andrewcilia -

    It's no need to remove front panel to change battery. I just skip to Step 10 and successfully changed battery, and it works well. And THANKS TO ifixit.com, IT IS AWESOME!

    sorrowboy -

    I skipped steps 6-9. leaving the screen attached to the phone makes it that much easier and quicker to repair

    Frank -

    Mon téléphone a pris l'humidité et présente un fond d'écran d'aspect granuleux. Du coup l'éclairage n'est plus uniforme, nuisible pour une bonne lecture de l'écran.

    J'ai démonté l'écran, une pellicule grasse et collante entre le LCD et la plaque métallique. J'ai nettoyé à l'alcool. Tout remonter avec la crainte que le téléphone ne fonctionne plus.

    Le téléphone s'est rallumé, tout fonctionne normalement mais j'ai toujours ses traces sur le fond d'écran. Il faut le changer!

    Mes difficultés étaient de remettre les petites vis aimantés, difficiles à remettre!

    Merci à IFIXIT pour ce tutoriel très explicite.

    Patrick Rosa, june 23 2014

    pkrosa -

    So, of COURSE I dropped the screw that you are not supposed to lose. I was being careful, but as I did not want to lose track of it, I attempted to put it back ing the phone FIRST. Bad idea. This makes the plate kind of springy, and my screwdirver slipped, and the screw popped up, spun in the air, fell between my legs, bounced off my padded chair, and clattered around on the floor. I searched for an hour, and could not locate it. BE IT KNOWN, at least in MY CASE, the screw WAS INDEED attracted to my magnet (I keep a powerful round magnet stuck to the shaft of my drivers to provite the magnetism, far more powerful than a regular magnetic screwdriver. This being the case, I WAS able to provide a substitute fron a bag of iphone 4 screws, and my compass calibrated flawlessly upon power-up. YOUR MILEAGE MAY VARY, but I thought I'd add my experience.

    stevesontheroad -

    Be warned, the 1.6mm screw is exceptionally easy to strip. I haven't been able to get it out yet (already tried rubber band trick and a few others) and am on the verge of giving up. The #00 screwdriver that comes with the set did not do a very good job of catching.

    joseparra947 -

    Were you ever able to get it out? Mine seemed stripped from the get go, rendering my attempt to troubleshoot my blank screen fruitless. Rubber band, glue, flat-head all did not work for me. Buying a soldering iron tomorrow to try that.

    randypalmerjr -

    I did the repair without disconnecting the screen. I skipped down to step 13 and carefully held the screen while removing the battery. Adds a small element difficulty, but helps prevent all the issues others are having when reconnecting the screen.

    CHRISMIYAMOTO -

    The non-magnetized screw was very difficult to install. This is how I ultimately succeeded:

    Install the two magnetized screws first. They are easy because the magnetized screws will stick to then end of the screwdriver. They will hold the cable bracket in place.

    Place the third, non-magnetized, screw on the center of the cable bracket. Take a toothpick and nudge the screw toward the screw hole. The threaded part of the screw (the shaft) has enough weight that it will fall into the hole, and the head of the screw will be pointed upward. You will then be able to use the screwdriver.

    alsmith1928 -

    Put a piece of tape on the table sticky side up. Set the screw on the tape head down. lift the tape and guide the screw in place. drive the head of your screw driver through the tape and tighten screw. lift off tape. throw away. :)

    rdgentry -

    The tape trick works well. Another way is to dip the screwdriver in alcohol (isopropanol, do NOT use water) and put the screw on its tip. It will be held there until the liquid is evaporated, which should be sufficient to put it in place.

    Kater_S -

    One of the screw is completely stuck and I cannot remove it! What can I do?

    stefanoclearmounth -

    When putting it back together, I replugged in all three of the ribbon cables and powered on the phone to test before putting everything back together. All was OK except for the Home button, it had no effect when pressed. I ended up unplugging and replugging the 3 ribbon cables a few times and retrying. I then cleaned the connectors using a can of compressed air, screwed the little silver cover back on and snapped the whole phone back together, hoping everything would be fine. It was. I don't know if the problem was a dirty connector, or if you need to close the phone to make the home button work again.

    I recommend wiping the plastic prying tool after lifting the screen off, it gets dirty from the gunk build up and some of that could eventually fall inside the phone.

    My battery was really stuck, so much that the plastic tab broke when pulling. I followed someones advice to heat the back of the phone with a hair dryer, still wasn't super easy but I managed to get the battery out, only deforming it slightly.

    grosstua -

    The contacts for the home button are on the phone base so the screen needs to be in place for the button to work..

    Liam Carson -

    Step 9-12 are totally unnecessary unless you need to replace a broken screen. All you need is to keep the front panel in a vertical position once the front is open. The battery can be removed without taken out the 3 connectors which by the way the screws are very very tiny and difficult to put back.

    rich1812 -

    I completely agree. These are unnecessary steps. Might be a little easier to pry the battery out with the display completely off, but not enough to make it worthwhile IMHO.

    davidmeyers -

    Is the 1.2mm a #000 or #0000? I have a small set and can't get one of these out. The instructions say a 1.2mm, the tools list shows #000, but my set says #000 = 1.5mm.

    Kevin -

    1.2 mm refers to the length of the screw (from head to end), the screw head size is compatible with a Phillips #000 driver. So as long as you have a #000 you should be set! Good luck =)

    Sam Goldheart -

    Invest in and use some colored Sharpie Pens... I color the tops of the screws orange and red etc. to match the colors of the circles in this guide. Then when I go to put them back in there's no doubt as to which screw is the correct size.

    Pete H -

    What an idea, lol.

    bigfnevil -

    frustrated...screws to battery holder is stripped, now what?

    Martin Gonzalez -

    Maybe a small amount of loctite. I noticed the P2 screws holding the display down had a small amount on my iPhone 5.

    Steve Heigh -

    Como se ha comentado más arriba, no es necesario desmontar la pantalla, yo he sustituido la batería aplicando calor con el iOpener y siguiendo atentamente la guía. Resultado óptimo.

    Cesar Martin -

    Yes, right! I, too, do not see the need to remove the LCD display at all; except, when one is replacing a broken display. The battery is ready for replacement once you had removed its bracket.

    valuesphilippines -

    I found that it wasn't at all necessary to remove the front glass. I did need to use a hair dryer to soften the glue holding the battery, but I simply laid the phone down on the face glass and blew the hot dryer on the back for a couple of minutes at almost point blank range. Then I simply held the phone open with one hand, making sure the front glass never went back more than about 80 degrees (no need to stretch it all the way to 90 degrees), and used my other hand to work the spudger around the battery, making sure not to touch any delicate electronics in the area. The top right corner gave away first and then I worked it down from there and the battery came out pretty easily. The trick is to use the hair dryer for a few minutes beyond the phone being too hot to hold in your hand! (you might need to use a towel to pick it up when you pry the battery out.)

    Eclectica -

    The battery of my 2012 iPhone 5 was working well but started to inflate pushing the front panel assembly out from the case. Replacing is faster and easier than on iPhone 5s. No need to remove the front panel completely, just holdig it at near 90º is enough but needed to warm the case to soften the battery glue. Thanks to iFixit for this guides and you guys for your comments.

    Cesar Martin -

    As other people already indicated, steps 13 to 16 are not needed and risky. I asked another person to hold the front panel at 70 degrees while changing the battery.

    Javier Buzzalino -

    I rushed in and did steps 13 to 16 without reading the warning. There were some unexpected events that happen. The short version of this story is my screen comes up with funny looking grey squares but phone is still usable. I don’t care as my main phone is an iPhone SE and I bought the battery as a learning exercise. Plus iOS 11 doesn’t install on an iPhone 5 so it’s days are numbered as a productivity tool.

    Long version. Dissemble was easy. I made sure I had used the phone so the battery was warmed up . First problem with reassembly is in step 13 the bottom most 1.2mm wasn’t biting and screwing in. So it looked like the top of the hole got threaded. Also a screw fell out of what I think is the loud speaker. That was unexpected. This iPhone 5 isn’t my original, it was a replacement phone that came in a white phone that the Apple Store gave me when my original phone from 2012 had 2 recalls on it. So I strongly suspect this is a factory refurbished phone and not 100% mint off the line.

    Ignatius Tse -

    I found I didn’t need to remove the front panel at all so I skipped this step 13 through step 16. These steps seem to add potential problems.

    Anthony Baldino -

    Incredibly helpful tips & comments. Very grateful, thanks!

    Jay -

  14. X3Ph4Rdtaw3RBH3Y
    X3Ph4Rdtaw3RBH3Y
    Try4npTUTKxKacYo
    • Lift the display cable bracket toward the battery to unhook it, and remove it from the iPhone.

    • During reassembly, clip the left-hand hooks under the logic board and lower the bracket towards the outside of the phone.

    My iPhone 5 (1428) model don't has this bracket and replacing the earpiece don't fix my problem (don't hear anyone).

    plyhell -

    You might check that front camera flex cable.there can be a damage also where war speaker connects

    Vinayak Devadiya -

    Great Guide, Any idea what else could be wrong if Ive replaced the screen with a working 1 and the phone still has no display?

    Thanks for any insight in advance.

    Raistlin -

    When you reverse step 7, make sure you clip the little hooks of the bracket under and then lower towards the outside of the phone. If you don't, the phone won't snap back together properly.

    Dirk -

    I've misplaced this metal plate AND the three screws and two pentalobe screws. I think my wife threw out the ziplock I had them in. Any chance you can tell me where to get them? thx

    Don -

    Don't forget to clip this in flush, my phone couldn't get a cell signal when it was slightly out-of-place.

    julian -

    Remember to put this plate back such that it's sitting evenly. The side towards the battery some times tends to stick up a bit, this in turn will put pressure on the backplate of the screen. After putting everything back together, you see a small yellow smear just to the left of the battery % indicator, you have not put that plate on correctly. Open up the phone, remove that retention plate and put it back such that it sits properly!

    AGS -

    Opened my iPhone 5 etc. When reassembling, I notice the screen doesn't stay clipped into the back tray and is raised a couple of mils.

    There is also a new brighter spot on the screen. Any ideas anyone?

    Ian Campbell -

    I really wonder about the wisdom, and risk, of removing this upper plate in step 14 - unless I missed it, those three cables are NOT connected to the battery in anyway - and the chances for stuffing up said cables re-assembly are moderate to high! I can see that one would have to be careful taking that bracket and disconnecting those three cables ( I certainly was), but it looks to me like there's a case for just undoing the battery bracket & screws and carefully - very carefully - with great patience and some good spudgers, esp the black ones we use in desktop iMacs, - flat one end; pointy the other - plus the usual blue plastic ones and even a guitar pick - prying the battery out from its hideyhole! Much less stress regarding the upper bracket and the three cables while only a bit more stress over releasing the battery from its sticky grip! Anywho, I might have to stand corrected - but next time I'll go for this abreviated method. :)

    amicuset -

    please do not do this part....after you remove the bracket over the battery don't mess with the 3 cables at the top or remove its bracket. Just carefully remove the battery and insert the new one. the idea of using the rubber band helped a lot with the entire procedure and i did it in one very easily. thank you ifixit and most importantly the comments. Make sure to read all the comments before doing each step even when you r reassembling.

    Anderson Ashby -

    I confirm the previous post! It’s the third times I change the battery and I just realize this time that it’s completely useless to remove the front panel. You just have to be careful if it’s your first battery change because the original one is strongly sticked on the board. Don’t be brutal! Proceed slowly.

    I think that lots of problem may occur when you reassemble the front panel cables. So just don’t disconnect them !

    Ifixit is great. The comments are usefull too.

    jproubin -

    I also made the mistake of trying to remove the cable bracket. Once again I had to resort to another screwdriver since the included 000 in the battery kit did not work on these. But once I got the three screws removed I noticed the bracket’s top corner (near the top of the unit) was stuck even when I properly pulled the bracket back to unhook the lip from the logic board. I tried pulling it free every which way but nothing seemed to work so that’s when I checked the comments here and realized I shouldn’t have even bothered trying to remove it.

    Clay Withrow -

    Can I leave the bracket out? Does it have any shielding or antenna function? It’s hard enough to get the replacement screen in without it…

    Andi -

    I agree, it is not necessary to remove this cover or the cables underneath. nothing is covering the battery so just pry it out. I had the battery changed in less than 10 minutes.

    chriswood -

  15. qyrrmC3tPAKqsfDL
    qyrrmC3tPAKqsfDL
    g1qXXgcNiSkruVnO
    ZW43Q1f4ipOsacub
    • Make sure the battery is disconnected before you disconnect or reconnect the cables in this step.

    • Use a plastic opening tool or a fingernail to disconnect the three front panel assembly cables:

    • Front-facing camera and sensor cable

    • LCD cable

    • Digitizer cable

    • When reassembling your phone, the LCD cable may pop off the connector. This can cause white lines, or nothing at all to appear when powering your phone back on. If that happens, simply reconnect the cable and power cycle your phone. The best way to power cycle your phone is to disconnect and reconnect the battery.

    The part itfixit sent only has two cables: the digitizer and LCD are combined into a single cable. (And the guide is great! Thanks!)

    baileyswanson -

    After replacing the screen I was presented with a no image screen (but backlight was ok), so I refited the shartered one, same issue, no image, but backlight. thinking I might damage the pcb, I just did a power cycle (disconnecting the battery) and now it's fine.

    so... always powercycle :)

    poseido -

    Be very careful here, at this point the phone power is live! a slip of the connectors or a loose screw could let the magic smoke out of the chips (chips won't work without their magic smoke, you know :-)

    I'd disconnect the battery before messing with the connectors.

    andrewcilia -

    This is a troublesome step, since the LCD connector is particularly difficult to reconnect, and know that you've gotten it on. And thanks to the note claiming that if it's disconnected, if you might just get a black screen, you're left with having to disassemble the entire unit again, without knowing if it's powered off (since you presumably tried to power on). That's also nerve-wracking. I had this problem and disassembled and reassembled the entire phone, only to have the problem again. On the second try, I plugged the phone into power, and after a little bit, got the dead battery screen showing. So the problem was that the battery was discharged, not that I'd biffed the LCD connector.

    Adam Engst -

    A tip for knowing when your device is powered:
    Activate VoiceOver before you start. this can give you audio clues with the volume control.

    I did not do it on purpose, but it saved me, because I got the black screen.
    I also had to re-insert the display cable for like 3 to 4 times until it worked for me.

    (Note: Check if the display port cover is hinged on the battery side, otherwise there will be room for the connectors to come loose.)

    Eric Nöske -

    The hint to disconnect the battery was very useful for my successful repair. After rebooting the phone everything was working just fine. Thanks!

    Benjamin Richter -

    BE CAREFUL HERE.

    Take a good look at that camera loosely sitting there. It is possible that it will be slightly offset when shutting the assembly back into place. This causes it to not properly focus on closeups. If you don't move it around you will probably be okay.

    Also, look at the display assembly, it has three small locking tabs that can bend easily if not pushed in at the right angle into the iPhone frame. Be careful not to be too forceful. Good luck.

    info -

    I am having issues removing the white lines on my screen. I made sure to connect the digitiizer connector was seated all the way and I also power cycled my phone several times. Anyone else having this issue?

    eric51redding -

    If your lcd is properly fine then it can be a LCD Ic issue on pcb

    Vinayak Devadiya -

    When I was reassembling this the front facing camera cable was a bit longer than the previous one. I had to kink the ribbon cable a bit to get the connection to line up. Everything seems to be working but I wanted to note that the part might be slightly off spec.

    Aaron Martina -

    I am very satisfied with the replacement display assembly (including FaceTime camera and Home button) iFixit sent. It arrived a day early, fit perfectly, and has fixed the color banding, cracked screen, and scratched edges very well. In addition, the home button now has a much crisper "click" to it, more like the new MacBook's keys vs those of an older MacBook Pro.

    Nathan Jones -

    This step is not needed to remove the battery and complicates the process by having to reconnect the sensors.

    nicholaskan -

    if my lcd metal plate is scratched can i replace it to remove the lines or do i need a new lcd

    brittany stapleton -

    When I started the phone again, there was a grid pattern and touch was not working consistently. It turns out there were two separate problems. (1) We had over-handled the cables and a quick swab of alcohol helped remove the oil from the connections. (2) The first connection is really tricky to get right and comes undone easily during the final reassembly.

    Jeannie Crowley -

    I had this problem too (not the oil though). When I first restarted the phone, I had white crosses over the display, and the digitiser didn't work. The only way to shut down the phone was to hold the home key & power key for 8 seconds until the display went black. Reseating the LCD & Digitiser connectors, and power cycling by reconnecting the battery fixed the problem. Hope this info helps others.

    Tom Hannen -

    In the image you can see the camera has lifted out a bit. Mine did this too, because the old screen had levered it out. To push the camera back into position you need to insert a fine tool behind a small metal spring contact because it catches on the camera's casing otherwise. This little spring is to the left of the metal case, between the camera and ribbon.

    pauldevans -

    Great pics too. Pls confirm if the three photos in Step 15 only show removal of 2 of the 3 connectors mentioned in the instruction (and colored bullets). I could not tell which was the third one to remove in the three photos. Thanks!

    gandarlmg -

    So I keep getting the "white lines on the LCD" bit with no resolution. I've tried reconnecting the connector like 6 times and power cycling and I get the exact same thing every time? Is it possible that the replacement screen has an issue?

    Jared Spencer -

    May I ask what the 4th little connector is that comes from under your battery and connects to the board mine came undone during repair and won't go back in

    Cameron -

    Watch the soft pad between the rear camera enclosing and the top side of the frame, especially when reassembling. After replacing the battery, my camera pictures gradually showed lots of dust spots. I opened the device again and discovered that the pad had been displaced. However, I am not fully sure if that is the reason for the spots.

    Kater_S -

    On reinstall, I can't get the connectors to line up and the replacement screen has 3 connectors where as my busted screen had only 2. The cables on the replacement screen are too short? Is that even possible?

    maryann miller -

    I’d say removing the screen is BS. I realized that I didn’t have to remove my screen cable as I was able to flip the screen vertically while I take the battery out. Removing the screen cables causes more problems- you may end up with white squares on the top of the screen which seem to expand over time. Also it is very easy to bend little metal legs on the socket when prying the connector.

    kimgcp08 -

    totally agree, no need to remove the screen. It means you will have to do everything with only one hand (the other one is holding the screen), but you skip so many steps that overall it’s well worth it.

    Metafisco Parapensante -

    It is very important to make sure the cables are fully seated. When I finish assembling the phone I too had a vertical white stripe on the display. I disassembled the phone and reconnected the cables very carefully, and also made sure the shield was properly seated. When I turned the phone back on I found a very faint white line, but after doing a power cycle it disappeared to my great relief. Also, I would definitely recommend removing the display because it’s so hard to get the battery out you don’t need the extra risk of damaging the display.

    Bill Roughen -

    After replacing a friend’s iPhone 5’s rear camera and reassembling their phone the screen displays verticle black lines on the right side now like this: http://i1091.photobucket.com/albums/i393...

    Anyone else have this problem? I didn’t think about cleaning the display connectors with alcohol at the time.

    Ken Shimabukuro -

    Also, when the battery was too low and before the display produced vertical lines the display showed half of a low battery symbol:

    http://i1091.photobucket.com/albums/i393...

    Like the right side of the display was blank.

    Ken Shimabukuro -

    On reinstalling the front panel assembly, I had a difficult time lining up the digitizer cable. After struggling with it for a while, I noticed that the plastic shoulders of the small mounting bracket at the ends of the pins had become rounded over. After cleaning these up with a razor blade, everything slid together perfectly. Thanks so much for these guides and all the helpful comments!

    Dave Martin -

    I have done all these operations 6 times to get back a good displaying. The last was the last: nothing on the screen now. It is now black, no sound, no vibration, BUT the iPhone show up in iTunes O.O

    iTunes asked me to update the iOS to 10.3.3 but it’s already done. I clicked OK but nothing more. Still black and quiet.

    The new battery is 100% charged.

    What is my problem, please help :-(

    franck.bremeault -

    I found the part who was deffective: the connector of the screen has broken due to too much movements. :-( Screen is perfect and clean but dead.

    franck.bremeault -

  16. kntTmSteECxqglDO
    • Remove the front panel assembly from the rear case.

    My display was not turning on and my home button was not working (I verified this by trying to activate siri which didn't work). When I replaced the display assembly everything works except for the home button. Since this assembly comes with the button and the ribbon cable, I'm not sure what else can be wrong. I checked the contacts on the phone and I see the little copper 'pins' sticking out. I can't tell if they are making contact since the display has to be closed, but it appears they are lined up correctly. Does anyone have any suggestions or ways to test the contact pins? Could the home button on my replacement be defective? I've already emailed support, but just curious if anyone has any suggestions I could try while waiting to hear back from them. Thanks! By the way, SUPER grateful the rest of the display works. I can now back up my phone and can probably deal with a broken home button if I need to. Woohoo!

    jhagerman -

    I'm having issues where the screen jumps around when you get a finger near it. I'm reading it might be grounding but no idea where any tape could be applied. Replaced the screen twice thinking it was a bad part. Now, I just don't know.

    Ana Van Meter -

    My front camera does not work. I took apart and ensured the connection several, several , several times.... no front camera... anyone else have this issue?

    Patricia Young -

    Try replacing the camera and flex assembly.

    Greg M -

    No info on removing the home button?

    T S -

  17. UrOWXcDTqyiuTZ2h
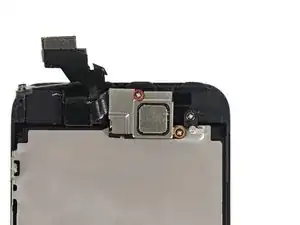
    • Remove two screws securing the front-facing camera bracket to the display assembly.

    • One 4.1 mm Phillips screw

    • One 2.2 mm Phillips screw

    I just replaced mine on 10/6/13. WARNING: the black plastic spacer for the upper screw could come loose when taking the bracket off. Be very careful.

    cappich -

    Can anybody measure the spacer height for me? I have the phone where it is missing. I have even been to service place to ask for it, and they claim there is absolutely no other small part under earpiece speaker. I guess I'll have to make some replacement from hard plastic. I can't seem to find it in any online store.

    Adam -

    You can find it on eBay. It is sold along with the two clear plastic pieces.

    Greg M -

    The 4.1 mm screw has a blue line on it. This may help with organization.

    Timmy McInerney -

    reassembling the upper screw ( i guess i fastened it too tight) i ripped off its base on display plate… there was no spacer maybe because of a previous repair.

    Emanuele Carucci -

  18. 13NuUOKJUxcapPv5
    13NuUOKJUxcapPv5
    C51eeYvi2dfBYaIF
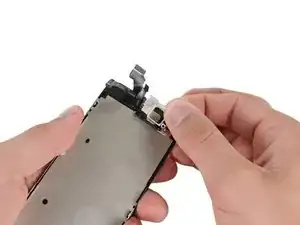
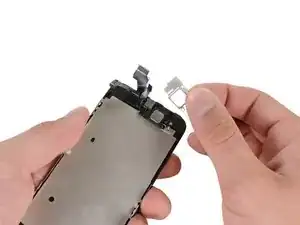
    • Remove the earpiece speaker bracket from the display assembly.

    There is a tiny black plastic spacer under the top screw, be sure not to lose this. It is easier to reinstall it after all of the parts have been transferred to the new screen including the front facing camera assembly. The spacer has a small cutout in it, which is positioned to the left side. Put this spacer in as the last step before reinstalling the metal speaker bracket, otherwise you risk losing it moving the screen around reattaching all the parts to the new screen.

    crevz -

    Hello, Do you have a photo of this as I'm still unsure to where it goes.

    Thank You

    Jordan Baker -

    ehm, you can leave that out just fine

    Fixandinstall -

    One additional note to the above comment, the gap in the little spacer goes on the left, but the flat side of the spacer goes on top. Took me a few minutes to figure out that orientation.

    vhfreak -

    what happens if i lost the small plastic spacer? and where can i buy it? ty

    HandyGarage -

    Same here and could not find answers. Basically without this wicked little plastic bastard I can only make calls via headphones? What a faulty design.... Maybe loosening the screws can help? Or using something plastic or paper on that place with similar size?

    More annoying than soldered parts I swear...

    szikszai70 -

  19. IZYXyFLf3OoXZJSt
    • Remove the earpiece speaker from the iPhone.

    There a small square black plastic "gasket" next to the 2 copper contact points. Be sure it is back in place before putting back the screws holding the earpiece speaker in place.

    Rany -

    It is a site of iPhone 5 Earpiece Speaker Replacement .I have visit the site Its photos are very nice and relevant like a site <a href="http://www.reasonablegifts.com/">Iphone 5 cases</a>

    Lee Ratliff -

    Took about 2 hrs to finish. First I left the red film on after placing the LCD plate. I unscrewed and took the film off. The tough part was placing the front camera and earpiece speaker. It took me sometime to understand that one of the cables fold to sit in its position. Tested the camera and phone call. All seems to be working fine.

    sathyajsn -

    I torn (ripped ) my earpiece speaker contacts ( two metal dot ) , how can I repair them ? Thanks

    bulentkucuk -

    You will need to replace the flex assembly.

    Greg M -

  20. UmppVqlwI23VGnDM
    • There is a small, black plastic spacer underneath the metal bracket at the upper screw. The upper screw goes through the metal bracket then through this plastic spacer.

    Use a hair-dryer on low heat to loosen the glue around the speaker cover. Also, don't forget the small clear plastic holder for the camera

    Tady Walsh -

    This should really come after Step 16

    Drew18 -

    This seems to be in the wrong order. The picture shows parts removed that are instructed to be removed in later steps.

    Kenny Evitt -

    I don't know what's going on here. First, it seems like this instruction is in the wrong place -- it should be a few steps later. Second, the phone I was working on did NOT have the piece described. I don't know if that means that the phone was screwed up before I got it apart, or whether there was some change to the design to the iPhone that some models have this piece separate, and some models don't. As far as I can tell, the proximity sensor works after reassembly.

    Adam Goldberg -

    I replaced my battery and ever since then my front facing camera does not work and after a while my back camera is not working nethier does the microphone where I hear people talk on the phone why is this please help

    Kulli Kalervo -

    When replacing the battery, be careful not to open the LCD more than 90 degrees. You may have damaged a flex cable assembly or possibly the connector may not be seated correctly, although unless you removed the connector cover, that is unlikely. Or if you had to pry the battery out, you may have damaged something else. Since the cameras are on different connectors it doesn't sound like something simple.

    Greg M -

    This step should be after step 20. It is fitted under the earpiece speaker,

    Herbert Schröder -

    I believe you (and the other commenters who pointed this out) are correct! I went ahead and shuffled the order of the steps. Thanks for the heads-up.

    Jeff Suovanen -

    I agree with you guys. This step should be after the camera and sensor cable are removed. It's much easier to get at. Cheers fellow fixit's

    Wayne Lyell -

    did you sell the plastic spacer ? if yes, how much?

    Hrahmi -

    you can also see the front facing camera soccer/positioning piece of plastic (clear plastic circle) this needs to be removed also and placed into the new display.

    laptop -

    Be VERY careful with this spacer! When i picked it up with the tweezers to put it back in, it shot out of the tweezers! I finally found it - but it was a tense half hour!!!

    Theresa Biggs Greenan -

    “The upper screw goes through the metal bracket then through this plastic spacer.”

    doesn’t the screw go first through the shield, then the speaker, then the spacer then the bracket? The wording here is confusing.

    garegin -

  21. MRgyQiHJJHLoiO1s
    MRgyQiHJJHLoiO1s
    my5hfVLkf2NCwMnN
    • Starting under the earpiece speaker contacts, use a plastic opening tool or the tip of a spudger to pry the front facing camera cable out of the display assembly.

    • Caution: Removing the earpiece speaker contacts can cause them to tear. Use extreme caution when peeling the contacts up.

    Sensor cable breaks very easily, take it off with extreme caution or you will break it like I did. Easy to fix though, and only $8 on ebay

    Bill Snow -

    Pay VERY close attention here during teardown. Reassembling these components is one of the trickier steps.

    NatCk -

    This is very difficult for me to remove. The top-right portion is *very* firmly attached.

    Kenny Evitt -

    I'm a little bit suprised by the comments here on this step. I used a hairdriver, and a sharp scalpel. With extreme caution I got it off in 1 minute. And its in perfect condition. I guess the adhesive may be stronger on some than others. I started on the right by the right pole, and worked my way to the left. Remember to warm it up enough, so that the adhesive is weakened. Waiting to long just make it strong again.

    Kenneth Hilstan -

    it was at this point that the plastic spacer jumped out for me. thanks for all the comments to keep an eye out for it

    Eoin -

  22. SXKOPvCNqy3YplIB
    SXKOPvCNqy3YplIB
    qVisiBIVoffn1jmU
    • Remove the front-facing camera and rear microphone assembly.

    • If you are installing a new part, your new part may have two tabs with holes in it used for manufacturing purposes. These tabs can be cut off with scissors.

    • There is a small, square plastic and metal holder for the proximity sensor. This holder is essential for the proximity sensor to function correctly.

    • If replacing the proximity sensor or camera make sure that the holder remains adhered to the back of the display. If it comes off with the old proximity sensor, remove it from the old sensor and use a tiny bit of adhesive to re-attach it to the back of the display.

    The replacement display assembly that I ordered did not include the circular plastic piece that holds the front facing camera in place. I used tweezers to remove it from my old screen. There is a similar piece of plastic (square) holding a separate piece of the microphone assembly in there too. Also, there is a very tiny opaque white sheet of plastic covering the proximity sensor in the original iphone display that I used tweezers to remove as well. That tiny black plastic spacer threw me for a loop when I found it on the table. I couldn't find a good picture of exactly how that is supposed to fit in there...I think I put it back in the right spot...

    Ryan Griswold -

    The display that I received from iFixit Store didn't include them either. I swapped them to the new display by heating up the glue using a haidryer. Next step, I pulled the circular facetime camera plastic piece out with a tweezer. And the metal sensor square bracked was removed by cutting lose the glue with a razor blade. Re-apply glue on the new display!

    Spacewide -

    The front-facing camera and rear microphone assembly I received didn't include some of the foam protectors that are on the original assembly. I was unable to remove those pieces from the original assembly so completed the install w/o the foam pieces. The phone works ok but I would rather have been able to apply the foam pieces. I suspect the foam is there to keep everything in place and maybe help keep the connector from popping off.

    jharrison -

    Does anybody know what that little white piece of tape is that covers the proximity sensor? Is it some type of filter? I know the proximity sensor won't work if you do not have that, but I can not find any source on what it is or where you can purchase a replacement at in case the original screen doesn't have it already. Perhaps there is something you can put in there as an alternative?

    Rob -

    According to the Apple inc. technical drawing of the Iphone 5, it is the Ambient Light Sensor, not the proximity sensor.

    I have problem to make my light sensor back to work after replacing the screen, even I have transferred the white little filter from the old one.

    Hicks -

    The tiny spacer of brown plasti sits on top of the thread of the screw right above front camera where the metal cover attach. It took me a while to discover that cause at first i thought it was a frame of one of the sensor on the ribbon cable. It only stays on place in one position, so try rotate it if you find it hard to put spacer, ribbon, metal cover and screw.

    Sara bulho -

    I am stuck putting the camera back in. it does not seem like there is anything keeping it in, nothing 'snaps' back in except the one little 'knob' on the ribbon . The proximity sensor, the camera, the little plastic piece that supposedly holds in the camera all seem to be loose. I had to walk away, I felt like all the pushing and moving around was damaging it. any suggestions would be helpful. thanks

    Tea Drew -

    I had the same exact problem, although i noticed in the old digitizer i took off it had a plastic housing for the camera, so i put a tiny bit of glue on that and stuck it in. Although im still stick with the proximity sensor and where and how the black square pieces go on. And also how are we supposed to attach the flex cables when we took off the adhesive with the disassembly!?

    mkocher10 -

    When you are putting the camera assembly back together bear in mind the order in which the cables re-attach to the main board. I had to redo a couple of steps as the ribbons were in the wrong order in a stack.

    Daniel Hatton -

    When removing the sensor/front assembly, there will be a small, black, plastic spacer which you'll easily lose. When assembling, the spacer should be between the front facing camera and the 2 contacts. Make sure the flat side is on top (i.e. facing to the back of the phone when assembled), and the opening is towards the phone bottom and towards the opposite side of the volume buttons.

    Furthermore, my replacement screen did not come with:

    1. The translucent, circular protector for the front cam

    2. The square metal bracket for the sensor

    3. The small white plastic sheet in front of the other sensor.

    I manually transferred those parts to my new display assembly using a hairdryer (to loosen up the glue), tweezers and some ordinary glue (the ones they have in kindergarten, not the permanent glue)

    Christiaan -

    how did the ordinary glue work?

    daddy2caius -

    It is too sad - I have tried it three times now! I cannot get the proximity sensor to work. I have salvaged both the white sheet and the metal frame from the original display, as they were not included in my replacement. Still no luck! I have found a thread about the iPhone 4 display replacement, where someone suggests to use a black pen or black tape to somehow darken the screen (as far as I understood it). Is there something similar or other useful tips for the 5?

    McP -

    I don't know if this helps but you will notice on the transparent plastic camera protector there are two notches specifically spaced on the deeper side of it. This allow it to slot (albeit unsecuredly) onto the camera itself.

    The other part that threw me was the noise cancellation tube thing for the mic (or the mic itself) fits into a rubber hole quite uncooperatively.

    Dai -

    I have been led to believe that there is a "cover "or "gasket "which goes over the proximity sensor. I have spent several hours on line trying to source this gasket but I have found no source for it. My research indicates that the proximity sensor will not function properly without this gasket. My own iPhone 5 is missing this gasket and the proximity sensor has very little range. I am desperately looking for a source for this part.

    Tom Brandolini -

    Right hand screw, boy what a pain. I felt that I would have to abandon the entire project after reaching so close to the end because I will end up stripping the screw. Finally I had to wiggle (gently) home button bracket back and forth after removing the left side screw to loosen the right hand screw a bit.

    remaneeraj -

    This picture shows where the small, black, plastic spacer should go:

    https://d3nevzfk7ii3be.cloudfront.net/ig...

    Carl -

    On reassembly the microphone nozzle really didn't want to go back into the new rubber seat, and then the ear-speaker had the same problem. I found holding everything in place and squeezing the whole assembly together with the backing plate before screwing was all i could do, and hopefully that works ok. The speaker phone function never gets used anyway, and the ear-speaker is quite loud.

    pauldevans -

    What happent if cut sensor cabel ?

    El Amari khaled -

  23. k5TJ2BKnK1XUk6Sj
    • Remove the two 1.3 mm Phillips #000 screws securing the home button bracket to the display assembly.

    • NOTE: When reinstalling the two 1.3 mm Phillips #000 screws, take care not to over tighten them as they can penetrate the other side of the display.

    Home Button Ribbon Cable is very difficult to remove and easily to tear off.

    Be careful when you try to remove it

    Mash Love -

    It might just be bad luck, but the left screw on the home button backing would not budge and I ended up stripping it. I just had to order a new home button & bracket, fortunately. I also experienced the inverse, where the screw wells of the new screen on another phone did not hold the screws down. I wouldn't encourage you to try this at home, but a little super glue can go a long way!

    Derek Carper -

    Use 99% Isopropyl Alcohol (or as high % as you can get) to act as a lubricant for that stuck screw holding the left side of the home button. Like above poster said, I had the same problem with that screw. The alcohol works wonders! (I work in a clean room where lubricant is not allowed, so Isopropyl Alcohol is commonly used for this purpose)

    stretchymantis -

    I heated a small hand towel in boiling water and double sealed it in a plastic bag container, I put it over the spot for 3 minutes and it peeled right off.

    dudeomfgstfux -

    the screws seemed to only fit one side or the other. Then, the left screw didn't ever want to tighten all the way down.

    briancoski -

    I had some problems here with the screws, as the phillips screwdriver from the set was too big... luckily I found a fitting one in my toolbox. The cable takes patience.

    Robin BS -

    Home button cable is stubborn. Really nice to apply pressure in the right place as per guide. Start between the two copper parts. Working left to right will break it.

    Daniel Hatton -

    I agree with others that this step is hardest. I did this step in the end, i.e. after completing steps 20-24. This gives a better visibility and more room. I had to insert a small flat jewelers screw driver (very carefully and gently) underneath to complete step 19. I wish the plastic tool supplies to me was narrower at one end.

    remaneeraj -

    Used the hot washcloth in a plastic bag method. worked great.

    daddy2caius -

    New home button, bracket and cable did not repair the non responsive home button function. Anyone out there have similar results?

    richard ralls -

    Can't open the screws.Used lubricant but didn't help.

    Marko Rinne -

  24. 1IcoxldTBAlCoBQA
    1IcoxldTBAlCoBQA
    suZPK1e51c3ywTHN
    • Use a plastic opening tool to pry the edge of the home button ribbon cable up from the display assembly.

    • Start on the right, at the area of the ribbon cable between the gold contact points, and work to the left.

    • Going left to right may rip your ribbon cable as the contacts are well adhered to the front panel.

    • Prying directly at one gold contact point or the other may break its soldering and pop it off the ribbon cable.

    • If you have trouble sliding the plastic opening tool under the contact points, flip the tool over and gently push against the right side of the contacts to loosen the adhesive, then try again.

    Hit it and the home button with a little heat, it eases in removing the button and ribbon that have a little bit of adhesive.

    crevz -

    I used a hairdryer to losen up the glue under the contacts.

    Spacewide -

    Soak it in 99% Isopropyl Alcohol (or as high of a % you can get). It will help loosen the adhesive quite nicely. :)

    stretchymantis -

    I was having issues with the new home button ribbon cable working consistently after the repair. Calibrated the new part by going into a stock Apple app and holding the power button until the "off" prompt appeared. From there I held the home button until it exited the "off" prompt which re-calibrated the home button. After that everything was good to go! =)

    ilau1337 -

    I found removing the Home button the most difficult step because the ribbon cable with the two contact dots is so thin that the plastic tool cannot grab it. I pushed it slightly until I see the dots moving. I kept pushing slightly and moving it back and forth until it finally came loose. All of the screws are very small, so use a tweezer to hold them uprighted to insert into their holes, and the rest is easy!

    rayramirez -

    Watch out while removing the home button cable. It breaks really easily! In my case I ended up with a fold in the home button cable, but luckily it still worked.

    You really shouldn't complete this step without using a hairdryer or something else to heat up the glue!

    Christiaan -

    Using a heat gun definitely helps soften the adhesive for pulling off the contacts. When putting it back on, I heated it as well to that it would re-stick better. Used heat gun at 250F for a few seconds only. ALSO when putting back the home button, at first when i tightened the screws on the plate too much the button wouldn't click. I had to loosen the screws and kept testing to see what the right torque is to ensure it would click. I used loctite to make sure these not fully tight screws wouldn't come back out.

    Kent Leung -

    This was super tight to get the two golden contact things off. Took me aprox 20 mins. Have to be patient with this one. The instructions are golden.

    drummerMarkku -

    I poured a small amount of near boiling water into a plastic ziploc bag then put that bag into another ziploc (just to be safe) then placed it on the home button area for about 7 minutes or so, that seemed to do the trick just nicely!

    loganmadson -

    It wasn't immediately obvious to me that the replacement package came with some double-sided adhesive with cutouts to match different parts. I needed a piece to keep the gold contacts down during reassembly.

    dkulp -

    This part had me NEARLY stomped... the plastic thingy that was shipped with the "kit" did NOT work to remove those glued-on contacts. I had to resort to a surgical scalpel knife I had handy (luckily, everyone should have one!) and was able to carefully lift the contacts this way....

    lutz -

    used a hairdryer and a scalpel (knive would probably work too) - went like a charm within 10 seconds it was done!!

    diewarenrochade -

    I had to also clean the terminals on the phone body that make contact with the 2 cooper patches on the ribbon cable. This phone had gotten wet causing the home button to operate intermittently. Replacing the ribbon cable didn't fix it until cleaning those contacts by rubbing them gently with a pencil eraser.

    Peeling up the ribbon cable was super easy with a standard retractable blade utility knife from my home repair tool kit.

    ssbnfair -

    I used a sharp kitchen knife to pry under the plastic ribbon at the right hand dot, then the left hand dot. Probably should have heated the adhesive, but my hairdryer is so clumsy... knife worked OK.

    mark -

    okay so more of a question that you can comment back on or message me at joyzimmer17@gmail.com to answer. just want to know if replacing the very long ribbon cable for the home button. and not the board or actual button will allow me to keep touch id

    joy_zimmer -

    I used a the plastic blade end of a Halberd Spudger to gently get under the contacts to remove it from the old display assembly. Took less than 10 minutes total to remove it and install into the new assembly. There was still enough adhesive left that I did not have to add any before attaching it to the new one. I hope this helps you when you need to move thr home button.

    John Cascella -

    Can anyone tell me where & how to replace the gold connectors, on the boards side? The bits that touch the 2gold dots on screen side if makes sense?

    Rick Wheeler -

  25. KlijNYPCUWdUZEQi
    KlijNYPCUWdUZEQi
    uCifjYHAHs22kQy3
    • Use a plastic opening tool to pry the home button up from the display assembly.

    I had a bit of a tough time remove the sticky gasket that sits around the home button. I almost tore it during removal.

    baileyswanson -

    It was pretty harder at the beginning to remove the home button as baileyswanson mentioned here. But you can loosen up the glue with an Ifixit Heat Gun or a hairdryer.

    Spacewide -

    I used this to remove a "big" dent from the top right corner of my iPhone, thank you so much! :)

    Francesco -

    I am looking for the glue that is used for fixing the LCD and touch panel, Can anyone suggest me which is that and how to apply?

    Tobin -

    Soak it in 99% Isopropyl Alcohol (or as high of a % you can get). It will help loosen the adhesive quite nicely. :)

    stretchymantis -

    When reinstalling the home button, be careful you don't offset too much of the adhesive. This can result in a steeper edge when pressing the home button once everything is finished. Make sure that the adhesive closest in distance to the home button is as far from the opening as possible.

    earthhasassri -

    Heating the home button prior to removal is recommended, as the rubber around the button is extremely thin and prone to ripping.

    Addison Rasmussen -

    Just pressing it carefully from the other side made it come out quite easily !

    Nico van Dalen -

  26. yU4YSbRfhhUNvpMF
    • Remove the home button from the display assembly.

    When putting the home button back please turn over the display and make sure you have it straight. It wasn't until I finished the repair that I discovered mine is angled a bit wrong. I don't care - but you might!

    Daniel Hatton -

    Nel rimontare il pulsante è probabile che l’adesivo non sia più funzionante: un modo pratico per evitare che entri polvere è utilizzare un adesivo liquido generico applicandolo sul bordo della guarnizione in gomma con un bastoncino di legno a punta.

    Giampaolo Novelli -

  27. FJhuMX3LaXFbhVRG
    FJhuMX3LaXFbhVRG
    jjeyvQXV1TOYtukV
    • Remove two 1.2 mm Phillips screws from each side of the LCD frame (four total).

    Any one else have a hard time removing these screws????

    Erin Ray -

    These were tighter then the rest of them.

    dudeomfgstfux -

    Having trouble getting these out any advice?

    whitingkye -

    Yes, WD-40 did not help much but the screwdriver PZ000 worked.

    Vlad Dolnik -

    Make a note of the fact that these 1.2 mm screws are different than the other 1.2 mm ones used elsewhere in this procedure. These 4 seem to have a different thread and a flat/countersunk head. The other two removed previously have a flat/pan head. They are not interchangeable. If you do get them mixed up it’s easy enough to tell them apart if you put them thread up on your work surface which should probably be a tray of some sort. The pan head ones will reflect light at you, the countersunk head ones won’t.

    Bruce Hart -

  28. YLYZfon2S5qDZf3f
    • Remove the two screws securing the LCD shield plate to the display assembly:

    • One 1.4 mm Phillips screw

    • One 2.6 mm Phillips screw

    The gold retaining nut into which the 2.6mm screw screws can fall out. Be mindful.

    Dave Varon -

    As with the home button, take care not to pierce the fornt panel when re-assembling, especially on the upper 2.6 mm screw

    James Macleod -

  29. KhpiZTbdOUycXTIS
    KhpiZTbdOUycXTIS
    ZiEKEvTMBI5yD5Hi
    • Remove the LCD shield plate from the display assembly.

  30. hmJIVEfVQMiyANEX
    • The bare display assembly remains.

    • For reassembly, make sure to transfer over the LCD shield, home button, front facing camera assembly, front facing camera lens bezel and earpiece speaker to your new part.

    • If the replacement screen seems to not fit in the original frame, do not put too much force on the screen, or the glass might crack. Instead, try inserting the screen at a 30° angle, starting at the top. The aim here is to get the three plastic brackets under the metal frame of the phone and move with slight pressure from the sides to the bottom.

    • Make sure to remove the protective cover from your new display assembly as well as the protective cover on the back of the LCD.

    • Note: When reassembled, the screen may not turn on. Try fixing this by plugging your phone in, and holding down the power and home buttons at the same time for 20 seconds.

    After a replace the old screen with the new screen somehow when I put everything back together including the screws at the very bottom to tighten it up the screen popps up a little bit ???? Like it doesn't want to go in please help

    Daisy Medina -

    Is this a screen from us?

    Scott Dingle -

    Yes when I baught it, it said us LCD

    Daisy Medina -

    The screen that I got had a purple film on the back. Must remove so that the back looks like exactly the same color as the one original one.

    Kent Leung -

    HELP :) my old screen and new screen look identical taken apart except that the old one has a clear ring wear the front camera sits and the new one does not. Is there a way to move this part?

    Kristen -

    Use the small suction cup to remove and place the LCD

    dudeomfgstfux -

    after replacing the assembly, the phone doesn't turn on, but only shows the battery and the plug icons. There's anything I could do before contact the vendor?? Thanks for the help ^^

    Rocco Lorusso -

    Me too, did you get a fix for this?

    JMS -

    Hello, I’m trying to retrieve pictures from an iphone5 that were not in iCloud. Phone didn’t turn on had problems w battery replace battery and doesn’t turn on. Apple store advised that as long as phone turns on then they can help.

    Isabel -

Conclusion

To reassemble your device, follow these instructions in reverse order.

Andrew Optimus Goldheart

Member since: 17/10/09

502341 Reputation

141 comments

As far as screens go, with the technology and build quality involved, I dont see this screen going under $200. Wasn't difficult at all, but there are still many steps involved. Great guide ifixit!

crevz -

Actually right now they are $30 for Grade A.

Josh Bacon -

12 for a copy :D the 6s screens are also dropping, it happens every year. might be different with iphone 8 oled display though

echow2001 -

iPhone 8 screen replacements now less than $20 :)

Esther Goldberg -

thanx for all your great repair manuals

adam -

the fixit guides are really useful and great

adam -
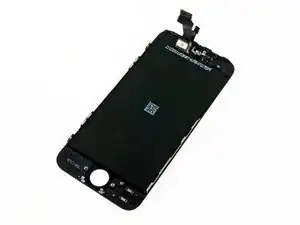
Is it possible to replace only the front glass without the LCD-diplay and digitizer???

thisismyname -

Yes ofcourse it is, I just finished up fixing a few touchscreen phones a couple hours ago for the first time at replacing them,with just the front glass being replaced with only 6 bucks and 95 cents for one replacement glass, these people out here are not being

moparman -

The suctioncup solution could be tricky because a cracked display can be Very cracked. Try the good old metal spudger!

Metal Spudger

Ram it in between the cracked display and the middleframe about 5mm and bend downwards until the display come loose. Much easier.

Peter H -

Easier than I thought with the help of ifixit. Thank you so much!

Daryl Dean -

Overall the guide is very good!; I would add the following suggestions: if you are working with badly cracked screen, try putting first a small piece of contact paper first - about the size of the screen - (near the bottom of the phone) and then go with the plastic spudger; this will prevent damage to the case and will help a lot with the suction cup; this also will help with the small pieces of cracked glass preventing them from falling apart, and off course holding the damaged display together.

Mauricio Barreto -

My screen went in easily enough. But now it jitters around and presses buttons on its own when I'm not touching the screen. Totally sucks. Waiting for iPhone6 since I don't want to deal with another fix.

bsdaly1 -

Are you sure all cables have a good connection? (Especially the digitizer one)

Zodiac -

Probably a low-quality screen.

Costacel -

after replacing my screen is black, i can tell the phone is on. the display just wont light up. any ideas?

Nick Diakos -

When reassembled, the screen may not turn on. Try fixing this by draining the power through disconnecting battery, and holding down the power button for 15- 20 seconds. This fix works for me I got frustrated at the point that it won’t turn on at first.

patisoy108 -

Brilliant guide, helped me no end, did find on my screen that I had to transfer the circular plastic around the camera lens, but apart from that this guide was invaluable. thanks

Chris -

Thanks for you Repair guide, it is a good job manuals.

Truemax -

so easy compared to the iPhone 4 - took me no more than 30 mins on my second phone - can be tricky if the frames been bent from a drop as my first one was. Good stuff - keep up the good work

Ben Watkins -

If your iPhone wont start after the operation hopefully it will work buy holding down home button and lock screen button. I spent 3 extra hours figuring that out in fear for my iPhone's life!

After looking online that seemed pretty common, so its absolutely worth to mention buy the ifixit crew as the last step.

vegste96 -

What do you do if your phone wont come on after holding home button and power button down?

jtitsworthwp -

Check the connections again I opened up and then reconnnected battery and display worked fine the second time

Jamie Archer -

Thanks simply simple to understand with the instructions provided thanks again:)

jason emmerson -

After I re installed the new screen i noticed it wouldnt fit as snug as the one before. Everything works except the headphone jack now. It sounds very faint and if i push on the screen near the headphone area it starts to sound better. Any suggestions on how to fix this?

Cory -

after the fix my phone wouldn't turn on which worried me but if you hold the power and home button it came on fine after 10seconds, maybe this should be added to the guide as it seems to be a common problem.

Archie Sinclair -

I have a much deeper appreciation for the workers who assemble these phones. Makes working on a laptop seem like working on a diesel truck in comparison! I highly recommend a clean, well lit workspace and at least an hour just in case something's fidgety. Problem areas include transferring the camera/speaker assembly and removing the contact pad from the home-button assembly. Remain calm and do not use too much force. Be prepared to spend some time on those things, otherwise a fairly simple process. Much nicer than the 4/4S, and I hope Apple continues to factor in the ease of screen replacement for all future models.

theneovega -

After installing the new screen and reassembling the phone I am getting lines of code on the opening Apple screen. Any ideas?? Thanks in advance.

hibdon -

Just replaced the display and battery on my cracked iPhone 5, worked flawlessly.

I didn't run into any glue problem. just be gentle and ease into it.

- The toughest part was the home button connector, but as long as you attack it from the right as noted here, you'll be fine, I can see how rushing / attacking through the left would ruin it.

- Also make sure the front facing camera is aligned with the hole when you re-assemble.

You can see that this is a late generation consumer electronic device from Apple, as this process is amazingly straightforward, and replacing the screen was designed into the product unlike earlier iPhone models (and iFixit gives you the insider knowledge you need).

gullaud -

Hey guys i´ve a big problem with my iphone 5 concerning the new touchscreen.

I´ve bought a complete touchscreen, with a new home button, camera and so on.

Today i´ve put the new one into my iphone in general it works but there are 2 big problems:

first the new touchscreen doesn´t keep on the iphone means that i´m not able to reassembly the screen at my phone because it´s almost moving and doesn´t i don't know how to say it "click" into the holes.

I think it´s important to know that I've changed the hole back cover but im as good as sure that I've put the parts that hold the screen the right way.

the second problem is about the home button and the two screws on the downer side of the iphone.

The hp doesn't react to anything and the two screws to not leave in the phone they do net become i don't know how to say it english im sorry

i mean so that they do not fall out on their own.

Would be great if you could help me because i really don't know what to do and need my iphone

Marsi -

If this is a part from iFixit please email support [at] ifixit [dot] com. If it's not, I would recommend talking to the company you purchased it from or post up on ifixit.com/answers

Scott Dingle -

The only way I differed from this guide was I used a Stanley knife at the bottom of the phone to remove the screen. The suction cup didn't work due to the screen being shattered.

Thank you very much

Joseph Buckton -

Tape the screen to hold it together and press out any air bubbles, then place the suction cup on the lower part of the screen on top of the tape, this should give the broken more stability as you pull up.

P clark -

Has anybody had any issues with the display's color kind of lose it's color during use? You can lock screen and next time you use it, color is back. I can't make it happen either. A customer of mine's phone keeps doing this and I am on a 2nd replacement.

The only thing to note is while removing the front panel cable bracket (step 6), one of the screw mounts was off (assuming it was from the phone being dropped). Other than that bracket being a pain to screw back in due to the short cables, everything seems fine.

Thanks,

Steve

Steve -

You probably used a low quality replacement part. Try returning it and buying from iFixit or phonepartsusa.com

Josh Bacon -

thankyou for this! I followed the steps. Just making sure that all parts were swapped over and that the LCD clip and plugs are firmly seated was the important bit for me. Also to be careful with lifting up the home button sensor thing too. But this guide helped me 100% to replace my cracked glass.

nathan ong -

Phone wont come on at all? Tried the power button and home button but didn't work? And suggestions.

jtitsworthwp -

i put the new screen in and now it is over sensitive and has what looks like static how do i fix?

jess aller -

Sounds like a defective display assembly. Please contact us if it was purchased from us.

Scott Dingle -

No matter what I tried, I cannot seem to get the screen to lift off even if I give it a good tug. I've removed the bottom screws using the 54-bit driver set and I have about 3 different suction cups, different sizes and followed steps precisely and non lift the screen away.. It it super glued to the rest of the unit???

chrismitchellclare -

It can be a really tight fit. I had to pull on the screen so hard i feared i was going to break the screen more than it was already. I ended up putting a piece of packing tape on my screen and wetting the suction cup to get a good grip. From there i had to pull the screen far enough from the phone to get the pry thing into the opening before it closed. It can be very tricky, just be careful.

CCTrollz -

When reassembling, make sure to disconnect and reconnect the battery (i.e. power cycling the phone). Sometimes a new screen won't work before power cycling the phone.

Christiaan -

Awesome guide. Only suggestion is maybe a note about reconnecting the cables. Took me a while to figure out it just needs a firm push but for a long time I was nervous about it since there was no indication about what to do. Great job in any case!

On that note, my replacement screen has two "dis colored" spots (tan-ish) on the LCD up near the ear opening. Any idea how to fix or is this a defect?

Jonas -

Sounds like something is pushing against the back side. Typically a cable.

Scott Dingle -

I just completed my repair and have a sunspot on the display. Has anyone seen this or know why it's happening?

bradmclaughlin -

See my reply above

Scott Dingle -

This looks great, but the repair kit I have doesn't have the ribbon cable on the screen. Will this still work, or did I get screwed over?

Kenny -

Is this from us?

Scott Dingle -

Unfortunately, no. In hindsight, maybe I should have, but I got it off of ebay. I could send a link if it would help. http://www.ebay.com/itm/Replacement-Fron...

Kenny -

That's just glass, not a display assembly.

Scott Dingle -

Guide helped a lot. Went back and forth to understand the order of putting things back

sathyajsn -

Incredible guide! Using this and the repair kit, I replaced the damaged screen on my phone with minimal trouble. The guide is right; there are a number of small, very small, and - ok - downright tiny screws. I didn't buy the cool magmat so I used a big piece of paper and deviated from the guide a bit.

Since there isn't really any overlap between the LCD screen guard, the front camera assembly and the home button I replaced each one individually instead of disassembling the entire phone first. I got about halfway through the camera assembly but then removed the guard to give myself better access. I also felt more comfortable manipulating the new part with a big metal backing plate on it, call it peace of mind. After getting the backing installed I finished up the camera assembly then moved to the home button. At any given time there was a minimum of screws to be lost or confused with others.

As a last note the most worrisome part for me was the contacts had to spend a while carefully manipulating them.

TCelicaGTBoi -

What is another way to remove the screen in step one that does not involve the suction cup? There are fragments of glass missing from my screen so it is not an option. I'm not familiar enough with what parts inside are delicate to know how to go about removing it.

Luke -

Cover the screen with packing tape or similar material. That will allow the iSclack or suction cup to work properly.

Scott Dingle -

I been repairing a few iPhone 5 but I have serious problem when I replaces the display assembly.Most of them suffer from issues like multiple white boxes on first row of screen, screen skipping n screen not responding to touch. Does anyone has similar problems? I am not sure if is the display assembly quality issue or my skill issue.

Kenneth Hoh -

Are these screens from us?

Scott Dingle -

I bought one from ebay and had same problem, immediately removed it to return.

Mona -

Is this guide also for iPhone 5s and iPhone 5c?

Andreas Asheim -

We have guides for both 5s and 5c display replacement. Please see following links:

5s - iPhone 5s LCD and Digitizer Replacement

5c - iPhone 5c LCD and Digitizer Replacement

Andrew Stone -

Great fix! Went super easy and coupled with a PureGear Roll on anti-fingerprint screen protector my screen is even better than the original!

Find the screen protector kit here!

http://www.pure-gear.com/shop-by-device/...

Sebastian Baker -

Just installed the new digitizer screen and LCD, everything installed fine however when powered on there are small white boxes all along the top of the screen that wont go away. when touched, the screen does not respond in that area. Whats up with that?

Ryan -

I have the same issue with the small white boxes. whats up with it??

breoshshala -

Please shoot us an email so we can get you taken care of.

Scott Dingle -

I broke the glass front of my I phone5, which I got repaired at a cost of Rs.6500.00 ($110). It worked as original for six months. Yesterday a black circle 3cm diameter developed just above the home button. The glass front is intact. This time I want to fix it by myself. The phone is working nice other than the hindrance by this black spot while typing a massage. Can any body guide me as to which part is to be replaced, and how can I order the same along with necessary tools.

joginder dhar -

Great help. Cheers whoever put this up.

Neil Devine -

You guys need to update your screwmap for this guide (iPhone 5 Display replacement) because the step numbers in the guide do not coincide with the screwmap

Phil Burnett -

Everything went fine with my screen installation. Works good, only problem I have found is with my camera. Rear camera works fine, when I switch to front facing camera it freezes up, wont allow to switch to recorder, square, panorama, etc. Also will not allow to switch back to front rear camera. I took the phone apart and re attached all the camera components to make sure I had a good connection but still no change. What could the problem be?

rubenromero76 -

Is this a screen from us?

Scott Dingle -

I have the same issue.

Sascha van Tillo -

This was an easy 10 minute job with the kit from ifixit that included the button etc. The hardest part was the final ribbon connector, some good old fashioned patience helps you there.

Robert Moitoza -

I got my screen fixd, but for some reason the screen keeps freezing up at random times. It never did this before with my cracked screen. If someone can help me I would appreciate it because I've already had to pay the man who did this one hundred and fifity dollars. Thanks!

waldropmadison -

Possible it's defective. If you paid a person to repair your phone, take it back and demand it be fixed correctly.

Scott Dingle -

I did the whole thing in about 90 minutes. I was stuck at step 18 for about 30 minutes though. The screws were held on too tight and neither PH#000 nor J#000 screw drivers were working. I finally placed the LCD panel in front my radiator for a few minutes and then used a flat head 000 screw driver. I don't know why this happened. The rest of the steps worked smoothly.

qosmioamit -

Question: Two iphone 5 screen replacements and how buttons that don't work!? The screens are flawless, they look great but the home buttons are not working on either phone...what gives?? Thanks for your response...

Frankly -

Are these from iFixit?

Scott Dingle -

Hardest part was definitely removing/inserting the screen. These bastards are tight(which is good) took me a while to get it off, especially with the cracks being around the home button. takes patience and effort, but I did find that being a little more forceful and less careful than i thought i had to be was more effective. Removing the components from the old screen and attaching them to the new one was pretty straight forward, Just be careful with all the contact points and ribbons. However the Apple screen has a little clear plastic circle that frames the front camera that the iFixit screen did not have. I used it on the new one, but it was never fully secured and still had to be sure to realign the front camera several times. Putting the new screen in proved challenging. The directions made it seem far easier, and for a while I didnt think it was going to fit (it eventually did). Now just going to wait to make sure everything continues to work properly. Overall, defintly worth it

fakik0240 -

I followed the instructions to the tee however the digitizer just does not want to work....any tips?

Random Guy -

Is this part from iFixit?

Scott Dingle -

My screen works before I try to shut it as soon as I try to place it back in place, it goes black the backlight works but nothing on it how can I fix that

Caro -

The guide with the photos and the video was very helpful, my phone look like a new one.

I only got a little complicated connecting the cables again but still is working without issues.

valeriamedellin -

I replaced the LCD with a new one with no problems. After assembly the touch screen does not work. Any ideas?

EJ Landry -

Is the part from iFixit?

Scott Dingle -

Completed my first front panel replacement today and happy to say that it was a huge success. It was more involved than what the step by step instructions have, but the video was the perfect guide to all the steps I had to take. I would highly recommend the Slcack tool for removing the screen. Any other method could get you into trouble(cracked screen etc)

younesyasin -

Hi to all. I need help with more explanation since english is not my first language.

My problem is a broken screen. I can still use the iphone perfectly and everything works fine, i just have a cracked glass. Isnt there a way of only replacing the broken glass? If not, which guide should I follow and which replacement parts should I buy?

My confussion appears because there is a "Display Assembly Replacement" guide and the "Front Panel Replacement" guide, and i dont know which should i follow, if any of these two.

Thanks a lot!

johnetix -

When i finished and assembled new display, iphone didn't switched on, but when switched on- nothing appeared on the screen just black shining. So if you have the same problem- go to step 11 read the ! sign- i got the problem with LCD connector- it often pops off when you attach your front pannel to its place, so simply reconnect battery and recheck three front panel cables- this will work.

PS Plastic spacer in step 14 was the trickiest thing to put back :)

hmndvc -

It might be helpful to mention how easily these screws can be stripped in the video. Now, I have to order the home button assembly.

daddy2caius -

I have just changed my screen, and my phone turns on, but the touch screen doesn't work. I now cannot power down the phone to take it apart and have another look! I purchased my screen from you guys, and followed the link to herr from the email received. Please can someone advise!?!?

Kat906 -

Success! Fixed my shattered screen in 20 minutes. Spend the extra $10 and get the kit with the camera and home button pre-assembled, it's worth it.

Quick tip: If your screen is cracked put packing tape over the screen so the suction cup has a smooth leak free surface to do suction cup stuff =)

michaeldeboef -

Excellent guide and video demonstration. It's essential to power down phone to avoid damaging electronics. Also, moving the clear plastic front camera guide ring is easy but necessary.

Took me about 40 minutes start to finish, my daughter is over the moon.

Thanks for a brilliant website!

Simon Needham -
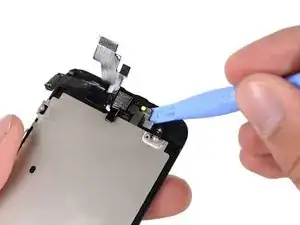
Excellent guide, took me 40 minutes to repair my daughters iphone 5 with failed backlight. Watch the video first and make sure you power off the phone to avoid frying motherboard components.

Also you need to swap over the clear plastic front camera housing - really easy, but not mentioned in the guide.

Thanks for an excellent guide - saved me a bundle and my daughter thinks I'm a hero!

Simon16a -

i did this guide but for some reason, the screen doesnt fit flush... also, the home button doesnt work anymore. this is probably a problem with my own phone. however, i switched back to the old screen and my home button works again! i tried installing this 3 times but home button still doesnt work and it wont sit flush on the left side of my phone. otherwise, this is a quality product and good, easy guide.

mujzjiggy2k1 -

Is this a screen from iFixit?

Scott Dingle -

Ordered the complete assembly to save changing out other parts and it was well worth the extra couple of bucks. If only due to the fact that I shake like a paint mixer when handling VERY SMALL screws. Suction cup was tough to keep on only because of the shattered screen but with the tape trick it opened after a few stabs at it. First time I've opened up a phone and it wasn't a five minute fix ( took an hour or so) but the kit was the way to go. Wife is happy, everything works fine. Thanks IFIXIT.

bevincn -

Great tutorial. Took me 30 mins with no problems. One question: is the plastic spacer important as mine didn't have one (probably got lost during previous repair)?

Pete -

Just replaced my screen with the complete kit and now my touch screen does not work! Help!!!

nicolepoach -

This is an iFixit screen?

Scott Dingle -

The front panel assembly was more difficult that I had imagined. The little contacts glued on to the plastic (electric contacts) for the home button and the ear piece, both were hard to remove... If you want to save yourself some jittery nerves using a scalpel to remove those (The included plastic scraper thingy was not working) then I suggest to buy the "assembly" which costs more but comes "plug and play ready". However, if you have a glass of Schnaps cost by (to steady your hands : ) and have strong nerves, go for it! I can be done.. : )

lutz -

i did it but unsuccesfully.

really good guide and followed step by step but still went wrong. i only dismantled it untill i took of the screen then reasembled.

how did i go wrone there is like 5 screws

i did the complete thing step by step but screen is just black no signs of turning on. any help or advice would be great thanx

florofailure -

Try putting your old screen back in and see if it works.

Scott Dingle -

Thanks so much! This was super helpful and totally easy to use. I am a law student, so I am poor and I dont have a ton of time to just play around and figure things out. Expedited shipping had it to my house in 36 hours and only took me 30 minutes to replace! Did not spend hundreds of dollars to get a new iPhone. I'm putting this in the win category!

adrienkarene -

excellent step by step

leonard bruins -

So where can I buy a good quality glass replacement?

Varah -

Where did you get the tools? I've been looking for the exact size number of screwdriver. But they tend to have something else. Is there a substitution?

Mariny -

Fantastic repair manual! Very easy to complete.

Leo Carr -

is.it.possible.to.replace.my.iphone5s.screen.with.a.iphone5c.screen.instead?

salvador -

is.it.possible.to.replace.my.iphone5s.screen.with.a.iphone5c.screen?

salvador -

is.it.possible.to.replace.my.iphone5s.screen.with.myiphone5c.screen?

salvador -

Great guide, very detailed and thorough. After LCD replacement, my phone wouldn't turn on, so I was very nervous. Went down into the comments, and saw that you needed to hold the lock and home buttons down. Held them for 15-20 seconds, and it worked! Please add this to the guide.

Hale Croft -

I had a cracked screen but the phone was otherwise working perfectly. I replaced the entire front panel per the directions and video. Now when I try to turn the phone on, NOTHING happens. The phone won't turn on anymore. I wondered if the front panel I was sent was faulty so I tried to reinstall the old cracked screen and it still would not turn on (that screen previously worked fine). I tried to plug it in and press the home and power buttons simultaneously but nada! Also tried plugging it into iTunes and that didn't work either. All the ribbon cables seem to be intact and fine. I was not particularly traumatic when I was opening the phone. Please HELP!

rckwak -

My phone works and you can hear it if you plug it to the charger.. Only problem is it won't turn on. I kinda dipped it in water by mistake but only the top part. Not sure on what to buy

sexytiara05 -

If my screen has green stripes and doesn't respond on one half and has black pieces in it and is unusable will this work?

Timo Metz -

It should! It’s usually the LCD & Digitizer causing it not to work.

In my case it was the same as you except the screen didn’t work at all.

Costacel -

Use this guide to replace a cracked or broken screen in an iPhone 6s.

Thats the first line of this iphone 5 replacement part description. Good job iFixIt

Addison Rasmussen -

well by the way good job on this post but did not quite get how to replace the touchscreen only without the lcd replacement could not find any tut on this i try to make one...

did not solve my issue. thanks anyway

zahirpocho -

The fixit guides are really useful and great

nemecsek -

The glass on my phone came off and I was able to replace the front panel following this guide. Thanks for putting it together!

Daniel Tavares -

very thorough guide. One additional tip would be to add some packing to the back of the digitizer connector (and the other connectors) if you have bought a cheaper replacement screen. The original has some 2mm foam on the backs which helps the cover plate keep pressure on the connectors so they don't come loose leading to lines on display or loss of touchscreen control if you drop the phone again.

Simon Needham -
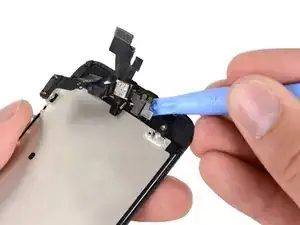
Simon, if my screen isn't cracked, but is unresponsive at times could it be that I just need to add some foam? I notice lines on the screen periodically. Is there a way to test this i.e. put pressure on the screen in spots.

rootskitchencannery -
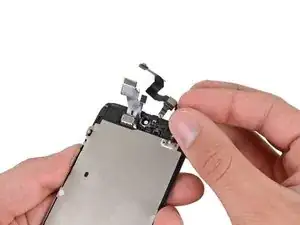
شكرا لكم على الاعمال القيمة دات فائدة كبيرة انصح الكل بالاشتراك بالموقع لما له من فائدة كبيرة من ناحية التعليم والمعرفة والمشتريات ارخص من اي موقع ^_^

zuhair -
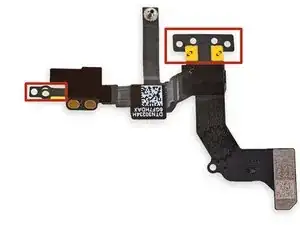
Hi there, did anybody get screen flickering on new LCD? I had after few days, already tried this procedure: turn off auto brightness and set to minimum, wait 10 minutes, turn brighness on again; it works, but only for some hours, then flickering again. Could be a "poor" display?

Thank you

Francesco Di Giovanni -

great instructions - replaced the smashed screen and everything is good

Thanks

Andrew

Andrew Leslie -

Great guide . pretty easy to replace the screen. thanks :)

Angelos Varsopoulos -

Great guide super easy to follow just wish I had a tool to bend the frame back into shape would have made the assembly easier.

Nick Bauer -

Well, I was successful in replacing the cracked screen on my wife's phone using this guide. The hardest part for me was the reinstallation of the front-facing camera and proximity sensor. In fact, when I first reassembled the phone, everything worked except the proximity sensor. I disassembled the phone a 2nd time and reinstalled the camera and sensor assembly. Lo and behold! It worked! So far, so good. Time will tell if I was truly successful. Thanks so much for you guide, Andrew! And to iFixit, thanks for the website and for the tools! I can't wait to try another project.

Lon Adams -

Did the repair with iFixIt parts and it went smoothly, but a few days later the phone showed nothing but vertical lines, then went dead. Took it apart to check connections and all seemed fine. Tried holding home and power buttons of course. Still nothing. Parts from iFixIt are usually very good but I wonder if I revieved a defect.

allenm -

Hey allenm! It does sound strange that it worked for a while before it stopped working. Especially if everything else (including the connectors) all look good. I wouldn't hesitate to contact the support team and see if they can help get you up and running again.

Scott Havard -

hola con que pegan el display a la tarjeta madre ?

?

ldsarangobolivar -

After putting everything back together I noticed part of the digitizer didn't work. I took it off and reassembled it 2 more times and the area shifted. Is this a bad digitizer or is a cable or something not seated correctly?

Brian Pifer -

Great job with these instructions, Thanks very much for the guide, dissasembly and assemly went smooth and without problems . Iphone like a new -:-)

jenda701 -

This was a very comprehensive and great guide. Be extra careful with the home button contact points as they are very difficult to get it off if it is your first time repairing the screen.

Matthias Broome -

Repaired my broken screen following this guide and ifixit parts, the hardest part was removing the home button cable, the contacts were very hard to get under and even though i tried to do it the right way i still ended up tearing the cable right between the two middle contacts >.<''' . Other than rendering my homebutton non functional everything works well. At first I had some difficulty and some dead zones on the screen which had me very worried however after disconnecting the battery and making sure the digitizer flex cable was firmly and correctly atattched before reconnecting the battery everything worked just fine. Other than that some minor things to note is the color of the new screen is very cold making me wish i could properly calibrate it. Cheers!

Martin -

Installed new screen following great instructions, tried to turn on, nothing happened. Tried home+power for 10+ seconds. Nothing. Connected to MacBook and it sees my my iPhone. Tried the home+power and iTunes said that there was a problem. It would try updating, otherwise a restore would be necessary.

Downloaded update, installed (always with screen off), and restarted my iPhone. Alas, it couldn't complete the update because there's a passcode on myiPhone. And.. I can't disable it obviously because I have no access to the screen.

I disassembled and reinstalled the old cracked screen and tried to start the phone again. Nada. Same thing.

I'm tech savvy and used to building my own hardware, this wasn't hard to do and I think I followed everything smoothly. Any suggestions why this isn't working?

El Orenz -

Try Disconnecting the battery from the logicboard, drain the excess power by holding the power button for 15-20 seconds. Try this while 3 cables from the screen still intact.

*After draining the excess power put the cable intact in the logic board and try to hold Home button for 3 seconds followed by Power button (don’t let go until the logo comes up). Reply me the feedback if it works or not.

patisoy108 -

Great this is great great

stephe emkay -

Power to the people! Thanks Andrew et al for a great guide - I was somewhat intimidated by the task; but I just went ahead, and it was pretty easy after all. Well, except for those tiny screws.

Thanks - you’re the bomb!

Dawn Freer -

I could use some help. I replaced the screen and the button ribbon cable, powered the device on and the screen is black. I then followed instructions somewhere else here about solving that problem by connecting and reconnecting the battery cable. i did that and still I have a black screen. I then plugged the phone into a computer and found that it is recognizable (and therefore it has internal power is my assumption). This must mean I have a problem with the screen or display unit. Is this the correct assumption? Can anyone provide advice on a solve?

Vincent Polito -

Great guide! Great parts! Absolutely seamless experience from start to finish except for that stupid little spacer in step 20. That thing, seriously, has a mind of it’s own and it took a few minutes to figure out the appropriate orientation and to get it to stay in place (my border collie has the same problem) but everything went together without any trouble. I replaced the battery at the same time as the screen. I took my time, limited my caffeine;>) and it turned right on when I was done. No muss. No fuss. Power, a pristine screen and all the data was just fine. I highly recommend doing this repair! If you are timid, buy the display assembly with the camera, etc. attached. Reattaching those is a bit tricky and it would have definitely been worth the few extra dollars to eliminate those steps for no other reason than saving myself 10 minutes of my inner repair critic telling me this was never going to work…especially since it did!

C. Kate Fletcher -

Easy like Sunday morning! Perfect execution in less than an hour. Only challenges were the removal of the home button ribbon cable and getting the non-magnetized screw back into its hole. Thanks to all for the advice on those two items. It helped immensely!

-Mike

Loraine Castro -

ho sostituito lo schermo del mio iphone, ora funziona, ma devo aver sbagliato qualcosa e non riesco a chiudere bene lo schermo, rimane rialzato nella parte alta sinistra e provando a premere forte mi accorgo che sbatte contro qualcosa verso il centro, chi sa aiutarmi?

dieyoung79 -

Thank you! Really helpful clear guide. The only places I got stuck were in removing the screen at the start (as it was all shattered I couldn’t work out where to prise initially) and at step 22 where I had to transfer the white paper covering the proximity sensor, the front camera surround and the small plastic/metal box for another component as others have commented. All reassembled and works perfectly with a Sintron OEM screen. Thanks!

David Porter -

Thanks for the guide - it is very useful!

Costacel -