1st Fife Artillery Volunteers
The 1st Fife Artillery Volunteers, later the Highland (Fifeshire) Heavy Battery, was a volunteer unit first recruited in Fifeshire, Scotland, in 1860, which fought on the Western Front in the First World War. Its successor units expanded recruitment to Aberdeenshire and again fought in North West Europe, during the Second World War.
| 1st Fife Artillery Volunteers Highland (Fifeshire) Heavy Battery 56th (Highland) Medium Regiment 356th (Highland) Medium Regiment | |
|---|---|
| Active | 1860–1967 |
| Country | |
| Branch | |
| Type | Artillery Regiment |
| Role | Garrison Artillery (1860–1908) Heavy Artillery (1908–1920) Medium Artillery (1920–1956) Field Engineers (1956–1967) |
| Engagements | First World War: Western Front Second World War: Battle of France Dunkirk evacuation Normandy |
Volunteer Force (1859–1908)
The Volunteer Force came into existence in 1859 as a result of an invasion scare, and the subsequent enthusiasm for joining local Rifle, Artillery and Engineer Volunteer Corps.[1][2][3][4] By 1860, there were 11 Artillery Volunteer Corps (AVCs) in Fifeshire, mainly in coastal towns:[5][6][7]
- 1st (Tayport) Fife Artillery Volunteers, formed at Ferryport on Craig, 26 January 1860
- 2nd (Newport) Fife Artillery Volunteers, formed at Newport-on-Tay, 13 April 1860
- 3rd (St Andrews) Fife Artillery Volunteers, formed on 6 March 1860
- 4th (Inverkeithing) Fife Artillery Volunteers, formed on 3 March 1860
- 5th (Kirkcaldy) Fife Artillery Volunteers, formed on 22 March 1860
- 6th (Burntisland) Fife Artillery Volunteers, formed on 20 February 1860
- 7th (Anstruther) Fife Artillery Volunteers, formed at Elie on 8 March 1860
- 8th (Leven) Fife Artillery Volunteers, formed two batteries on 24 July 1860
- 9th (Dysart) Fife Artillery Volunteers, formed on 19 September 1860
- 10th (Wemyss) Fife Artillery Volunteers, formed out of the overflow of the 8th on 16 January 1862.
- 11th (Kinghorn) Fife Artillery Volunteers, formed on 30 April 1863
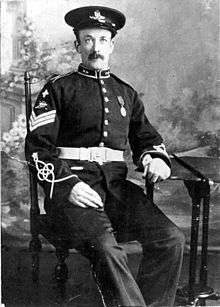
Together, these units comprised the 1st Fifeshire Administrative Brigade based in St Andrews under the command of Lt-Col W.H.M. Dougall, a Royal Navy officer. The administrative brigade also included the 1st and 2nd Stirlingshire AVCs at Grangemouth and Stirling respectively. It retained its organisation of 13 corps (later companies) throughout the 19th century. They were not connected with the Fife Artillery, which was a Militia regiment based in Cupar.[8]
Despite the ban on Volunteer involvement in politics, the band of the 5th Fife Artillery Volunteers illegally took part in a trade union demonstration in July 1873. This was a recurrent problem with the Volunteer bands, which were only nominally under military control.[9]
At the time of the Childers Reforms in 1881, the Administrative Brigade was consolidated as the 1st Fifeshire Artillery Volunteers, covering Fifeshire and Stirlingshire, ranked 18th in the order of precedence of Artillery Volunteers. Later it was included in the Scottish Division of the Royal Artillery (RA).[10]
In 1889, a position battery of 16-Pounder Rifled Muzzle Loading (RML) guns was issued to the Corps and manned by 3rd Battery. [6] In 1892, this became the 1st Position Battery, with the 1st (Tayport) Company becoming the 2nd Position Battery, whilst the 2nd Company became the 3rd Position Battery.
In 1900, a new 14th Company was formed at Kirkaldy. [6]
By the end of the century, the Artillery Volunteers had been attached to the Royal Garrison Artillery (RGA), with the 1st Fifeshire forming part of its Southern Division.[11] In 1902, the unit was redesignated as 1st Fifeshire RGA (Volunteers). There was also an affiliated Cadet Corps at Kirkcaldy High School.[12]
Territorial Force (TF)
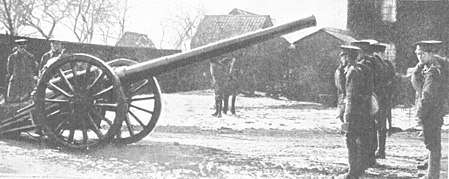
When the Volunteers were subsumed into the new Territorial Force in 1908 under the Haldane Reforms,[13] the 1st Fifeshire RGA (V) (except No 7 Company) was split between three units: the Highland (Fifeshire) RGA, the Fifeshire Battery of the II Highland Brigade, Royal Field Artillery at Leven, and (together with the 1st Forfarshire RGA (V)) the North Scottish RGA, later renamed the Forth RGA, a 'defended ports' unit based at Edinburgh.[7][14][15][16][17]
The Highland (Fifeshire) RGA consisted of a heavy battery equipped with 4.7-inch guns and an ammunition column, based at Kirkcaldy, later at the Drill Hall, Elgin Street, Dunfermline, and was assigned to the Highland Division of the TF. From 1908 until the outbreak of war in August 1914, it was commanded by Major Lord Bruce, son of the Honorary Colonel of the 1st Fife RGA, the 9th Earl of Elgin and Kincardine (and himself later 10th Earl of Elgin and Kincardine).[17][18][19][20][21]
First World War
1/1st Highland (Fifeshire) Battery
The Highland (Fifeshire) Heavy Battery mobilised at Dunfermline and joined the Highland Division, which was concentrating around Bedford as part of First Army of Central Force. Having separated 'Home Service' men, who remained at the depots forming 2nd Line units with the recruits who were coming in, the division's 1st Line units (now distinguished by the prefix '1/') undertook training for overseas service. The Highland Division was later designated 51st (Highland) Division.[20]
Aubers Ridge
1/1st Highland Battery went to France with the Highland Division, to join the British Expeditionary Force (BEF) on the Western Front, landing on 4 May 1915. However, artillery policy in the BEF was to withdraw heavy batteries from the divisions and group them into dedicated heavy artillery formations, so the battery was immediately posted to II Group, Heavy Artillery Reserve for the Battle of Aubers Ridge.[20][21][22][23] II Heavy Artillery Reserve consisted of a variety of heavy and siege batteries whose role was to support the assault of IV Corps by demolishing strongpoints and farms that were beyond the range of divisional field guns, and for counter-battery (CB) fire in the Ligny le Grand–Aubers–Fromelles sector. The group was provided with Royal Flying Corps reconnaissance aircraft fitted with wireless to assist observation in the flat country. The bombardment began at 05.00 on 9 May, and soon reports came in that many of the shells were falling short of their targets. This was due to faulty ammunition and wear and tear on the old 4.7-inch gun barrels. In many cases the copper driving bands stripped off the shells as they left the barrels, resulting in the shell turning end over end and landing anywhere, even deep in the British support positions.[24] In spite of the CB fire, German guns were able to open up on the British trenches, which were soon packed with wounded men from the first attacking wave, and support troops waiting to follow up. A second attempt to attack in the afternoon was hampered by the shortage of artillery ammunition to repeat the bombardment.[25][26][27]
The battery had been assigned to III Heavy Artillery Brigade on arrival in France, now it was moved to IV Heavy Bde on 3 July and VIII Heavy Bde on 20 August, before being attached to 5th Divisional Artillery from 4 September to 6 November. It then rejoined VIII Heavy Bde.[22]
Somme
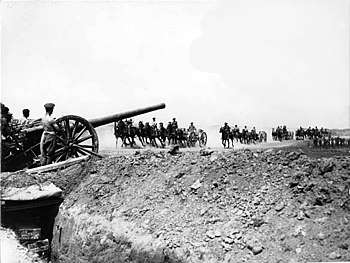
In April 1916 the heavy artillery brigades were renamed heavy artillery groups (HAGs),[22][23] and the battery moved to 1st HAG on 14 June. 1st HAG was with Fourth Army preparing for that year's 'Big Push' (the Battle of the Somme.[22][28] During the battle the battery transferred to the 16th HAG on 7 July and on 27 July to 17th HAG, which came under Reserve Army for the latter stages. After the Somme fighting ended, 1/1st Highland Hvy Bty moved to 32nd HAG on 2 December.[22][29]
Reorganisation
On 10 December 1916, the battery was withdrawn from the line to rest and refit, replacing its 4.7-inch guns with 60-pounders. On 23 January 1917, it was joined by a section from 201st Heavy Battery, making it up to six guns. It then returned to action on 29 January. It moved to 56th HAG on 19 February 1917 and 4th HAG on 14 March (both with Reserve Army, now renamed Fifth Army) and then transferred to XVII Corps in Third Army with 7th HAG on 21 March. This corps was preparing for the Battle of Arras.[22][30][31][32]
Arras
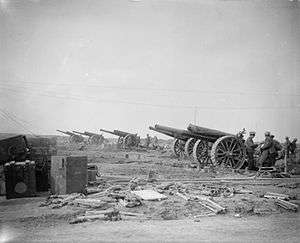
There were many more guns available for this attack and the artillery plan was much more carefully worked out than previous operations. It began with systematic CB work to put the German artillery out of action. Then, at Zero hour, howitzers laid a standing barrage on the German trenches while the 60-pounders swept and searched in depth to catch machine gunners and moving infantry. As the attacking infantry reached their second objective (the Blue Line), their field guns moved up in support and the 60-pounder batteries moved forward into the vacated positions. On XVII Corps' front the attack was a great success, the 60-pounders laying a standing barrage on the distant final objective until the infantry reached it. However, the follow-up over succeeding days was less successful, the guns having to be moved forward through mud and destruction, and the later bombardments were rushed and less effective. Fighting on the Arras front dragged on into May.[33][34]
Flanders
1/1st Highland Hvy Bty moved to 48th HAG on 16 May 1917, to 3rd HAG on 29 May, to 73rd on 26 June, and then to 28th HAG in Fourth Army on 7 July. Fourth Army was at the time stationed on the Flanders coast awaiting a breakthrough at Ypres that never came.[22][28][35] Eventually, the battery was transferred on 11 September to 35th HAG with Second Army, which was taking over the direction of the faltering offensive. The Battles of the Menin Road, Polygon Wood and Broodseinde were highly successful because of the weight of artillery brought to bear on German positions. But as the offensive continued with the Battle of Poelcappelle and First and Second Battles of Passchendaele, the tables were turned: British batteries were clearly observable from the Passchendaele Ridge and were subjected to CB fire, while their own guns sank into the mud and became difficult to aim and fire. 1/1st Highland Hvy Bty had been moved to 28th HAG on 17 October, then on 27 October, as the fighting at Passchendaele ground on, it was transferred away to 83rd HAG to the quiet sector of First Army's front.[22][36][37][38][39]
From late 1917, batteries ceased to be swapped between HAGs, and from 27 October 1917 until the end of the war a year later, 1/1st Highland Heavy Bty served with 83rd HAG (later 83rd Heavy Brigade). 83rd Brigade was a mixed grouping of heavy guns serving with First Army.[22][23][40]
Spring Offensive
Part of First Army was engaged at Arras on 28 March 1918 (Operation Mars), the second phase of the German Spring Offensive, when the British heavy artillery replied with devastating CB fire.[41][42][43] Then most of First Army was involved in heavy fighting in the Battle of the Lys in April, when the third German offensive (Operation Georgette) failed to break through in the Ypres sector.[41][44][45]
The Hundred Days
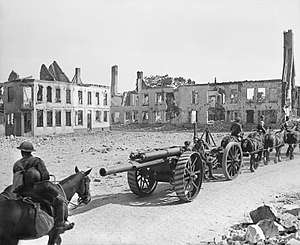
On 18 August 1918, the brigade moved to Fourth Army and served with it during the triumphal advance of the Hundred Days Offensive of 1918.[22][40]
By the end of September Fourth Army had closed up to the Hindenburg Line. On 29 September IX Corps carried out an assault crossing of the St Quentin Canal, with 83rd Bde amongst the mass of artillery supporting the operation. The canal defences had largely been destroyed by the heavy guns, which continued firing on the canal banks until the last possible moment as 137th (Staffordshire) Brigade stormed the outpost line and then scrambled across the canal in the morning mist. The objectives were taken by 15.30; and 83rd Bde was moved forward to fresh positions along the canal that day and the following day.[28][46][47]
By 3 October the brigade was supporting IX Corps' attack on the Beaurevoir Line, bombarding Sequehart, Ramicourt, Montbrehain and other commanding features. Fourth Army then pursued the Germans to the River Selle. From 11 to 17 October it prepared for another set-piece attack with vigorous CB work, 83rd Bde among the mass of artillery supporting IX Corps. The successful assault of 17 October was followed by another on 23 October: a moonlight attack with 83rd Bde supporting 1st Division.[28][48][49][50] As the regimental historian wrote:
- "The guns of Fourth Army demonstrated, on 23rd October, the crushing effect of well co-ordinated, massed artillery. They simply swept away the opposition and, though stiff fighting was reported in places, it was not on a large scale".[51]
Fourth Army continued its advance from the Selle to the Sambre Canal, which it crossed on 4 November, after which the advance became a pursuit in which most of the heavy artillery was left behind, held up by blown bridges. The Armistice with Germany came into force on 11 November.[28][52][53]
2/1st Highland (Fifeshire) Battery
Shortly after the outbreak of war, on 31 August 1914, the TF was authorised to raise 2nd Line units from those men who had not volunteered for, or were not fit for, overseas service, together with new volunteers, while the 1st Line went overseas to supplement the Regulars. The role of the 2nd Line was Home Defence and training drafts for the army on active service.[54] 2/1st Highland (Fifeshire) Heavy Bty RGA was raised at Dunfermline for service with the 64th (2nd Highland) Division. In January 1916, the division was attached to the Eighth New Army and moved to Norfolk. In September 1916, the battery left 64th Division and was attached to the 3rd Provisional Brigade at Sheringham, which became 223rd Mixed Brigade in December 1916. The battery retained its obsolete 4.7-inch guns and remained with this brigade until the end of the war.[55][56]
Interwar
When the TF was reformed in 1920, the battery was reconstituted as the 1st (Highland) Medium Brigade, RGA, with the headquarters now at Aberdeen. As well as men from the former Highland (Fifeshire) Battery, personnel were drawn from the 6th (Banff and Donside) and 7th (Deeside) Battalions of the Gordon Highlanders to bring it up to a strength of four batteries. It was renumbered as the 5th (Highland) Medium Brigade in 1921 when the TF was reorganised as the Territorial Army (TA). In 1924, the RGA was absorbed into the RA. The brigade was classed as 'Army Troops' within 51st (Highland) Divisional Area. By 1927, the unit's organisation was as follows:[57][58][59]
56th (Highland) Medium Brigade, RA (TA)
- HQ at Aberdeen
- 221st (Peterhead) Medium Battery (Howitzers)
- 222nd (Fraserburgh) Medium Battery (Howitzers)
- 223rd (Banffshire) Medium Battery (Howitzers)
- 224th (Fife) Medium Battery
In 1938, the Dunfermline-based 224th (Fife) Bty was transferred to provide the basis for a new 71st (Forth) Anti-Aircraft Regiment, RA.[60][61] It was replaced by 174th Bty, transferred from the North Scottish Heavy Brigade (formerly the North Scottish RGA), a coast defence unit that included part of 1st Fifeshire RGA when it was reorganised in 1908 (see above). In 1938, the RA renamed its brigades as regiments. Thus, by 1939, the unit's organisation was:[57][62]
56th (Highland) Medium Regiment, RA (TA)
- HQ at Drill Hall, 43 Skene Terrace, Aberdeen
- 174th (North Scottish) Battery at Fonthill Barracks, Aberdeen
- 221st (Peterhead) Battery at Peterhead
- 222nd (Fraserburgh) Battery (H) at Drill Hall, Fraserburgh
- 223rd (Banffshire) Battery (H) at Banff
Just before the outbreak of war in September 1939, the regiment was split into two: 56th Medium Regiment retained 174 and 221 Btys; the new 65th Medium Regiment based in Banff had 222 and 223 Btys. Both regiments formed part of the Highland Area of Scottish Command[57][63][64]
Second World War
56th (Highland) Medium Regiment
The regiment went to France with the British Expeditionary Force in October 1939 as part of III Corps.[64][65][66]
When the Battle of France began on 10 May 1940, the regiment accompanied the BEF's advance into Belgium, and then its retirement to defend the Escaut line.[67] German breakthroughs elsewhere forced the BEF to retreat to Dunkirk, where the artillery had to destroy its guns and await evacuation (Operation Dynamo).
After the evacuation from Dunkirk, the regiment became part of Eastern Command of Home Forces in June 1940.[68][69] It was sent, with whatever guns could be obtained, to assist in the defence of Essex, where it came under the Commander Royal Artillery (CRA) of 15th (Scottish) Division. According to the divisional historian:
- 'The guns had the stupendous task of covering from static positions the whole forty miles of the Divisional front from Southend along the Essex coast to Harwich. And what guns! The field regiments averaged eight museum pieces per regiment ... The pride of the C.R.A.'s flock was the 56th Medium Regiment, which he superimposed over the whole front. Its armament showed a pleasing variety, consisting of four 6-inch howitzers, six 6-inch mortars, two 4.7-inch Q.F. naval guns, two 4-inch B.L. naval guns, one 75m (French) gun taken off a ship, two 12-pounders on fixed mountings, and four 6-pounders. The rumour that Mons Meg was on her way south to join the party proved unfounded'.[70]
The Essex coastal defences were stood down in 1941 and the units returned to training.[71] 56th Medium Regiment never saw active service again. It joined 76th Infantry (Reserve) Division on 25 January 1943, remaining with it until 1 September 1944, when the division was disbanded and the regiment joined 47th Infantry (Reserve) Division until the end of the war.[68][69][72]
56th Medium Regiment was placed in suspended animation in 1946.[57]
65th (Highland) Medium Regiment
When the regiment mobilised in September 1939, its 6-inch howitzers apparently still had wooden wheels from its horse-drawn days.[73] It too joined the BEF, arriving in April 1940 and coming directly under General Headquarters (GHQ). It also lost its guns in France and became part of Northern Command in Home Forces after the evacuation from Dunkirk.[64][65][66]
In May 1944, the regiment joined Second Army preparing for Operation Overlord and went to Normandy as part of 4th Army Group Royal Artillery.[64][68][73][74] The regiment landed on 8 June and proceeded to Colleville-sur-Orne, where it initially gave fire support to 1st Special Service Brigade, 6th Airborne and 51st Highland Divisions.[75]
The regiment continued to serve in North West Europe until the end of the war.[64][68][73][74]
65th Medium Regiment was placed in suspended animation in 1946, and disbanded in 1947.[57]
Postwar
When the TA was reconstituted in 1947, 56th Regiment was reformed as 356th (Highland) Medium Regiment, RA, initially forming part of 84 (Field) Army Group Royal Artillery, though that group was disbanded in 1950.[57][76][77] On 31 October 1956, it was converted into 278th (Buchan & Banff Artillery) Field Squadron, Royal Engineers, as part of 117 Field Engineer Regiment.[57] In 1961, the squadron was assigned to 51sth (Highland) Division/District RE, but was disbanded in 1967.[78]
Honorary Colonels
The following served as Honorary Colonel of the 1st Fife Artillery and its successors:[62]
- W.H.M. Dougall, RN, commanding officer from 1860, appointed 7 December 1872
- S. Grace, VD, appointed 12 July 1890
- 9th Earl of Elgin and Kincardine, KG, GCSI, GCIE, appointed 26 March 1902[19]
- Col A.W. McPherson, appointed (to 56th (Highland) Medium Regiment) 7 May 1935
Notes
- Beckett.
- Grierson, pp. 1–12.
- Litchfield & Westlake, pp. 1–4.
- Spiers, pp. 163–8.
- Beckett, Appendix VIII.
- Grierson, pp. 135–7.
- Litchfield & Westlake, pp. 72–6.
- Monthly Army List January 1866, January 1872.
- Beckett, p. 145.
- Monthly Army List December 1880, January 1884.
- Monthly Army List January 1899.
- Quarterly Army List October 1907.
- Spiers, Chapter 10.
- London Gazette, 20 March 1908.
- London Gazette, 14 October 1910.
- Litchfield, p. 273.
- Monthly Army List August 1914.
- Litchfield, p. 283.
- Burke.
- Becke, Pt 2a, pp. 103–5.
- 51st (Highland) Division at Long, Long Trail.
- 'Allocation of Heavy Batteries RGA' and 'Allocation of HA Groups', The National Archives (TNA), Kew, file WO 95/5494.
- Farndale, Western Front, Annex E.
- Edmonds, 1915, Vol II, pp. 32–3.
- Farndale, Western Front, pp. 103–7.
- Aubers Ridge at Long, Long Trail.
- Becke, Pt 4, pp. 156–9.
- Becke, Pt 4, pp. 102–7.
- Becke, Pt 4, pp. 114–9.
- Farndale, Western Front, p. 169.
- Becke, Pt 4, pp. 92–8.
- Becke, Pt 4, pp. 235–8.
- Farndale, pp. 164–74.
- Arras at Long, Long Trail.
- Wolff, pp. 143–7.
- Becke, Pt 4, pp. 82–6.
- Farndale, Western Front, pp. 211–13.
- Wolff, pp. 223–35, 249–51.
- Third Ypres at Long, Long Trail.
- Farndale, Western Front, Annex M.
- Becke, Pt 4, pp. 74–8.
- Blaxland, pp. 84-6.
- Farndale, Western Front, p. 275.
- Blaxland, pp. 117–23.
- Lys at Long, Long Trail.
- Blaxland, pp. 232–7.
- Edmonds & Maxwell-Hyslop, pp. 101–6, 130, 139.
- Blaxland, pp. 238–40, 251–2.
- Edmonds & Maxwell-Hyslop, pp. 159–64, 295, 299–305, 354–6.
- Picardy at Long, Long Trail.
- Farndale, Western Front, pp. 311–2.
- Blaxland, pp. 254, 261.
- Edmonds & Maxwell-Hyslop, pp. 464–8, 499–502, 507–8, 519–21.
- Becke, Pt 2b, p. 6.
- Becke, Pt 2b, pp. 58–9.
- Farndale, Forgotten Fronts, p. 411.
- Litchfield, p. 271.
- Titles and Designations, 1927.
- Litchfield, Appendix IV.
- Glasgow Herald 13 January 1938.
- Monthly Army List, January 1938.
- Army Lists, various dates.
- Scottish Command 3 September 1939 at Patriot Files
- "Highland Area 1939 at British Military History" (PDF). Archived from the original (PDF) on 23 September 2015. Retrieved 15 February 2015.
- Ellis, Appendix I.
- Joslen, p. 462.
- Ellis, p. 71.
- British Artillery in World War 2.
- 56 Med Rgt at RA 39–45. Archived 2016-03-03 at the Wayback Machine
- Martin, p. 8.
- Martin, p. 10.
- Joslen, pp. 41 & 99.
- 65 Med Rgt at RA 39–45. Archived 2016-03-03 at the Wayback Machine
- Joslen, p. 463.
- 65 Med Rgt at Pegasus Archives.
- Watson. Archived 3 March 2016 at the Wayback Machine
- Litchfield, p. 326.
- 256–300 RE Sqns at British Army 1945 on.
References
- Ian F. W. Beckett, Riflemen Form: A study of the Rifle Volunteer Movement 1859–1908, Aldershot: Ogilby Trusts, 1982, ISBN 0-85936-271-X.
- Maj A. F. Becke,History of the Great War: Order of Battle of Divisions, Part 2a: The Territorial Force Mounted Divisions and the 1st-Line Territorial Force Divisions (42–56), London: HM Stationery Office, 1935/Uckfield: Naval & Military Press, 2007, ISBN 1-84734-739-8.
- Maj A. F. Becke,History of the Great War: Order of Battle of Divisions, Part 2b: The 2nd-Line Territorial Force Divisions (57th–69th), with the Home-Service Divisions (71st–73rd) and 74th and 75th Divisions, London: HM Stationery Office, 1937/Uckfield: Naval & Military Press, 2007, ISBN 1-84734-739-8.
- Maj A.F. Becke,History of the Great War: Order of Battle of Divisions, Part 4: The Army Council, GHQs, Armies, and Corps 1914–1918, London: HM Stationery Office, 1944/Uckfield: Naval & Military Press, 2007, ISBN 1-847347-43-6.
- Burke's Peerage, Baronetage and Knightage, 100th Edn, London, 1953.
- Gregory Blaxland, Amiens: 1918, London: Frederick Muller, 1968/Star, 1981, ISBN 0-352-30833-8.
- Brig-Gen Sir James E. Edmonds, History of the Great War: Military Operations, France and Belgium, 1915, Vol II, London: Macmillan, 1928/Imperial War Museum & Battery Press, 1995, ISBN 0-89839-219-5.
- Brig-Gen Sir James E. Edmonds & Lt-Col R. Maxwell-Hyslop, History of the Great War: Military Operations, France and Belgium 1918, Vol V, 26th September–11th November, The Advance to Victory, London: HM Stationery Office, 1947/Imperial War Museum and Battery Press, 1993, ISBN 1-870423-06-2.
- Major L. F. Ellis, History of the Second World War, United Kingdom Military Series: The War in France and Flanders 1939–1940, London: HM Stationery Office, 1954.
- General Sir Martin Farndale, History of the Royal Regiment of Artillery: Western Front 1914–18, Woolwich: Royal Artillery Institution, 1986, ISBN 1-870114-00-0.
- Gen Sir Martin Farndale, History of the Royal Regiment of Artillery: The Forgotten Fronts and the Home Base 1914–18, Woolwich: Royal Artillery Institution, 1988, ISBN 1-870114-05-1.
- Maj-Gen James Grierson, Records of the Scottish Volunteer Force 1859–1908, Edinburgh: Blackwood, 1909.
- Norman E. H. Litchfield, The Territorial Artillery 1908–1988 (Their Lineage, Uniforms and Badges), Nottingham: Sherwood Press, 1992, ISBN 0-9508205-2-0.
- Norman Litchfield & Ray Westlake, The Volunteer Artillery 1859–1908 (Their Lineage, Uniforms and Badges), Nottingham: Sherwood Press, 1982, ISBN 0-9508205-0-4.
- Lt-Gen H. G. Martin, The History of the Fifteenth Scottish Division 1939–1945, Edinburgh: Blackwood, 1948/Uckfield: Naval & Military Press, 2014, ISBN 978-1-78331-085-2.
- Osborne, Mike, 2006. Always Ready: The Drill Halls of Britain's Volunteer Forces, Partizan Press, Essex. ISBN 1-85818-509-2
- Edward M. Spiers, The Army and Society 1815–1914, London: Longmans, 1980, ISBN 0-582-48565-7.
- Titles and Designations of Formations and Units of the Territorial Army, London: War Office, 7 November 1927.
- Leon Wolff, In Flanders Fields: The 1917 Campaign, London: Longmans, 1959/Corgi, 1966.