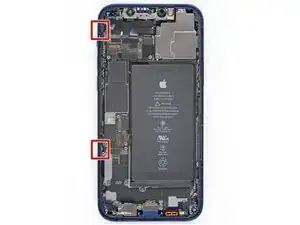
Introduction

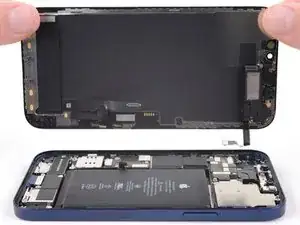
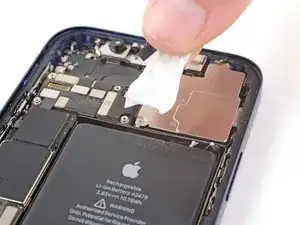
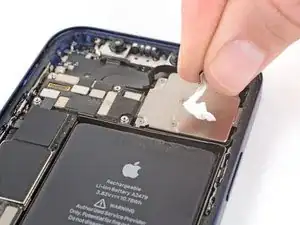
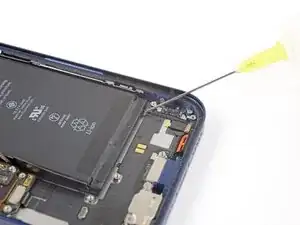
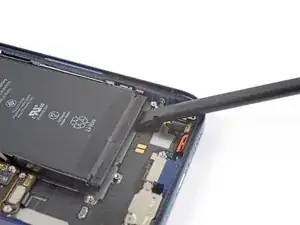
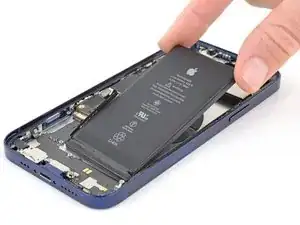
iPhone batteries are rated to hold 80% of their capacity for up to 500 charge cycles, which lasts roughly 18-24 months for most users. After that, your iPhone may need to be charged far more frequently, and iOS may warn you that performance is affected (in other words, your phone will run slower). Use this guide to replace your battery and restore your iPhone to like-new performance.

If your battery is swollen, take appropriate precautions.

Note: After the repair, your iPhone may display a warning about the “genuineness” of the battery, even when using original Apple parts. If your iPhone functions normally, you can safely ignore the warning.

For optimal performance, after completing this guide, calibrate your newly installed battery: Charge it to 100% and keep charging it for at least two more hours. Then use your iPhone until it shuts off due to low battery. Finally, charge it uninterrupted to 100%.

  1. 3DrAgS2S2IaCnYj6
    3DrAgS2S2IaCnYj6
    o3bFFFYrbZSyymaN
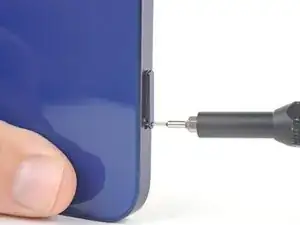
    • Insert a SIM card eject tool or a paperclip into the small hole in the SIM card tray, located on the volume button edge of the iPhone.

    • Press firmly to eject the tray.

  2. hWorRgls1LGfXIAa
    hWorRgls1LGfXIAa
    fXONTKgMtaqwruBw
    crH24u4ItSleZrnm
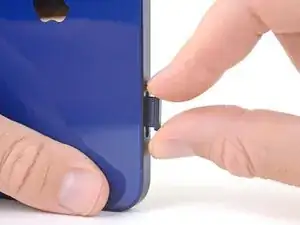
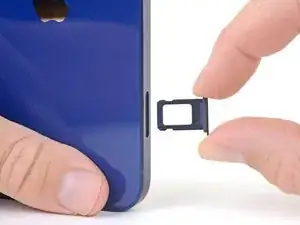
    • Remove the SIM card tray from the iPhone.

    • The SIM card will fall out of the tray easily.

    • When reinserting the SIM card, make sure it's in the proper orientation inside the tray.

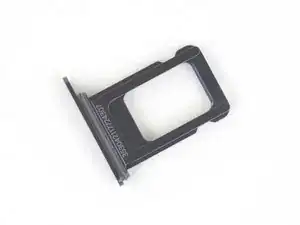
    • A thin rubber gasket around the SIM tray provides water and dust protection. If this gasket is damaged or missing, replace the gasket or the entire SIM tray to protect your iPhone's internal components.

  3. oBBxtkV2gJcIPKkK
    • Caution: Before you begin, discharge your iPhone battery below 25%. A charged lithium-ion battery can catch fire and/or explode if accidentally punctured.

    • Power off your iPhone before beginning disassembly.

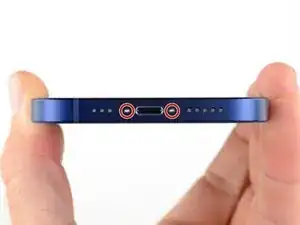
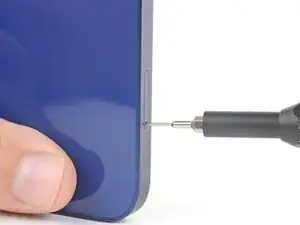
    • Remove the two 6.75 mm long pentalobe P2 screws at the bottom edge of the iPhone.

    • Opening the iPhone's display will compromise its waterproof seals. Have replacement seals ready before you proceed past this step, or take care to avoid liquid exposure if you reassemble your iPhone without replacing the seals.

    Do you sell the waterproof seals separately or are they included in the kit?

    Heather Furnas -

    Do you sell the waterproof seals separately or are they included in the kit? (I would like to know this as well.)

    CaliforniaGunner -

  4. 6UPwoloGBO4tmVoS
    6UPwoloGBO4tmVoS
    BmSYPJmOy6dbHipF
    3EOdQPAGOmiuhoKU
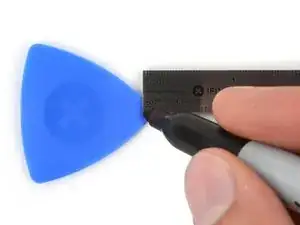
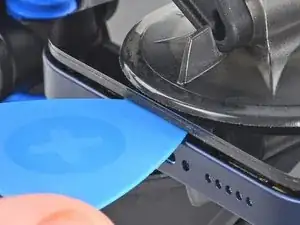
    • If inserted too far, an opening pick can damage your device. Follow this step to mark your pick and prevent damage.

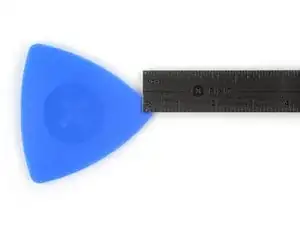
    • Measure 3 mm from the tip and mark the opening pick with a permanent marker.

    • You can also mark the other corners of the pick with different measurements.

    • Alternatively, tape a coin to a pick 3 mm from the tip.

    Got to step 2 and realized the fix kit doesn't include an opening pick! Looks like a guitar pick, and I have those lying around. Is that expected? Looks like the pick is used in many steps below. There's a little blue crowbar that isn't mentioned in the instructions. Perhaps that replaces the opening pick?

    Sloan Looney -

    Hi! I can't see which guide you were using when writing this comment. Can you reply here with which guide and fix kit you used?

    Clay Eickemeyer -

    I see you posted this in Meta. I hope it's resolved soon! In the meantime, a guitar pick may work well enough for your repair.

    Clay Eickemeyer -

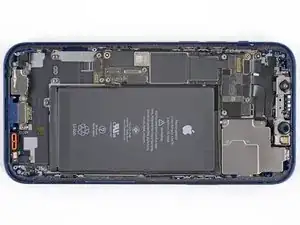
    what fix kit?

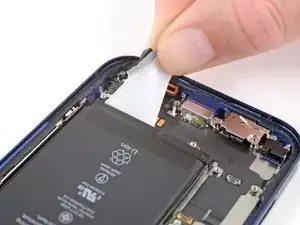
    Meow Purr -

    My fix kit didn't include an opening pick either

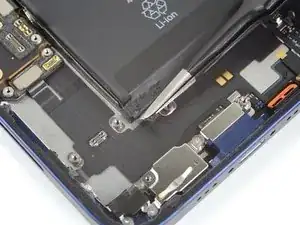
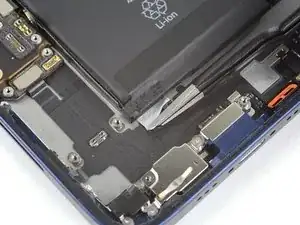
    WILLIAM HARRIS -

    Make sure you check inside the black boxes after emptying them. My pick was stuck inside one of the boxes.

    AndyF -

    My AliExpress refurbished screen came with a pick that has a coin-like circle that pops out, so no modification was necessary

    Gijs Leegwater -

  5. U6uMaQ2w3xOXGqZt
    U6uMaQ2w3xOXGqZt
    CPoII2uYnsjeyboh
    UYpZQjIJZTscr1dr
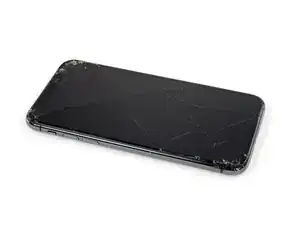
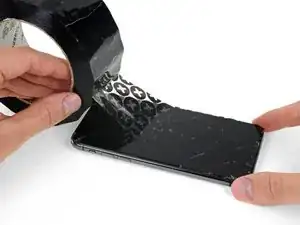
    • If your iPhone has a cracked screen, keep further breakage contained and prevent bodily harm during your repair by taping over the glass.

    • Lay overlapping strips of clear packing tape over the iPhone's screen until the whole face is covered.

    • Wear safety glasses to protect your eyes from any glass shaken free during the repair.

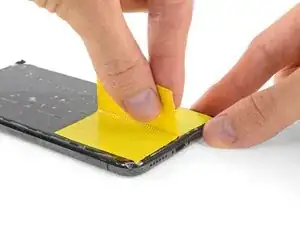
    • If you can't get the suction cup to stick in the next few steps, fold a strong piece of tape (such as duct tape) into a handle and lift the screen with that instead.

    • If all else fails, you can superglue the suction cup to the screen.

  6. B3jjMp2cvD5Rjabx
    B3jjMp2cvD5Rjabx
    QXAiF3sdtAYXQTQt
    FMOPQmVFrA1qxL1R
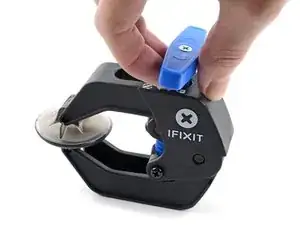
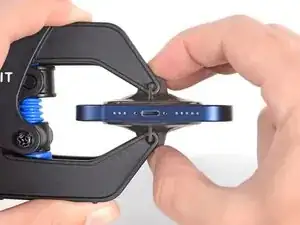
    • The next three steps demonstrate the Anti-Clamp, a tool we designed to make the opening procedure easier. If you aren't using the Anti-Clamp, skip down three steps for an alternate method.

    • For complete instructions on how to use the Anti-Clamp, check out this guide.

    • Pull the blue handle backwards to unlock the Anti-Clamp's arms.

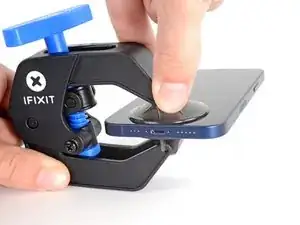
    • Slide the arms over either the left or right edge of your iPhone.

    • Position the suction cups near the bottom edge of the iPhone—one on the front, and one on the back.

    • Squeeze the cups together to apply suction to the desired area.

    • If you find that the surface of your iPhone is too slippery for the Anti-Clamp to hold onto, you can use tape to create a grippier surface.

  7. oVcZhyKbh6AqAYBD
    oVcZhyKbh6AqAYBD
    bPLD3rBQF23DDmGa
    mpAqXAZbRjfBNAkL
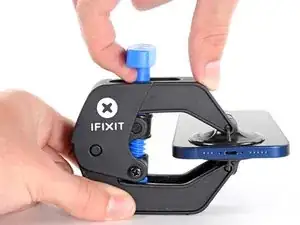
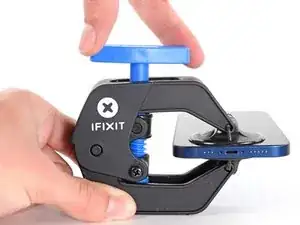
    • Pull the blue handle forwards to lock the arms.

    • Turn the handle clockwise 360 degrees or until the cups start to stretch.

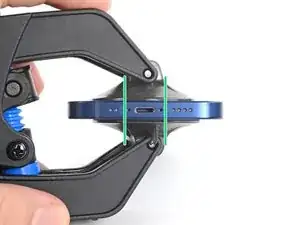
    • Make sure the suction cups remain aligned with each other. If they begin to slip out of alignment, loosen the suction cups slightly and realign the arms.

  8. u1p2GSBABb4i1qXl
    u1p2GSBABb4i1qXl
    TEVkJ3VWQ5bWEZ2G
    LMDHoJDdVkP56a4a
    • Support your iPhone on something sturdy such as a hardcover book so it rests hands-free and parallel to the ground; this makes it easier to work with in the following steps.

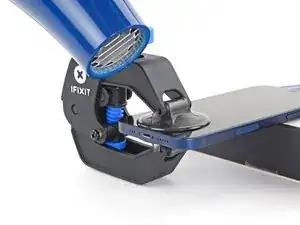
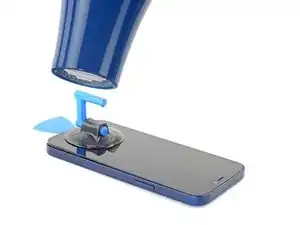
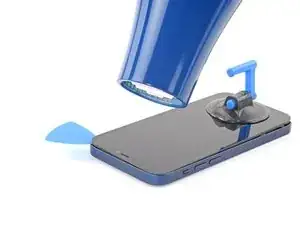
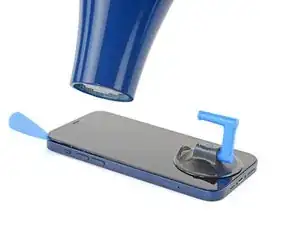
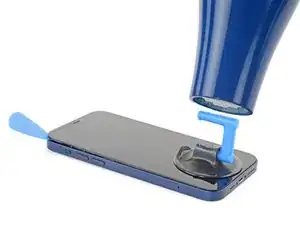
    • Use a hair dryer to heat along the bottom edge of the iPhone. The screen should feel slightly too hot to touch.

    • For complete instructions on how to use a hair dryer, check out this guide.

    • Wait one minute to give the adhesive a chance to release and present an opening gap.

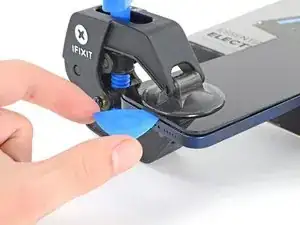
    • Insert an opening pick under the screen's plastic bezel when the Anti-Clamp creates a large enough gap.

    • If the Anti-Clamp doesn't create a sufficient gap, apply more heat to the area and rotate the handle a quarter turn.

    • Don't crank more than a quarter turn at a time, and wait one minute between turns. Let the Anti-Clamp and time do the work for you.

    • Skip the next three steps.

  9. OXZKWsxxXqG3arZh
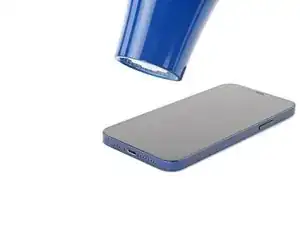
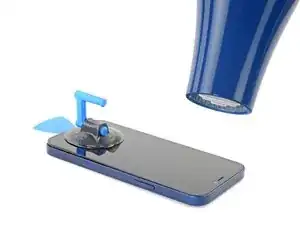
    • Use a hair dryer or a heat gun to heat the bottom edge of the iPhone for 90 seconds or until the screen is slightly too hot to touch.

    • Never leave your hair dryer in one spot for an extended period of time.

  10. ASLAa2AJO4E5GYT1
    ASLAa2AJO4E5GYT1
    EMmHxm3YOfOoLkEG
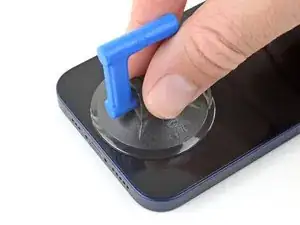
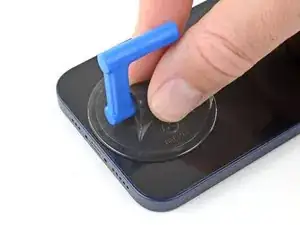
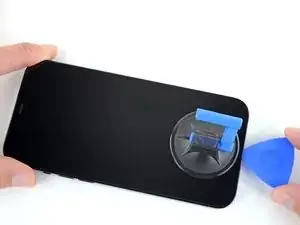
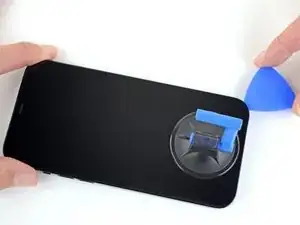
    • If you're using a single suction handle, apply it to the bottom edge of the phone, while avoiding the very edge of the glass.

  11. QdfiItrQQ6MhHWbj
    QdfiItrQQ6MhHWbj
    4nKuwPf1B6TyCssL
    eU1UEGuDjKnyIdUg
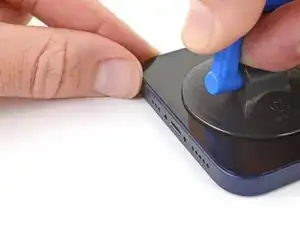
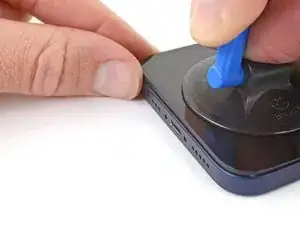
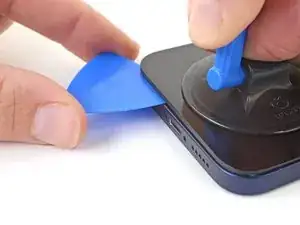
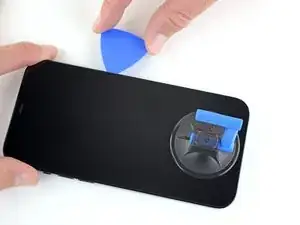
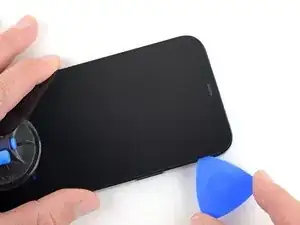
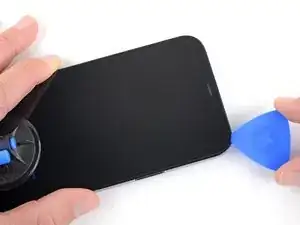
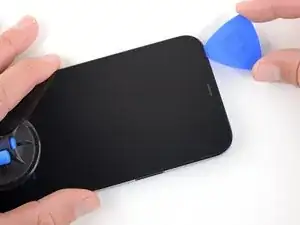
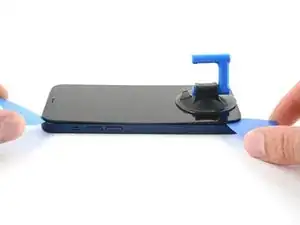
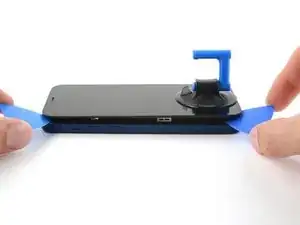
    • Pull up on the suction cup with firm, constant pressure to create a slight gap between the screen and the frame.

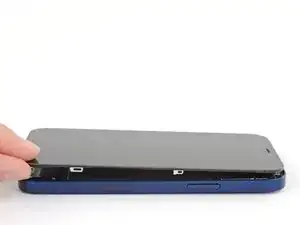
    • Insert an opening pick into the gap under the screen's plastic bezel.

    • The watertight adhesive holding the screen in place is very strong; creating this initial gap takes a significant amount of force. If you're having a hard time opening a gap, apply more heat, and gently rock the screen up and down to weaken the adhesive until you create enough of a gap to insert your tool.

    This seems impossible. I've been trying for an hour with heat and rocking, and the screen doesn't budge. :(

    Aubi Abramowitz -

    this is impossible, will take years

    Evan Z -

    Don’t give up! Use more heat and a tad more force. I know you may fear breaking it more, but as long as you don’t stick the prying tool too far or tug too hard, you can do it! I have faith that you can do it!

    Rachel Kelley -

    I'm in the same boat, this isn't coming off. I've tried the hair dryer as well as the heating pad from ifixit. Any other ideas?

    The suction cup comes off before the screen will

    Brian Melcher -

    Is there a better tool for this? Just saw a video on YouTube where a kid pryed it open with no heating/etc. in 5 seconds.

    Brian Melcher -

    I've changed the batteries in probably a half dozen iphones of different models. But 25 minutes of heating and pulling had no effect on iPhone 12

    Ryan Thornburg -

    Welp. I finally ended up breaking the screen attempting this. DO NOT ATTEMPT THIS REPAIR! Not worth the broken screen and losing the cost of shipping both ways when you return the battery.

    Ryan Thornburg -

    thx, I ll go to an apple repair center

    Ronald Geerligs -

    Back (and bad...) experience ! Even if you heat a lot, the screen is hardly sticked. Take care, before sliding the mediator under the screen, this one should be moved up, at least 2 mm. On my side i have slided around 1 mm and .... inserted the mediator between the glass screen and the screen structure ring.... result : glass break and screen to change (my initial exercise was the battery removal !). I feel that next time i will visit a repair center...

    Gilbert -

    Pro tip for anyone having trouble with this. You have to use multiple rounds of heat and pulling. Use a hair dryer and not the iOpener that comes with the fix kit and get it just too hot to touch then quickly start pulling and wiggling it up and down. Once it cools down grab the hair dryer again and repeat it a couple times until you start to get a big enough gap.

    I just did this yesterday and it took around 5 rounds of heating and pulling to get it to seperate enough from the body.

    Oliver Pressello -

    It's important to insert the pick under the bezel. I just delaminated my screen. The screen was probably fine, but it was glitching, so I wanted to check for a bad connection. Anyway, now I get a new screen.

    Under the bezel, eh.

    Chris Green -

    After reading this almost a year later to the day I last commented on it, I now know that the best way I have found to remove a screen, from pretty much any phone, not just this one, is heat (I use a heating pad on 80 degrees celsius) and before putting the phone on the heating pad, I use 91% isopropyl alcohol around the edges that you will be sliding your pry tools in, and I leave it on for 10 min. I then take it off, add more alcohol, and then put it back on the pad for another 5 min. Also, while I am sliding my tools around the screen, I continuously add more alcohol, and if it takes a really long time, then more heat as well. Heat, alcohol, and patience, lots of patience, and you should be good. Hope this helps, good luck!

    Rachel Kelley -

    Can confirm, this does indeed work. Just keep warming it up, lifting up and down, and repeat when phone goes cold. After around 10 rounds it would move enough to where I could see inside the phone when lifted. You can then insert pick

    Tip: You can also try to apply heat and lift the other corner, just enough to make it move slightly. This will ease pressure needed to separate the glue on the other side as-well.

    Thomas -

  12. TLFrov6MrYfe6MLs
    TLFrov6MrYfe6MLs
    DDIYLM3VDKPF1sdb
    • Use a hair dryer to heat the right edge of the iPhone (the edge with the power button) for 90 seconds or until the screen is slightly too hot to touch.

  13. rGMaUZMOwp6jDZup
    rGMaUZMOwp6jDZup
    sBgqGmTWBfaWInJQ
    rxBEr5BO3bFbLaRG
    • Slide the opening pick around the bottom right corner of the iPhone to separate its adhesive.

    • Continue sliding up the right edge of the iPhone until you reach the top right corner.

    • Don't insert your pick more than 3 mm, as you may damage internal components.

    • Leave the pick in the top right corner before continuing.

  14. EEAWPuNCXwOopd5j
    • Use a hair dryer to heat the top edge of the iPhone for 90 seconds or until the screen is slightly too hot to touch.

  15. jjDP5cRJDxygaS4e
    jjDP5cRJDxygaS4e
    wfpdoWB6GTpFmSWF
    hRbFaNyEBNemtUjd
    • Slide the opening pick around the top right corner of the iPhone to separate the top adhesive.

    • Don't insert your pick more than 3 mm, as you may damage the top sensors.

    • Leave the pick in the top left corner before continuing.

  16. 1iVQp4WpwoHLdBEJ
    1iVQp4WpwoHLdBEJ
    oTaCH2yFmSQBq4A5
    • Use a hair dryer to heat the left edge of the iPhone for 90 seconds or until the screen is slightly too hot to touch.

  17. 1EkaRCPsl1hLCcO5
    • There are delicate cables along the left edge of your iPhone. Don't insert your pick here, as you may damage the cables.

  18. U32XuDLs5g4YdpJX
    U32XuDLs5g4YdpJX
    P1QKu5D5XkUVQHhB
    • Insert a second opening pick in the bottom left corner of the iPhone.

    • Twist both picks simultaneously until the left edge clips release.

    • Apply the twisting force gradually.

    • If you're having trouble separating the adhesive, reheat the left edge.

  19. IWXGOEkVZMt431sG
    IWXGOEkVZMt431sG
    Qxj6lbMWEEfMw45M
    NoVbSlrJHyCMaaFN
    • Rotate your iPhone so the right edge faces you.

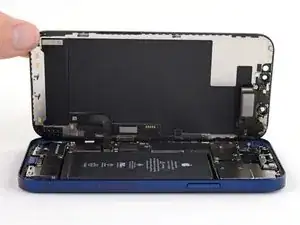
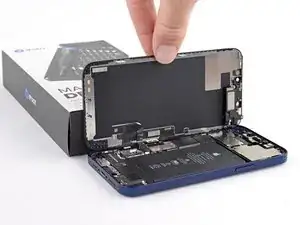
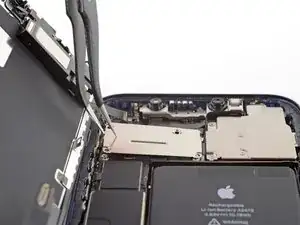
    • Open the iPhone by swinging the display up from the right side, like the front cover of a book.

    • Don't try to fully separate the display yet, as several fragile ribbon cables still connect it to the iPhone's logic board.

    • Lean the display against something to keep it propped up while you're working on the phone.

    • During reassembly, lay the display in position, align the clips along the top edge, and carefully press the top edge into place before snapping the rest of the display down. If it doesn't click easily into place, check the condition of the clips around the perimeter of the display and make sure they aren't bent.

    i did this and the shroud with the earpiece speaker still stuck with the phone so its just wedged in there i cant get it out

    lil teslas -

  20. fVLd1ujMC23kPMBM
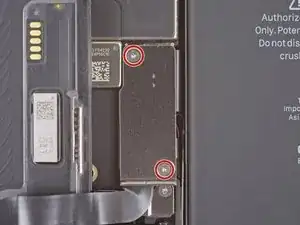
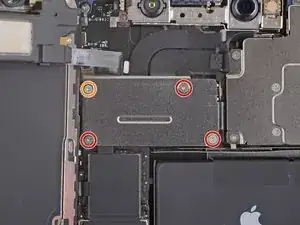
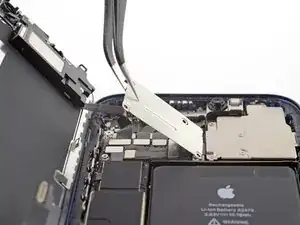
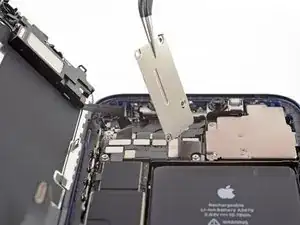
    • Remove two 1.1 mm long Y000 screws securing the battery and display connector cover.

    • Throughout this repair, keep track of each screw and make sure it goes back exactly where it came from to avoid damaging your iPhone.

    • During reassembly, this is a good point to power on your iPhone and test all functions before you seal the display in place. Be sure to power your iPhone back down completely before you continue working.

    Ouch, I see a broken flat here…

    Alessandro Sordelli -

    Can I use a y 0.6 if I don’t have y000

    kellciou cr -

    Yep! The measurements for Y000 are 0.6 mm.

    Alex Diaz-Kokaisl -

  21. nCqmqLuRyNhUsecI
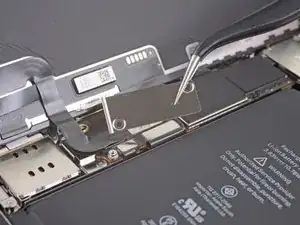
    • Remove the cover.

    Hi

    On my original display on an iPhone 12, there is no metal hinge as shown here and therefore no place for it when closing the phone. Have double-checked model and the original display - and it is just not there. Is there another model based on serial number?

    Hinge marked: https://www.dropbox.com/scl/fi/asztgi60g...

    Best regards,

    Carsten

    Carsten Feltman -

  22. q1GE6ij6DBGAtVUa
    q1GE6ij6DBGAtVUa
    UFeAbkthIglN1PdG
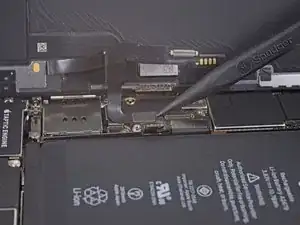
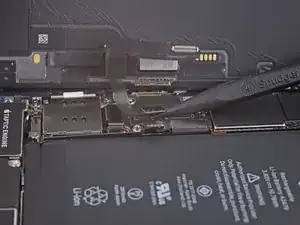
    • Use a spudger or a clean fingernail to pry the battery connector up from its socket on the logic board.

    • Try not to damage the black silicone seal surrounding this and other board connections. These seals provide extra protection against water and dust intrusion.

    • Bend the connector slightly away from the logic board to prevent it from accidentally making contact with the socket and providing power to the phone during your repair.

  23. JWGf11bubrJIQJqt
    JWGf11bubrJIQJqt
    JnsnSmZNtLSbSfID
    • Use a spudger or a fingernail to disconnect the display cable connector.

    • To re-attach press connectors like this one, carefully align and press down on one side until it clicks into place, then repeat on the other side. Do not press down on the middle. If the connector is misaligned, the pins can bend, causing permanent damage.

  24. FtXJDFkUoD1lyBai
    FtXJDFkUoD1lyBai
    lnDDQGdsvpfnyRjt
    • Use a spudger or a fingernail to disconnect the digitizer cable connector.

    • If any part of your screen doesn't respond to touch after your repair, disconnect the battery and then re-seat this connector, making sure it clicks fully into place and that there's no dust or other obstruction in the socket.

  25. vanQfZqXPQGekhh1
    • Use a Y000 driver to remove four screws securing the front sensor connector cover.

    • Three 1.1 mm long screws

    • One 1.4 mm long screw

  26. KJnJAuPTwlxnICBD
    KJnJAuPTwlxnICBD
    MHdESpgJCsSSZaMy
    1qodeTMyy56DyGRv
    • Swing the cover up from the left until the small clip on the right unhooks.

    • Remove the cover.

    • During reassembly, insert the clip on the right edge into its slot first, then hinge the rest of the cover into place.

  27. LC4oSHWw4nEIZ3H5
    LC4oSHWw4nEIZ3H5
    5PkRCF6AJnj1hYTc
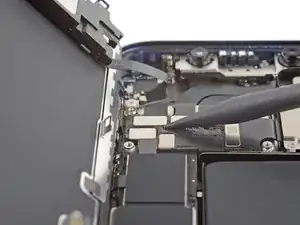
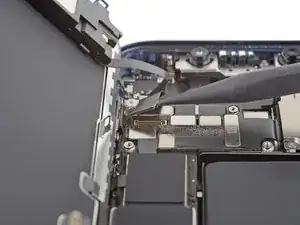
    • Use a spudger or a fingernail to disconnect the front sensor assembly cable connector.

  28. XrIRhPcqOHJyMV1q
  29. bRS3cGFFP6yojSpm
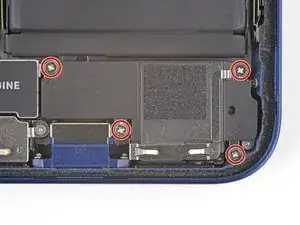
    • Use a Phillips driver to remove the four 1.6 mm screws securing the loudspeaker.

  30. NbpcmhGkrL4pJPrR
    • Remove the loudspeaker.

  31. BDG1AsU2FMntVTlp
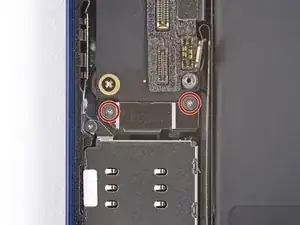
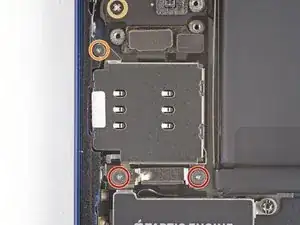
    • Use a Y000 driver to remove the two 1.4 mm long screws securing the SIM card reader connector cover.

  32. igdoNGEhPvLdVBRZ
    • Remove the SIM card reader cable connector cover.

  33. VNUiJJKGOjk2iFBR
    VNUiJJKGOjk2iFBR
    elAojh3KOE6K4dBi
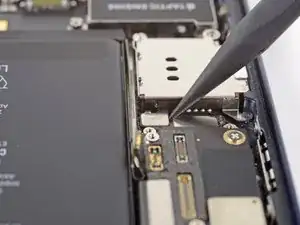
    • Use the point of a spudger to pry the SIM card reader cable connector straight up and out of its socket on the logic board.

  34. ALhewoX52AEkRWYq
    • Use a Y000 driver to remove the three screws securing the SIM card reader.

    • Two 1.4 mm screws

    • One 1.1 mm screw

  35. QScPMnajX66ruBeM
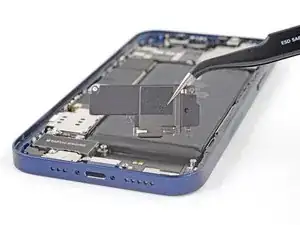
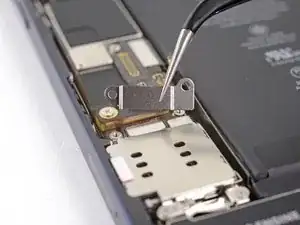
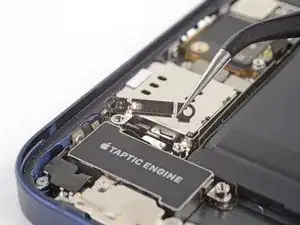
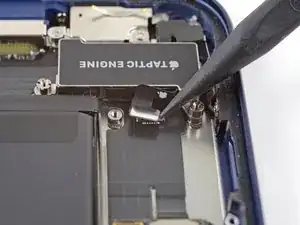
    • Remove the Taptic Engine cable connector bracket.

  36. 4yWAQHGOFvoFIECR
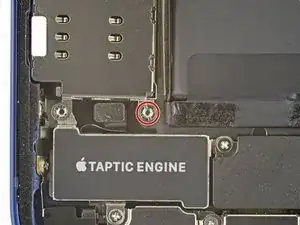
    • Use a standoff or a small flathead driver to remove the 2.82 mm long standoff screw securing the SIM card reader.

    • Standoff screws are best removed using a standoff screwdriver or bit.

    • In a pinch, a small flathead screwdriver will do the job—but use extra caution to ensure it doesn't slip and damage surrounding components.

  37. LvbxCZQJOkUCFFCb
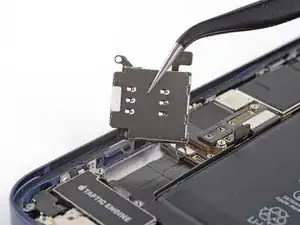
    • Remove the SIM card reader.

    • Before reinstallation, make sure the SIM eject plunger is pushed into the edge of the phone.

  38. 4nYrMqalZMEeIWgi
    4nYrMqalZMEeIWgi
    a1kQMgMNrmTVfRDb
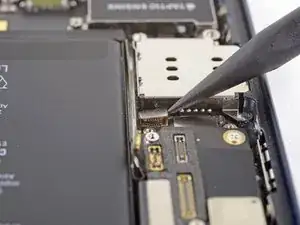
    • Use the point of a spudger to pry the Taptic Engine cable connector straight up and out of its socket on the logic board.

  39. yFHOgNuSK6pjMXFQ
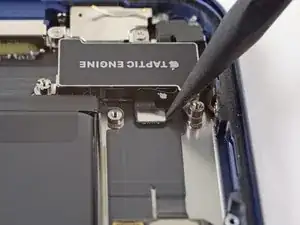
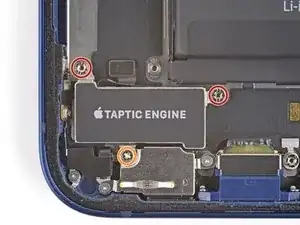
    • Remove the three screws securing the Taptic Engine.

    • Two 2.8 mm long standoff screws

    • One 1.8 mm Phillips screw

  40. HFkpJab1qmZXfVkk
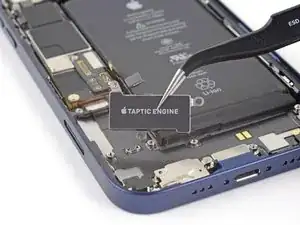
    • Remove the Taptic Engine.

  41. DpdUrxwkYVUltK1J
    DpdUrxwkYVUltK1J
    QUQhF4mciwENBcR2
    P5GRm6UKiXMu1gIJ
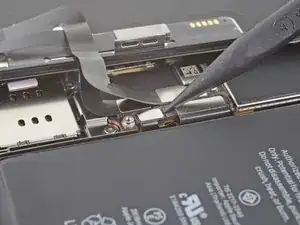
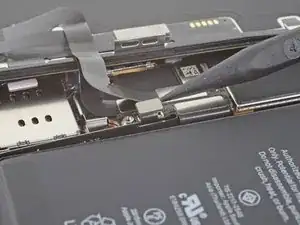
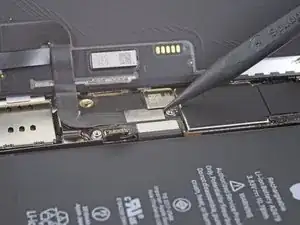
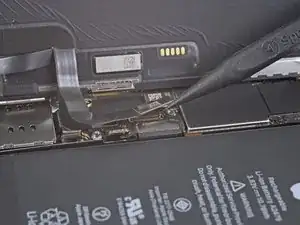
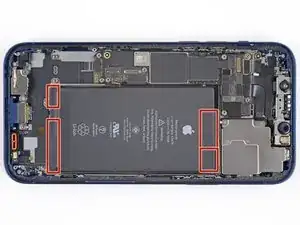
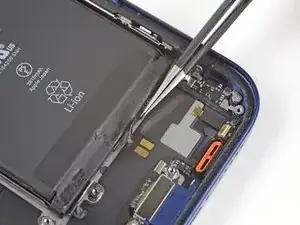
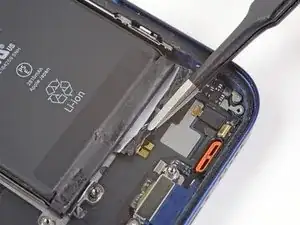
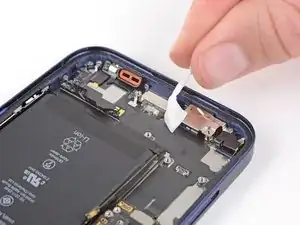
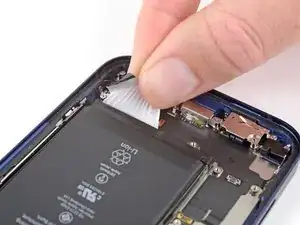
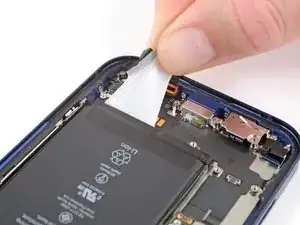
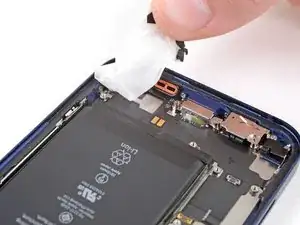
    • The battery is secured to the rear case with four pieces of stretch-release adhesive—two on the bottom edge of the battery, and two on the top edge.

    • Each piece of adhesive has a black pull-tab at the end, which is lightly adhered to the edge of the battery.

    • In the following steps, you'll pull each tab to slowly stretch out the adhesive underneath the battery. These "command-strip" style adhesives lose their stick when stretched, so you can remove the battery with ease.

    • If the strips break, don't panic! They don't always work as intended. Keep reading for tips on removing broken strips.

  42. Ym2m6JRPP4JNWvJg
    Ym2m6JRPP4JNWvJg
    2cKYR6kpZVMI5mwi
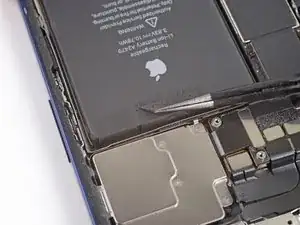
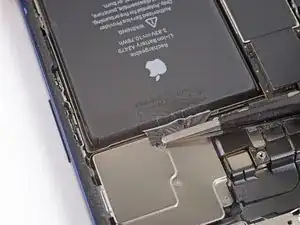
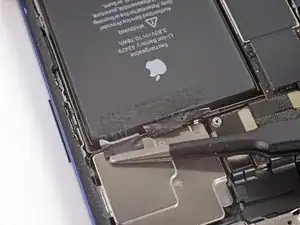
    • Peel down the first battery adhesive pull-tab to un-stick it from the bottom edge of the battery.

    • Caution: Don't jab the battery with any sharp tools. A punctured battery may leak dangerous chemicals or catch fire.

    Ihr verwendet hierbei einen breiten Tweezer welcher nicht in der Werkzeugliste genannt ist.

    Daniel -

  43. D5VUeqpJs5uvRVjK
    D5VUeqpJs5uvRVjK
    eApYRkUHHj6dKXR2
    • Peel down the second battery adhesive pull-tab to un-stick it from the bottom edge of the battery.

  44. IPrGRoUiAKK6wefl
    IPrGRoUiAKK6wefl
    IDcjHTNTAQUtUUtC
    SHDXUZ2TKUN1UKE6
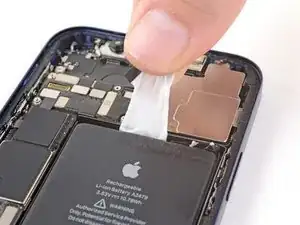
    • Grab the first pull-tab with your fingers and slowly pull it away from the battery, toward the bottom of the iPhone.

    • Pull hard enough to maintain tension on the strip, but don't force it. Give it plenty of time to stretch and un-stick from under the battery.

    • Don't press down on the battery. Hold the iPhone firmly by its sides.

    • Keep the strip flat and unwrinkled. Try to pull evenly on the whole strip, rather than pulling mainly in the middle or on one side.

    • Pull at a low angle so the strip doesn't snag on the edge of the battery.

    • If the adhesive strip breaks off, try to retrieve it using your fingers or blunt tweezers, and continue pulling—but do not pry under the battery.

    • If any of the adhesive strips break off underneath the battery and can't be retrieved, try to remove the other strips, and then proceed as instructed below.

  45. bt3tdOvvKSYPUYSj
    bt3tdOvvKSYPUYSj
    1dj4PLaNJX5hXV3w
    DACseVfcjdRaJPFy
    • Grab the second pull-tab with your fingers and pull it away from the battery, toward the bottom of the iPhone.

    • Follow the same procedure as with the previous strip: don't press down on the battery, keep the strip flat and unwrinkled, and pull at a low angle.

    • If the adhesive strip breaks off, try to retrieve it using your fingers or blunt tweezers, and continue pulling—but do not pry under the battery.

    • If the adhesive breaks off underneath the battery and can't be retrieved, continue with the next step.

  46. pHEOVUDRMUCiPJu6
    pHEOVUDRMUCiPJu6
    yikFJB3utSpoS3qC
    RLqJ53qWUUbGZIDk
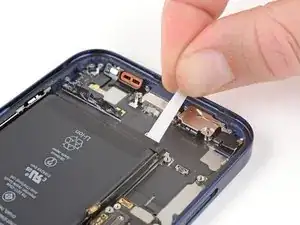
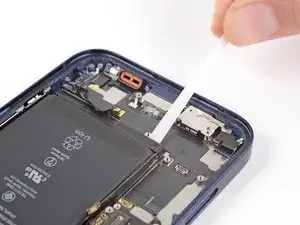
    • Peel up the two remaining battery adhesive pull-tabs to un-stick them from the top edge of the battery.

  47. i4ptGyFyic5cjPaX
    i4ptGyFyic5cjPaX
    CMyhJvPo1oBEYrAp
    OCTEWFSy4V6hPoxm
    • Using the same procedure as before, pull the remaining two tabs, one at a time, to stretch and remove the remaining adhesive strip holding the battery in place. Try not to snag the adhesive on anything.

    • Be careful not to fling the battery from the iPhone as the final adhesive strip comes out.

    • If you removed all the adhesive strips successfully, skip the next step.

    • Otherwise, continue with the next step below.

  48. WJRQeMBTUCSPWMGc
    WJRQeMBTUCSPWMGc
    XGAK3NE3lXUWVoW6
    • If you're still having trouble removing the battery, apply a few drops of high concentration (over 90%) isopropyl alcohol under the edge of the battery in the area of the broken adhesive strip(s).

    • Wait about one minute for the alcohol solution to weaken the adhesive.

    • Use an opening pick or the flat end of a spudger to gently lift the battery.

    • Don't try to forcefully lever the battery out. If needed, apply a few more drops of alcohol to further weaken the adhesive. Never deform or puncture the battery with your pry tool.

  49. gFZEpU3wNSwpPlDx
    • Remove the battery.

    • If there's any alcohol solution remaining in the phone, carefully wipe it off or allow it to air dry before installing your new battery.

    • If your new battery didn't come with adhesive preinstalled, refer to this guide for help replacing the adhesive strips.

    • Perform a force restart after reassembly. This can prevent several issues and simplify troubleshooting.

Conclusion

Compare your new replacement part to the original part—you may need to transfer remaining components or remove adhesive backings from the new part before installing.

To reassemble your device, follow the above steps in reverse order.

Take your e-waste to an R2 or e-Stewards certified recycler.

Repair didn’t go as planned? Try some basic troubleshooting, or ask our iPhone 12 Answers community for help.
Adam O'Camb

Member since: 11/04/15

195421 Reputation

0 comments