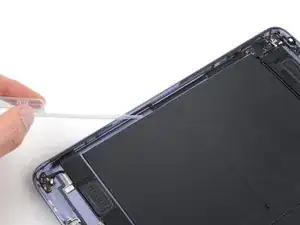
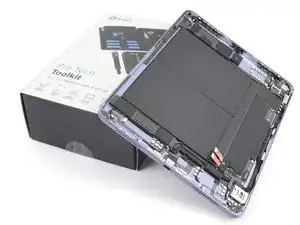
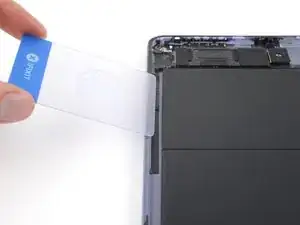
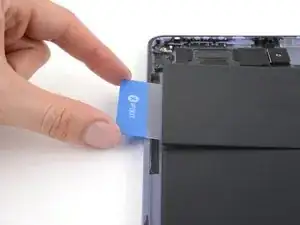
Introduction

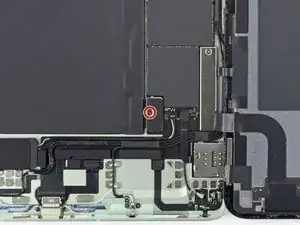
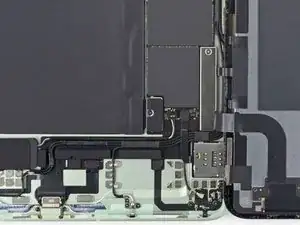
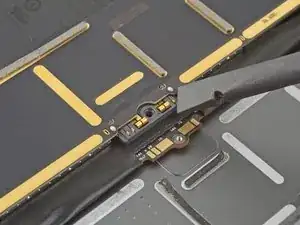
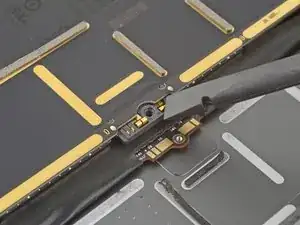
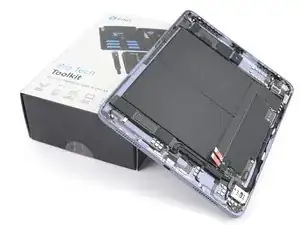
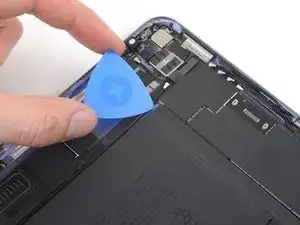
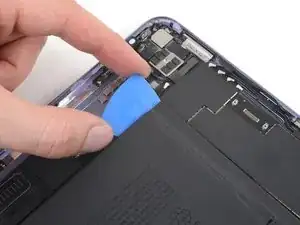
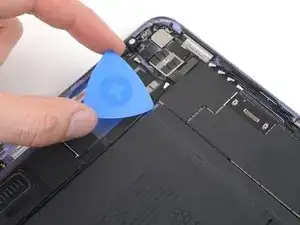
Follow this guide to replace the battery in your iPad Air 5th Generation.

If your battery is swollen, take appropriate precautions.

Some photos in this guide are from a different model and may contain slight visual discrepancies, but they won't affect the guide procedure.

  1. R3SU2vkFbrl26yLP
    • Allow your iPad's battery to fully drain before starting this repair. A charged battery may catch fire if damaged during the repair.

    • Unplug any cables and fully shut down your iPad.

  2. wM54VayWTIbXOhvo
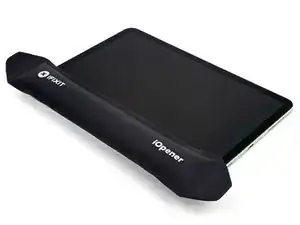
    • Apply a heated iOpener to the left edge of the screen for two minutes.

    • You can also use a hair dryer, heat gun, or hot plate—but extreme heat can damage the screen and/or internal battery, so proceed with care.

  3. AMFYEnOTMWHlwjs3
    AMFYEnOTMWHlwjs3
    H1tC2IragMq6foBf
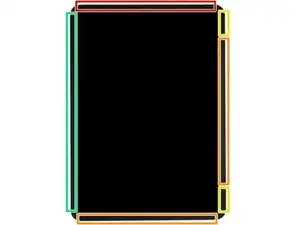
    • While your iPad looks uniform from the outside, there are delicate components under portions of the screen. To avoid damage, follow instructions exactly as written and note the following areas as you open your iPad:

    • Camera module and ambient light sensors

    • Display cables

    • Screen magnets

    • Display edges

  4. oBvxxF4AkQph6CSx
    oBvxxF4AkQph6CSx
    Ud4TkQYKd6wqEnXi
    TMHVMgRTbKfNMUDE
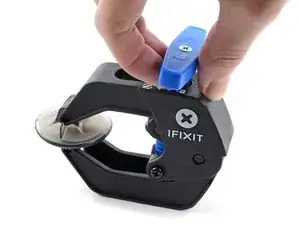
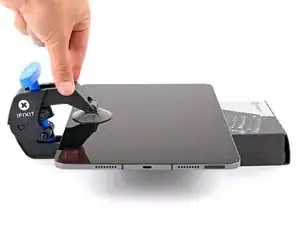
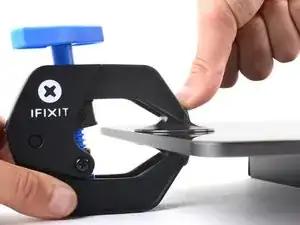
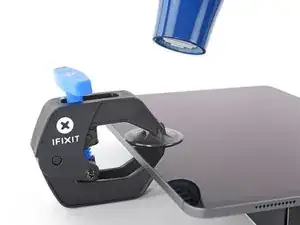
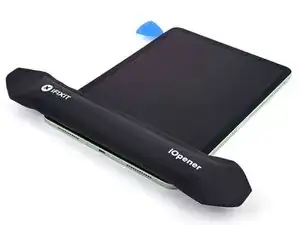
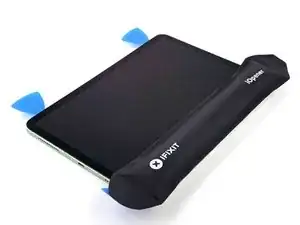
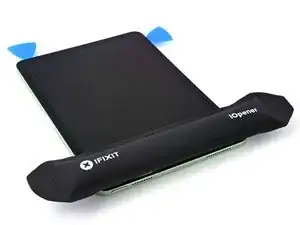
    • The next three steps demonstrate the Anti-Clamp, a tool we designed to make the opening procedure easier. If you aren't using the Anti-Clamp, skip down three steps for an alternate method.

    • For complete instructions on how to use the Anti-Clamp, check out this guide.

    • Pull the blue handle backwards to unlock the Anti-Clamp's arms.

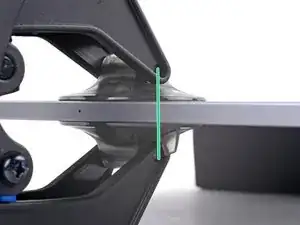
    • Place an object under your iPad so it rests level between the suction cups.

    • Position the suction cups near the middle of the left edge—one on the top, and one on the bottom.

    • Hold the bottom of the Anti-Clamp steady and firmly press down on the top cup to apply suction.

    • If you find that the surface of your iPad is too slippery for the Anti-Clamp to hold onto, use tape to create a grippier surface.

  5. iBkOOxK5jbPMwMnO
    iBkOOxK5jbPMwMnO
    L4brv32KdHlgDoyK
    BVJwAupcHSRsoSEe
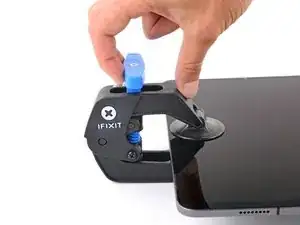
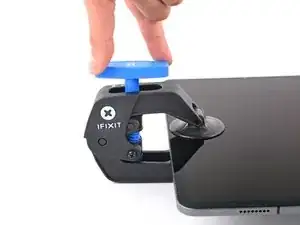
    • Pull the blue handle forward to lock the arms.

    • Turn the handle clockwise 360 degrees or until the cups start to stretch.

    • Make sure the suction cups remain aligned with each other. If they begin to slip out of alignment, loosen the suction cups slightly and realign the arms.

  6. NniJoRnySqGrBUau
    NniJoRnySqGrBUau
    yOuurtBUPSipX3jh
    • Wait one minute to give the adhesive a chance to release and present an opening gap.

    • If your screen isn't getting hot enough, you can use a hair dryer to heat along the left edge of the iPad.

    • For complete instructions on how to use a hair dryer, check out this guide.

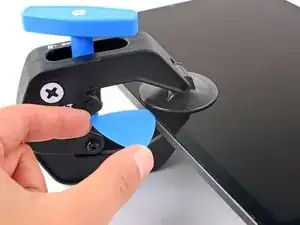
    • Insert an opening pick under the screen when the Anti-Clamp creates a large enough gap.

    • If the Anti-Clamp doesn't create a sufficient gap, apply more heat to the area and rotate the handle clockwise half a turn.

    • Don't crank more than a half a turn at a time, and wait one minute between turns. Let the Anti-Clamp and time do the work for you.

    • Skip the next step.

  7. RJositJLeHQExiQg
    RJositJLeHQExiQg
    VEIPAJsCHp3WCIUa
    vxbhFeSRKaqkIBbN
    • If your screen is badly cracked, covering it with a layer of clear packing tape may allow the suction cup to adhere. Alternatively, very strong tape may be used instead of the suction cup. If all else fails, you can superglue the suction cup to the broken screen.

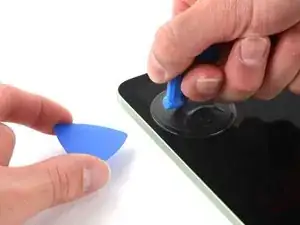
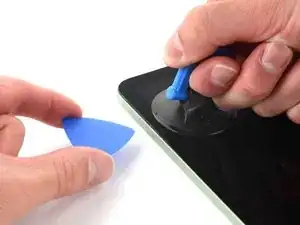
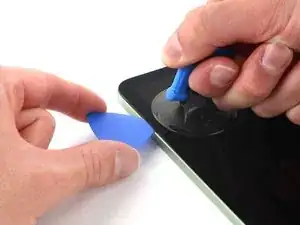
    • Apply a suction handle to the top left edge of the screen.

    • Pull up on the suction handle with firm, constant pressure to create a gap just small enough to insert an opening pick.

    • Only create a gap small enough to insert an opening pick. Overbending the screen will damage it.

    • Insert the tip of an opening pick into the gap.

    • Don't insert the opening pick more than 3 mm or you'll damage the display edges.

    • Leave the pick in to prevent the adhesive from re-sealing.

  8. 12BXmnMqYVHStlfP
    12BXmnMqYVHStlfP
    1Q646Ka3YqgHm2sJ
    GtRBfx6IVb1gkaFU
    • Don't insert the pick more than 3 mm or you'll damage the display edges.

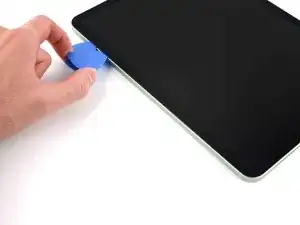
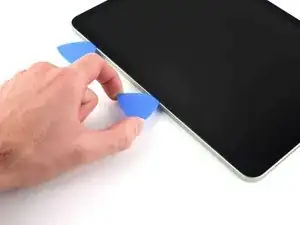
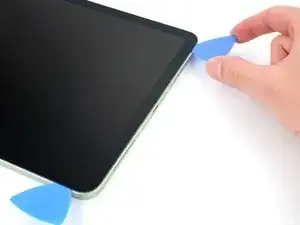
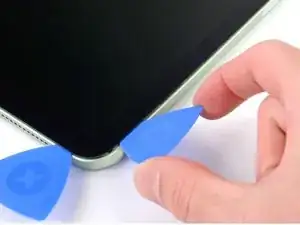
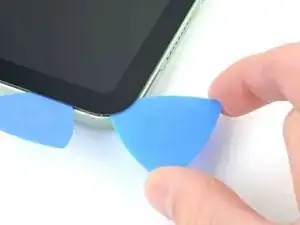
    • Insert a new opening pick in the gap you just created.

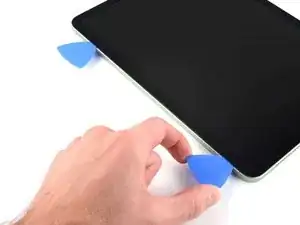
    • Slide the opening pick along the left edge to separate the adhesive.

    • Leave the pick in the bottom left corner to prevent the adhesive from re-sealing.

  9. GJXcgmbDlVUvPNTW
    • Apply a heated iOpener to the bottom edge of the screen for two minutes.

  10. iOFpI5URYjrhekPM
    iOFpI5URYjrhekPM
    yXYXxKVqNvHaUWqX
    lC2rWs5ZomuBiPUZ
    • Don't insert the pick more than 3 mm or you'll damage the display cables.

    • Insert a new opening pick in the bottom left corner.

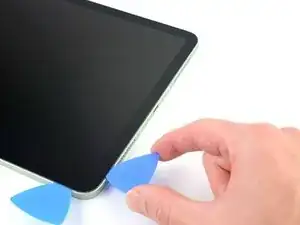
    • Slide the opening pick along the bottom edge to separate the adhesive.

    • Leave the pick in the bottom right corner to prevent the adhesive from re-sealing.

  11. mZWYRpRkW2LSqA4x
    • Apply a heated iOpener to the right edge of the screen for two minutes.

  12. HPcQfAjrpHy2fvSR
    HPcQfAjrpHy2fvSR
    gfRUsnhHULuUUacl
    KSU1i1cYCEBKPhwm
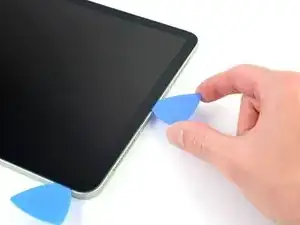
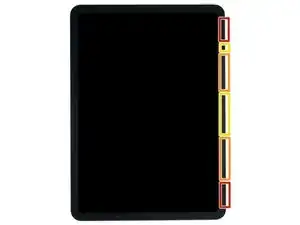
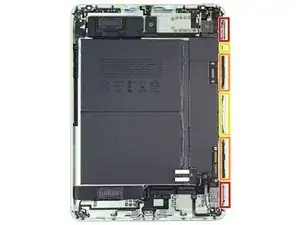
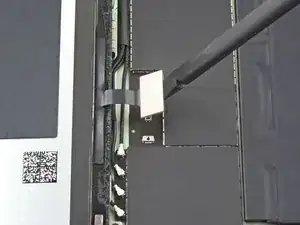
    • The right edge of the iPad contains the screen magnets, display cables, and a digitizer cable. These components are easily damaged if an opening pick is inserted too far.

    • Insert a new opening pick in the bottom right corner and slide along the right edge to separate the adhesive. Make sure to note the following marked areas:

    • Don't insert an opening pick more than 2 mm or you'll damage the screen magnets.

    • The screen magnets are located directly above the SIM card slot (Wi-Fi + Cellular models only) and volume buttons.

    • Don't insert an opening pick more than 3 mm or you'll damage the display and digitizer cables.

    • Don't insert an opening pick more than 5 mm or you'll damage the display edges.

    • Leave the pick in the top right corner to prevent the adhesive from re-sealing.

  13. UVgkFoVYRNGcXmsX
    • Apply a heated iOpener to the top edge of the screen for two minutes.

  14. lJx12TISO24l5oLh
    lJx12TISO24l5oLh
    2IFofNQ6dQmjXVrp
    DRBEVLjiIOdjmKUn
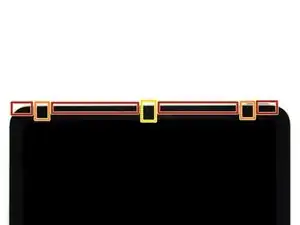
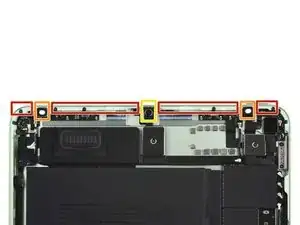
    • The top edge of the iPad contains the front camera module and two ambient light sensors. These components are easily damaged if an opening pick is inserted too far.

    • The two ambient light sensors can be hard to see and can be located using a flashlight or by placing the iPad under a bright light.

    • Insert a new opening pick in the top right corner and slide along the top edge to separate the adhesive. Make sure to note the following:

    • Don't insert an opening pick more than 5 mm or you'll damage the display edges.

    • Don't insert an opening pick more than 3 mm or you'll damage the ambient light sensors.

    • Don't insert an opening pick more than 2 mm or you'll damage the front camera module.

    • Leave the pick in the top left corner to prevent the adhesive from re-sealing.

  15. mnthYA5LA1JNmn5O
    mnthYA5LA1JNmn5O
    Ole4Qdi2KYMJqTdT
    xiusM3ACT4Na43TB
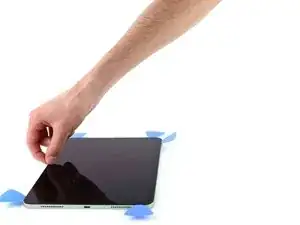
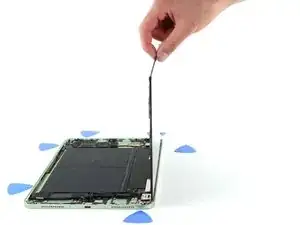
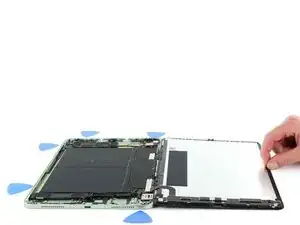
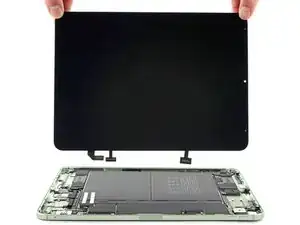
    • Don't try to remove the screen yet, as it's still attached to the frame by delicate ribbon cables.

    • Grip the left edge of the screen and fold it open like a book.

    • During reassembly, this is a good point to power on your iPad and test all functions before sealing it up. Be sure to power your iPad back down before you continue working.

  16. XkkI3wBLolqRKxLb
    XkkI3wBLolqRKxLb
    VCOPnhcoYrDqQWpT
    • Use a Phillips screwdriver to remove the 1.8 mm screw securing the battery connector to the logic board.

    • Throughout this repair, keep track of each screw and make sure it goes back exactly where it came from.

  17. YLO1FA2dJ32XwCVB
    YLO1FA2dJ32XwCVB
    IlnMB3djkLF3bxpw
    LuKZuxBQnPA1aUFB
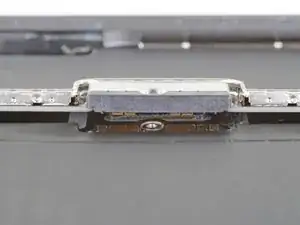
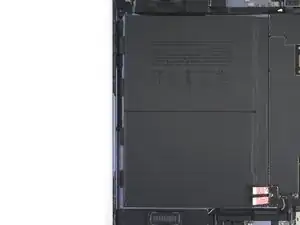
    • These photos show what the battery connector looks like underneath the logic board. Use these photos as a reference while you safely disconnect the battery.

    • Notice that the battery connector has cantilever springs on the logic board that press against the battery contact pads. Since both the logic board and battery are glued down, you'll need to slide something thin and flexible between the contact points to disconnect the battery.

    Achtung! Die kleinen Kontakte sind sehr empfindlich und brechen leicht, wenn sie seitlich gebogen werden.
    Beachte das unbedingt bei Schritt 18!

    Andreas Kröll -

  18. k1P36Wu5bFADkTlL
    k1P36Wu5bFADkTlL
    yKVpF4Ncl5U6fB2n
    jUQ3lWxvaNZYhqrc
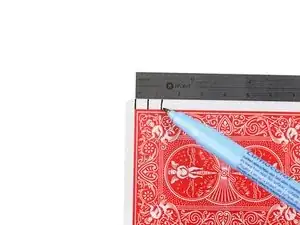
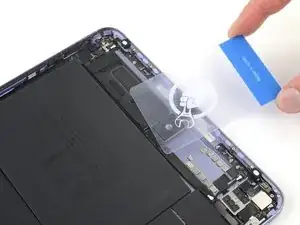
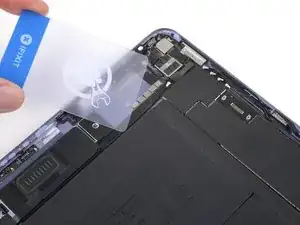
    • Cut two 6 mm wide strips from a playing card or cardstock to use as a battery blocker.

    • The strips should be about 4 cm long so you can easily grip them.

  19. kJthdDhcVaWway1p
    kJthdDhcVaWway1p
    F2tVUCnVIDxZItwT
    xXqM2HjvJGLsW1B6
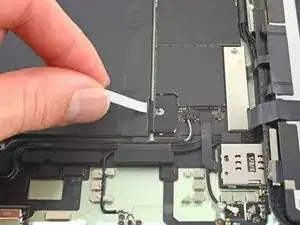
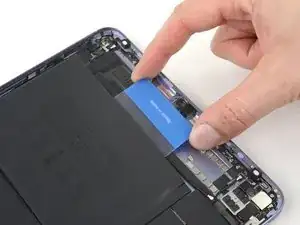
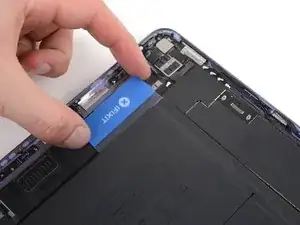
    • Insert the card strips on each side of the battery connector until they stop.

    ACHTUNG: Bewege die Streifen niemals seitwärts! Die kleineren Kontakt können dabei leicht abbrechen und dann hast Du ein größeres Problem.

    Andreas Kröll -

  20. XwerCWCGRuOPDZtG
    XwerCWCGRuOPDZtG
    HFPJPH6SnXtHvXkQ
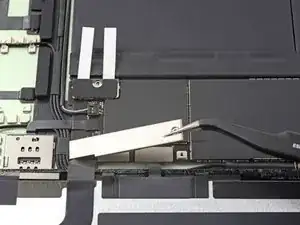
    • Use a Phillips screwdriver to remove the three screws securing the display and digitizer cable brackets to the logic board:

    • Two 1.1 mm screws

    • One 1.5 mm screw

  21. rmTOxxvkEfEV5hJI
    rmTOxxvkEfEV5hJI
    Xq4GIgknH5GQJGtU
    CuUxsJeYiN3kcsJJ
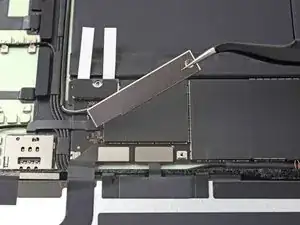
    • The display cable bracket is held in place by a small latch at the bottom.

    • Use tweezers or your fingers to pivot the latch out from the top and remove the bracket.

  22. 4OWZAtwCwccTOaaF
    4OWZAtwCwccTOaaF
    NMUv2q2NTx6xSBJa
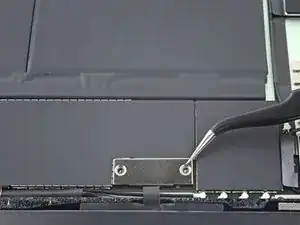
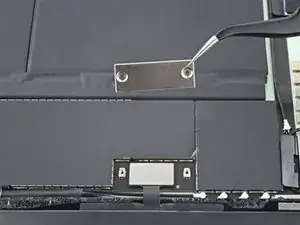
    • Use tweezers or your fingers to remove the digitizer cable bracket.

  23. 2rBTXWyWFOAekHOm
    2rBTXWyWFOAekHOm
    BjWAfXZWQj4tgRRb
    CXkCIqKD1yQvL3OI
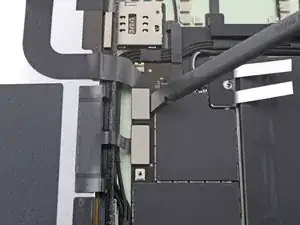
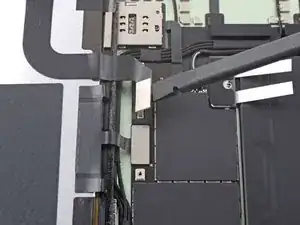
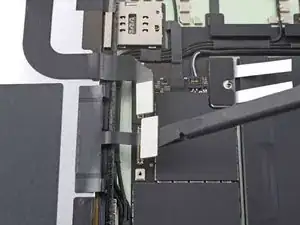
    • Use the flat end of a spudger to disconnect the two display cables by lifting straight up on the press connectors.

    • To re-attach press connectors like this one, carefully align and press down on one side until it clicks into place, then repeat on the other side. Do not press down on the middle. If the connector is misaligned, the pins can bend and cause permanent damage.

  24. wUhTZYZGSC6oAIVg
    wUhTZYZGSC6oAIVg
    3SVRDIUIjctYTbXU
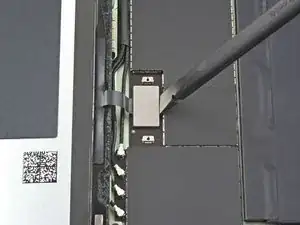
    • Repeat the previous step for the digitizer cable.

  25. KQA4HVoFH62S6TbX
    • Grip the left edge of the screen and lift it away.

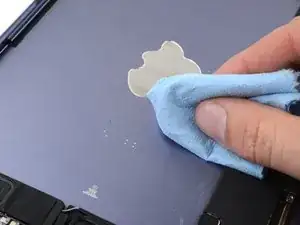
    • During reassembly, before installing a screen, remove any remaining adhesive from the frame, and clean the glued areas with high-strength (>90%) isopropyl alcohol and a lint-free cloth. This helps prep the iPad for fresh adhesive and ensures that it will bond properly.

    • If you plan to reinstall your existing screen, remove any remaining adhesive from the back and clean the adhered areas with isopropyl alcohol.

    • Follow this guide to install pre-cut adhesive strips on your iPad before sealing it up.

  26. c2BJqAMc1K6tUdFv
    c2BJqAMc1K6tUdFv
    6uMxQPUkyKGdRapA
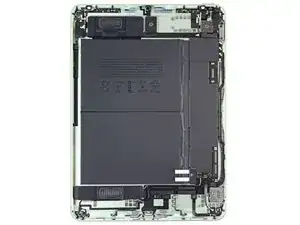
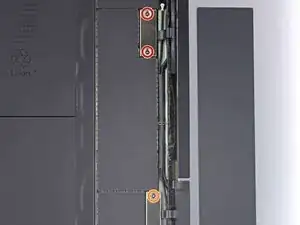
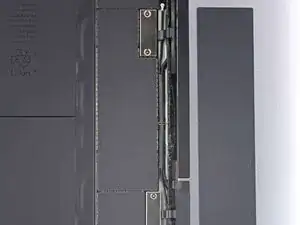
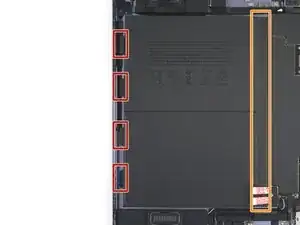
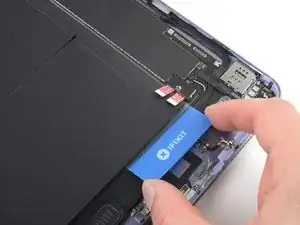
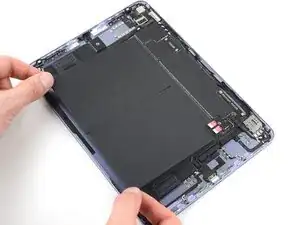
    • Your iPad's battery is held in place by both stretch-release and regular adhesive:

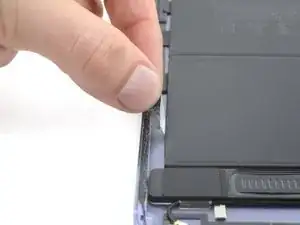
    • Four stretch-release adhesive strips secure the battery cells to the frame. Each adhesive strip has a black pull tab along the left edge of the battery.

    • The remaining adhesive secures the battery board to the right side of the frame.

  27. a1DNOXbPkIGXOEeO
    a1DNOXbPkIGXOEeO
    qsYDcDZ3lKM3ybgJ
    mHXMnIC6ODWLiadm
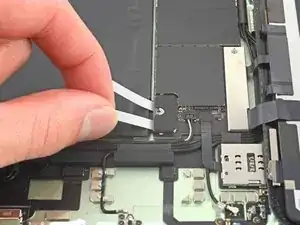
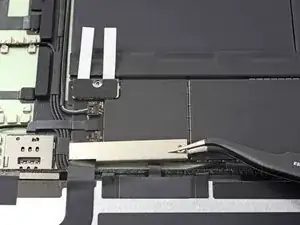
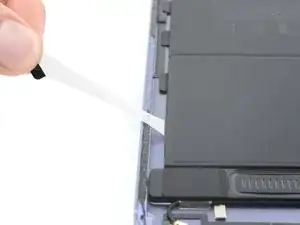
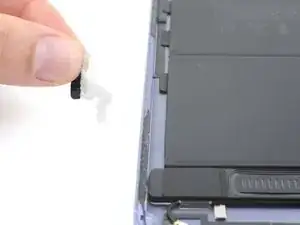
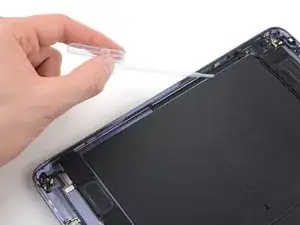
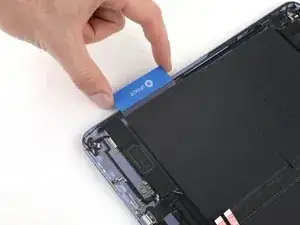
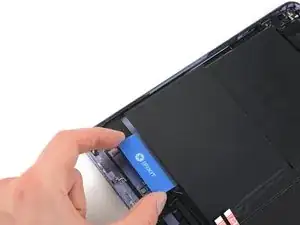
    • Use blunt nose tweezers or your fingers to peel each stretch-release pull tab away from the battery.

    • Slowly pull the strips straight away from the battery, keeping a low angle to the frame.

    • Give the strips plenty of time to stretch. If a strip breaks off, try to retrieve it and continue pulling.

    • If you removed all four stretch-release adhesive strips, skip down five steps.

    • If any strips broke off, follow the next four steps for an alternative method to remove the battery.

  28. WPynDq4aeUUAtEoS
    WPynDq4aeUUAtEoS
    RihmA3NpsKnbLEP3
    v1r1yOPJvkRxIDno
    • Apply several drops of highly-concentrated isopropyl alcohol (over 90%) to the left edge of each battery cell.

    • Elevate the left edge of the iPad to allow the alcohol to flow under the battery cells.

    • Wait one minute for the alcohol to soften the adhesive.

  29. MjEV2ZmdHPFKyZPP
    MjEV2ZmdHPFKyZPP
    Z1pZZWUXWNa134ch
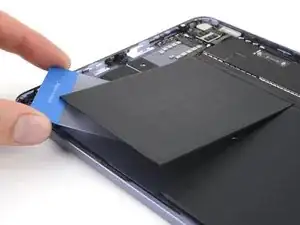
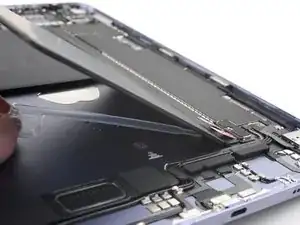
    • Slide a plastic card under the left edge of the upper battery cell near any broken strips of stretch-release adhesive.

    • Don't puncture or bend the battery. If it feels stuck, apply more isopropyl alcohol or apply a heated iOpener to the back of the frame to further soften the adhesive.

    • If you removed both stretch-release adhesive strips from the upper cell, skip to separating the lower cell.

  30. RrHUBCOxcbrHHm5X
    RrHUBCOxcbrHHm5X
    cbWNKBZp6HBKt5Xs
    AXHZBhaKGdOPyfNZ
    • Be very careful not to bend the battery. If it feels stuck, apply a few more drops of isopropyl alcohol and slice the entire underside of the battery cell.

    • Reinsert your plastic card under the long edge of the battery cell to slice the remaining adhesive.

    • Twist the plastic card to lift the short edge of the battery cell from the frame.

    • Don't try to remove the battery yet—its still connected to the battery board.

  31. OJbNQTrH15ALtSoB
    OJbNQTrH15ALtSoB
    mAaTpQcIfJlK5cxc
    XbVccjYoYqhe1B62
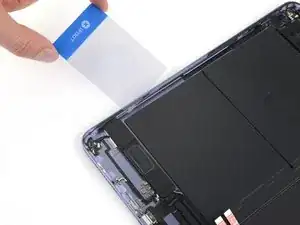
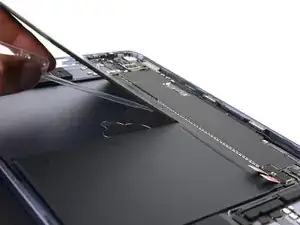
    • Insert your plastic card under the short edge of the lower battery cell to slice the adhesive.

    • Don't puncture or bend the battery. If it feels stuck, apply a few more drops of isopropyl alcohol or apply a heated iOpener to the back of the frame.

    • Insert the plastic card again under the long edge of the lower battery cell to slice the remaining adhesive.

    • Twist your plastic card to lift the short edge of the battery cell from the frame.

    • Don't try to remove the battery yet—it's still connected to the battery board.

  32. SgihLBHeRAHrTyXF
    SgihLBHeRAHrTyXF
    xXuUfpdWdRnyTRmg
    qtREHQOCgtUWLmTj
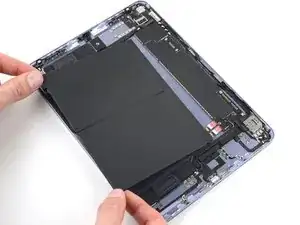
    • Lift the battery cells away from the frame to gain access to the left edge of the battery board.

    • Apply a few drops of isopropyl alcohol under the left edge of the battery board.

    • Elevate the left edge of the iPad and wait one minute to allow the alcohol to soften the adhesive.

  33. RZEwiGFnfyCfpmSf
    RZEwiGFnfyCfpmSf
    x5fMnGI2MbgbtJNh
    HBnLQFHWHfUxDimK
    • Insert an opening pick under the upper edge of the battery board.

    • Be sure to insert the pick completely under the battery board and not through its side.

    • After creating a gap between the battery board and the frame, remove the pick.

  34. vMBBhGZ1sL2vPXgg
    vMBBhGZ1sL2vPXgg
    6ekGNfDNStOf3ox6
    • Be careful not to bend the battery cells or board.

    • Insert your plastic card between the upper edge of the battery board and the frame, using the gap created by your opening pick.

    • Fully slide the plastic card under the battery board to separate the upper edge from the frame.

  35. 2AqiCFoCqD2LorIO
    2AqiCFoCqD2LorIO
    2kqTB2nGU6bWJOba
    pKjOQRPi2d13DurR
    • Be careful not to bend the battery cells or board.

    • Insert your opening pick under the lower edge of the battery board.

    • Be sure to insert the pick completely under the battery board and not through its side.

    • Once you've created a gap between the battery board and the frame, remove the pick.

    • Slide your plastic card under the battery board to separate it from the frame.

  36. PkbZJJ3y1KCvZFWZ
    PkbZJJ3y1KCvZFWZ
    npLGbgslJ1IdoQ3g
    HnA5NM3lHOsZyjSY
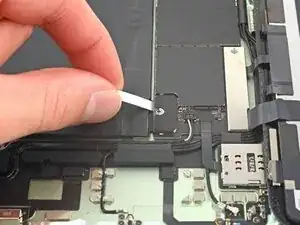
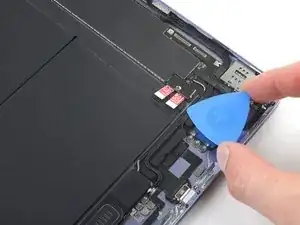
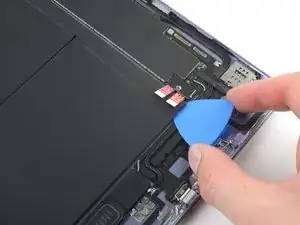
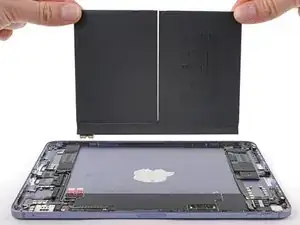
    • Grab and pull the battery cells away from the logic board until the connector slides out from under the card strips.

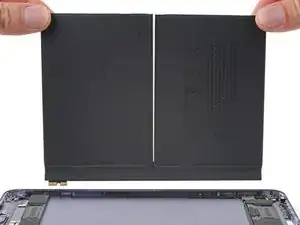
    • Remove the battery.

  37. NeZjI6K3tDdXjydB
    • Clean any remaining residue from your frame using a few drops of highly-concentrated isopropyl alcohol (over 90%) and lint-free or microfiber cloth.

    • If your new battery doesn't come with adhesive, use double-sided adhesive such as Tesa tape to adhere it to the frame.

Conclusion

Compare your new replacement battery to the original one—you may need to transfer remaining components or remove adhesive backings from the new battery before installing it.

To reassemble your device, follow these instructions in reverse order.

Take your e-waste to an R2 or e-Stewards certified recycler.

Repair didn’t go as planned? Try some basic troubleshooting, or ask our iPad Air 5th Generation answers community for help.

Clay Eickemeyer

Member since: 19/09/22

65190 Reputation

2 comments

Is it possible to build a battery from an iPad Air 4 in the iPad Air 5? The battery's have the same specifications and the connector looks pretty similar.

Techozoom -

Hi Technozoom! I don't recommend salvaging an old iPad Air 4 battery, as used batteries can catch fire or heat up unpredictably, especially coming from an iPad, where the batteries are fragile and difficult to remove. That said, we just tested an Air 4 battery in an Air 5, and can confirm it works. So, if you have a new or like-new battery, you can perform the repair with a 4th generation battery. Good luck!
Clay Eickemeyer -