Introduction

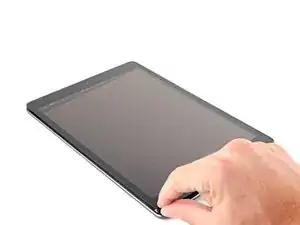
Use this guide to replace the left Bluetooth and Wi-Fi antenna in your iPad 9 LTE.

Note: this guide is for the LTE version only. For the Wi-Fi version, click here.

For your safety, discharge the battery below 25% before disassembling your iPad. This reduces the risk of fire if the battery is accidentally damaged during the repair. If your battery is swollen, take appropriate precautions.

Some of the instructions in this guide were taken from a previous model. There are small differences between models, but the overall procedure is very similar.

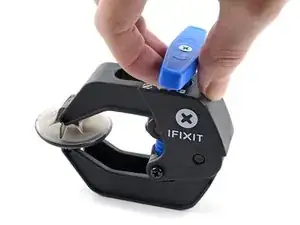
You'll need replacement adhesive in order to complete this repair.

  1. THxeZqAlU4lI3Dsj
    • Power down your iPad before beginning the repair.

    • Heat an iOpener and apply it to the left edge of the iPad for two minutes.

  2. BDFaonJejZFgEePr
    BDFaonJejZFgEePr
    5oaRxkGbOfRApjHD
    A2HORgVC1Qep3Lse
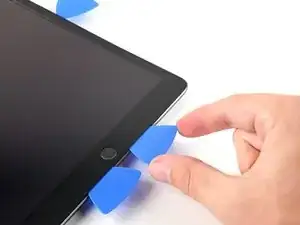
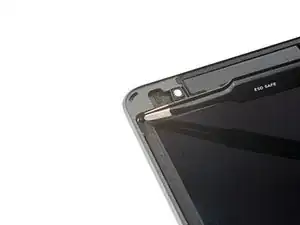
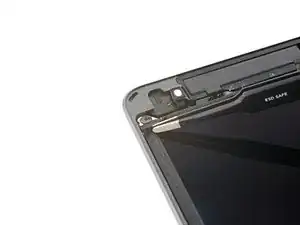
    • While you're waiting for the adhesive to loosen, note the following areas that are sensitive to prying:

    • Front camera

    • Ambient light sensors
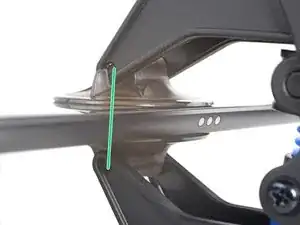
    • Antennas

    • Display cables

  3. yCAYXEXkZKHRVfH6
    yCAYXEXkZKHRVfH6
    Ueh3TWDLPOY4Gs1L
    knO4OIOcPiQaPhmh
    • The next three steps demonstrate the Anti-Clamp, a tool we designed to make the opening procedure easier. If you aren't using the Anti-Clamp, skip down three steps for an alternate method.

    • For complete instructions on how to use the Anti-Clamp, check out this guide.

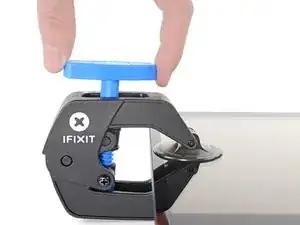
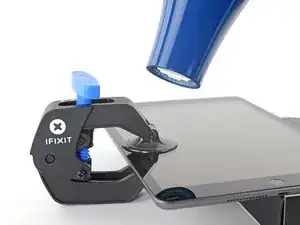
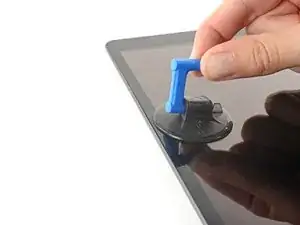
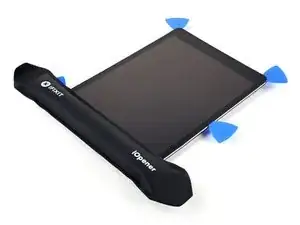
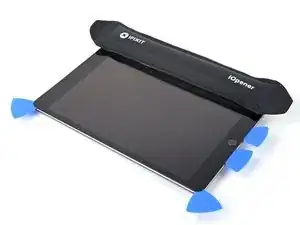
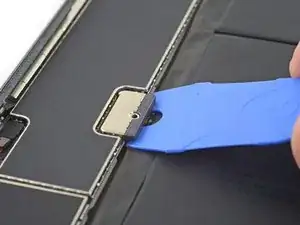
    • Pull the blue handle backwards to unlock the Anti-Clamp's arms.

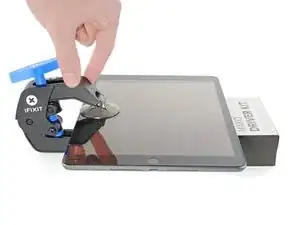
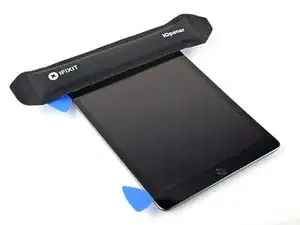
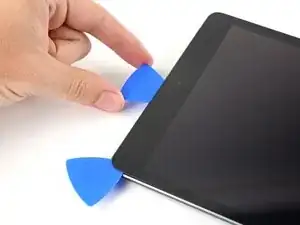
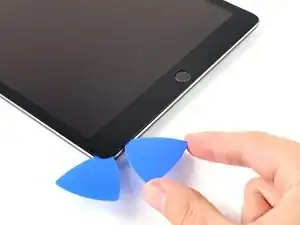
    • Place an object under your iPad so it rests level between the suction cups.

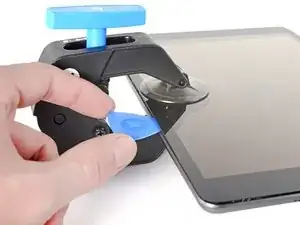
    • Position the suction cups near the middle of the left edge—one on the top, and one on the bottom.

    • Hold the bottom of the Anti-Clamp steady and firmly press down on the top cup to apply suction.

    • If you find that the surface of your iPad is too slippery for the Anti-Clamp to hold onto, use tape to create a grippier surface.

  4. iK4amGEesUBc3lIp
    iK4amGEesUBc3lIp
    4vqyKrCElCfKg5DK
    FAiqPTjHJJOQfeSE
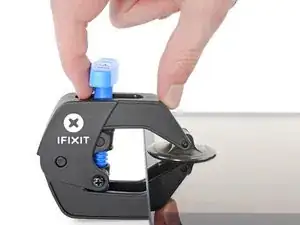
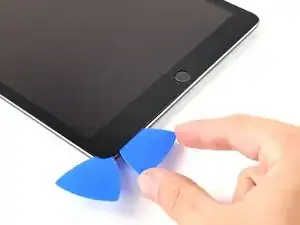
    • Pull the blue handle forward to lock the arms.

    • Turn the handle clockwise 360 degrees or until the cups start to stretch.

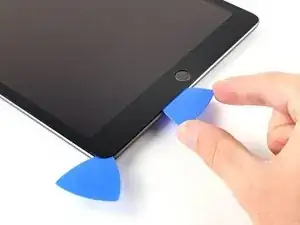
    • Make sure the suction cups remain aligned with each other. If they begin to slip out of alignment, loosen the suction cups slightly and realign the arms.

  5. Uay64swghpGfLbNo
    Uay64swghpGfLbNo
    rep1LoXJsQyTa2qf
    • Wait one minute to give the adhesive a chance to release and present an opening gap.

    • If your screen isn't getting hot enough, you can use a hair dryer to heat along the left edge of the iPad.

    • For complete instructions on how to use a hair dryer, check out this guide.

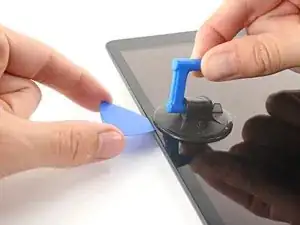
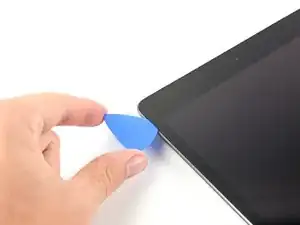
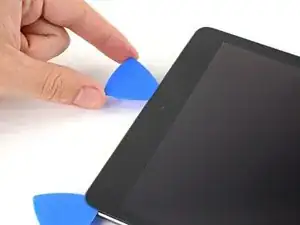
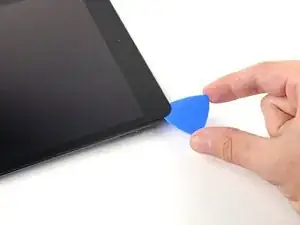
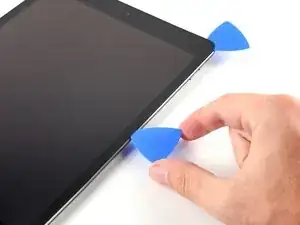
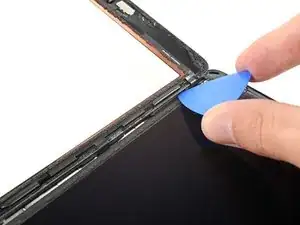
    • Insert an opening pick under the digitizer when the Anti-Clamp creates a large enough gap.

    • If the Anti-Clamp doesn't create a sufficient gap, apply more heat to the area and rotate the handle clockwise half a turn.

    • Don't crank more than a half a turn at a time, and wait one minute between turns. Let the Anti-Clamp and time do the work for you.

    • Skip the next step.

  6. J2IQvQOy1BYPtTom
    J2IQvQOy1BYPtTom
    mHcQZ3ybJlVWXZAX
    ZE5bLBVCycZZ4IXh
    • If your display is badly cracked, covering it with a layer of clear packing tape may allow the suction cup to adhere. Alternatively, very strong tape may be used instead of the suction cup. If all else fails, you can superglue the suction cup to the broken screen.

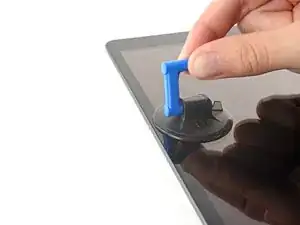
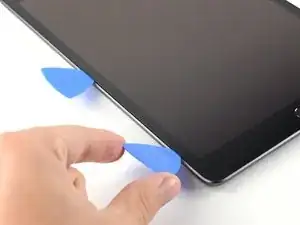
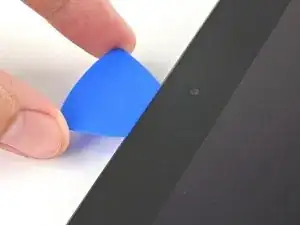
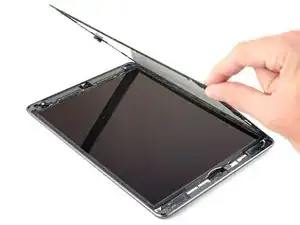
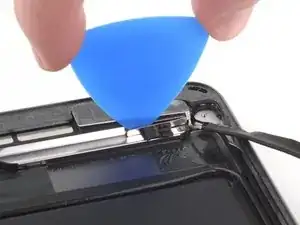
    • Once the screen is warm to touch, apply a suction handle to the left edge of the screen and as close to the edge as possible.

    • Lift the screen with the suction handle to create a small gap between the digitizer and the frame.

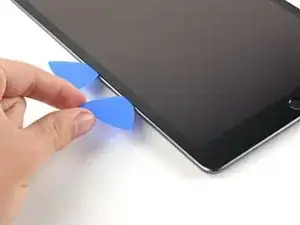
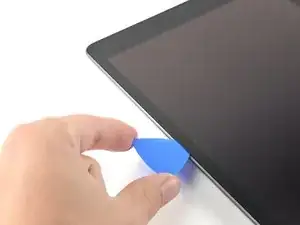
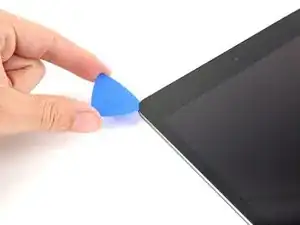
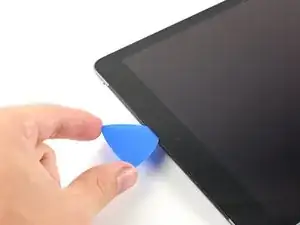
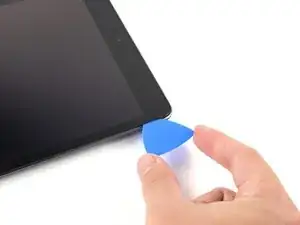
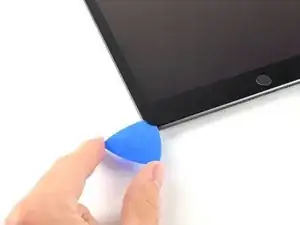
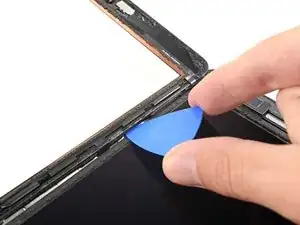
    • Insert an opening pick into the gap between the digitizer and the frame.

  7. x2uBdEGsXXD1UGux
    x2uBdEGsXXD1UGux
    dLpd1xH2K1QoGc6n
    2caJZKMEgJeYYxP4
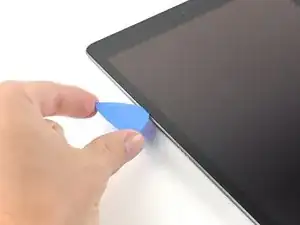
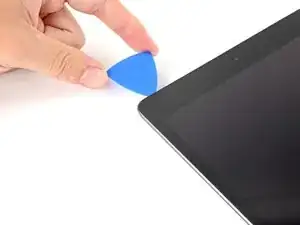
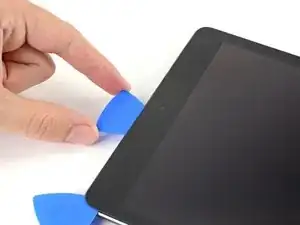
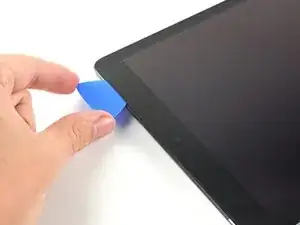
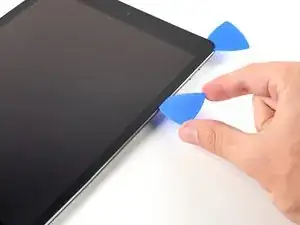
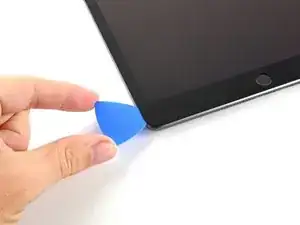
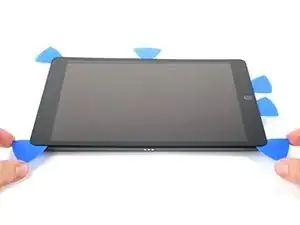
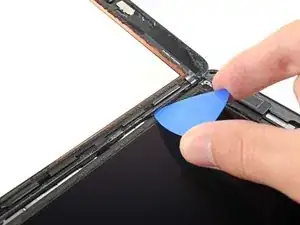
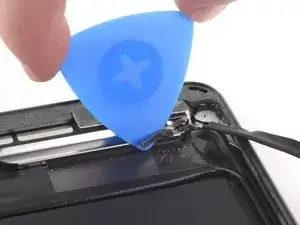
    • Insert a second opening pick into the gap you just created.

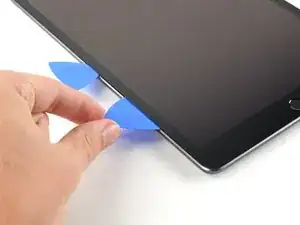
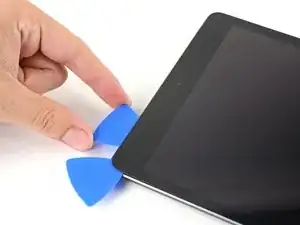
    • Slide the pick toward the bottom-left corner of the iPad to separate the adhesive.

    • Leave the pick in the bottom-left corner to prevent the adhesive from re-sealing.

    • Don't worry if you can see the opening pick through the digitizer—just pull the pick out. The LCD screen shouldn't be damaged, but you risk leaving behind hard-to-clean adhesive.

  8. JPsPT5ML14VHRhGe
    JPsPT5ML14VHRhGe
    ultr2KYJ6Sc1kYaH
    ZATK6B6Fo1vrYUIw
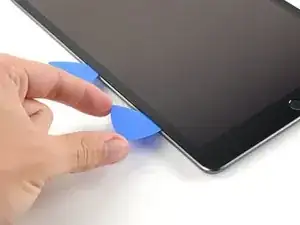
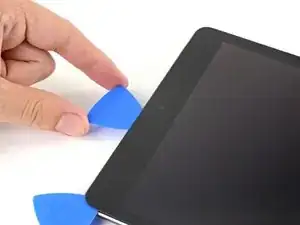
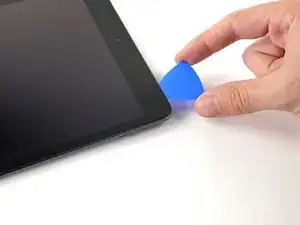
    • If the opening pick gets stuck in the adhesive, "roll" the pick along the side of the iPad to continue separating the adhesive.

  9. EaRSxNw3vj5GpMur
    EaRSxNw3vj5GpMur
    yRXg6rNGAQgVf1Cf
    W26QbH5y1V5Kv2oM
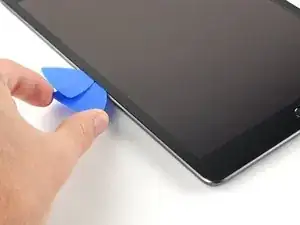
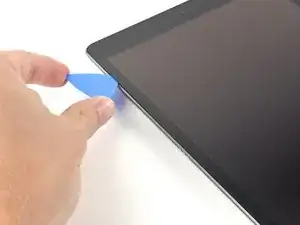
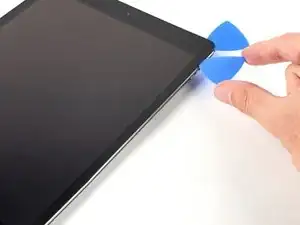
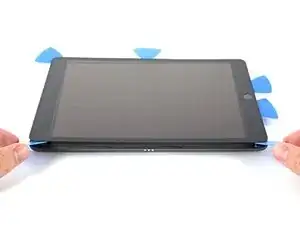
    • Slide the first opening pick towards to top-left corner of the iPad to separate the adhesive.

    • Leave the pick in the top-left corner to prevent the adhesive from re-sealing.

  10. FLj6SpbOQdrvVpRi
    • Heat an iOpener and apply it to the top edge of the iPad for two minutes.

  11. p15tb6VN1vUscQ2N
    p15tb6VN1vUscQ2N
    SocgxgkXBnLnGSWX
    oPDYoHHMVRcxhVPT
    • Rotate the pick around the top-left corner of the iPad to separate the adhesive.

    • Only insert the pick up to 7 mm to avoid damaging the ambient light sensor.

  12. Jil3FKjTxdwCK5GP
    Jil3FKjTxdwCK5GP
    6nKHEJpQiZSaFBGo
    ROYjHt2LlrcPPDUx
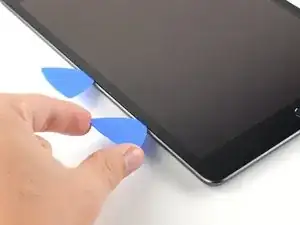
    • Slide the opening pick along the top edge of the iPad, stopping just before you reach the front camera.

    • Avoid sliding the pick over the front camera, as you may damage the lens. The following steps will show how to prevent this.

  13. TioLriFFwlSWARE3
    TioLriFFwlSWARE3
    cBURkpbxyZsN2fs4
    fQWclYvRi615iGML
    • Pull the pick out until only the tip is between the digitizer and the frame.

    • Slide the pick above the front camera to separate the adhesive.

    • Leave the pick near the right side of the front camera before continuing.

  14. Jiwfe4BYASgflPlt
    Jiwfe4BYASgflPlt
    GNqQecAUKHkBQsFJ
    TjnBLTuM3hvFrh4t
    • Re-insert the pick and slide it towards the top-right corner of the iPad to completely separate the top adhesive.

    • Leave the pick in the top-right corner to prevent the adhesive from re-sealing.

  15. ZHBh3M1LZI1RNTnX
    • Heat an iOpener and apply it to the right edge of the iPad for two minutes.

  16. IaiyPav5brNr6jCX
    IaiyPav5brNr6jCX
    IXOuHUPJMRyyp3gb
    wKVPV5jH516oONom
    • Rotate the pick around the top-right corner of the iPad to separate the adhesive.

    • Only insert the pick up to 4 mm to avoid damaging the ambient light sensor.

  17. uMAkRgI5TwCTd4Ks
    uMAkRgI5TwCTd4Ks
    6R5iFXyAqocMYSU4
    n3WPFtEKy3pVcab1
    • Insert a new opening pick and slide it to the middle of the iPad's right edge.

    • The display cables are located approximately halfway from the bottom of the iPad. Stop sliding once you reach three inches from the bottom of the iPad.

  18. UGjYPQYXKPD6dNES
    • Heat an iOpener and apply it to the bottom edge of the iPad for two minutes.

  19. ZLBC4NKlQbk3OZTD
    ZLBC4NKlQbk3OZTD
    OMqDTrkrkwxwGI5M
    A51oePiIiC2OVqED
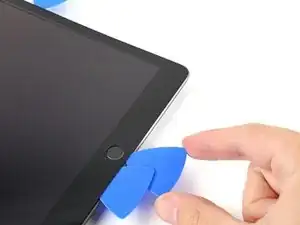
    • Slide the bottom-left pick to the bottom-left corner to separate the adhesive.

    • Don't fully rotate the pick around the corner, as you may damage the antenna.

    • The third image shows the bottom-left antenna underneath the digitizer.

    • Leave the pick in the corner before moving to the next step.

  20. TEwIBIf3sxmJiEN1
    TEwIBIf3sxmJiEN1
    xOEXNBRtCOWQeuFY
    22JRGthoRvQSYaRf
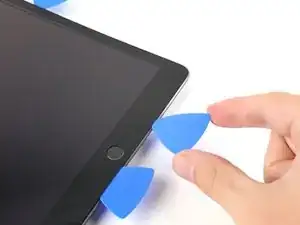
    • Insert a new opening pick into the gap you just created on the bottom edge of the iPad.

    • Slide the pick over the antenna, stopping just before the home button.

    • Only slide the pick towards the home button and not away from it, as you may damage the antenna.

    • If you need to slide the pick over this section again, remove and re-insert it at the bottom-left corner.

    • Leave the pick to the left of the home button before continuing.

  21. C2RdZwTKLextDlUC
    C2RdZwTKLextDlUC
    ZYORWWfQkWbQHeZk
    35FCdHGOd2P3tVJH
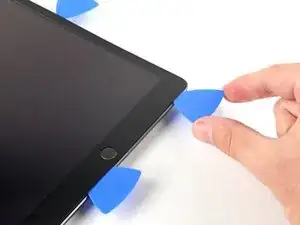
    • Insert an opening pick into the gap you just created.

    • Slide the pick underneath the home button and towards the bottom-right corner, making sure only the tip is between the digitizer and the frame.

  22. EdcTHHvhSmUedM5X
    EdcTHHvhSmUedM5X
    aeho4dfNWsncrbYf
    CmWXujasluPDsXpH
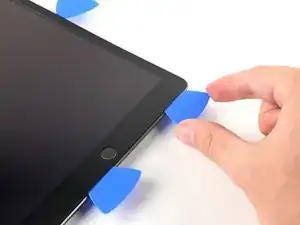
    • Re-insert the pick and slide it towards the home button to completely separate the bottom adhesive.

    • Only slide the pick towards the home button and not away from it, as you may damage the antenna.

    • If you need to slide the pick over this section again, remove and re-insert it at the bottom-right corner.

    • Leave the pick to the right of the home button before continuing.

  23. lwiCOncwPlKLg3a3
    • Heat an iOpener and apply it to the right edge of the iPad for two minutes.

  24. ABh5NOiTnhO15fgU
    ABh5NOiTnhO15fgU
    Ub5UlnWWBB6GLUth
    • Be very careful with this step. Take your time, ensure the adhesive is hot and soft, and make sure you separated all of the adhesive with an opening pick. Don't be afraid to stop and reheat.

    • Twist the two opening picks on the left corners of the iPad to lift the digitizer slightly, separating the the last of the adhesive in the process.

    • If there's a significant amount of resistance, reheat the edges and work along them with an opening pick.

  25. WFFmnZZPToQRsBrh
    WFFmnZZPToQRsBrh
    A1DkoMhAVgLuYJcB
    • Lift the left edge of the digitizer upwards to further separate the adhesive along the right edge of the iPad.

  26. TuWcGklrctSA4vd1
    TuWcGklrctSA4vd1
    lCHklMQfQE6AZ6Gh
    kCab34QaCQWowvsm
  27. rRJgBD3gSsu2XQpD
    rRJgBD3gSsu2XQpD
    xNWvca15WkyCikGS
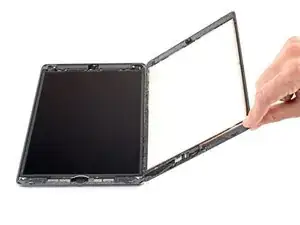
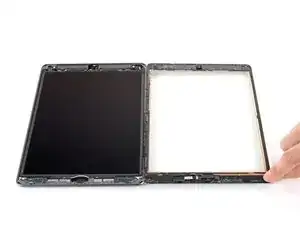
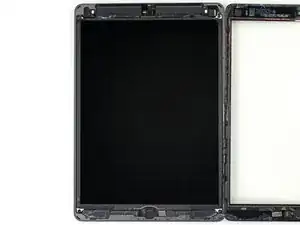
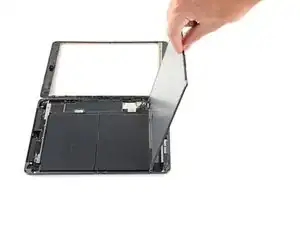
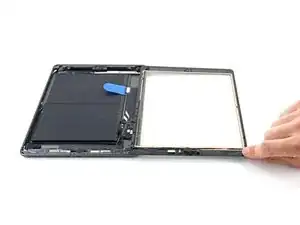
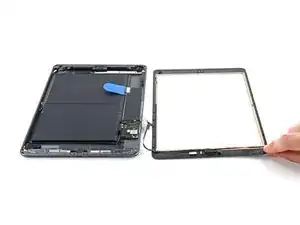
    • Once all of the adhesive has been separated, open the digitizer like a book and rest it parallel to the iPad.

    • During reassembly, clean the remaining adhesive from the frame—and the digitizer if you're re-using it—with isopropyl alcohol. Replace the adhesive with our adhesive strips or pre-cut adhesive cards.

    • Be mindful of the display cables when reassembling the iPad. Make sure they are folded properly underneath the LCD screen to prevent any damage.

  28. dIXE1vPxmKERsdLX
    dIXE1vPxmKERsdLX
    vj1CkLQlIvkSPCZx
    jr2eMwxEENdqoJCF
    • Use tweezers, or your fingers, to remove any tape covering the LCD screws.

  29. lSFAoUfC1CTspYxp
    lSFAoUfC1CTspYxp
    LIZeisld3raMKiVm
    • Use a Phillips #00 screwdriver to remove the four 4.2 mm screws securing the LCD screen.

  30. NFQPakcKUfXQbCN1
    NFQPakcKUfXQbCN1
    aq5WNQDmAbEC1scU
    • The LCD is lightly adhered to the frame.

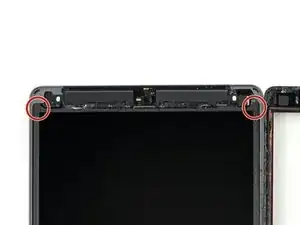
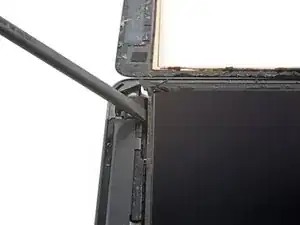
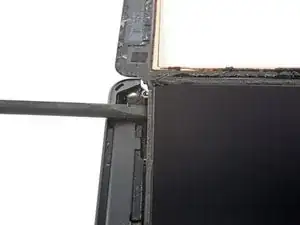
    • Insert a spudger between the frame and the top-right portion of the LCD.

    • Pry slowly with the spudger to separate the adhesive.

  31. B5XBEaKiOY36cGal
    B5XBEaKiOY36cGal
    6Ol5f4SORaU2OnQG
    • Repeat the previous step for the top-left portion of the LCD.

  32. VlOgdEaTCqaaZEgT
    VlOgdEaTCqaaZEgT
    CdhZGS3FrglfEvPp
    VT2qBNbUCZQJGyBV
    • Don't attempt to fully remove the LCD during this step, as it's still connected by a flex cable.

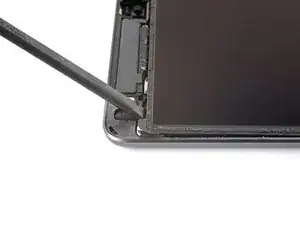
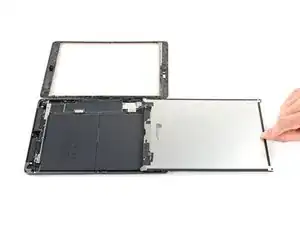
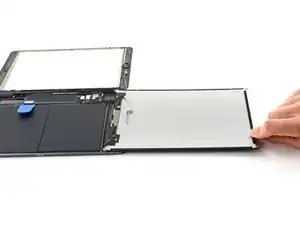
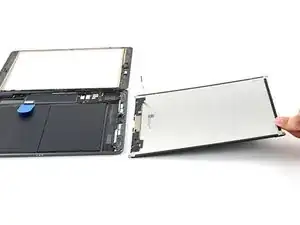
    • Use the flat end of a spudger to pry the LCD out of its recess just enough to grab it with your fingers.

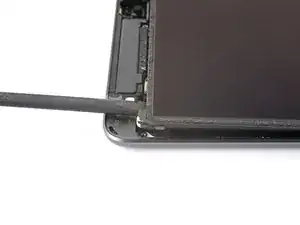
    • Flip the LCD like a page in a book, lifting near the camera and turning it over the home button end of the frame.

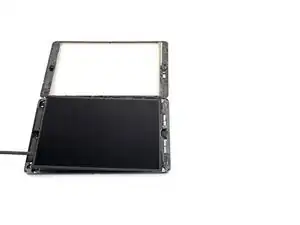
    • Lay the LCD on a clean, soft, lint-free surface to allow access to the display cables.

  33. NLjYysFXFSBFYY22
    NLjYysFXFSBFYY22
    MfSOUYOSmKfKYySr
    • Use a Phillips screwdriver to remove the 2.3 mm-long screw securing the battery connector to the logic board.

  34. jt4vWJnpj3gdTY4b
    jt4vWJnpj3gdTY4b
    iMJKm2GEMbPyKxCY
    5jJiilcK6uVuO6UG
    • These photos show what the battery connector looks like underneath the logic board. Use these photos as a reference while you safely disconnect the battery.

    • Notice that the battery connector has cantilever springs on the logic board that press against the battery contact pads. Since both the logic board and battery are glued down, you'll need to slide something thin and flexible between the contact points to disconnect the battery.

  35. nsyt2uuWayDvnWSN
    nsyt2uuWayDvnWSN
    ABBJiqrXuKcEc1AL
    S5webgxEegkCKbUS
    • Be careful when you isolate the battery using a battery blocker. The battery contacts are easily bent or broken, resulting in irreversible damage.

    • Ensure that the iFixit logo on the battery blocker is facing up.

    • Slide the battery blocker underneath the logic board's battery connector at a 35 degree angle.

    • Don't push the battery blocker underneath the connector with excessive force. If you're having trouble fitting the battery blocker underneath the logic board, you can try using a playing card to disconnect the battery instead.

    • The battery blocker or playing card ideally should slide under the logic board without encountering any blockages. After insertion, it should rest at about a 15 degree angle.

    • Leave the battery blocker in place as you work.

  36. MXWfQNMDmRonYjDU
    MXWfQNMDmRonYjDU
    dOn5Y1RuSWoL4QdM
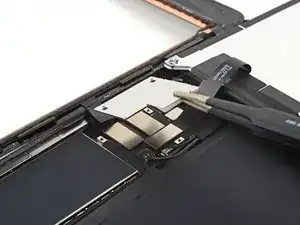
    • Use a Phillips screwdriver to remove the three 1.4 mm-long screws securing the display cable bracket.

  37. UlCmQJMnpKYMKikJ
    UlCmQJMnpKYMKikJ
    yMOZdTssB1MWKVTL
    • Remove the display cable bracket.

  38. QhlmQgZQE31VFCl5
    QhlmQgZQE31VFCl5
    jxTEr2F6FuWjOtEw
    • Use the flat end of a spudger to pry up and disconnect the LCD cable press connector.

    • To re-attach press connectors like this one, carefully align and press down on one side until it clicks into place, then repeat on the other side. Do not press down on the middle. If the connector is misaligned, the pins can bend, causing permanent damage.

  39. UHHTrNXlSsKbrkuC
    UHHTrNXlSsKbrkuC
    xdJppBpCc1ZLsqQP
    • Remove the LCD completely and rest it face down on a clean, soft, lint-free surface.

  40. MHGffJncM3IpC24W
    MHGffJncM3IpC24W
    fyUKP6ErCFjK62ev
    • Use a pair of tweezers to peel off the tape covering the home button cable ZIF connector.

  41. kdRMXZcLCUMv6Xqc
    kdRMXZcLCUMv6Xqc
    LrLSlov3MGiZyGRA
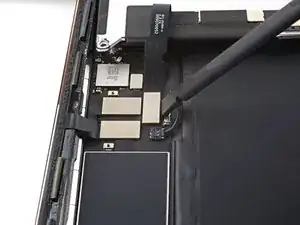
    • Use a spudger, an opening tool, or your fingernail to flip up the small, hinged locking flap on the home button cable ZIF connector.

  42. FJQlTMCOQbFy2Orm
    FJQlTMCOQbFy2Orm
    ojaHMSyh4CFQZhgH
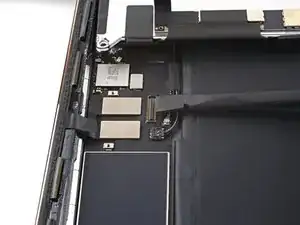
    • Use a pair of tweezers to pull the home button ribbon cable straight out of the ZIF connector.

  43. fRqjvfUDFpGwJEuM
    fRqjvfUDFpGwJEuM
    2cZUUmYT6MTjcxtl
    qqbJARxZIHM5nCan
    • Use the flat end of a spudger to pry up and disconnect the two digitizer cable press connectors.

    • To avoid damaging your iPad, pry only on the connectors themselves, not on the socket on the logic board.

  44. 2R4qx1OywjLGEeuS
    2R4qx1OywjLGEeuS
    BsBYEsNttJPsQG1y
    rKAR4e1eqH3p3H3C
    • Use the flat end of a spudger to pry up the buffer block near the bottom-right corner of the iPad.

    • Take care not to puncture or tear the home button ribbon cable.

    • Remove the buffer block.

  45. BSNdl11uwE5nfPRd
    BSNdl11uwE5nfPRd
    Dn6olvIvhiU5fA3J
    OXPUKCA3xTakuRCW
    • The home button cable is secured with some light adhesive.

    • Use a pair of tweezers to peel the home button cable away from the frame.

  46. 6nVv2pTvXfQeJt5k
    6nVv2pTvXfQeJt5k
    edNM131pTfdaygtM
    NTLOVWWsXPM33GkA
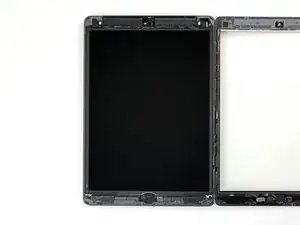
    • Remove the front panel assembly.

    • Use an opening pick to cut away any residual adhesive that may still be connecting the front panel assembly to the frame.

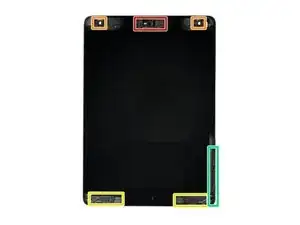
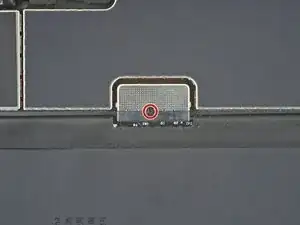
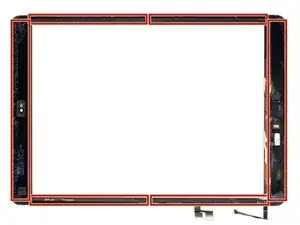
    • If you experience "ghost" or "phantom" touch input issues with your new display, this can be resolved by adding a layer of very thin insulating tape, such as Kapton (polyimide) tape, to the highlighted areas on the back of the panel. iFixit replacement digitizers come with the proper insulation and should not require the addition of any tape.

    • Without the proper insulation, these areas of the digitizer can ground out against other components, causing touch input malfunction.

    • The insulation is not visible to the naked eye and is different from the foam dust barrier strips found on many iPads.

    • During reassembly, before installing a display, remove any remaining adhesive from the iPad, and clean the glued areas with high concentration isopropyl alcohol (90% or greater) and a lint-free cloth. This helps prep the iPad for fresh adhesive and ensures that it will bond properly.

    • Test your iPad's functions and install pre-cut adhesive strips to the back of the display using our display adhesive application guide before sealing it up.

  47. KROZeMGi3TaVXOco
    KROZeMGi3TaVXOco
    YgHslGLFRWg1a22H
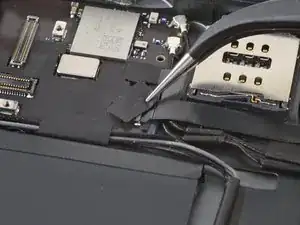
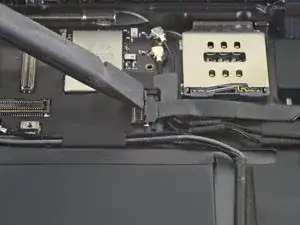
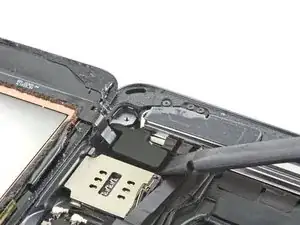
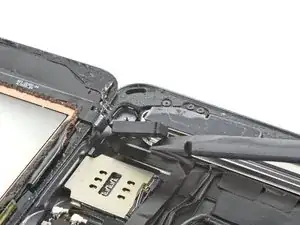
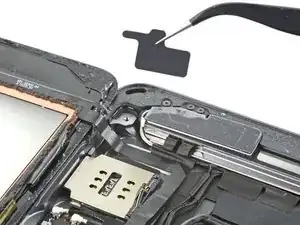
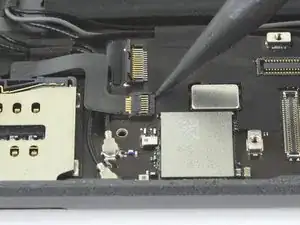
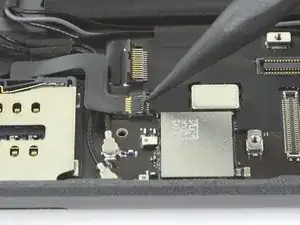
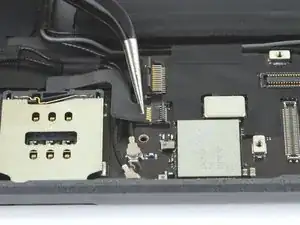
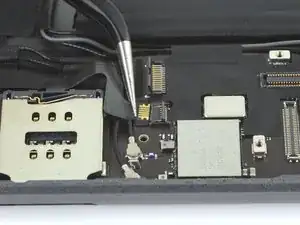
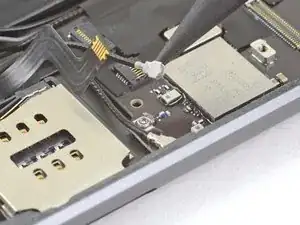
    • Use the tip of a spudger, an opening tool, or your fingernail to flip up the small, hinged locking flap on the SIM card reader cable ZIF connector.

  48. MRasSEQNL3OLr5vv
    MRasSEQNL3OLr5vv
    w2dYIFWBb6vjvEmq
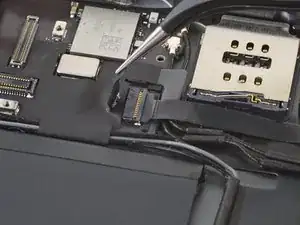
    • Use a pair of tweezers to carefully pull the SIM card reader cable straight out of the ZIF connector.

  49. PJVOZVloHuAHN5Fh
    PJVOZVloHuAHN5Fh
    EvlN6I11dIYCEahc
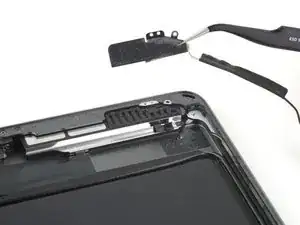
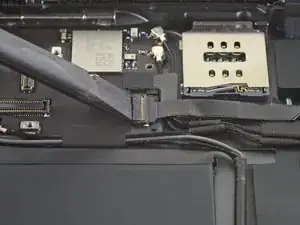
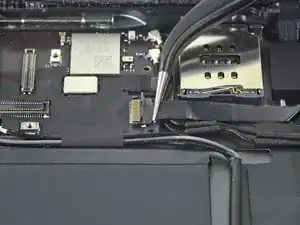
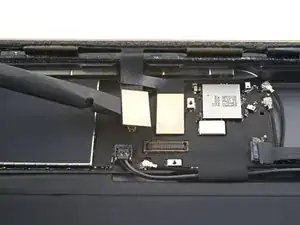
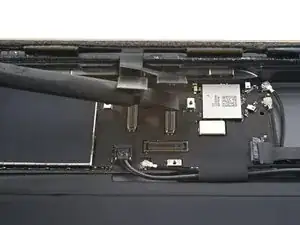
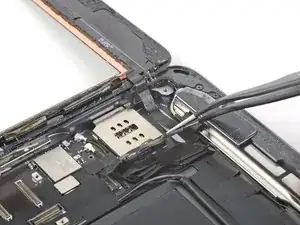
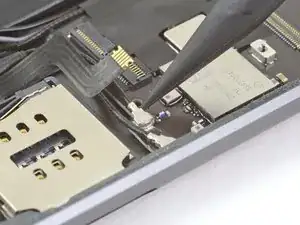
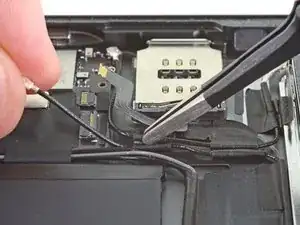
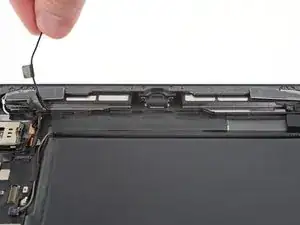
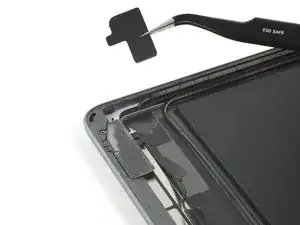
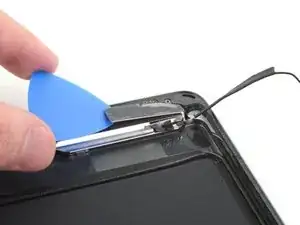
    • Insert the pointed end of a spudger under the left antenna cable and lift straight up to disconnect it.

    • There are two antenna cables here, but you only need to disconnect the one farthest from the edge.

  50. vekCTkahiheBiINQ
    vekCTkahiheBiINQ
    55gKxXxpNkWpf5IQ
    qDOsgcSIvSGbjO6l
    • Peel the left antenna cable up from the rear case.

    • Grip the antenna cable by the cable itself and not at its connector. Pulling coaxial cables by their connectors can break them.

    • The tape securing the left antenna cable is underneath the tape securing the right antenna cable. Disconnect and peel up the right antenna cable if you are having trouble.

  51. WMJ5GwBJSwgLUO1k
    WMJ5GwBJSwgLUO1k
    GlU1Ey4IQF2Ku233
    svJCVWKjw2lfLyXH
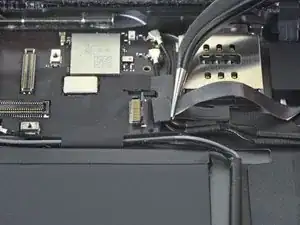
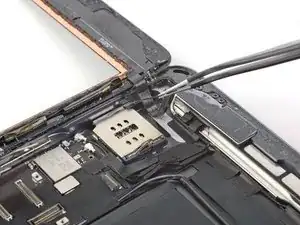
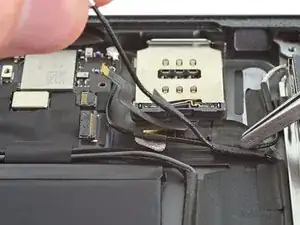
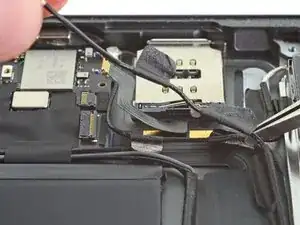
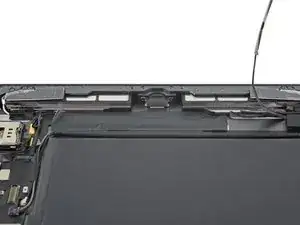
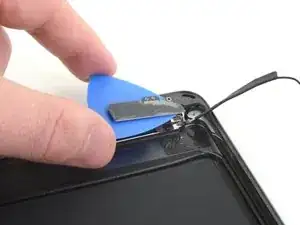
    • Continue to peel the left antenna cable away from the rear case, along the bottom edge of the iPad.

  52. ZBYXYdviVQIQrIZW
    ZBYXYdviVQIQrIZW
    v2h4YyJSMbhtEqKp
    rRnU1bLLJDhXZbIV
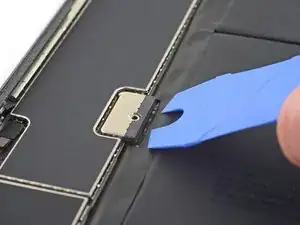
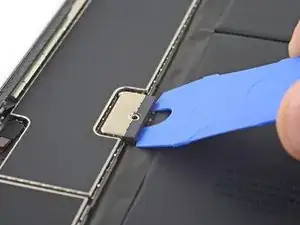
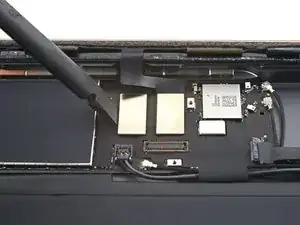
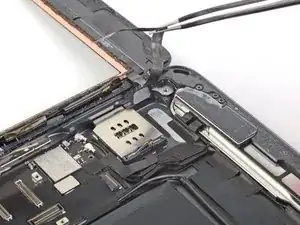
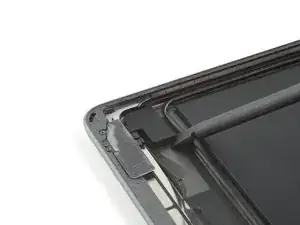
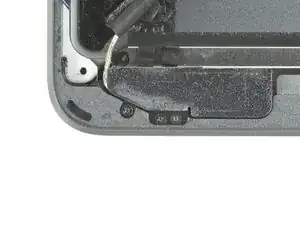
    • Use the flat end of a spudger to pry up the buffer block at the bottom left corner of the iPad.

    • Use a pair of tweezers to remove the buffer block.

  53. SWSRpHJu6BqLm5Hc
    SWSRpHJu6BqLm5Hc
    BQOY1xkHGXgxVEbZ
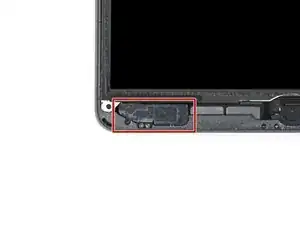
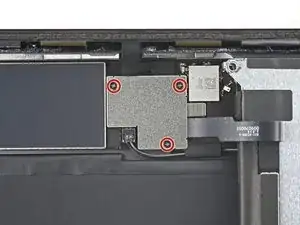
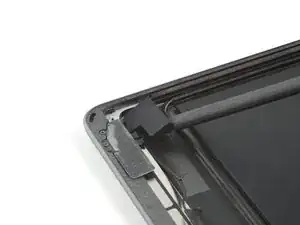
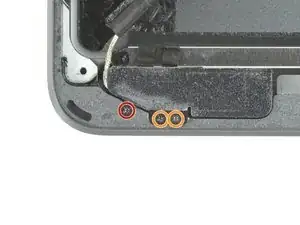
    • Use a Phillips screwdriver to remove the three screws securing the left antenna.

    • One 2.3 mm-long screw

    • Two 1.4 mm-long screws

  54. yNKlyKxDetAI1TtP
    yNKlyKxDetAI1TtP
    BHM5nQqjWdWvEnXw
    ANHGEm4LMpDy5KHW
    • The antenna cable is anchored to the speaker with a small metal bracket. The bracket is permanently crimped to the antenna and adhered to the speaker enclosure. The adhesive must be severed in order to extract the antenna.

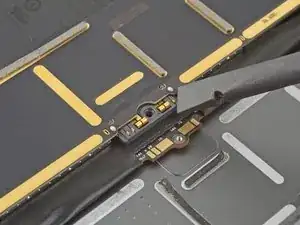
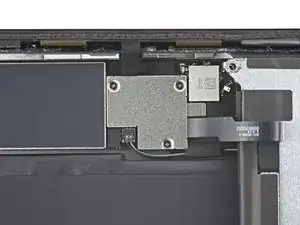
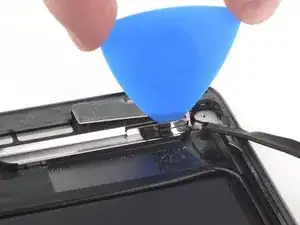
    • Carefully insert an opening pick between the speaker enclosure and the bracket.

    • Slide the pick towards the charging port to cut the adhesive.

    • Push the bracket away from the speaker to clear it of the tape under it.

  55. nlBALHXEDvcsJtLp
    nlBALHXEDvcsJtLp
    jUnhSwrWNLjZhRNe
    RstMPelo21xF6KZI
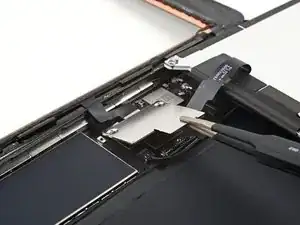
    • Insert an opening pick between the antenna and speaker assembly.

    • Slide the opening pick underneath the antenna to cut the foam adhesive.

    • Remove the left antenna.

Conclusion

To reassemble your device, follow these instructions in reverse order.

Take your e-waste to an R2 or e-Stewards certified recycler.

Repair didn’t go as planned? Try some basic troubleshooting, or ask our iPad 8 Answers community for help.

Alex Diaz-Kokaisl

Member since: 16/01/22

117875 Reputation

0 comments