Introduction
This repair guide was authored by the iFixit staff and hasn’t been endorsed by Google. Learn more about our repair guides here.
Use this guide to replace the flip front camera in your Google Pixel Fold.
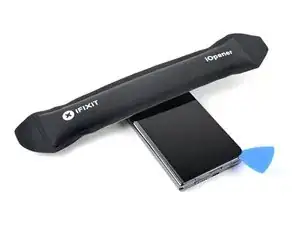
Tools
-
-
While you're waiting for the adhesive to soften, note the following:
-
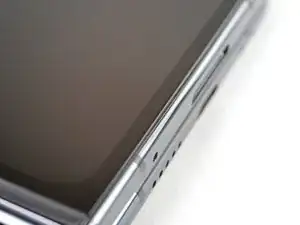
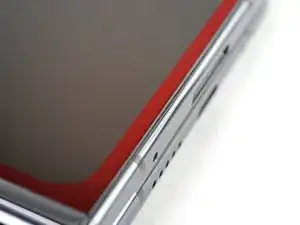
The adhesive is under the dark black border surrounding the screen.
-
-
-
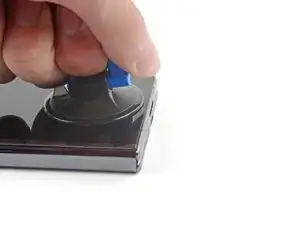
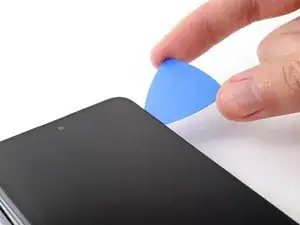
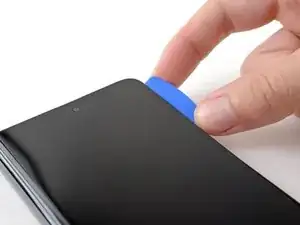
Apply a suction cup to the screen, as close to the center of the bottom edge as possible.
-
Pull up on the suction cup with strong, steady force to create a gap between the screen and the frame.
-
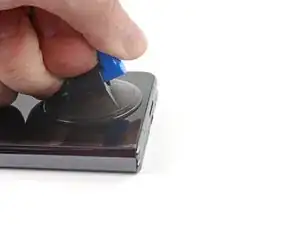
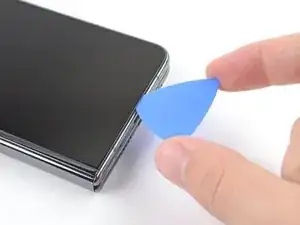
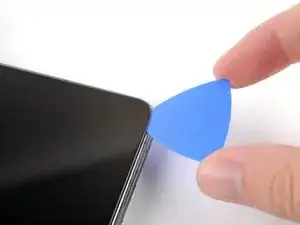
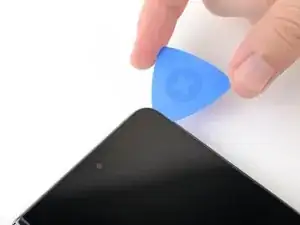
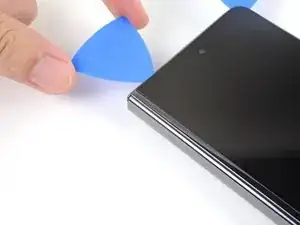
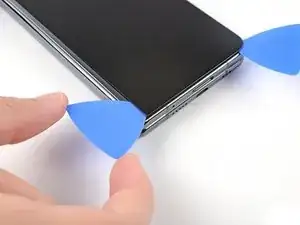
Insert an opening pick into the gap.
-
-
-
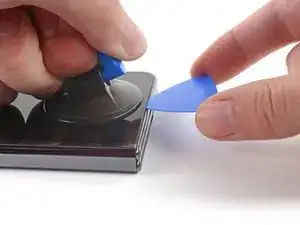
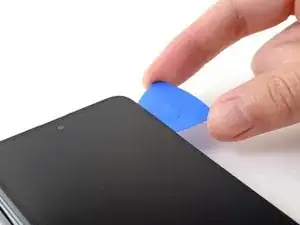
Slide the opening pick along the bottom edge to separate the adhesive.
-
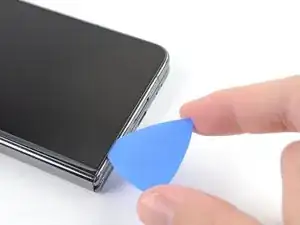
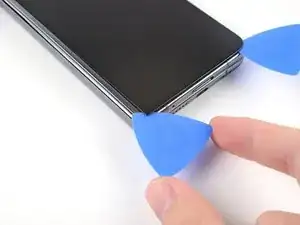
Leave the opening pick in the bottom right corner before continuing.
-
-
-
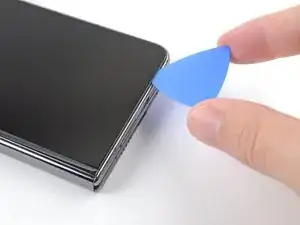
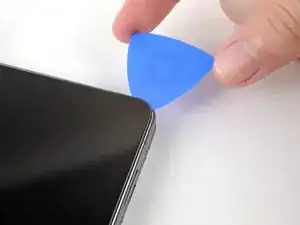
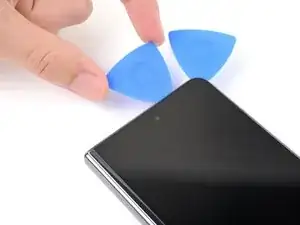
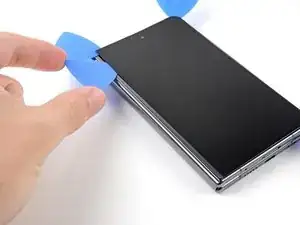
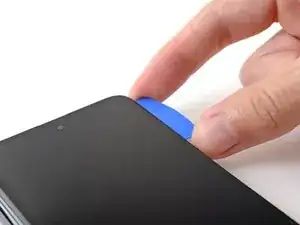
Insert a new opening pick in the bottom right corner.
-
Slide the opening pick toward the top right corner to separate the adhesive.
-
Leave the opening pick in the top right corner before continuing.
-
-
-
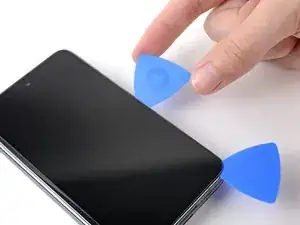
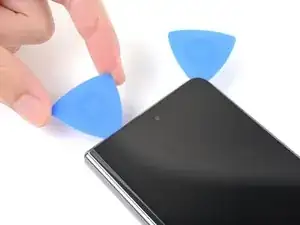
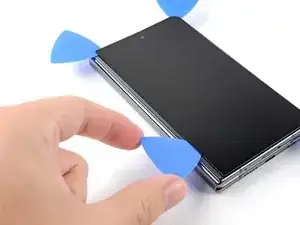
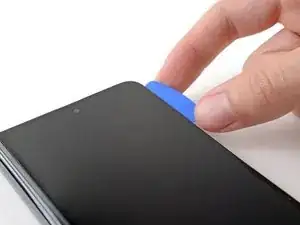
Insert a new opening pick in the top right corner.
-
Slide the opening pick toward the top left corner to separate its adhesive.
-
-
-
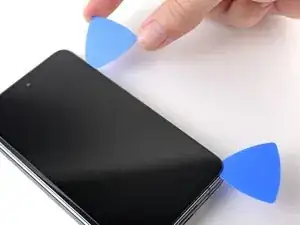
Angle your pick so it's as flat as possible to the screen.
-
Rotate the opening pick around the top left corner to separate the adhesive.
-
-
-
Insert a new opening pick in the top left corner.
-
Slide the opening pick toward the bottom left corner to separate the adhesive.
-
-
-
Angle your pick so it's as flat as possible to the screen.
-
Rotate the opening pick around the bottom left corner to separate the adhesive.
-
-
-
There's a small adhesive strip that secures the screen near the top right corner of the phone.
-
-
-
Insert an opening pick under the right edge of the screen, near the top right corner.
-
Push the opening pick under the screen as far you can go without losing your grip.
-
-
-
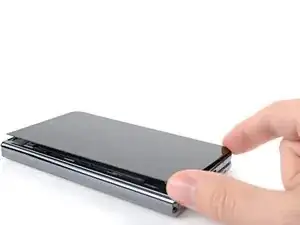
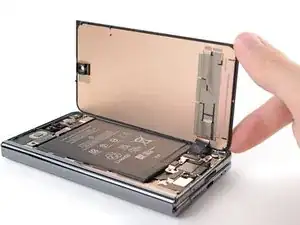
Swing the left edge of the screen up and over the right edge of the phone.
-
Let the screen rest next to the phone before continuing.
-
-
-
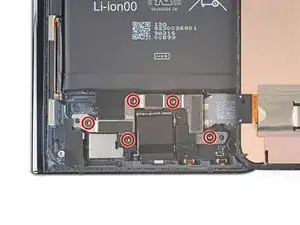
Use a Torx Plus 3IP screwdriver to remove the five 2.5 mm‑long screws securing the bottom bracket.
-
-
-
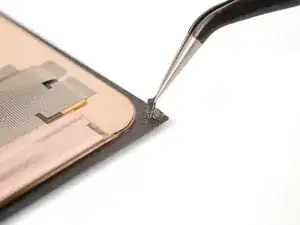
Insert the point of a spudger under the short edge of the screen press connector facing the bottom of the phone.
-
Pry up to disconnect the screen press connector.
-
-
-
If you're reusing your screen, use tweezers to remove big chunks of adhesive from the perimeter of the screen.
-
Repeat for any adhesive on the frame, including the small adhesive at the top right of the phone.
-
Use isopropyl alcohol (>90%) and a lint-free cloth to remove any remaining adhesive residue.
-
Follow this guide to replace your screen adhesive.
-
-
-
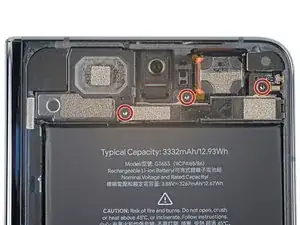
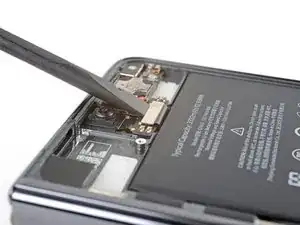
Use a Torx Plus 3IP screwdriver to remove the three 2.5 mm‑long screws securing the top bracket.
-
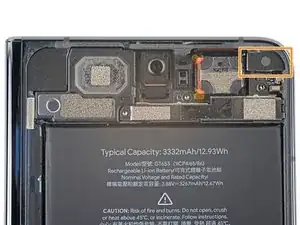
There's a magnet at the top right corner of phone. As you remove nearby screws, they might stick the magnet.
-
-
-
Pull the top bracket toward the left edge of the phone to separate it from its recess in the frame.
-
Remove the top bracket.
-
-
-
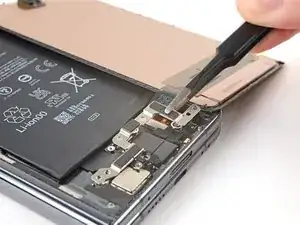
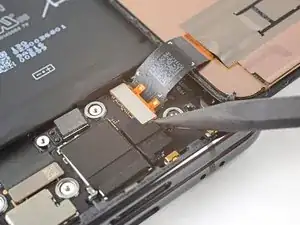
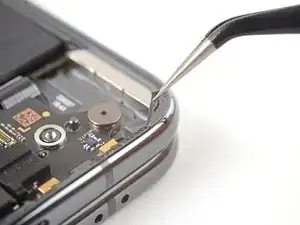
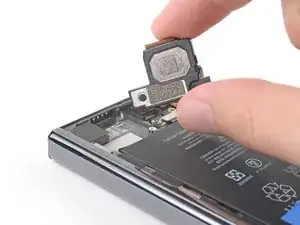
Insert the flat end of a spudger between the battery and the bottom edge of the top speaker.
-
Twist the spudger to separate the adhesive securing the bottom speaker.
-
Remove the top speaker.
-
-
-
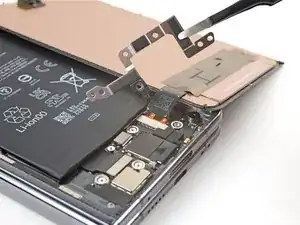
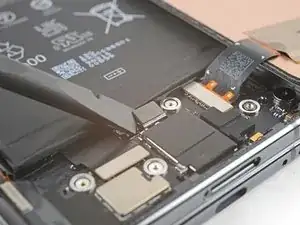
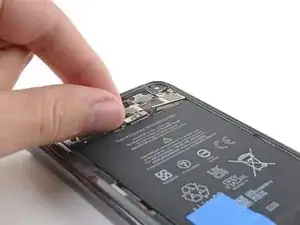
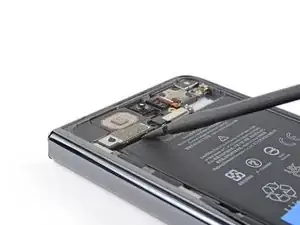
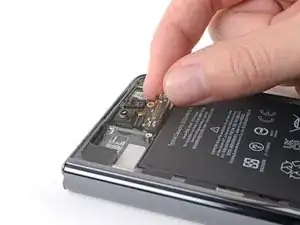
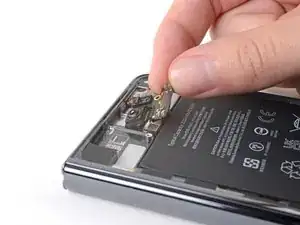
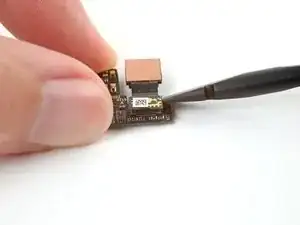
Use the flat end of spudger to pry up and disconnect the top interconnect cable press connector.
-
-
-
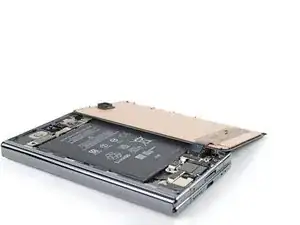
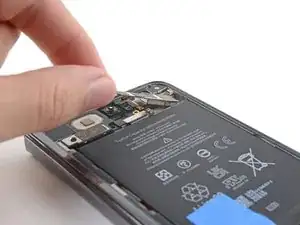
Pull the upper board toward the bottom of the phone to separate it from its recess in the frame
-
Remove the upper board.
-
-
-
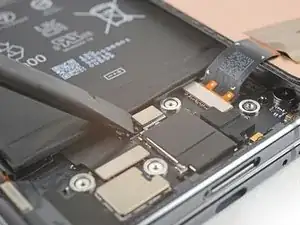
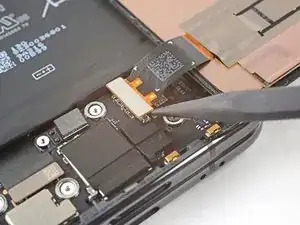
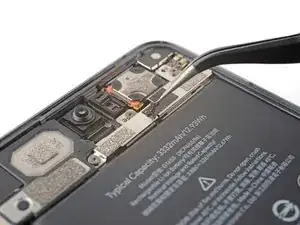
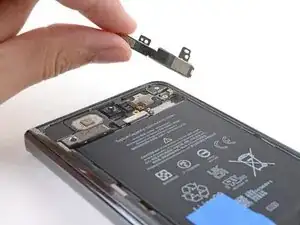
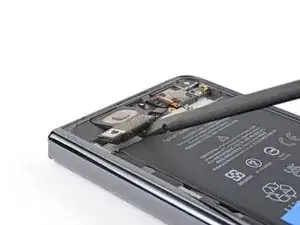
Support the upper board with one hand.
-
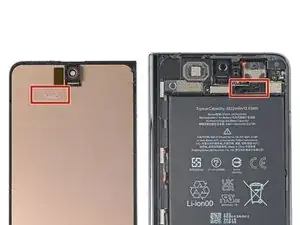
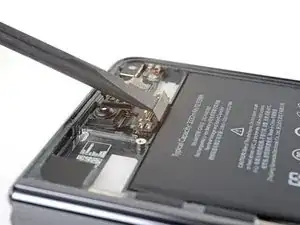
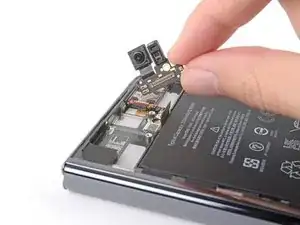
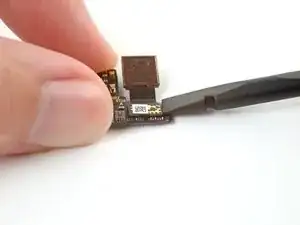
Use your other hand to pry up and disconnect the front camera press connector with the flat end of the spudger.
-
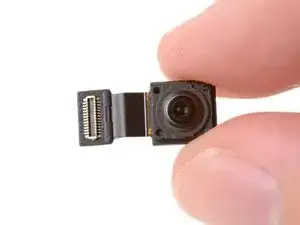
Remove the front camera.
-


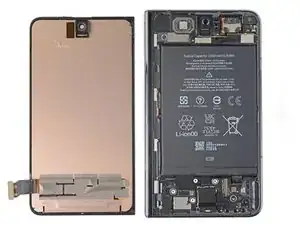
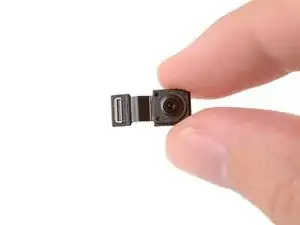
Take your e-waste to an R2 or e-Stewards certified recycler.
Compare your new replacement part to the original part—you may need to transfer remaining components or remove adhesive backings from the new part before you install it.
To reassemble your device, follow these instructions in reverse order.
To run a diagnostics test with the built-in Pixel Diagnostic tool, click here.
Repair didn’t go as planned? Try some basic troubleshooting, or ask our Google Pixel Fold Answers Community for help.

4 comments
Hi, my cam stop working i buy the piece here, but when i remove the screen i try to do it very gently now mi outter screen have white bars, and the touch dont work at all.
I can see only parts of the screen and the camera still just show black.
I need yo teeplace now my screen?
And what else can be the problen of the front face cam
Hi there!
I'm sorry to hear about the repair! There's a few things that could've gone wrong here. The first is that the front camera part is defective, in which case you should contact our Customer Support team (you can find the link at the bottom of the page) and work with them to get a new part. If the part isn't defective, it could be that either the press connector on the camera is not fully connected to its board OR that the interconnect cable isn't fully connected to the board. Try disconnecting and reconnecting it, making sure that the connector sits flat on its pins. Otherwise, there could be something blocking the camera, like some leftover adhesive, which could be directly on the camera lens or on the back of the screen where the camera "looks" through it. For the screen and its white bars, it could be that the screen got damaged during disassembly. If so, you can buy a replacement screen here. It could also be that the screen connector isn't fully connected, so disconnect and reconnect it!
Hi Alex isnthere any way to reach you personal, I already changed the outside camera with the new one I bought at ifixit, it still doesn't work.But when I disconnect the camera and all that module, my camera app crashes, so the module does work I can't even take photos with my selfie can in tablet mode, I already connected my old camera and the one I bought and everything looks black
I bought a new front camera from ifixit I try to install it and don't work