Introduction

This repair guide was authored by the iFixit staff and hasn’t been endorsed by Google. Learn more about our repair guides here.

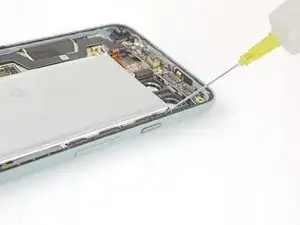
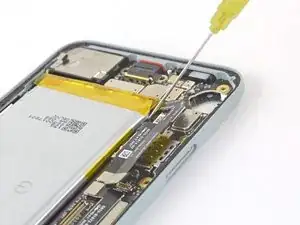
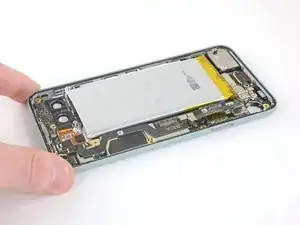
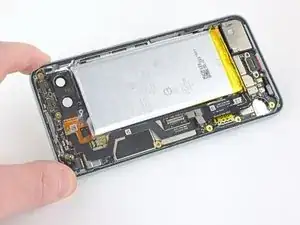
Follow this guide to remove and replace the battery on a Google Pixel 5.

For your safety, discharge your battery below 25% before disassembling your phone. This reduces the risk of a dangerous thermal event if the battery is accidentally damaged during the repair. If your battery is swollen, take appropriate precautions.

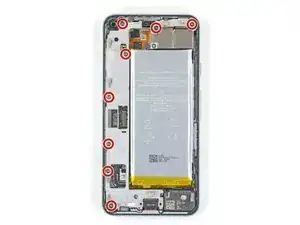
The rear cameras were removed in the photos, but it is not a necessary step to take when removing the battery.

  1. QQGLSFPODbK54uDM
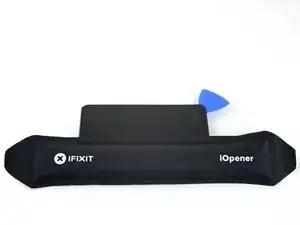
    • Heat an iOpener and apply it to the bottom edge of the screen for one minute.

    • A hair dryer, heat gun, or hot plate may also be used, but be careful not to overheat the phone—the display and internal battery are both susceptible to heat damage.

    It would be helpful to know for how long ally the heated pad

    Yuri Deglin -

    Agreed, my friend from the past.

    Albert Einstein -

    If you click on the "iOpener" link, it tells you to heat it up for 30 seconds, and if you're using a microwave with a carousel, make sure it moves freely.

    Azurina Schalk-Smith -

    How long do you think it would take with a hair dryer?

    Gen L. -

  2. XB15jHbG4YWAkvHj
    XB15jHbG4YWAkvHj
    idLGWGUERlrSUErg
    FsdxJwViyOclRRRc
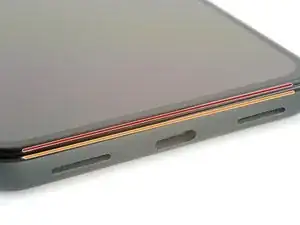
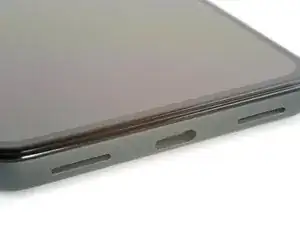
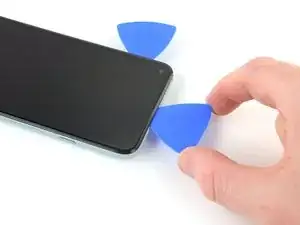
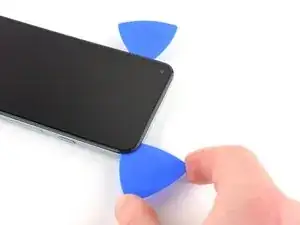
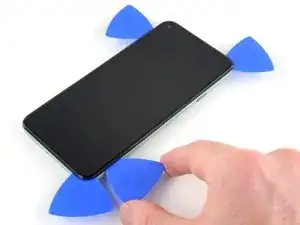
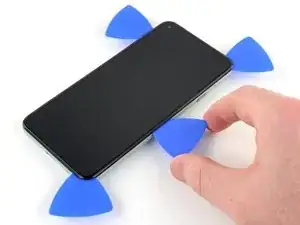
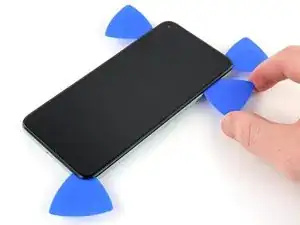
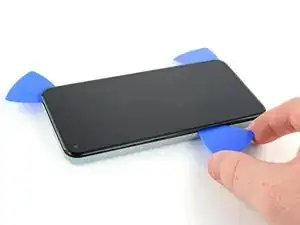
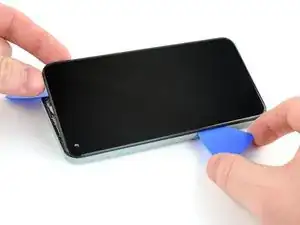
    • While you're waiting for the adhesive to loosen, take note of the following:

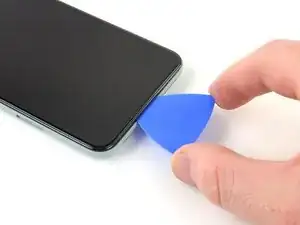
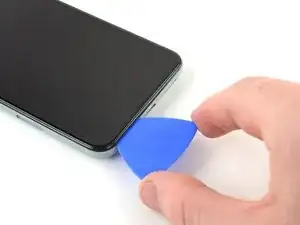
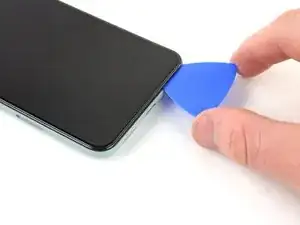
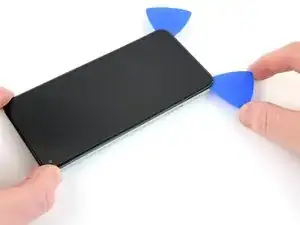
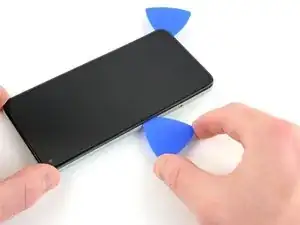
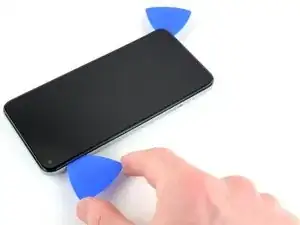
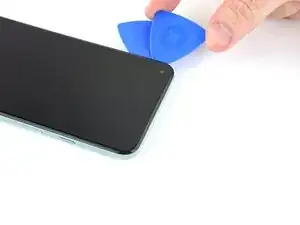
    • Screen seam: This seam separates the screen from the rest of the phone. Do not pry at this seam.

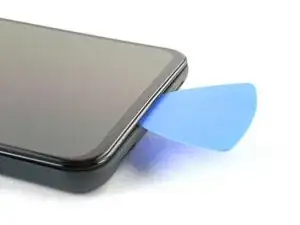
    • Bezel seam: This is where the plastic bezel designed to protect the screen meets the frame. It's held in place by plastic clips. This is where you should pry.

    Please remove the image of the pick in the bottom of the phone in Step 2. This led me to place a pick there BEFORE step 5 which damaged my digitizer. Now I have to replace the entire screen as a result.

    Alternatively, add the image from step 5 with the suction cup in place, or just draw an arrow digitally to the seam you're referring to in step 2. Or call "Step 2" "Important Note" instead of a step.

    David Smith -

  3. 23sHH3BUSbtCbtOh
    23sHH3BUSbtCbtOh
    wIVYR4w6CPIbpvc1
    Pi3qHdWqZra6AUCg
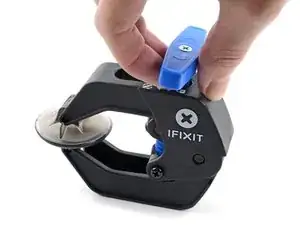
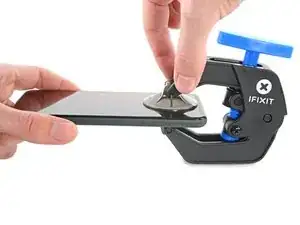
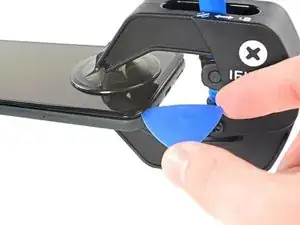
    • The next two steps demonstrate the Anti-Clamp, a tool we designed to make the opening procedure easier. If you aren't using the Anti-Clamp, skip down two steps for an alternate method.

    • For complete instructions on how to use the Anti-Clamp, check out this guide.

    • Pull the blue handle towards the hinge to disengage opening mode.

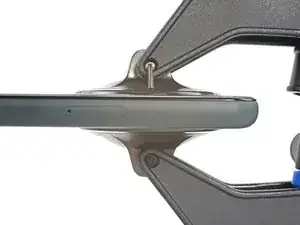
    • Position the suction cups near the bottom edge of the screen—one on the front, and one on the back.

    • Push down on the cups to apply suction to the desired area.

    • If you find that the surface of your device is too slippery for the Anti-Clamp to hold onto, you can use packing tape to create a grippier surface.

  4. LHErCKT1C5tQ23UD
    LHErCKT1C5tQ23UD
    ffUX41QYpsWEufib
    WJrFDynE3AHciwdH
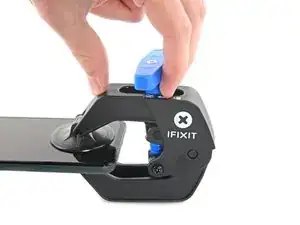
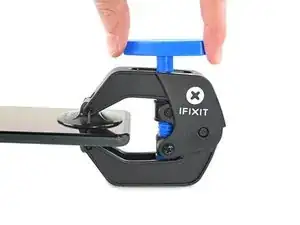
    • Push the blue handle away from the hinge to engage opening mode.

    • Turn the handle clockwise until you see the cups start to stretch.

    • Make sure the suction cups remain aligned to each other. If they begin to slip out of alignment, loosen the suction cups slightly and realign the arms.

    • Wait one minute to give the adhesive a chance to release and present an opening gap.

    • Insert an opening pick under the screen and its bezel frame when the Anti-Clamp creates a large enough gap.

    • If the Anti-Clamp doesn't create a sufficient gap, apply more heat to the area and rotate the handle clockwise half a turn.

    • Don't crank more than a half a turn at a time, and wait one minute between turns. Let the Anti-Clamp and time do the work for you.

    • Skip the next step.

  5. Z6keo3lUlisS6PiX
    Z6keo3lUlisS6PiX
    r3JOcDoYsjpYSPFJ
    TNkpv1vbVMDOwwPO
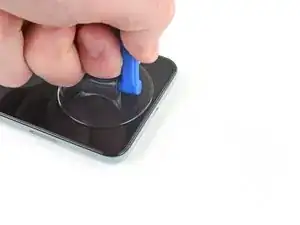
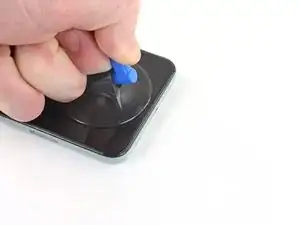
    • Apply a suction cup to the screen, as close to the heated edge as possible.

    • If your screen is badly cracked, follow this guide to tape over the cracked screen. If all else fails, you can superglue the suction cup to the broken screen.

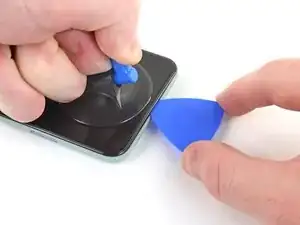
    • Pull up on the suction cup with strong, steady force to create a gap.

    • Depending on the age of your device, this may be difficult. If you have trouble, apply more heat and try again.

    • Insert the opening pick into the gap.

    "Insert the opening pick into the gap." NOT the gap under the glass, the second gap... If not you will probably break your screen, at least I did. Especially important if your pixel 5 shipped with the screen gap :(

    Alex Beaven (Nevbox) -

  6. JR3ablPZImMYsdPw
    JR3ablPZImMYsdPw
    16NeY1RIgBr4ALBD
    eHki2SVKH3c4LedP
    • Slide the opening pick back and forth along the bottom of the screen to slice the adhesive.

    • Leave the pick inserted in the bottom right corner to prevent the adhesive from re-sealing.

  7. YYBV6DBqqFtaUCfr
    • Apply a heated iOpener to the left edge of the screen for one minute.

  8. PkwPMyUxTWxYtfMG
    PkwPMyUxTWxYtfMG
    t1IgSk2tcCpnLXL1
    m4ZVwT1q3UtyNBso
    • Insert another opening pick into the bottom left corner of the screen.

    • Slide the opening pick around the left corner.

    • Do not insert the pick more than 1/4 inch (6 mm) or you may damage the screen's flex cable located in the middle of the left edge.

    • Continue to slide the pick up towards the front camera to slice the adhesive on the left edge of the screen.

    • Leave the pick inserted to prevent the adhesive from re-sealing.

  9. oEPA4kQQ5fVdHWvt
    oEPA4kQQ5fVdHWvt
    XhJQ6tagwvAhEmpG
    RKsZYcUGPiGcP3sF
    • Insert another opening pick into the top left corner of the screen.

    • Slide the pick around the front camera and across the top edge of the phone.

    • If the adhesive is difficult to slice, apply heat to the area for one minute and try again.

    • Slide the pick to the top right corner of the phone and leave the pick inserted.

  10. 1QnGhC4UIh3IUk1d
    1QnGhC4UIh3IUk1d
    HkkaPbXOq1RfD2hL
    eAIALPreGV2eXEBQ
    • Insert an opening pick into the bottom right corner of the screen.

    • Slide the pick up to the top right corner to slice the last edge of adhesive.

    • You may need to run an opening pick around the edges again to ensure all the adhesive is cut. It is applied the thickest on the four corners.

  11. lNM4JsPdVK4M1MxG
    lNM4JsPdVK4M1MxG
    O1oOFnIGMGbAJoAG
    • Use the opening pick from the top left corner to lift up the left edge of the screen a few millimeters. This will keep the clips from snapping back down into the case.

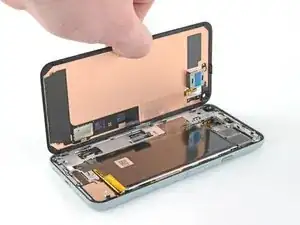
    • Lift up on the right side of the screen and open up the phone like a book.

    • Do not open the screen more than 90 degrees to prevent damaging the screen flex cable.

  12. Fy2oOr21rAtW4q2W
    Fy2oOr21rAtW4q2W
    OVUGNVxv23M3tSAM
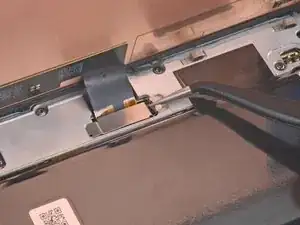
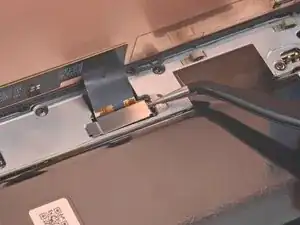
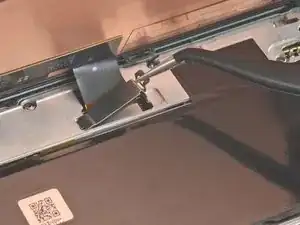
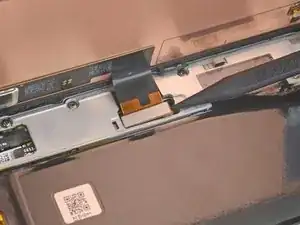
    • Use tweezers to grip the screen connector cover securing the screen flex cable.

    • Push the clip in towards the connector to unlatch it.

    I found it easier to use the spudger here rather than the tweezers (which have sharp ends that could damage something if you happen to slip).

    tristanwaddington -

    some 5a models will have a screw instead of clip , here's a photo https://imgur.com/a/9dZG5pQ


    Daniel Gonzales -

  13. YHjY6XJvlJjJ5tLY
    YHjY6XJvlJjJ5tLY
    bWD4NvY5CfksGydP
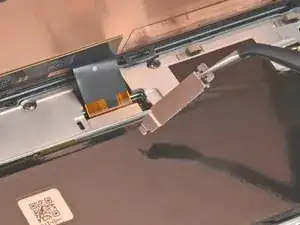
    • Remove the screen connector cover.

    • Make sure to keep this component to reinstall it during reassembly.

  14. cCDA2hvJgjXGYnJM
    cCDA2hvJgjXGYnJM
    3tLAI2OIwSxJUEYL
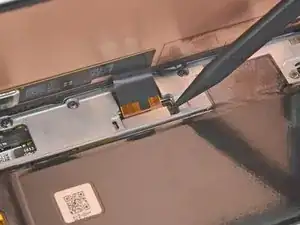
    • Use the tip of the spudger to pry up and disconnect the screen flex cable.

    • To re-attach press connectors like this one, carefully align and press down on one side until it clicks into place, then repeat on the other side. Do not press down on the middle. If the connector is misaligned, the pins can bend, causing permanent damage

    The curved ends of the blue iFixit Opening Tool helped me reseat the connector when installing the new screen.

    tristanwaddington -

    Jesus no wonder the Chinese factory workers kill themselves, this thing is brutal

    Holy Moly -

    So hard to get this thing reseated to test the screen, even before putting the adheasive round the phone edge to finish the job. What made it particularly hard was that the flex cable on mine seemed very short compared to video's i've seen online.

    Jake Boddington -

  15. ZMAy1r2nNBMo5WNf
    ZMAy1r2nNBMo5WNf
    t5oZvVG2wXnsOAxs
    • Remove the screen.

    • Use tweezers to pick off the remaining adhesive on the case.

    • If you use isopropyl alcohol to clean the adhesive off the display, be sure to not let it splash onto any unintended components, as this can weaken their adhesive bond.

    • If you replaced the screen, check the screen's front-facing camera hole and remove any protective liners covering it.

    • If your replacement screen's display cable is held down by tape, remove the tape before installation.

    • If you are using a custom-cut adhesive, follow this guide to correctly apply new screen adhesive.

    • If you are using Tesa tape to reattach the screen, follow this guide.

    • During the boot-up process after reassembly, the screen will go through a calibration sequence. Do not touch the screen during this process, as it could result in improper touch calibration and create touch issues.

    Where from we can buy the screen. Thanks

    Ajay Sharma -

    the screen does not fit

    Joel Kelly -

    After reconnecting the screen, is it necessary to remove a screen protector (if installed) for the a proper screen calibration?

    Maxx -

  16. JjAfOqeYvPL5Q1AO
    JjAfOqeYvPL5Q1AO
    wLheS56raJwteEcq
    mjgDKNJOCZiBdShT
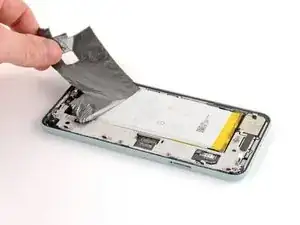
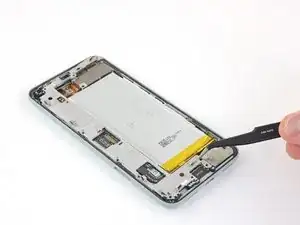
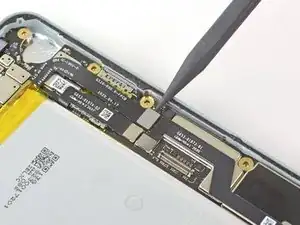
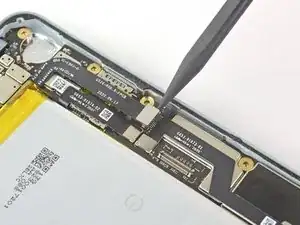
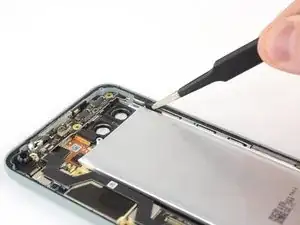
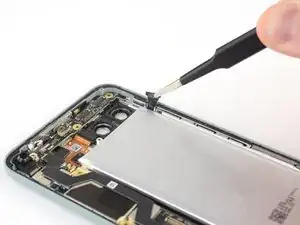
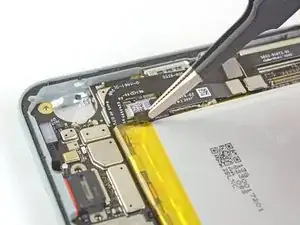
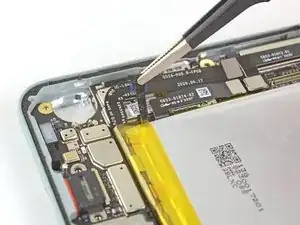
    • Use tweezers to lift up the graphite tape until you are able to grip it with your fingers.

    • Take care not to puncture or bend the battery with your tool—a punctured or bent battery may leak dangerous chemicals or cause a thermal event.

    • Peel off the graphite tape.

    On reassembly, I missed the graphite tape installation. Will this be an issue?

    Gene Harriman -

  17. tfXQmjGhSOU33UD2
    tfXQmjGhSOU33UD2
    1jrdoV3IGxUvBHwp
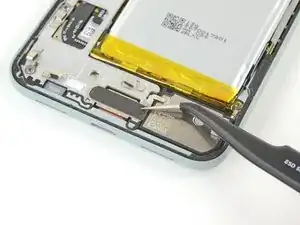
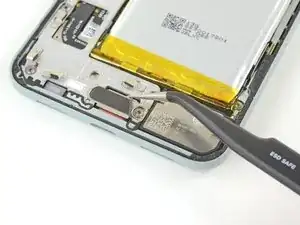
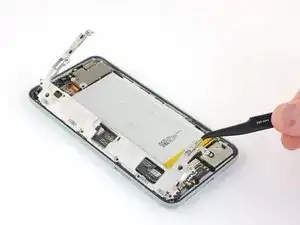
    • Use tweezers to peel off the graphite pad covering the charging plate cover.

    • If you are able to keep the graphite pad in good condition, you may reapply it during reassembly.

    Would have been much more helpful to start off by saying to be careful removing this piece so you can reuse.

    Also would have been helpful to say that the kit comes with a new one, so don't worry about saving it.

    lupa -

  18. 1eBqEykKCjSnXjba
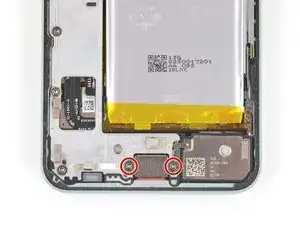
    • Use a T3 Torx driver to remove the two 4.6 mm-long screws securing the charging plate cover to the midframe.

    • Throughout this repair, keep track of each screw and make sure it goes back exactly where it came from.

  19. MRXQwTZ2RrfesIYE
    MRXQwTZ2RrfesIYE
    vxTHHVZE22vHJCO2
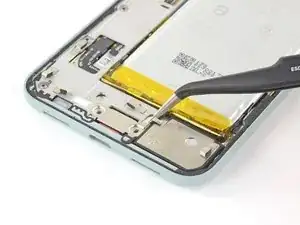
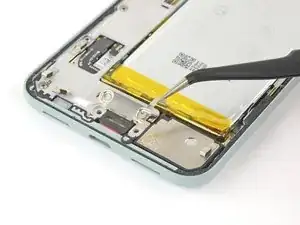
    • Use tweezers to remove the charging plate cover.

    • Make sure to keep this component to reinstall it during reassembly.

  20. oR3xLWXumQOWvDOi
    • Use a T3 Torx driver to remove the eight 4.6 mm-long screws securing the midframe.

  21. JPgBZLYKgs1THrXW
    JPgBZLYKgs1THrXW
    EPgFFlgRcP264jrI
    nFXAFwvFhDLKAJcn
    • Use tweezers to lift up the right side of the midframe.

    • Remove the midframe.

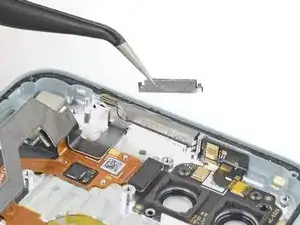
    • The spacer at the top of the phone is likely to fall out when you remove the midframe. Remember to save this spacer for reassembly. See pictures in the motherboard replacement guide.

    Removing the midframe may cause a metal-foam spacer above the light sensor to pop out. After placing in the midframe on re-assembly, you can use the tweezers to squeeze the spacer back in between the midframe and the metal divider near the top of the phone.

    Dumpy Sheep -

    There is a picture of this spacer at https://www.ifixit.com/Guide/Google+Pixe.... To replace it, first replace the midframe. Then, before screwing the midframe back down, use the tweezers to pinch the space together, compressing the foam in the middle, and slide it into place.

    soren -
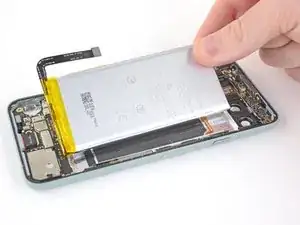
    In step 21 (and step 23) the photo showing the spacer shows the cover over the rear camera and apparently the camera itself removed. But this is not required and nor is it instructed in this guide. Confusing for photo to not match what I'm looking at.

    Gregg Lee -

  22. wYIZd3UBYiJOIH6B
    wYIZd3UBYiJOIH6B
    mTkFMKoNFSJlHdsA
    • Use the pointed end of the spudger to pry the battery connector straight up and disconnect it from the motherboard.

  23. KR4lNjRZkgFkZdZh
    KR4lNjRZkgFkZdZh
    VQALn1g6aEC4IOhf
    qWmxLyJrbZFB6Vjw
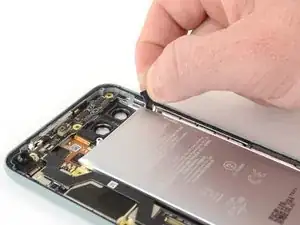
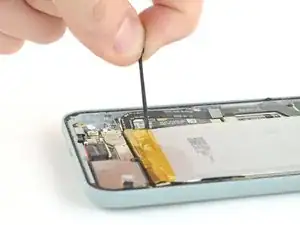
    • Use blunt nose tweezers to grip the black adhesive pull tab located on the top right edge of the battery. Lift the pull tab with the tweezers until you are able to grip it with your fingers.

    • Pull on the pull tab with a slow, steady force at a shallow angle to prevent the pull tab from snapping in the middle.

    • Try to keep the adhesive strips flat and unwrinkled during this procedure; twisted or wrinkled strips will stick together and break instead of pulling out cleanly.

    • If the adhesive becomes hard to pull, you can roll it around a spudger and continue pulling.

    • If the pull tab breaks prematurely, use tweezers to retrieve the remaining length of adhesive and continue pulling.

    • If you are unable to retrieve it, move on to the next step.

    I found what helped the best, was after grabbing the tab wrapping it around the tip of the spudger, and rolling slowly away, holding it as close as possible to where the tab was. Before I did that since you're pulling so much at once it easily snapped in half. Luckily I could grab a tiny bit of the strip. After wrapping it around the spudger, it no longer broke. The whole strip came off in one piece. Both pieces are complete horizontal pieces and are along the entire width of the battery, from the side you're pulling to the other side of the battery. There's quite a bit there especially since it stretches during this process. You'll feel it suddenly basically give away. ******

    It is very much like the adhesive strips you use to hang items on the wall. When you're removing the hook, you pull at a low angle on that tab and it stretches until it comes off clean. Pull too high and you peel paint. A similar process here, keep it low and roll it slowly on the spudger. It will come away cleanly.

    Jesse -

    Pull very slowly. Once there is enough out to grip with fingers use your fingers . The tweezers concentrated the load in a small contact area with hard edges. more likely to start a tear. Easier to control pull as well. As the tab comes out keep regripping closer to the battery. That takes the load off the part of tab that has already been stretched thin and weakened.

    Gregg Lee -

    "Shallow" is not a very helpful descriptor for the angle, nor do any of the pictures demonstrate what they meant.

    Instead of pulling straight up, try pulling as parallel to your work surface as possible. It's like removing Command hooks.

    lupa -

  24. PNnhcXiI3Fjrt5DW
    PNnhcXiI3Fjrt5DW
    LNvauDhS6lXaVhvY
    FuVYIte1ITLyvmvO
    • Use the same process to remove the pull tab located at the bottom left edge of the battery.

    • If this tab breaks prematurely and you are not able to retrieve it with tweezers, move on to the next step.

    I had to fish around for this tab. It was not as easy to find as the last.

    lupa -

  25. gChMTRLxNnsAymdF
    gChMTRLxNnsAymdF
    PfeiY5VKlLvcsxCN
    • If any of the adhesive strips broke off underneath the battery and could not be retrieved, apply a few drops of high concentration (over 90%) isopropyl alcohol into the opening of the affected tab.

    This is a frustrating step since I bought the kit thinking I had everything I needed. I don't keep 90% isopropyl alcohol on hand (71% is effective as a disinfectant, where as 90% is not).

    For those who also do not have 90% on hand, I was able to just gently lift the battery out without the alcohol and the graphite under the battery remained in perfect condition and did not tear at all.

    lupa -

  26. LajAYQFplGJcMSbs
    LajAYQFplGJcMSbs
    bTTWR2UoNMAkYcPs
    • Tilt the phone so that the alcohol flows towards the remaining adhesive.

    • Wait one minute for the adhesive to soften, then proceed to the next step.

    If you're like me, I ended up having a random piece fall out of the phone that I had no idea where it went. After searching I gave up and left it out. However, after looking at the second photo in this step, the one with it tilted fully towards the camera, I found it. Between the index and thumb in the photo, directly in the center of the phone is a thick gray bar. Just to the right of it is a loose piece that might fall out for you. It looks like two thin pieces of metal that sandwich some insulation. You will also notice two tiny tabs bent at an angle on each end only on one side. If that piece does fall out, that's where it goes. Just match the tab angles with this photo and location. I, unfortunately, don't have that piece anymore and am not willing to break through that display adhesive to put it back anyways.

    Jesse -

  27. DrliTJneKm2bIUSP
    DrliTJneKm2bIUSP
    2B64XTFTwiVjwueS
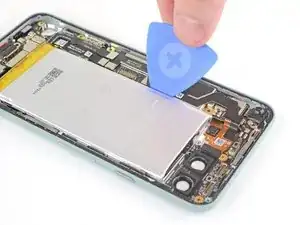
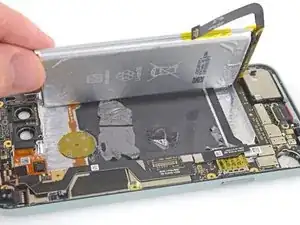
    • Insert an opening pick into the gap long the left side of the battery.

    • Use the opening pick to slice the remaining adhesive at the top and bottom of the battery.

    • Avoid scraping the two flex cables under the battery with your opening pick.

    • This may be difficult as the adhesive is strategically located between the cables and the battery tray. A possible solution is to cut a plastic card to fit between the flex cables and battery tray edge.

    • Do not bend the battery.

    • Avoid the earpiece contact pins located near the top left corner of the battery as you pry up with your opening pick.

    • If you cannot pry the battery up, add a few more drops of isopropyl alcohol to the adhesive. A plastic card can also be helpful during this process.

    This was, by far, the hardest step for me. Pay very much attention to that link "strategically located". It tells you exactly where the toughest adhesive is. I had to use a lot of isopropyl alcohol, a lot of waiting for the adhesive to dissolve, and the thin spudger on only the top and bottom of the battery to pry it out. I did not use the pick.

    I don't think it's worth applying adhesive when putting the battery back in.

    Dumpy Sheep -

    Absolutely agree. More isopropyl alcohol, a lot of waiting is the key.

    Artem Chepurnyi -

    I would recommend applying a little adhesive to the new battery. I didn't apply any and my battery rattles a bit. I wish I had put a small amount of tape in just to keep it in place.

    Elliot -

    Watch how far you push in. The thin cable for the finger print sensor is at the back I snapped it pushing into the glue.

    Kevin McDonagh -

    Try to not use alcohol. Or at least use just a tiny bit without tilting the phone too much. While it worked for me, it leaked into my primary camera lens. Wide camera is okay fortunately, so I can still take photos for important things, and I hope in the next few days alcohol will evaporate. I also tried to put the iOpener on the camera to increase the pressure and move the alcohol to the edges. It kinda worked but photos are still a no go, too blurred

    Emanuele Luciani -

    Just to update who may read this, alcohol fully evaporated after 1 day. I've been very lucky 😅!

    Emanuele Luciani -

  28. Z6ay1oul4bGqB32N
    Z6ay1oul4bGqB32N
    Nst3AuDPQCO3C3Hd
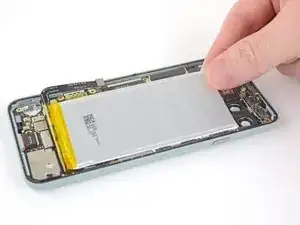
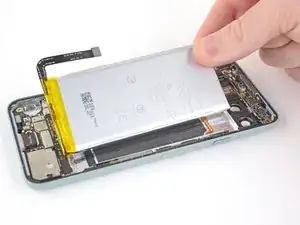
    • Do not reuse the battery if it has been deformed or damaged, as doing so is a potential safety hazard. Replace it with a new battery.

    • Remove your old battery.

    Step 28 battery replacement guide. This is the battery replacement guide - for bad batteries. So why does it say "Do not reuse the battery if it has been deformed or damaged, as doing so is a potential safety hazard. Replace it with a new battery." This must have been copied from a different guide, that does not involve battery replacement.

    Gregg Lee -

Conclusion

For optimal performance, calibrate your newly installed battery after completing this guide.

Compare your new replacement part to the original part—you may need to transfer remaining components or remove adhesive backings from the new part before installing.

To reassemble your device, follow the above steps in reverse order.

Take your e-waste to an R2 or e-Stewards certified recycler.

Repair didn’t go as planned? Try some basic troubleshooting, or ask our Answers community for help.

Robert Boyd

Member since: 01/02/21

26261 Reputation

25 comments

While this is an excellent guide, like the others here, I find the ending statement of "To reassemble your device, follow the above steps in reverse order." very much a throw you in the deep end type of scenario. Figuring out how to place the adhesives that come with the kit was very much a trial and error thing. They are not quite intuitive and I was unable to find any answers anywhere. In my first attempt, the two strips for the battery, are a mess. You never get a visual of how or where they are since you remove them by pulling tabs in Step 21.

Here's the deal with them. Two protective layers, a clear oversized layer on one side, and blue cut to the exact shape on the other. Both sides are sticky. Once you figure out the placement, apply the adhesives by peeling the clear protective layer first. Line it up and firmly press. When ready to adhere to the other side, the blue layer is removed by 2 tabs that are part of the layer. Pull 1 tab and carefully peel it away and it should come away in 1 or 2 pieces.

Jesse -

Very frustrating that a year and a half later the tutorial has not been fixed to include the information you've given, or any more information at all.

It's clear that this tutorial is not complete when multiple replies have had issues with vibration, screens, and other functions, along with pieces that got left out upon reassembly. I had better hopes for ifixit since they offer a complete kit and boast they have tutorials. I thought the experience would be higher quality.

lupa -

I followed this guide and successfully changed the battery. Unfortunately, vibration seems to be not working anymore. What could I have done wrong? Did I damage something?

Julian -

To keep you posted: I opened it again and apparently bent the contacts for the vibration motor in one corner of the main PCB. So be also careful here when removing the battery.

Julian -

There is a spacer between the midframe and the top of the phone that will fall out when the midframe is removed. This spacer is pictured at Google Pixel 5 Motherboard Replacement. When reassembling, first replace the midframe. Then, before screwing the midframe back down, use the tweezers to pinch the space together, compressing the foam in the middle, and slide it into place.

soren -

After changing the battery and putting the phone back together the proximity sensor showed that something was in front of it it all the time. Removing the display shows the sensor is still working. Is there any special trick?

Noel Mohring -

Found the issue, lost the proximity sensor grommet.

Noel Mohring -

did you get a new grommet? or find the old one? or is it still not working?

dan -
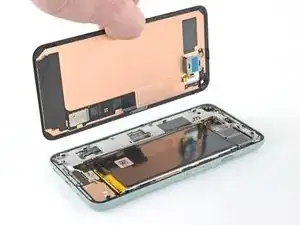
Followed the guide. First time doing this type of repair. Instructions were great and repair went smoothly using the ifixit battery replacement kit.

Daniel -
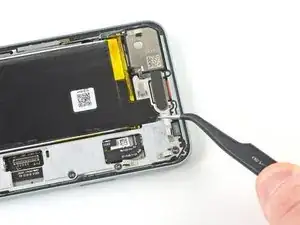
I had a good repair and everything works but i forgot the screen connector cover. Is it okay if it isn't in the phone?

Lucas Tye -
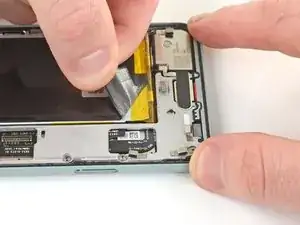
It will function just fine, but that screen connector cover is to keep the screen connected in case of any jostling. So if you drop your phone it's less likely to disconnect the screen.

James Tran -

%#*@ I must have made an error, the new battery charges I think (it heats up and green light on wireless charger) but the screen is not displaying anything

Ben F. -

I hear you. I mostly got it working--the screen mostly works, but it displays a vertical white (and some thin red and geen lines) in the center. It seems stable even when I re-seat the connector, so I'm thinking maybe my screen is broke.

Costano -

Good concise guide, and thank you for mentioning the spacer when pulling out the midframe, that would have had me in a panic when it came out along with the midframe.

Chris B. -

Where can I buy a battery for pixel 5 and be sure that it is original?Where can I buy a battery for pixel 5 and be sure that it is original?

Daniele S. -

Make sure all of the isopropyl is dry before reassembling. I was in a hurry, reassembled, and found condensation behind my rear camera glass. I had to take the glass off to let it out since the phone is mostly sealed up. Then you need to get the phone warm to try to evaporate out any moisture that may still be inside, otherwise the camera glass will fog if the phone gets warm. I used 70% isopropyl which might have been the issue.

Elliot -

Did that resolve the issue for you? Ive just done a quick test before sealing the screen and have the same issue

Christopher Bean -

Como hago para adquirir una batería ,pero para enviarme a Ecuador ????

Galo Tomas -

After replacement of the battery followig this guide, I cannot hear the caller when picking up the phone.
When switching to the main speaker it seems to work.

Obviously there is a speaker in the top part of the display, which does not work any more.

Any hints, how to fix that ?

Claus Bartetzko -

I successfully installed the new battery per the instructions in this guide. However, my phone won't turn on. I can get the phone to go to the fast boot menu by holding volume down/power but that's all I can do. None of the options in that menu even do anything when I select them. My phone just turns back off. I reconnected my old battery and my phone turns on just fine. Is it possible I was sent a faulty battery replacement? What other explanation is there that my phone wouldn't boot up with a new battery?

James Brown -

I'm sorry to hear your phone is not running correctly. I'd suggest watching a full tear down and reassembly video on YouTube or a reputable tutorial site and see if you can pinpoint any missed connections or pinched components.

The reddit group r/mobilerepair is also a great resource and may be able to help you diagnose your problem.

lupa -

I am thankful this is not my first battery replacement because this guide is not for beginners. I commented above with specific info, but overall I've never seen a tutorial that gives an ok teardown and then just says to do the reverse.

Nothing about how to prep surfaces prior to putting things back. No warning about pinch points. No instructions on how to apply the new graphite stickers or the adhesive. I had a rubber piece fall out while I was taking the battery out. There was no clear diagram so I had to hunt to find a pic with the piece in it. It did end belonging where I thought it did, but a lot of times people in competent tutorials will point out all of the loose things that may come out. Nothing about how you clean the glass on the camera in case you accidentally got fuzz or smudges on it before you seal your phone back up. Nothing about safe handling of the display (copper sticker has some marks on it, I was hoping it didn't affect my display but not addressed. It seems ok so far). Disappointing.

lupa -

This less a battery replacement guide and more of a battery removal guide as there no steps on how to apply the new battery and screen adhesives to actually complete the replacement. Many things may be end up being overlooked during the reassembly I think warrants at least a couple of tips.

For example, I managed to replace my battery successfully. It charges and the battery life is significantly improved. However, it appears I must have missed something when placing the screen back as the proximity sensor is now permanently triggered. I can see the flashing white dot where it's supposed to be, so it appears to be unobstructed but short of opening the phone again I don't really have a way to troubleshoot this. Does anyone have any ideas?

I may have to get another display adhesive before opening the phone again...

Sent -

I did not open my phone but had this issue too, I would guess its the adhesive with the display having a gap in the top?
For me it will eventually work when I press down on the phones top (slightly left) a bit and it will for a second pretend like nothing is infront of it. Its strange

Philipp Seincher -

On reassembly, I missed the graphite tape installation. Will this be an issue?

Gene Harriman -