Alauddin Khalji's conquest of Ranthambore
In 1301 Alauddin Khalji, the ruler of the Delhi Sultanate in India, conquered the neighbouring kingdom of Ranastambhapura (modern Ranthambore).
Hammira, the Chahamana (Chauhan) king of Ranthambore, had granted asylum to some Mongol rebels from Delhi in 1299. He refused requests to either kill these rebels or hand them over to Alauddin, resulting in an invasion from Delhi. Hammira lost his general Bhimasimha to an army led by Alauddin's general Ulugh Khan, and his brother Bhoja defected to Alauddin some days later. After recovering from these initial reverses, Hammira's generals (including the Mongol rebels) defeated Ulugh Khan's army at a mountain pass near Ranthambore. Alauddin then dispatched his general Nusrat Khan to reinforce Ulugh Khan's army, but Nusrat Khan was killed while besieging the fort.
Alauddin then himself took control of the operations at Ranthambore. He ordered the construction of a mound to scale its walls. After a long siege, the defenders suffered from a famine and defections. Facing a desperate situation, in July 1301, Hammira and his loyal companions came out of the fort, and fought to death. His wives, daughters and other female relatives committed Jauhar (mass self-immolation). Alauddin captured the fort, and appointed Ulugh Khan as its governor.
Background
Ranthambore was reputed to be an impregnable fort, and Alauddin's predecessor Jalaluddin had made an unsuccessful attempt to capture it in 1291.[1]
In 1299, Alauddin Khalji sent his generals Nusrat Khan and Ulugh Khan to capture Gujarat. This army included several Mongol soldiers (also called Mughals or neo-Muslims), who had converted to Islam recently. When the army was returning to Delhi after its successful campaign, some of the Mongols staged a mutiny against the generals, near Jalore. The mutiny was crushed, and the army returned to Delhi. Two rebel Mongol leaders — Muhammad Shah and Kabhru — managed to escape with some of their followers. Hammira of Ranthambore (called Hamir Dev in Muslim chronicles) granted asylum to these Mongol fugitives.[2]
Ulugh Khan was the governor of Bayana near Ranthambore. After returning to Bayana from Delhi, he sent messengers to Hammira, urging him to kill the Mongol fugitives as a friendly ruler. He also threatened to wage a war against Hammira, if this request was not complied with. Hammira's counsellors advised him not to endanger his kingdom, and comply. However, Hammira refused to do so. He replied to Ulugh Khan that he had no desire to start a conflict, but he would not give up the refugees who had sought his asylum. He added that he was not afraid of a war, and had enough money and soldiers to participate in a war.[3]
Death of Bhimasimha
When Alauddin learned about Hammira's reply, he dispatched an army led by Ulugh Khan to capture Ranthambore. According to Hammira Mahakavya and Surjana-Charita, Hammira was engaged in a religious ceremony at the time of this invasion. Ulugh Khan's army marched unopposed up to the Banas River. There, Hammira's general Bhimasimha stopped his advance. Bhimasimha underestimated the strength of the Delhi, and launched a direct attack on them, instead of keeping his army stationed at the top of the mountain pass leading to Ranthambore.[4] The Delhi army retreated temporarily, possibly deliberately to fool the Chahamanas into dropping their guard.[5] This led Bhimasimha to believe that he had foiled the invasion. However, while Bhimasimha was returning to Ranthambore, Ulugh Khan's forces re-assembled and attacked his contingent. The defenders were defeated, and Bhimasimha was killed in the battle.[4]
Bhoja's defection to Alauddin
According to the Hammira Mahakavya, Bhimasimha had abandoned his strong position at the top of the mountain pass on the advice of the minister Dharmasimha. As a punishment, Hammira ordered Dharmasimha to be blinded and castrated, declaring that only a blind man would have failed to see the true strength of the invading army, and only an impotent man would have allowed Bhimasimha to die on the battlefield unsupported. After Dharmasimha's dismissal, Hammira's brother Bhoja became the chief royal counsellor. However, Bhoja was unable to arrange sufficient money for raising an army that could defeat Alauddin's invasion. In the past, the Chahamanas had raised money by raiding their neighbours, but this was not possible as they were under siege.[5]
Dharmasimha, who now maintained a grudge against Hammira, took advantage of this financial crunch. He contacted the king through a court dancer named Dhara, and offered to arrange horses for Hammira's cavalry from Malwa. Hammira took Dharmasimha back into service.[5] Dharmasimha raised money by imposing heavy taxes, which made Hammira very unpopular among his subjects. Dharmasimha also sidelined Bhoja: on his advice, Hammira ordered Bhoja to provide a full account of the ministry during his tenure.[6]
The Hammira Mahakavya further states that Bhoja and his brother Pithasimha decided to leave Ranthambore as a result of Dharmasimha's scheming. Hammira did not try to stop his brothers, and instead, gave Bhoja's post of danda-nayaka to his general Ratipala. Feeling insulted, Bhoja defected to Alauddin, who received him with honour. Alauddin gave him the jagir (fief) of Jagara, which was earlier held by the rebel Mongol leader Muhammad Shah. Bhoja advised Hammira to attack Ranthambore before the harvest season. Alauddin dispatched a large army (100,000-strong, according to Hammira Mahakavya) to conquer Ranthambore.[6]
Chahamana victory at Hinduvata

According to the Hammira Mahakavya, the Delhi army marched to Ranthambore, ransacking the Hindu territories on their way. At a mountain pass called Hinduvata, the Chahamana army inflicted a heavy defeat on the Delhi forces. This army was led by Hammira's own generals as well as the Mongol leaders who had taken asylum at Ranthambore. Hammira's own generals included Virama (his brother), Ratipala, Jaja and Ranamalla. The Mongol leaders included Muhammad Shah (called Mahimashahi in Hammira Mahakavya), his brother Garbharuka, Tichara and Vaichara (the last three are Sanskritized names given in Hammira Mahakavya: the original names are not certain).[6]
The Chahamana army captured much of the Delhi army's equipment as a result of this victory. The Hammira Mahakavya states that the Chahamanas also captured a large number of Muslim women after this victory. These women were forced to sell sour buttermilk in the villages of Hammira's kingdom, in order to spread the news of the Chahamana victory.[6]
Hammira's Mongol allies then attacked Jagara, the former jagir of Muhammad Shah that Alauddin had granted to Bhoja. They captured Bhoja's family members, and brought them to Ranthambore as prisoners. Bhoja survived the attack, as he was at Delhi.[6] The 14th century Pakrta-Paingalam claims that Hammira's officer Jaja marched towards Delhi, striking fear into the hearts of its Muslim citizens, although the text does not mention what was the result of this march.[7]
Death of Nusrat Khan

After these initial reverses, Alauddin asked Nusrat Khan, the governor of Awadh, to lead an army in Ulugh Khan's support. The joint armies of Nusrat Khan and Ulugh Khan invaded Hammira's territory.[3]
The Hammira Mahakavya claims that this time, Ulugh Khan pretended that he was coming to negotiate a truce with Hammira. As a result, Hammira did not resist the invaders' entry into his territory, and the Delhi army crossed the Hinduvata mountain pass easily.[8] The Delhi army captured Jhain, and renamed it as Shahr-i Nau ("new town").[3]
Finally, the Delhi army reached Ranthambore, and encamped near the fort walls. According to the Hammira Mahakavya, a messenger from Alauddin offered two alternatives to Hammira:[8]
- Present 400,000 mohurs (gold coins), 4 elephants and Hammira's daughter in marriage to Alauddin
- Surrender the Mongol rebels who had taken refuge at Ranthambore
Hammira scornfully rejected the demands, and replied that Alauddin could have 400,000 sword wounds instead. The Delhi army then besieged the fort, and tried to scale its walls.[8] One day, Nusrat Khan was hit by a manjaniq stone; he died after 2–3 days. Taking advantage of the mourning in the invaders' camp, Hammira came out of the fort with a strong army, and forced Ulugh Khan to retreat to Jhain.[3] According to the 16th century writer Firishta, Hammira's force was 200,000-strong, but this appears to be an exaggeration.[9] Another chronicler Yahya states that Hammira had less than 12,000 cavalry, several elephants and "innumerable" infantry. Amir Khusrau estimates the strength of Hammira's cavalry as 10,000.[10]
Alauddin at Ranthambore

When Alauddin learned about Ulugh Khan's defeat, he decided to personally lead a stronger force to Ranthambore. He ordered his other officers from various provinces to bring their armies to Tilpat near Delhi. While these armies were on their way to Tilpat, he spent his time hunting. During one such hunting expedition, his nephew Sulaiman Shah Akat Khan conspired to kill him. However, the conspiracy was not successful, and Akat Khan and his companions were executed.[11]
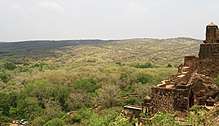
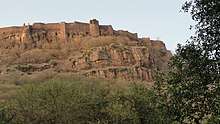
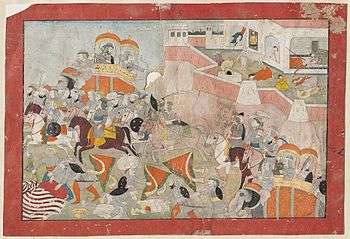
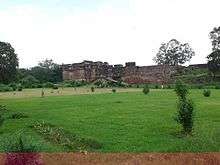
When Alauddin reached Ranthambore, the fort was already surrounded by the Delhi army. He realized that a direct attack on the fort was not feasible: the advantage lay with the defenders.[12] Alauddin's camp was located on a hillock called Ran, which faced the Ranthambore Fort's hill. Alauddin ordered the construction of a pasheb, an inclined mound built to fill the ditch separating his camp and the fort.[13][12] Weavers from the neighbouring areas were brought, and asked to sew a large number of bags. Alauddin's soldiers then filled these bags with soil, and used them to build the pasheb mound.[12]
The construction of the pasheb was a long and difficult process for the invading army. But none of Alauddin's soldiers deserted him, because he demanded three years' pay from any deserter. The Delhi army used the siege engines called maghrabis to shoot stones at the defending garrison. But the defenders kept destroying the under-construction pasheb with fire and stones.[12] Alauddin's army also tried to construct a tunnel, but the defenders destroyed it and killed those involved in its construction by throwing a mixture of oil and resin on them.[14] There was heavy loss of lives on both the sides. During this time, Alauddin's army also plundered the neighbouring region, going as far as Dhar in the Paramara territory.[12]
While Alauddin was at Ranthambore, there were two attempts to usurp the power in Delhi. In the first attempt, his nephews Malik Umar and Mangu Khan started recruiting soldiers to overthrow his rule. But Alauddin sent his officers to subdue him. The two brothers were brought to Ranthambore, and killed.[15] Sometime later, an officer named Haji Maula took control of Delhi and appointed one Alavi as the puppet Sultan. Alauddin first sent Malik Hamiduddin, who killed Haji Maula and Alavi. Some days later, he also sent Ulugh Khan, who had the other rebels executed.[16] Despite these rebellions, Alauddin did not abandon his campaign to conquer Ranthambore.[15]
Ratipala's defection to Alauddin
The Hammira Mahakavya states that during the siege, Alauddin once offered to negotiate a peace treaty. As a result, Hammira sent his general Ratipala (or Ratanpal) to Alauddin's camp. Alauddin received Ratipala with great honour, and treated him good food and drinks. Alauddin then won Ratipala over to his side, by promising him the governship of Ranthambore after Hammira's defeat.[14]
After returning to Ranthambore, Ratipala did not inform Hammira about what had actually transpired at the meeting. Instead, he told Hammira that Alauddin was willing to establish peace in return for marriage to Hammira's daughter. Later, he also turned another general named Ranamalla (or Ranmal) against Hammira. One evening, Ratipala and Ranamalla led their forces out of the fort, and joined Alauddin's army.[14]
Hammira's last stand

The construction of the pasheb, which started in March–April (Rajab), seems to have finished around the beginning of the rainy season in July. By this time, the defenders had exhausted their provisions. According to Amir Khusrau, the fort had become a "desert of thorns" due to scarcity of water and green leaves: the people were willing to purchase "one grain of corn for two grains of gold", but still could not get it.[17] The Rajput bardic chronicles claim that the scarcity of food resulted from a conspiracy by Sarjan Shah, a Buddhist merchant (bania) belonging to the Sharaoji sect. Sarjan Shah's father had been killed by Hammira. To avenge his father's death, he polluted the provisions stored in the fort with animal hides, thus rendering them unusable for the Hindus.[18]
Having been betrayed by his trusted generals, and under the famine-like circumstances in the fort, Hammira realized that Alauddin would capture the fort sooner or later. Hammira decided to fight to death with his loyal men, while the ladies of the fort prepared for suicide by jauhar (mass self-immolation to avoid falling into the enemy hands).[14] According to the Hammira Mahakavya, Hammira offered to escort the Mongol refugees to a safe place. However, the Mongol leader Muhammad Shah refused the offer: he killed his wife and children, and declared that he would join Hammira's last stand. Hammira asked his brother Virama to be his successor, but Virama too decided to accompany Hammira in his last fight.[19]
Hammira had all his valuables thrown into the Padmasara lake, and appointed his minister Jaja (also Jajala or Jajadeva) as his successor.[19] Like other loyalists, Jaja had also been offered a safe passage out of the fort, but decided to stay behind. He supervised the organization of the jauhar, in which Hammira's queens, daughters and other female relatives committed suicide.[20] This jauhar has been described by Alauddin's courtier Amir Khusrau,[21] which makes it the first jauhar to be described in a Persian language text.[22]
Hammira and his loyal companions marched to the top of the pasheb mound, where they fought to death with Alauddin's army.[23] Some Rajput-era bards claim that Hammira severed his own head and offered it to the god Mahadeva when faced with a certain defeat.[24]
Aftermath
According to the 16th century historian Firishta, Alauddin's army captured the fort on 10 July 1301.[23] However, the Jain author Nayachandra dates this conquest to two days later in his Hammira Mahakavya. According to Nayachandra, Jaja continued to offer resistance for two more days after Hammira's death, which may explain this discrepancy.[25]
In the fort, Alauddin found the Mongol rebel Muhammad Shah lying wounded. Alauddin asked Muhammad Shah what he would do if pardoned and saved. Muhammad Shah replied that he would kill Alauddin and appoint Hammira's son as the new king. An angry Alauddin ordered Muhammad Shah to be trampled by an elephant. However, later he ordered Muhammad Shah to be buried with honour because he appreciated the dead man's courage and loyalty.[23]
Alauddin ordered punishments for Ratipala and Ranamalla, who had deserted Hammira to join him. Ratipala was flayed alive, while Ranamalla and his followers were killed. Alauddin argued that these people had not been loyal to their earlier master, so he did not expect them to be loyal to him.[19]
The victors destroyed the Vaghabhatta (Bahar Deo) temple and other buildings in the fort premises.[26] Before returning to Delhi, Alauddin gave the control of the fort to Ulugh Khan. However, the local public hated Ulugh Khan so much, that he decided not to go beyond the suburbs of Ranthambore.[26]
References
- Kishori Saran Lal 1950, pp. 100-101.
- Kishori Saran Lal 1950, p. 88.
- Banarsi Prasad Saksena 1992, p. 342.
- Dasharatha Sharma 1959, p. 109.
- Dasharatha Sharma 1959, p. 110.
- Dasharatha Sharma 1959, p. 111.
- Dasharatha Sharma 1959, p. 116.
- Dasharatha Sharma 1959, p. 112.
- Kishori Saran Lal 1950, p. 103.
- Kishori Saran Lal 1950, p. 102.
- Banarsi Prasad Saksena 1992, pp. 343-344.
- Banarsi Prasad Saksena 1992, p. 344.
- Kishori Saran Lal 1950, p. 107.
- Dasharatha Sharma 1959, p. 113.
- Banarsi Prasad Saksena 1992, p. 345.
- Banarsi Prasad Saksena 1992, pp. 346-347.
- Banarsi Prasad Saksena 1992, p. 346.
- Kishori Saran Lal 1950, pp. 103-104.
- Dasharatha Sharma 1959, p. 114.
- Dasharatha Sharma 1959, pp. 118-119.
- Banarsi Prasad Saksena 1992, p. 368.
- Satish Chandra 2007, p. 97.
- Banarsi Prasad Saksena 1992, p. 347.
- Kishori Saran Lal 1950, p. 104.
- Dasharatha Sharma 1959, pp. 114-115.
- Dasharatha Sharma 1959, p. 115.
Bibliography
- Dasharatha Sharma (1959). Early Chauhān Dynasties. S. Chand / Motilal Banarsidass. ISBN 9780842606189.CS1 maint: ref=harv (link)
- Banarsi Prasad Saksena (1992) [1970]. "The Khaljis: Alauddin Khalji". In Mohammad Habib and Khaliq Ahmad Nizami (ed.). A Comprehensive History of India: The Delhi Sultanat (A.D. 1206-1526). 5 (Second ed.). The Indian History Congress / People's Publishing House. OCLC 31870180.CS1 maint: ref=harv (link)
- Kishori Saran Lal (1950). History of the Khaljis (1290-1320). Allahabad: The Indian Press. OCLC 685167335.CS1 maint: ref=harv (link)
- Satish Chandra (2007). History of Medieval India: 800-1700. Orient Longman. ISBN 978-81-250-3226-7.CS1 maint: ref=harv (link)