Introduction

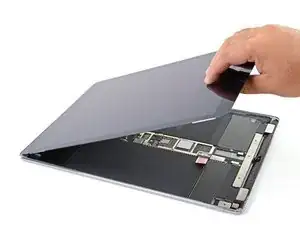
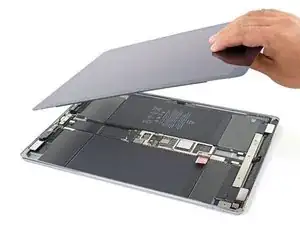
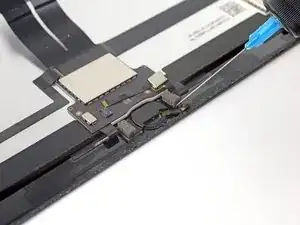
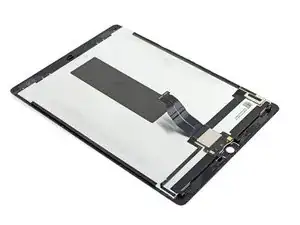
Follow the steps in this guide to replace the screen in an iPad Pro 12.9", or to access other internal components for servicing.

Note that the home button installed in your original screen is paired to the iPad's logic board, and will need to be removed and transferred to the new screen to retain Touch ID functionality.

Before beginning, check to see if your replacement part has a daughterboard adhered to its back. If so, this guide will work for you. Otherwise, you will need to transfer the board from the old screen to the new one. Transferring the daughterboard from the original to replacement unit will require specialty microsoldering equipment and we recommend DIY users source a new part rather than attempt the procedure.

Parts of this guide were shot with a Wi-Fi model and as such the internals may look slightly different from the LTE model. The procedure is the same for both models except where noted.

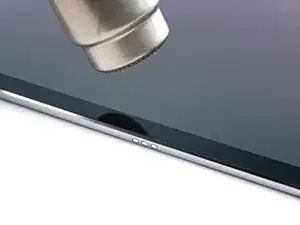
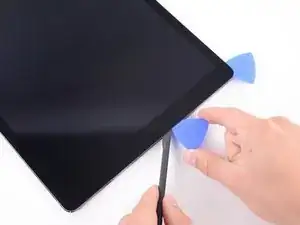
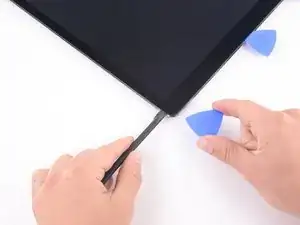
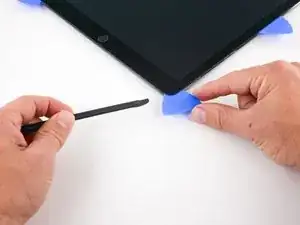
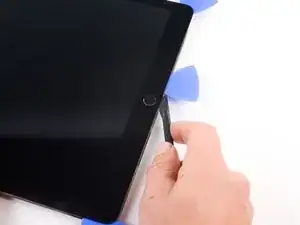
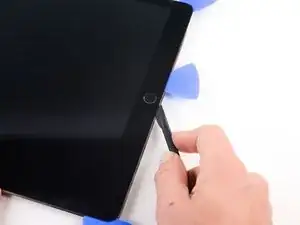
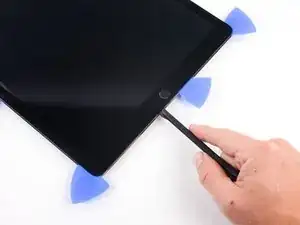
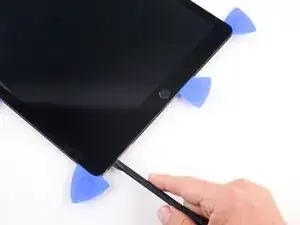
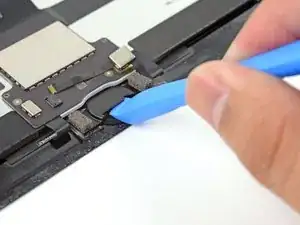
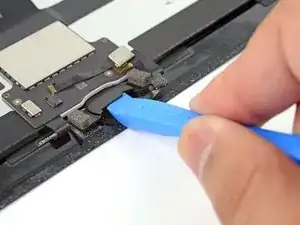
The opening procedure for this iPad Pro is shown using a Halberd Spudger. If you don’t have one, you can use an opening pick instead—the process is the same.

  1. xUapwHBISCGUkkSV
    xUapwHBISCGUkkSV
    C3lIO2OnLdLSgyRO
    fJ444exNZJxY1sTM
    • Completely power down your iPad before you begin.

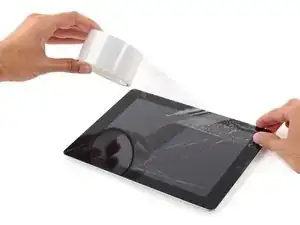
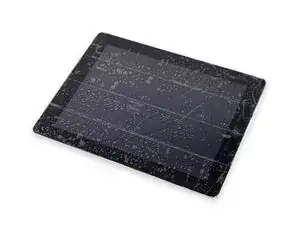
    • If your screen is cracked, lay overlapping strips of clear packing tape over the iPad's screen until the whole face is covered.

    • This will keep glass shards contained and provide structural integrity when prying and lifting the screen.

    • Do your best to follow the rest of the guide as described. However, once the glass is broken, it will likely continue to crack as you work, and you may need to use a metal prying tool to scoop the glass out.

    • Wear safety glasses to protect your eyes, and be careful not to damage the LCD screen.

  2. SUxrTFhldDVEYRKQ
    SUxrTFhldDVEYRKQ
    ww4GIR4ulMuI4APh
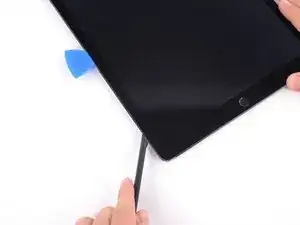
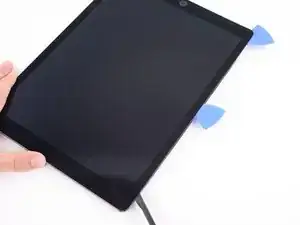
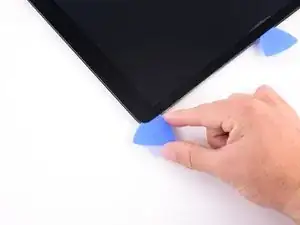
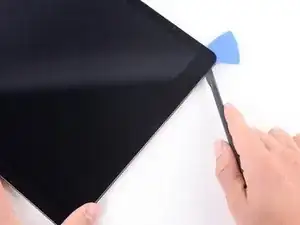
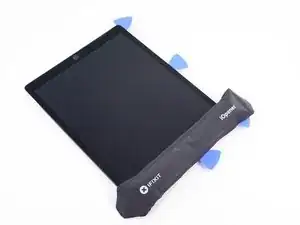
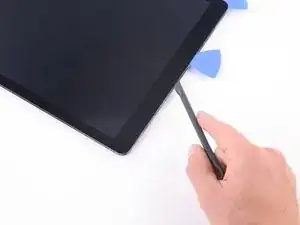
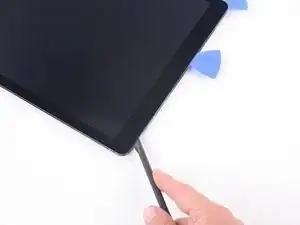
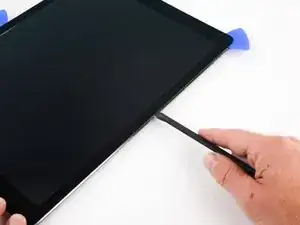
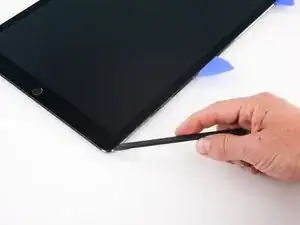
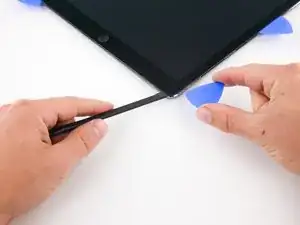
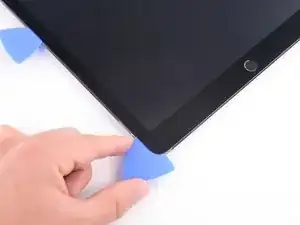
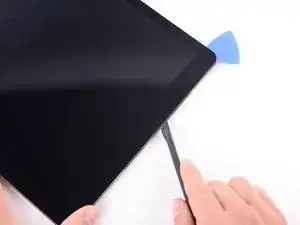
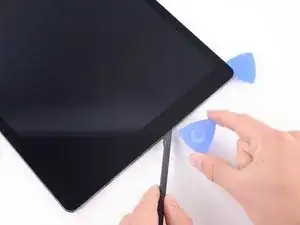
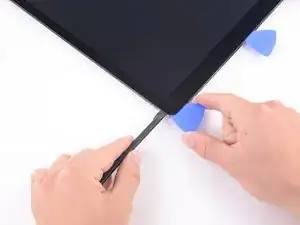
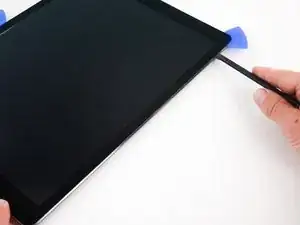
    • Removing the screen involves using an opening pick or halberd spudger to separate the adhesive securing the screen to the frame.

    • As you slice through the adhesive, note the following:

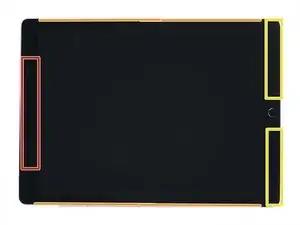
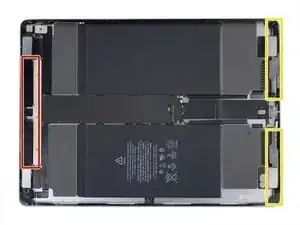
    • The top has a large patch of thick adhesive. You'll need to slice 1/2" deep in order to cut the adhesive.

    • Don't slice deeper than 2 mm along the long edges of the iPad, or you risk damaging the display panel.

    • The lower edge also has thick patches of adhesive, but there are delicate flex cables in each corner. Don't slice deeper than 1/4" around the lower corners.

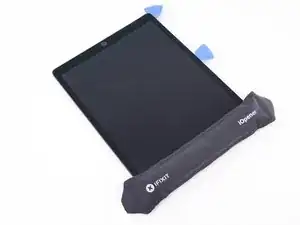
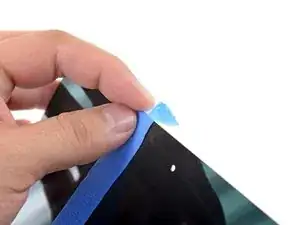
    • To help mark the iPad's orientation, you can apply a piece of tape to the top edge of the iPad screen.

    I have an A1652 iPad pro 12.9” that was originally my wife’s. The battery doesn’t hold a charge very long in use so I read through this guide and ordered the kit and battery. This iPad has a gold colored case that appears to wrap over the edges of the screen. As a result I could not find any place to slice through the adhesive. Model number brought up on the “about” screen is ML3P2LL/A and serial is DLXR3M7LGMW5. Is this possibly a transition model? Any ideas?

    wavose -

    Hello! Based on the model number, it looks like you have the 1st generation cellular version of the iPad Pro 12.9". This guide should work for you. The tolerances on the iPad are very tight—you're looking for the seam between the black bezel and the gold case. You'll need a lot of heat in order to loosen the bezel.

    Arthur Shi -

  3. aJBeJMOgBCcMHno4
    aJBeJMOgBCcMHno4
    H6eTqDuArmxDxP6p
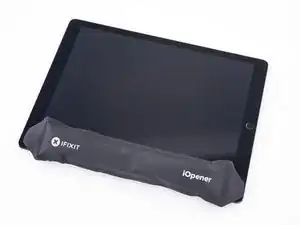
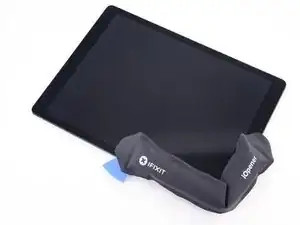
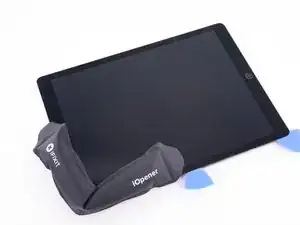
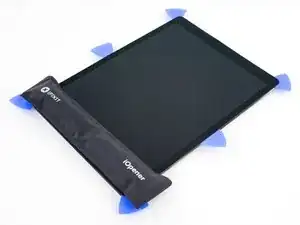
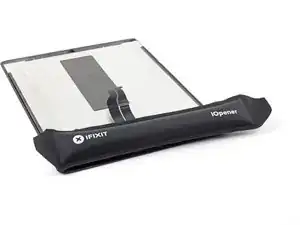
    • Heat an iOpener and lay it over the left edge of the iPad to soften the adhesive holding the screen in place.

    • Alternatively, you can use a heat gun, hair dryer, or heat pad. Be careful not to overheat the iPad—the display and internal battery are both susceptible to heat damage.

    • Wait two minutes for the adhesive to soften before proceeding to the next step. The edge should be slightly too hot to the touch.

    Oven works fine: preheat to ~225 then turn off, protect back with towel and warm for 10-15 minutes. Basically the same as a car interior in summer, this skips about a dozen steps. Used mini plastic pry tools and a few picks/cards, no need for suction or iopener: yet another reason microwaves should be relegated to diners to destroy perfectly good food. Two issues from my surgery: damaged small section of screen border by carding too far inside the device while effortlessly slicing through adhesive, and one of the smart connector pins was revived from bent pin purgatory. Apple’s planned obsolescence genius truly shines through the multipin snap connectors. I detached the screen cable before disabling battery, YMMV; remainder of procedure was done to spec with disabled battery on reinstall. Screw monster only ate about 2, even after breaking an elbow sweat with 70% iso the residual adhesive should outlast the ios nerf that will bring this ipad to the grave. Much easier than first impression with oven.

    Andrew Johnson -

  4. JFLVZXKSNWSMwgan
    JFLVZXKSNWSMwgan
    tkQ2QlSr5jQcloko
    4PQqFpOPGYZdfVbK
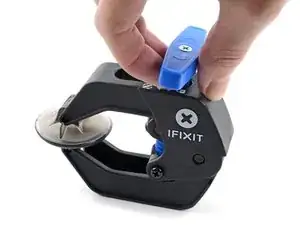
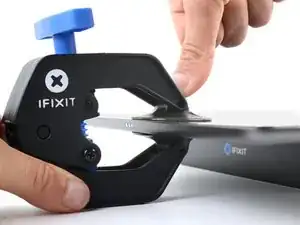
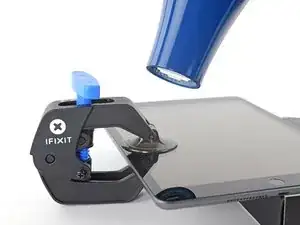
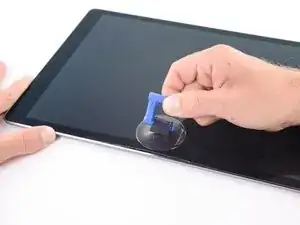
    • The next three steps demonstrate the Anti-Clamp, a tool we designed to make the opening procedure easier. If you aren't using the Anti-Clamp, skip down three steps for an alternate method.

    • For complete instructions on how to use the Anti-Clamp, check out this guide.

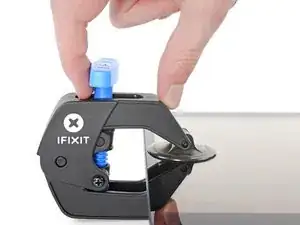
    • Pull the blue handle backwards to unlock the Anti-Clamp's arms.

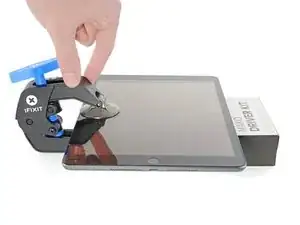
    • Place an object under your iPad so it rests level between the suction cups.

    • Position the suction cups near the middle of the left edge—one on the top, and one on the bottom.

    • Hold the bottom of the Anti-Clamp steady and firmly press down on the top cup to apply suction.

    • If you find that the surface of your iPad is too slippery for the Anti-Clamp to hold onto, use tape to create a grippier surface.

  5. WwegTfncKMB2uKfK
    WwegTfncKMB2uKfK
    AKC5R5llWlg1VjRd
    RJfykqKVVxAGaQmG
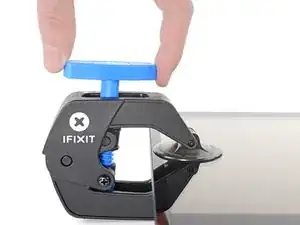
    • Pull the blue handle forward to lock the arms.

    • Turn the handle clockwise 360 degrees or until the cups start to stretch.

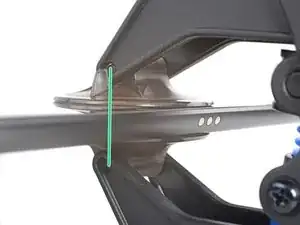
    • Make sure the suction cups remain aligned with each other. If they begin to slip out of alignment, loosen the suction cups slightly and realign the arms.

  6. nuqWoOGKJBIAZvOG
    nuqWoOGKJBIAZvOG
    PLlX3KdMnTC4FDqN
    • Wait one minute to give the adhesive a chance to release and present an opening gap.

    • If your screen isn't getting hot enough, you can use a hair dryer to heat along the left edge of the iPad.

    • For complete instructions on how to use a hair dryer, check out this guide.

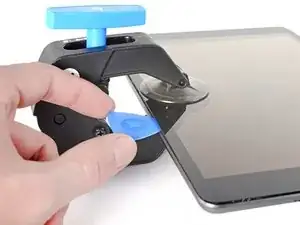
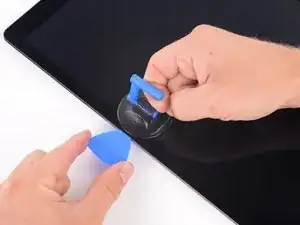
    • Insert an opening pick under the screen when the Anti-Clamp creates a large enough gap.

    • If the Anti-Clamp doesn't create a sufficient gap, apply more heat to the area and rotate the handle clockwise half a turn.

    • Don't crank more than a half a turn at a time, and wait one minute between turns. Let the Anti-Clamp and time do the work for you.

    • Skip the next two steps.

  7. AlZDU3orr6ufwCCU
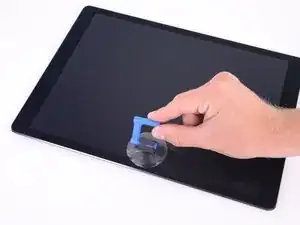
    • Attach a suction cup to the left edge of the iPad's screen, above the Smart Connector port.

  8. kKRQsRqfvXDPZOQO
    kKRQsRqfvXDPZOQO
    ojbgpm4RcYSYNY3R
    GrcJWPaTSorvslJJ
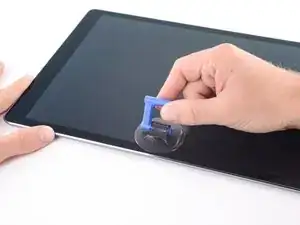
    • While holding down the corners of the iPad, repeatedly pull up on the screen, then ease it back down to weaken the adhesive. This will eventually create a small gap in the seam.

    • If the edge cools down during the pulling process, reheat the edge with an iOpener before proceeding.

    • Once you've created a small gap, insert the tip of an opening pick into the gap.

    • Don't insert the pick more than 2 mm, or you risk permanently damaging the display panel.

  9. 1I5gTHDkIFPGtCKq
    1I5gTHDkIFPGtCKq
    MaeO3RTJcdcEYRGQ
    fQIwEQmTmGTaDmNx
    • Lay a hot iOpener along the bottom left corner of the iPad, spanning from the opening pick to the home button.

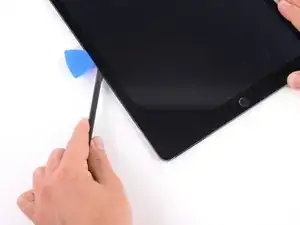
    • After letting the adhesive soften, insert an opening pick or halberd spudger into the gap next to the Smart Connector.

    • Be careful not to insert the halberd spudger more than 2 mm.

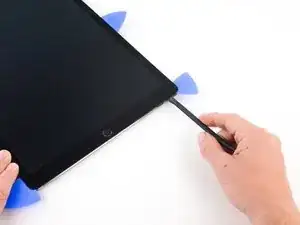
    • Use an opening pick or halberd spudger to slice the adhesive along the bottom left side of the iPad. If the slicing becomes difficult, reheat the edge and try again.

    Well, this is the scariest part so hold my beer. I tried something similar to the “iOpener” which is a gel filled heat/cold pack I could microwave. That was good to start warming, but I was too impatient to get the first pick under, so I got out my heat gun. Mine is a 1200 watt model and I used it on low, the tip about 3 fingers away from the glass, sweeping it over 8” sections about 10 times taking about 3 seconds per pass. It worked ok and I now have 10 picks pried under all edges. Took about 35 minutes to this point. Only difficulty here is bracing the iPad while sliding the picks under the glass - need to be careful to not knock out the picks you already have inserted.

    One note I might offer is that it’s not entirely clear from your pics which is the top/bottom/left/right side because it’s hard to see the button on the screen in your pics. Another is to mark your 2mm pick depth with whiteout or something similar.

    jpmist -

  10. TRTFVF4nfQDiGPR6
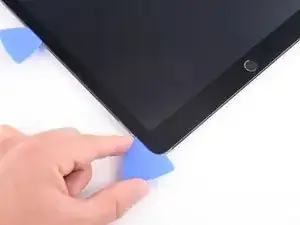
    • Insert a pick in the bottom left corner of the iPad to prevent the adhesive from resealing.

  11. cJSs2NAwdFpvPTgU
    cJSs2NAwdFpvPTgU
    qvVKSR1EkTBZVlEN
    ZFqoWOhhVvCPmZZY
    • Lay a hot iOpener along the upper left corner of the iPad, spanning from the opening pick to the front-facing camera. Wait a minute to let the adhesive soften.

    • Use an opening pick to slice the adhesive along the upper left side of the iPad. If the slicing becomes difficult, reheat the edge and try again.

    • Be careful not to insert the opening pick more than 2 mm as you slice along the left edge.

  12. 44YUG2cQmMkRwCVg
    • Insert a pick in the upper left corner of the iPad to prevent the adhesive from resealing.

  13. CBQc6gvFqMKQKZVJ
    CBQc6gvFqMKQKZVJ
    ZO4RhLxdHN6rXS1o
    RqMo3CDQ26O3VaLD
    • Reheat your iOpener and lay it over the top edge of the device. Wait a couple minutes for the adhesive to soften.

    • Use an opening pick to slice through the top edge of the iPad, stopping before you reach the front-facing camera.

    • The adhesive is thicker along the top. You'll need to slice 1/2" deep—about the thickness of the top bezel.

    • If the slicing becomes hard, reheat the edge and try again.

  14. mNh1GTQlrTR3pkLy
    mNh1GTQlrTR3pkLy
    dLAPVZJI5vGYMCMV
    • Insert an opening pick just before the front-facing camera to keep the adhesive from resealing.

  15. PFlUwPfGpXky1muC
    PFlUwPfGpXky1muC
    hreYhudKgHTMRZTy
    o4mmn3fusrS4VQTA
    • Reheat your iOpener and lay it over the top edge of the device. Wait a couple minutes for the adhesive to soften.

    • Insert an opening pick or a halberd spudger blade just past the front-facing camera.

    • Use the opening pick to slice through the adhesive in the upper right corner.

    • You'll need to slice 1/2" deep—about the thickness of the top bezel.

    • If the slicing becomes hard, reheat the edge and try again.

  16. FyNhGWiLgp1Pmagx
    FyNhGWiLgp1Pmagx
    4JFJnCqN4OVLLwGk
    • Insert an opening pick in the upper right corner to prevent the adhesive from resealing.

  17. USkLgwFmKpt5RY2c
    USkLgwFmKpt5RY2c
    RW44JXTuOmbWLnJP
    GamImImPThfm6LCK
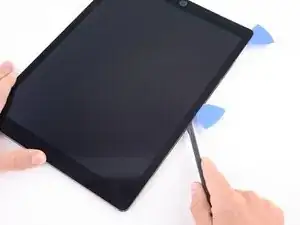
    • Soften the adhesive by heating the right edge of the iPad using an iOpener.

    • Use an opening pick or halberd spudger to slice along the right edge of the iPad, till you reach the lower right corner.

    • Don't insert the pick more than 2 mm along the right edge.

    • Leave an opening pick in the middle of the right edge to prevent the adhesive from resealing.

  18. Ihhg6aHVBPCvjHAS
    Ihhg6aHVBPCvjHAS
    MjBC5C4AvGWSep26
    • Leave an opening pick in the lower right corner of the iPad to prevent the adhesive from resealing.

  19. XXXsMME11P13sGjx
    XXXsMME11P13sGjx
    LTKyX3ifZoYJXidx
    vnw6JmqparjiZ5Sp
    • Use an iOpener to heat the lower edge of the iPad.

    • Insert an opening pick or a halberd spudger blade 1/4" into the lower right corner of the iPad.

    • Slide the opening pick along the lower edge of the iPad, stopping short about 1/2" before reaching the home button.

    • Each lower corner has a thick patch of adhesive, but there is also a delicate flex cable. Don't slice deeper than 1/4" around the corner to prevent damaging the flex cable.

  20. 3IoRJkBZXK6PHawA
    3IoRJkBZXK6PHawA
    PTHEUWLlZ51hqPXK
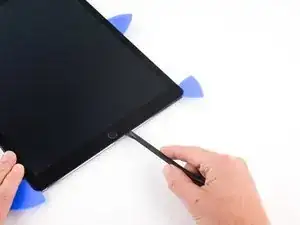
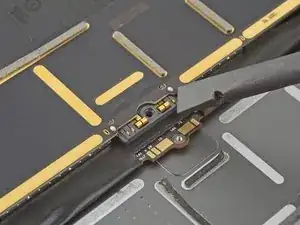
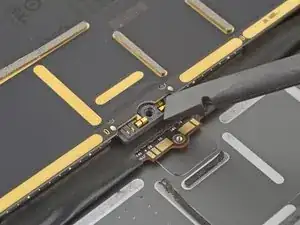
    • Slide the tip of an opening pick or a halberd spudger to cut the adhesive below the home button.

  21. GdlHDjpjDOFqdWmP
    GdlHDjpjDOFqdWmP
    PLfhuKagUdSB4bPL
    • After you slice below the home button, reinsert the tip of an opening pick or a halberd spudger blade 1/4" into the lower edge.

    • Slice along the lower edge until you reach the opening pick.

  22. itJwcMwMm1bJ2qZX
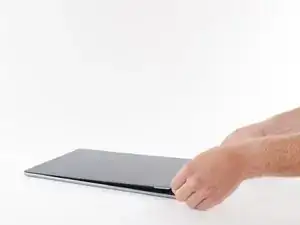
    • At this point, you've sliced through most of the screen adhesive. Use an opening pick to carefully slice any remaining adhesive along the edges until the screen is freed. If some parts are stubborn, heat the area with an iOpener to loosen the adhesive.

  23. AakLhWjiDWpC4Grh
    AakLhWjiDWpC4Grh
    dJ3HaHgomNdwre2r
    fxyBcpH1XjQCFvl1
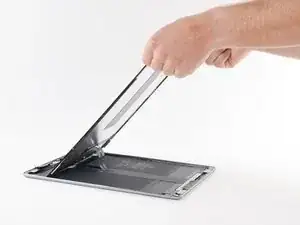
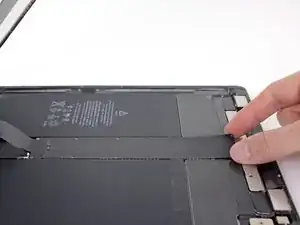
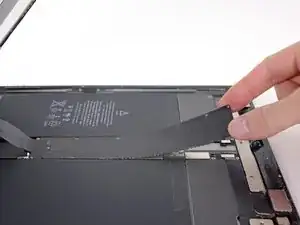
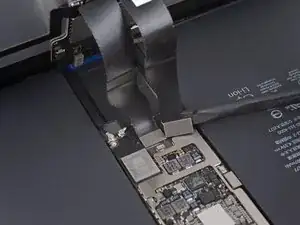
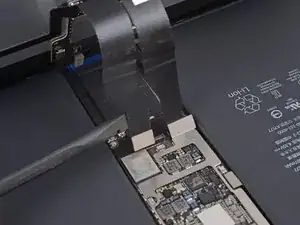
    • The display cables in this iPad are very short. Read the next two steps before you proceed.

    • Do not tilt the screen about the lower edge. The display cables don't have enough slack to allow for this.

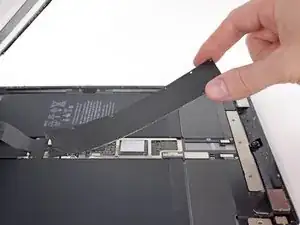
    • Lift up the upper edge of the screen and slide the entire screen towards the front-facing camera to access the iPad's internal components.

    • The display cables will tear if you raise the screen more than 80 degrees.

    • Use masking tape to tape the lower edge of the screen to the frame to prevent the screen from slipping.

    At this step I could lift the Top edge about 4 inches to peek under it and see the cable in the center. I tugged the top edge away from the bottom some to reduce strain on the cable.

    jpmist -

    For me, disaster struck at this step. I was being careful but somehow lifted the wrong end and snapped the ribbon cable.

    😟😟😟  Be careful It would have been helpful to label the screen's top and bottom edges with a marker and tape at the beginning of the repair process. For that matter, label right and left edges as well. Then change all dialog to reference topbottomleft, or right. I think it would make it easier to follow the instructions

    David Hobson -

  24. OMtdRReDFEhLUhUx
    OMtdRReDFEhLUhUx
    WNDanCV23FiyrgUF
    1qu2TL6hSAGZMXjG
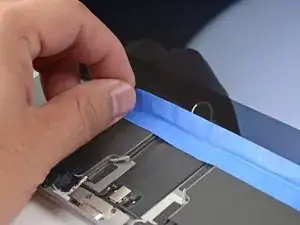
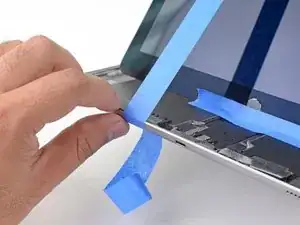
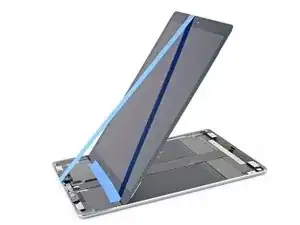
    • This step shows one way to support the screen using masking tape. You can also turn the iPad sideways. Make sure not to strain the display cables with whatever method you choose.

    • Attach a long strip of masking tape to the top edge of the screen. Fold the tape over the edge and make sure that the tape is attached securely.

    • Attach the other end of the strip to the bottom edge of the iPad frame to hold the screen at an angle. Make sure the tape attaches securely to the frame.

    I must have crappy masking tape as the screen wanted to slip and close, so some wooden coffee stirrers helped to prop it up.

    jpmist -

    Just make sure you use plenty of tape on the backside of the screen and on the underside of the iPad and the tape won't slip.

    trevorsklar -

  25. nDvHSQu2ehxaFfMw
    • It's important to disconnect the battery before you proceed further. Detaching or connecting the display cables with the battery plugged in can cause a short that will destroy touchscreen functionality.

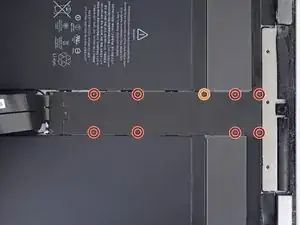
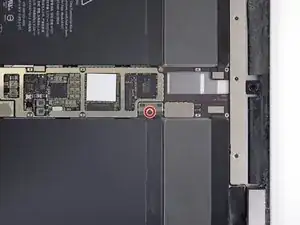
    • Use a Phillips screwdriver to remove the nine screws securing the logic board EMI shield:

    • Eight 1.2 mm screws

    • One 2.4 mm screw

  26. 1j4TW2xNcxeZorBN
    1j4TW2xNcxeZorBN
    VoLpXIeyr3gyjiZH
    ST5OpJBg63Hi6adh
    • Lift the logic board EMI shield from the edge nearest the top of the iPad.

    • Peel up and remove the EMI shield from the logic board.

    • This takes a bit of force due to the many tiny clips securing the shield, and the shield may deform slightly. That's okay—try to keep the deformation to a minimum, and it will lay flat when you reinstall it and screw it down.

    • Remove the logic board EMI shield.

    So many teeth! Jiggling the shield side to side helped release it.

    jpmist -

    In the iPad 4G version, this is where the cellular radio sits. You might see some different chips underneath the EM shield, and a little adhesive gasket. When I pulled my EM shield off I tried not to disturb that adhesive, and put it back when I was done.

    trevorsklar -

  27. TBGQfaGoBuJQIvCC
    • Use a Phillips screwdriver to remove the 1.8 mm screw securing the battery connector.

  28. 3yNdI63KF3PkUETA
    3yNdI63KF3PkUETA
    RHuWxOZjJH4pYE1j
    36vdrtPlHGQgZiwJ
    • These photos show what the battery connector looks like underneath the logic board. Use these photos as a reference while you safely disconnect the battery.

    • Notice that the battery connector has springs on the logic board that press down against the battery contact pads. You'll need to slide something thin and flexible between the contact points to disconnect the battery.

  29. 3BWOpk34PEnIZoGm
    3BWOpk34PEnIZoGm
    ubgkEiGPbhWudQBJ
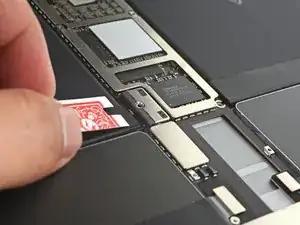
    • Make a battery blocker using a playing card and slide it underneath the logic board connector to disconnect the battery.

    • You can also use an iFixit battery blocker. Be very careful and don't push the battery blocker underneath the connector with excessive force.

    • Leave the blocker there to prevent the battery connector leads from making contact until you have completed your repairs.

  30. Ms1hYuJRGuRYTE2P
    Ms1hYuJRGuRYTE2P
    xRN4DagkTKq6wJcD
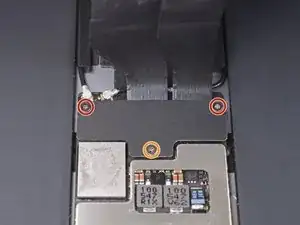
    • Use a Phillips screwdriver to remove the three screws securing the display cable bracket:

    • Two 2.4 mm screws

    • One 1.2 mm screw

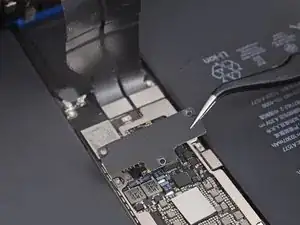
    • Remove the display cable bracket.

  31. E2gA1qJPcbv6aCau
    E2gA1qJPcbv6aCau
    OguHXH3ui2OFZFXv
    uoLWscFJOOt2XpmS
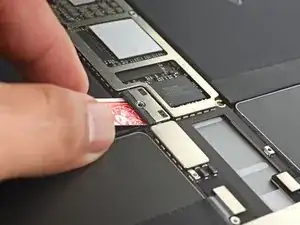
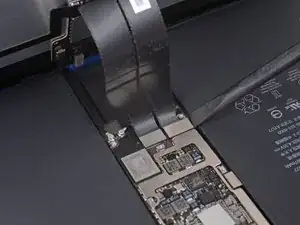
    • Use the flat end of a spudger to pry up and disconnect the display and digitizer cables from their logic board sockets.

    • To re-attach press connectors like this one, carefully align and press down on one side until it clicks into place, then repeat on the other side. Do not press down on the middle. If the connector is misaligned, the pins can bend, causing permanent damage.

    • These cables are very delicate, and the connectors can damage easily if they're misaligned. When you reattach the cables to the logic board, try to have as much slack on the cables and gently press the connectors onto their sockets.

    Would it help to draw a sharpie line between the two parts of the connector, so these can be alingned when refitting?

    Mal Hatcher -

  32. O6UKlJqtigd1bMd2
    O6UKlJqtigd1bMd2
    yPsyjannMtYH1S2Y

    Phew! One hour 45, took my time, maybe cut that in half if I did it again and pray I don’t have to. Working sideways, the little screws were usually caught by the battery on the bottom edge. Need a shorter Phillips than in the iFixit kit. And looks like I don’t need the pre-cut adhesives I bought as they were on the replacement screen - hopefully I can get a refund.

    Good time for a coffee break before cleaning off the old adhesive. Quite a relief to get the screen off & thanks much to you guys for getting me this far.

    jpmist -

    Es wäre sehr schön, wenn hier noch jemand beschreiben könnte, wie man "unfallfrei" die Klebereste vom Display rundherum entfernt. Ich habe das in meinem Falle ganz vorsichtig mit Isopropanol (hochrein) getan. Die Klebereste gingen damit gut ab - trotzdem ist das eine sehr aufwendige Arbeit, bis man alles sauber hat. Zudem kann man noch so vorsichtig sein, durch die angebrachte Displayunit auf der Rückseite der Displayscheibe und die dadurch entstehende Kapillarwirkung zieht sich immer Isopropanol zwischen Display und Displayunit, was danach zu hellen Flecken führt. Ich hoffe, die verschwinden wieder, wenn das Iso abgetrocknet / ausgetrocknet ist.

    Vielleicht hat jemand eine gute Idee, wie man diese Klebereste entfernt, ohne dass das Beschriebene passiert.

    Markus Schnackenberg -

    Markus,

    I just wouldn't use any isopropyl alcohol to remove the residue. We're going to immediately apply more adhesive right after we remove the old adhesive, so if there's a little bit of sticky residue remaining, that's not a problem for us. I would just scrape as best as I could with a spudger, make sure there's no adhesive on the internals, and call it a day.

    trevorsklar -

  33. pXAlbqd23DO2Bkhc
    pXAlbqd23DO2Bkhc
    5YgVXwYfsKW6lgDE
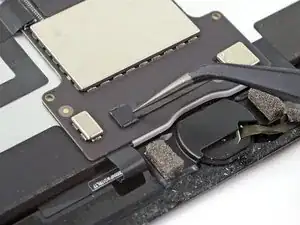
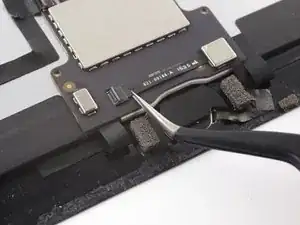
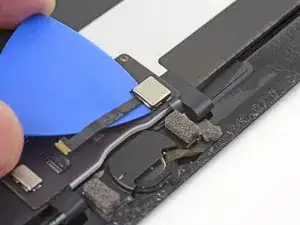
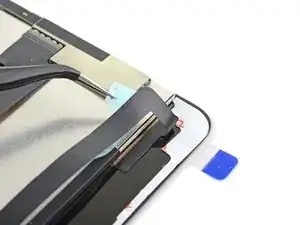
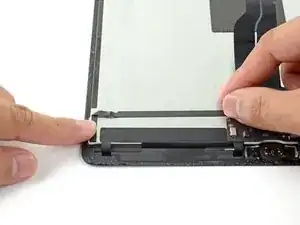
    • Use tweezers to remove the tape covering the ZIF connector above the home button.

  34. dfkPkZ1WXcDtZ3a2
    dfkPkZ1WXcDtZ3a2
    VTlPVwIgxhinFjrT
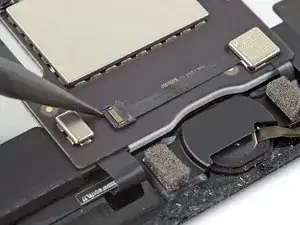
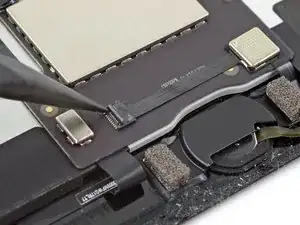
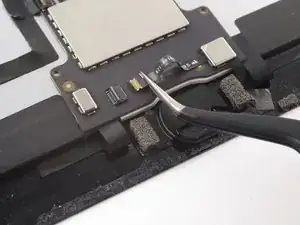
    • Use the point of a spudger to lift the flap on the ZIF connector that secures the cable.

  35. ZkkFZ1RNliKlFhVD
    ZkkFZ1RNliKlFhVD
    STCKJU2aASeEQjpM
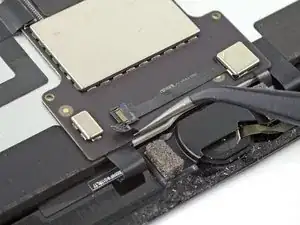
    • Use tweezers to slide the cable out of the ZIF connector.

  36. 4kDYshx3P5QddKtr
    4kDYshx3P5QddKtr
    DfEcKfadDQ1H315Z
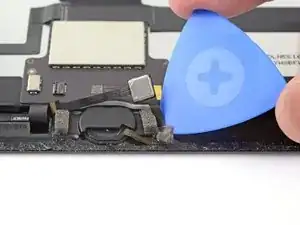
    • The home button's ribbon cable is very fragile. If it gets damaged, Touch ID will no longer function.

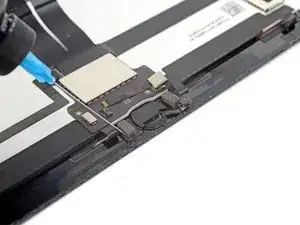
    • Use an iOpener, heat gun, or hair dryer to soften the adhesive under the cable before you pry it up.

    • Alternatively, apply a few drops of isopropyl alcohol to the cable and wait for a minute to let the adhesive soften.

    I used a heat gun on low air, set to 150°C, and very very gentle pressure with the tweezers, and it came out very easily and neatly.

    trevorsklar -

  37. r1ZVER1JyqQMftnK
    r1ZVER1JyqQMftnK
    f1Ra2ZBcVGKe5aqd
    RHCYxeYTMWCqOUGd
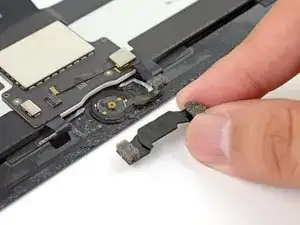
    • Starting from the ZIF connector, use an opening pick to separate the home button cable from the adhesive holding it in place. Stop when you reach the home button.

  38. MGGYctwn3GZXd1MO
    MGGYctwn3GZXd1MO
    NOnKJt14IIwPIhlP
    hphFUYCqpOytayti
    • The home button bracket is held in place with strong adhesive.

    • Apply a few drops of isopropyl alcohol to the base of the home button bracket.

    • Alternatively, you can use a heated iOpener to loosen the adhesive.

  39. TXDHrDDVnKadQruO
    TXDHrDDVnKadQruO
    nkcf3135NQZRSRDk
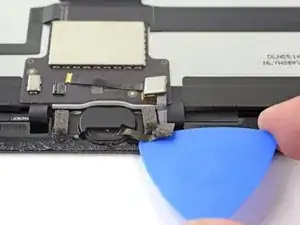
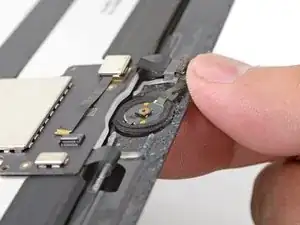
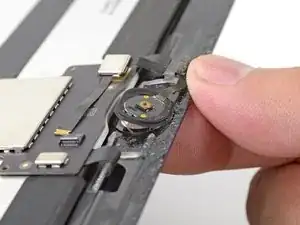
    • Insert the edge of an opening tool under the home button bracket lip.

    • Pry up with steady force to loosen the bracket.

    • The adhesive holding this bracket can be stubborn. Apply more isopropyl alcohol or heat if it doesn't budge.

  40. xGiHumUfATquFaaK
    • Remove the home button bracket.

    • Be careful when you remove the home button bracket. There may be a small plastic washer wedged between the bracket and the button. If there is, be sure to retain this washer for reinstallation.

    • During reassembly, after installing the home button, you'll need to glue this bracket into place to secure it.

    • Scrape off as much of the old adhesive residue as you can, then clean it with acetone or high concentration (>90%) isopropyl alcohol.

    • Secure the bracket with E6000 glue, superglue, or high-strength double-sided tape. Make sure the bracket is aligned correctly before allowing your adhesive to cure, or the home button will not click when pressed.

    Would be really nice if the adhesive strip kit for the screen included the adhesive bits needed to secure the existing home button to the new screen (or a new home button to an existing screen).

    Marc Nelson -

    One more thing about the bracket: you really need a strong adhesive when you put it back, so that pushing the button doesn’t dislodge it. If it doesn’t hold the button firmly, you can push the button out of its socket during normal use. Getting the bracket in and aligning it without accidentally sticking it in the wrong place or (much worse) sticking it to the fragile ribbon cable takes some very careful work.

    This is an excellent guide, but I’d like to see maybe the first two steps of reassembly, showing how to do this correctly.

    John Lasseter -

    When replacing the bracket, a very slight difference in the replacement part caused the bracket to make the home button click all the time. The little white washer between the home button and the back of the glass was about 0.3 mm thicker than the original, and i had already superglued those parts together.

    Fortunately, the playing card included in the kit is about 0.3 mm thick. I cut 2 small rectangles and superglued them to the feet of the bracket, so it would stand away from the home button. Then superglued the bracket on, and now it clicks perfectly. Hopefully I don't have any issues with the playing card delaminating as the home button wears, because I definitely don't know if i could get this ipad apart again (the first time was easier because the screen was already shattered).

    trevorsklar -

  41. RA3CxcCpNruoUvU5
    RA3CxcCpNruoUvU5
    4TiMh2tWpNDou3tE
    • Gently push the home button from the front of the display inward using the tip of a finger.

    The gasket tears easily, so go slower than I did. I should have heated the button up so to help the gasket release.

    jpmist -

  42. vWYbaFXXWTrhKYZL
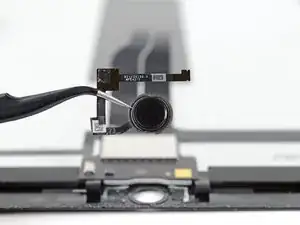
    • Remove the home button.

    • The home button attaches to the screen with an adhesive gasket. When you transfer the home button to a new display, use some liquid adhesive to glue the button perimeter to the screen.

  43. NYkZTvGjcUSeCx2D
    • Only the screen remains.

  44. SVZPIbFNoBvda4Cy
    SVZPIbFNoBvda4Cy
    SZESJAkVXJDCi5BU
    • When you install a replacement screen:

    • Remove all packing tape.

    • Peel any adhesive liners from the flex cables and press the cables in place onto the display panel.

    • Fold and connect the flex cable in the bottom left corner of the screen.

    • Don't peel and expose the perimeter adhesive until you've tested your repair and are ready to seal up the iPad.

    manca la parte di montaggio del nuovo schermo ?

    roberto bruzzese -

    Ciao Roberto,

    Per montare il nuovo schermo, puoi seguire le istruzioni dello smontaggio in ordine inverso. I punti con la puntina da disegno si riferiscono in particolare al rimontaggio.

    Buona riparazione!

    Claire Miesch -

Conclusion

Compare your new replacement part to the original part—you may need to transfer remaining components or remove adhesive backings from the new part before installing.

To reassemble your device, follow the above steps in reverse order.

Take your e-waste to an R2 or e-Stewards certified recycler.

Repair didn’t go as planned? Check out our Answers community for troubleshooting help.

Evan Noronha

Member since: 06/02/15

223244 Reputation

21 comments

Hello there OK so I have 2 screens with 2 different connectors one L shaped (which is on the new screen) and the old cracked screen has a rectangular type? I’m not sure rather it’s a 1gen/2nd gen type of problem? I’m about to grab my hot air gun to completely disassemble the cracked screen, as maybe I’m missing something? Any assistance is welcome… well actually please help me with this before I get a headache since this has totally frustrated me and i’ve had this sitting for nearly 2 1/2 months now but it’s about that time that I readdress this in attempt to fix it.

Matthew Newton -

Hi, does your replacement screen have the home button assembly included? Otherwise there's need of soldering the assembly to it before it can be installed.

Dreetn -

hi

does anyone knows why there is a foam adhesive in thr back of the screen ? do i need to put back when i replaxe screen ?

thanks

screensguy -

I suppose the foam adhesive is similar to the one on the back of the 6s screens. I guess it has more of a heat dissipation function or is meant to absorb any pointy pressure points from inside that may develop (loose screw, sand, dirt...)

Dreetn -

hi

hope someone can help . i tested couple of screens before fitting them in they were working but once tech close it there no touch or black lcd (backlight on but no image )

NB : they disconnect battery before connecting Screen

screensguy -

If you don't have this problem while the assembly is still loose, my best guess is that you have an unwanted contact somewhere, causing a short circuit or malfunction. Perhaps in the bending of the flex?

Dreetn -
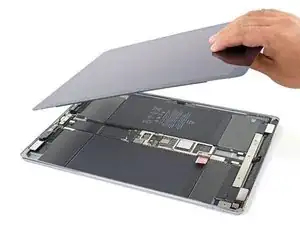
Removing the screen takes a great degree of patience. You apply heat, and pull on the suction cup, and for a long time nothing seems to happen. Do not try to replace time with force at this point keep heating and pulling on various areas, you will get separation. It took 5 or 6 heating/pulling cycles to start to see results. Then you can work your way around.

oclark -

MAKE SURE YOU DO NOT INSERT ANY CARDS/PICKS/SPUDGERS MORE THAN 1/4 inch tops!! YOU WILL DAMAGE THE SCREEN. Just replaced the battery in my iPad Pro 12.9 (A1652). Unfortunately I did not read this until completed. I now have several areas on my $1000 iPad where the white screen has orange burn looking marks around the edges. Looks like it was a $200 oops. Live and Learn. I’m now a member and will utilize this website for future endeavors…

Dave Ryberg -

You know any workshop who does a repair for my three iPad Pro 12.9 front glasses with the digitizer,

Sometimes the process is called OCA refurbishment oder LCD refurbishment.

NOT the display-unit as a whole. I have two models from 2015 and one from 2017. The model numbers are a 1584 and  a 1670.

 In Germany there are a few companies who are able to do it, but not affordable. The prices are nearly as high as a complete swap of the display unit.

giuseppe naniscola -

Just wondering, I work in a repair shop, and am replacing the front panel entirely but unfortunately screwed up soldering the daughterboard. Is this a part they MUST be transferred or am I safe to just replace it?

Zane Clark -

Hello.

Is it possible to change only the “Glas” and not the Display? My display works fine but the Protecting Glas is broken.

sim sem -

Hi, that’s possible for very, very experienced technicians. Not only do you need to heat up the screen quite a lot to soften up the LOCA glue, but furthermore you need to cut it with a cutting wire while making sure not to damage the LCD underneath. I also fear the iPad pro will probably require some micro-soldering to be able to (dis)connect the glass from all the rest (but perhaps I’m confusing things with the first screen modules in mind that came out but still needed some micro-soldering to finish them of at that time). In short, if you haven’t separated touchscreens/glass plates several times before … don’t even think about it. The above is only half the trouble to go through as the new touchscreen/glass needs to be attached to the LCD again with new LOCA glue afterwards. Again a job which requires a lot of expertise.

Dreetn -
I used this guide to replace a screen for my iPad Pro. The device powers on but now gets stuck in a boot loop. I took it to a local phone repair shop and they said they don’t do repairs on iPad Pros because they always get stuck in boot loops. I wish there was a warning on this guide telling people this so they don’t go to all the effort and spend money on a new screen just to get their iPad stuck in a boot loop.

Brandon der Blatter -

Brandon, I don’t know of any specific ‘sensitivity’ that iPad Pro’s have towards repairing that would result in bootloops.

I think it is more likely that either

- The repair shop isn’t keen on repairing your device because parts are expensive and/or difficult to find (for instance motherboard parts). They just tell you a believable story to avoid having to say ‘Too risky’ or ‘Not worth our effort/time’.

- Something got damaged during the repair.

Another possibility, which you can easily put aside yourself, is software damage. Try a full restore (without data retention) with tools such as 3uTools. It’s free software. I advise using the iTunes restore method. You can first try a restore with ‘retain user’s data’ but success ratio is minimal there. Best is to go for a clean flash/restore.

Good luck!

Dreetn -
No matter how many times I have tried to apply the iOpener, or to use a dryer for 10 mins (iPad was super hot), I’m simply unable to lift the screen with the suction cup, even for a micron. Anything I could have missed ?

Laurent Crivello -
Hi Laurent, it sounds like you’re on the right track—continue gradually applying more heat until the adhesive softens a little. Unfortunately these screens are super hard to remove. Just be careful about applying too much heat at once in a small area as that could damage the screen.

Adam O'Camb -
hi all, I'm part-way through this (amazing instructions as always), while I was removing the EMI shield the sticky fabric underneath came away and rolled up on itself, do I need to make a new one or can I replace the shield without it? Many thanks

johnegrey -

While removing the screen I accidentally pulled the soldering from the daughterboard to the display cable. is their a way to fix this or is it an issue?

jacob myers -

This was an awesome guide! It was really fun, but a lot of really careful work!! How could anybody do this repair and charge a reasonable rate for the labor? It took me soooo long.

trevorsklar -

Hey there! It will be great if you create a guide to replace the digitalizer, as the LCD could be reusable.

Thank you!

Jose -

FYI - on the 12.9" iPad it's practically impossible to detach the screen without damaging it. Not an issue if you're fixing a screen that's already broken, but if you're trying to repair an internal component, be prepared to buy a replacement screen as well.

hhtec -