Introduction

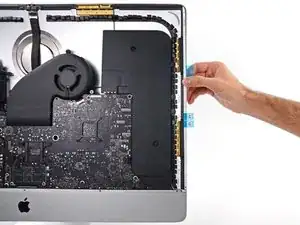
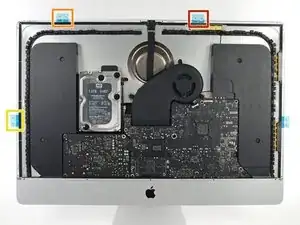
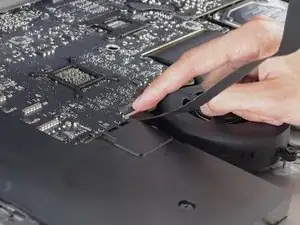
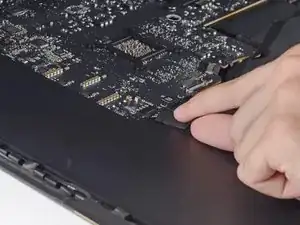
Removing the display on a 2012-2015 iMac requires cutting through the adhesive around the perimeter of the screen. After the adhesive is cut, it cannot be used to re-seal the display.

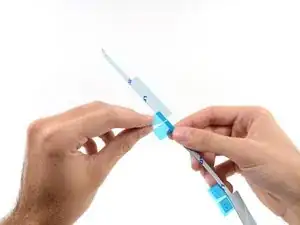
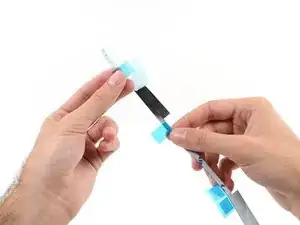
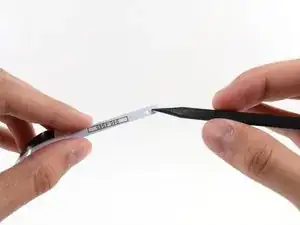
Follow this guide to apply a new set of adhesive strips.

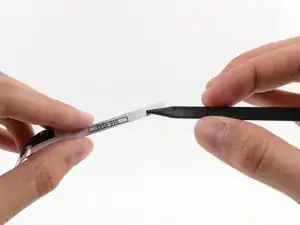
The adhesive strips come in two variants: 2012-2015 adhesives and 2012-2019 adhesives. The 2012-2015 adhesives don’t have a microphone cutout along the lower strip and should only be used for 2012-2015 iMacs.

  1. rmG2SeoxARLHEpa5
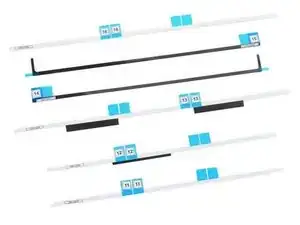
    • Before you begin, make sure you have the right adhesive strips:

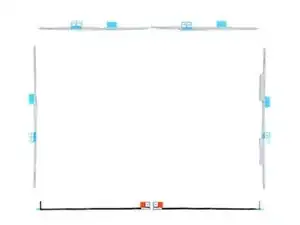
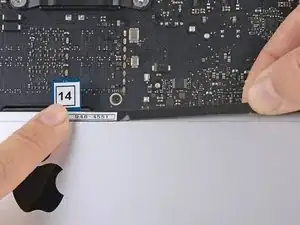
    • The 2012-2015 iMac adhesive strips do not have a microphone cutout and are numbered 11, 12, 13, 14, 15, and 16.

    • Do not install these adhesives on iMacs newer than 2015. Without modifications, the adhesive will block the microphone hole.

    • If your strips are numbered 16, 21, 22, 23, 25, and 26, follow the 2012-2019 iMac adhesive guide instead.

  2. XYkBhNZP2LELyAAr
    • With the hinge free to move, the iMac will be unbalanced and hard to work on. Repairs can be completed as shown, but are faster and easier with an iFixit cardboard service wedge.

    • Follow these assembly directions to put the service wedge together.

    • If you are not using an iMac service wedge, be very careful when installing and working behind the display—it can easily fall out and break if the iMac moves unexpectedly.

    Where is the adhesive numbered?

    Julien Dal Col -

  3. SXyZVVQNeM5hJWdI
    SXyZVVQNeM5hJWdI
    BDehN5GZ1IsguqTZ
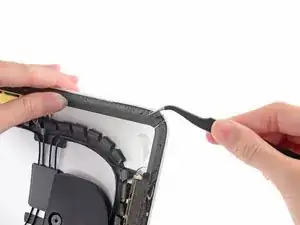
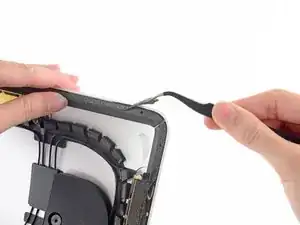
    • Before you install new adhesive strips, remove all of the old adhesive from the perimeter of the rear enclosure.

    • If you are re-using your existing display, you must also remove the old adhesive from the back of the display.

    • Peel off the adhesive strips using tweezers or your fingers. Start at the bottom and peel upward towards the top of the device.

    • After all the old adhesive is removed, carefully clean the surface with 90% (or greater) isopropyl alcohol and a lint-free cloth. Wipe in one direction, not back and forth.

    • Don't skip this step, or your new adhesive strips may not bond properly, and the display may fall out of your iMac.

  4. UBWLOlUTQUT2yyUp
    UBWLOlUTQUT2yyUp
    TWktHAX4iqCZsZPs
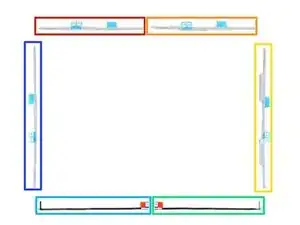
    • Lay out the adhesives strips beforehand so you won't accidentally install a strip in the wrong place:

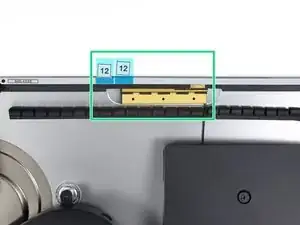
    • Strip 11 on the top left

    • Strip 12 on the top right

    • Strip 13 on the right vertical

    • Strip 14 on the bottom right, dark side up

    • Strip 15 on the bottom left, dark side up

    • Strip 16 on the left vertical

    My Strips that came are numbered altogether different. YOU NEED TO FIX THIS

    Stephen Fowler -

    Hi Stephen! I think you may have gotten the newer adhesive strips. Please see step one of this guide to determine which strips you have, and to follow the right guide for your strips.

    Arthur Shi -

  5. NhARZqAwrCNG6ldL
    NhARZqAwrCNG6ldL
    esGcFVFstVoOTNLr
    aYFREHW16ZOIWUe4
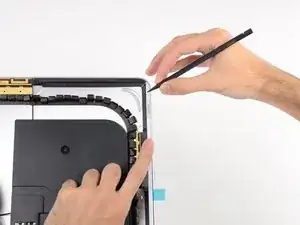
    • Start with strip 13, which goes on the right vertical side of the rear enclosure.

    • Before peeling off any backing, line it up along the frame of the iMac to get an idea of where it goes.

    • Peel the short piece of backing off the back of the strip.

  6. HwAXmSQWVH4thVeq
    HwAXmSQWVH4thVeq
    rMoHuELKfAAOODvX
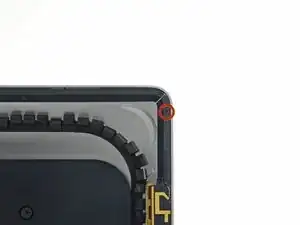
    • Insert the tip of a spudger into the hole at the top of the strip from the side that still has a backing on it.

  7. XSCyxR2QnGYxELqs
    XSCyxR2QnGYxELqs
    DaBoHdGpJ1yEXNpv
    ySWFecPZaqQkEIlR
    • With the spudger still poking through the hole in the adhesive strip, push the spudger tip into the corresponding hole in the frame of the iMac.

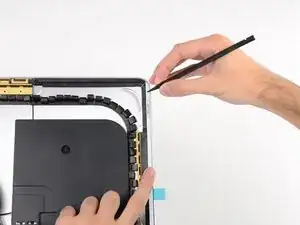
    • Using the hole and spudger to anchor the position of the adhesive strip, line the strip up against the right edge, gently pull down against the spudger to ensure the strip is taut, and stick it onto the frame.

  8. BRhPTUPHdOKJ4tWv
    BRhPTUPHdOKJ4tWv
    YHNJh3TBLWSXIYIQ
    3lA2Kv5AMAdkNP4v
    • Once you're satisfied that the top half of the adhesive strip is neatly aligned, peel the longer piece of backing out from behind the strip.

    • If the top half isn't aligned properly, you can carefully peel it up and re-stick it before peeling off the lower backing strip. Be sure to use the spudger tip to anchor the top.

  9. KI4taW5PfVnojg4k
    KI4taW5PfVnojg4k
    oL2xkPxJoJjnckPM
    • Align the lower portion of the strip with the right edge of the frame, and stick it down.

  10. lkauWjVS6huGUAWU
    lkauWjVS6huGUAWU
    NZ4xGBhA56fETs3R
    • Use your finger to smooth out the strip. Make sure it is neatly aligned with the right side of the frame and that it sits flat.

    • Do not peel off the front adhesive backing yet.

  11. EAasL3saVmxoLrQT
    EAasL3saVmxoLrQT
    OVEeKfYDkMDMNyvV
    • Work your way counter-clockwise around the perimeter of the iMac, adding three more adhesive strips in the same manner:

    • Strip 12 on the top right

    • Strip 11 on the top left

    • Strip 16 on the left vertical

    • These three strips have a hole at each end—always use the smaller hole for alignment for more precise placement.

    • On the iMac Intel 27" Retina 5K Display, the top-right strip's blue tabs will not line up with the top antenna in the same way as the non-5K model. This is perfectly acceptable and won't impact the performance of the strips or antenna.

  12. vIyWHtlpwAHaNNJb
    vIyWHtlpwAHaNNJb
    kSGPpbtbP1AVgWyq
    AQxIu1sHvKupTqiH
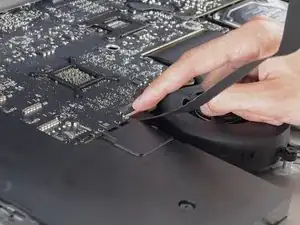
    • The two remaining strips (14 and 15) do not have guide holes and are more difficult to place. Before sticking them down, we recommend first setting them in their respective places on the iMac to get comfortable with their placement.

    • Grasp the red pull tab on strip 14 and pull to remove the backing from the strip.

    • Align the strip on the bottom edge of the rear enclosure, directly to the right of the middle screw on that edge.

    • The strip should be positioned such that the L-bend sits next to the right vertical adhesive. The L-bend should not overlap the right vertical adhesive.

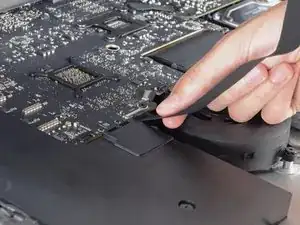
    • Run your finger along the length of the adhesive strip to ensure it is straight and unwrinkled, pressing down as you go to adhere the strip to the iMac.

    Note this important point from the next step, which I believe should appear in this step as well, with respect to the right vertical adhesive..

    The strip should be positioned such that the L-bend sits next to the left vertical adhesive. The L-bend should not overlap the left vertical adhesive.

    ace -

    Thanks for the comment! I added the note you pointed out into the step.

    Arthur Shi -

  13. AeFDLJJwHHx3PyyE
    AeFDLJJwHHx3PyyE
    TexfmXhpOCTyOBDc
    j1bPhe5bYHXveHVD
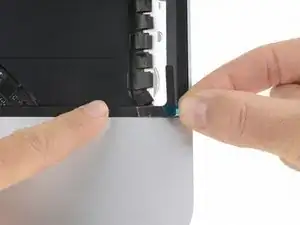
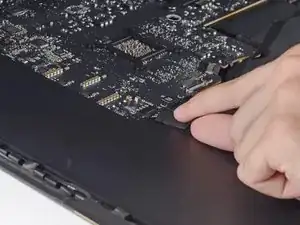
    • Repeat the previous step for strip 15, placing it along the bottom left edge of the iMac.

    • The strip should be positioned such that the L-bend sits next to the left vertical adhesive. The L-bend should not overlap the left vertical adhesive.

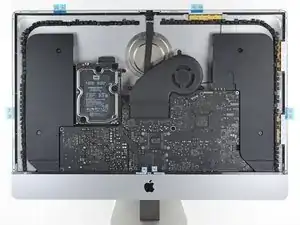
    • Once you've applied all the adhesive strips, the iMac should look as shown in the second photo.

  14. jWlGUmAVUDAVDcyP
    jWlGUmAVUDAVDcyP
    GeIOkUMXQv3djbrK
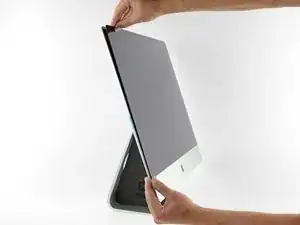
    • Gently set the display in place over the iMac, and align it carefully.

  15. Q6cmVLJt4LAGscky
    Q6cmVLJt4LAGscky
    f1RPGdP4bULqvKqx
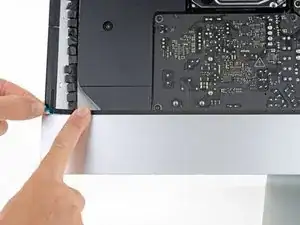
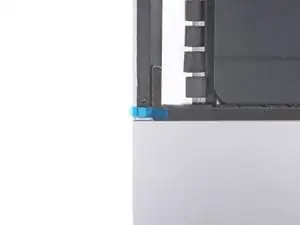
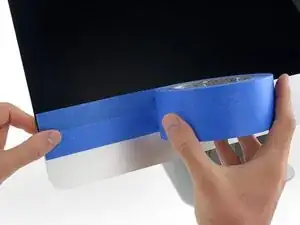
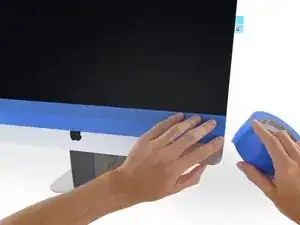
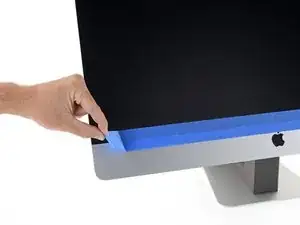
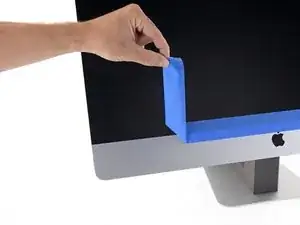
    • Use painter's tape or masking tape to temporarily secure the bottom edge of the display to the iMac's enclosure.

    • The tape preserves the display's alignment, and allows you to safely swing the top edge of the display open to access the display cables.

  16. BotQGgDKskPIPRUF
    BotQGgDKskPIPRUF
    AajvpY1ocF35cdGH
    4DQEIjDvb1yZnwXm
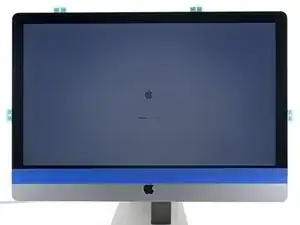
    • At this point it's a good idea to test your repair, in order to make sure your iMac works properly before you seal it back up. Follow the next three steps to temporarily reconnect the display cables and boot up your iMac prior to pulling the protective film off the adhesive strips.

    • If you've already verified that your iMac is working correctly and are ready to seal it up, skip to step 18.

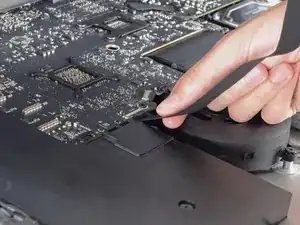
    • Gently insert the display data connector into its socket on the logic board. Be sure to press it straight into the socket, and insert it completely.

    • Flip the display data connector lock down onto the socket.

    • Insert the display power connector into its socket on the logic board.

  17. ksqZWna2nXm3MdyQ
    ksqZWna2nXm3MdyQ
    nfQSrf1XdZxnQO1I
    • Set the display back on the iMac's rear enclosure.

    • At this time, plug in your iMac, power it on, and test your repair before sealing up the computer. Be sure to check for full functionality of any hardware you removed or disconnected.

    • When you are finished, shut the iMac down and unplug the power cord before you continue.

  18. lokGpWWG6QPW6Jjy
    lokGpWWG6QPW6Jjy
    CQc1RJRO2mKPeijC
    SApht3IDIeFX4RaT
    • Verify that your iMac is turned off and unplugged from power before you continue.

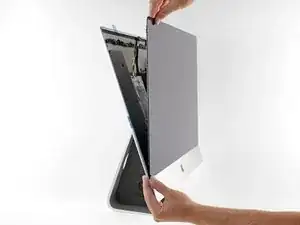
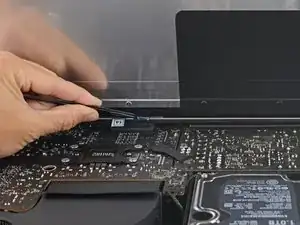
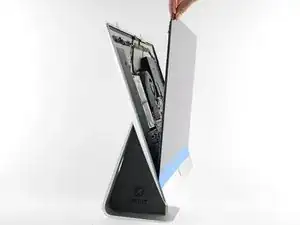
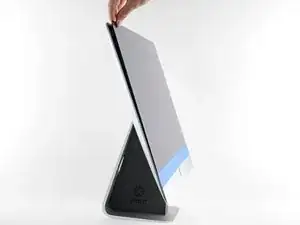
    • After confirming that your iMac functions properly, disconnect the display cables and carefully lean the display forward.

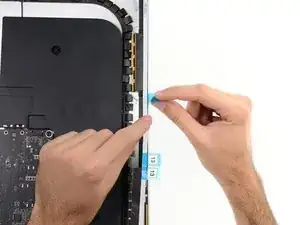
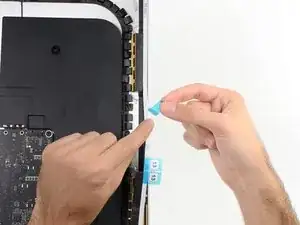
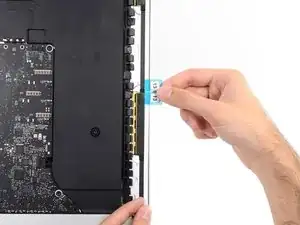
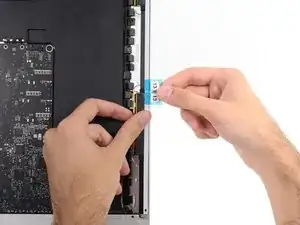
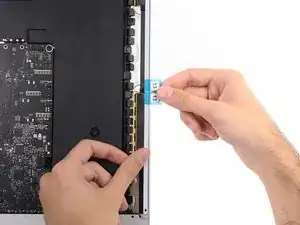
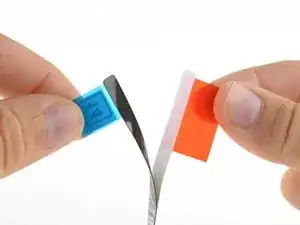
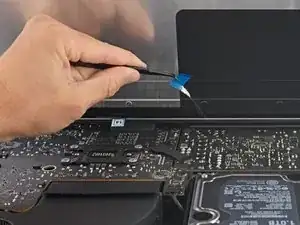
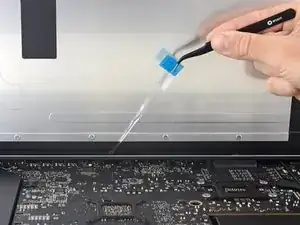
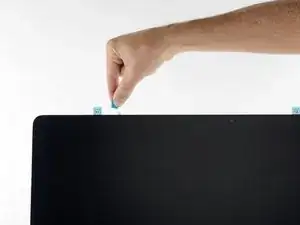
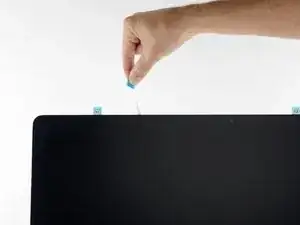
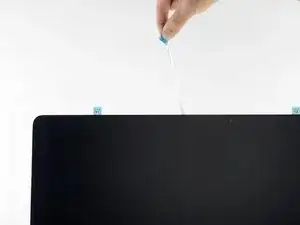
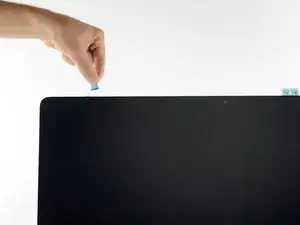
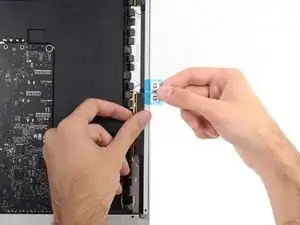
    • Remove the film from the two bottom strips by reaching in from above with a pair of tweezers and pulling the blue tabs straight up from the bottom edge of the display.

    This step should specify removing the film from strip 15, such that repeating the step again for strip 14 in the next step isn’t confusing. Or this step could specify both strip 14 and 15 and step 19 could be deleted entirely.

    ace -

    Good point! I’ll adjust the steps to implement what you suggested.

    Arthur Shi -

  19. PwPlLTlgt4HwQWet
    PwPlLTlgt4HwQWet
    hGYLCNqxJHtjAJGw
    QCBksaMXV56GEdPU
    • Reconnect the display power and data cables for the final time.

    • Remember to secure the metal retaining bracket on the display data cable.

  20. nOGv2JVlxNs3hCWf
    nOGv2JVlxNs3hCWf
    SRYJcOvCSDvVEFGV
    iAf1f6RoZtRbjJCo
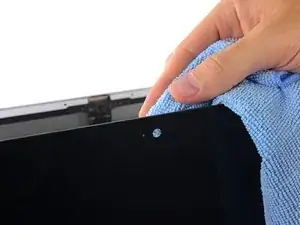
    • Check the glass directly in front of the webcam for dust and other contaminants. If necessary, wipe it down with a microfiber cloth before you seal up the display.

    • Steady the display with one hand as you remove the adhesive liners in the following steps, or rest it lightly against the iMac's enclosure.

  21. HpRuStwLLDNOMWaC
    HpRuStwLLDNOMWaC
    byxN4exgLbgh54GD
    V2R4MMEdVAraGmqx
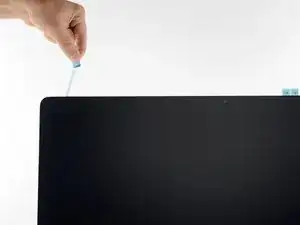
    • Remove one side of the protective film from strip 11 by pulling its tab straight up.

  22. BHYZQelEGiVlylZt
    BHYZQelEGiVlylZt
    QIeA1mUlFwFHZWfr
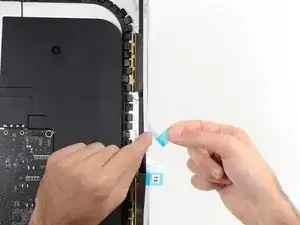
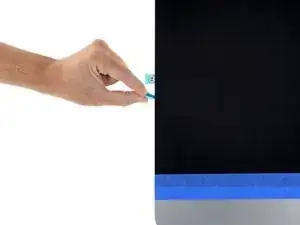
    • Remove the other side of the protective film from strip 11.

  23. XEyNKvKCJSZj1pBJ
    XEyNKvKCJSZj1pBJ
    IYiAP6SwHSFKRLUK
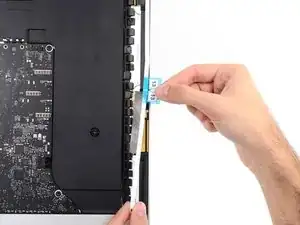
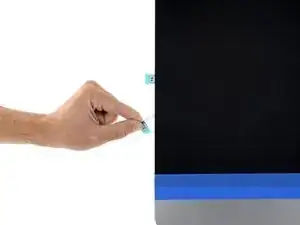
    • Repeat the previous steps to remove the protective films from all the remaining adhesive strips (labeled 11, 12, and 13).

    (labeled 12, 13 and 16)

    euscore@gmail.com -

  24. pFVDvVUpi4xSPFTV
    pFVDvVUpi4xSPFTV
    26LYMptoCEeAo1kV
    • To ensure a strong bond, carefully tip the iMac flat on its back (with the screen facing straight up) and press carefully but firmly around all four edges of the display.

    • Remove the tape securing the display to the rear enclosure.

    • Check the display after 24 hours to make sure that it is not loose on the iMac.

    This was an excellent guide. Very detailed and comprehensive.

    py -

    Great guide. I just yesterday did my first iMac SSD upgrade and this certainly helped. The strips having glue on both sides were harder to handle than shown but then it was my first time. It’ll be easier next time. The old glue was a little more difficult to remove than suggested but after a number of years setting up I was expecting that. All things considered, this a very good and useful guide. No complaints really; nothing now days is ever 100% as it seems. Biggest lesson was don’t fear doing this. If you’re worked inside computers of any kind you very likely have the necessary skills. I wish I’d swapped the HDD for an SSD a lot sooner.

    David Phillips -

    Great Guide! Just did it! :)

    Mario Günter -

Arthur Shi

Member since: 03/01/18

248651 Reputation

One comment

Great guide, thanks!

Pro tip: don’t forget to plug in the 2 cables before you close the screen.. not that I had to cut open the iMac and replace the stickers again or something :-).
Tom Vreugdenhil -