Introduction
Follow this guide to remove the loudspeaker in the Samsung Galaxy S10. For this model, the loudspeaker is built into the lower midframe.
The hardest part of this guide is removing the S10’s back cover.
Tools
Parts
-
-
Unplug and power off your phone before you begin.
-
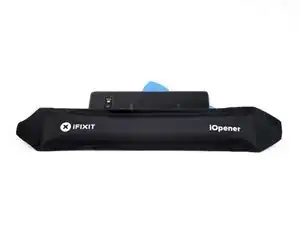
Heat an iOpener and apply it to the back cover's right edge for two minutes.
-
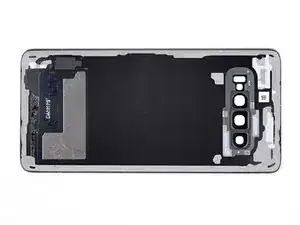
As you wait, take a look at the image of the removed back cover and take note of where the adhesive is located.
-
-
-
Rest the heated right edge of the phone on something that is about 0.5 inches (13 mm) thick. This angles the phone for the opening tool.
-
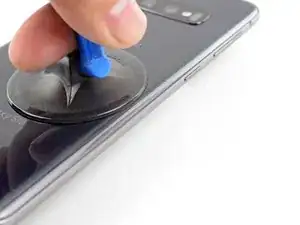
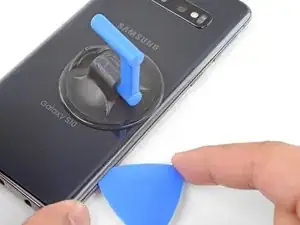
Brace the left edge of the phone with your fingers so that the phone won't slide. Pull on the suction cup with firm pressure.
-
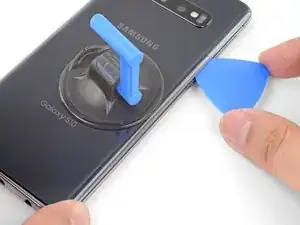
Press the edge of an opening tool into the seam between the back cover and the frame.
-
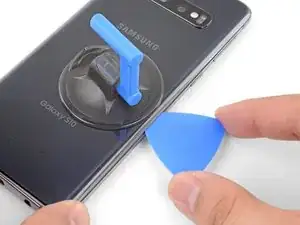
With the opening tool in place in the seam, slide it back and forth along the seam to loosen the back cover.
-
-
-
Heat an iOpener and apply it to the same edge of the phone for two minutes.
-
Apply a suction cup to the back of the phone, as close to the center of the right edge as possible (where the adhesive is narrowest).
-
Pull on the suction cup with strong, steady force to create a gap between the back cover and the frame.
-
Insert the point of an opening pick into the gap.
-
If you are having trouble creating a gap, your best bet is to apply more heat to the edge and try the previous step again. The glass is heated enough when it is barely too hot to touch.
-
You can try applying a few drops of high concentration (over 90%) isopropyl alcohol into the seam to help loosen the adhesive.
-
-
-
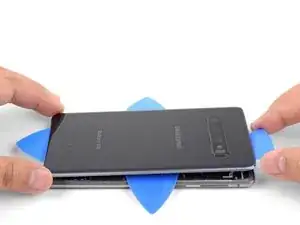
Slide the opening pick along the edge of the phone, slicing through the adhesive.
-
Leave a pick in the seam to prevent the adhesive from re-sealing.
-
-
-
Apply a heated iOpener to the bottom edge of the phone for two minutes.
-
Insert an opening pick into the right edge near the bottom right corner.
-
Carefully slide the pick around the corner. Continue cutting along the bottom edge and around the bottom left corner.
-
Leave an opening pick in the seam to prevent the adhesive from re-sealing.
-
-
-
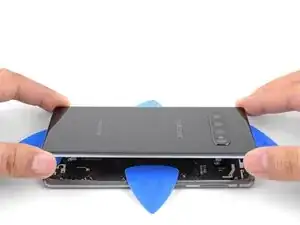
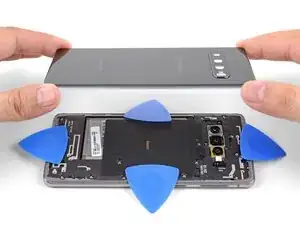
Once you have sliced around the phone, twist an opening pick in one of the edges to help separate the back cover from the frame.
-
Lift the back cover slowly. Use opening picks to slice any remaining adhesive.
-
Remove the back cover.
-
-
-
The midframe is still held in place by a few plastic clips around the edge.
-
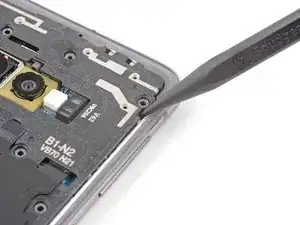
Insert the point of a spudger into the notch on the right edge of the midframe, near the volume up button.
-
Pry up to loosen the midframe from the phone.
-
-
-
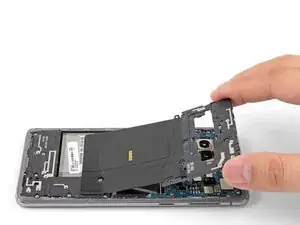
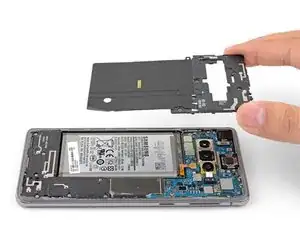
Lift the midframe from the top corners and remove it from the phone.
-
To reinstall the top midframe:
-
Align the midframe's top edge to the phone and lay the frame down on the phone.
-
Use fingers to apply pressure along the midframe perimeter to snap the midframe clips back into place. The edges should sit flush against the phone edge.
-
-
-
Insert the flat end of a spudger underneath the battery connector, which is attached to the motherboard below the rear-facing camera.
-
Pry upwards to disconnect the connector from its socket.
-
Gently push the battery's flex cable away from the motherboard socket to prevent accidental contact.
-
-
-
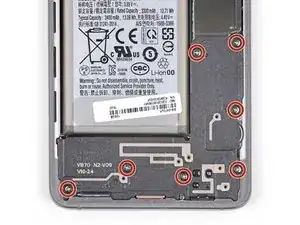
Insert the point of a spudger underneath the top right corner of the lower midframe.
-
Pry up to release the midframe from the phone.
-
-
-
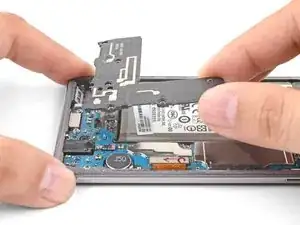
Grasp the loosened end of the midframe with your fingers and lift upwards slowly.
-
Wiggle the midframe slightly to help release the remaining edge clips.
-
Remove the lower midframe. The loudspeaker is built into the lower midframe.
-
To reassemble your device, follow these instructions in reverse order.
After you've completed the repair, follow this guide to test your repair.
2 comments
in 14 Schritten wird haarklein beschrieben wie man den lautsprecher ausbaut , jeder Schaube wird eingezeichnet. Am Ende aber >Der Lautsprecher ist in den unteren Mittelrahmen eingebaut.< für ein Foto hat es dann nicht mehr gereicht ? Koitus interruptus .Sechs setzen.
Rolf -
Waarom niet no 1 of 2 foto's toegevoegd om te laten zien welk onderdeel de speaker is en hoe lost te maken ????

















I think we should mention that the glass needs to be barely too hot to touch to determine when it's hot enough that a pick can be slid underneath.
Or we can mention a thermometer temperature, but most diy people probably don't have a thermometer to check.
A lot of people seem to have issues using the iopener to unglue phone parts like back glass (can Google it), likely because the glue didn't get hot enough, so mentioning the desired touch temperature can be helpful for DIYers to ensure that their glue is sufficiently weakened and they can begin working off the part.
(Just being hot isn't enough for glue to weaken, as you can probably attest to if you've ever had your phone get really hot but the back cover never came loose)
A X -