Introduction

This is a prerequisite-only guide! This guide is part of another procedure and is not meant to be used alone.

Use this guide to remove the interconnect cable in the OnePlus 9 5G.

Note: Retaining water resistance after the repair will depend on how well you reapply the adhesive, but your device will lose its IP (Ingress Protection) rating. However only the T-Mobile version of the OnePlus 9 5G offers an IP rating.

  1. s1CLVEEaChtsTPqj
    • Completely power off your phone before you begin.

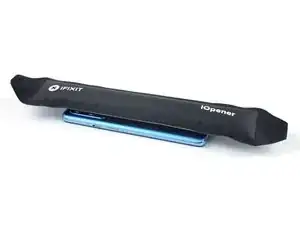
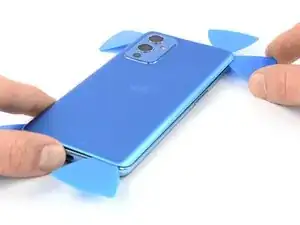
    • Prepare an iOpener and apply it to the rear glass for at least three minutes to loosen the adhesive underneath.

    • A hair dryer, heat gun, or hot plate may also be used, but be careful not to overheat the phone—the display and internal battery are both susceptible to heat damage.

  2. XBcpuVrlTOKShlp3
    XBcpuVrlTOKShlp3
    yIOVdVUfYbyhDxNB
    FqJfV44D1lPkegaS
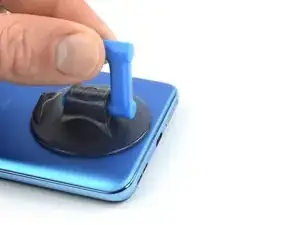
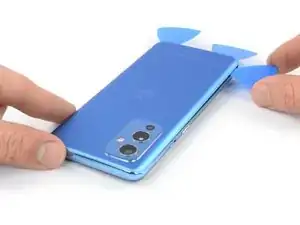
    • Apply a suction handle to the rear glass, as close to the bottom edge as possible.

    • If your rear glass is badly cracked, covering it with a layer of clear packing tape may allow the suction handle to adhere. Alternatively, very strong tape may be used instead of the suction handle. If all else fails, you can superglue the suction handle to the broken rear glass.

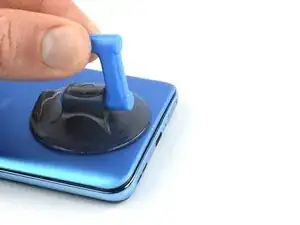
    • Pull up on the suction handle with strong, steady force to create a gap between the glass and the frame.

    • If you have trouble creating a gap, apply more heat to further soften the adhesive.

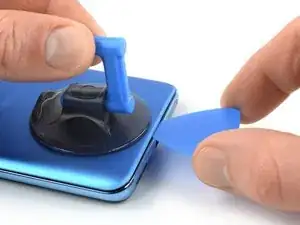
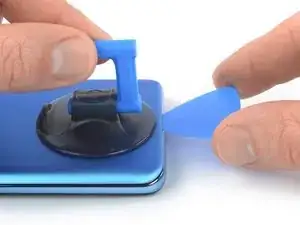
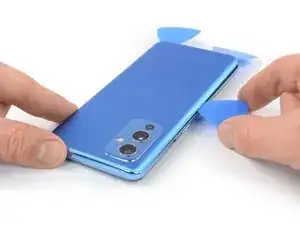
    • Insert an opening pick into the gap.

  3. I3nInSMWCgyLeyNJ
    I3nInSMWCgyLeyNJ
    EuXZnLpBwsWrga2Q
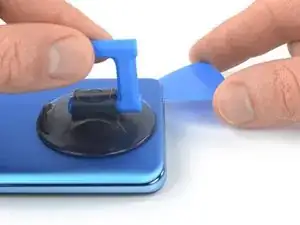
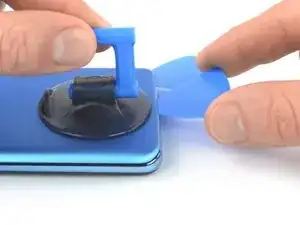
    • Slide the opening pick to the bottom right corner to slice the adhesive.

    • Leave the opening pick in place to prevent the adhesive from resealing.

  4. 2vQeMPOp2PQuSNTP
    2vQeMPOp2PQuSNTP
    FdvLsCNZAiYWx3qW
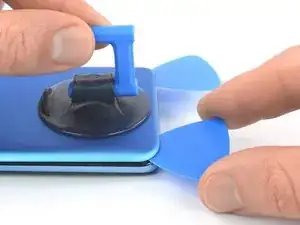
    • Insert a second opening pick underneath the bottom edge of the rear glass.

    • Slide the opening pick to the bottom left corner to slice the adhesive.

    • Leave the opening picks in place to prevent the adhesive from resealing.

  5. njF2HJXMGMLHEGMP
    njF2HJXMGMLHEGMP
    BRUbbfPAo6b3NVY2
    nIEoJA3mRxwKWlNU
    • If the adhesive becomes hard to cut, it has most likely cooled down. Use your iOpener to reheat it.

    • Insert a third opening pick underneath the bottom left corner of the rear glass.

    • Slide the opening pick along the left edge of your phone to slice the adhesive.

    • Leave the opening pick in the top left corner to prevent the adhesive from resealing.

  6. RlMXdqKMfGLUFbhX
    RlMXdqKMfGLUFbhX
    ivXIXHScWCIKjhHF
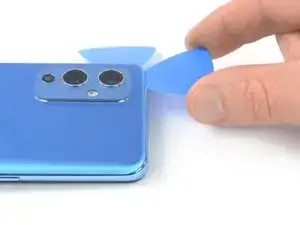
    • Insert a fourth opening pick underneath the top left corner of the rear glass.

    • Slide the opening pick along the top edge to slice the adhesive.

    • Leave the opening pick in the top right corner to prevent the adhesive from resealing.

  7. WyVCqOIhacETjIaC
    WyVCqOIhacETjIaC
    pmNkUcL5i5dhqXHm
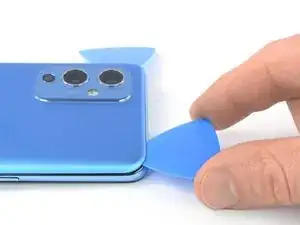
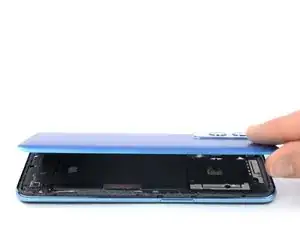
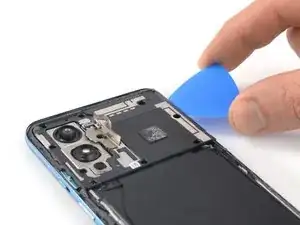
    • Insert a fifth and final opening pick underneath the top right corner of the rear glass.

    • Slide the opening pick along the right edge of the back cover to slice the remaining adhesive.

  8. scNTSmWr3HLyJaZx
    scNTSmWr3HLyJaZx
    slvAH4gvnHEKGkFA
    • Remove the rear glass.

    • If the rear glass is still stuck to the frame, slide an opening pick around the entire perimeter until the rear glass separates completely.

    • During reassembly secure the rear glass with pre-cut adhesive or double-sided adhesive tape. After installing the rear glass, apply strong, steady pressure to your phone for several minutes to help the adhesive form a good bond—a stack of heavy books works well.

  9. OQdnLkiBxevZVnGe
    OQdnLkiBxevZVnGe
    PRhKOeeLB5PWWLdV
    KScwovgIahjsT4dD
    • Use a pair of tweezers to carefully peel the bottom right corner of the charging coil tape off of the daughterboard cover.

  10. GFLBtXPT2xRQyMUX
    GFLBtXPT2xRQyMUX
    aetYo2vVxlMPRS3a
    • Use a pair of tweezers to carefully peel the bottom left corner of the charging coil tape off of the loudspeaker.

  11. QoSS2qGc6DhMdX5n
    QoSS2qGc6DhMdX5n
    SvPyapYaP5IM2THV
    • The flash assembly is held in place by mild adhesive and covers a motherboard cover screw.

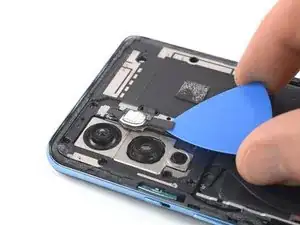
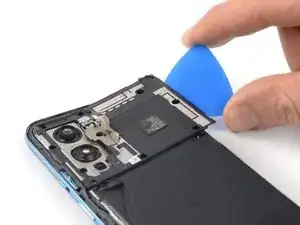
    • Carefully slide an opening pick underneath the bottom edge of the flash assembly.

    • Use your opening pick to pry up the flash assembly.

    • Don't try to remove the flash assembly all the way during this procedure. Its cable is adhered to the backside of the motherboard cover.

  12. 3kCUPQKXDUyL2naP
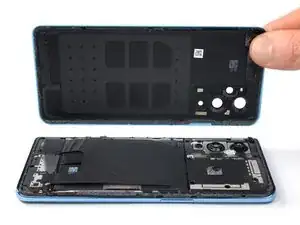
    • Use a Phillips screwdriver to remove the ten 3.8 mm-long screws securing the motherboard cover.

    • One of the motherboard cover screws is covered by a white water ingress sticker. To unfasten the screw you can puncture the sticker with your screwdriver.

  13. 3EoXTexXXVityspd
    3EoXTexXXVityspd
    ArFh5WDNfdWQCgZe
    • The motherboard cover is further held in place by tight plastic clips.

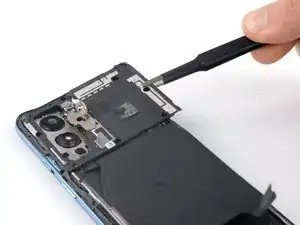
    • Insert a spudger underneath the bottom right edge of the motherboard cover.

    • Pry upwards to loosen the motherboard cover and create a gap.

  14. bmL4cDMYKIVhrH3B
    bmL4cDMYKIVhrH3B
    iWtUKTqdSs44h4Fh
    N5hmYyASyXoggMgy
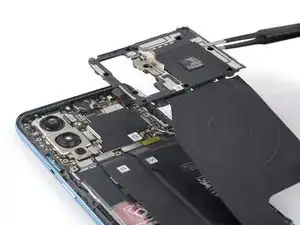
    • Insert an opening pick underneath the bottom right edge of the motherboard cover.

    • Slide the opening pick up along the right edge of the motherboard cover.

    • Twist the opening pick to release the plastic clips and pry up the motherboard cover.

  15. 2N5P1gyGh46GkIwJ
    2N5P1gyGh46GkIwJ
    EDVtJJAQX6xfWSFR
    • Use a pair of tweezers or your fingers to remove the motherboard cover.

    • The charging coil is attached to the motherboard cover and will lift up at the same time.

  16. qEqNSuNJ5AFIJHTH
    qEqNSuNJ5AFIJHTH
    BBNNjBoVQJUxMhGH
    • Use a spudger to disconnect the battery cable by prying the connector straight up from its socket on the bottom left corner of the motherboard.

    • To re-attach press connectors like this one, carefully align and press down on one side until it clicks into place, then repeat on the other side. Do not press down on the middle. If the connector is misaligned, the pins can bend and cause permanent damage.

  17. ePSsshKyqejZDQxG
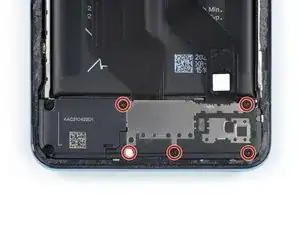
    • Use a Phillips screwdriver to remove the five 3.8 mm-long screws securing the daugtherboard cover.

    • One of the daughterboard cover screws is covered by a white water ingress sticker. To unfasten the screw you can puncture the sticker with your screwdriver.

  18. NnIZWICcgbw1EVwP
    NnIZWICcgbw1EVwP
    dJfGFrjrQU2mleNR
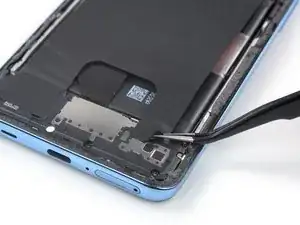
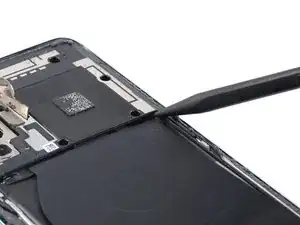
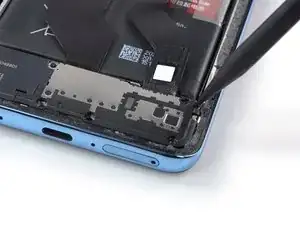
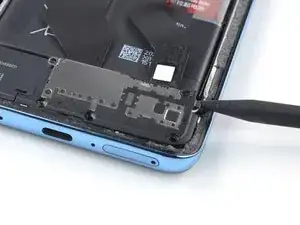
    • Insert the point of a spudger underneath the top right edge of the daughterboard cover.

    • Pry upwards to loosen the daughterboard cover.

  19. lbDXCi3ogEpdyALl
    lbDXCi3ogEpdyALl
    4eEQR2fn3PgFLTM2
    • Use a pair of tweezers or your fingers to remove the daughterboard cover.

  20. PkmTyHjT3LnLoYPu
    PkmTyHjT3LnLoYPu
    oQDKHJlfwQxDTUIy
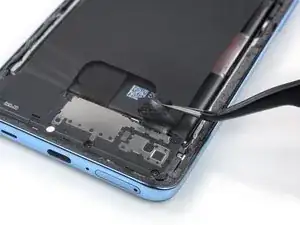
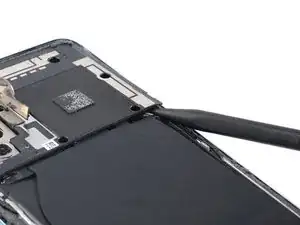
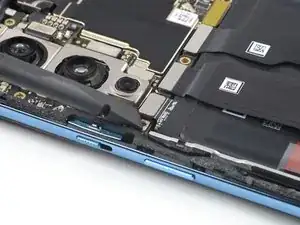
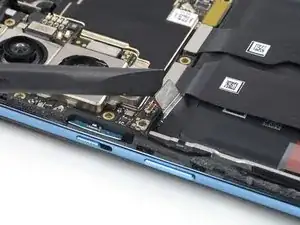
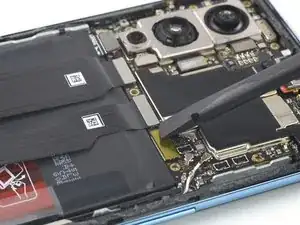
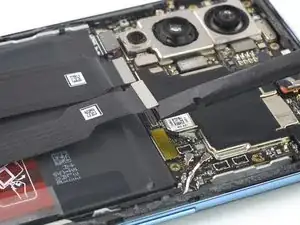
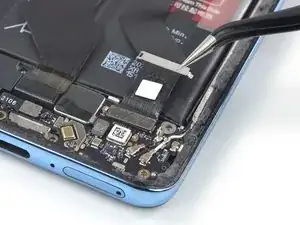
    • Use a spudger to disconnect the interconnect cable from the motherboard by prying the connector straight up from its socket.

  21. VB1XLaHAlggZTvnj
    VB1XLaHAlggZTvnj
    mkix3S1mNiqpXh6U
    1SOOPAOStRu6SNfm
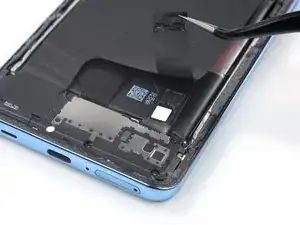
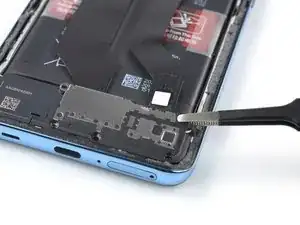
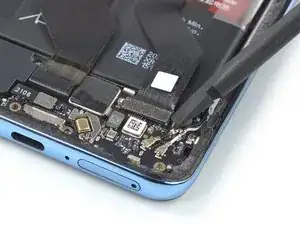
    • Slide one arm of a pair of tweezers underneath the metal bracket covering the interconnect cable.

    • Use your tweezers to lift and unhinge the metal bracket.

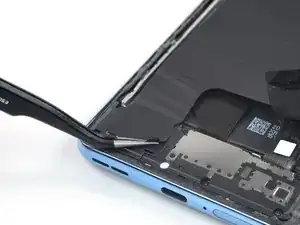
    • Remove the metal bracket.

  22. h1CkdGIjqmbssJOb
    h1CkdGIjqmbssJOb
    GtYunQkJNsVUHQhV
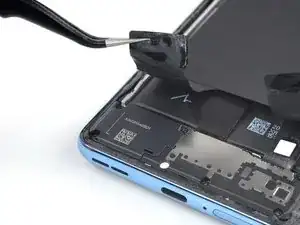
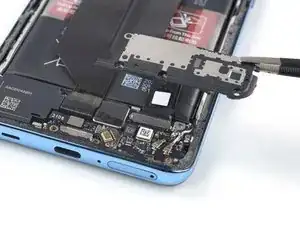
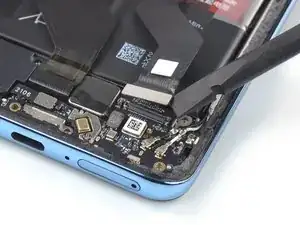
    • Use a spudger to disconnect the interconnect cable from the daughterboard by prying the connector straight up from its socket.

  23. HqrDK1AFqWdvWZvN
    • Use a pair of tweezers or your fingers to remove the interconnect cable.

Conclusion

To reassemble your device, follow these instructions in reverse order.

Repair didn’t go as planned? Try some basic troubleshooting, or ask our OnePlus 9 5G answers community for help.

Dominik Schnabelrauch

Member since: 23/11/16

201162 Reputation

0 comments