
Introduction
Fans can be such blowhards, except when they blow out. Use this guide to help you replace a damaged, broken, or faulty right fan.
-
-
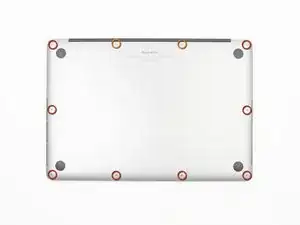
Remove the following P5 pentalobe screws securing the lower case to the MacBook Pro:
-
Eight 3.0 mm
-
Two 2.3 mm
-
-
-
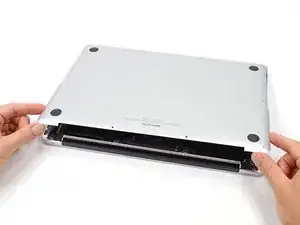
Lifting from the edge nearest the clutch cover, lift the lower case off the MacBook Pro.
-
Set the lower case aside.
-
-
-
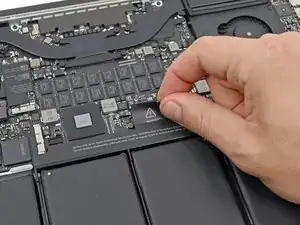
Using the flat end of a spudger, gently pry the battery connector straight up out of its socket on the logic board.
-
Bend the battery cables back and out of the way, ensuring that the battery connector doesn't accidentally make contact with the logic board.
-
-
-
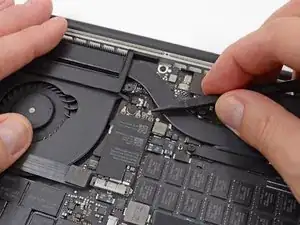
Use a spudger or tweezers to pry the three AirPort antenna cables straight up off of their sockets on the AirPort board.
-
-
-
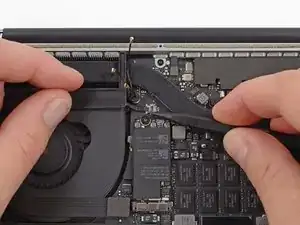
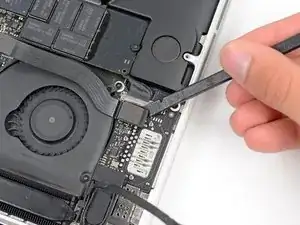
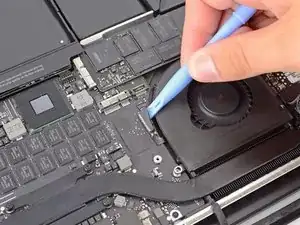
Use the tip of a spudger to push the camera cable's plug toward the fan and out of its socket on the logic board.
-
-
-
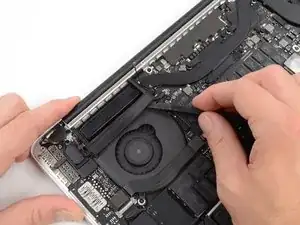
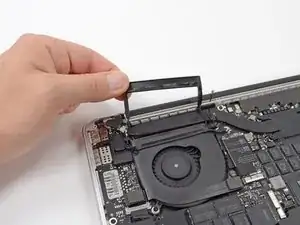
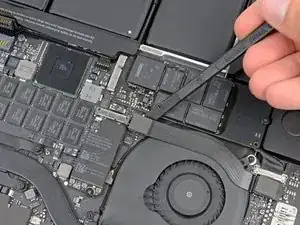
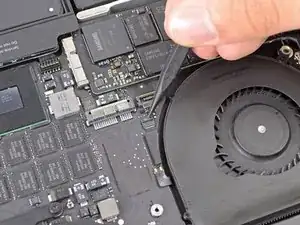
Insert the flat end of a spudger underneath the rubber heat sink cover on the right fan.
-
Slide the spudger underneath the length of the cover, releasing the adhesive.
-
Lift the cover and flip it back so that you can access the cables underneath.
-
-
-
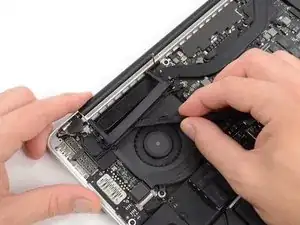
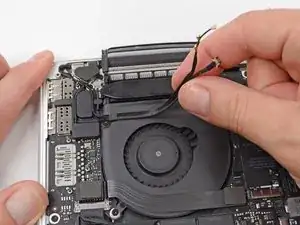
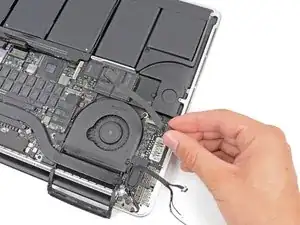
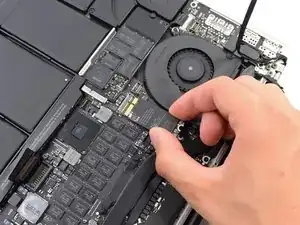
Use your fingers to pull the AirPort/Camera cables up off the fan.
-
Carefully de-route the cables from the plastic cable guide.
-
-
-
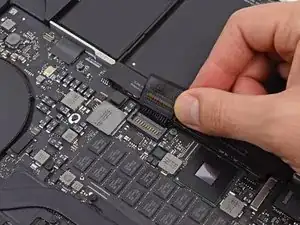
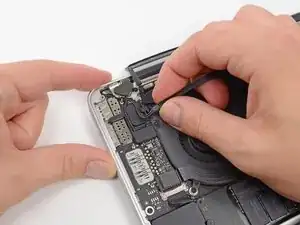
Using the flat end of a spudger, pry the I/O Board connector straight up out of its socket on the logic board.
-
In a similar fashion, remove the I/O Board cable connector from its socket on the I/O Board.
-
Remove the I/O Board cable from the MacBook Pro.
-
-
-
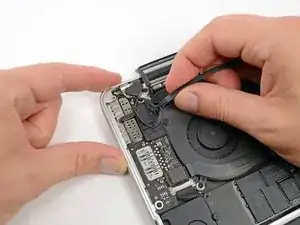
Grasp the sides of the AirPort card and lift it up to a shallow angle (5-10˚) to separate the light adhesive adhering it to the logic board.
-
Pull the AirPort card parallel out of its connector on the logic board to remove it.
-
-
-
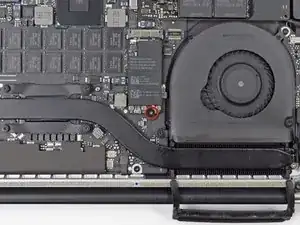
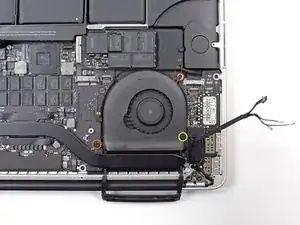
Remove the following three screws securing the right fan to the logic board:
-
One 4.4 mm T5 Torx screw
-
One 3.9 mm T5 Wide Head Torx screw
-
One 5.0 mm T5 Torx screw with 2 mm collar
-


To reassemble your device, follow these instructions in reverse order.

12 comments
Successfully replaced the right hand fan on my macbook pro retina. It no longer sounds like a lawn mower. Who needs geek squad??? The whole process took less than 30 minutes.
racolon4 -
Great guide! It took me 45 minutes to replace my old and loud right fan. Thanks for the guide!
Installed the new fan but it's not running. Other fan is running. Any ideas?
To remove the back panel there are two different pentalobe screws 2.3mm and 3mm however on the tools list there is only one screwdriver. Will I be able to remove both screws with the same screwdriver?
lantzero -
The 2.0 and 2.3 mm measurements are screw lengths, the screw heads are the same sized P5 pentalobe heads. We include the screw lengths so you don't put the wrong screws in the wrong places and end up with screw heads poking out of your device. Hope that clears up some confusion =)
Sam Goldheart -
Yes the same screwdriver will remove both screws, the difference in screws I believe is the length and width but the head is the same.
Mike -
Just be careful to store the 2 shorter screws in a seperate space then the other 3mm screws.
The first time I opened up my Macbook, I put the screws in the wrong order.
Shahzad Arif -