Introduction

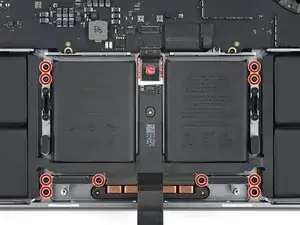
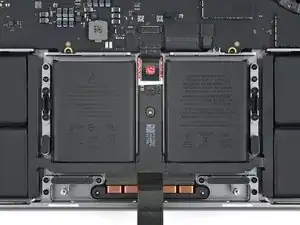
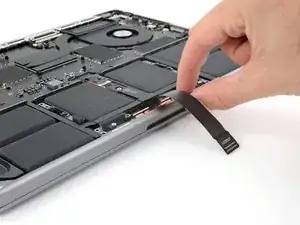
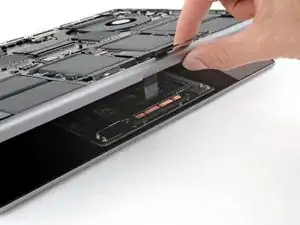
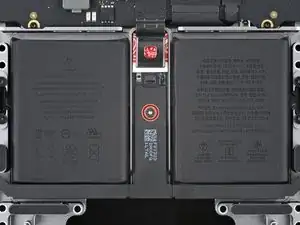
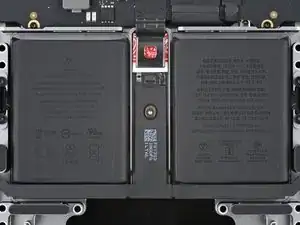
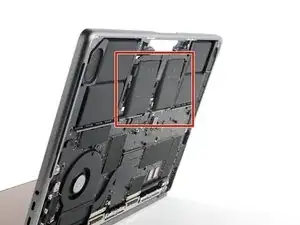
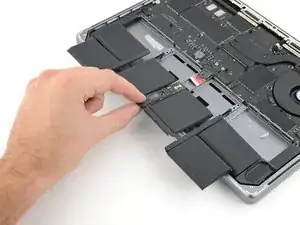
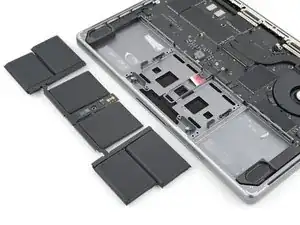
Use this guide to replace a worn-out battery in your MacBook Pro 14" Late 2023 (M3).

If your MacBook needs charging more frequently or shuts off unexpectedly during use, it might be time to replace the battery.

You'll need replacement battery adhesive in order to complete this repair.

If your battery is swollen, take appropriate precautions.

  1. CeHPQBrymZnLHPQ2
    CeHPQBrymZnLHPQ2
    GZnmgv3O2jnjxIKE
    mYQGVQelqZKMQxqn
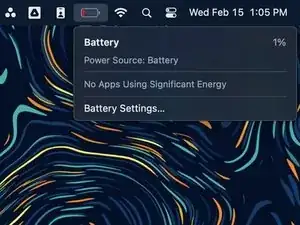
    • Allow your MacBook's battery to drain below 10% before starting this repair. A charged battery may catch fire if damaged during the repair.

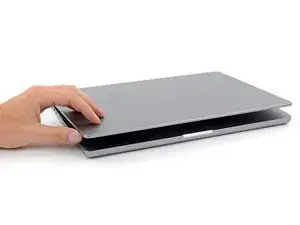
    • Fully shut down your MacBook, close the lid, and flip it over. Keep the lid closed until you've physically disconnected the battery.

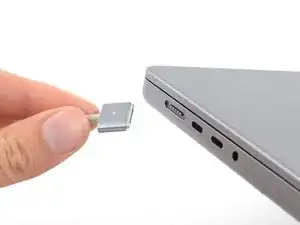
    • Unplug the MagSafe cable and any accessories connected to your MacBook.

  2. VMXfiPR6NHfZvAUr
    • Throughout this repair, keep track of each screw and make sure it goes back exactly where it came from.

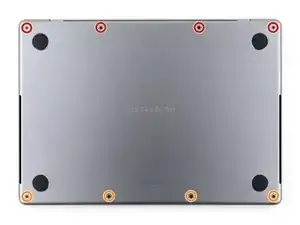
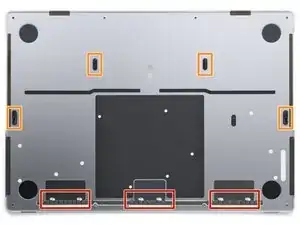
    • Use a P5 pentalobe driver to remove the eight screws securing the lower case:

    • Four 9.2 mm-long screws along the back edge (near the screen hinge)

    • Four 5 mm-long screws along the front edge (near the trackpad)

  3. aTbTq6JWRAPFTWdi
    aTbTq6JWRAPFTWdi
    DGUpd2RFkVkA6jXX
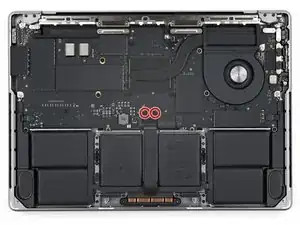
    uvJv6JlOby5qkrhf
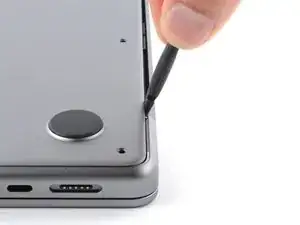
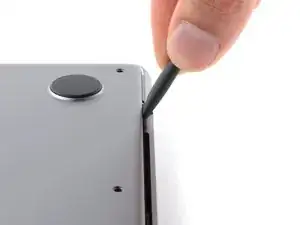
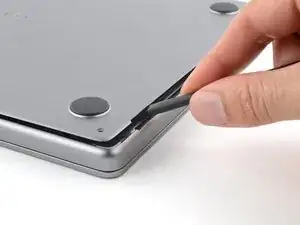
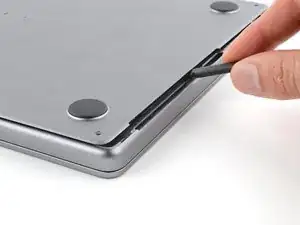
    • Sliding clips along the back edge of the MacBook secure the lower case. In this step, you'll shift the lower case away from the hinges to free it from these clips.

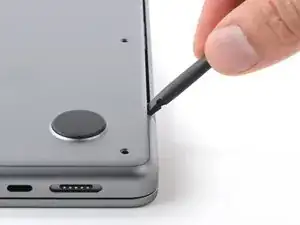
    • Insert the flat end of a spudger between the lower case and the right screen hinge.

    • Lever your spudger against the hinge to push the lower case away from it.

    • Repeat for the left hinge.

  4. OQFLnZnUiReUSi6X
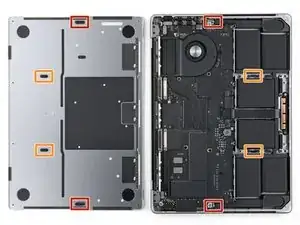
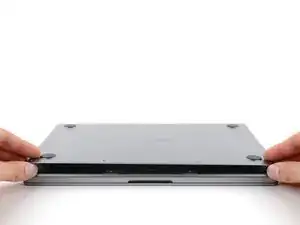
    • After you've released the sliding clips along the back edge, four remaining clips secure the lower case to the frame:

    • Two clips near the cutouts in the frame

    • Two clips near the middle of the lower case

    • As you release the lower case from the frame, you'll hear and feel a distinct "pop" as each of these four clips release.

  5. wvsXDAQxvtXgVFXH
    wvsXDAQxvtXgVFXH
    KHon6XFB53xMvuy2
    o1MkDNqmlQG66WYv
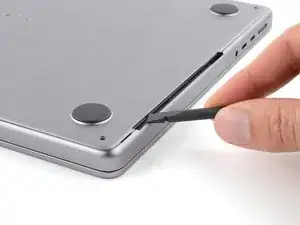
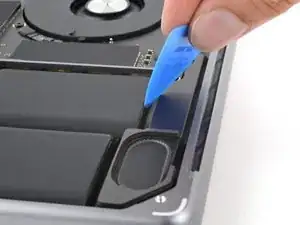
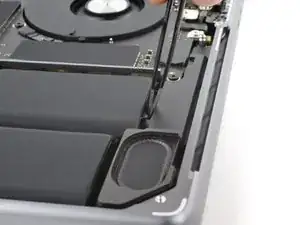
    • Don't insert your tool deeper than 1 cm (a little less than half an inch) near the front of the speaker cutouts to avoid damaging the speakers.

    • Insert the flat end of your spudger into the front of the cutout in the right side of the frame.

    • Slide your spudger toward the back of the cutout and pry up to release the two right-side clips.

    • Repeat for the left-side speaker cutout to release the two left-side clips.

  6. wnBonkhmwBfmgX3j
    wnBonkhmwBfmgX3j
    merlCYiv1kyQgvrQ
    GgNQ1LWWZCAOQaOV
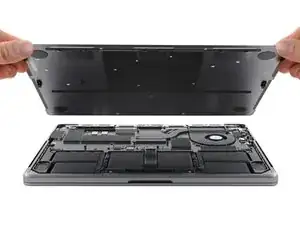
    • Remove the lower case.

    • To reinstall the lower case:

    • Lay it down and align the sliding clips with the back edge of the MacBook. Press down on the lower case and slide it toward the back edge to engage the clips.

    • When one side is engaged, it may push the other out of alignment. Check both sides as you push.

    • Once the back corners of the lower case are secured and flush with the frame, press down along the middle of the lower case to engage the four remaining clips.

    • You'll hear and feel each clip snap into place.

  7. F6OMofpMnnX6Hdmk
    F6OMofpMnnX6Hdmk
    ZXbyO44vMNKAY3kp
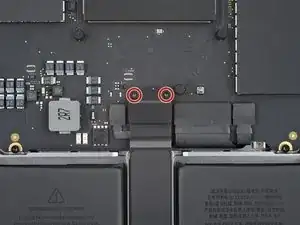
    • While your MacBook uses some Torx Plus screws, standard Torx bits work. Make sure to apply constant, downward force to avoid stripping.

    • Use a T3 Torx driver to remove the two 2.1 mm-long 3IP Torx Plus screws securing the trackpad connector cover.

  8. 5xJNKlSQBJYdln6u
    5xJNKlSQBJYdln6u
    H5CtONSEOcM5WEPt
    • Remove the trackpad connector cover.

  9. JMjlkXeedVq3aCPe
    JMjlkXeedVq3aCPe
    cUtT1PHDJIJsa3g2
    • Use the flat end of your spudger to pry up and disconnect the trackpad press connector from the logic board.

    • To re-attach press connectors like this one, carefully align and press down on one side until it clicks into place, then repeat on the other side. Don't force it, since a misaligned connector can bend the pins, and cause permanent damage.

  10. jDQRoyWTtGyCHgCa
    jDQRoyWTtGyCHgCa
    cYr4gOMKpnHKItiQ
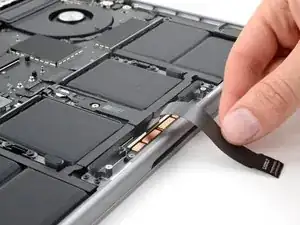
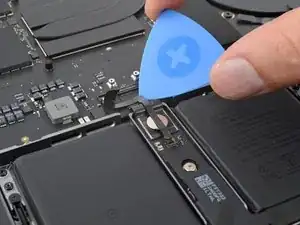
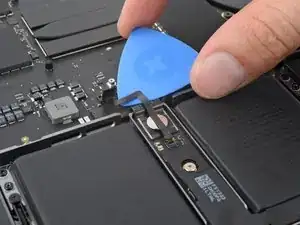
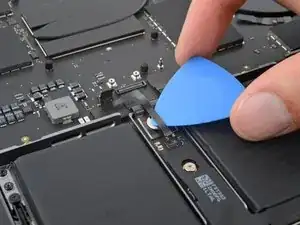
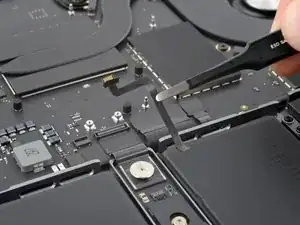
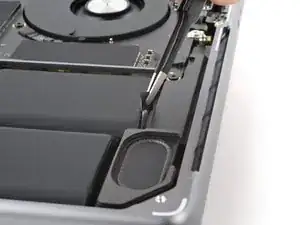
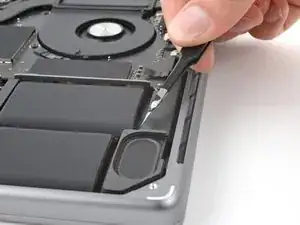
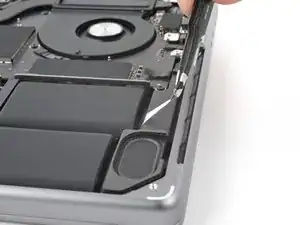
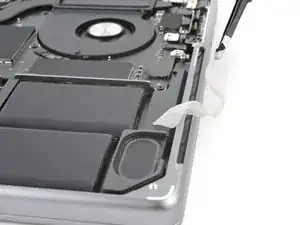
    • Light adhesive secures the trackpad cable to the battery board.

    • Peel the trackpad cable from the battery board and move it over the front edge of the MacBook.

    • Be careful not to crease or damage the cable.

  11. EwUWWNVPlRDRJ3IE
    EwUWWNVPlRDRJ3IE
    KYdnWDD2gAKVHkXw
    34WBq5QDMfn2LwCc
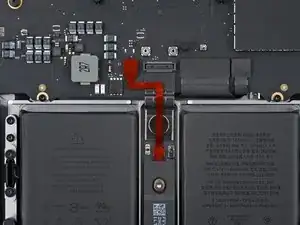
    • The battery data cable is adhered to the battery board and logic board. In the next few steps, you'll disconnect it, separate its adhesive, and remove it.

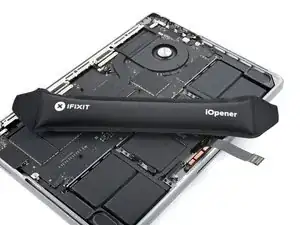
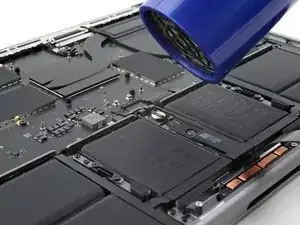
    • Heat an iOpener and place it on the battery data cable for 30 seconds to soften its adhesive.

    • If you don't have an iOpener, you can use a hair dryer to lightly heat the cable. Be careful not to overheat the battery, as doing so is a fire hazard.

  12. YUljDDLjXef2vdUd
    YUljDDLjXef2vdUd
    CwMVIXpr4rM54D6q
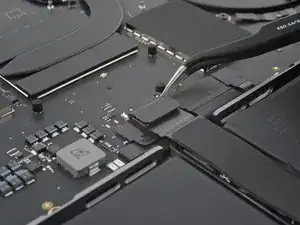
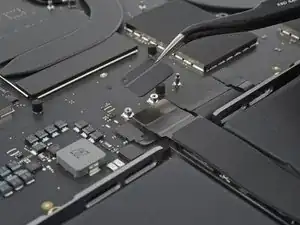
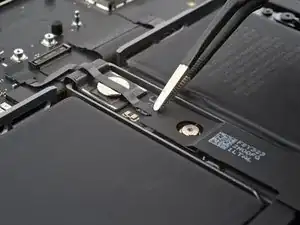
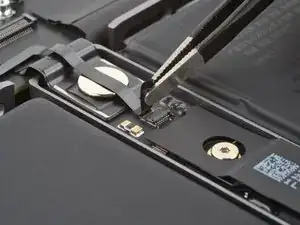
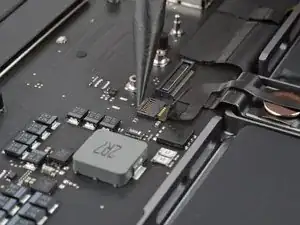
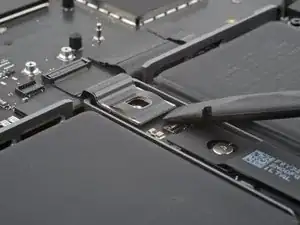
    • Use your tweezers to peel back the tape covering the battery data cable ZIF connector on the battery board.

  13. A6CQQtHBylZCluOH
    A6CQQtHBylZCluOH
    MK31KthZoDcESAYr
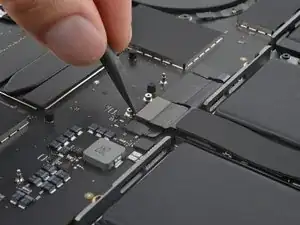
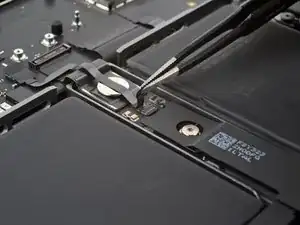
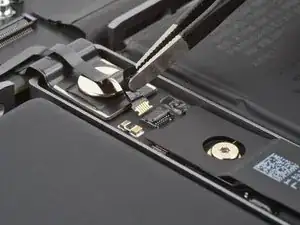
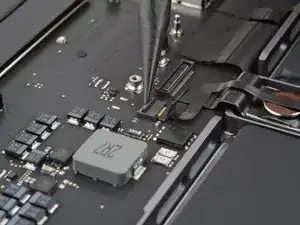
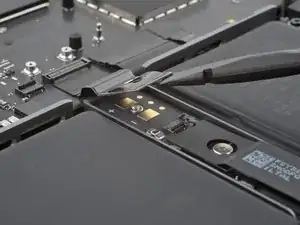
    • Use the point of your spudger to flip up the small locking flap on the battery data cable ZIF connector on the battery board.

  14. ayoZ3ciiSXaxf2BR
    ayoZ3ciiSXaxf2BR
    GGgaGLQUgpqPcNdp
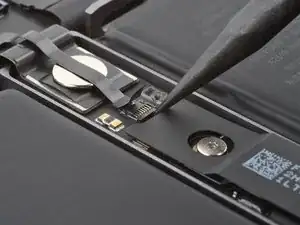
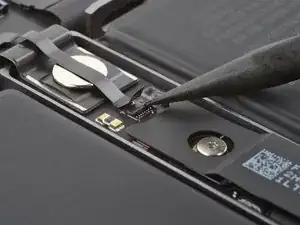
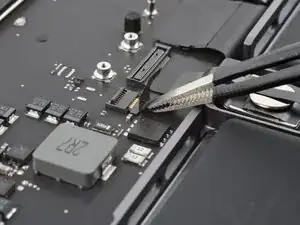
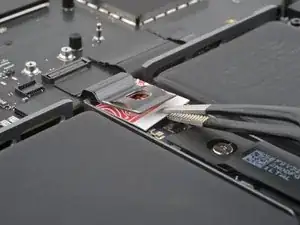
    • Use your tweezers to slide the connector straight out of its socket to disconnect it from the battery board.

  15. RiwBBiQWRcEWl2KL
    RiwBBiQWRcEWl2KL
    PLjNKhiS3VsF6tRr
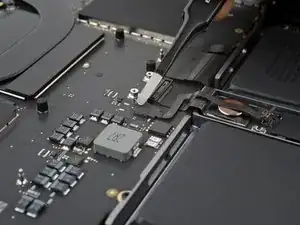
    • Use your tweezers to peel back the tape covering the battery data cable ZIF connector on the logic board.

  16. f1TnyLBBtK5Y2wFe
    f1TnyLBBtK5Y2wFe
    P3YOEBRRjDNKrY5x
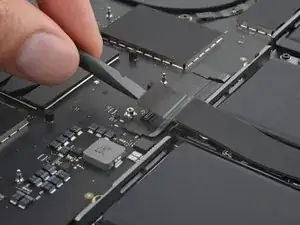
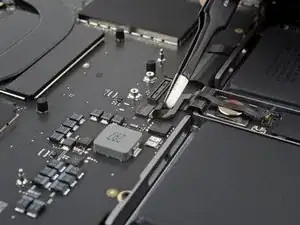
    • Use the point of your spudger to flip up the small locking flap on the logic board battery data ZIF connector.

  17. gV135lG5qKJ2aaXc
    gV135lG5qKJ2aaXc
    W2iA6hB3x1CFCvih
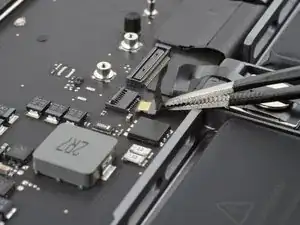
    • Use your tweezers to grip the neck of the cable and slide it straight out of its socket to disconnect it from the logic board.

  18. vFCbQTs3TEcdZeAS
    vFCbQTs3TEcdZeAS
    xf6kl4CPIFV2DfLJ
    DLW1A6BT3I3eOF2s
    • The battery data cable is lightly adhered to the battery board and logic board.

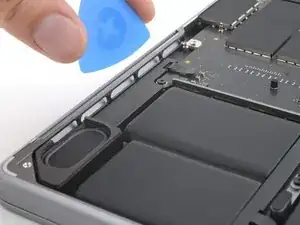
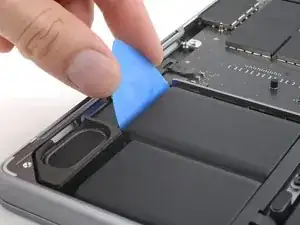
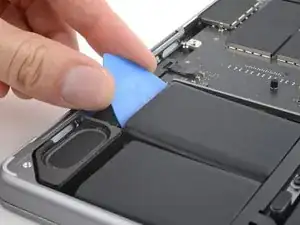
    • Slide the tip of an opening pick between the upper section of the battery data cable and the logic board to separate the adhesive.

    • Slide your pick between the lower section of the cable and the silver wide-head screw to separate the remaining adhesive.

  19. vosINGfKPKGGWcQM
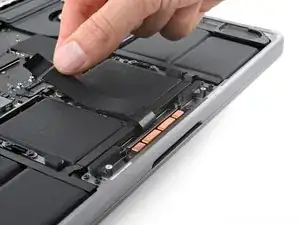
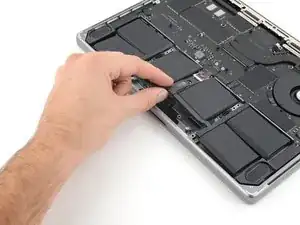
    • Remove the battery data cable.

  20. J5NOgJSPKHsv4Lda
    • Use a T5 Torx driver to remove the 3.9 mm-long 5IP Torx Plus wide-head screw securing the main battery connector.

  21. ODXXVb4NpTysWRQZ
    ODXXVb4NpTysWRQZ
    wDaoWTXaxy4CHoF5
    mxVOtZjQCRCKilFV
    • Use the flat end of your spudger to lift the main battery connector away from the battery board, disconnecting the battery.

    • Lift the connector high enough that it doesn't accidentally make contact during the repair, but no more than 45 degrees to prevent breaking it.

    • For added safety, place a non-conductive barrier, such as a piece of a playing card, between the connector and board.

  22. vntMXmqeXX3PtqAu
    vntMXmqeXX3PtqAu
    qEQOiblwZF4HP2Nv
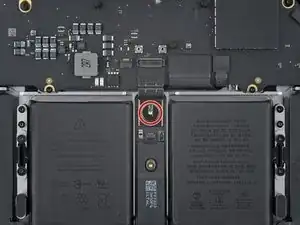
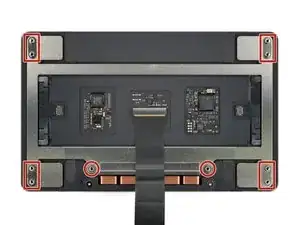
    • Use your T5 Torx driver to remove the ten 5.8 mm-long 5IP Torx Plus screws securing the trackpad.

    • During reassembly, you may need to open your MacBook to check for alignment as you tighten the screws. Adjust the trackpad so that the edges don't rub against the frame.

  23. K6TuwxPq2TbYw22J
    K6TuwxPq2TbYw22J
    3FhkirCMtdJeMeFC
    PUHcBRa1B1WxlSVx
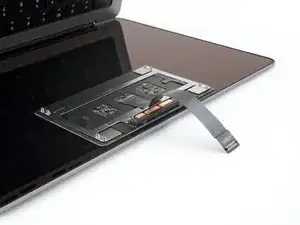
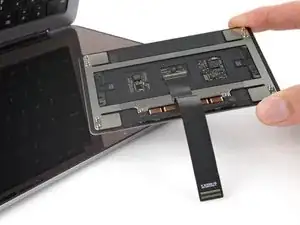
    • Slowly lift the body of your MacBook away from the screen and guide the trackpad cable through its cutout.

    • The trackpad will remain on the screen.

    • During reassembly, make sure all the screw holes align with their holes in the frame as you lower it onto the trackpad.

  24. cLG3bohEyFJwgpJJ
    cLG3bohEyFJwgpJJ
    ucCabHtIQrIl2KMM
    1SGQ4ECrwi4bp6cf
    • Remove the trackpad.

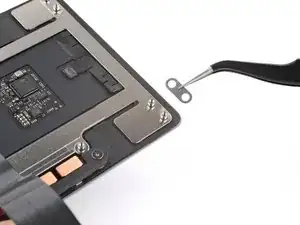
    • Make sure not to lose the six small metal washers from their screw posts on the trackpad. Without them, your trackpad won't sit flush in the frame.

  25. JVnOkOOO2eEsdJAP
    JVnOkOOO2eEsdJAP
    jCEAvcQgvVv1caO1
    • Lower the body of your MacBook flat to the screen.

    • Use your T5 Torx driver to remove the 4.1 mm-long 5IP Torx Plus screw securing the battery board.

  26. TuhT3BKteLHVBUcw
    • Check that your battery connector isn't sticking out beyond the frame, as it could break when you flip your MacBook over and lay it down.

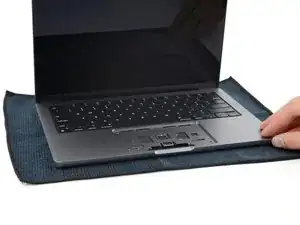
    • Place a soft cloth on your work surface.

    • Flip your MacBook over and lay it on the cloth.

    • Open the screen enough to access the trackpad recess.

  27. SBZ6D4l2j3xhbppU
    SBZ6D4l2j3xhbppU
    xxjehj22T3niNAtd
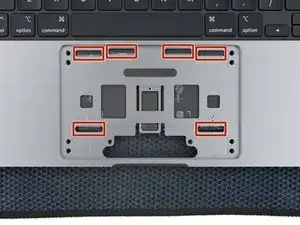
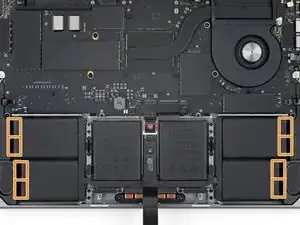
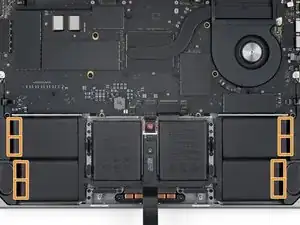
    • Your MacBook's battery is secured with 14 stretch release adhesive strips. The next five steps show how to remove them and free your battery.

    • Six strips are accessible from the trackpad recess.

    • The remaining eight strips are on the edges of the outer battery cells.

  28. XI2JtdZiXmOOHOIv
    XI2JtdZiXmOOHOIv
    u6GJZpGrRRSQrGTB
    LfGrfwaGxskuXfcO
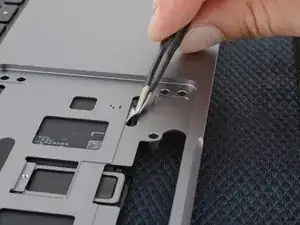
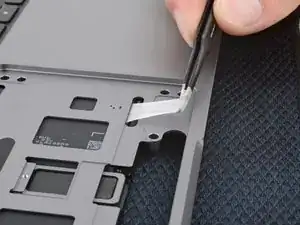
    • Use blunt nose tweezers to grip the black pull tab on one of the adhesive strips through its cutout in the frame.

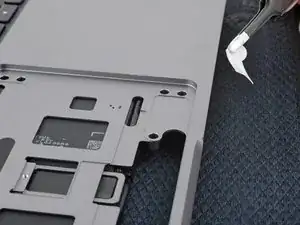
    • Grip the entire length of the strip's pull tab and pull it slowly, evenly, and at a low angle out from underneath the battery cell. Twist your tool to wrap the strip around itself as you pull.

    • Give the strip plenty of time to stretch. Avoid dragging it over the frame as you pull.

    • If you're using your fingers to remove the strip, re-grip it often to avoid it stretching unevenly and tearing.

    • Repeat for the other five strips accessible from the trackpad recess.

    • If a strip breaks off, try to retrieve it from under the battery. If you can't retrieve it, don't worry! Move on to the next step to remove the other strips, then keep reading for an alternate method to remove the stuck battery cells.

  29. l2l1QuQbrhjASTSH
    l2l1QuQbrhjASTSH
    XI2YFAoNnDshYw2r
    • Be careful as you move your MacBook—the middle battery cells might be loose. They won't fall out, but don't let them strain any cables or components.

    • Close the screen and flip over your MacBook, so the battery faces up.

    • There are two pull tabs on the outer edge of each of the four outer battery cells.

  30. GkTGqJFkom3GyLZI
    GkTGqJFkom3GyLZI
    efnCftf2ChoUcAca
    66v3vSh4fWOKOTUr
    • Don't use metal or sharp tools near the battery, and be careful not to dent or puncture it.

    • Use the tip of an opening pick to peel up an edge of one of the adhesive strip pull tabs.

    • Use blunt nose tweezers to grip the pull tab and separate it from the edge of the battery cell.

  31. CRbHwacVs5GOIgsc
    CRbHwacVs5GOIgsc
    4vAfTKSGr1OTZ6oT
    VugdEY6R26NL4KvI
    • Grip the entire length of the strip's pull tab and pull it slowly, evenly, and at a low angle out from underneath the battery cell. Twist your tool to wrap the strip around itself as you pull.

    • Give the strip plenty of time to stretch. Avoid dragging it over the speakers as you pull.

    • If you're using your fingers to remove the strip, re-grip it often to avoid it stretching unevenly and tearing.

    • Repeat the last two steps for the other seven strips.

    • If a strip breaks off, try to retrieve it from under the battery. If you can't retrieve it, read on to the next step for an alternate method to remove the battery.

  32. d4MiPir1AbEaMFJM
    d4MiPir1AbEaMFJM
    RpDX1VNGNGe3iBLl
    • If you removed all 14 stretch release adhesive strips, you can now remove the battery. If not, follow the next three steps to separate the remaining adhesive with isopropyl alcohol and an opening pick.

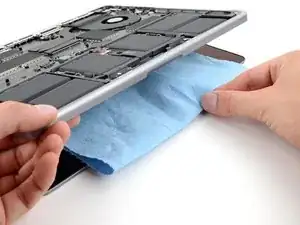
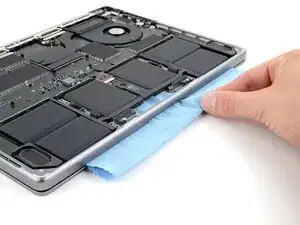
    • Open your screen and place a paper towel or absorbent cloth between it and the trackpad recess to protect the screen from any residual isopropyl alcohol.

  33. gxNnEcEp6Mke5RwL
    gxNnEcEp6Mke5RwL
    oUqy5TNQ1eVcHREY
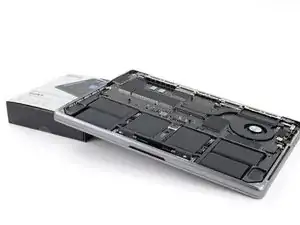
    • Prop up the edge of your MacBook where the stuck adhesive strips are.

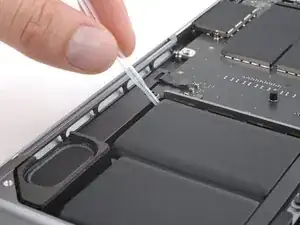
    • Use a pipette or syringe to apply a few drops of highly-concentrated isopropyl alcohol (over 90%) to the outside edges of the stuck battery cells.

    • Wait one minute for the isopropyl alcohol to flow underneath the stuck battery cells and soften the adhesive.

  34. xhcTuGD4bj5YoKlI
    xhcTuGD4bj5YoKlI
    ZDmYGZG5lcdyxERC
    Cwjv6JJjpsXCKL56
    • Don't bend or crease your battery cells. If they feel stubborn, apply a few more drops of isopropyl alcohol and try again.

    • Insert the flat end of an opening pick between the stuck battery cell and the speaker.

    • Slowly and steadily pry up the battery cell.

    • Depending on how strong your adhesive is, this may take some time. Allow up to a minute of constant pressure for the adhesive to loosen.

    • Repeat this process for any additional stuck cells.

  35. QrFlJsvdGdxaePor
    QrFlJsvdGdxaePor
    cVfu6G2pETqdxlQU
    AYTIV4RZIWWXsm2e
    • Remove the battery.

    • To install a new battery:

    • Peel any residual adhesive strips from the frame.

    • Clean the frame with isopropyl alcohol and a lint-free or microfiber cloth.

    • If your battery comes with adhesive pre-installed, remove the liners and firmly press each cell into place.

    • If your battery doesn't come with adhesive pre-installed, apply a couple strips of thin, double-sided tape to each cell and firmly press it into place.

Conclusion

To reassemble your device, follow these instructions in reverse order.

For optimal performance, calibrate your newly installed battery after completing this guide.

Take your e-waste to an R2 or e-Stewards certified recycler.

Repair didn’t go as planned? Try some basic troubleshooting, or ask our Answers community for help.
Clay Eickemeyer

Member since: 19/09/22

65196 Reputation

0 comments