Introduction
Use this guide to upgrade or replace the solid-state drive in a MacBook Air 13” Early 2014. This MacBook Air uses a proprietary storage drive connector, and is therefore not compatible with common M.2 drives without the use of an adapter.
Before you perform this repair, if at all possible, back up your existing SSD. Then, either familiarize yourself with internet recovery or create a bootable external drive so you’ll be ready to install macOS onto your new drive and migrate your data to the new SSD.
Finally, we strongly recommend installing macOS 10.13 High Sierra (or a later macOS) before replacing the original SSD from your MacBook Air. Most new SSDs require updated storage drivers not found in versions of macOS prior to High Sierra.
Tools
Parts
-
-
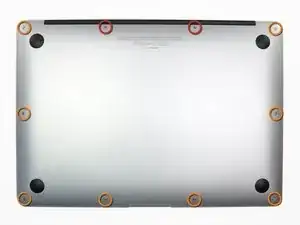
Use a P5 Pentalobe driver to remove ten screws securing the lower case, of the following lengths:
-
Two 9 mm screws
-
Eight 2.6 mm screws
-
-
-
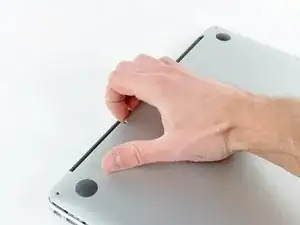
Wedge your fingers between the display and the lower case and pull upward to pop the lower case off the Air.
-
Remove the lower case and set it aside.
-
-
-
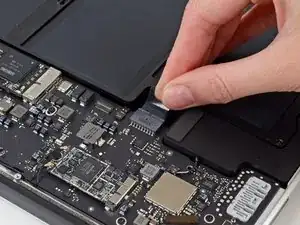
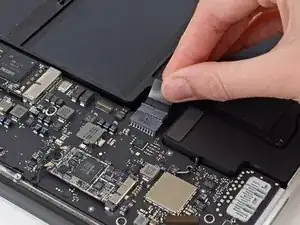
Grab the clear plastic pull tab attached to the battery connector and pull it parallel to the board toward the front edge of the Air.
-
-
-
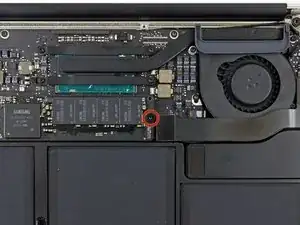
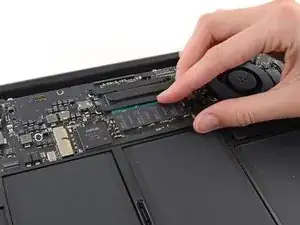
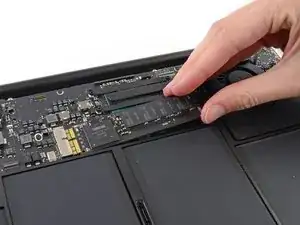
Gently lift the end of the SSD about half an inch and pull it straight out of its socket on the logic board.
-
To reassemble your device, follow these instructions in reverse order.
25 comments
Fairly straight forward once you get the right screwdrivers. Took me less than 10 minutes.
Very simple and straight forward replacement. First-party SSD replacement can be found on ebay (typically removed from parted-out MacBook Airs). Currently they're aren't any third-party parts available.
Don't forget to re-attach the battery cable before closing up the underside... not that I did or anything ;-/
phil -


Pulling the fan cable out was terrifying but you actually just pull on the cable itself. No way to get any leverage at the connector to dislodge it. Did come out easily but like I said, scared me!
allison -