Introduction
Use this guide to clean the ports on your favorite electronic device.
If your device isn't registering something being plugged into a port, like a USB flash drive, that port may be dirty and require cleaning.
The cleaning procedures for each type of port follow the same progression: cleaning with air, a brush, and finally a cotton swab with isopropyl alcohol. Although similar, the procedures do vary slightly, and you should read the steps for the type of port you're cleaning.
This guide uses tools that you might have around the house, but we also sell a Precision Cleaning Kit that includes some small brushes and picks to make your cleaning life easier.
-
-
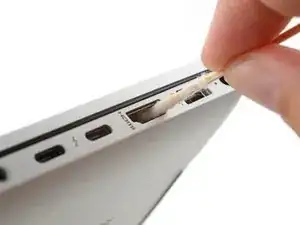
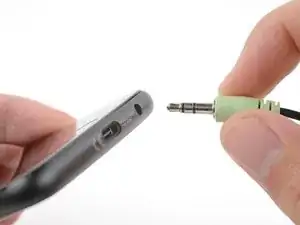
Shine a flashlight into your port and inspect it for any large blockages.
-
Follow the links below to skip to the procedure for your type of port:
-
-
-
-
-
-
-
-
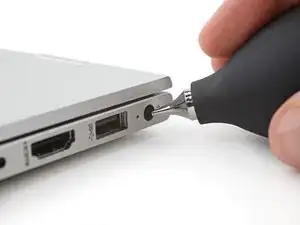
Insert the tip of a dust blower, or the nozzle of compressed air, at one corner of the port.
-
Blow a few puffs of air into the port.
-
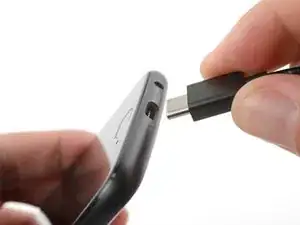
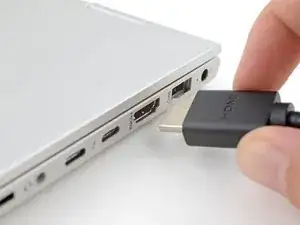
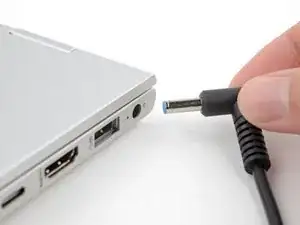
Plug in your device to check if it works and if the connector is fully seated.
-
If your device isn't working or seats properly, unplug it and repeat the blowing process.
-
If your device still doesn't work or sits properly after multiple repetitions, move to the next step.
-
-
-
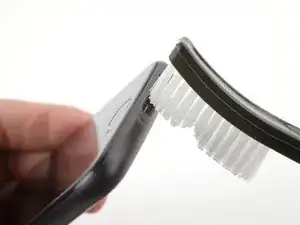
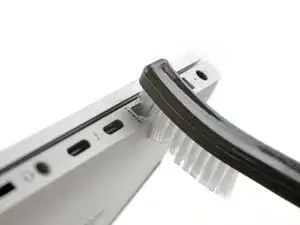
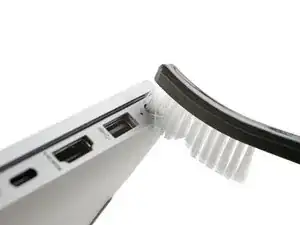
Insert the head of a brush, like a dry toothbrush, into the port, making sure the hairs surround the middle contact pad (the black tab in the middle of the port).
-
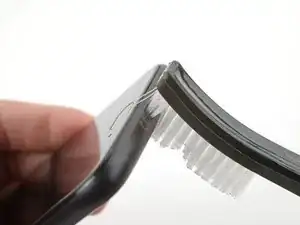
Gently turn the brush in small circles to break up any clumped debris.
-
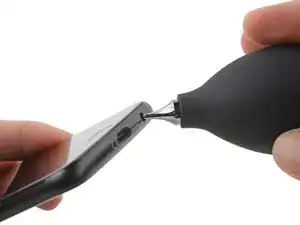
Remove the brush and use a dust blower or compressed air to blow out any debris.
-
If any debris is stuck, reinsert the brush and rotate it to let the hairs "scoop" out any debris.
-
Plug in your device and check if it's working. If it's still not working, move on to the next step.
-
-
-
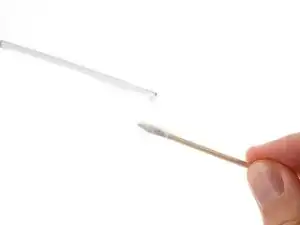
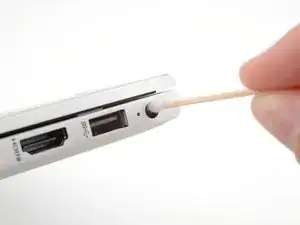
Follow this guide to make a custom cotton swab.
-
Apply a few drops of highly-concentrated isopropyl alcohol (>90%) to the cotton.
-
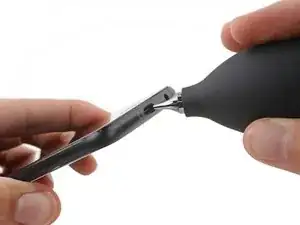
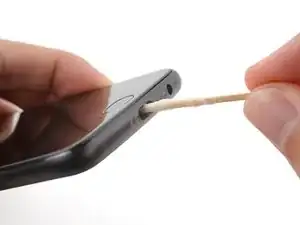
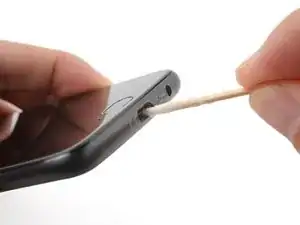
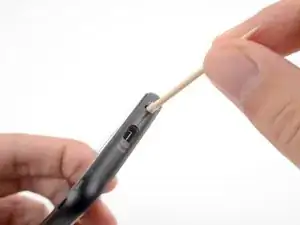
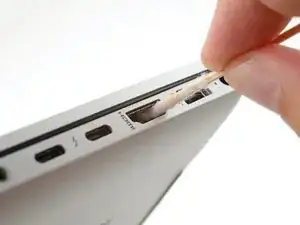
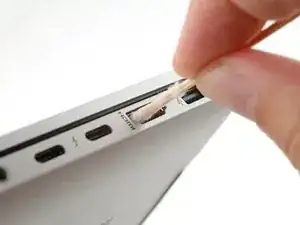
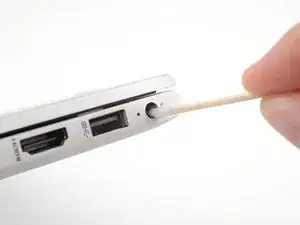
Insert your tool between the middle contact pad and the perimeter of the USB-C port itself.
-
Slide the tool along the perimeter of the port to clean it.
-
Wait a few minutes for the isopropyl alcohol to evaporate before plugging in your device and testing it.
-
-
-
Insert the tip of a dust blower, or the nozzle of compressed air, at one end of the port.
-
Blow a few puffs of air into the port.
-
Plug in your device to check if it works and if the connector is fully seated.
-
If your device isn't working or seats properly, unplug it and repeat the blowing process.
-
If your device still doesn't work or sits properly after multiple repetitions, move to the next step.
-
-
-
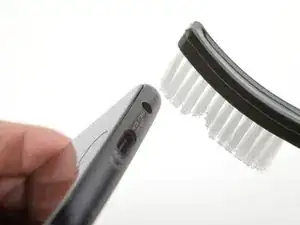
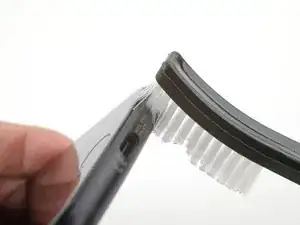
Insert the head of a brush, like a dry toothbrush, into the audio port.
-
Gently turn the brush in small circles to break up any clumped debris.
-
Remove the brush and use a dust blower or compressed air to blow out any debris.
-
If any debris is stuck, reinsert the brush and rotate it to let the hairs "scoop" out any debris.
-
Plug in your device and check if it's working. If it's still not working, move on to the next step.
-
-
-
Follow this guide to make a custom cotton swab.
-
Apply a few drops of highly-concentrated isopropyl alcohol (>90%) to the cotton.
-
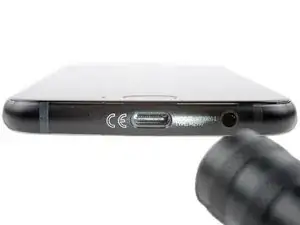
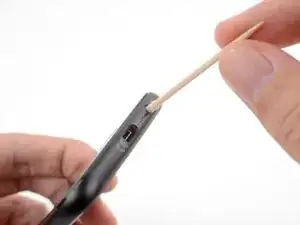
Insert your tool in the audio port.
-
Twist the tool back and forth within the port to clean it.
-
Wait a few minutes for the isopropyl alcohol to evaporate before plugging in your device and testing it.
-
-
-
Insert the tip of a dust blower, or the nozzle of compressed air, at one end of the port.
-
Blow a few puffs of air into the port.
-
Plug in your device to check if it works and if the connector is fully seated.
-
If your device isn't working or seats properly, unplug it and repeat the blowing process.
-
If your device still doesn't work or sits properly after multiple repetitions, move to the next step.
-
-
-
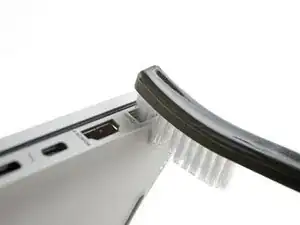
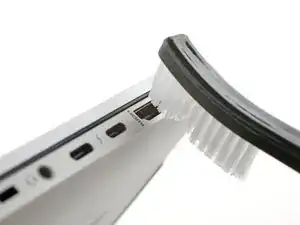
Insert the head of a brush, like a dry toothbrush, into the port.
-
Gently slide the brush back and forth to break up any clumped debris.
-
Remove the brush and use a dust blower or compressed air to blow out any debris.
-
If any debris is stuck, reinsert the brush and rotate it to let the hairs "scoop" out any debris.
-
Plug in your device and check if it's working. If it's still not working, move on to the next step.
-
-
-
Follow this guide to make a custom cotton swab.
-
Apply a few drops of highly-concentrated isopropyl alcohol (>90%) to the cotton.
-
Insert your tool in the USB-A port.
-
Slide the tool back and forth along the port to clean it.
-
Wait a few minutes for the isopropyl alcohol to evaporate before plugging in your device and testing it.
-
-
-
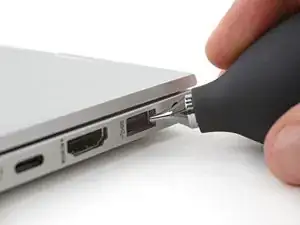
Insert the tip of a dust blower, or the nozzle of compressed air, at one end of the port.
-
Blow a few puffs of air into the port.
-
Plug in your device to check if it works and if the connector is fully seated.
-
If your device isn't working or seats properly, unplug it and repeat the blowing process.
-
If your device still doesn't work or sits properly after multiple repetitions, move to the next step.
-
-
-
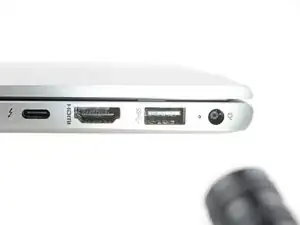
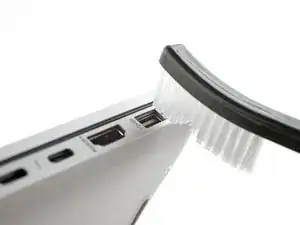
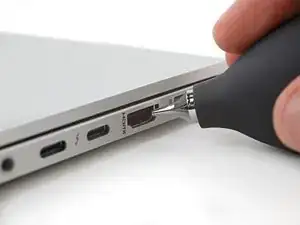
Insert the head of a brush, like a dry toothbrush, into the port, making sure the hairs surround the middle contact pad (the black tab in the middle of the HDMI port).
-
Gently turn the brush in small circles to break up any clumped debris.
-
Remove the brush and use a dust blower or compressed air to blow out any debris.
-
If any debris is stuck, reinsert the brush and rotate it to let the hairs "scoop" out any debris.
-
Plug in your device and check if it's working. If it's still not working, move on to the next step.
-
-
-
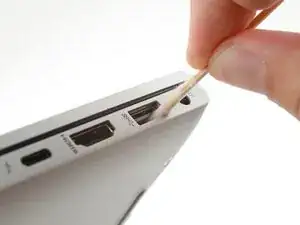
Follow this guide to make a custom cotton swab.
-
Apply a few drops of highly-concentrated isopropyl alcohol (>90%) to the cotton.
-
Insert your tool between the middle contact pad and the perimeter of the HDMI port itself.
-
Slide the tool along the perimeter of the port to clean it.
-
Wait a few minutes for the isopropyl alcohol to evaporate before plugging in your device and testing it.
-
-
-
Insert the tip of a dust blower, or the nozzle of compressed air, at one end of the port.
-
Blow a few puffs of air into the port.
-
Plug in your device to check if it works and if the connector is fully seated.
-
If your device isn't working or seats properly, unplug it and repeat the blowing process.
-
If your device still doesn't work or sits properly after multiple repetitions, move to the next step.
-
-
-
Insert the head of a brush, like a dry toothbrush, into the charging port.
-
Gently turn the brush in small circles to break up any clumped debris.
-
Remove the brush and use a dust blower or compressed air to blow out any debris.
-
If any debris is stuck, reinsert the brush and rotate it to let the hairs "scoop" out any debris.
-
Plug in your device and check if it's working. If it's still not working, move on to the next step.
-
-
-
Follow this guide to make a custom cotton swab.
-
Apply a few drops of highly-concentrated isopropyl alcohol (>90%) to the cotton.
-
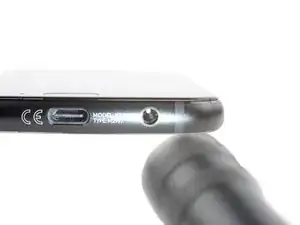
Insert your tool in the charging port.
-
Rotate the tool around the perimeter of the port to clean it.
-
Wait a few minutes for the isopropyl alcohol to evaporate before plugging in your device and testing it.
-


For other general electronics skills guides, click here.

One comment
This comes at a time where my Galaxy S9 thinks the port is broken so often I've changed to my old phone and gotten a wireless charger. Might as well give it a proper deep clean some day.