Introduction

This is a prerequisite-only guide! This guide is part of another procedure and is not meant to be used alone.

Use this guide to disconnect the battery in the Google Pixel 7.

  1. RH1hNR5DYvEMTNGX
    RH1hNR5DYvEMTNGX
    kUNSpM2wM3aEGX23
    • Allow your battery to drain below 25% before starting this repair. A charged battery may catch fire if damaged.

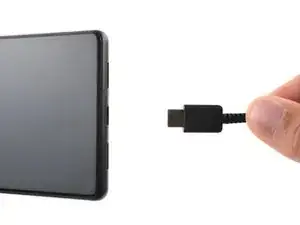
    • Fully power off your phone and unplug any cables.

    i replaced my pixel 7 screen, I noticed that my proximity sensor is no longer working, I have tried to calibrate it using 3rd part apps and it ddisnt work,i tried using developer settings to switch the proximity sensor and i also updated my android version...all these didnt work

    Ian -

  2. uWsCCoGWV5JIrUns
    uWsCCoGWV5JIrUns
    qBuyTnEhoZIp4ycS
    rCPFaRmEDnGc6YSe
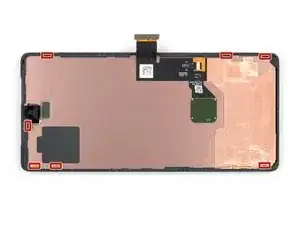
    • The screen of the Google Pixel 7 is held in place by plastic clips and adhesive.

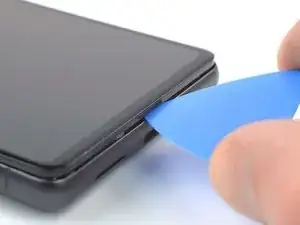
    • During the removal procedure, make sure to insert your opening picks in the right position to avoid separating the screen from its safety frame instead of the phone assembly.

    • Only insert the pick up to ~3.5 mm during the removal procedure to avoid damaging the internals and to avoid interfering with the plastic clips.

    • There are several plastic clips around the whole screen. In case your opening pick gets blocked during the screen removal procedure it means you inserted your pick too deep underneath the screen.

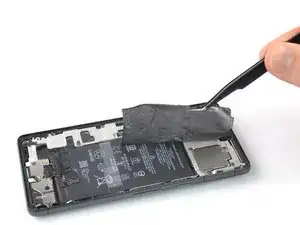
  3. uNWQn4O2iyarfTwP
    uNWQn4O2iyarfTwP
    X4Mot1WmVF3dl5H6
    hwdBtFR1G1bs6cUM
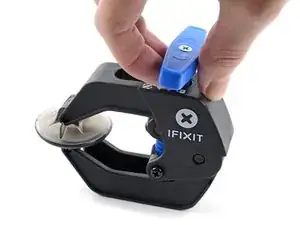
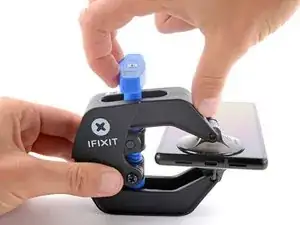
    • The next three steps demonstrate the Anti-Clamp, a tool we designed to make the opening procedure easier. If you aren't using the Anti-Clamp, skip down three steps for an alternate method.

    • For complete instructions on how to use the Anti-Clamp, check out this guide.

    • If your screen is cracked, cover it with a layer of clear packing tape to help the suction cup adhere.

    • Pull the blue handle backwards to unlock the Anti-Clamp's arms.

    • Slide the arms over either the left or right edge of your phone.

    • Position the suction cups near the bottom edge of the phone—one on the front, and one on the back.

    • Squeeze the cups together to apply suction.

    • If you find that the surface of your phone is too slippery for the Anti-Clamp to hold onto, you can use tape to create a grippier surface.

  4. C5UOdfJGyBNrPmud
    C5UOdfJGyBNrPmud
    NT1pkIvVebv5WAbQ
    5q3uaImPG2XtyBUP
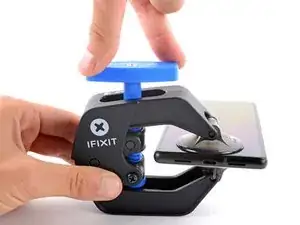
    • Pull the blue handle forward to lock the arms.

    • Turn the handle clockwise 360 degrees or until the cups start to stretch.

    • Make sure the suction cups remain aligned with each other. If they begin to slip out of alignment, loosen the suction cups slightly and realign the arms.

  5. iu5TEcPWZeWgMueB
    iu5TEcPWZeWgMueB
    iklY4LILrc5nWFlx
    mI2NZfhUYJ3QJbYH
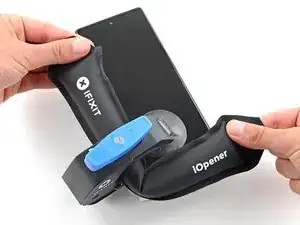
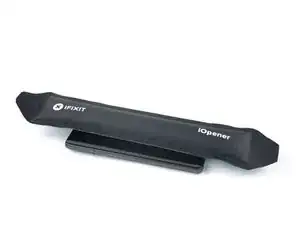
    • Heat an iOpener and thread it through the arms of the Anti-Clamp.

    • You can also use a hair dryer or heat gun—but extreme heat can damage the display and/or internal battery, so proceed with care.

    • Fold the iOpener so it lays on the bottom edge of the phone.

    • Wait one minute to give the adhesive a chance to release and present an opening gap.

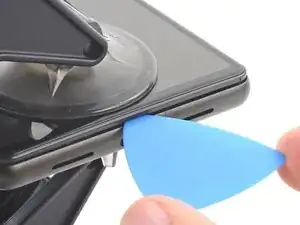
    • Insert an opening pick under the screen frame when the Anti-Clamp creates a large enough gap.

    • If the Anti-Clamp doesn't create a sufficient gap, apply more heat to the area and rotate the handle clockwise half a turn.

    • Don't crank more than a half a turn at a time, and wait one minute between turns. Let the Anti-Clamp and time do the work for you.

    • Skip the next two steps.

  6. 6cKgLNhBJSeuArNm
    • Apply a heated iOpener to the screen to loosen the adhesive underneath. Apply the iOpener for at least 3 minutes.

    • A hair dryer, heat gun, or hot plate may also be used, but be careful not to overheat the device. The edge should feel slightly too hot to the touch.

  7. CexARCSAqGYQbmha
    CexARCSAqGYQbmha
    4gF4DCWXWHNS2aGI
    gfaVVfZV1RGTbMLx
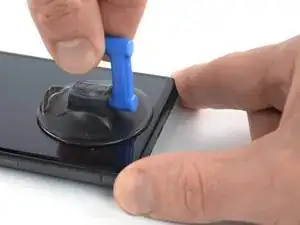
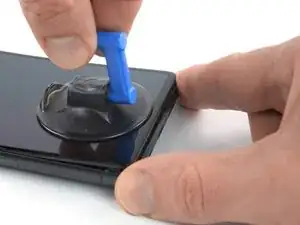
    • Once the screen is warm to the touch, apply a suction handle to the bottom edge of the screen.

    • If your display is badly cracked, covering it with a layer of clear packing tape may allow the suction cup to adhere. Alternatively, very strong tape may be used instead of the suction cup. If all else fails, you can superglue the suction cup to the broken screen.

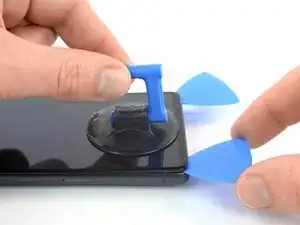
    • Lift the screen including its safety frame with the suction handle to create a small gap between the screen and the phone assembly.

    • Depending on the age of your phone, this may be difficult. If you're having trouble, apply more heat to the bottom edge and try again.

    • Insert an opening pick into the gap.

    If you're having trouble getting the first pick in, try a different hand position than what is shown. Grip the suction cup's handle with your index finger, and keep your thumb and middle finger on either side of the screen. Choose a forgiving surface underneath in case you slip. Then hold firmly and keep it stable (no need to really push down). Just be prying it open deliberately and evenly. Then take your pick and use gentle prodding, experimenting with your angle and pressure, feel around. That should be all you need to get in.

    Orin Zebest -

  8. IBUeZvgemYHWImZc
    IBUeZvgemYHWImZc
    2SO1E2gi6C2FiaZI
    • To avoid damaging your phone, don't insert your pick more than ~2.5 mm as you separate the screen adhesive. Note the following areas:

    • The screen cable is a little less than halfway up the left edge of the phone. Be very careful here to avoid tearing the cable.

    • There are many spring contacts around the perimeter of the phone. Be very careful in these areas to avoid bending the contacts.

  9. wtdv5UrUMow2CECH
    wtdv5UrUMow2CECH
    djiNoNgaVURRqAnE
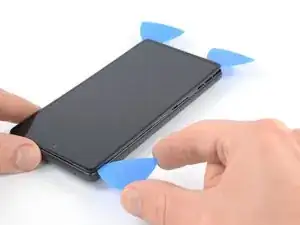
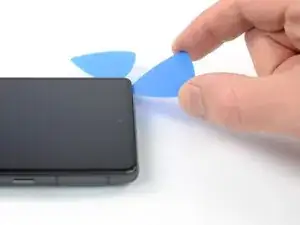
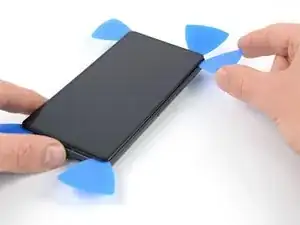
    • Slide the opening pick to the bottom right corner of the screen to slice its adhesive.

    • Leave the opening pick in place to prevent the adhesive from resealing.

  10. BvVyMHlKdFsfT4jJ
    BvVyMHlKdFsfT4jJ
    STqP6jEultQQM41x
    • Insert a second opening pick at the bottom edge and slide it to the bottom left corner of the screen to slice the adhesive.

    • Leave the opening pick in place to prevent the adhesive from resealing.

  11. 3TahkFe4ry6RCiY4
    3TahkFe4ry6RCiY4
    3JU6OqcJvHWxqoST
    6ZPHWVqkfEhNxfpF
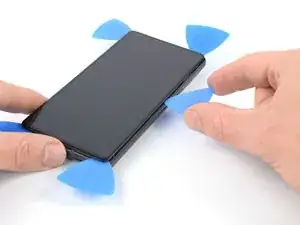
    • Insert a third opening pick underneath the bottom left corner of the screen.

    • Slide the opening pick along the left edge of the screen to slice the adhesive and to release the plastic clips.

    • Leave the opening pick in the top left corner to prevent the adhesive from resealing.

  12. RAqKHAsrl3xCRUU1
    RAqKHAsrl3xCRUU1
    snvx1NYmrDPfUDaX
    cnPPFVoxMmq3nELB
    • If the adhesive becomes hard to cut, it has most likely cooled down. Use your iOpener or heat gun for 1-2 minutes to reheat it.

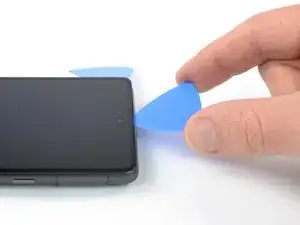
    • When you slice near the front facing camera, insert only the tip of the opening pick (~2.5 mm) to avoid damaging or smearing the camera.

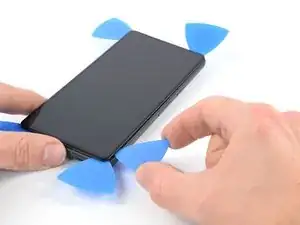
    • Insert a fourth opening pick at the top left corner of the screen.

    • Slide the opening pick along the top edge of the phone to slice the adhesive.

    • Leave the opening pick in the top right corner to prevent the adhesive from resealing.

    This is the only slice that makes me nervous. Never had a problem, but yeah... extra care because of the camera.

    Orin Zebest -

  13. PnfIw3f25Eqr1XHF
    PnfIw3f25Eqr1XHF
    KenvqZiSWYaywVKu
    TZuqyojhZfgKo23H
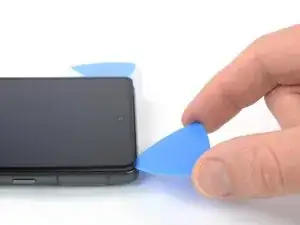
    • Insert a fifth opening pick and slide it along the right edge of the phone to slice the remaining adhesive and release the right plastic clips.

    • Do not try to remove the display all the way yet, the screen is still connected to the phone assembly by a flex cable.

  14. rhQqo5C35FvoYK3U
    rhQqo5C35FvoYK3U
    IrVMIJexBS6bDSeP
    jLlFZYjxMwL21C2X
    • Lift the right edge of the screen up and towards the left side of the device, like opening a book.

    • Don't twist the screen or move it too far away from the frame to avoid straining or damaging the flex cable.

    • Rest the screen upside down and parallel to the frame before continuing.

    The adhesive still sticking to the screen might trip you up... don't let it pull the screen in weird ways. Just pick that stuff off and the screen sits perfectly next to the phone, as pictured.

    Orin Zebest -

  15. PSmtyE4SOWOdAwOu
    PSmtyE4SOWOdAwOu
    EP6lSfkEvCqupEtr
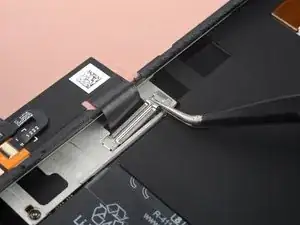
    • The display cable bracket sits tightly and requires some force to release it.

    • Insert one arm of a pair of tweezers into the opening at the upper end of the display cable bracket.

    • Push the bracket inwards and pry up to release it.

    The way this piece is wedged in there can be a difficult to imagine, so you may need to apply force at a different angle than you expect. I bent mine a few times, but just bent it back into shape with no issue.

    Orin Zebest -

    This was a pain to get out! Felt like I was going to rip the whole cable out. But it popped out eventually.

    Alex Thengvall -

  16. WKPNiJHhVHnhCorC
    WKPNiJHhVHnhCorC
    LhAcZy62xFSngm3n
    • Use a pair of tweezers to remove the display cable bracket by pulling it from underneath the midframe and in direction of the cameras.

    I forgot to replace this the first time. It's not a dealbreaker (phone works fine without it), but if you ever open your phone again you must be super-extra careful -- nothing is securing the connection.

    Orin Zebest -

  17. jRnnMxxSKtAwg2aW
    jRnnMxxSKtAwg2aW
    HaPX5khLMl4bDRNB
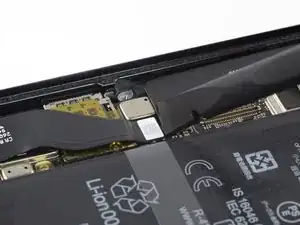
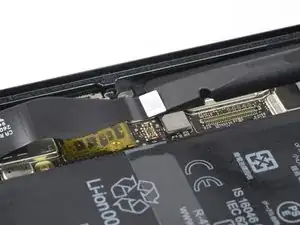
    • Use a spudger to disconnect the display flex cable by prying the connector straight up from its socket.

    • To re-attach press connectors like this one, carefully align and press down on one side until it clicks into place, then repeat on the other side. Do not press down on the middle. If the connector is misaligned, the pins can bend, causing permanent damage.

    Getting the press connector aligned properly is a very fiddly task and impossible without a light touch and several tries. My only advice is to take a break if you get frustrated. There's no 'click' or anything to help you notice that you've got it right. But when you do, it'll just... fit. And you'll probably think, "wait I did it? oh, not as hard as it sounded. just took awhile."

    Orin Zebest -

    Beware! I tried using the forceps instead of my finger and I ended up tearing into the ribbon cable. So be careful and use your finger if possible. I wouldn't use a sharp tool like I did. There are a couple Youtube videos that probably can help if you search "pixel 7 screen replacement". Sadly I didn't do that first.

    Alex Thengvall -

  18. 14imDI25DUIx1yGK
    14imDI25DUIx1yGK
    TFYpSGAObkMQVbOn
    56Lyx2AoExgaqrTE
    • Take care not to puncture or bend the battery with your tool in the following steps—a punctured or bent battery may leak dangerous chemicals or cause a fire.

    • Use a pair of tweezers to peel the black silicone pad off the battery and midframe.

  19. VDPIZdKfH3wuXY2B
    VDPIZdKfH3wuXY2B
    CXSDIgr4kqK4EUu3
    UVO1ulPhOufQgl1P
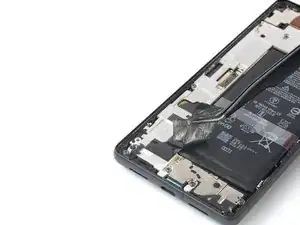
    • Use a pair of tweezers to carefully peel the upper graphite foil off the battery and midframe.

    • If you're having a hard time peeling off the foil, apply a heated iOpener to the foil for two minutes to loosen its adhesive.

  20. ViHZySMPUa3YJNXP
    ViHZySMPUa3YJNXP
    EtIxr6sbQbvRHxan
    FlDBAAhxsnmbbJaR
    • Use a pair of tweezers to carefully peel the lower graphite foil off the battery and midframe.

    • If you're having a hard time peeling off the foil, apply a heated iOpener to the foil for two minutes to loosen its adhesive.

  21. pbbhTvbOv51oPAWq
    pbbhTvbOv51oPAWq
    X5krQjmm3scjBR2E
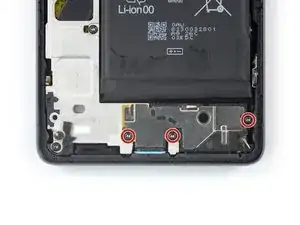
    • Use a Torx T3 screwdriver to remove the three 5.1 mm-long screws securing the loudspeaker.

  22. bNE1RIGFBYEeKcqZ
    bNE1RIGFBYEeKcqZ
    wmVWfVHUkYc2kScS
    • Use a pair of tweezers to lift the loudspeaker out of its recess and remove it.

  23. JxTWHWI1ZEti1kDp
    JxTWHWI1ZEti1kDp
    tb5RIJQqmyQZGUEN
    • Use a Torx T3 screwdriver to remove the nine 5.1 mm-long screws securing the midframe.

  24. OoT3ECRbkjHTrU5U
    OoT3ECRbkjHTrU5U
    vleQwMUKxf6UlKXs
    WwCHUMeEJDwyGDvL
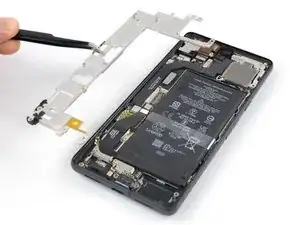
    • Use a pair of tweezers to remove the midframe.

    • During reassembly check the condition of the thermal pad. If it's damaged, remove the pad, clean the area with high-concentration (greater than 90%) isopropyl alcohol and a microfiber or lint-free cloth, and apply a new thermal pad.

  25. 6BrgM6SJIEyyahJY
    6BrgM6SJIEyyahJY
    AQMSn2QGAih3B6Cn
    • Use a spudger to disconnect the battery cable by prying the connector straight up from its socket.

Conclusion

Compare your new replacement part to the original part—you may need to transfer remaining components or remove adhesive backings from the new part before you install it.

To reassemble your device, follow these instructions in reverse order.

Repair didn’t go as planned? Try some basic troubleshooting, or ask our Google Pixel 7 answers community for help.
Dominik Schnabelrauch

Member since: 23/11/16

201162 Reputation

0 comments