2nd Armoured Division (United Kingdom)
The 2nd Armoured Division was an armoured division of the British Army, which was active during the early stages of the Second World War. The division's creation had been discussed since the beginning of 1939, with the intent to form it by breaking up the 1st Armoured Division. A lack of tanks resulted in this not happening until December 1939. After its creation, the division was deprived of forces for a short while until elements of the 1st Armoured Division were assigned to it.
| 2nd Armoured Division | |
|---|---|
 Historian Michael Chappell wrote that "a plumed knight's helmet" was chosen as the divisional sign, which was "certainly painted on vehicles and tanks, but probably never worn in uniform, as the division left the UK ... before the authorization of battle insignia."[1] | |
| Active | 1939–1941 September 1976 – December 1982 |
| Branch | |
| Type | Armour |
| Size | Second World War 10,750 men War Establishment: 340 tanks[lower-alpha 1] Actual: 102 tanks (Libya) Cold War 8,600 men 144 tanks |
| Engagements | Operation Sonnenblume |
| Commanders | |
| Notable commanders | Major-General Michael Gambier-Parry |
In early 1940, priority for equipment was given to the 1st Armoured Division and the 2nd Armoured Division was forced to make do with whatever equipment could be provided. After the Battle of France, with the threat of a German invasion (Operation Sealion) of the United Kingdom, priority for equipment shifted to the 2nd Armoured Division. While it was brought up to strength, it was planned to use the division to counter-attack the flanks of any invasion force. In August 1940, elements of the division were transported to Egypt to reinforce Middle East Command. In October, it was decided to transfer the rest of the division. Before leaving it swapped a brigade with 1st Armoured Division, reducing the division to three armoured regiments.
The division arrived in Egypt in December 1940, and in the following months was stripped to support an expeditionary force that was dispatched to Greece (Operation Lustre). The rest of the division moved to the conquered province of Cyrenaica in Italian Libya. Its tanks were worn-out, mechanically unreliable, and supplemented by captured Italian models that were equally unreliable. In March, a German-Italian counter-attack led to the destruction of the division and the ejection of most British forces from Cyrenaica. The consensus of historians is there was little the division could have done to stop this.
The division was not reformed until 1976, during the Cold War, after the 2nd Infantry Division was renamed. In case of war, the new 2nd Armoured Division, of the British Army of the Rhine, was intended to fight a delaying battle against their armoured counterparts in the Soviet Union's Red Army. In 1982, the division ceased to exist as it reverted to its infantry title.
Second World War
Background
During the Interwar period, the British Army examined the lessons learnt from the First World War. This included experimentation and development of theories of manoeuvre and armoured-warfare, as well as the creation of the short-lived Experimental Mechanized Force.[2] The long-term impact was for the Army to start to move towards mechanisation to restore battlefield mobility.[3] By the 1930s, the army had established three types of division: the infantry division, the mobile division (later called the armoured division), and the motor division. The military historian David French wrote: "The main role of the infantry ... was to break into the enemy's defensive position". This would then be exploited by the mobile division, followed by the motor divisions that would "carry out the rapid consolidation of the ground captured by the mobile divisions" therefore "transform[ing] the 'break-in' into a 'break-through'".[4]
The Mobile Division was created in October 1937.[5] French wrote that it was "'tank-heavy' ... with too few infantry and support arms. It had six cavalry light tank regiments ... three medium regiments ... two motorized infantry battalions and two artillery regiments. The mechanized cavalry were designed to reconnoitre, not to fight, and the infantry were intended to protect the tanks when they were resting and replenishing."[6] General John Burnett-Stuart, responsible for training the Mobile Division, stated the infantry were not "to be put on to a position by tanks and told to hold it, and they are not meant to fight side by side with your tanks in the forefront". French wrote this "stood outside the mainstream of official doctrine", which promoted combined-arms co-operation to win battles and placed the British armoured formations at odds with their German counterparts in the Panzerwaffe (Tank Arm). They had "concluded that tanks working on their own or merely in conjunction with infantry would never be a decisive weapon" and that "the key to success lay in combining tanks and supporting arms in the same divisional organization". According to French, this thinking predominated within the British armoured forces, until doctrine was reformed in 1942.[6]
In the 1930s, tensions built between Germany and the United Kingdom and its allies.[7] During late 1937 and 1938, German demands for the annexation of the Sudetenland in Czechoslovakia led to an international crisis. This was resolved in September by the Munich Agreement, which accepted that the Germans would annexe the Sudetenland.[8] Tension did not subside, and the British Government debated how best to prepare the Army for war. In January 1939, the Secretary of State for War Leslie Hore-Belisha proposed splitting the Mobile Division into two smaller formations but found no support for this move.[9] The issue was broached a month later and was accepted in principle by the Cabinet.[10] Shortly after, the French were informed of a preliminary timetable for the arrival of the British Expeditionary Force (BEF) in the event of war: "One Regular Armoured Division will become available about the middle of 1940, the second would not be available 'till a later date". The formation of a second division during this period was complicated by the slow pace of tank production.[11]
Formation and home service

The 2nd Armoured Division was activated on 15 December 1939, with Major-General Frederick Hotblack as the first General Officer Commanding (GOC).[12] Hotblack joined the Royal Tank Corps in 1916. By 1918 he had become the Army's expert on German tanks. During the 1930s, he had been posted to Germany where he witnessed and reported on the development of German armoured forces. Following the outbreak of the war, he was the BEF's senior advisor on armoured vehicles. [13] The division had no troops until the following month, when the 1st Light Armoured Brigade and the 22nd Heavy Armoured Brigade were transferred from the 1st Armoured Division (previously the Mobile Division).[14] On assignment to the division, the 1st Light Armoured Brigade comprised the 1st King's Dragoon Guards (KDG), 3rd The King's Own Hussars (3H) and the 4th Queen's Own Hussars (4H).[15] The 22nd Heavy Brigade consisted of the Royal Gloucestershire Hussars, and the 3rd and the 4th County of London Yeomanry (Sharpshooters).[16] The division had 77 Vickers light tanks.[17] The 2nd Support Group, which was to contain the supporting arms, was formed in February, but it was not until March that its troops were allocated: the 3rd Field Squadron, Royal Engineers; 12th Regiment Royal Horse Artillery (12RHA); the 102nd (Northumberland Hussars) Light-Anti-aircraft/Anti-tank Regiment; and two motorised infantry units: the 1st Battalion The Rangers, King's Royal Rifle Corps, and the 1st Battalion, Tower Hamlets Rifles, Rifle Brigade (The Prince Consort's Own).[18]
In early 1940, the 1st Armoured Division had priority for equipment and the 2nd Armoured Division had to make do with the remainder.[19] On 14 April, the 1st Light Armoured Brigade became the 1st Armoured Brigade, and the 22nd Heavy Armoured Brigade was renamed the 22nd Armoured Brigade.[20] Three days later, Hotblack ended his tenure as GOC of the division after an apparent stroke.[21] Major-General Justice Tilly took over on 10 May, having been an armour warfare instructor and commander of the 1st Tank Brigade before the outbreak of the war.[12][22] The division had an establishment of 340 tanks, sixteen 25-pounder field guns, and twenty-four 2-pounder anti-tank guns. By May, the division was down to 31 light tanks, all in the 1st Armoured Brigade. The 22nd Armoured Brigade had no serviceable tanks and made do with lorries. The division had two 25-pounders supplemented by four First World War-vintage 18-pounder field guns, four 4.5 in (110 mm) howitzers of similar vintage, and two anti-tank guns.[19][23][24]
The division was held in reserve in the Lincolnshire area.[26] In June, the number of serviceable tanks fluctuated between 178 and 197.[27] After the Battle of France, the division was moved to a position between Northampton, Northamptonshire, and Newmarket, Suffolk. The division was to strike into the flanks or the rear of any potential German landing in East Anglia or north of The Wash.[28] During July, production priority was given to the 2nd Armoured Division, which received new 25-pounders. By 4 August, the division had 17 new Cruiser tanks, and the number of light tanks had increased to 226.[29] During August, despite the threat of invasion, the War Office decided to reinforce Middle East Command. The 3H were transferred to Egypt to reinforce the 7th Armoured Division.[30][31][lower-alpha 2] The 3H were replaced by the 3rd Royal Tank Regiment (3rd RTR).[15] The division saw a steady increase in its tank strength and by early October it had 269 light tanks and 65 cruisers.[33]
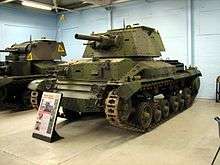
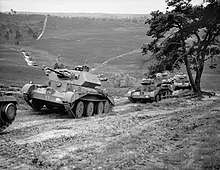
By October, the threat of a German invasion had receded. The British could now spare additional forces for the Mediterranean and Middle East theatre, which included the dispatch of the 2nd Armoured Division.[lower-alpha 3] Prior to being dispatched, the 22nd Armoured Brigade was exchanged with the 3rd Armoured Brigade (that only consisted of the 5th RTR) of the 1st Armoured Division.[35] The exchange brought the division up to 334 tanks: 159 light tanks, 157 cruiser (74 Cruiser Mk II and 83 Cruiser Mk IV), and 18 close support cruisers (armed with 3.7 in (94 mm) howitzers in place of the standard 2-pounder).[19][25] The division departed Liverpool, in late October, on Convoy W.S. 4a.[36]
Arrival in the Middle East
The convoy sailed around the Cape of Good Hope and arrived in Suez at the end of December.[37][38] The division arrived in Egypt with just three armoured regiments: 4H, 3rd RTR and the 5th RTR.[39] On arrival, Tilly reported to General Archibald Wavell (Commander-in-Chief of Middle East Command and all British land forces in the Middle East) that "the mechanical state of his two Cruiser regiments" was in question, with "the tracks ... practically worn out" and "engines [that] had already done a considerable mileage" without overhaul before being transported. The intention had been to replace the tracks once the tanks arrived in Egypt, but the spare parts in stores were found to be useless.[31][40] On 5 January, Tilly died following an air crash. He was replaced by Major-General Michael Gambier-Parry on 12 February 1941.[12][41] Gambier-Parry had served in the infantry during the First World War, transferred to the Royal Tank Corps in the 1920s, and commanded an infantry brigade in the 1930s. Prior to his appointment as GOC, he was part of a diplomatic mission to Greece.[42][43] During February, the 102nd (Northumberland Hussars) converted to solely an anti-tank unit.[18]
While the division was en route to Egypt, Wavell had begun Operation Compass, a counter-attack to the Italian invasion of Egypt. The initial objective was to destroy forward Italian forces and advance as far as Sollum if the situation allowed. By the time the division had arrived, Compass was on the verge of defeating the Italian 10th Army. By February, the offensive had captured the Italian Libyan province of Cyrenaica.[44] Further prosecution of the offensive was discussed, but it was believed the province of Tripolitania would be too hard to defend or supply and that the captured territory in Cyrenaica would provide sufficient security for Egypt. It was also felt there was little threat until at least May (by which point, additional forces would be available to reinforce the Cyrenaica garrison). British strategy had shifted to support Greece and to maintain the status-quo in the Balkans without allowing additional countries to be overran by Germany or Italy. After discussions with the Greek Government, it was decided to dispatch an expeditionary force using substantial forces under the command of Middle East Command and reducing the garrison in Cyrenaica. The transportation of this force was codename Operation Lustre.[45][46] As part of this effort, the 1st Armoured Brigade was detached from the division on 27 February, and arrived in Greece on 18 March with its 52 cruisers and 52 light tanks. The division also lost the 1st Battalion, The Rangers, the 12th RHA, and the 102nd Anti-Tank Regiment to the expeditionary force.[47][48][lower-alpha 4] These units ended up fighting in the Battle of Greece.[48]
Move to Libya
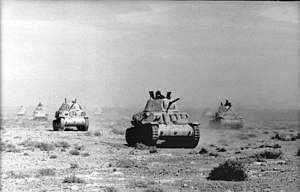
In March, the remnants of the 2nd Armoured Division left Egypt and travelled to Libya, suffering many breakdowns en route.[12][50] The 5th RTR began their journey with 58 Cruisers, but arrived with only 23.[51] Once in Libya, the division had the strength of a brigade group and consisted of the KDG, the 3H, the 5th RTR, the 6th RTR (which it had just taken command of), the 1st Tower Hamlets Rifles, and the 104th RHA.[50][52] The 6th RTR arrived without any tanks, and was equipped with captured Italian Fiat M13/40 tanks. While equipped with a good Cannone da 47/32 (a 47mm anti-tank gun), they were found to be slow, uncomfortable, and mechanically unreliable. The British tanks had exceeded their engine-lives and were also unreliable.[50][53] There was a lack of transport, workshops were understaffed and lacked spare parts, and the divisional radios lacked the equipment needed to keep them charged so they soon failed.[50][54] By the end of March, the division had 102 tanks: 3H: 26 MK VI light tanks and 12 M13s; 5th RTR: 25 Cruiser Mk IVs; 6th RTR: 36 M13; 3rd Armoured Brigade HQ: 3 MK VI light tanks.[55]
Benghazi contained the port that was closest to the frontline. However, Axis bombing had rendered it unusable for landing supplies for the 2nd Armoured Division, which therefore had to rely on overland routes back to Tobruk. A lack of transport meant the British Army had to create a series of static stockpiles to supply the forward area. This made it impossible to supply a garrison west of El Agheila, which was the most favourable position for a defensive line. It also restricted the mobility of the 2nd Armoured Division, which could not move beyond the range of their supply dumps.[56] Lieutenant-General Philip Neame, GOC Cyrenaica Command, arrived in Libya to find his command lacked staff and signal equipment for mobile operations. It also had to rely on the local telephone system (staffed by Italian operators) to communicate with subordinate formations.[50][54]
The terrain between El Agheila and Benghazi was optimal for armoured warfare, and there existed no easily defensible position for infantry. Neame believed his position was untenable without a fully equipped armoured division supported by two complete infantry divisions and adequate air support. The only other major formation available to Neame was the 9th Australian Division. It was under-equipped, under-trained, and lacked direct communication with the 2nd Armoured Division. One of the 9th Australian Division's brigades remained at Tobruk. The other two were positioned well to the north of Benghazi to hold the high ground of the Jebel Akhdar. Neame was ordered to give ground if attacked, as the conservation of his force was more important. The 2nd Armoured Division had the conflicting objectives of avoiding tank losses while being ready to operate against the flanks of any Axis armoured force. The 3rd Armoured Brigade was based south-east of Mersa Brega, where the Support Group was located. Once operations got underway, Neame also predicted the 2nd Armoured Division's tank numbers would rapidly dwindle due to breakdowns.[57][58]
Axis offensive
March

Italy had responded to Compass by redeploying their 5th Army from the border with French Tunisia towards Cyrenaica, and by dispatching the 132nd Armoured Division Ariete and the 102nd Motorised DivisionTrento.[59][60] In addition, Germany had dispatched the Afrika Korps (the 5th Light and 15th Panzer Divisions) under the command of Generalleutnant Erwin Rommel. At the end of March, the 5th Light Division was on the border of Cyrenaica with 25 Panzer I, 45 Panzer II, 60 Panzer III and 17 Panzer IV tanks. The Ariete had around 46 M13/40s in the forward area.[61][62] The British had underestimated the scope of Axis reinforcements to Libya, believing they would not have four divisions available until the end of May, and then only two would be used extensively due to the expected strain on the supply line. British Royal Air Force (RAF) aerial reconnaissance had observed Axis troop movements towards Cyrenaica, and on 25 February spotted German Schwerer Panzerspähwagen (eight-wheeler armoured cars). These armoured cars were superior in both speed and armament to the British who averted contact to avoid casualties.[63] Continued reconnaissance flights showed further troop movements and preparations closing in on El Agheila.[64]
The forward area was patrolled by a single platoon from the 1st Tower Hamlet Rifles and elements of the KDG. On 23 March, the division had its first action with the enemy. A patrol of two armoured cars from the KDG, supported by a single anti-tank gun attached from the 9th Australian Division, spotted and engaged their German reconnaissance counterparts near El Agheila. The Axis force withdrew after the Australians claimed three vehicles knocked out. The following day, a platoon from the 1st Tower Hamlet Rifles moved forward to ensure that the colonial fort near El Agheila was still unoccupied, before an intended move to take up an ambush position to the west of the town. Nearing the fort, they found it occupied and came under fire. Shortly afterwards, German armoured cars moved forward. A brief clash occurred that resulted in one German armoured car being knocked out, and an Australian gun crew suffering casualties. After this brief action, the British screening force withdrew to Mersa Brega ceding El Agheila to the Axis. At least one, and maybe two, German tanks were subsequently lost striking mines in this area (potentially left over Italian ones, which had not been cleared by the British).[64][65]
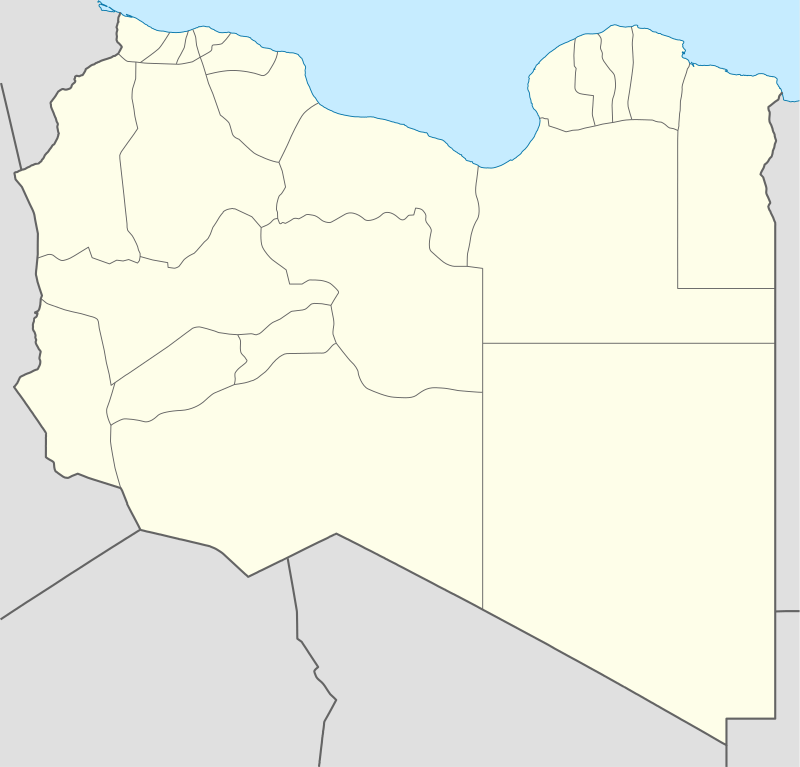
4 – Msus; 5 – Mechili; 6 – Derna
On 31 March, the Axis forces renewed their attack. After dawn, the first clash of the day occurred with the 5th RTR. Sources either describe one clash from the British or German perspective, or two separate events. The 5th Light Division reported engaging up to five British tanks, in two inconclusive engagements with no losses on either side. The 5th RTR reported a patrol of four tanks observing the Axis advance; they then engaged resulting in one British tank damaged, and three Italian M13s potentially destroyed.[66][67] By 09:00, the 3rd Armoured Brigade started to withdraw following their prearranged plans.[68] After 10:00, the Germans moved forward towards the main position held by the Support Group at Mersa Brega. Skirmishing took place between the outposts held by the Tower Hamlet Rifles and the Germans, before the forward troops fell back to the main position. During the day, the fighting increased with both sides calling upon artillery to bombard each other's positions.[69]
A Luftwaffe attack by Junkers Ju 87 (Stuka) dive bombers was also conducted. The 2nd Armoured Division's AA gunners reported two planes shot down, and the Germans recorded a friendly fire incident with one bomber attacking German tanks. During this period, the 2nd Support Group reported having repulsed two attacks and driving off an advance by German armoured cars. The Germans recorded their own success in suppressing the British positions, destroying numerous vehicles that were within range of their guns and at least one tank of the 5th RTR. A request for the 3rd Armoured Brigade to be deployed to assist was denied. Gambier-Perry reported there was "insufficient time to get them into action from their present position before dark".[69][70] After 18:00, a heavy German barrage was fired and two attacks were launched. The first was repulsed, while the second managed to make gains in the Tower Hamlet position. A counter-attack was launched by a scout platoon that restored the position with the loss of eight universal carriers. After dark, the Support Group withdrew. By the next morning, they had moved 30 miles (48 kilometres) to Agedabia. Under the cover of dark, the Germans carefully advanced and captured Mersa Brega without incident the next morning. The fighting had cost the division at least 59 men.[70][71]
April

During 1 April, the 3rd Armoured Brigade continued to withdraw but lost more tanks to mechanical breakdowns.[68] The Germans caught up with the Support Group at first light on 2 April. At 10:30, an attack was launched that included infantry and up to 50 tanks. At the same time, the Support Group was given the order to withdraw. A scout platoon attempted to conduct a rearguard action to allow the rest of the Tower Hamlet Rifles to get away and was lost in the process. While retreating, B Company was outflanked by eight German tanks and forced to surrender. The Support Group withdrew 30 miles (48 kilometres) to the north and took up new positions.[72] Out on the desert flank, the 3rd Armoured Brigade was still withdrawing, at 7 mph (11 km/h) to match the slowest vehicles that were towing artillery. For most of the day, their movements were shadowed by armoured vehicles they were unable to identify. During the afternoon, the withdrawal was further slowed by breakdowns, conflicting orders, as well as the need to rest and refuel allowing the nearby armoured vehicles to gain ground. Two troops from the 5th RTR were ordered to conduct a rearguard action and took hull-down positions.[73]
The 5th RTR decided the shadowing tanks were Italian (they were German). The Axis tanks advanced in arrowhead formation straight at the British position. When the range was between 900–1,500 yards (820–1,370 metres), both sides opened fire. The 5th RTR suffered five tank losses and 24 casualties, claiming at least eight tanks in return.[74] The historian Thomas Jentz wrote that German records show only three German tanks were destroyed, "along with an unrecorded number damaged".[75] The remaining British tanks withdrew to friendly positions farther behind and then the regiment regrouped 2 miles (3.2 kilometres) back. The brigade resumed its retreat, with no German vehicles following.[76] During the day, there were contradictory orders, sometimes delayed, from Gambier-Perry, Neame, and Wavell to the division; how and should it conduct its withdrawal, if it was capable of blocking the coastal road, and if the division should keep together or split its forces. The discussions were hampered by ignorance of events, and notably included Neame informing Gambier-Perry that the 3rd Armoured Brigade was not to be committed en masse without his permission.[77][78]
By the morning of 3 April, the 3rd Armoured Brigade had reached Antelat, and had been located by German aerial reconnaissance.[79][80] Unknown to the division, the bulk of the 5th Light Division had halted around Bir el Ageradt as it focused on moving supplies forward.[81] However, German and Italian detachments were ordered to probe around the southern flank of the 2nd Armoured Division, including a reconnoitre towards Msus.[79] During the early afternoon, the movements of the 3H and the 6th RTR caused alarm and confusion within the 5th RTR, which at first had believed them to be German.[82] The RAF spotted Axis forces approaching Msus, site of the main divisional supply dump. The 3rd Armoured Brigade, along with some elements of the Support Group, were ordered to move to Msus to deal with the hostile force. However, the division was crippled by a breakdown in communication, the result of late, missed, and conflicting orders. None of the division arrived at Msus during the day, and it was established late in the afternoon that the RAF had mistakenly identified friendly vehicles in the area.[83] By the end of the day, the 3rd Armoured Brigade had been reduced to 18 light tanks, 26 Italian tanks, and 12 cruisers.[82]
On 4 April, the Axis advance resumed with the ultimate objective of Tobruk. Benghazi was liberated by Axis forces at dawn, having been abandoned by the 2nd Armoured Division and other Allied forces.[84] The only clash during the day occurred when artillery fire, from the divisional Support Group, halted German reconnaissance forces near Charruba.[85] At midday, Lieutenant-General Richard O'Connor (GOC British Troops in Egypt) arrived at the front and held a meeting with senior commanders in Cyrenaica, including Gambier-Perry. Gambier-Perry was of the opinion that the Axis forces would attempt no further advance now that they had captured Benghazi.[50][86] However, the decision was made to withdraw from the Jebel Achdar, and the 2nd Armoured Division would concentrate at Mechili to protect the withdrawal of the Australian infantry. The recently arrived 3rd Indian Motor Brigade would secure Mechili, an old Italian stone and mud colonial fort ringed by trenches, to ensure it was in Allied hands when the division arrived.[87] The division spent the day withdrawing, again impeded by communication failures and tank losses through breakdowns. A supply convoy for the division was attacked by 18 Axis aircraft and destroyed, including the loss of 1,600 imperial gallons (7,300 l) of fuel.[82][88] By the end of the day, the 5th RTR had nine cruisers left and the 6th RTR nine M13s.[88] The following day, alarmist reports suggested Axis armoured forces had passed Msus. The KDG, and other Allied units, verified there were no Axis forces near Msus. The tank sightings turned out to be the 2nd Armoured Division. By the end of the day, the nearest Axis unit was 20 miles (32 kilometres) from Msus.[89]
General withdrawal
At first light on 6 April, the KDG reported large forces moving to the east of Msus, which were also reported by RAF reconnaissance flights.[90][91] This was part of the Axis move to concentrate on Mechili, before advancing to cut the coastal road, encircle Allied forces, and retake Tobruk.[92] The 3rd Armoured Brigade started the day with eight cruisers, 14 light tanks, and two M13s. These figures exclude the 6th RTR, who had abandoned all of their M13s due to mechanical breakdowns and fuel shortages.[92] Brigadier Edward Vaughan's 3rd Indian Motor Brigade was attached to the division during the day, most of which was at Mechili.[91][93][lower-alpha 5]
Around 09:00, two Axis field guns opened fire on the fort at Mechili. Two hours later, the 11th Prince Albert Victor's Own Cavalry (Frontier Force) (11th PAVO) captured 21 prisoners after they ventured towards Mechili. Further prisoners were taken around the perimeter during the day, including one who had been directing artillery fire.[95] Neame, unaware of these events, set off into the desert to locate Gambier-Parry to deliver new instructions. At the same time, the attack on the fort prompted O'Connor to order a general withdrawal of all Allied forces towards Gazala via Derna.[91][96]
What followed was a series of confusing and conflicting orders that fragmented the division and omitted the 3rd Indian Motor Brigade.[97] At first the division moved east towards Mechili. Following the new instructions, the Support Group moved north towards the coastal road to withdraw towards Gazala via Derna. The divisional headquarters, including Gambier-Parry and a battery of artillery, continued towards Mechili. The 3rd Armoured Brigade turned north for Maraura due to a lack of fuel, but found little petrol there. The brigade moved towards Derna via Giovanni Berta, as the 2nd Lancers (Gardner's Horse) (2nd Lancers) escorted a fuel convoy from Mechili towards where they expected the division to be.[91][98] The Axis advance through the desert continued. In the early afternoon, an 18th King Edward's Own Cavalry (18th Cavalry) patrol from El Adem, moved to assist RAF personnel at Acroma, near Tobruk and captured 18 Italians, the most advanced Axis force.[99] By 17:00, more Axis troops had reached Mechili but not enough to attack; one was expected the next day. Towards dusk, a German officer entered the British perimeter to demand the garrison's surrender and was refused.[100] German troops briefly managed to block some desert tracks near Derna before moving to take up positions near the main coastal road east of the town. German patrols intercepted and disrupted some Allied convoys, but the route east remained open until the following day.[101]
During the early hours of 7 April, Brigadier Reginald Rimington, GOC 3rd Armoured Brigade, was mortally wounded and captured following his attempt to drive to Derna via an inland desert track. By dawn, the 2nd Support Group and the 3rd Armoured Brigade were stretched out, largely stuck in traffic west of Derna and as far back as Slonta (north of Mechili). The Tower Hamlet Rifles were positioned guarding the western end of the Giovanni Berta pass, near Derna. Gambier-Perry and the 3rd Indian Motor Brigade had been surrounded at Mechili.[102] Axis armoured cars had penetrated as far as Timimi (near Gazala) and ambushed some retreating Australian forces. They were repulsed following the fortunate appearance of a 5th RTR cruiser tank that had been separated from the rest of the regiment.[103] At 10:00, after elements of the division had passed through Derna, a squadron of the KDG were detached to guard the Derna airfield (6 miles (9.7 kilometres) south of the town) to help keep the inland road open. Elements of the Tower Hamlet Rifles were nearby. By 14:30, the 5th RTR, now down to four tanks due to mechanical breakdowns, was the last of the divisional tank units to arrive near the airfield; they formed a rearguard. During the early afternoon, the KDG were engaged in a prolonged fight with the vanguard of the Axis forces. Around 15:00, the KDG and some infantry were ordered to withdraw and inadvertently isolated other parts of the rearguard, including the 5th RTR.[104][105]
Lieutenant-Colonel Henry Drew, commander of the 5th RTR, led the rearguard of his four tanks, elements of the Tower Hamlet Rifles, some anti-tank guns, and elements of the 7th Armoured Division that had been moved up (A Company, 1st Battalion, King's Royal Rifle Corps; and J Battery, 3rd Royal Horse Artillery).[104][105][106] Around 16:00, German forces at the airfield moved to secure the road and attacked towards Drew's forces. Within thirty minutes, two attacks had been repulsed, with up to eight armoured cars claimed to have been knocked out along with several trucks.[104][107] At 17:15, Drew tried to bypass the airfield with his force covered by the remaining tanks. As the four tanks advanced towards the German positions, fifty other vehicles containing the rearguard (including some Australian forces) moved off. While some vehicles were knocked out, the tanks were able to keep the German forces busy enough to allow the rest to move past the area after which they dispersed; the four tanks were lost.[108] Barton Maughan, author of the Australian official history for this period of the fighting, wrote "by coincidence ... the 5th Royal Tanks ... [were] where they were most needed and could be most effectively employed that day".[108] The British official history recorded "the action cleared the road also for any troops that remained in Derna" as well as allowing the force to break away.[104]
Surrender
At Mechili, on 7 April, the Germans continued to build up their forces surrounding the division's position. At dawn, elements of the 3rd Indian Motor Brigade, supported by a battery of guns, launched a minor and unsuccessful raid on the Axis positions. It resulted in the loss of two guns, along with one man killed and another wounded. At 11:00, Axis guns opened fire from a nearby ridge. A small detachment of Indian troops attempted to silence this position, but were unable to get close enough to attack. The shelling continued, but inflicted few casualties. A Germans envoy again demanded the garrison surrender, but was rebuffed by Gambier-Parry as he believed it was a bluff conceal the weakened German position.[109][110] In the afternoon, Italian forces launched a minor attack, but were repulsed with several men and two guns captured. Axis forces subsequently bombarded the division's positions for thirty minutes. At some point during the day, contemporary sources differ on times, 'A' Squadron, 18th Cavalry entered the Mechili perimeter having skirmished with Axis armoured cars en route.[110] In the evening, a second German officer approached the division to demand surrender and was also refused by Gambier-Perry.[109][110] This refusal was followed by an artillery bombardment, machine-gun fire, and some skirmishing between patrols outside the main positions. Previously out of contact, at around 22:00, Gambier-Perry re-established communication with Cyrenaica Command. He was informed that the rest of his division would not be joining him nor any other reinforcements, and was ordered to break-out at first light and head for El Adem.[111]
The break-out was to be led by one squadron of the 18th Cavalry along with a single cruiser tank, which belonged to the divisional headquarters. This vanguard was to attack east towards the Axis defensive positions before dawn, to negate their anti-tank gun defensive capability. This eastward move, towards the strongest Axis positions, would be followed by a column formed from the brigade and divisional headquarters. This, in turn, would be followed by engineers, and then all other remaining personnel. The 11th PAVO would provide flank protection, and the 2nd Lancers would form the rearguard of the column. The anti-tank guns were spread out among the column's various units. It was hoped this attack would break through the position and provide a direct retreat route, avoiding the need to drive deeper into the desert, on a meandering route and through difficult terrain, to bypass Axis forces.[112] Maughan wrote, "If the original plan had been adhered to, if it had been boldly executed, a great measure of success might have been achieved. But the operation miscarried badly".[113]
The tank did not arrive on time, and the attack was delayed to allow it to move up to the start line resulting in the loss of the cover of dark. Despite this, 24 vehicles of the 18th Cavalry achieved surprised charging an Italian battery of 12 guns. The Indians dismounted and attacked at bayonet point, scattering the battery's personnel for the loss of at least two dead and 15 wounded. With their mission achieved, they remounted their vehicles and proceeded with the escape plan. Instead of following up this move, the rest of the escape column awaited the cruiser to advance. The 11th PAVO then attacked and a large portion of their force broke through the Axis defensive positions, followed by the 3rd Indian Motor Brigade headquarters. The main body followed the cruiser, which moved towards the gun battery previously silenced by the 18th Cavalry. The Italians, having recovered from the shock of the attack, had returned to their guns. They engaged and destroyed the tank, resulting in the death of the entire crew. Now alert to the British attack, Axis guns from around the Mechili perimeter opened fire. The artillery and heavy machine gun fire hindered the ability of the division's non-armoured vehicles to attempt a break-out. This was followed by an attack by Axis infantry and German tanks. Two Australian anti-tank guns, part of the rearguard, opened fire in a fierce battle with the German tanks, but were unable to stop their attack; the majority of the crews were killed or wounded.[109][114]
Vaughan, who had broken out, returned towards Mechili to aid the extradition of the 2nd Lancers. There was discussion of a break-out to the south or the west, however, Gambier-Perry made the decision to surrender to spare the men in the non-armoured vehicles from suffering unnecessary casualties. His surrender was not immediately known to all forces still in the Mechili perimeter due to a sandstorm. However, by 08:00 all fighting had ceased. Elements of the garrison refused to capitulate, in particular 'M' battery 3rd RHA and portions of the 2nd Lancers who, with non-armoured vehicles, charged the Axis positions and pushed through them without a fight. Eventually, most of these troops were able to make it back to Allied lines at Tobruk, some taking prisoners en route. Those who did not attempt to escape were captured along with Gambier-Perry and Vaughan. In total, around 3,000 prisoners were taken.[109][115]
The remnants of 6th RTR, 'C' Squadron, which had failed to reach Derna before it was taken, moved south into the desert to avoid Axis forces. They continued to move east, before meeting British reconnaissance forces near El Adem on 10 April. They had been reduced to a force of four trucks. From there, they were escorted into Tobruk, reaching the port an hour before midnight.[116] On 10 May 1941, the 2nd Armoured Division was officially disbanded.[12]
Assessment
Maughan wrote, "at what great risk and cost had these tanks been shipped across the seas from England to the Middle East! Churchill's courage, energy and determination in sending munitions to Wavell had been frustrated because others failed to ensure that the equipment sent was at least battle-worthy."[116] A contemporary after action report, by surviving senior officers from the division, noted "this division had not, in fact, had an opportunity for adequate training as a team. It was a collection of units, three of which had only joined shortly before the action, rather than a trained formation. The breakdown in control and administration was largely due to this fact".[117] Gambier-Parry was described as "a conventional and slow minded soldier who couldn't cope with the unexpected". David French described this critique as harsh; the divisional commander "was not a cavalryman" and had transferred from the infantry to the Royal Tank Corps.[118] French looked at "the ineptitude of [the division's] undertrained staff", as well as a lack of logistical support: "[T]he disaster that overtook [the division] was in part caused by the fact that it had no railhead and could not be provided with sufficient motor transport to enable it to build up a sufficient reserve of supplies some 350 miles (560 km) from the nearest base."[119]
The field marshal and historian Michael Carver wrote "a combination of long delays in communications, resulting in misunderstandings and changes in orders, and a general breakdown of the logistical organization within [the division], led to a collapse of any effective resistance".[77] In reviewing the defeat, including the loss of the division, Carver wrote it "must be attributed to failure to face realities at every level. The general state of the force, in terms of training, professional competence, logistical supply and serviceability of equipment, meant that it was no match for its opponent".[120] The general and historian David Fraser wrote, once "the Germans chose to drive across the chord of the Cyrenaican arc there was little to stop them", as the 2nd Armoured Division "had little fighting capacity left as a coherent formation of all arms" following the extensive breakdown of equipment. Had it been able to fight, Fraser criticised a chain of command that would have hindered its ability; the 3rd Armoured Brigade "was subjected to the orders of ... Gambier-Parry; ... Neame; ... Wavell" and O'Connor.[121]
The historian Thomas Jentz argues that, considering the mechanical state of their tanks, the 2nd Armoured Division "didn't have anything to lose in conducting ambush counter-attacks" against their Axis opponents "as recommended in their tactical manual. At no time [was the division] a threat or a hindrance to the advancing German-Italian forces" largely as a result of how they were "tactically handled".[75] Jentz lauded the courage of the tank crews, but criticised their inflexible attitude towards combat and especially manoeuvre, which required permission from the next level in the chain of command to move even one tank. Jentz argued that this lack of flexibility, mixed with a lack of alternative firing positions, explained the rapid tank losses that occurred when the division did engage their opponents. Jentz also criticised the Germans, who showed an equal lack of flexibility against their own doctrine. This resulted in the two sides lining up to fire at one another rather than manoeuvring. The lack of understanding on the Germans' part about the intention of the 2nd Armoured Division resulted in the 5th Light Division being "decimated by mechanical breakdowns" due to "unnecessarily rushing through the desert", a move that resulted in 83 tanks having to be sent to workshops.[122]
Cold War
Background
At the end of the Second World War, the United Kingdom was allocated an occupation zone in northwest Germany. It formed the British Army of the Rhine (BAOR) to administer its occupation forces. Following the creation of West Germany, the BAOR ceased being an occupation force and became part of the UK's contribution to the defence of Western Europe from the Soviet Union.[123][124] This role was reaffirmed at the 1954 London and Paris Conferences, with the promise to commit four divisions to the defence of Europe.[125] While the BAOR fluctuated in size and the number of divisions, it was founded with and maintained the 2nd Infantry Division throughout this period.[123] By the 1960s, the BAOR had been reduced to three divisions. The division's brigades had adopted a square organisation; each consisted of two armoured battalions and two mechanised infantry battalions.[126]

By the 1970s, the UK was in the position of having to reconcile decreasing resources with its commitments and the increased threat of the Soviet Union.[129] In 1974, following the general election, Roy Mason became Secretary of State. He authored the Mason Review, a Government White paper outlining the new defence policy. It reaffirmed the Soviet Union as the primary threat to British national security and the need to concentrate its forces in Western Europe.[130] Mason argued for proposed changes that would "maintain as far as possible the present combat capability of the Army in Europe ... while reducing the overall number of men".[131] This would be achieved by disbanding headquarter units, including the elimination of "the brigade level of command" with battalions being "commanded directly by smaller-sized divisional headquarters". The overall aim was to have "fewer formation headquarters overall, and fewer but larger units".[132] These changes were to maintain the BAOR's ability to wage "a mobile and intense armoured battle" against invading Soviet forces.[133]
Historian David Isby wrote that Mason's reforms were promised "with an alleged 25 percent increase in combat power".[129] This increase was to be brought about by more efficient use of manpower, streamlining the logistical elements of the division and improving the ratio of weapons and men.[134] Historian Marc Donald DeVore argued the politically forced change coincided with BAOR doctrinal changes that had started in the 1960s. They were subsequently pioneered by the 1st Armoured Division in the early 1970s: to fight a mobile defensive battle by defending key attack routes that Soviet armoured forces would more than likely take, and then draw them into killing areas where they would suffer disproportionate losses at the hands of anti-tank guided missile equipped infantry and tanks in hull-down defensive positions. The British division would keep on moving, fighting this aggressive delaying battle from the East German border.[135] The restructure saw the BAOR increase to four divisions, each with two armoured regiments and three mechanised battalions.[129] It was believed that this attritional battle, using four divisions, would allow the BAOR to resist a Soviet advance and buy enough time for one of several contingencies: a diplomatic solution to be achieved; reinforcements to arrive to allow further conventional warfare; or a threat made, warning of the use of tactical nuclear weapons.[136] On 1 September 1976, as part of these reforms, the 2nd Division was re-designated as the 2nd Armoured Division.[137]
History
The 2nd Armoured Division was the first of the four BAOR divisions to be reorganised. After the process was completed, it was 8,600 men strong, and equipped with 132 Chieftain tanks (with 12 additional tanks in reserve). In a time of war, the division would be reinforced to a wartime strength of 14,000 men.[138] Divisional headquarters was based in Lübbecke, and its signal regiment was in Bünde, Germany.[127][139] The division consisted of an armoured reconnaissance regiment (two squadrons equipped with FV101 Scorpions, and a third squadron equipped with FV107 Scimitars); two armoured regiments each with 66 tanks spread over four squadrons; three mechanised infantry battalions, each with four rifle companies that were carried in FV432 armoured personnel carriers. The pre-reform organisation included pioneer and reconnaissance forces integrated within each infantry battalion. Now all reconnaissance forces were concentrated in the reconnaissance regiment, and all pioneers were allocated to the divisional engineer regiment. The division's artillery group included a close support regiment equipped with the Abbot self-propelled artillery system and Blowpipe missiles, a man-portable air-defence system; a general support regiment of self-propelled M109 howitzers; and an anti-tank battery equipped with Swingfire anti-tank missiles. Other divisional assets included a field ambulance unit, a provost company, a transport regiment, an ordnance company, field workshop battalions, and an aviation regiment of scout helicopters.[138] The actual units that comprised the division were not fixed. The British Army rotated units through the BAOR. For example, infantry battalions would generally serve a four-year tour with the army before being rotated to another theatre; armoured units could serve up to eight years.[140] Elements of the division could also be rotated elsewhere from Germany while remaining part of the division. For example, the 2nd Armoured Division Engineer Regiment was deployed to Northern Ireland in December 1979.[141]
With the removal of the brigade level, the division was ideally able to form up to five battlegroups each based around the headquarters of the armoured regiment or infantry battalions. These groups were to be formed for a specific task and allocated the required forces needed. The reforms envisioned that the divisional commander would oversee these battlegroups, but early training found this to be impractical. To compensate, the divisional headquarters was increased to 750 men (war time strength) including two brigadiers, who would each command a flexible task force that would be formed by the GOC.[142] The 2nd Armoured Division's task forces were Task Force Charlie and Task Force Delta. The task forces would allow the GOC to tailor their forces to meet unforeseen events and better execute the killing area doctrine.[143] These task forces were not a reintroduction of a brigade command structure, and they had no logistical responsibilities. Structuring the division in this manner allowed the division to be reduced by 700 men.[142] The historian David Stone commented the system was "designed to allow the commander maximum flexibility and take precise account of the operational or tactical task to be achieved."[144]
In November 1976, the BAOR held Exercise Spearpoint 76. It was designed to test the reorganised 2nd Armoured Division, and included troops from Denmark and the United States.[145] Norman Dodd, a retired British Army officer who attended the exercise and reviewed what took place, wrote: "Exercise Spearpoint proved that the new structure of the corps is workable and an improvement on the old organization." He suggested the new structure may see problems "after some days in combat when fatigue and strain begin to take their toll" on the divisional headquarters and those in charge of the battlegroups.[146] Following the exercise, further refinements to the organisation took place into 1977, as additional armour and infantry units were transferred and brought the formation up to strength.[137] The Task Force concept lasted until the end of the decade. Stone wrote it had "not prove[d] entirely satisfactory".[144] Isby wrote brigades were reintroduced after the flaws of the new system became apparent. It was an issue exacerbated by troop deployments to Ulster that had "caused some armoured and mechanized battalions to reduce their fourth squadrons or companies to cadre status."[129] The division then comprised the 4th and the 12th Armoured brigades.[147][148]
End of the division
In 1981, John Nott, the Secretary of State for Defence for the government elected in 1979, authored the 1981 Defence White Paper. It, like the Mason review, aimed at balancing the British military inline with the nation's financial resources.[149] Nott's paper called for the BAOR to be restructured from four armoured divisions of two brigades to three divisions of three brigades, saving manpower and money with the loss one division. Nott also called for a new division to be formed in the United Kingdom, which would be made up primarily of Territorial Army personnel. The new formation would reinforce the BAOR on the outbreak of war.[150]
In July 1981, the 2nd Armoured Division was chosen to be the formation that would be disbanded in Germany. It was to be reformed in the United Kingdom as the 2nd Infantry Division and be assigned to reinforce the BAOR. The new division headquarters would be based at Imphal Barracks, in York.[151] The Division's assets were dispersed. For example, the 4th Armoured Brigade was transferred to the 4th Armoured Division.[147] By December 1982, the division ceased to exist. On 1 January 1983, the 2nd Infantry Division was reformed.[128][lower-alpha 6]
General officer commanding
The division had the following GOCs during the Second World War:
| Appointed | General Officer Commanding |
|---|---|
| 15 December 1939 | Major-General F. E. Hotblack[12] |
| 17 April 1940 | Brigadier C. W. M. Norrie (acting)[12] |
| 10 May 1940 | Major-General J. C. Tilly (Died on 5 January 1941)[12] |
| 16 January 1941 | Brigadier H. B. Latham (acting)[12] |
| 12 February 1941 | Major-General M. D. Gambier-Parry (captured, 8 April 1941)[12] |
The division had had the following GOCs during the Cold War:
| Appointed | General Officer Commanding |
|---|---|
| December 1976 | Major-General Frank Kitson[129][152] |
| 28 February 1978 | Major-General Alexander Boswell[153] |
| 12 March 1980 | Major-General Martin Farndale[154] |
Orders of battle
| 2nd Armoured Division (December 1939 – October 1940) | |
|---|---|
|
1st Light Armoured Brigade (assigned 19 January 1940, and renamed the 1st Armoured Brigade on 14 April)[155]
22nd Heavy Armoured Brigade (assigned 15 January 1940, and renamed the 22nd Armoured Brigade on 14 April)[156]
3rd Armoured Brigade (assigned 5 October 1940)[157] 2nd Support Group (assigned 5 February 1940)[158]
Divisional troops[12]
| |
| 2nd Armoured Division (Libya, 1941) | |
|---|---|
|
3rd Armoured Brigade[157]
3rd Indian Motor Brigade (6–8 April 1941)[93]
2nd Support Group[158]
Divisional troops
| |
See also
Notes
Footnotes
- These two figures are the war establishment and the paper strength of the division for 1940.
- This was in addition to two other armoured regiments, 48 anti-tank guns with 40,000 rounds, 20 light AA guns with 30,000 rounds, 48 25-pounders and 24,000 rounds, 500 machine guns, 250 anti-tank rifles, 50,000 anti-tank mines, one million rounds of .303 ammunition, wireless equipment and 300 tons of spare parts.[32]
- Between the end of August and the end of 1940, the following transfers took place: 76,000 men, including Australian and New Zealanders, were shipped from the UK to the Middle East; c. 50,000 troops were dispatched from Australia, India and New Zealand to the Middle East. These reinforcements included administration and supply units, Royal Air Force personnel and machines, reinforcements for depleted formations and new units including seven artillery regiments and five infantry brigades to bring existing divisions up to strength. Additional transfers included the 5th Indian Division and the 1st South African Division, although these went to East Africa.[34]
- The dispatch of the 102nd (Northumberland Hussars) Anti-Tank Regiment, for example, deprived the division of 578 men, 168 vehicles and forty-eight 2-pounder anti-tank guns.[49]
- The Brigade comprised the 2nd Lancers (Gardner's Horse), the 11th Prince Albert Victor's Own Cavalry (Frontier Force), and the 18th King Edward's Own Cavalry. These battalions were technically mechanised cavalry units but lacked armoured vehicles; most men had rifles and moved in trucks. The brigade lacked artillery, anti-tank weapons and had only half of its wireless sets.[93][94] The Brigade was joined by elements of the Australian 2/3rd Anti-Tank Regiment and the British 3rd Royal Horse Artillery (an anti-tank unit). The Brigade formed a perimeter around the fort, with the 11th Cavalry and a battery of anti-tank guns holding the eastern flank, and the 2nd Lancers and a battery of guns holding the western flank. The 18th Cavalry dispatched numerous patrols.[88]
- The reformed division was assigned the territorial 15th (based at Alanbrooke Barracks, Topcliffe, North Yorkshire) and 49th Infantry Brigades (based in Nottingham), and the regular army 24th Infantry Brigade (based at Catterick Garrison) and the 29th Engineer Brigade (based at Newcastle upon Tyne).[128]
- Joslen lists this regiment as a divisional asset from January through May 1941, but also as part of 3rd Armoured Brigade for the period 26 February until 22 March 1941.[157][50]
Citations
- Chappell 1987, p. 12.
- French 2001, pp. 28–29.
- French 2001, pp. 36–37.
- French 2001, pp. 37–41.
- Perry 1988, p. 45.
- French 2001, p. 42.
- Bell 1997, pp. 3–4.
- Bell 1997, pp. 258–275, 277–278.
- Gibbs 1976, pp. 503–504.
- Gibbs 1976, p. 511.
- Gibbs 1976, pp. 514, 525.
- Joslen 2003, p. 16.
- Hardy 2017, pp. 40–44; Pallud 2014, p. 42.
- Joslen 2003, pp. 14, 16.
- Joslen 2003, p. 144.
- Joslen 2003, p. 168.
- Newbold 1988, p. 408.
- Joslen 2003, p. 216.
- Hughes, Broshot & Philson 1999, p. 35.
- Joslen 2003, p. 144, 168.
- Hardy 2017, p. 40.
- "No. 34485". The London Gazette. 18 February 1938. p. 1080.
- Joslen 2003, p. 129.
- Newbold 1988, pp. 68, 410.
- Playfair et al. 2004b, p. 345.
- Collier 1957, p. 125.
- Collier 1957, p. 125; Newbold 1988, p. 417.
- Collier 1957, p. 130.
- Newbold 1988, pp. 250, 421.
- Playfair et al. 2004a, p. 190; Fraser 1999, pp. 119–120.
- "No. 37638". The London Gazette (Supplement). 2 July 1946. p. 3424.
- Playfair et al. 2004a, p. 190.
- Newbold 1988, pp. 422, 426, 427.
- Playfair et al. 2004a, pp. 244–247, 251.
- Joslen 2003, p. 16, 151, 168–169.
- Higham & Knighton 1955, p. 152; Farndale 1996, p. 103.
- Playfair et al. 2004a, pp. 244–245.
- Farndale 1996, p. 103.
- Joslen 2003, pp. 144, 151.
- Playfair et al. 2004a, p. 478.
- Smithers 1987, p. 82, 100.
- Doherty 2013, p. 238.
- Playfair et al. 2004b, p. 122.
- Playfair et al. 2004a, pp. 258–261, 355–362.
- Playfair et al. 2004a, pp. 372–376.
- Playfair et al. 2004b, pp. 2–3.
- Joslen 2003, pp. 144, 216.
- Long 1953, p. 30.
- Operation Lustre aid to Greece – file ref WO 106/3132
- Playfair et al. 2004b, p. 3.
- Smithers 1987, p. 82.
- Joslen 2003, pp. 16, 151, 216.
- Jentz 1998, pp. 85–88.
- French 2001, p. 226.
- Jentz 1998, p. 88.
- Playfair et al. 2004b, pp. 4–6.
- Playfair et al. 2004b, pp. 1–9.
- Carver 2002, p. 19.
- Playfair et al. 2004b, p. 14.
- Bauer 2000, p. 121.
- Playfair et al. 2004b, p. 13.
- Jentz 1998, pp. 82–86.
- Playfair et al. 2004b, pp. 10–12.
- Maughan 1966, pp. 36–38.
- Jentz 1998, p. 82.
- Jentz 1998, pp. 89–91.
- Maughan 1966, p. 49.
- Jentz 1998, p. 91.
- Maughan 1966, pp. 49–50.
- Jentz 1998, pp. 90–91.
- Maughan 1966, pp. 51–52.
- Maughan 1966, p. 54.
- Jentz 1998, pp. 92–93.
- Jentz 1998, pp. 92–95.
- Jentz 1998, p. 101.
- Jentz 1998, pp. 94–95.
- Carver 2002, p. 21.
- Maughan 1966, pp. 57–58.
- Playfair et al. 2004b, pp. 25–26.
- Jentz 1998, pp. 96, 95.
- Jentz 1998, pp. 95–96.
- Jentz 1998, p. 96.
- Maughan 1966, pp. 59–63.
- Playfair et al. 2004b, pp. 26–27.
- Playfair et al. 2004b, p. 27.
- Maughan 1966, p. 67.
- Maughan 1966, pp. 67, 76.
- Maughan 1966, p. 76.
- Maughan 1966, pp. 81–82.
- Maughan 1966, p. 85.
- Playfair et al. 2004b, p. 28.
- Jentz 1998, p. 97.
- Mackenzie 1951, p. 71.
- Playfair et al. 2004b, p. 8.
- Maughan 1966, pp. 84, 89.
- Maughan 1966, pp. 85–86.
- Maughan 1966, pp. 86, 94.
- Maughan 1966, pp. 86, 89, 102.
- Maughan 1966, p. 87.
- Maughan 1966, p. 89.
- Maughan 1966, pp. 90–95.
- Maughan 1966, pp. 94–95.
- Maughan 1966, pp. 95–96.
- Playfair et al. 2004b, p. 29.
- Maughan 1966, pp. 97–98.
- Joslen 2003, p. 218.
- Maughan 1966, pp. 98–99.
- Maughan 1966, p. 99.
- Playfair et al. 2004b, p. 30.
- Maughan 1966, p. 102.
- Maughan 1966, p. 103.
- Maughan 1966, pp. 103–104.
- Maughan 1966, p. 104.
- Maughan 1966, pp. 104–107.
- Maughan 1966, pp. 107–108.
- Maughan 1966, p. 100.
- French 2001, p. 227.
- French 2001, p. 231.
- French 2001, p. 117, 231.
- Carver 2002, p. 22.
- Fraser 1999, p. 151.
- Jentz 1998, pp. 101–102.
- Isby 1988, p. 336.
- Speiser 2016, p. 1.
- Rees 2013, p. 57.
- Isby 1988, p. 331.
- Lord & Watson 2003, p. 28.
- Horseman & Shaw 1983, p. 126.
- Isby 1988, p. 332.
- Taylor 2010, pp. 6–7.
- Mason 1975, p. I-22.
- Mason 1975, p. I-23.
- Mason 1975, pp. III=8–9.
- Dodd 1977, p. 373.
- DeVore 2009, p. 279.
- DeVore 2009, p. 282.
- Kneen & Sutton 1996, p. 183.
- Dodd 1977, p. 374.
- Stone 1998, p. 225.
- Hansen 1970, p. 27.
- "Baor Units (Ulster Service)". Parliamentary Debates (Hansard). House of Commons. 19 December 1979. Archived from the original on 29 October 2019. Retrieved 29 October 2019.
- Dodd 1977, p. 375.
- DeVore 2009, pp. 281–282.
- Stone 1998, p. 224.
- Dodd 1977, p. 372.
- Dodd 1977, p. 378.
- Kneen & Sutton 1996, p. 185.
- Stone 1998, p. 222.
- Taylor 2010, p. 7.
- Nott 1981, p. 17.
- Blaker, Peter (1981). "1(BR) Corps, Written Answers (Commons), HC Deb 20 July 1981 vol 9 cc57-8W". House of Commons Library: Historic Hansard. Archived from the original on 11 November 2019. Retrieved 28 October 2019.CS1 maint: ref=harv (link)
- "No. 46807". The London Gazette (Supplement). 26 January 1976. p. 1289. and "No. 47474". The London Gazette (Supplement). 27 February 1978. p. 2580.
- "No. 47474". The London Gazette (Supplement). 27 February 1978. p. 2580.
- "No. 48130". The London Gazette (Supplement). 17 March 1980. p. 4156.
- Joslen 2003, pp. 16, 144.
- Joslen 2003, pp. 16, 168.
- Joslen 2003, pp. 16, 151.
- Joslen 2003, pp. 16, 216.
- Maughan 1966, p. 47.
References
- Bauer, Eddy (2000) [1979]. Young, Peter (ed.). The History of World War II (rev. ed.). London: Orbis. ISBN 1-85605-552-3.CS1 maint: ref=harv (link)
- Bell, P. M. H. (1997) [1986]. The Origins of the Second World War in Europe (2nd ed.). London: Pearson. ISBN 978-0-582-30470-3.CS1 maint: ref=harv (link)
- Carver, Michael (2002) [1986iu]. Dilemmas of the Desert War: The Libyan Campaign 1940–1942. Staplehurst: Spellmount. ISBN 978-1-86227-153-1.CS1 maint: ref=harv (link)
- Chappell, Mike (1987). British Battle Insignia 1939–1940. Men-At-Arms. II. London: Osprey Publishing. ISBN 978-0-85045-739-1.CS1 maint: ref=harv (link)
- Collier, Basil (1957). Butler, J. R. M. (ed.). The Defence of the United Kingdom. History of the Second World War, United Kingdom Military Series. London: HMSO. OCLC 375046.CS1 maint: ref=harv (link)
- DeVore, Marc Ronald (2009). Armed Forces, States and Threats: Civil-Military Institutions and Military Power in Modern Democracies (PDF) (PhD). Massachusetts: Massachusetts Institute of Technology. Retrieved 29 October 2019.CS1 maint: ref=harv (link)
- Dodd, Norman (1977). "British New Look Divisions Tested in Exercise Spearpoint" (PDF). Militaire Spectator (August 1977): 373–379. Retrieved 29 October 2019.CS1 maint: ref=harv (link)
- Doherty, Richard (2013). British Armoured Divisions and their Commanders, 1939–1945. Barnsley: Pen & Sword Military. ISBN 978-1-84884-838-2.CS1 maint: ref=harv (link)
- Farndale, Martin (1996). The Years of Defeat: Europe and North Africa 1939–1941; History of the Royal Regiment of Artillery. London: Brassey's. ISBN 978-1-857-53080-3.CS1 maint: ref=harv (link)
- Fraser, David (1999) [1983]. And We Shall Shock Them: The British Army in the Second World War. London: Cassell Military. ISBN 978-0-304-35233-3.CS1 maint: ref=harv (link)
- French, David (2001) [2000]. Raising Churchill's Army: The British Army and the War Against Germany 1919–1945. Oxford: Oxford University Press. ISBN 978-0-199-24630-4.CS1 maint: ref=harv (link)
- Gibbs, N. H. (1976). Grand Strategy. History of the Second World War. I. London: Her Majesty's Stationery Office. ISBN 978-0-116-30181-9.CS1 maint: ref=harv (link)
- Hansen, Richard H., ed. (March 1970). "British Army in Europe". Army Digest. 25 (3): 22–29.CS1 maint: ref=harv (link)
- Hardy, Colin (2017). "A Great War Legend: Major Frederick Elliot ('Boots') Hotblack" (PDF). Stand To! The Journal of the Western Front Association (January–February 2017 No. 108): 40–44. Retrieved 14 September 2019.CS1 maint: ref=harv (link)
- Horseman, Martin; Shaw, Jennifer, eds. (1983). "2nd Infantry Division re-formed at York". Armed Forces. Ian Allan Ltd. and the Royal United Services Institute for Defence Studies (April 1983). OCLC 923901878.CS1 maint: ref=harv (link)
- Higham, J. B. & Knighton, E. A. (1955). Movements. History of the Second World War. London: War Office. OCLC 16642055.CS1 maint: ref=harv (link)
- Hughes, David; et al. (1999). British Armoured and Cavalry Divisions. The British Armies in World War Two: An Organizational History. I. West Chester, OH: George F. Nafziger. ISBN 978-1-58545-050-3.CS1 maint: ref=harv (link)
- Isby, David C. (1988). "Developments in the Front-Line States: The United Kingdom". In Simon, Jeffrey (ed.). NATO-Warsaw Pact Force Mobilization. Washington: National Defense University Press. pp. 317–352. OCLC 18522267.CS1 maint: ref=harv (link)
- Jentz, Thomas L. (1998). Tank Combat in North Africa: The Opening Rounds, Operations Sonnenblume, Brevity, Skorpion and Battleaxe, February 1941 – June 1941. Atglen, PA: Schiffer. ISBN 978-0-764-30226-8.CS1 maint: ref=harv (link)
- Joslen, H. F. (2003) [1990]. Orders of Battle: Second World War, 1939–1945. Uckfield: Naval and Military Press. ISBN 978-1-84342-474-1.
- Kneen, Brigadier J. M.; Sutton, Brigadier D. J. (1996). Craftsmen of the Army: The Story of the Royal Electrical and Mechanical Engineers 1969–1992. II. London: Leo Cooper. ISBN 978-0-850-52549-6.CS1 maint: ref=harv (link)
- Long, Gavin Merrick (1953). Greece, Crete and Syria. Australia in the War of 1939–1945, Series 1 – Army. II. Canberra: Australian War Memorial. OCLC 3134080.CS1 maint: ref=harv (link)
- Lord, Cliff; Watson, Graham (2003). The Royal Corps of Signals: Unit Histories of the Corps (1920–2001) and its Antecedents. West Midlands: Helion. ISBN 978-1-874622-07-9.CS1 maint: ref=harv (link)
- Mackenzie, Compton (1951). Eastern Epic: September 1939 – March 1943 Defence. I. London: Chatto & Windus. OCLC 59637091.CS1 maint: ref=harv (link)
- Maughan, Barton (1966). Tobruk and El Alamein. Australia in the War of 1939–1945. Series 1 – Army. III. Canberra: Australian War Memorial. OCLC 954993.CS1 maint: ref=harv (link)
- Mason, Roy (1975). "CAB 129/181/21: C (75) 21 Statement on the Defence Estimates 1975". The National Archives. Retrieved 28 October 2019.CS1 maint: ref=harv (link)
- Newbold, David John (1988). British Planning And Preparations To Resist Invasion On Land, September 1939 – September 1940 (PDF) (Ph.D. thesis). London: King's College London. OCLC 556820697.CS1 maint: ref=harv (link)
- Nott, John (1981). "Cmnd. 8288: The United Kingdom Defence Programme The Way Forward" (PDF). London: Her Majesty's Stationery Office. Retrieved 11 November 2019.CS1 maint: ref=harv (link)
- Pallud, Jean Paul (2014). Margry, Karel (ed.). "It Happened Here: The First to be Killed in Action". After the Battle. Old Harlow, Essex: Battle of Britain International (132): 34–55. OCLC 680456280.CS1 maint: ref=harv (link)
- Perry, Frederick William (1988). The Commonwealth Armies: Manpower and Organisation in Two World Wars. War, Armed Forces and Society. Manchester: Manchester University Press. ISBN 978-0-71902-595-2.CS1 maint: ref=harv (link)
- Playfair, I. S. O.; et al. (2004a) [1st. pub. HMSO 1954]. Butler, J. R. M. (ed.). The Mediterranean and Middle East: The Early Successes Against Italy (to May 1941). History of the Second World War, United Kingdom Military Series. I. Naval & Military Press. ISBN 978-1-84574-065-8.CS1 maint: ref=harv (link)
- Playfair, I. S. O.; et al. (2004b) [1st. pub. HMSO 1956]. Butler, J. R. M. (ed.). The Mediterranean and Middle East: The Germans Come to the Help of their Ally (1941). History of the Second World War, United Kingdom Military Series. II. Naval & Military Press. ISBN 978-1-84574-066-5.CS1 maint: ref=harv (link)
- Rees, Wyn (2013) [2001]. "Chapter 3: Preserving the Security of Europe". In Croft, Stuart (ed.). Britain and Defence 1945-2000: A Policy Re-evaluation. Washington: Routledge. pp. 49–68. ISBN 978-0-582-30377-5.CS1 maint: ref=harv (link)
- Smithers, A.J. (1987). Rude Mechanicals: An account of Tank Maturity during the Second World War. London: Leo Cooper. ISBN 978-0-58620-305-7.CS1 maint: ref=harv (link)
- Speiser, Peter (2016). The British Army of the Rhine: Turning Nazi Enemies into Cold War Partners. Urbana: University of Illinois Press. ISBN 978-0-252-04016-0.CS1 maint: ref=harv (link)
- Stone, David (1998). Cold War Warriors: The Story of the Duke of Edinburgh's Royal Regiment (Berkshire and Wiltshire). London: Leo Cooper. ISBN 978-0-850-52618-9.CS1 maint: ref=harv (link)
- Taylor, Claire (2010). "A Brief Guide to Previous British Defence Reviews (SN/IA/5714)" (PDF). House of Commons Library: International Affairs and Defence Section. Retrieved 28 October 2019.CS1 maint: ref=harv (link)
Further reading
- Shales, J. (2015). A Detailed Fighting Account of the 2nd Armoured Division, 9th Australian Division, 3rd Indian Motor Brigade, 7th Support Group and 22nd Guards Brigade in Combat with the Afrikakorps and Units of the Ariete, Brescia, Bologna, Pavia and Trento Divisions: February–May 1941. Infantry, Artillery and Tank Combat in Libya and Egypt. I. Rainham, Kent: Armour. ISBN 978-0-9931732-0-2.
External links
- "War Diaries For The [6th] Royal Tank Regiment: August 1939 To March 1946". Warlinks.com World War II, a British Focus. Retrieved 18 October 2019.
- Watson, Graham; Rinaldi, Richard A. (2005). The British Army in Germany: An Organizational History 1947–2004. Takoma Park, MD: Tiger Lily Publications for Orbat.com. ISBN 978-0-972-02969-8. – This work does not meet Wikipedia guidelines for reliable sources, in particular due to being self-published. It details the division's order of battle during the late 1970s and the early 1980s.
- Various. "Tax House". BAOR Locations. Retrieved 27 October 2015. Photos and personal recollections of the 2nd Division's headquarters in Germany
- Various. "Birdwood Barracks". BAOR Locations. Retrieved 27 October 2015. Photos and personal recollections of a barracks used in Germany by the division