34th Armoured Brigade (United Kingdom)
The 34th Armoured Brigade was an armoured brigade of the British Army that saw active service in the Second World War. It was formed in 1941 as the 34th Army Tank Brigade and subsequently redesignated as the 34th Tank Brigade in February 1945 and became part of the 79th Armoured Division. It was equipped with Churchill tanks and provided close support for assaults by the infantry. During the fighting in North-west Europe from July 1944 to May 1945 the brigade served with both the First Canadian Army and the British Second Army. The brigade was disbanded in early 1946.[2][3]
| 34th Armoured Brigade | |
|---|---|
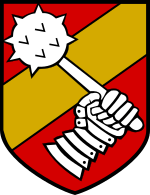 Insignia of the 34th armoured brigade.[1] | |
| Active | 1941-1946 |
| Country | |
| Branch | |
| Type | Armoured |
| Size | Brigade |
| Part of | Independent Brigade 1st Mixed Infantry Division 79th Armoured Division |
| Equipment | Churchill tanks |
| Engagements | Normandy Campaign Capture of Le Havre Scheldt Reichswald Rhine Crossing |
| Commanders | |
| Notable commanders | Brigadier J. N. Tetley Brigadier W. S. Clarke |
History
The brigade was formed on 1 December 1941 as one of ten independent Army Tank brigades to be equipped with Churchill tanks. In June 1942, the word "Army" was dropped from the brigade's title and it became part of the 1st Mixed Infantry Division. The 34th Tank Brigade was transferred to the 43rd Mixed Infantry Division in September 1942 and in September 1943 it returned to independent status (attached to XII Corps), when the concept of mixed divisions was abandoned.[2][3]
Normandy
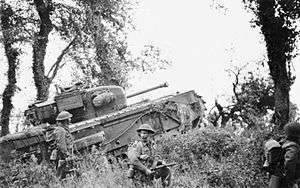
The first two and half years of the brigade's existence were spent in training in the south of England and it saw its first active service in the Normandy bridgehead.[2]
Advance parties departed to Normandy on D + 10 (16 June) but the entire brigade was not gathered together in France until early July 1944. Its first combat was in support of the 15th (Scottish) Infantry Division in Operation Greenline from 15 to 18 July, to enlarge the Odon bridgehead and advance beyond Hill 112; the German opposition held a strong position and 153rd Regiment Royal Armoured Corps suffered particularly severe casualties, including its commanding officer. Overall, the brigade lost 30 officers and 156 other ranks in this action. The brigade continued in active service in Normandy until late August.[2]
Operation Astonia
After a 14-day rest and reorganisation and now under the First Canadian Army, the brigade crossed the River Seine on 4 September to prepare to assault Le Havre. On arrival outside Le Havre on 6 September, the brigade came under command of 49th (West Riding) Infantry Division, who were to assault Le Havre from the north east and east. The defenders' morale was low despite impressive defence works and victory was completed on 12 September with minimal casualties. A troop of 7th Royal Tank Regiment, without infantry, had entered the fort at 11:30am and had captured Oberst Hermann-Eberhard Wildermuth, the garrison commander, his whole staff and 400 prisoners.[2]
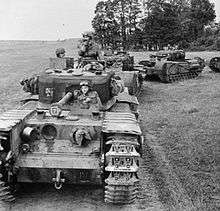
Around this time, the Allied armies' supply lines were under great stress due to the lack of usable ports and the brigade's transport was added to the supply chain for the front line in Belgium. The brigade as such was effectively grounded and out of action. By 18 September, the brigade was concentrated about midway between Dieppe and Rouen. On 29 September. still lacking its transport, the brigade's 300 Churchills (including a delivery squadron), heavily loaded with munitions, moved on tracks northwards for three days to Desvres, near Boulogne. On 2 October, one regiment, 7th Royal Tank Regiment, was detached to assist the containment of Dunkirk by 51st (Highland) Infantry Division, where it took an active and successful part in the siege.[2]
By 6 October, the brigade had reached the Eindhoven area and all regiments were immediately deployed into the front line.[2]
Clarkeforce
The strategic requirement now was to clear the Scheldt Estuary and get the port of Antwerp into use as an Allied supply base.[4] As part of these operations, 49th (West Riding) Division was to attack towards Loenhout, and then unleash a mobile force to exploit the breakthrough and move up the main road to Wuustwezel in Operation Rebound. This mobile force was commanded by Brigadier W.S. Clarke of 34th Tank Brigade and named 'Clarkeforce'.[5]
Controlled by 34th Tank Bde's HQ, Clarkeforce consisted of Churchill tanks of 107th Regiment Royal Armoured Corps, with C Squadron carrying infantry of D Company, 1st Battalion, Leicestershire Regiment, accompanied by a troop of Achilles self-propelled 17-pounders from 248 Bty, 62nd (6th London) Anti-Tank Regiment, Royal Artillery, a troop of Churchill Crocodile flamethrowing tanks of the 1st Fife and Forfar Yeomanry and two sections of Royal Engineers. The field artillery support was provided by the 25-pounder guns of 191st (Hertfordshire and Essex Yeomanry) Field Regiment, Royal Artillery.[6][7][8]
Operation Rebound (part of the larger offensive of Operation Pheasant) began on 20 October with a barrage fired by the field regiments of 49th (WR) Division reinforced by two medium regiments, then 56th Infantry Bde and 9th Royal Tank Regiment seized Stapelheide as a start line for Clarkeforce, which was launched through the gap at 16.00. The column bypassed some strongpoints to be mopped up by supporting troops, but progress was not fast: the route was restricted to one tank's width, and the M3 Stuart ('Honey') light tanks of 107th RAC's Reconnaissance Troop were held up by the bad tank going. At 17.00 B Sqn 107th RAC reached a road junction and detached half the squadron to cover this, while the rest of the squadron pushed on to 'Stone Bridge'. The fight for this point, supported by fire from 191st (H&EY) Fd Rgt, took most of the remaining daylight, but the bridge was seized before it could be completely demolished and B Sqn crossed, followed by the Recce Trp. B Squadron formed a bridgehead facing north and north-west, and A Sqn passed through to complete the bridgehead to the south and south-west. By now it was dark, but C Sqn and the infantry pushed on to clear Wuustwezel, taking some prisoners. By 22.00, 147th Infantry Brigade of 49th (WR) Division had moved up to relieve Clarkeforce, and the tanks were ordered to push on: 'The night was pitch dark, it was raining, and there was no moon'. Progress was slow and the Recce Trp scouting ahead were held up by a roadblock of trees, which were cleared by the leading Churchills.[6][7][8]
After a short rest, 107th RAC and the company of Leicesters moved on at 0800 the following morning towards Nieuwmoer. By now the Recce Trp had run out of fuel, and the advance was led by A Sqn of 49th (West Riding) Reconnaissance Regiment, Royal Armoured Corps. When they came across a bridge that had been blown, the reconnaissance troops and tanks had to fan out to the flanks in search of alternative crossings, and with no cover they were engaged over the flat country by German Self-propelled guns concealed in Nieuwmoer. The advance had to be covered by smoke. Once clearance of the village was well in hand, the Recce Trp came up and pushed on carelessly into a wood occupied by German troops and SP guns. Four Honeys were knocked out, bringing 107th RAC's casualties to eight tanks in the day. Meanwhile the troops round Stone Bridge, including 1st Leicesters and 191st (H&EY) Fd Rgt, had to beat off counter-attacks by German armour. 532 Field Battery, which had already crossed over, was called upon to deploy and fire its 25-pounders in an anti-tank (A/T) role, while the other batteries backtracked and found an alternative route forwards. At last light, 191st (H&EY) Fd Rgt called in fire from every divisional and Army Group Royal Artillery gun within range (about 200) to devastate the woodland that was holding up Clarkeforce.[6][7][8]
On 22 October, the advance continued towards Esschen, 107th RAC engaging enemy infantry and SP guns, and crossing a canal by means of one of 34th Tank Bde's bridge-laying tanks. 191st (H&EY) Field Rgt moved up to Nieuwmoer, despite pockets of enemy resistance along the route, which ambushed some of 107th RAC's A Echelon vehicles and a field artillery reconnaissance party. 49th Recce Rgt began clearing the enemy pockets before nightfall. For the next day's advance the Leicesters were relieved by two companies from 7th Bn Duke of Wellington's Regiment, who attacked Schanker successfully with C Sqn's Churchills on the morning of 24 October. The infantry's A/T guns then took over the defence.[6][7][8]
Clarkeforce rested on 25 October to plan the next phase of its advance towards Roosendaal (Operation Thruster). Once again, 56th Infantry Bde prepared the way by advancing from Esschen to Nispen during the night of 25/26 October. After supporting this advance, 191st (H&EY) Fd Rgt's Forward Observation Officers (FOOs) rejoined Clarkeforce for its push towards Brembosch, beginning at 10.00 the following morning. The advance encountered strong enemy rearguards, losing four tanks and an SP gun from 245 Bty, 62nd A/T Rgt, but Clarkeforce reached the town by the end of the day. The following morning the Leicesters crossed a massive anti-tank ditch using ladders, then a bulldozer tried to make it passable. In the end, the top of the concrete obstacle was shot away using high explosive and armour-piercing shells from the Churchills and Achilles. It took the rest of the day and concentrated artillery firepower to push the enemy off two hilltop strongpoints.[6][7][8]
The following day, 107th RAC supported the Leicesters in an attack along the Brembosch–Wouwe Hil road, and reached Oostlaar by nightfall. At first light on 28 October, while replenishing their tanks, C Sqn came under fire, lost some vehicles and had to withdraw under smoke and covering fire, but at 08.15 the regiment was ready to support an attack by 11th Bn Royal Scots Fusiliers and cut the Wouwe–Bergen-op-Zoom road, despite enemy SP guns. The advances were masked by smoke and covered by the remaining Achilles. Clarkeforce spent the night in Wouwe.[6][7][8]
49th (WR) Division found the approaches to Roosendaal strongly held, and the commanding officer of 1/4th Bn King's Own Yorkshire Light Infantry requested a set-piece artillery- and armour-supported assault. The artillery support involved three field, two medium and two heavy anti-aircraft regiments as well as 191st (H&EY) Fd Rgt, while 107th RAC was positioned to support an attack by the infantry and 9th RTR. However, a patrol infiltrated the town under cover of mist and found that the Germans had pulled out.[8][9]
49th (WR) Division's final objective was Willemstad on the Hollands Diep (part of the Maas Estuary). This was 10 miles (16 km) away across poor country for armour, so Clarkeforce was disbanded and the division carried out a conventional infantry advance (Operation Humid), supported by 34th Tank Bde in its more familiar infantry tank role. Willemstad was liberated on 6 November after the German garrison withdrew across the Maas.[8][10][11]
Operation Veritable
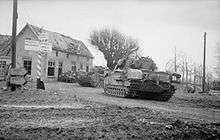
In February, 1945, the 34th Armoured Brigade provided armoured support to infantry units, mainly the 53rd (Welsh) Infantry Division, during the Battle of the Reichswald, in ground conditions that caused more damage to its tanks than the enemy.
After the Rhine crossings, the brigade saw no further active service in Europe and was in preparation for transfer to South-East Asian theatre when the war ended.
Commanders
The 34th Armoured Brigade had just two commanding officers:[3] Brigadier J. N. Tetley[12] until June 1943 (left to command 25th Tank Brigade) and then Brigadier W. S. Clarke,[13] who commanded the brigade until it was disbanded in 1946.
Order of battle
The composition of 34th Armoured Brigade was as follows:[3]
- 1 December 1941 (formation date)
- Brigade Headquarters (formed from 226th Independent Infantry Brigade)
- North Irish Horse (Lt.‑Col. D. Dawnay)
- 147th Regiment Royal Armoured Corps (Lt.‑Col. A. R. W. S. Koe) (formerly 10th Battalion, Hampshire Regiment)
- 153rd Regiment Royal Armoured Corps (Lt.‑Col. C. L. Wilson, M.C.) (formerly 8th Battalion, Essex Regiment)
- Autumn, 1942
- Brigade Headquarters
- 147th Regiment Royal Armoured Corps (Lt.‑Col. A. R. W. S. Koe)
- 151st Regiment Royal Armoured Corps (Lt.‑Col. S. H. Crow) renamed in December 1943 as 107th Regiment Royal Armoured Corps (formerly 10th Battalion, King's Own Royal Regiment (Lancaster))
- 153rd Regiment Royal Armoured Corps (Lt.‑Col. C. L. Wilson, M.C.)
- 4 September 1944
Shortly after 15 August 1944, 153 RAC were disbanded and their men and materièl were used to make up losses in the remaining regiments in the brigade.
- Brigade Headquarters
- 107th Regiment Royal Armoured Corps
- 147th Regiment Royal Armoured Corps (Lt.‑Col. A. R. W. S. Koe) (temporarily attached to 15th (Scottish) Infantry Division until end September)
- 7th Royal Tank Regiment
- 9th Royal Tank Regiment
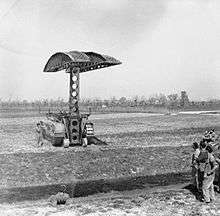
The headquarters of a tank or armoured brigade in 1944 was equipped with 10 tanks plus eight Armoured Observation Post (OP) tanks for the use of attached artillery units. By the time of the Normandy campaign it also included three Churchill bridgelayer tanks. By March 1945 the number of gun tanks at HQ had been reduced to seven, but two Crusader anti-aircraft (AA) tanks had been added to the establishment.[14][15]
Notes
- Cole p. 126
- "THE HISTORY of 34 ARMOURED BRIGADE". Archived from the original on 22 February 2012. Retrieved 8 October 2013.
- Joslen, pp. 184 & 207.
- Ellis, Vol II, p. 70.
- Sainsbury, p. 239.
- 34 Tank Bde War Diary October 1944, The National Archives (TNA), Kew, file WO 171/643.
- 107 RAC War Diary October 1944, TNA file WO 171/876.
- Sainsbury, pp. 240–4.
- Buckley, pp. 246–7.
- Ellis, Vol II, pp. 126–7.
- Sainsbury, pp. 241–4.
- James Noel Tetley at Generals of WWII.
- William Stanhope Clarke at Generals of WWII.
- Ellis, Vol I, p. 544.
- Joslen, pp. 9–10, 142.
References
- John Buckley, Monty's Men: The British Army and the Liberation of Europe, London: Yale University Press, 2013, ISBN 978-0-300-13449-0.
- Cole, Howard (1973). Formation Badges of World War 2. Britain, Commonwealth and Empire. London: Arms and Armour Press.
- Major L.F. Ellis, History of the Second World War, United Kingdom Military Series: Victory in the West, Vol I: The Battle of Normandy, London: HM Stationery Office, 1962/Uckfield: Naval & Military, 2004, ISBN 1-845740-58-0.
- Major L.F. Ellis, History of the Second World War, United Kingdom Military Series: Victory in the West, Vol II: The Defeat of Germany, London: HM Stationery Office, 1968/Uckfield: Naval & Military, 2004, ISBN 1-845740-59-9.
- Lt-Col H.F. Joslen, Orders of Battle, United Kingdom and Colonial Formations and Units in the Second World War, 1939–1945, London: HM Stationery Office, 1960/Uckfield: Naval & Military Press, 2003, ISBN 1-843424-74-6.
- Lt-Col J.D. Sainsbury, The Hertfordshire Yeomanry Regiments, Royal Artillery, Part 1: The Field Regiments 1920-1946, Welwyn: Hertfordshire Yeomanry and Artillery Trust/Hart Books, 1999, ISBN 0-948527-05-6.