1st Hull Heavy Battery, Royal Garrison Artillery
The 1st Hull Heavy Battery was a unit of the British Army in World War I recruited from Kingston upon Hull in the East Riding of Yorkshire. It was the first unit of the Royal Garrison Artillery raised for 'Kitchener's Army' and it went on to serve as a howitzer battery in the East African Campaign and as a siege battery on the Western Front.
| 1st Hull Heavy Battery, RGA 11th (Hull) Heavy Battery, RGA 158th (Hull) Heavy Battery, RGA 545th Siege Battery, RGA | |
|---|---|
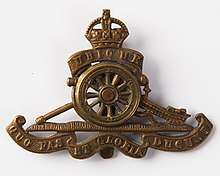 Cap Badge of the Royal Regiment of Artillery | |
| Active | 1914–19 |
| Country | |
| Branch | |
| Role | Heavy Artillery |
| Part of | Royal Garrison Artillery |
| Garrison/HQ | Kingston upon Hull |
| Engagements | World War I
|
Recruitment
_Britons_(Kitchener)_wants_you_(Briten_Kitchener_braucht_Euch)._1914_(Nachdruck)%2C_74_x_50_cm._(Slg.Nr._552).jpg)
On 6 August 1914, less than 48 hours after Britain's declaration of war, Parliament sanctioned an increase of 500,000 men for the Regular Army, and on 11 August the newly appointed Secretary of State for War, Earl Kitchener of Khartoum issued his famous call to arms: 'Your King and Country Need You', urging the first 100,000 volunteers to come forward. This group of six divisions with supporting arms became known as Kitchener's First New Army, or 'K1'.[1]

The establishment for each of these divisions included a heavy battery of the Royal Garrison Artillery (RGA). For the 11th (Northern) Division this was the 1st Hull Heavy Battery, together with its ammunition column, raised by Charles Wilson, 2nd Baron Nunburnholme, as Lord-Lieutenant of the East Riding of Yorkshire and President of the East Riding Territorial Association. This was unusual because most of the county Territorial Associations were fully engaged with recruiting and equipping their existing Territorial Force (TF) units and had no time for the early New Army units, which were mainly formed at Regular Army depots. By contrast, Lord Nunburnholme and the East Riding TA were simultaneously raising the 'Hull Pals' Brigade (10th–13th Service Battalions of the East Yorkshire Regiment), and in 1915 also raised the 124th (2nd Hull) and 146th (3rd Hull) Heavy Batteries and the 31st (Hull) Divisional Ammunition Column. Lord Nunburnholme borrowed Hull City Hall and opened it on 6 September as the Central Hull Recruiting Office for all the units being raised in the city. Douglas Boyd, a Hull Corporation employee, was commissioned as Lieutenant and appointed recruiting officer.[2][3][4][5][6][7][8]
Authority for the new battery – the first heavy artillery formed for Kitchener's Army – was given by the War Office on 7 September 1914. It was to be administered by the General Officer Commanding-in-Chief, Northern Command, who was responsible for all the units that would form the 11th (Northern) Division,[3] but for the first few months the battery was left largely to the resources and initiative of Lord Nunburnholme and the civic authorities in Hull. John Claybourn Williams, a ship's captain in Lord Nunburnhome's family shipping line (Thomas Wilson Sons & Co.) and an officer in the Royal Naval Reserve (RNR), was appointed as the battery's temporary Commanding Officer (CO). By 15 September, 80 men had been enrolled for the battery, many drawn from the shipbuilding and engineering firms in Hull, while drivers came from the rural villages of the East Riding. It reached its full war establishment by mid-December, when it was authorised to recruit an additional depot section to supply reinforcements.[6][9][10]
Training
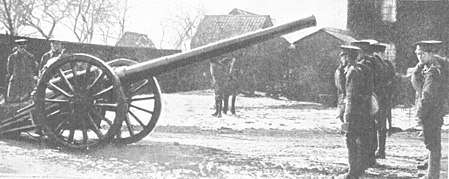
The recruits began training at East Hull Barracks on Holderness Road,[lower-alpha 1] performing drill in nearby East Park. The men lived at home, and until uniforms arrived the men of 1st Hull Bty were distinguished form the other East Riding recruits by wearing a red and blue armband on their civilian clothes. The battery's guns, four Boer War-era 4.7-inch guns, arrived at Kingston Street Station in late October, and the men dragged them through the streets of Hull, first to Wenlock Barracks, then on to East Hull Barracks.[6][12]
On 5 November, Captain Williams handed over command and reverted to the RNR (he commanded armed merchant vessels later in the war). The new CO was Temporary Captain John McCracken, who had been an RGA Battery Serjeant-Major with 23 years' experience at the outbreak of war.[13]
As part of 11th Division, the battery was formally designated 11th (Hull) Heavy Battery on 1 May 1915, when it established its headquarters outside the city at the former Hedon Racecourse. Here the horse teams were lodged in the racing stables and the battery began serious training. Meanwhile, the infantry of 11th Division were already considered adequately trained, and when the division embarked for the Gallipoli Campaign on 30 June, 11th Heavy Bty remained behind.[2][3][10][14]
Captain McCracken left on 25 May 1915 to become adjutant of the Humber Garrison and was replaced as CO by Lieutenant-Colonel H.M. Slater, RGA, who commanded the training brigade at Hedon. Slater in turn was replaced due to ill-health by T/Capt Basil Floyd, who took over as CO on 9 September. Floyd had already seen action with the RGA on the Western Front; he remained CO of the Hull Battery for the rest of the war.[15]
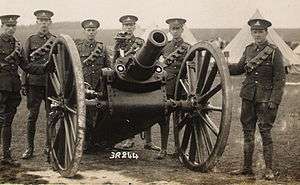
The battery was formally taken over by the military authorities on 12 August 1915.[16] On 28 October it moved by rail to Charlton Park, near the Royal Artillery's main depot at Woolwich. The decision was then made to convert the battery into a howitzer siege battery for service in East Africa. This meant handing in the battery's draught horses, because motor traction would be used.[10][17] On 18 January 1916 the battery moved from Woolwich to Denham, Buckinghamshire.[lower-alpha 2] Here the battery, its ammunition column and depot section were reorganised into a complete brigade (XXXVIII or 38th Bde, RGA) of two batteries under Major Piercy Reade:[2][10][19][20][21]
XXXVIII Brigade, RGA
- 11th (Hull) Heavy Battery
- 158th (Hull) Heavy Battery
- XXXVIII Brigade Ammunition Column
- Depot Company
The guns were eight obsolete 5-inch breechloading howitzers transferred from 4th Home Counties Brigade, Royal Field Artillery, a TF unit that was re-equipping before returning to France. Napier and US-made Four Wheel Drive Auto Company (FWD) lorries and additional mechanical transport (MT) drivers were provided by specially-formed 625 Company of the Army Service Corps (ASC). Some horse drivers were transferred to other mounted units, while others were re-trained as signallers.[2][20][22][23][24]
East Africa
XXXVIII Brigade embarked some of its lorries and stores aboard SS Anselma da Larrinaga at Avonmouth Docks and the rest of men, lorries and guns aboard HM Transport Huntsgreen (formerly the German Norddeutscher Lloyd shipping line's Derfflinger) at Devonport Dockyard on 7–8 February. It disembarked at Mombasa on 14 March 1916.[2][10][20][21][25][26][27] The brigade arrived in the rainy season, and suffered a great deal of sickness in its tented camp outside Mombasa. It was not until 3 May that 11th (Hull) Bty entrained for Voi and then went by road to Mbuyuni, arriving on 5 May, followed two days later by 158th Bty. At Mbyuni the batteries practised observation and field firing.[28]
Before resuming the offensive after the rains, the commander of the British Empire forces, Lieutenant-General Jan Smuts, reorganised his forces into three divisions. 38th Brigade was split up into subunits distributed to different formations, and given new local designations. Left Section (2 guns) of 11th (Hull) Bty became 11th Howitzer Bty attached to Major-General Jacob van Deventer's 2nd Division in the south-west and Right Section became 13th Howitzer Bty attached to 1st Division in the east; 158th (Hull) Bty became 14th Howitzer Bty in reserve with Army Troops.[10][26][29][30][31][32]
Kondoa Irangi
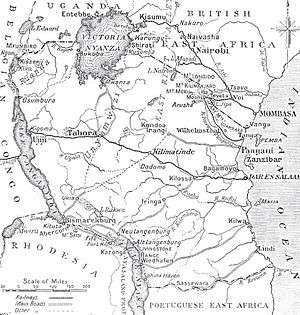
Smuts's advance began on 21 May and the Hull batteries were sent up to join the offensive. 11th (H) Bty reinforced 2nd Division at Kondoa Irangi on 3 June after a long march through rough country, crossing the Pienaar Heights and several rivers where motor vehicles had to be towed through the water. At Kondoa Irangi the battery was grouped with 10th Heavy Bty, consisting of guns taken from HMS Pegasus and manned by Royal Navy personnel, and 12th (H) Bty, a mule-drawn unit manned by RGA personnel from Cape Town, which had just lost one of its howitzers to a premature burst. 11th (H) Bty went straight into action alongside 12th (H) Bty on 'Battery Hill' to protect Deventer's left flank from German incursions. 12th (H) Battery's mules were employed to get the guns into position silently at night, under shellfire[20][21][31][33]
The battery began exchanging fire with German gun positions and observation posts (OPs) on 'Black Rock'. From 6 June the fire was directed by newly arrived Voisin aircraft from No 7 Squadron Royal Naval Air Service. This firing continued until 25 June, when an infantry attack took Black Rock. The German then retired from the area and the British troops followed them down to the Central Railway. 11th (H) Battery left Kondoa Irangi on 20 July and reached Dodoma on the railway on 6 August. The battery had deployed for action at Meia Meia waterhole on 27 July, but had no targets during the short action.[10][34]
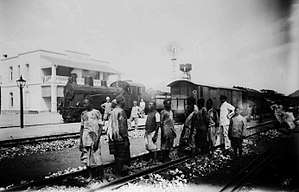
Deventer continued the advance from the railway on 10 August, the artillery heading eastward on a congested single-track road. The single mule-drawn gun of 12th Bty, reinforced with gunners from 11th Bty, pushed on with the infantry who fought their way into Mpwapwa on 12 August. The rest of 11th (H) Bty reached Mpwapwa on 18 August, but was held up there by lack of petrol and the damage done to its vehicles by the bad roads. The force fought its way through Kidete Station to Kilosa by 1 September.[10][35][36][37][38][39]
Wami River
Meanwhile, in the eastern sector, 13th (H) Bty did not move up from Mbuyuni until mid-June, escorted by 7th South African Light Horse. The two guns were towed by FWD lorries, but the ammunition column was drawn by oxen and manned by 134th (Cornwall) Heavy Bty. The column crossed the Pangani River, reached Handeni on 6 July after its capture, and then crossed the Lukiguri after the bridge had been seized. Here the battery camped until 5 August, where it was joined by 134th (Cornwall) Bty.[10][40]
Another forward thrust began in August. For this operation, 13th (H) Bty was attached to 3rd Division, which was cooperating with 1st Division, while 14th (H) Bty remained with Army Troops. However, 13th (H) Bty found the route impassable and had to return to the Lukiguri. It then followed 1st Division down the main road and supported an attack along the Wami River on 17 August. The battery went onto action at a range of 2,500 yards (2,300 m), where the howitzers' heavy Lyddite shells proved decisive, causing the German Askaris to break and flee. The force then took Morogoro on the Central Railway, where 13th (H) Bty went into camp on 28 August, while Smuts attempted to surround the enemy by pushing down both sides of the Uluguru Mountains with 1st and 3rd Divisions. 13th (H) Battery moved out on 7 September, following a newly-cut road to the Ruvu River crossing where it camped again.[37][41][42][43][44]
The offensive was halted by rain, exhaustion and German defences in mid-September. 11th (H) Battery remained in camp at Kilosa throughout October, while 13th (H) Bty was finally able to cross the Ruvu on 11 October and join the front line at the Mgeta River on 14 October, where for the next few weeks it exchanged occasional shots with the enemy.[45][46][47][48]
Kilwa
Meanwhile, Kilwa on the coast had been captured in September, and on 14 October, 14th (H) Bty was landed there to take part in the advance inland. However, the advance bogged down into static fighting at Kibata Fort, where the infantry took heavy casualties from shellfire until the two howitzers could finally be got forward on 1 January 1917.[10][49][50][51][52]
The campaign having been halted, reorganisation took place. A serious shortage of howitzers for training in the UK led to four of 38th Bde's eight guns being repatriated by sea. Sickness had also reduced the number of men available. 12th (H) Battery was reduced to just four men and was amalgamated into 11th (H) Bty, which returned from Kilosa to Dodoma and joined the remaining men of 13th (H) Bty, which had left one howitzer and stores, guarded by three men, in case they were needed on the Rufiji River. Captain Floyd successfully argued for the batteries to be recombined, and in April 1917 11th (Hull) Heavy Bty consisting of four howitzers was reformed, the temporary titles and those of 38th Bde and 158th Heavy Bty being discontinued.[53][54]
Flying columns
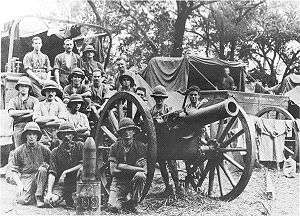
Apart from the section at Kilwa, the whole battery was at Morogoro. Having handed its remaining guns over to 134th (Cornwall) Bty, it had two of that battery's Indian-pattern 5.4-inch howitzers for training. These sections then acted as a depot, sending men forward to Kilwa until 29 August, when those remaining at Morogoro were sent to Dar es Salaam and all fit men were with the battery at Kilwa. The two remaining howitzers of the former 158th Bty had been at Chenera, some 40 miles (64 km) from Kilwa, since the end of 1916. Towards the end of June 1917 the whole battery moved (using porters to draw the guns in the absence of motor vehicles) to Rombo to join No 2 Column of Deventer's force.[55]
The advance began on 4 July, the columns pursuing the German commander Paul von Lettow-Vorbeck and his small force, which engaged them with rearguards, but never stayed long enough for the battery to get into action. Mobility was improved in mid-July when the Napier and FWD vehicles arrived, and the battery crossed over to No 1 Column, which was spearheading the pursuit. Roads were bad, necessitating the use of porters to help the vehicles, and the battery remained inactive at Mssindy throughout August while the infantry cleared the surrounding area. No 2 Column was reinforced in mid-September, and renewed the advance, with 11th (Hull) Bty in attendance. It now had wireless-equipped aircraft spotting for the guns. The Hull battery went into action supporting infantry attacks on Ndessa Kati and Ndessa Juu on 20 September, and against German machine gun positions on high ground near Nahungu on 1 October. It then switched to support an attack by No 1 Column on 4 and 5 October.[56][57][58]
Von Lettow-Vorbeck was now in danger of being encircled by the columns and fighting became bitter. The Hull battery broke up one counterattack with shrapnel and high explosive shells on 21 October. On 11 November the battery supported an infantry attack on Chiwata Hill and then shelled German positions over succeeding days. Serjeant Arthur Cowbourne was awarded a Distinguished Conduct Medal for maintaining the telephone line between the OP and the column.[59][60][61][62]
Deventer had now linked up with troops from Lindi, and von Lettow-Vorbeck retreated into Portuguese East Africa. Assuming that the campaign was now essentially over (in fact von Lettow-Vorbeck conducted a guerrilla campaign for the rest of the war) the British commanders began reducing the European force in East Africa. 11th (Hull) Battery sailed from Lindi to Dar es Salaam on 7 December and left for home via Durban on 13 December.[63][64]
545th Siege Battery
The battery returned to England aboard RMS Durham Castle, landing at Plymouth on 31 January 1918. On 1 March at Aldershot it was redesignated 545th Siege Battery, RGA, under the command of Captain (now Major) Floyd, who set out to get back as many veterans of the 1st Hull Bty as he could from other RGA units where they had been posted from convalescence hospitals. The battery was joined by newly trained signallers from Catterick Camp, and on 2 April it moved to Lydd for training.[2][26][65]
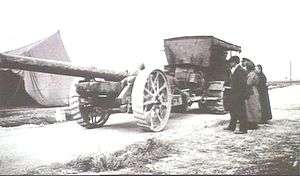
Lord Nunburnholme, who had originally raised the battery in 1914, now joined it as an active officer. Although he was a former Major in the 2nd Volunteer Battalion, East Yorkshire Regiment, and was Honorary Colonel of its 5th (Cyclist) Battalion (and of the East Riding Volunteers, a wartime home guard organisation), and held a Distinguished Service Order (DSO) from service with the City Imperial Volunteers during the Boer War, his army rank was only that of an honorary lieutenant. He was now commissioned as temporary captain in the RGA on 15 May 1918. After completing the battery officers' course at Lydd he joined the battery in France on 14 September and served as second-in-command to Major Floyd.[66][67][68][69][70][71][72][73]
The battery moved to Hilsea Barracks on 10 June, where it was intended to become the crew for a 12-inch railway howitzer. However, Maj Floyd objected and in July the battery was re-equipped with four modern 6-inch Mk XIX guns towed by Holt tractors, with an MT section of 16 Thornycroft lorries. On 17 July the battery embarked at Southampton Docks while the guns and transport went from Portsmouth Harbour. The battery landed at Le Havre on 16 July 1918 and deployed in the Lys sector under Fifth Army, where it came under regular gas shelling.[74][75]
Western Front
545th Siege Battery had arrived on the Western Front in time for the Allied Hundred Days Offensive. The success of the Battle of Amiens caused the Germans to withdraw from the Lys Salient and the battery had to move forward to new positions. It came into action at Doulieu on 20 September, at once coming under heavy Counter-battery fire. The following day it was pulled out and moved south to join Fourth Army, with which it served for the rest of the war.[75][76]
St Quentin Canal
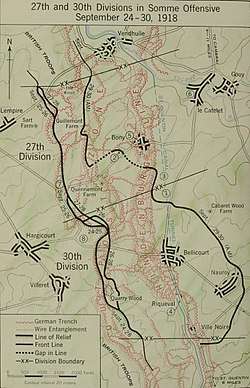
At Peronne the battery joined 47th Brigade RGA, assigned to III Corps. The gunners were unable to find suitable positions during the night of 24/25 September, and left their gun platforms beside the road under guard. During the night one of the platforms received a direct hit from enemy fire. The guns were positioned the following night, and from 27 September took part in the preparatory bombardment for the assault on the Hindenburg Line (the Battle of St Quentin Canal) by III Corps and II US Corps. On 27 November it carried out counter-battery fire in support of the Americans' preliminary attack on 'The Knoll', continuing the following day as calls for support came in from the infantry. For the main attack on 29 September, the battery fired a large number of tasks on roads and bridges, as well as enemy batteries.[10][77][78][79][80]
- Fourth Army stormed across the St Quentin Canal, in large part because (in Sir Douglas Haig's words), 'The intensity of our fire drove the enemy's garrisons to take refuge in their deep dugouts and tunnels, and made it impossible for his carrying parties to bring food and ammunition'.[81]
- The modern historian of II US Corps concurs: 'Much of the success of the American 30th Division came from the work the British artillery began the day before the attack and continued until the jump-off. With trench bombardment, counter-battery fire, and a barrage that cut the wire, the artillery caught the Germans in their dugouts and caused numerous casualties among their units. German prisoners captured by units of the 30th Division substantiated this fact by telling their interrogators that the barrage caused heavy casualties'[82]
Beaurevoir Line
The firing continued on 1 October, as III Corps was relieved by XIII Corps to continue the offensive. The battery targeted Usigny Dump, a German stores depot masked in a dip in the ground some 6 miles (9.7 km) away. It also fired on strongpoints at Villers Farm, Élincourt and Serain, and roads around Villers-Outréaux and Malincourt. The battery then moved up to Ronssoy to join the howitzers of 47th Bde to support XIII and Australian Corps' attack on the Hindenburg Support Line (the Beaurevoir Line) on 3–5 October.[83][84][85][86]
Getting the artillery forward following these victories proved difficult, but 545th Siege Bty's Right Section was attached to 'Roberts Brigade', an ad hoc formation organised for the pursuit, and continued its bombardment on 10 October from Maurois railway station. Left Section suffered from a German air raid on the night of 9/10 October, without casualties. While Right Section followed the advance, Left Section manned a brigade ammunition dump at Maretz.[87]
Selle
The pursuit ended at the River Selle. For its assault crossing of the river on 17 October (the Battle of the Selle), XIII Corps had its 6-inch guns, including 545th Siege Bty (now in 73rd Army Brigade, RGA), sited well forward so that they could hit the crossings over the Sambre Canal, which carried the German lines of supply (and retreat). The assault went in behind a massive bombardment, the attacking infantry crossing the Selle by means of duckboard bridges. By the end of the day Fourth Army had forced its way across the Selle and broken into the German Hermann Stellung I defences. Over succeeding days it closed up to the Sambre Canal.[88][89][90]
545th Siege Battery's guns had now fired so many rounds that their barrels required re-lining, and were sent to the Ordnance depot at Amiens on 27 October, thereby missing the Battle of the Sambre. Meanwhile, the personnel and the ammunition column moved forward to Le Cateau. During the night of 27/28 October their position came under heavy fire from German artillery, and ammunition lorries were set alight. Serjeant Goodwin (ASC) and Lance-Bombardier Frank Dickens (545th Bty) were awarded the Meritorious Service Medal for their gallantry in throwing shells from a burning lorry. In the confused pursuit, one of the ammunition lorries was accidentally driven into No man's land and had to be abandoned until the enemy retreated.[91]
Disbandment
On 5 November, all heavy artillery batteries in XIII Corps' area were stood down and the men billeted in Le Cateau. The Armistice with Germany came into effect on 11 November. 545th Siege Bty handed over three of its re-lined Mk XIX guns to 189th Siege Bty, which went forward as part of the Army of Occupation, receiving older Mk VII 6-inch guns in exchange. The battery moved to Saulzoir in December, where it carried out salvage duties. Demobilisation began at New Year, and the men were progressively sent to Clipstone Camp in Nottinghamshire, where the last group of men from the original 1st Hull Battery were demobilised on 31 July 1919.[92]
Footnotes
- Now occupied by 152 (City of Hull) Squadron, Air Training Corps[11]
- The temporary camp at Denham later became RAF Uxbridge.[18]
Notes
- Becke, Pt 3a, pp. 2, 8, 24, Appendix I.
- Becke, Pt 3a, pp. 19–25.
- War Office Instructions July 1915, Appendix VI.
- War Office Instruction No. 183, September 1915.
- Bilton, Hull Pals.
- Bilton, Hull in the Great War, pp. 38–9.
- Drake, pp. 44–7.
- East Riding Regiment at Long, Long Trail.
- Drake, pp. 47–54.
- Record of service of 11th Hull Heavy Battery, RGA, at First World War Digital Poetry Archive (John Edward Burnham enlisted December 1914).
- 152 (City of Hull) Squadron, ATC.
- Drake, pp. 54–6.
- Drake, pp. 47, 53.
- Drake, pp. 58–62.
- Drake, pp. 60–3.
- War Office Instructions September 1915, Appendix VII.
- Drake, pp. 64–7.
- Drake, pp. 72–3.
- Drake, pp. 67–73.
- Farndale, Forgotten Fronts, p. 318.
- Hordern, p. 221.
- Becke, Pt 2b, pp. 75–82.
- Drake, pp. 73–4, 102.
- Young, Annex Q.
- Drake, pp. 75–85, 91.
- 'Allocation of Heavy Batteries RGA', The National Archives (TNA), Kew, file WO 95/5494/2.
- Embarkation dates, TNA file WO 162/7.
- Drake, pp. 94–101, 106.
- Anderson, pp. 116–7, 23.
- Drake, pp. 115–7.
- Hordern, pp. 285, 288–9.
- Sibley, pp. 62–3.
- Drake, pp. 118–33.
- Drake, pp. 133–50.
- Anderson, p. 135.
- Drake, pp. 151–5.
- Farndale, Forgotten Fronts, pp. 325–6.
- Hordern, p. 353.
- Sibley, pp. 96–8.
- Drake, pp. 165–73.
- Anderson, pp. 143–5.
- Drake, pp. 174–8.
- Hordern, pp. 348, 361.
- Sibley, pp. 98, 104–6.
- Anderson, pp. 147–8.
- Drake, pp. 155–6, 179–89.
- Farndale, Forgotten Fronts, pp. 328–30, 339.
- Sibley, pp. 109–13.
- Anderson pp. 162–9.
- Drake, pp. 191, 195–8.
- Farndale, pp. 333–5.
- Sibley, p. 116.
- Anderson, p. 179.
- Drake, pp. 157, 193–4, 199–204, 207–9.
- Drake, pp. 209–23.
- Anderson, pp. 225–6, 238–42.
- Drake, pp. 224–30.
- Sibley, p. 130.
- Anderson, pp. 253–5.
- Drake, pp. 231–3.
- Sibley, pp. 134–5.
- London Gazette, 3 October 1918.
- Anderson, pp. 255–7.
- Drake, pp. 234–5, 246.
- Drake, pp. 248, 256–60.
- Army List.
- Burke's, 'Nunburnholme'.
- Who was Who.
- Drake, pp. 55, 260–1, 274, 306.
- London Gazette, 15 December 1917.
- London Gazette, 19 December 1917.
- London Gazette, 10 May 1918.
- London Gazette, 15 October 1919.
- Drake, pp. 262–73.
- Farndale, Western Front, Annex M.
- Drake, pp. 273–5.
- Drake, pp. 276–82.
- Edmonds & Maxwell-Hyslop, pp. 97–101, 106–7, 110–11.
- Farndale, Western Front, p. 298.
- Yockelson, pp. 160–182.
- Quoted in Drake, p. 282.
- Yockelson, p. 182.
- Drake, pp. 282–3.
- Edmonds & Maxwell-Hyslop, pp. 164–8, 174–8.
- Farndale, Western Front, pp. 301–2.
- Yockelson, pp. 191–3.
- Drake, p. 284–7.
- Drake, pp. 287–8.
- Edmonds & Maxwell-Hyslop, pp. 295–315.
- Farndale, Western Front, pp. 307–9.
- Drake, p. 289.
- Drake, pp. 290–6.
References
- Lt-Col Ross Anderson, The Forgotten Front: The East African Campaign, Stroud: Tempus, 2004, ISBN 0-7524-2344-4.
- Maj A.F. Becke, History of the Great War: Order of Battle of Divisions, Part 2b: The 2nd-Line Territorial Force Divisions (57th–69th), with the Home-Service Divisions (71st–73rd) and 74th and 75th Divisions, London: HM Stationery Office, 1937/Uckfield: Naval & Military Press, 2007, ISBN 1-847347-39-8.
- Maj A.F. Becke, History of the Great War: Order of Battle of Divisions, Part 3a: New Army Divisions (9–26), London: HM Stationery Office, 1938/Uckfield: Naval & Military Press, 2007, ISBN 1-847347-41-X.
- David Bilton, Hull in the Great War 1914–1919, Barnsley: Pen & Sword, 2015, ISBN 978-1-47382-314-3.
- David Bilton, Hull Pals, 10th, 11th 12th and 13th Battalions East Yorkshire Regiment – A History of 92 Infantry Brigade, 31st Division, Barnsley: Pen & Sword, 2014, ISBN 978-1-78346-185-1.
- Burke's Peerage, Baronetage and Knightage, 100th Edn, London, 1953.
- Rupert Drake, The Road to Lindi: Hull Boys in Africa: The 1st (Hull) Heavy Battery Royal Garrison Artillery in East Africa and France 1914–1919, Brighton: Reveille Press, 2013, ISBN 978-1-908336-56-9.
- Brig-Gen Sir James E. Edmonds & Lt-Col R. Maxwell-Hyslop, History of the Great War: Military Operations, France and Belgium 1918, Vol V, 26th September–11th November, The Advance to Victory, London: HM Stationery Office, 1947/Imperial War Museum and Battery Press, 1993, ISBN 1-870423-06-2.
- Gen Sir Martin Farndale, History of the Royal Regiment of Artillery: Western Front 1914–18, Woolwich: Royal Artillery Institution, 1986, ISBN 1-870114-00-0.
- Gen Sir Martin Farndale, History of the Royal Regiment of Artillery: The Forgotten Fronts and the Home Base 1914–18, Woolwich: Royal Artillery Institution, 1988, ISBN 1-870114-05-1.
- Lt-Col Charles Hordern, History of the Great War: Military Operations, East Africa, Vol I, August 1914 – September 1916, London: HM Stationery Office, 1941/Imperial War Museum and Battery Press, 1990, ISBN 978-089839158-9.
- Maj J.R. Sibley, Tanganyikan Guerilla: East African Campaign 1914–18, London: Pan/Ballantyne, 1971, ISBN 0-345-09801-3.
- Mitchell A. Yockelson, Borrowed Soldiers: Americans under British Command, 1918, Norman, OK: University of Oklahoma Press, 2008, ISBN 978-0-8061-5349-0.
- Instructions Issued by The War Office During July, 1915, London: HM Stationery Office.
- Instructions Issued by The War Office During September, 1915, London: HM Stationery Office.
- Who was Who, Vol II, 1916–1928, London: Bloomsbury, 2014, ISBN 978-1-40819336-5.
- Lt-Col Michael Young, Army Service Corps 1902–1918, Barnsley: Leo Cooper, 2000, ISBN 0-85052-730-9.