174th Siege Battery, Royal Garrison Artillery
174th Siege Battery was a unit of Britain's Royal Garrison Artillery (RGA) formed during World War I. It served on the Western Front, including the Battles of Arras, Messines and Passchendaele, and the crushing victories of the Allied Hundred Days Offensive in 1918.
| 174th Siege Battery, RGA | |
|---|---|
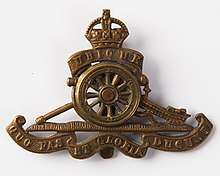 Cap Badge of the Royal Regiment of Artillery | |
| Active | 13 June 1916–1919 |
| Country | |
| Branch | |
| Role | Siege artillery |
| Part of | Royal Garrison Artillery |
| Garrison/HQ | Weymouth, Dorset |
| Engagements | Somme Arras Messines Ypres Hundred Days Offensive |
Mobilisation
174th Siege Battery, RGA, was raised at Weymouth, Dorset, on 13 June 1916 under Army Council Instruction 1239 of 21 June 1916 with a cadre of 3 officers and 78 other ranks from the Dorsetshire Royal Garrison Artillery of the Territorial Force.[1][2] It went out to the Western Front in October 1916, equipped with four 6-inch 26 cwt howitzers, and joined 47th Heavy Artillery Group (HAG) with Third Army.[3][4]
Service
The battery quickly (17 October) moved to 8th HAG with Fifth Army which was engaged in the Somme Offensive. This ended with the Battle of the Ancre in November.[3][4][5]
Arras
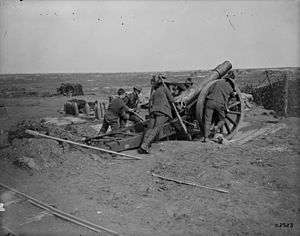
It was the policy to switch siege batteries from one Heavy Artillery Group (HAG) to another as the situation demanded, and 174th Siege Bty moved between 8th and 46th HAGs within Fifth Army until 3 February 1917 when it joined 54th HAG in Third Army, which was preparing for the Battle of Arras.[3][6][7] The artillery part of this attack was a carefully planned barrage in great depth. After the preliminary bombardment, the howitzers laid a standing barrage on the German trenches at Zero hour. Then as the attacking infantry reached the first objective behind a creeping barrage fired by the field guns, the howitzers lifted to the Phase 2 objectives, the German fourth line trenches, known as the 'Blue Line'. Once the infantry reached this line, the field guns began moving forward into No man's land and the 6-inch howitzers moved up to take over the vacated field gun positions, to help shoot the infantry on to the Brown Line or final objective. The attack went in at 05.30 on 9 April 1917 and was generally successful.[8] Fighting continued in the Arras sector until the middle of May, with 174th Siege Bty switching between HAGs as required.[3][6][9]
Messines
On 21 May 1917 174th Siege Bty was transferred to 45th HAG with Second Army in the Ypres Salient. Second Army had assembled 2266 guns and howitzers, including 316 6-inch howitzers, for the Battle of Messines. Although this attack was characterised by the surprise explosion of 19 huge mines under the German lines at Zero hour, it was preceded by days of preliminary bombardment aimed at destroying strongpoints and the opposing artillery hidden behind the Messines–Wytschaete ridge. This began on 21 May, with the assistance of Royal Flying Corps observation aircraft, and continued until 02.40 on 7 June, when the guns fell silent. Then at 03.10 the mines were exploded and the assault went in with massive artillery support, the heavies accurately hitting the remaining strongpoints and deluging the remaining German gunsites with gas shell. The infantry swept through the shattered German positions and easily took their Phase 1 objectives. Here they paused, protected by a distant barrage fired by the heavy howitzers from 07.00, which broke up German counter-attacks. Then at 14.40 the heavy batteries concentrated on breaching the barbed wire in front of the German second line. Although the range was long (9,000 yards (8,200 m)) the regimental historian records that 'the results were exceptionally good and the wire was no obstacle when the attack went in'. The Battle of Messines was a strictly limited operation, and there was no intention of exploiting further, with all the attendant difficulties of moving the artillery forward.[3][4][10][11][12][13]
Ypres
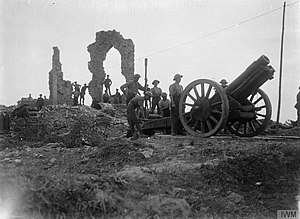
Next, 174th Siege Bty moved to 46th HAG on 22 June. This group was with Fifth Army for the opening of the Third Ypres Offensive. An even greater concentration of guns was massed than for Messines, but the circumstances were less favourable. Gun batteries were packed into the Ypres Salient where they were under observation and counter-battery (CB) fire from the Germans on the higher ground. Casualties among guns and gunners were high, and despite the massive preparation Fifth Army failed to take all its objectives when it attacked on 31 July (the Battle of Pilckem). A second push on 16 August (the Battle of Langemarck) suffered from rushed artillery planning and was unsuccessful. 174th Siege Bty was rested from 19 August to 4 September.[3][4][14][15][16]
The offensive continued through the summer and autumn of 1917: the Battles of the Menin Road, Polygon Wood and Broodseinde were highly successful because of the weight of artillery brought to bear on German positions. But as the offensive continued with the Battle of Poelcappelle and First and Second Battles of Passchendaele, the tables were turned: British batteries were clearly observable from the Passchendaele Ridge and were subjected to CB fire, while their own guns sank into the mud and became difficult to aim and fire.[17][18][19]
Winter 1917–18
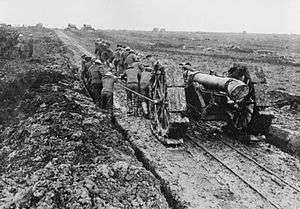
46th HAG transferred to Second Army's command at the end of the Passchendaele fighting on 9 November, then 174th Siege Bty moved to 79th HAG on 18 December. Fourth Army HQ took over the Ypres Salient two days later. 174th Siege Bty was rested from 23 December, then moved to 72nd HAG on 28 January 1918.[3][4][20]
448th Siege Bty arrived on the Western Front on 16 February, having been formed on 8 June 1917 at Aldershot. It was equipped with six 6-inch howitzers but was immediately broken up, with two-gun sections being assigned to existing batteries to bring them up to a strength of six guns. One section travelled to Fourth Army to join 174th Siege Bty on 23 February.[2][3]
174th Siege Bty rejoined 79th HAG on 26 February. By now HAG allocations had become more fixed, and from February 1918 they were converted into permanent RGA brigades. 79th Brigade was designated as a Mixed Brigade, with guns and howitzers of several sizes. 174th Siege Bty remained with this brigade until the Armistice.[3][4][7][21]
Spring Offensive
Fourth Army was renamed Second Army again on 17 March. It was not involved in the first phase of the German Spring Offensive of 1918, but was directly attacked and driven back from its positions during the following Battle of the Lys. Yet the line held, and the heavy guns, often well forward, took a heavy toll of the attackers.[10][20][22][23]
79th Brigade had shifted to First Army by 1 May, and on 28 June it supported XI Corps in Operation Borderland, a limited counter-attack on La Becque and other fortified farms in front of the Forest of Nieppe, in what was described as 'a model operation' for artillery cooperation.[24][25][26][27][28][29] 79th Brigade then transferred with XI Corps to the command of the reconstituted Fifth Army on 1 July 1918.[4][5][25]
Hundred Days Offensive
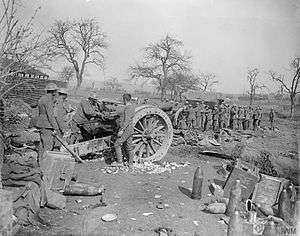
79th Brigade joined the reconstituted Fourth Army on 18 August, soon after the beginning of the final Allied Hundred Days Offensive that lasted to the end of the war.[4] By the end of September Fourth Army had closed up to the Hindenburg Line. On 29 September IX Corps carried out an assault crossing of the St Quentin Canal, with 79th Bde amongst the mass of artillery supporting the operation. The canal defences had largely been destroyed by the heavy guns, which continued firing on the canal banks until the last possible moment as 137th (Staffordshire) Brigade stormed the outpost line and then scrambled across the canal in the morning mist. The objectives were taken by 15.30. 79th Brigade moved its battery positions forward during the night of 30 September/1 October.[30][31]
On 8 October, IX Corps attacked the next German defensive position, the Beaurevoir Line. Harassing fire (HF) had been carried out on the night of 6/7 October, and all through 7 October and up to Zero the heavies carried out CB fire and shelled important localities. Once the attack went in the heavies continued intense CB and long-range HF fire until the infantry were on the objective.[32]
On 11 October preparations began for IX Corps' assault on the German line along the River Selle. CB fire began on 13 October, together with bombardment by the heavy howitzers of important localities chosen by Corps HQ. On 15 and 16 October mist and rain disrupted air reconnaissance, but Zero for the Battle of the Selle was fixed on 16 October for 05.20 the next day. The first day of the battle went well, one German counter-attack being broken up when all available guns were turned onto it, but the attackers were still short of their objective, the Sambre Canal. Steady progress was also made on the second and third days as Fourth Army closed up to the canal.[33][34][35]
IX Corps renewed its advance on 23 October, with 79th Bde part of a massive corps artillery reserve. The attack went in at 01.20 in moonlight, after the heavy guns had done the usual CB and Harassing Fire bombardments, and the results were extremely satisfactory.[36] As the regimental historian relates, 'The guns of Fourth Army demonstrated, on 23 October, the crushing effect of well co-ordinated massed artillery. they simply swept away the opposition'.[37] After a pause to regroup and reconnoitre, IX Corps stormed across the canal on 4 November (the Battle of the Sambre). After that the campaign became a pursuit of a beaten enemy, in which the slow-moving siege guns could play no part. The war ended with the Armistice with Germany on 11 November.[38][39][40]
174th Siege Battery was disbanded in 1919.[2]
Notes
- Army Council Instructions June 1916.
- Frederick, pp. 703–4.
- 'Allocation of Siege Batteries RGA', The National Archives (TNA), Kew, file WO 95/5494/4.
- 'Headquarters Heavy Artillery Groups', TNA file WO 95/5494/1.
- Becke, Pt 4, pp. 114–20.
- Becke, Pt 4, pp. 92–8.
- Farndale, Western Front, Annex E.
- Farndale, Western Front, pp. 164–71; Map 23.
- Farndale, Western Front, pp. 172–4, 176–82.
- Becke, Pt 4, pp. 82–7.
- Edmonds, 1917, Vol II, pp, 41–95.
- Farndale, Western Front, pp. 184–91.
- Wolff, pp. 111–20.
- Edmonds, 1917, Vol II, pp. 150-63, 185.
- Farndale, Western Front, pp. 105–204, Map 26.
- Wolff, pp. 146–62.
- Farndale, Western Front, pp. 205–14.
- Edmonds, 1917, Vol II, pp. 253–360.
- Wolff, pp. 191–4, 199, 207–8, 223–35, 249–51.
- Becke, Pt 4, pp. 102–9.
- Farndale, Western Front, Annex M.
- Blaxland, pp. 117–24.
- Farndale, Western Front, p. 281.
- Becke Pt 4, pp. 74–8.
- Becke, Pt 4, pp. 201–3.
- Bilton, pp. 240–4.
- Blaxland, p. 149.
- Farndale, pp. 283–4.
- Jackson, pp. 190–4.
- Blaxland, pp. 232-7.
- Edmonds & Maxwell-Hyslop, pp. 101–6, 139.
- Edmonds & Maxwell-Hyslop, pp. 189–92.
- Blaxland, pp. 251–2.
- Edmonds & Maxwell-Hyslop, pp. 295–305, 318, 325.
- Farndale, Western Front, pp. 307–9.
- Edmonds & Maxwell-Hyslop, pp. 352–61.
- Farndale, Western Front, pp. 311–2.
- Blaxland, pp. 254–6.
- Edmonds & Maxwell-Hyslop, pp. 386–8, 463–71.
- Farndale, Western Front, pp. 318–20.
References
- Maj A.F. Becke,History of the Great War: Order of Battle of Divisions, Part 4: The Army Council, GHQs, Armies, and Corps 1914–1918, London: HM Stationery Office, 1944/Uckfield: Naval & Military Press, 2007, ISBN 1-847347-43-6.
- David Bilton, Hull Pals, 10th, 11th 12th and 13th Battalions East Yorkshire Regiment – A History of 92 Infantry Brigade, 31st Division, Barnsley: Pen & Sword, 2014, ISBN 978-1-78346-185-1.
- Gregory Blaxland, Amiens: 1918, London: Frederick Muller, 1968/Star, 1981, ISBN 0-352-30833-8.
- Brig-Gen Sir James E. Edmonds, History of the Great War: Military Operations, France and Belgium 1917, Vol II, Messines and Third Ypres (Passchendaele), London: HM Stationery Office, 1948//Uckfield: Imperial War Museum and Naval and Military Press, 2009, ISBN 978-1-845747-23-7.
- Brig-Gen Sir James E. Edmonds & Lt-Col R. Maxwell-Hyslop, History of the Great War: Military Operations, France and Belgium 1918, Vol V, 26th September–11th November, The Advance to Victory, London: HM Stationery Office, 1947/Imperial War Museum and Battery Press, 1993, ISBN 1-870423-06-2.
- Gen Sir Martin Farndale, History of the Royal Regiment of Artillery: Western Front 1914–18, Woolwich: Royal Artillery Institution, 1986, ISBN 1-870114-00-0.
- J.B.M. Frederick, Lineage Book of British Land Forces 1660–1978, Vol II, Wakefield: Microform Academic, 1984, ISBN 1-85117-009-X.
- Andrew Jackson, Accrington's Pals: The Full Story, Barnsley, Pen & Sword, 2013, ISBN 9781-84884-469-8.
- War Office, Army Council Instructions Issued During June 1916, London: HM Stationery
- Leon Wolff, In Flanders Fields: The 1917 Campaign, London: Longmans, 1959/Corgi, 1966.