Creating a Repair Guide
If you’re interested in learning how to create a great guide on iFixit, you’re in the right place!

Creating a Guide
The majority of repair guides on iFixit.com are written by people just like you. And we think that's fantastic! iFixit is the free repair guide for everything, written by everyone. Anyone can create a new guide, or edit an existing one. We're trying to teach the world how to fix everything, and we absolutely can't do it without your help!
Why write repair guides?
- Help us fix the world.
- Empower others by showing them how to fix their devices.
- Show your friends how smart you are.
- Show what's inside the devices that people use every day.
- Show the world how stuff works.
- For the sheer joy of tinkering.
- Teach everyone else how to open their devices.
Overview
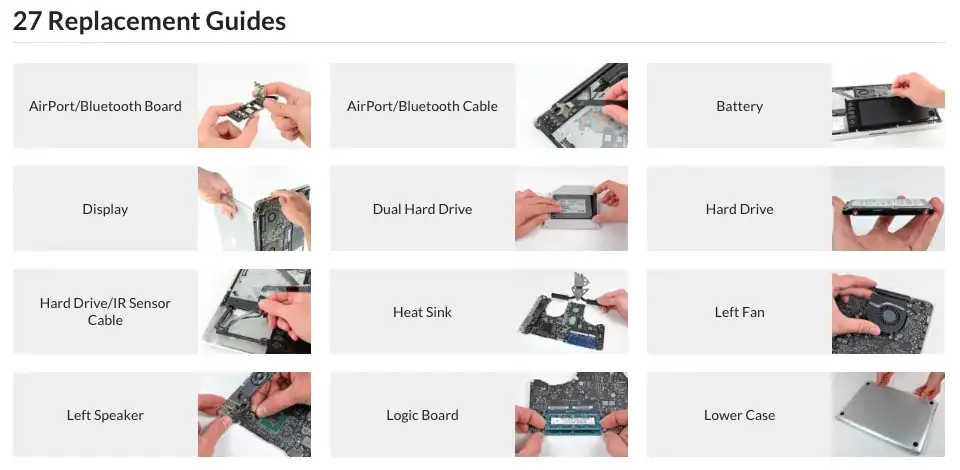
In most cases, a guide on iFixit shows the removal of a specific component for replacement. The guide shows step-by-step what must be done to open the device and remove the broken component. Since reassembly is usually just the reverse of disassembly, you don’t need to write reassembly steps. By default, each guide automatically concludes:

Each guide should contain the following
- A title and brief (1-2 sentence) summary
- An introduction that gives an overview of the process, including any warnings
- Estimated difficulty and time required
- A list of any required tools
- Step-by-step disassembly instructions written in clear, complete sentences
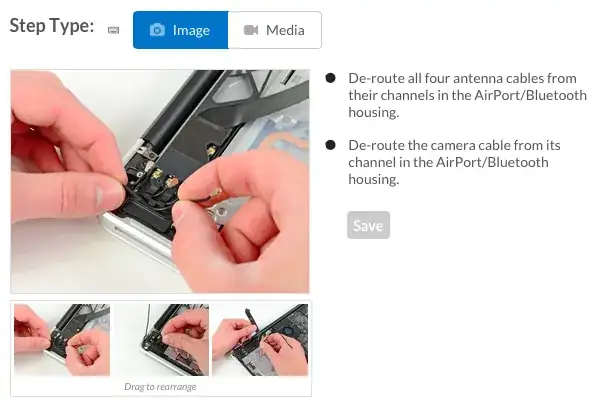
- One to three photos for each step
- Keep in mind that your guides will have a global audience, so you shouldn’t rely on the text alone.
- If needed: colored markup to highlight screws, cables and warnings with matched colored bullets in the step’s text.
How should I pick which guide to write?
To come up with a list of possible guides, first determine the major components within your device. Then try to determine which components are most likely to break or require an upgrade. Those guides will be the most valuable to the biggest audience.
For example, a typical laptop might contain the following major components:
- Battery—will wear out eventually
- RAM—popular upgrade
- Keyboard—possible victim of water damage
- Hard Drive—popular upgrade
- Optical Drive—might need disassembly to remove a stuck disk
- Motherboard—expensive component, possible victim of water damage
- Heat Sink—thermal paste replacement is common
- Fan—often gets dirty
- Speakers—less important component
- Display—likely to break
Creating more than one Guide?
Often times, a replacement guide will require taking out more components than just the one in the replacement guide. For example, you may need to remove the rear case before you remove the battery. So the battery guide is actually two guides, a rear case removal guide and a battery removal guide. When one guide must be followed first in order to complete another guide, we call it a prerequisite guide.
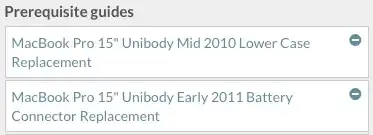
You can stack as many guides as you want, and you won’t have to remake a rear case removal guide for every component you remove afterward. It’s neat, but a little more complicated than a single long guide, so if you’re interested, check out the prerequisite section of this wiki after learning the basics below.
Pictures for your Guide
You don't need a lot of expensive equipment to shoot amazing guide photos—just proper technique and a little practice. Here are some tips for producing the perfect image:
- Find a clutter-free table or flat workspace.
- iFixit guide photos are 4:3. If possible, shoot to a 4:3 aspect ratio (landscape, not portrait) so you don’t have to crop your images. Most point-and-shoot cameras use a 4:3 aspect ratio automatically, while DSLRs shoot in 3:2.
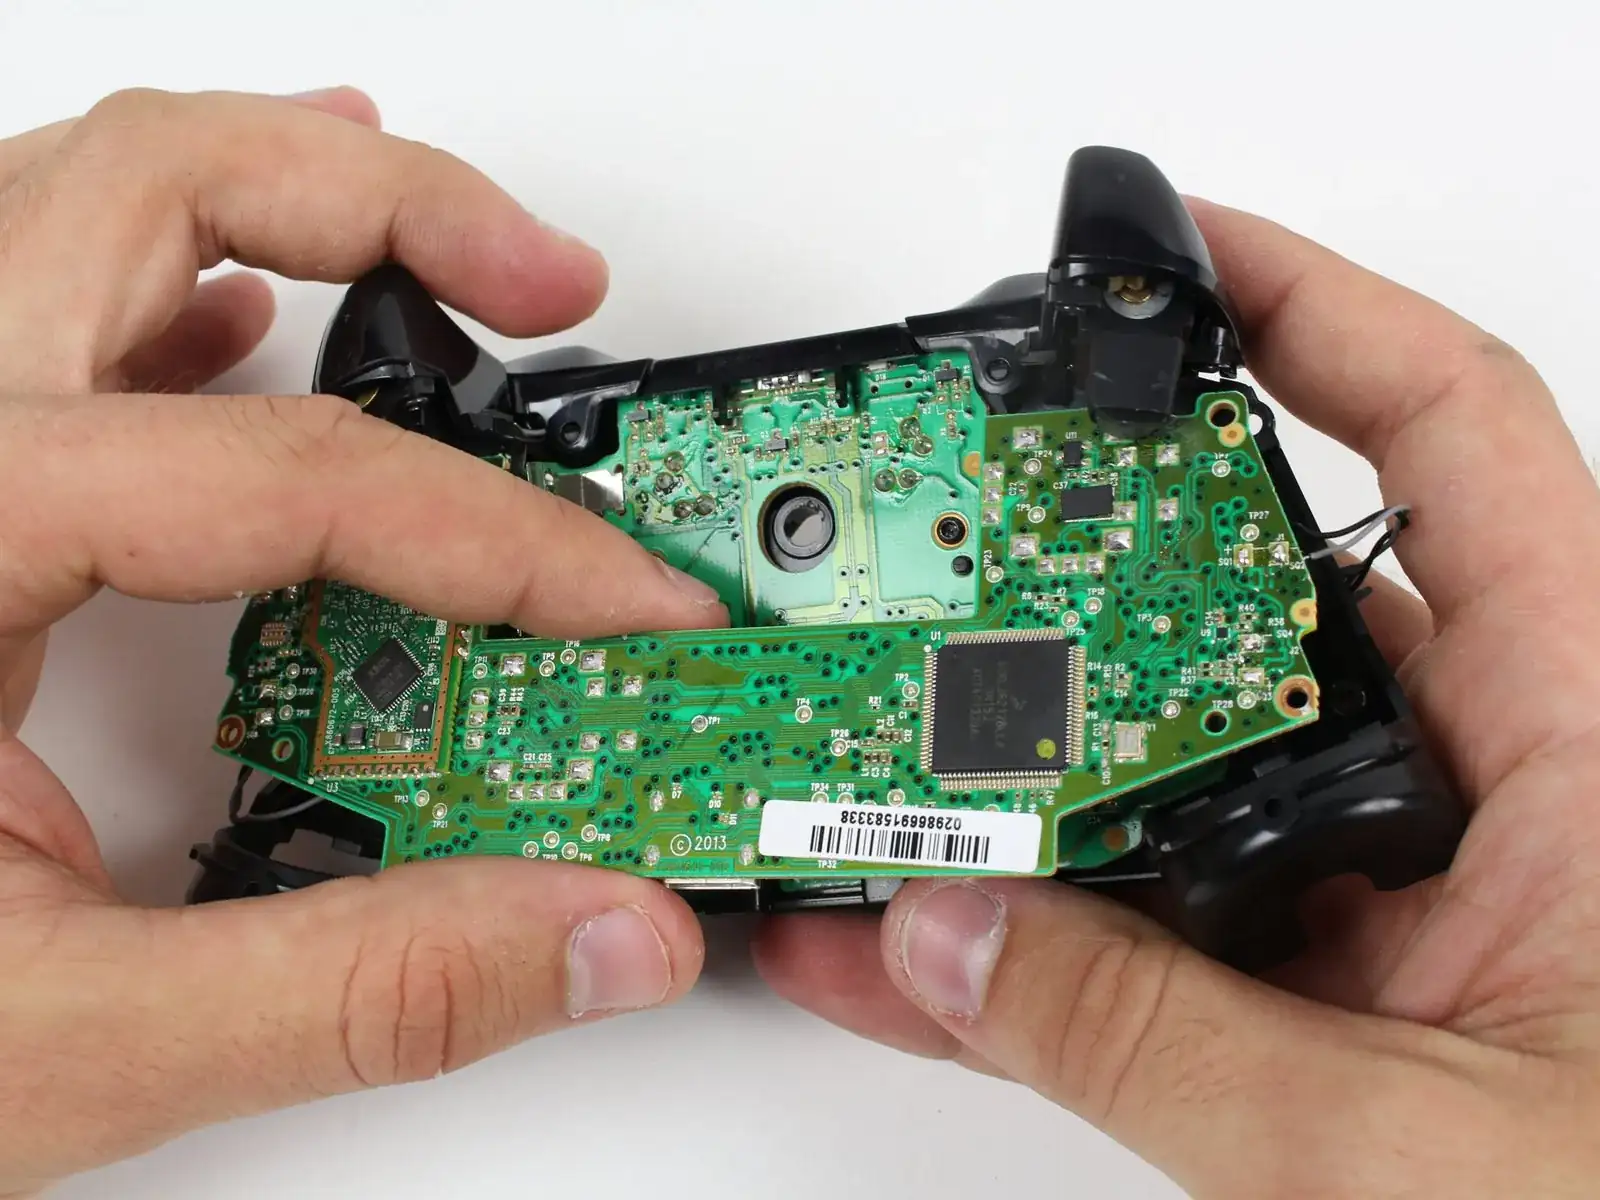
- Use your hands/tools in each shot to demonstrate the action being performed.
- Shoot in a first-person perspective. Try to set up each shot so that it matches what your readers will see.
- Keep the action in focus. It's easy to accidentally focus on the background instead of the item you're working on, but incorrect focus makes the guide harder to follow!
- Take multiple shots for each step. This way you’ll have options to choose from, and won’t need to go back and do things over again.
- Zoom in to get detailed shots of actions, especially when performing smaller or complex tasks.
Common photo issues to avoid
- Harsh shadows: Too much light from a single source will create harsh shadows and make details harder to see. Reposition your lights or add more lights to minimize shadows. Shooting at night can be a challenge for some cameras and lights.
- Glare: Bright lights or reflective surfaces can wash a photo out and make things hard to see. Reposition your lights and/or angle the device to eliminate glare.
- Posting images with watermarks makes for a poor user experience and is not permitted. Please see our Community Guidelines for more information.
Starting a Guide
Go to ifixit.com/new and start your new guide. After you've selected “Guide”, type in the name of your device. If your device already exists in the autocomplete drop-down, just click on it when you see it. Don't modify the name after you've clicked on it, as that will separate your new content from any existing work other users may have done.
The Introduction Tab
The prompts on the page should help you along but we have some additional tips you might want to consider as well:
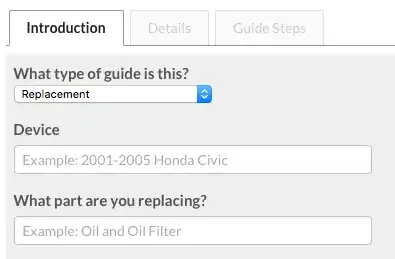
- The top of the page will ask you to choose a guide type. Most iFixit guides are Replacement guides, but if you are doing more than one part replacement in a single guide, you may want to try a disassembly guide, or check out prerequisites.
- Write a short summary for your guide. The summary is used in search results, so keep it brief (one or two sentences), and include any terms or phrases that your readers would be likely to search for. A good example of a summary might be, "Replace your dying battery to bring the power back to your iPod”.
- Write a short introductory paragraph for your guide. The introduction should contain any background information a reader would need before they begin. Think about what you would tell a friend before doing this guide: any special requirements, hazards, why this repair might be needed, etc.
Hit save, and you’ll be delivered to step one of your new guide!
Guide Steps
For each step in your guide, you'll add both written instructions and photos demonstrating those instructions.
Gear your writing towards an audience with little technical knowledge. iFixit is a website by everyone, for everyone—not just the gadget whizzes of the world. When writing your guides, ask yourself if your dad could follow your instructions. Be clear, descriptive, and concise. Read your own text out loud to yourself to be sure you’re not writing too much, or too little.
Tell your audience what to do and how to do it. It's important to be thorough when describing your repair procedure. Instead of simply saying "Remove the battery," describe how to remove it. "Use a plastic opening tool to pry the battery up and out of the case."
Be sure to identify tools, components and connectors correctly. This might sound obvious, but once you open your device up, you may run into things you've never seen before. Find a similar device on iFixit and check its guides for terminology, and have a look at our connector identification guide.
List all screw lengths (to the nearest tenth of a mm) and head types. For example, you might instruct your readers to remove four 5.5 mm Phillips #00 screws. That way if your reader mixes up their screws, they can measure them and find out which screws went where.
Markup
Once your photos are in place, you can use iFixit’s markup system to highlight the location of screws and other key components when necessary. To add markup to an image, go to the step’s edit page, click the gear icon on the image thumbnail, and then click “Markers…”
The first markup in a step should be red. Use additional colors only if there are more items that need to be marked up in the same step. Use them in the order they appear in the markup window (red, then orange, then yellow, etc.). When you write the bullet talking about the markup, match its color to the relevant markup. That way the red text matches the red bullet, no confusion!

Don’t overuse markup. Only add markup where it is necessary to point something out that is not otherwise obvious in the image. In many cases, a well-composed photograph that is centered on the action won’t need any markup at all.
The Details Tab
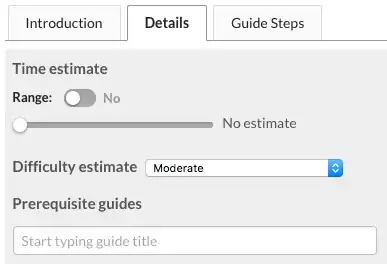
Clicking on the Details tab at the top of your guide’s Edit page lets you edit some important final fields. Most of the information in the details tab is necessary for a reader to decide if they can complete the guide, so be sure you fill out the difficulty, time required, and tools required.
Review!
Look over your guide, is it everything you were hoping it would be? Then great, you’re done! You can delete the In Progress flag on the Intro page, and set the Privacy to Public.


If you still need some polishing, don’t worry everything is fully editable and you can take your time perfecting your work.
Happy Fixing!
Special case: Video guides
While we do offer the option to upload a video or share links to YouTube and other platforms, iFixit has been specifically designed for step-by-step guides that users can follow directly on our site. It also makes it possible to translate the content, which can help more people around the world. For these reasons, we award reputation based on the number of steps.
If you’d like to share your repair video on our platform, please transcribe the video subtitle into steps for your guide and note our tips on how you could use this opportunity to turn it into an awesome guide. If you don’t find the time, screenshots of the specific steps taken in the video will do in the first place, but as soon as you get to it, consider upgrading your guide with awesome photos.
Bonus Round: Prerequisites
If you're making more than one guide for your device, each guide should be a completely independent step-by-step tutorial, showing all the steps to complete a repair, from start to finish. That sounds like a lot of extra work! And it would be, if not for the prerequisite system.
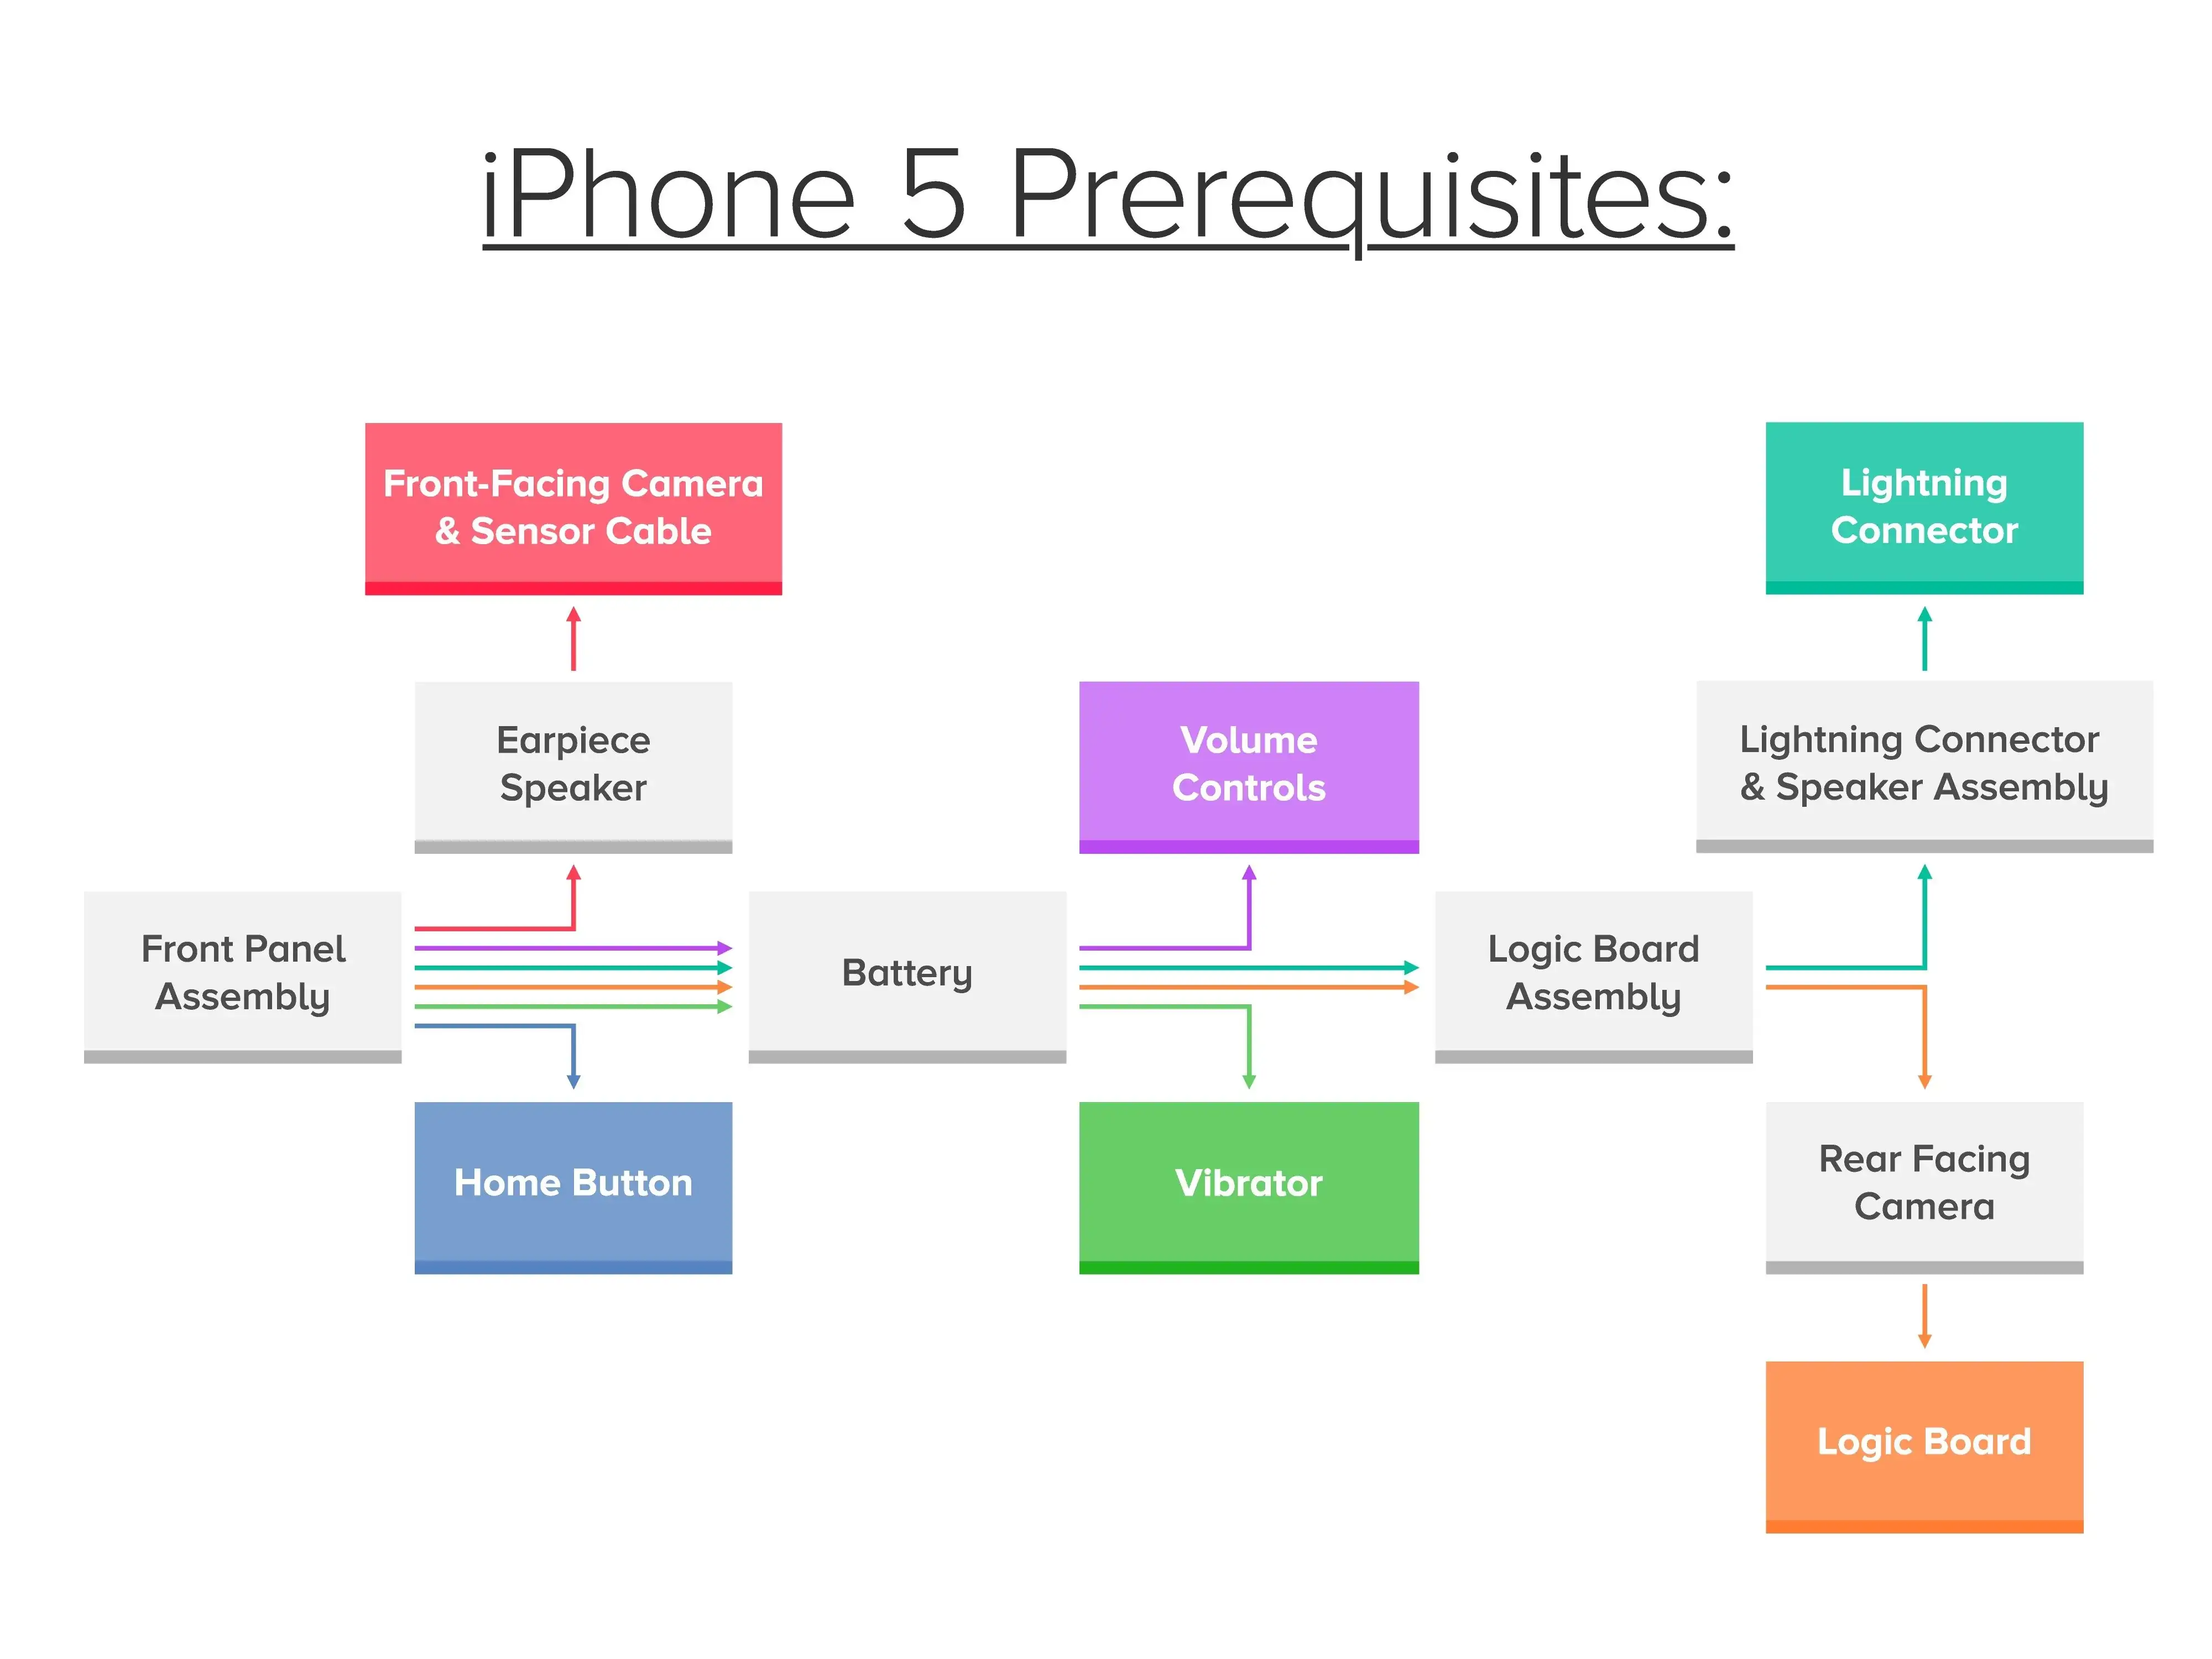
Prerequisites add the steps from existing guides to the beginning of your new guide, so that they show up before any new steps. This allows you to break your guides up to be specific to one component, without recreating or re-uploading a lot of content. For example, in most devices you'll want to remove the battery early in the repair process. Instead of having to create a step explaining how to remove the battery at the beginning of every guide, you can write the battery removal guide once, then select the battery guide as a prerequisite in future guides. Here's a guide for replacing an iPhone 5 battery. The battery removal guide is a prerequisite for the iPhone 5 Volume Controls guide. You can see that before you even get to the volume controls, you must go through the same steps that are found in the battery guide.
Effective use of prerequisites can be a huge time saver, but there are potential pitfalls. You can only use prerequisites for portions of the disassembly that are sequential. Let's consider an imaginary laptop, where the components can be removed in the following order:
1. Battery
2. RAM
3. Keyboard
4. Hard Drive
4. Optical Drive
4. Display Assembly
Notice that the hard drive, optical drive, and display assembly all share the same number. This means that once you've removed the first three components, you can choose to remove any of the next three. The hard drive is not a prerequisite for the optical drive because you do not have to remove the hard drive to take out the optical drive. This can get tricky to keep track of in your head, so drawing a tree diagram showing the order components are removed from your device may be helpful.
Another thing to watch out for when using prerequisites is prerequisite-only guides. Sometimes you'll end up taking something out of your device that isn't a single component, but rather a subsystem of many other small components, such as a display assembly or motherboard assembly. Prerequisite-only guides are incredibly important to proper guide flow, but having them show up with your other guides may confuse readers. That's why these particular guides will not actually be viewable to anyone except your team and site admins.
Still confused? How about a concrete example of prerequisite-only guides to help you out. Both the iPhone 5 Lightning connector and logic board guides use a "logic board assembly" guide as a prerequisite, but that doesn't show up in the guide list on the iPhone 5 device page. This is to keep users from getting mixed up because there is a "logic board assembly" guide, as well as a "logic board" guide. The logic board assembly includes a number of key components, but by itself isn't of much use to someone trying to fix their iPhone.
Bonus Round: How are repair guides licensed?
Please see the Content Licensing page for details on using the content.