Introduction
This guide is a prereq.
-
-
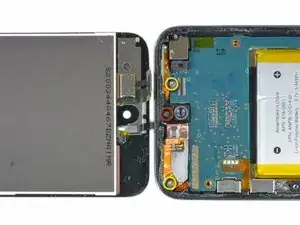
Remove the following three screws near the top edge of the logic board:
-
One 2.0 mm Phillips screw
-
Two 2.3 mm Phillips screws
-
-
-
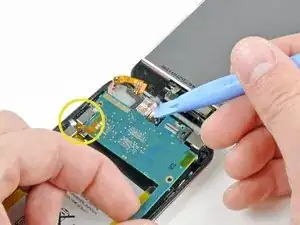
Use the edge of an iPod opening tool to gently pry, but not remove, the rear-facing camera away from the rear case.
-
-
-
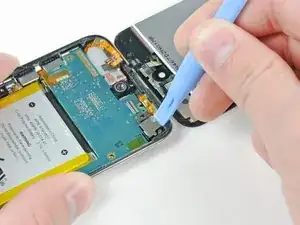
Use an iPod opening tool to slightly lift the edge of the logic board next to the battery enough to grab it with your other hand.
-
Be very careful not to lift too much as the volume control ribbon cable is still connected and will tear very easily.
-
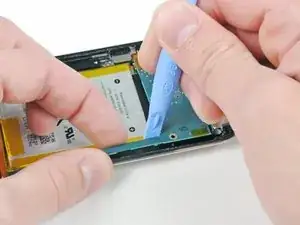
While gently lifting the logic board with one hand, use an iPod opening tool to lift the logic board near the copper tape at the logic board's top edge.
-
The logic board will be lifted adequately when the last display assembly connector has cleared the top edge of the rear case.
-
To reassemble your device, follow these instructions in reverse order.

Can you use the same colour coding as with The above sizes? [HvL]
Hugo van Leeuwen -
These colors are too close together.. One red, two yellow.. Please.
playpets106 -
Thanks for the comment! I adjusted that step, should be much easier to see now.
If you're ever having trouble seeing screw markers or other small details on a step, you can always view a larger version of the image with the "View Huge" link on the top left corner of the image.
Andrew Optimus Goldheart -
Can someone explain what the copper/ribbon is that the lower yellow marked screw goes through is for? Perhaps only heat dissipation? The ipod I have was given to me with much of the glass smashed and picked out, so some of this is just missing. Obviously I can't put it back...
hutchwilco -