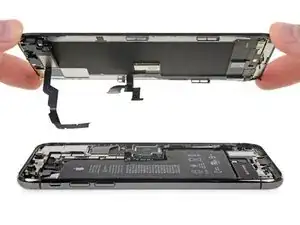
Introduction

Prereq-only for detaching the display assembly.

  1. L4SHpLOnFmSHNbUt
    L4SHpLOnFmSHNbUt
    klZrCyRh3mOhe1vi
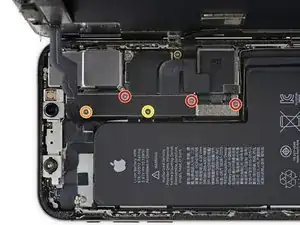
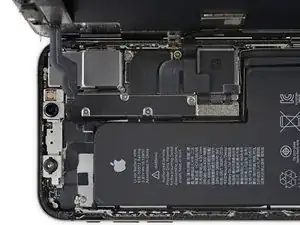
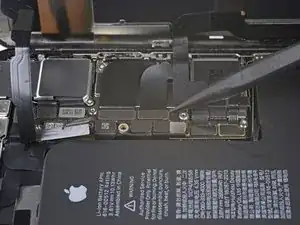
    • Remove five screws securing the logic board connector bracket, of the following lengths:

    • Three 1.0 mm Y000 screws

    • One 1.3 mm Y000 screw

    • One 3.7 mm Phillips screw

    • Throughout this repair, keep track of each screw and make sure it goes back exactly where it came from to avoid damaging your iPhone.

    The ribbon makes the 1.3 mm screw a little tricky. Use one hand to hold the display at a 90 degree or smaller angle to create the slack necessary to get the screw driver in place.

    charlotte -

    I tracked my screws by using my kids fridge magnets to hold each screw size and placing a piece of masking tape below with the screw size.

    charlotte -

    I stripped a screw ugh

    Tresia -

    Where can i buy a One 1.3 mm Y000 screw

    Ismail -

    FYI: I used a tiny piece of scotch tape to hold those 1mm screws in place while aligning the magnetic screwdriver. Otherwise they are so tiny the magnetic bit pulls them right out the hole.

    Jeff Miller -

  2. NRS1ETl65K3UsXxu
    • Remove the bracket.

    • The bracket may be lightly adhered in place. Lift gently but firmly to separate it.

    • During reassembly, this is a good point to power on your iPhone and test all functions before you seal the display in place. Be sure to power your iPhone back down completely before you continue working.

    During reassembly, pause here to check function. Gently reattach the top of the display to the base to test face ID.

    charlotte -

  3. GcwlxqG2c3tMI2eP
    GcwlxqG2c3tMI2eP
    yaKE452pmB6DtZfq
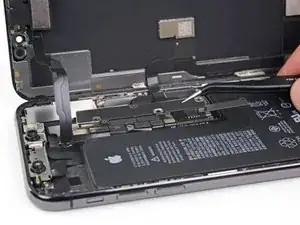
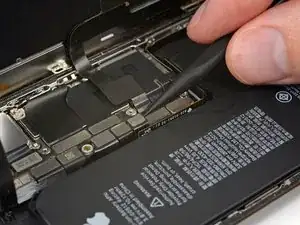
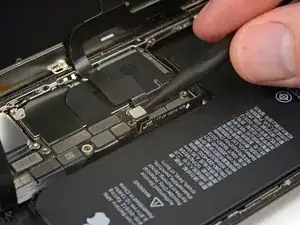
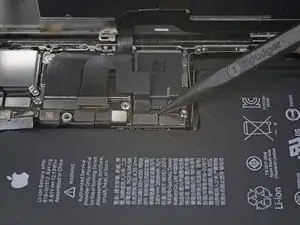
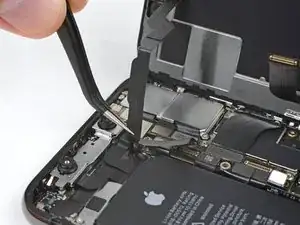
    • Use a spudger or a clean fingernail to pry the battery connector up from its socket on the logic board.

    • Try not to damage the black silicone seal surrounding this and other board connections. These seals provide extra protection against water and dust intrusion.

    • Bend the connector slightly away from the logic board to prevent it from accidentally making contact with the socket and providing power to the phone during your repair.

  4. 2PD5soUZSe3ZQyTK
    2PD5soUZSe3ZQyTK
    VfJmQ2o6MWIwj2rH
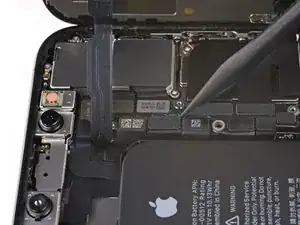
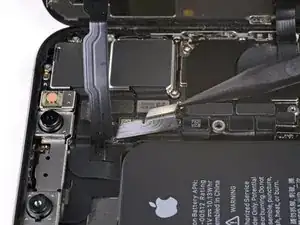
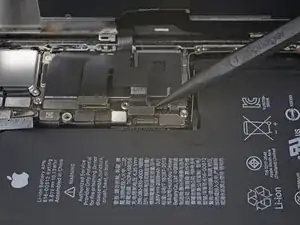
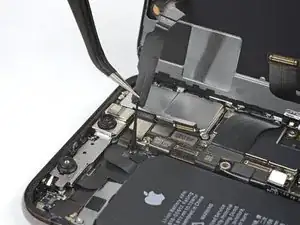
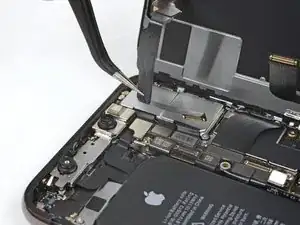
    • Use a spudger or a fingernail to pry up and disconnect the front panel sensor assembly connector.

    In my phone the connector made poor contact with the socket resulting in no sound audible through the phone receiver/headset. There was an overhang of insulation close to the socket which I believe may have prevented a good connection. So if you have these kinds of audio problems you might see if this is the problem.

    goblazers -

  5. asLYVcjUtcHdcKoa
    asLYVcjUtcHdcKoa
    GWSI1d2iAZSLC5fx
    • Use a spudger or a fingernail to disconnect the OLED panel cable connector.

    • To re-attach press connectors like this one, carefully align and press down on one side until it clicks into place, then repeat on the other side. Do not press down on the middle. If the connector is misaligned, the pins can bend, causing permanent damage.

    Shine a bright light here to help you align the connector. Eventually, the right side snapped in first.

    charlotte -

    On reassembly, use the pad of your fingertip to reconnect.

    charlotte -

  6. cOJMACcMMHtkE2tl
    cOJMACcMMHtkE2tl
    qs6qVlhbERRPsSqZ
    • Use a spudger or fingernail to pry the digitizer cable connector up from its socket.

    • This connector's recessed location makes it tricky to reconnect. Take your time and align it carefully, then gently press it into place with your fingertip—first one side, then the other. You should feel it click into place.

    • If any part of your screen doesn't respond to touch after your repair, disconnect the battery and then re-seat this connector, making sure it clicks fully into place and that there's no dust or other obstruction in the socket.

    Reassembly: reconnecting the press connectors upon reassembly was so hard, even for the ones not seated in a recessed location !! It took me two days to get them reconnected. What helped me was to shine bright lights on all sides of the iPhone and then hold the iPhone vertically like a book and press it in that way. They are now all in, but the touchscreen functionality has disappeared :( so I will need to reconnect that one.

    natialollie -

  7. NJPdFYTHitL2hafV
    NJPdFYTHitL2hafV
    aWAYZqlHNmxAtebd
    PxaTvWgCPXqUXVOh
    • The front panel sensor assembly flex cable is lightly adhered in place.

    • Carefully lift the cable until the adhesive separates.

    Will replacing camera and sensors fix damaged face I'd

    Siddhartha Chowdhury -

    No, FaceID will be disabled because the original sensors are paired with the logic board.

    Arthur Shi -

  8. ryfagYOqsXowIIsl

    I wish the reassembly directions were separate. I forgot to pause here to do the waterproof seal.

    charlotte -

    Geez, I blazed right past that small line to replace the waterproof seal. Needs to be called out much larger.

    Jeff Miller -

Conclusion

To reassemble your device, follow these instructions in reverse order.
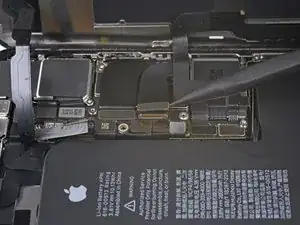
Jeff Suovanen

Member since: 06/08/13

427153 Reputation

0 comments