Introduction

Prerequisite-only guide for removing the battery in the iPhone 8 Plus.

  1. kGxbJ5FUjH25Lnd3
    • The iPhone 8 Plus's battery is secured by four pieces of stretch-release adhesive—two at the top, and two at the bottom.

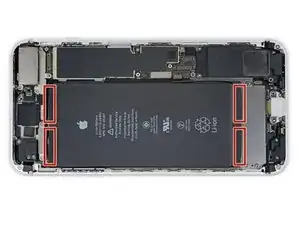
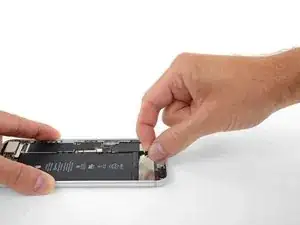
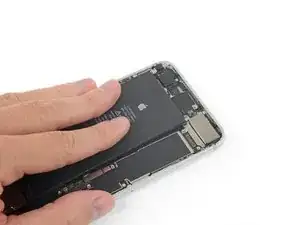
    • Each piece of adhesive has a black pull-tab at the end, which is lightly adhered to the front surface of the battery.

  2. UsDkDsQ1aSWpRw2I
    UsDkDsQ1aSWpRw2I
    WttOp6DVlKlTRhQQ
    XuKfeHJRRQVMy2Ak
    • Peel back the first battery adhesive tab from the bottom right edge of the battery.

    • If possible, use your fingernails or blunt tweezers. Be careful not to poke the battery with any sharp tools.

  3. aicQhEBXE4UDY1gi
    aicQhEBXE4UDY1gi
    GMKAmYKhayWGDKLg
    hpO3hEZTBrXX6kc1
    • Try to keep the adhesive strips flat and unwrinkled during this procedure; twisted or wrinkled strips will stick together and break instead of pulling out cleanly.

    • Additionally, do not press down on the battery as you pull the strips. Pressing on the battery creates pressure points that can snag and break the adhesive.

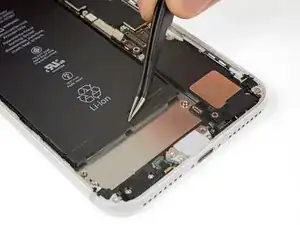
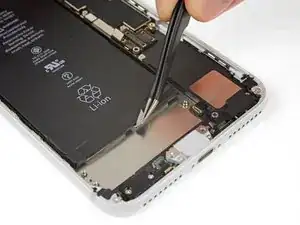
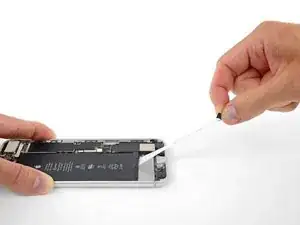
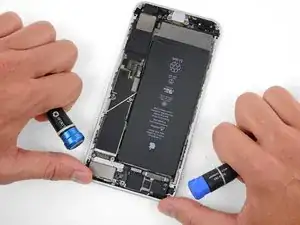
    • Slowly pull one battery adhesive tab away from the battery, towards the bottom of the iPhone.

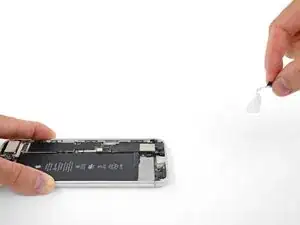
    • Pull steadily, maintaining constant tension on the strip until it slips out from between the battery and the rear case. For best results, pull the strip at as low an angle as possible, without snagging it on any of the iPhone's other components.

    • The strip will stretch to many times its original length. Continue pulling and re-grab the strip near the battery if necessary.

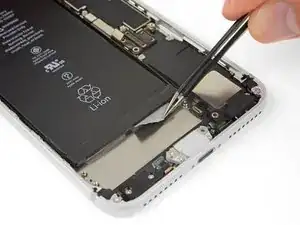
    • If the battery adhesive tabs break during the removal process, use your fingers or blunt tweezers to retrieve the remaining length of adhesive, and continue pulling.

    • If any of the adhesive strips break underneath the battery and cannot be retrieved, try to remove the remaining strips, and then proceed as instructed below.

  4. GTqWdDVGgaJICjUV
    GTqWdDVGgaJICjUV
    m2lJEPGkLMg5QLy6
    • Repeat the above steps to remove the remaining three adhesive strips.

    • Be sure to hold onto the battery as you remove the final strip, or it may fling out of the iPhone unexpectedly.

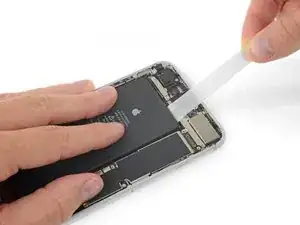
    • If you removed all of the adhesive strips successfully, skip the next step.

    • If any of the adhesive strips broke off underneath the battery and could not be retrieved, continue with the next step below.

    the upper ones usually break off. be advised to heat the phone up a little before trying

    hardijs -

    I can’t even find the upper ones. Tore into the battery cover trying.

    Kenneth Ewald, Sr. -

    Unfortunately both bottom and upper strips had been broken after pulling a little. Maybe I have pulled in a wrong way or maybe they had been more brittle as the time passes.

    Mustafa Kahraman -

    Aqueci com um aquecedor de cabelo e retirei a bateria com uma espátula de plástico. Não realizei os procedimentos da etapa 27 a etapa 35. Coloquei o adesivo e a bateria sem dificuldades de espaço.

    LipeBR -

  5. 6iyYOvSXUI5rbvh6
    6iyYOvSXUI5rbvh6
    DYCaKkvFUy3WWM5t
    • If any of the adhesive strips broke off and the battery remains stuck to the rear case, remove it by adding a few drops of isopropyl alcohol (90% or greater) underneath the battery near the stuck strip(s). After about a minute, gently lift the battery.

    • Don't try to forcefully lever the battery out. If needed, apply a few more drops of alcohol to further weaken the adhesive. Never deform or puncture the battery with your pry tool.

    • If you choose to use pry tools to lift the battery out of the iPhone, use extreme caution or you may damage the ribbon cables or the wireless charging coil directly underneath the battery.

    • If the battery remains stuck to the rear case, prepare an iOpener or use a hair dryer to heat the rear case directly behind the battery. This will help soften the adhesive.

    • Heat the iPhone until the rear case is slightly too hot to comfortably touch. Don't overheat the iPhone, or you may accidentally ignite the battery.

    • Alternatively, thread a strong piece of string (such as dental floss or a length of thin guitar string) underneath the battery.

    • Pull the string from side to side in a sawing motion all along the length of the battery to separate the adhesive. Do not deform or damage the battery.

    • To protect your fingers, wear gloves or wrap the string ends around a tool (such as the two screwdriver handles shown in the image).

    If you use isopropyl alcohol, use it very sparingly. The black (insulating?) paint on the wireless charging coil is readily alcohol-soluble.

    Scott Boyce -

    To add to Scott Boyce's comment, if you use too much alcohol, it may seep behind the camera glass, causing condensation behind it, and blurring the camera. With some time, it seems to all dry out.

    Aidan Brown -

    Unfortunately both bottom and upper strips had been broken after pulling a little. After that, removing the battery was a nightmare. I used pry tools to lift the battery out beginning from the bottom side. I heated bottom of the battery via heated air blower as lifted, used dental floss etc. Battery is crashed while lifting via pry tools, its tip had been burned, a strong odor reveled. After a though fight, removed the battery. I probably damaged wireless charging coil, its black protective shield was peeled place to place. I hadn't removed out the taptic engine before replacing battery, so I worried about it to be damaged because I applied some force to battery from bottom side initially. After replacement, everything seems working flawless; battery, home button, touch operations, NFC etc. I haven't used wireless charge before and not tried yet after replacement operation; I hope it also works and everything continues to work flawless.

    Mustafa Kahraman -

    I also broke all four labels after pulling them lightly. I was however able to remove the battery easily and in less than two minutes without an iOpener or hair dryer.

    I left the phone for 3-4 minutes over a plate, which was pre-heated in a microwave oven at 75W for 2-3 minutes.

    Andrea Collet -

  6. vkPFaWoOJ5IN1fIm
    • Remove the battery from the iPhone.

    • If your replacement battery came in a plastic sleeve, slide off and remove the sleeve before installation.

    • If there's any alcohol solution remaining in the phone, carefully wipe it off or allow it to air dry before installing your new battery.

    • Before you adhere the replacement battery, temporarily reconnect the battery connector to the logic board socket. This ensures that the battery is properly aligned in its recess.

    • Adhere the battery, disconnect it, and continue reassembling your device.

    • If your new battery doesn’t have adhesive preinstalled, refer to this guide to replace the adhesive strips.

    • Perform a force restart after reassembly. This can prevent several issues and simplify troubleshooting.

    I managed to remove the battery after taking the display off saving the time and trouble of removing all of the other items. If you try and fail, then follow the instructions and remove all of the parts. I did this by pulling on the white strips at the taptic engine end. The outside one is most important. Pull the strip with your entire finger and thumb on the white strip (don’t pull the black part). Pull slowly and gently out and move left and right. Very slowly. I was able to remove it. The inner one tore out - all the better if you can get both out. You can do this on the other end as well. Both mine tore out. Use an old credit card, cut it the width of the battery. Push under the corner until you’re under the battery. Do NOT pry up on the battery but let the credit card bend flat to the bottom. You can minimize how much the battery bends. As you push under 1/4 the way to 1/2 way it’ll get easier. If you get the strips off the other end, all the better. Apply heat from underneath the entire process.

    Bill Auerbach -

Conclusion

To reassemble your device, follow these instructions in reverse order.

Jeff Suovanen

Member since: 06/08/13

427153 Reputation

0 comments