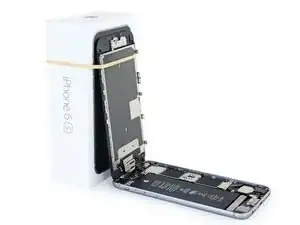
Introduction
Use this guide to remove, clean, or replace a faulty rear-facing iSight camera in your iPhone 6s.
You can also use this guide to replace the rear camera bracket.
-
-
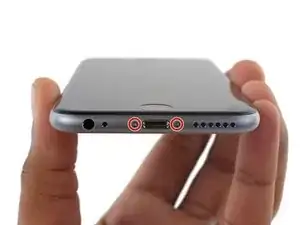
Remove the two 3.4 mm P2 Pentalobe screws on the bottom edge of the iPhone, on either side of the Lightning connector.
-
-
-
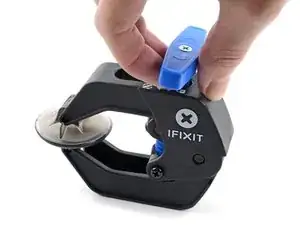
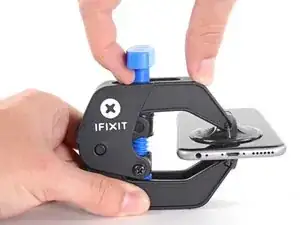
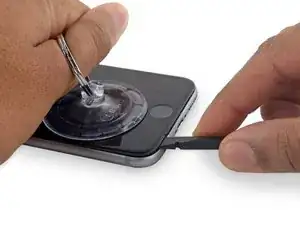
Pull the blue handle backwards to unlock the Anti-Clamp's arms.
-
Slide the arms over either the left or right edge of your iPhone.
-
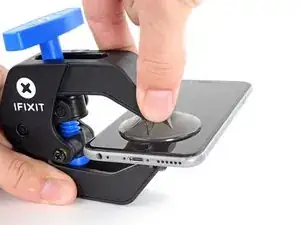
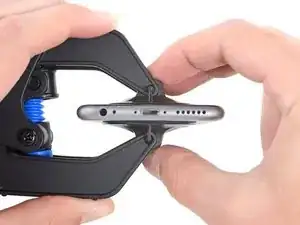
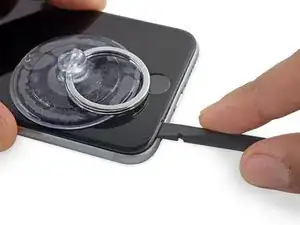
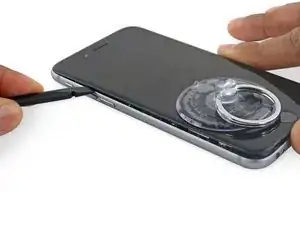
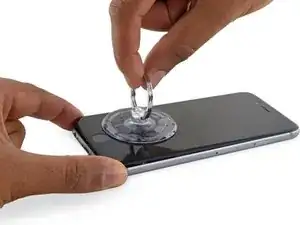
Position the suction cups near the bottom edge of the iPhone just above the home button—one on the front, and one on the back.
-
Squeeze the cups together to apply suction to the desired area.
-
-
-
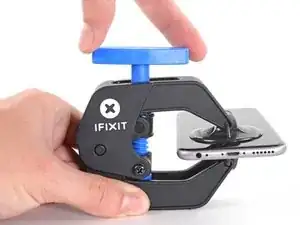
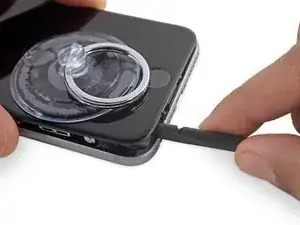
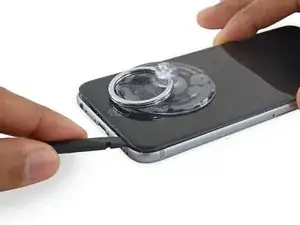
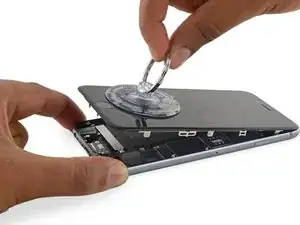
Pull the blue handle forwards to lock the arms.
-
Turn the handle clockwise 360 degrees or until the cups start to stretch.
-
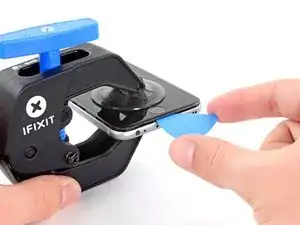
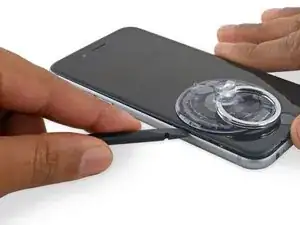
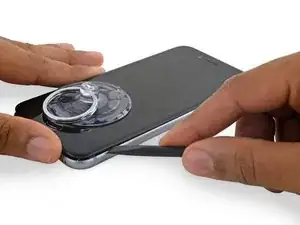
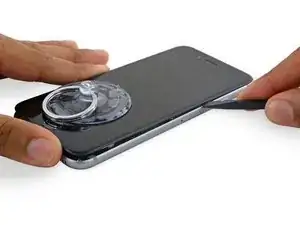
Insert an opening pick under the screen when the Anti-Clamp creates a large enough gap.
-
Skip the next three steps.
-
-
-
If you don't have an Anti-Clamp, follow the next three steps to use a suction handle.
-
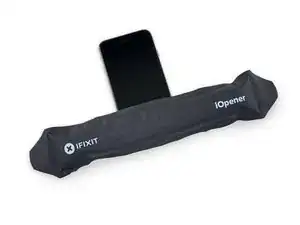
Apply mild heat to the lower edge of the iPhone using an iOpener or hair dryer for about a minute.
-
-
-
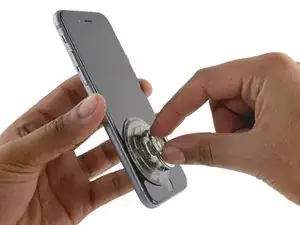
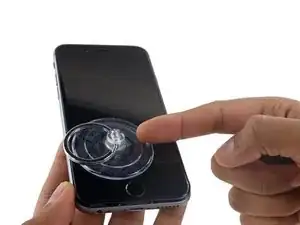
Apply a suction cup to the lower left corner of the display assembly.
-
Take care not to place the suction cup over the home button.
-
-
-
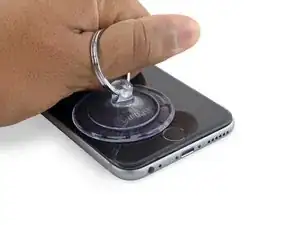
Pull up on the suction cup with firm, constant pressure to create a slight gap between the front panel and rear case.
-
-
-
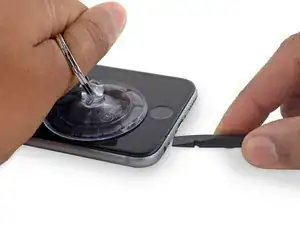
Place the flat edge of a spudger into the gap between the screen and rear case, directly above the headphone jack.
-
-
-
Twist the spudger to widen the gap between the front panel assembly and the rest of the phone.
-
-
-
Insert the flat end of the spudger on the left side of the phone, between the display assembly and rear case.
-
Slide the spudger up the side of the phone to separate the adhesive and pop the clips free.
-
-
-
Remove the spudger and reinsert it on the bottom edge, where you pried the phone open.
-
Slide the spudger to the right, along the bottom edge of the phone.
-
-
-
Slide the spudger up the right side to continue separating the adhesive and popping the display clips free from the iPhone.
-
-
-
Gently grasp the display assembly and lift it up to open the phone, using the clips at the top of the front panel as a hinge.
-
Open the display to about a 90º angle, and lean it against something to keep it propped up while you're working on the phone.
-
Add a rubber band to keep the display securely in place while you work. This prevents undue strain on the display cables.
-
-
-
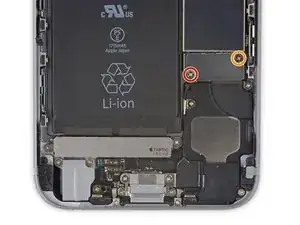
Remove two Phillips screws securing the battery connector bracket, of the following lengths:
-
One 2.9 mm screw
-
One 2.2 mm screw
-
-
-
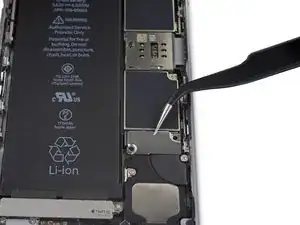
Use the point of a spudger to disconnect the battery connector by prying it straight up from the logic board.
-
-
-
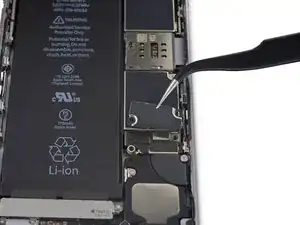
Push the battery connector away from the logic board until it stays separated from its socket, so as to avoid any accidental connection to the battery while you work.
-
-
-
Remove the following four Phillips screws securing the display cable bracket:
-
Three 1.2 mm screws
-
One 2.8 mm screw
-
-
-
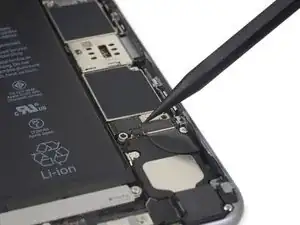
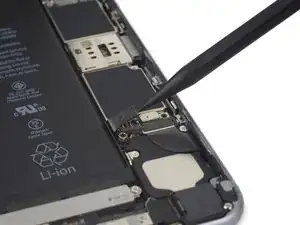
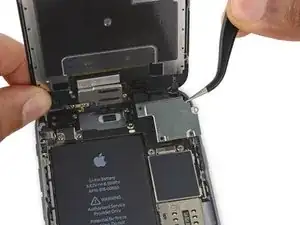
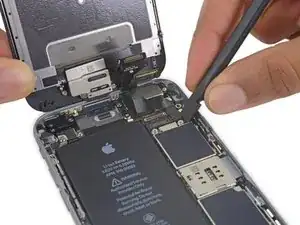
Use a spudger or a clean fingernail to disconnect the front camera flex cable by prying it straight up from its socket on the logic board.
-
-
-
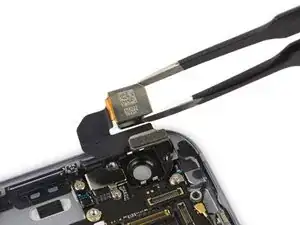
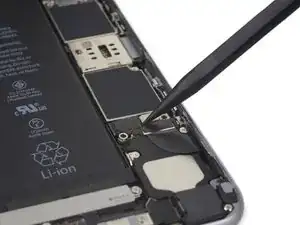
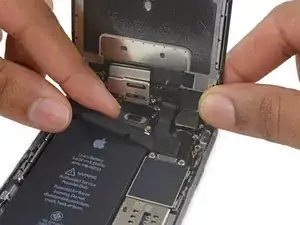
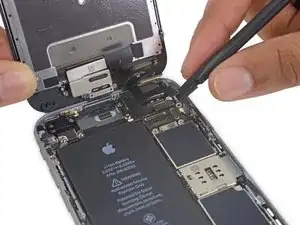
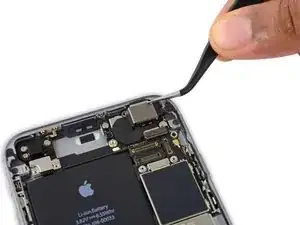
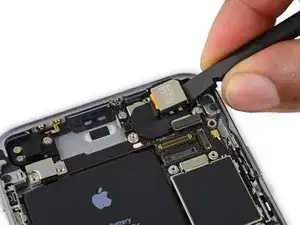
Use the flat end of a spudger to disconnect the rear camera from its socket on the logic board.
-
-
-
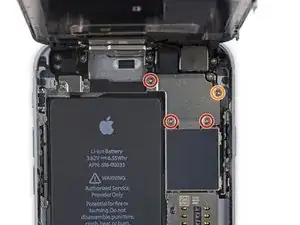
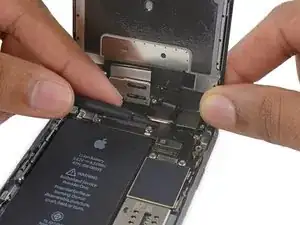
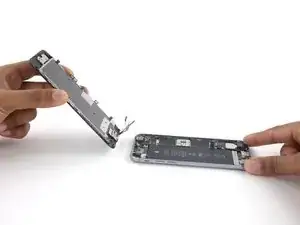
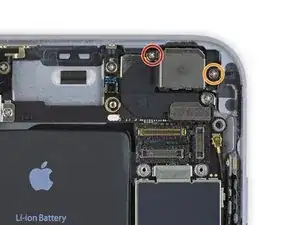
Remove the following two Phillips screws over the rear camera bracket:
-
One 1.6 mm screw
-
One 2.0 mm screw
-
-
-
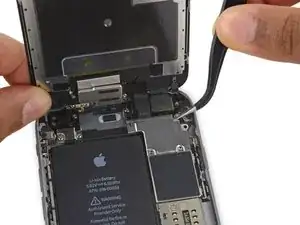
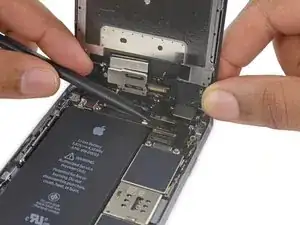
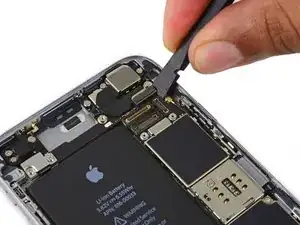
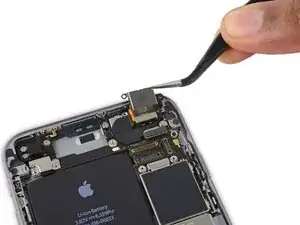
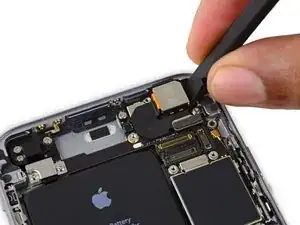
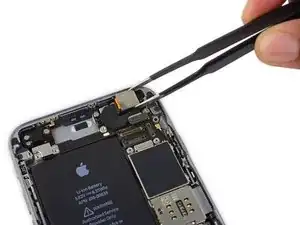
Insert a spudger to the side of the camera, between the rear case and the camera module.
-
Gently pry up on the camera to nudge it out from its housing.
-


To reassemble your device, follow these instructions in reverse order.

11 comments
After camera replacement my iSight camera does not focus close up its blurry but when I take it out of the housing it seems to work but when I pop it back in its housing it goes blurry? Any ideas
Arran -
Clean the lens with a qtip.
Hello, I was wondering if the camera they sell in here is also the same quality as the original one, thank you
I replaced the rear facing camera. The sapphire filter is shattered and must be replaced. Did not come with new camera. No instructions on how to replace it. iphone is disassembled , so I am with out a phone I need a replacement filter and instructions of the steps ASAP Please help!!!!!!!!!!
Don Carroll
dc@conceptimages.com
It's true, the lens cover is a separate part and is fixed to the rear case. Another user posted a guide for replacing the cover on the iPhone 6—you might be able to reference that to figure out how to replace the lens cover on your 6s. Good luck!
Hi, just got the repair kit that came with IPhone 6S battery. I felt that there’s no explanation on which tool to use to remove the two 3.4mm P2 Pentalobe screws. It’s not helpful just to say “Remove the two 3.4 mm P2 Pentalobe screws on the bottom edge of the iPhone, next to the Lightning connector. “. It’s more important to explain how and what tool to use. The repair tool kit tools were not marked at all and it’s not right to assume that people know which tool or part to use. Please kindly address this issue. Thanks. Janet
Janet Monaghen -
@beingchen For the P2 pentalobe screws you should use the driver bit marked P2. Might be a little hard to see but it’s there, etched into the side of the bit.
Jeff Suovanen -