
Introduction
Follow the steps in this guide to replace the Home Button Assembly, including the gasket and cable, in your iPhone 6s Plus. Note that home buttons are paired with their respective logic board, so Touch ID will no longer work after you replace the Home Button Assembly.
You can also use this guide to replace the home button bracket.
-
-
Power off your iPhone before beginning disassembly.
-
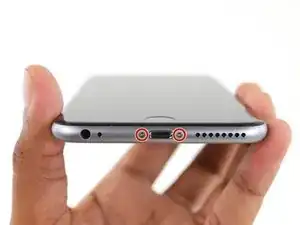
Remove the two 3.4 mm Pentalobe screws on either side of the Lightning port.
-
-
-
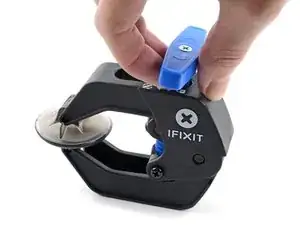
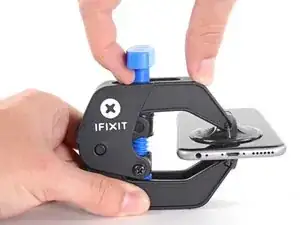
Pull the blue handle backwards to unlock the Anti-Clamp's arms.
-
Slide the arms over either the left or right edge of your iPhone.
-
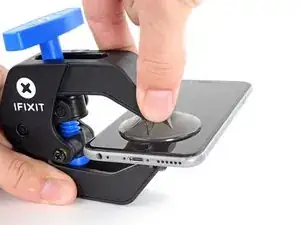
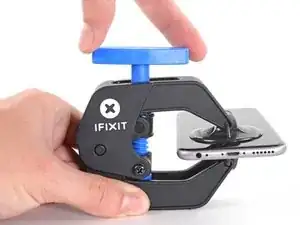
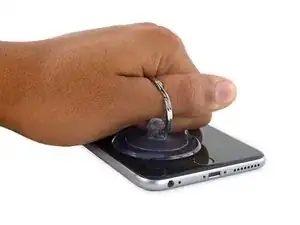
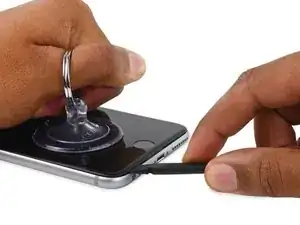
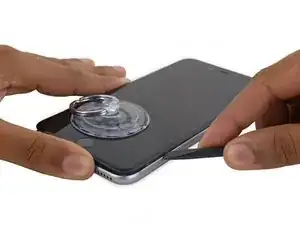
Position the suction cups near the bottom edge of the iPhone just above the home button—one on the front, and one on the back.
-
Squeeze the cups together to apply suction to the desired area.
-
-
-
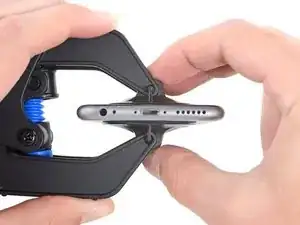
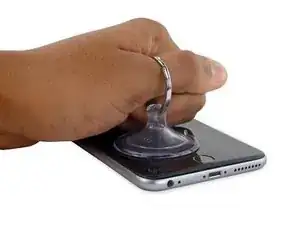
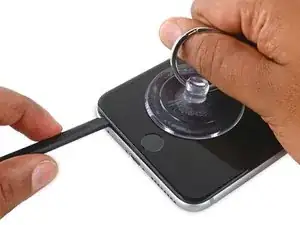
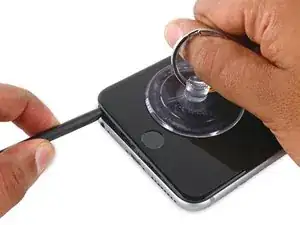
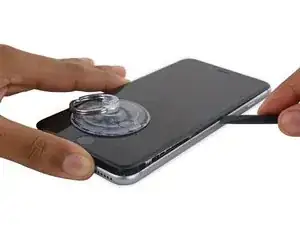
Pull the blue handle forwards to lock the arms.
-
Turn the handle clockwise 360 degrees or until the cups start to stretch.
-
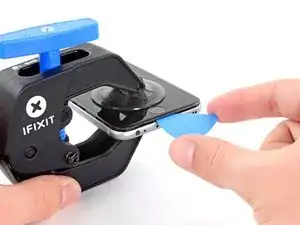
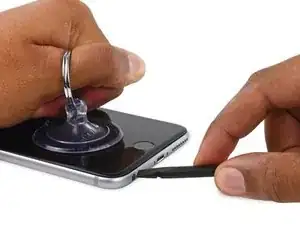
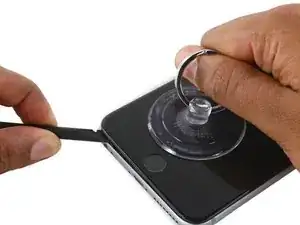
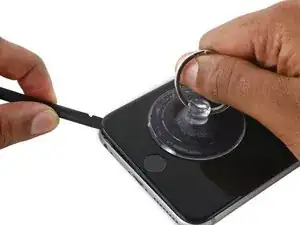
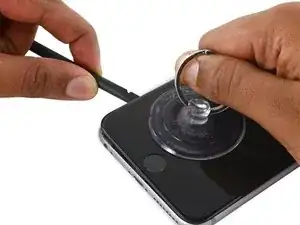
Insert an opening pick under the screen when the Anti-Clamp creates a large enough gap.
-
Skip the next three steps.
-
-
-
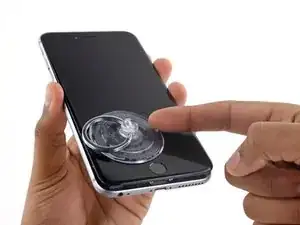
If you don't have an Anti-Clamp, follow the next three steps to use a suction handle.
-
Apply mild heat to the lower edge of the iPhone using an iOpener or hair dryer for about a minute.
-
-
-
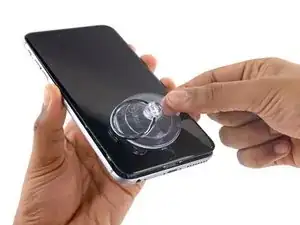
Pull up on the suction cup with firm, constant pressure to create a slight gap between the front panel and rear case.
-
-
-
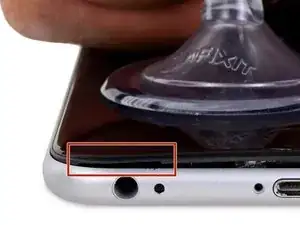
The safest place to pry from is the notch in the front panel above the headphone jack.
-
While still maintaining pressure on the suction cup, insert the flat tip of a spudger into the gap, directly above the headphone jack.
-
-
-
While firmly pulling up on the suction cup, slide the edge of the spudger under the bottom left corner of the display.
-
-
-
Slide the tip of the spudger up the left side of the phone, between the front panel and the rear case.
-
-
-
Insert the flat tip of the spudger under the right edge of the display.
-
Slide the spudger up the right side.
-
-
-
Use a plastic opening tool to hold down the rear case while pulling up the suction cup to open the phone.
-
-
-
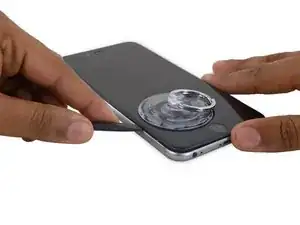
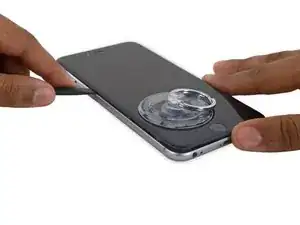
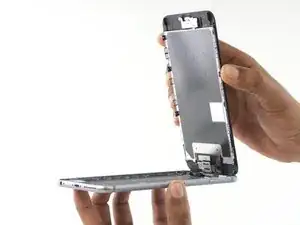
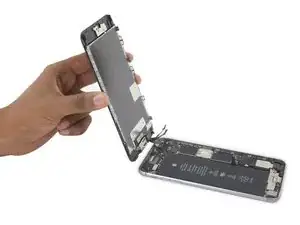
Gently grasp the display assembly and lift it up to open the phone, using the clips at the top of the front panel as a hinge.
-
Open the display to about a 90º angle, and lean it against something to keep it propped up while you're working on the phone.
-
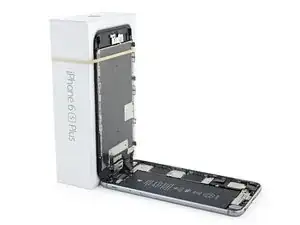
Add a rubber band to keep the display securely in place while you work. This prevents undue strain on the display cables.
-
-
-
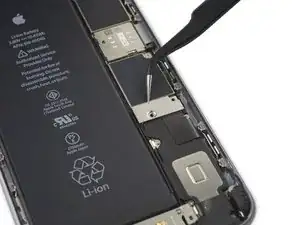
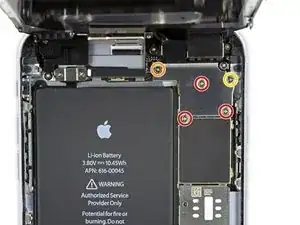
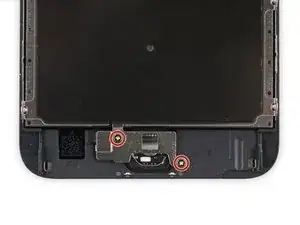
Remove two Phillips screws securing the battery connector bracket to the logic board, of the following lengths:
-
One 2.9 mm screw
-
One 2.3 mm screw
-
-
-
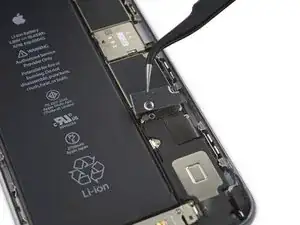
Use a spudger or a clean fingernail to disconnect the battery connector by prying it straight up off the logic board.
-
-
-
Bend the connector back to ensure it doesn't make contact and power the iPhone on while you're working on it.
-
-
-
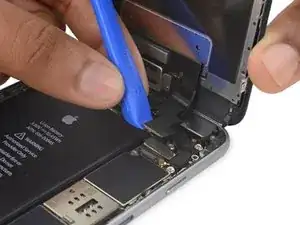
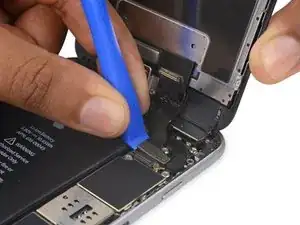
Use a plastic opening tool to disconnect the front-facing camera and sensor cable connector.
-
-
-
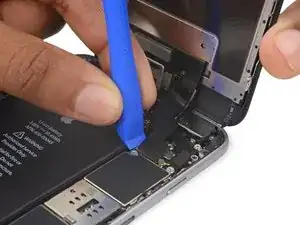
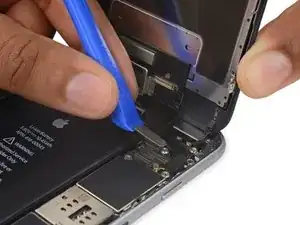
Use a plastic opening tool to disconnect the digitizer cable by prying it straight up from its socket on the logic board.
-
-
-
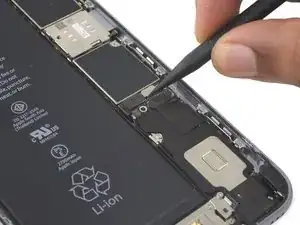
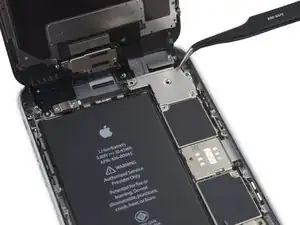
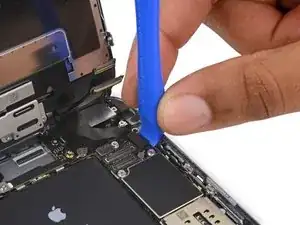
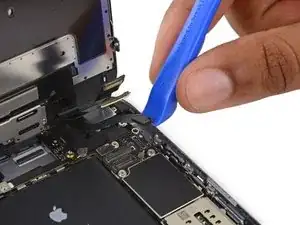
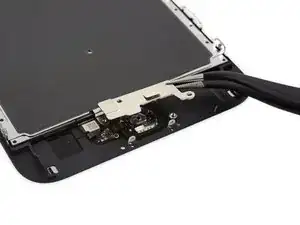
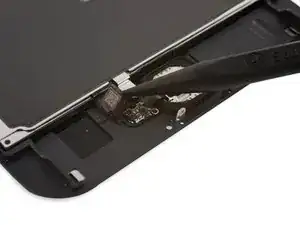
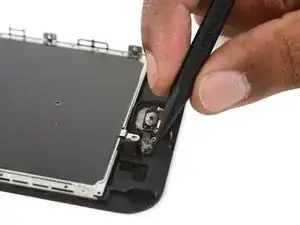
Disconnect the home button/fingerprint sensor cable by prying it straight up from its socket on the logic board.
-
-
-
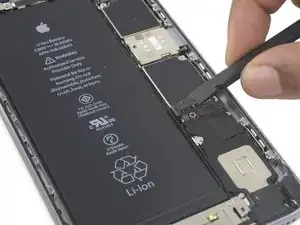
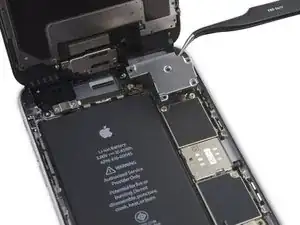
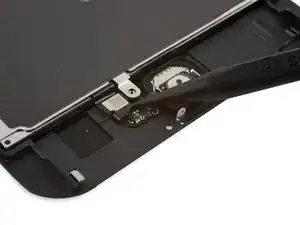
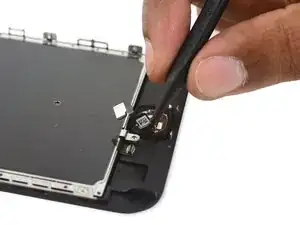
Use the pointed tip of a spudger to disconnect the home button cable from its connector on the display assembly.
-
-
-
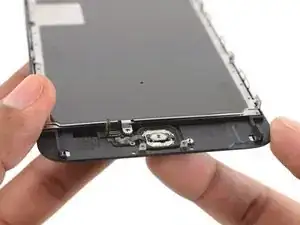
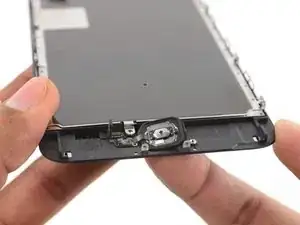
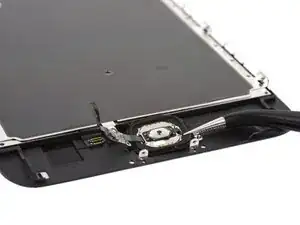
Apply mild heat (with an iOpener, heat gun, or hair dryer) to soften the adhesive securing the home button gasket.
-
Using your fingertip, gently press up on the home button from the front side of the display assembly. Use firm, constant pressure to slowly separate the home button's rubber gasket from the front panel.
-
-
-
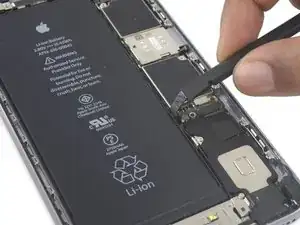
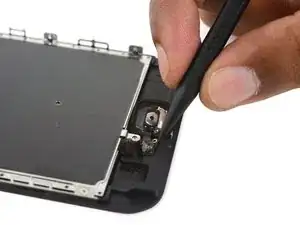
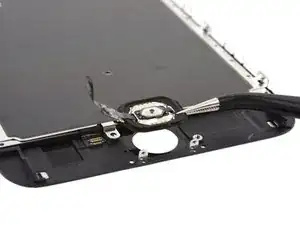
Use the pointed end of a spudger to pry the lightly-adhered home button flex cable off the display assembly.
-


To reassemble your device, follow these instructions in reverse order.

12 comments
I swear a night time operation for a home button transfer was not easy! But... I pulled it off!
SerJay -
Which part is difficult?
The only problem I experienced was that you have to re-use the black gasket around the home button. It was tricky to have to place it on the new home button, but I got it after a few tries.
can i still use the finger print scanner after changing the home button?
No, the fingerprint scanner and logic board are paired during their manufacturing so if the original scanner is destroyed, you will never have Touch ID again. But you should regain the functionality of the button.
Make sure you use the correct screw driver tip to remove these screws, which for the iPhone 6s Plus is the P2, otherwise you may strip the tip of the screw making it 10 times harder to remove. If once the screw is lose, it will not come off, use a magnet to remove it.
Miguel Perez -