Introduction
Use this guide to replace the earpiece speaker.
-
-
Power off your iPhone before beginning disassembly.
-
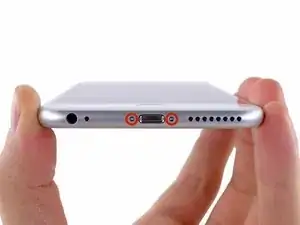
Remove the two 3.6 mm P2 Pentalobe screws next to the Lightning connector.
-
-
-
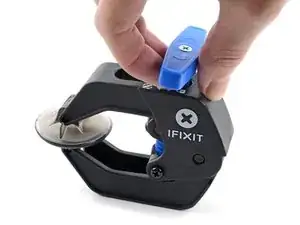
Pull the blue handle backwards to unlock the Anti-Clamp's arms.
-
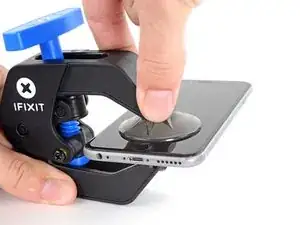
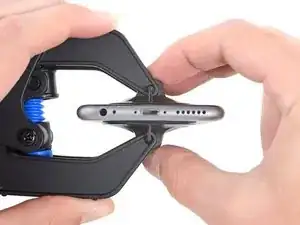
Slide the arms over either the left or right edge of your iPhone.
-
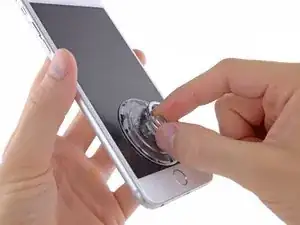
Position the suction cups near the bottom edge of the iPhone just above the home button—one on the front, and one on the back.
-
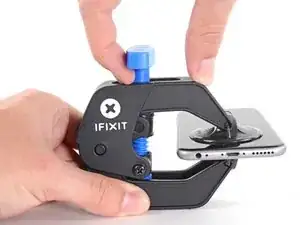
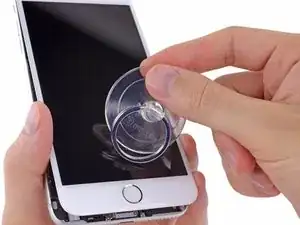
Squeeze the cups together to apply suction to the desired area.
-
-
-
Pull the blue handle forwards to lock the arms.
-
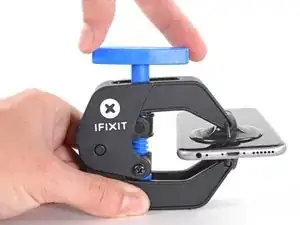
Turn the handle clockwise 360 degrees or until the cups start to stretch.
-
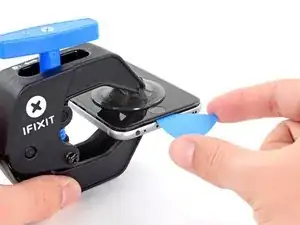
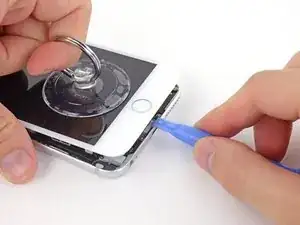
Insert an opening pick or tool under the screen when the Anti-Clamp creates a large enough gap.
-
Skip the next three steps.
-
-
-
Use a single suction cup to lift the front panel:
-
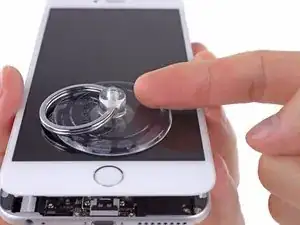
Press a suction cup onto the screen, just above the home button.
-
-
-
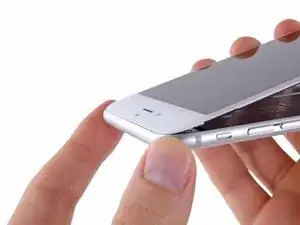
While holding the iPhone down with one hand, pull up on the suction cup to slightly separate the front panel assembly from the rear case.
-
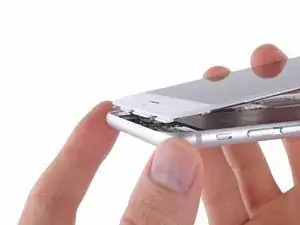
Using a plastic opening tool, begin to gently pry the rear case down, away from the display assembly, while continuing to pull up with the suction cup.
-
-
-
Pull the plastic nub to release the vacuum seal on the suction cup.
-
Remove the suction cup from the display assembly.
-
-
-
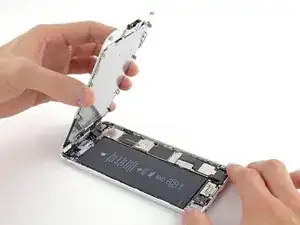
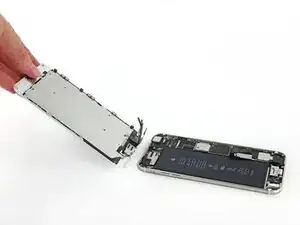
Pull the home button end of the front panel assembly away from the rear case, using the top of the phone as a hinge.
-
Open the display to about a 90º angle, and lean it against something to keep it propped up while you're working on the phone.
-
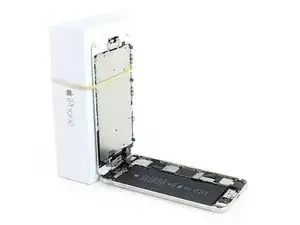
Add a rubber band to keep the display securely in place while you work. This prevents undue strain on the display cables.
-
-
-
Remove the following Phillips screws from the battery connector bracket:
-
One 2.3 mm screw
-
One 3.1 mm screw
-
-
-
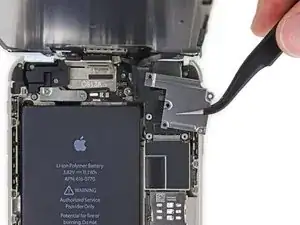
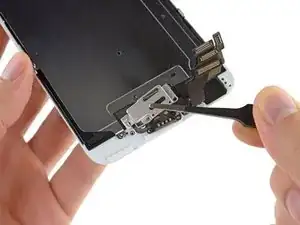
Use a clean fingernail or the edge of an opening tool to gently pry the battery connector up from its socket on the logic board.
-
-
-
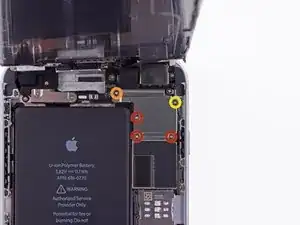
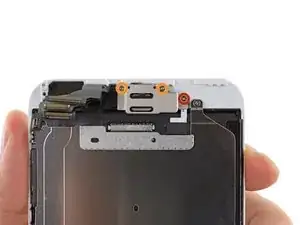
Remove the following Phillips screws securing the front panel assembly cable bracket:
-
Three 1.2 mm screws
-
One 1.5 mm screw
-
One 2.9 mm screw
-
-
-
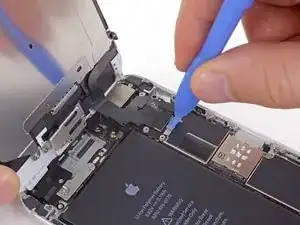
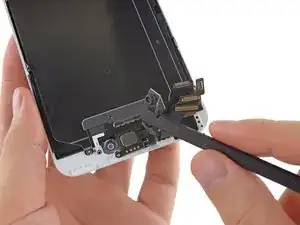
While still supporting the front panel, use a fingernail or the edge of an opening tool to disconnect the front-facing camera and earpiece speaker connector.
-
-
-
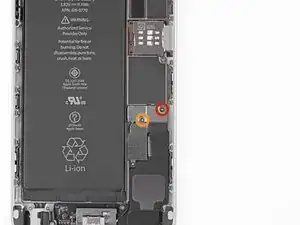
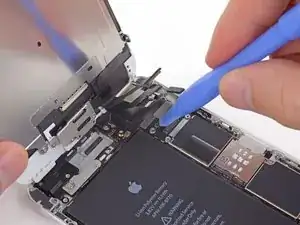
Remove the following Phillips screws securing the upper component bracket:
-
One 1.5 mm screw
-
Two 2.3 mm screws
-
-
-
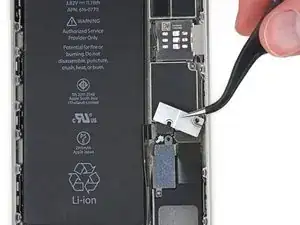
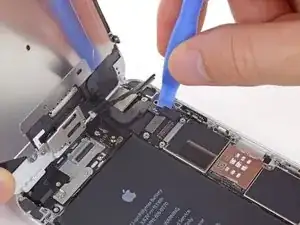
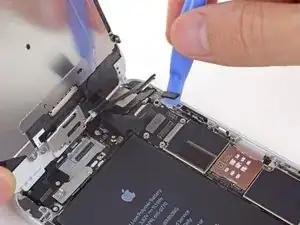
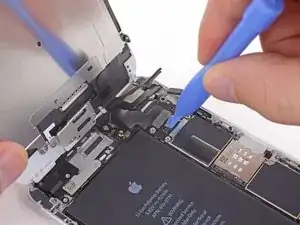
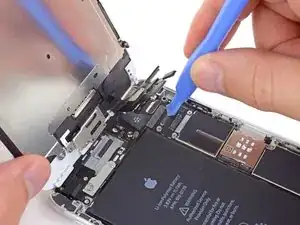
Use a the flat end of a spudger to pry up the front-facing camera and display cables, and gently push them aside.
-
-
-
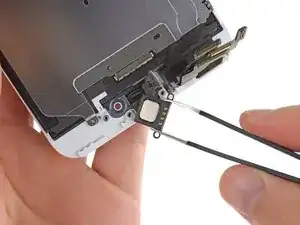
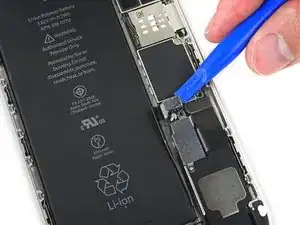
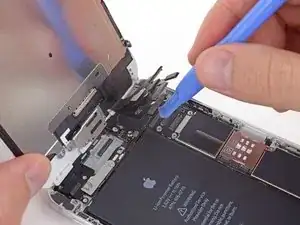
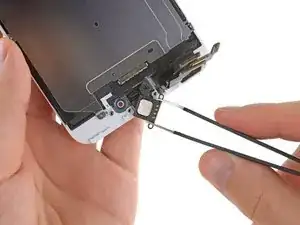
Use a pair of tweezers to firmly grasp and remove the earpiece speaker from the display assembly.
-


To reassemble your device, follow these instructions in reverse order.

7 comments
Dropped my iphone and the speaker stopped working.
Expected that it was a connector that was lose.
Used this guide to fix it.... Thanks :)
My son was chewing on my phone and the speaker was real quiet afterwards. I purchased your product above and installed but nothing changed. Not sure what else it could be, don't want to purchase a 100$ display only to have that not fix the issue either. And of course since I've already opened it Apple sent it back to me :D
After dropping my iPhone from the car, the speaker stopped working. Thankfully using this guide I was able to reseat the connector and all was good again. Make sure the four cable are attached properly to the board when reassembling as I had to take the protective covers back off again and reseat them.
Overall I feel confident that I would be able to do it again.
On a separate note I would highly recommend a decent precision set to carry out any repairs on these small devices. The screws are tiny and magnetised tools are a must.
Thanks iFixit!
Pentalobe P2
Enea Del Lama -