Introduction
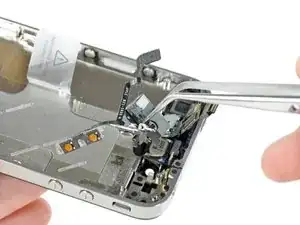
A new headphone jack will also give you new electronic portions of the silent switch and volume buttons.
Tools
Parts
-
-
Power off your iPhone before beginning disassembly.
-
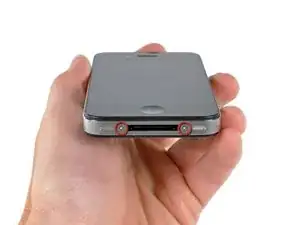
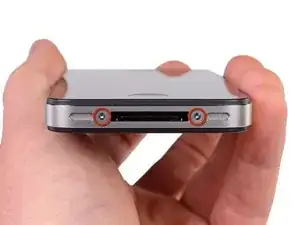
Your iPhone 4 rear cover may have either two #000 Phillips screws or Apple's 5-Point "Pentalobe" screws (second image). Check which screws you have, and ensure you also have the correct screwdriver in order to remove them.
-
Remove the two 3.6 mm Pentalobe or Phillips #000 screws next to the dock connector.
-
-
-
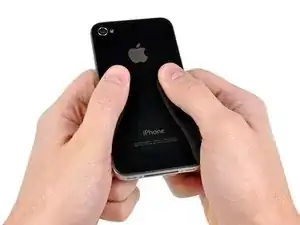
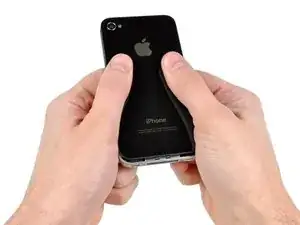
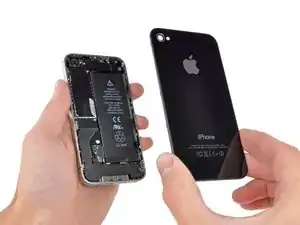
Pinch the rear panel with your fingers and lift it away from the iPhone. Alternatively, use a Small Suction Cup .
-
-
-
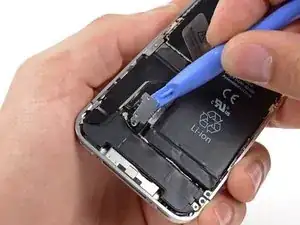
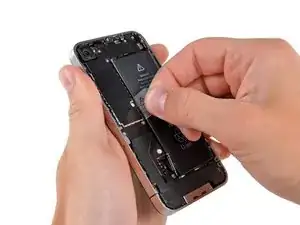
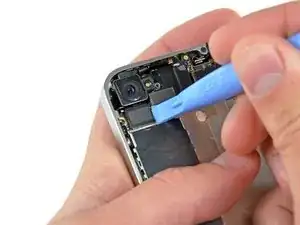
Use a plastic opening tool to gently pry the battery connector up from its socket on the logic board.
-
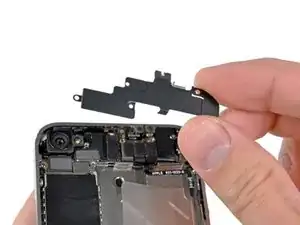
Remove the metal clip covering the antenna connector.
-
-
-
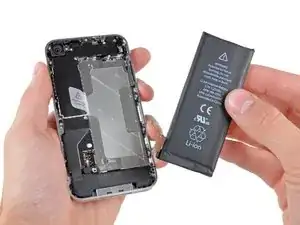
Use the clear plastic pull tab to gently lift the battery out of the iPhone.
-
If there's any alcohol solution remaining in the phone, carefully wipe it off or allow it to air dry before installing your new battery.
-
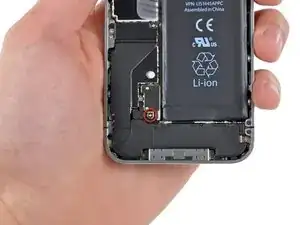
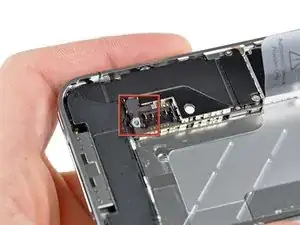
Before reconnecting the battery connector, be sure the contact clip (shown in red) is properly positioned next to the battery connector.
-
-
-
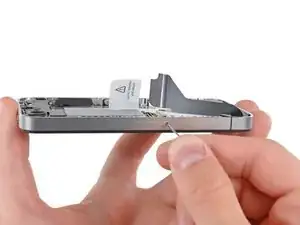
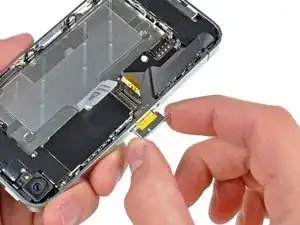
Use a SIM card eject tool or a paperclip to eject the SIM card and its holder.
-
Remove the SIM card and its holder.
-
-
-
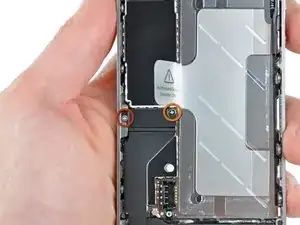
Remove the following two screws:
-
One 1.2 mm Phillips
-
One 1.6 mm Phillips
-
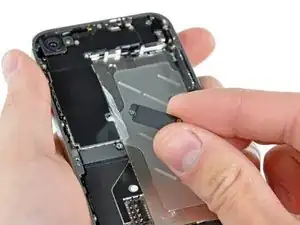
Remove the thin steel dock connector cable cover from the iPhone.
-
-
-
Use an iPod opening tool to gently pry the dock cable connector up off the logic board from both short ends of the connector.
-
-
-
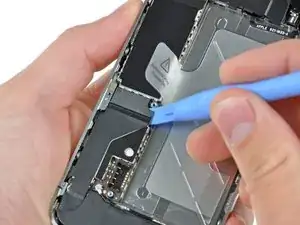
Use a plastic opening tool to pry the lower antenna connector up off its socket on the logic board.
-
-
-
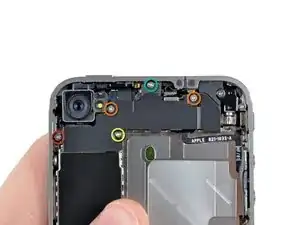
Remove the following five screws securing the Wi-Fi antenna to the logic board:
-
One 2.3 mm Phillips
-
Two 1.6 mm Phillips
-
One 1.4 mm Phillips
-
One 4.8 mm Phillips
-
-
-
Use an iPod opening tool to slightly lift the top edge of the Wi-Fi antenna away from the logic board.
-
Use the tip of a spudger to pull the Wi-Fi retaining clips away from the inner frame.
-
Remove the Wi-Fi antenna from the iPhone. Make sure you don't lose the metal clips on the top of the cover where the 4.8mm screw attaches or the 4.8mm screw. That's the primary reason for abnormal Wi-Fi performance after the reassembly.
-
-
-
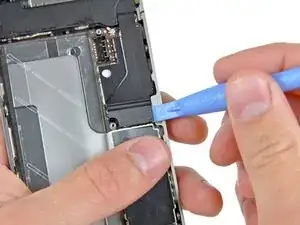
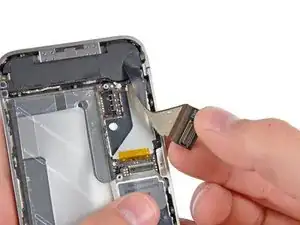
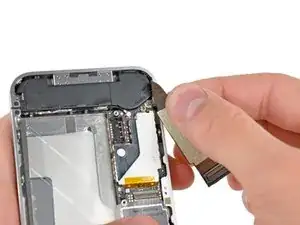
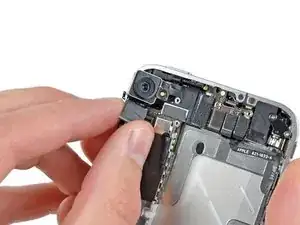
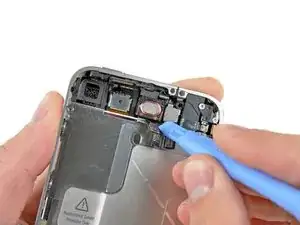
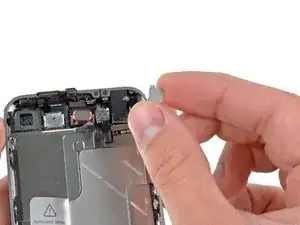
Use an iPod opening tool to carefully lift the rear camera connector up off its socket on the logic board.
-
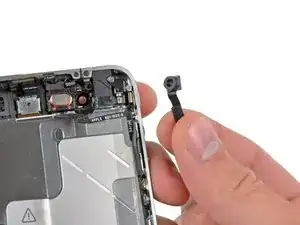
Remove the rear camera.
-
-
-
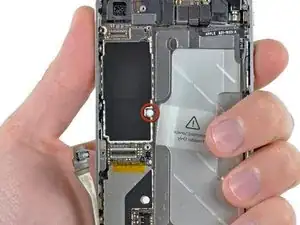
Remove the small circular white sticker (warranty sticker and water indicator) covering the screw near the battery pull tab.
-
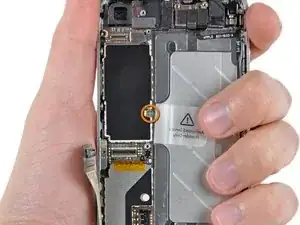
Remove the 2.4 mm Phillips screw that was hidden underneath the sticker.
-
-
-
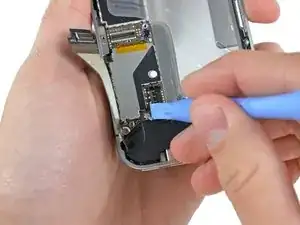
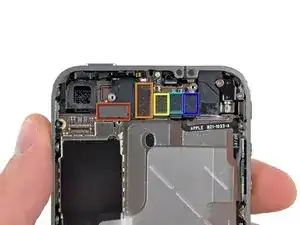
Use the edge of a plastic opening tool to gently pry the following connectors up and out of their sockets on the logic board:
-
Digitizer cable (pry from bottom)
-
LCD cable (pry from bottom)
-
Headphone jack/volume button cable (pry from top)
-
Top Microphone/sleep button cable (pry from top)
-
Front camera cable (pry from top)
-
-
-
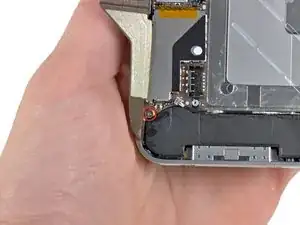
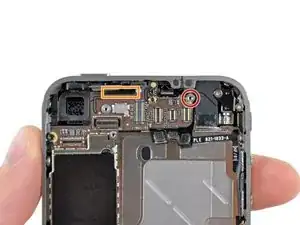
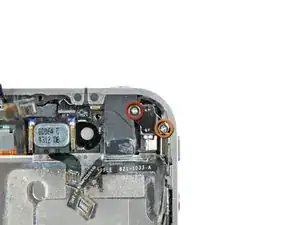
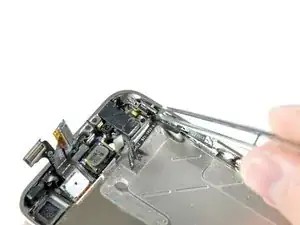
Remove the 4.8 mm standoff screw near the headphone jack.
-
Without this part, the motherboard could damage the ribbon cables around it.
-
-
-
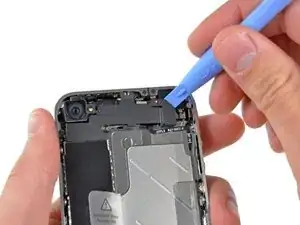
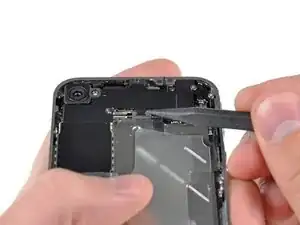
Use the edge of a plastic opening tool to lift the thin steel front camera retainer off the front camera.
-
Remove the front camera retainer.
-
-
-
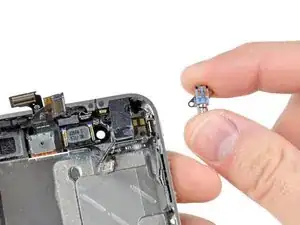
Remove the following two screws securing the vibrator to the inner frame:
-
One 6 mm Phillips screw
-
One 1.4 mm Phillips screw
-
Remove the vibrator from the inner case.
-
-
-
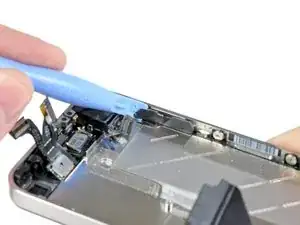
Use the edge of a plastic opening tool to peel the small strip of black tape off the back of the volume button bracket.
-
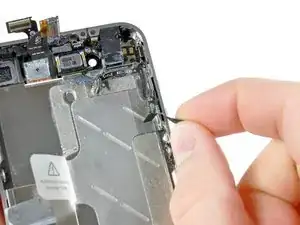
Carefully remove the remaining portion of tape off the small section of ribbon cable near the inside of the bottom volume button.
-
-
-
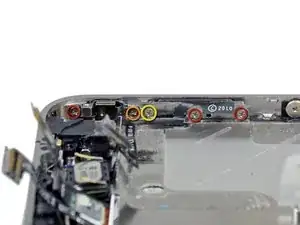
Remove the five Phillips screws securing the silent and volume button brackets to the outer case.
-
The screw directly below the silent switch is shorter than the others.
-
The left screw securing the volume control bracket is longer then the rest.
-
-
-
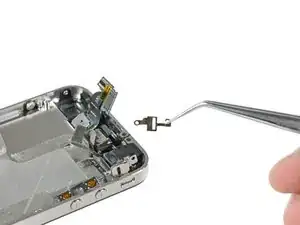
Use a pair of tweezers to carefully pull the silent switch and its bracket from the side of the outer case.
-
-
-
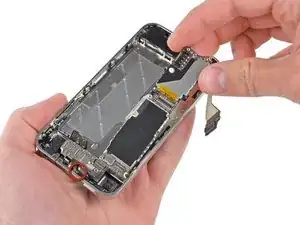
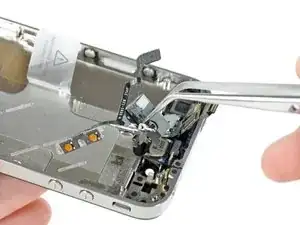
Grab the headphone jack with a pair of tweezers and remove the assembly from the iPhone, being careful not to rip the thin ribbon cables.
-
-
-
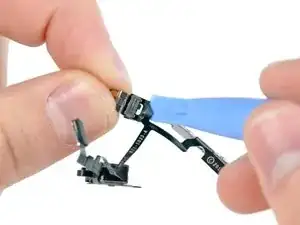
Use the edge of a plastic opening tool to peel the electronic portion of the silent switch off its metal bracket.
-
Transfer the bracket to the new silent switch.
-
Repeat this procedure to peel the metal volume button bracket off the electronic portion of the volume buttons.
-
Transfer the volume button bracket to the new volume buttons.
-
To reassemble your device, follow these instructions in reverse order.
13 comments
In my opinion, the hardest part of this repair is bending and routing the flex cable, specifically around the headphone jack and cable connector. There is no picture or clear directions on how to do this anywhere that I can find. If done incorrectly, the flex will tear rendering your whole job a failure.
Isaac -
tutorial worked perfect great stuff!!! im so pleased this was the first time i had ever opened my phone ...heck it was the first time i ever took the sim card out. A+++
corey -
I agree with Guide and step27. The photos are lacking and a diagram for how to route the cable would be helpful. But after one mishap where I stabbed myself in the eye, all is functional and well in the iphone. No lacking steps, which is good.
NKO -

using something like the 18-compartment tray will GREATLY help with this one; there are over a dozen groups of parts. For re-assembly having a digital calipers to measure the 2.4 vs the 2.6mm screws also helps greatly.
awr -
My method for hardware management during delicate phone surgery is to take and print out on 8.5"x11' paper, one or more pictures of the open phone in various stages of disassembly, and then tape the screws to the appropriate spots on the pictures. Also write numbers on the pictures next the screws to indicate the order in which you removed them.
lens42 -
I use a plastic egg tray, I drop all the screws and small parts (like the camera) for each step into the same egg indentation. You can see that the screws are different lengths, so I don't put one screw into it's own spot. I used 5 egg indentations to replace my screen.
Mangled Jargon -
I did a successful surgery on my iPhone, be warned this is not for the faint of heart!
I've done iPod screen replacements, battery replacements, this is by far much more difficult and intricate.
Great write up! Thanks a million.
Jaysen Strange -
I've changed some iPod screens as well and that has been the least pleasant experience so far. Glue and the main connector that has to be unwrapped and connected from the rear where you have no feel or control where it belongs.
iPhone repair is complex, but doable and has very few "traps".
mcbohdo -
Couldn't even get both screws out of the bottom of the case. One was easy and other refuses to budge. Screws so small I can't see if it is turning or screw driver is properly seated. Sad I too have done screen replacements on other phones. Don't know any secrets to get the screw out
ckracht -
I also have a problem with seeing what is happening with some of those tiny little screws and parts. For other projects that I do, I use an Opti-Visor. It slips over your head and provides 10x magnification. ( You can find them on Amazon).
Yeah, it adds cost to the project and you would have to wait for delivery, but it sure makes a world of difference in seeing what you are working with / on.
jhow -
On an early iPhone 4 I found that the #000 Phillips bit included in the 54 Bit Driver Kit didn't actually fit the screws. However the JIS #000 also in the kit did fit quite well. This is due to the JIS bits "thinner" design to prevent camming out of the slot. Otherwise everything went well. Looking forward to replacing the battery in my other phone that has the pentalobe screws. Glad I got the 54 Bit kit!
etler -
Use a vacuum duster and a sharp tool to pry out the dust, this can increase the volume insanely!
Dpairs -
What does the park that is gold and next to the 4.8mm screw for the antenna? Looks like I am missing that part and almost positive that is why I can't pick up or connect to any wifi signals. I have the screw and the antenna from another phone that is working and tried it on the broken phone and still doesn't work. Only thing different is that gold metal piece to the left of that 4.8 mm screw. Can I buy that part? how do I attach it?
Jay Pennington -
great instructions did it the first time
Mr J -
For organisation of the parts and for a much easier process of rebuilding i use a big magnetic flat surface with a grid drawn on it. Then I use a dry erase marker to make any notes I need and to number the parts in order as i disassemble . Believe me it saves a lot of time and hassle especially if you drop one of those tiny screws good luck finding it but when your working over the magnet and drop a screw its going to be right where it fell. At first I tried the piece of paper to keep organised but all it takes is one small slip and you move the paper too quick and your left with a jumbled bunch of screws and parts and a painstaking task of putting it all back correctly, aka a big waist of time and effort.
case-yg -
I found it very useful to use a magnet sheet when doing these repairs. I use electrical tape or a sharpie to make a grid, and place each micro screw in a separate box on the grid.
I work directly over the magnet sheet, so that if something drops I have a better chance at not losing it.
If you do lose a screw, go over the work area with a fridge magnet. It will pick it up if it hasn’t popped too far away.
Megan Telliano -