Introduction

This is a prerequisite-only guide! This guide is part of another procedure and isn't meant to be used alone.

  1. PQ4vWxXVLDNLuQhX
    PQ4vWxXVLDNLuQhX
    1COOvuXX5gRoOjOj
    KNJkEYEdYUkYjIKN
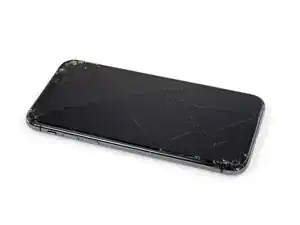
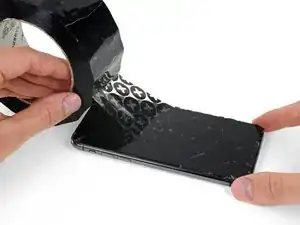
    • If your iPhone has a cracked screen, keep further breakage contained and prevent bodily harm during your repair by taping over the glass.

    • Lay overlapping strips of clear packing tape over the iPhone's screen until the whole face is covered.

    • Wear safety glasses to protect your eyes from any glass shaken free during the repair.

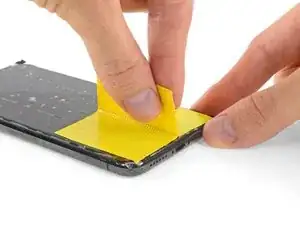
    • If you can't get the suction cup to stick in the next few steps, fold a strong piece of tape (such as duct tape) into a handle and lift the screen with that instead.

    • If all else fails, you can superglue the suction cup to the screen.

    Had to do the superglue. Also that glass was so shattered that it came off in pieces, took my almost an hour to get the whole screen of. Tape didn't really help there, it would just pull the tape off instead of the screen. Do note that the whole screen assembly is quite thick, I think I initially put my pick in a layer inbetween.

    Gijs Leegwater -

  2. scnT3QwcWxK1QBpx
    scnT3QwcWxK1QBpx
    wHHTFxSPIdgN4XGP
    P2w56QdRmoKj1xyd
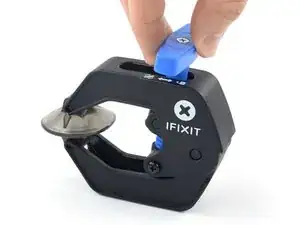
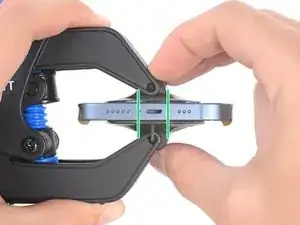
    • The next three steps demonstrate the Anti-Clamp, a tool we designed to make the opening procedure easier. If you aren't using the Anti-Clamp, skip down three steps for an alternate method.

    • For complete instructions on how to use the Anti-Clamp, check out this guide.

    • Follow this guide to secure your rear glass with the included tape.

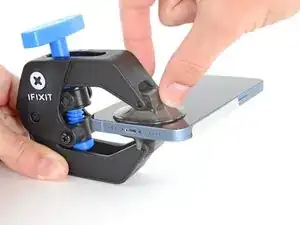
    • Pull the blue handle backwards to unlock the Anti-Clamp's arms.

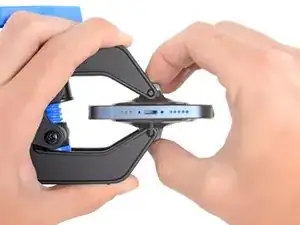
    • Slide the arms over either the left or right edge of your iPhone.

    • Position the suction cups near the bottom edge of the iPhone—one on the front, and one on the back.

    • Squeeze the cups together to apply suction to the desired area.

    • If you find that the surface of your iPhone is too slippery for the Anti-Clamp to hold onto, you can use tape to create a grippier surface.

  3. 44AgV2ZDrDWUOJB4
    44AgV2ZDrDWUOJB4
    i33NIbgFMNyTFHxU
    pUmUOOWSEFRCRCjN
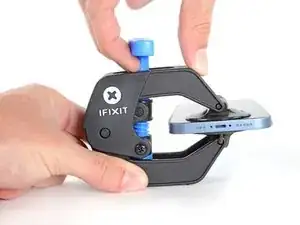
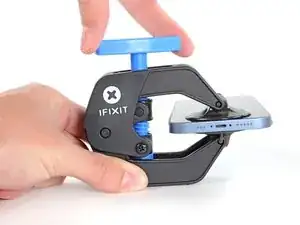
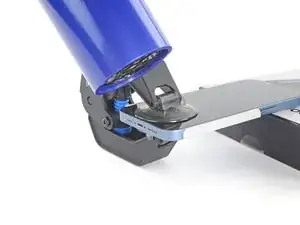
    • Pull the blue handle forward to lock the arms.

    • Turn the handle clockwise 360 degrees or until the cups start to stretch.

    • Make sure the suction cups remain aligned with each other. If they begin to slip out of alignment, loosen the suction cups slightly and realign the arms.

  4. kYygLWs2eOeDBQLc
    kYygLWs2eOeDBQLc
    EJ4cPY46MQY3x1Ne
    R5oJFthaXRqJb3tE
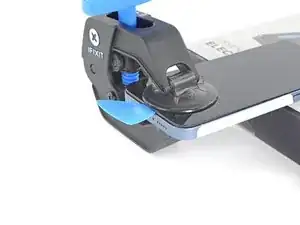
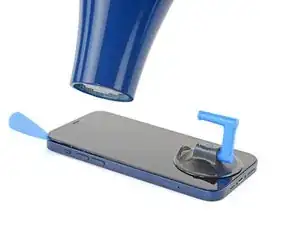
    • Support your iPhone on something sturdy such as a hardcover book so it rests hands-free and parallel to the ground; this makes it easier to work with in the following steps.

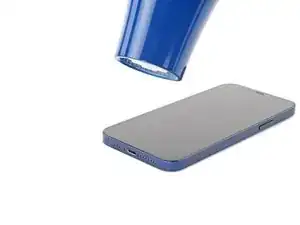
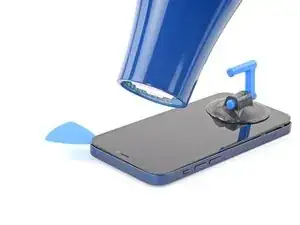
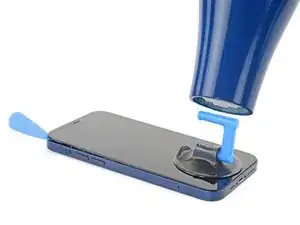
    • Use a hair dryer to heat along the bottom edge of the iPhone. The screen should feel slightly too hot to touch.

    • For complete instructions on how to use a hair dryer, check out this guide.

    • Wait one minute to give the adhesive a chance to release and present an opening gap.

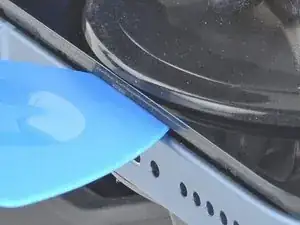
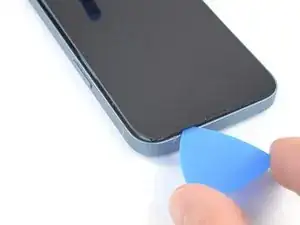
    • Insert an opening pick under the screen's plastic bezel when the Anti-Clamp creates a large enough gap.

    • If the Anti-Clamp doesn't create a sufficient gap, apply more heat to the area and rotate the handle a quarter turn.

    • Don't crank more than a quarter turn at a time, and wait one minute between turns. Let the Anti-Clamp and time do the work for you.

    • Skip the next two steps.

  5. X6buiLBCT6KXWSHx
    • If you're using a suction handle, follow the next two steps to loosen the screen.

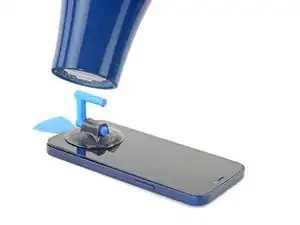
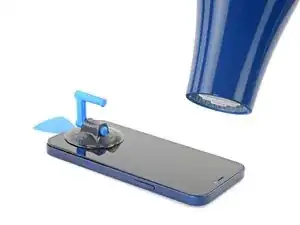
    • Use a hair dryer or a heat gun to heat the bottom edge of the iPhone for 90 seconds or until the screen is slightly too hot to touch.

    • Never leave your hair dryer in one spot for an extended period of time.

  6. u1AQJGhFkBwYP6kU
    u1AQJGhFkBwYP6kU
    LGpElBXXrqnJjIjV
    JYSKtvPKOKlKVaFC
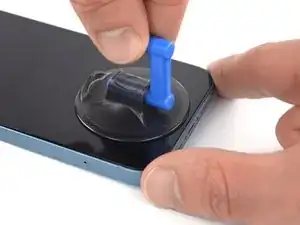
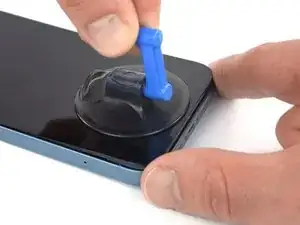
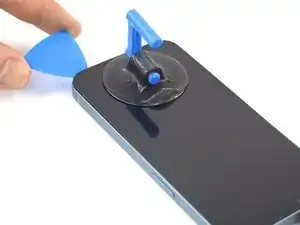
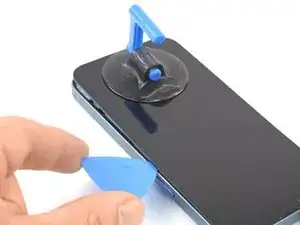
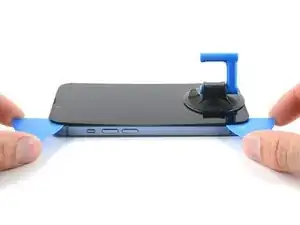
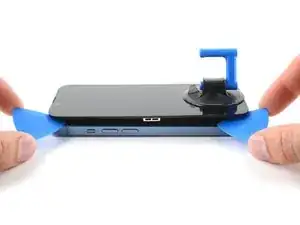
    • Apply a suction handle to the bottom edge of the phone, while avoiding the very edge of the glass.

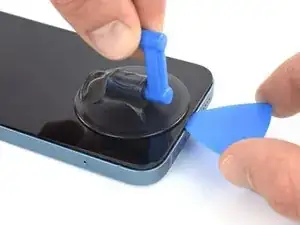
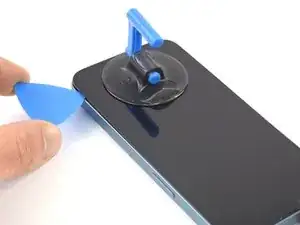
    • Pull up on the suction cup with firm, constant pressure to create a slight gap between the screen and the frame.

    • Insert an opening pick into the gap under the screen's plastic bezel.

    • The adhesive holding the screen is very strong; creating this initial gap takes a significant amount of force. If you're having a hard time opening a gap, apply more heat, and gently rock the screen up and down to weaken the adhesive until you create enough of a gap to insert your opening pick.

  7. uQWV4rE3NnXDotpg
    uQWV4rE3NnXDotpg
    NRnVyPDyRjMAFxvE
    • Use a hair dryer to heat the right edge of the iPhone (the edge with the power button) for 90 seconds or until the screen is slightly too hot to touch.

  8. C12fcdhcOWMPXWLQ
    C12fcdhcOWMPXWLQ
    DsARffEDFQgrSZtH
    y3PmCAbTieGGMoLr
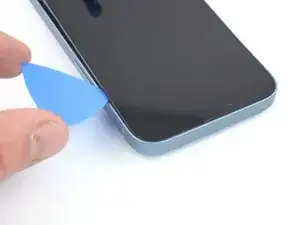
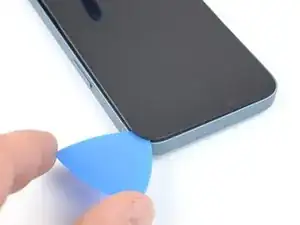
    • Slide the opening pick around the bottom right corner of the iPhone to separate its adhesive.

    • Continue sliding up the right edge of the iPhone until you reach the top right corner.

    • Don't insert your pick more than 3 mm, as you may damage internal components.

    • Leave the pick in the top right corner before continuing.

  9. t6CyTxvv4mAloXRv
    • Use a hair dryer to heat the top edge of the iPhone for 90 seconds or until the screen is slightly too hot to touch.

  10. NS16lbsF3ljEhx5L
    NS16lbsF3ljEhx5L
    ZGWbPid5fmfvvTWR
    TgejBgo3ZQRQiHIQ
    • Slide the opening pick around the top right corner of the iPhone to separate the top adhesive.

    • Don't insert your pick more than 3 mm, as you may damage the top sensors.

    • Leave the pick in the top left corner before continuing.

  11. tjNGQBSPSafPaWaL
    tjNGQBSPSafPaWaL
    IiacIGHxHHfNAYgI
    • Use a hair dryer to heat the left edge of the iPhone for 90 seconds or until the screen is slightly too hot to touch.

  12. CvRilxVIWfa3Blem
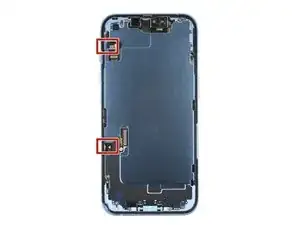
    • There are two delicate cable along the left edge of your iPhone. Don't insert your pick here, as you may damage the cables.

  13. DsbehqqWSruStIJh
    DsbehqqWSruStIJh
    H1OFZadKGvPFAZGZ
    • The cables along the left edge are very easy to damage with a pick. Follow this alternate procedure to separate the left adhesive.

    • Insert a second opening pick in the bottom left corner of the iPhone.

    • Twist both picks simultaneously until the left edge clips release.

    • Apply the twisting force gradually.

    • If you're having trouble separating the adhesive, reheat the left edge.

    My glass was so shattered that twisting picks never was going to create enough force for the centre to come loose. I just pulled up the corners with my hands.

    Gijs Leegwater -

  14. iYHphEWv5IlS1wDt
    iYHphEWv5IlS1wDt
    TJxIV2Y444fyJU3k
    woxUlCyhWHaqQ6E4
    • Remove your suction handle from the screen.

    • Rotate your iPhone so the right edge faces you.

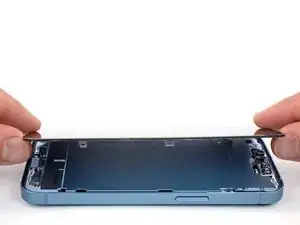
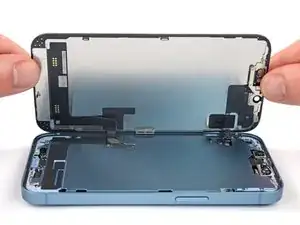
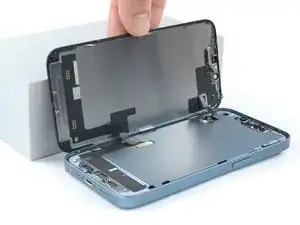
    • Open your iPhone by swinging the screen up from the right side, like the front cover of a book.

    • Lean the screen against something to keep it propped up while you're working on the phone.

    • If you don't have anything at hand to lean the screen against, your suction handle can do the trick.

    • During reassembly, lay the screen in position, align the clips along the top edge, and carefully press the top edge into place before snapping the rest of the screen down. If it doesn't click easily into place, check the condition of the clips around the perimeter of the screen and make sure they aren't bent.

  15. VgjLhtdw2KMPKJPe
    VgjLhtdw2KMPKJPe
    oMEXkvQXUcJRyiYM
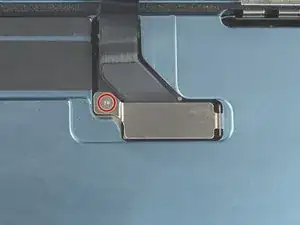
    • Use a Y000 screwdriver to remove the 0.9 mm-long screw securing the display connector bracket.

    • Throughout this repair, keep track of each screw and make sure it goes back exactly where it came from to avoid damaging your iPhone.

    • During reassembly, this is a good point to power on your iPhone and test all functions before you seal the screen in place. Be sure to power your iPhone back down completely before you continue working.

  16. ku3OaWndBqKaIjNK
    ku3OaWndBqKaIjNK
    BBJVTKc6UHnNdT61
    RxsVDu2AnA5N2Gco
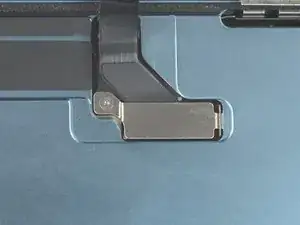
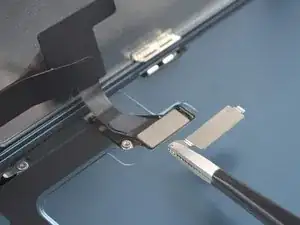
    • Grasp the screw hole end of the connector bracket with a pair of tweezers.

    • Lift the bracket slightly to loosen the latch on the other edge.

    • Remove the display connector bracket.

    • During reassembly, make sure the bracket latches properly.

  17. chU2VIrDXWycbxQF
    chU2VIrDXWycbxQF
    QCSYpLhNydT2DCEB
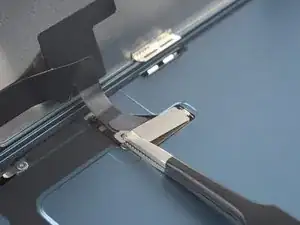
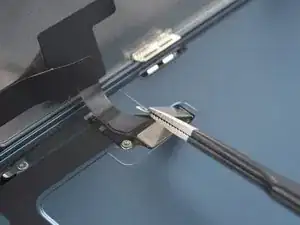
    • Use the pointed end of a spudger to disconnect the display cable by prying the connector straight up from its socket.

    • To re-attach press connectors like this one, carefully align and press down on one side until it clicks into place, then repeat on the other side. Do not press down on the middle. If the connector is misaligned, the pins can bend, causing permanent damage.

    It is necessary to disconnect the battery flex cable prior to disconnecting the screen to prevent any electrical damage to the device. This guide is inaccurate. You have to remove the rear glass panel first to disconnect the battery.

    Alec -

    @robialecm It's not necessary, although it is a bit risky to do it without disconnecting the battery by just turning it off. Anyway, I wanted to check if the new screen was working before fully reassembling, otherwise the warranty on my replacement screen would be void. I have to admit I accidentally turned on the phone a few times, it's hard to not press the power button every once in a while. I managed to turn off the phone more or less by pressing volume up then volume down then hold power button then wait until reboot, keep holding power button until screen goes dark, then quickly release. But I was lucky that the new screen didn't sustain any damage because I'm pretty sure the phone was on while I was messing with the display connector.

    Gijs Leegwater -

    I was very careful reconnecting the cables, and therefore it took my a very long time. Every time I pushed one side, the other side would come out. In the end the trick was to keep one side pressed down while gently - not too gently - pressing the other side.

    Gijs Leegwater -

  18. GAhMNvlZEhZNARkX
    GAhMNvlZEhZNARkX
    LUcZU41setDkDBxD
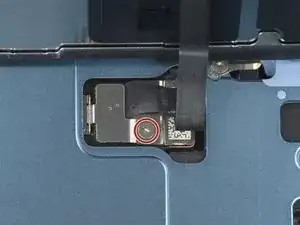
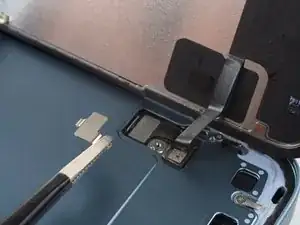
    • Use a Y000 screwdriver to remove the 0.9 mm-long screw securing the front sensor connector bracket.

  19. JbxiaLYwAZhovNVN
    JbxiaLYwAZhovNVN
    UdRZXenlKbOp6MXA
    1IZwTDHbEGrjEMWE
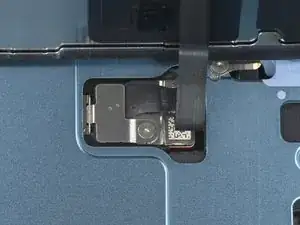
    • Grasp the screw hole end of the connector bracket with a pair of tweezers.

    • Lift the bracket slightly to loosen the latch on the other edge.

    • Remove the front sensor connector bracket.

    • During reassembly, make sure the bracket latches properly.

  20. o1UxuRTXtTTMZGCy
    o1UxuRTXtTTMZGCy
    xHRUy3vbuMxvHRJS
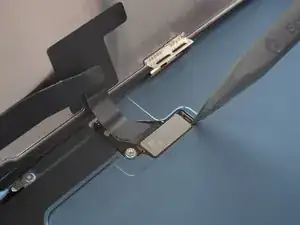
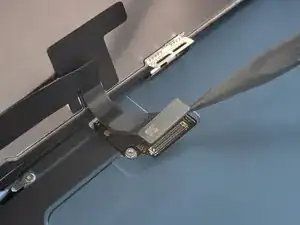
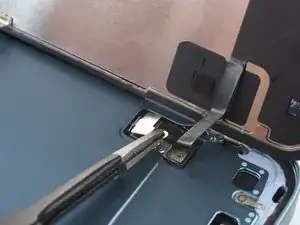
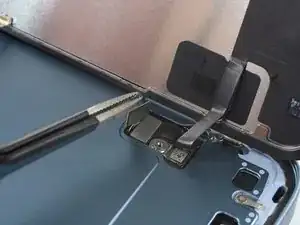
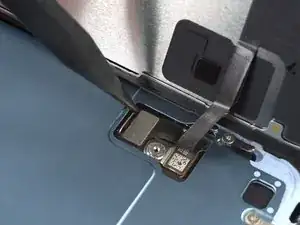
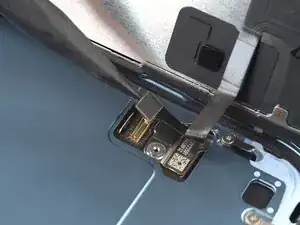
    • Use the pointed end of a spudger to disconnect the front sensor cable by prying the connector straight up from its socket.

  21. GqWDDwTZMGOYPbh5
    GqWDDwTZMGOYPbh5
    FEikINkpexmJWx6w
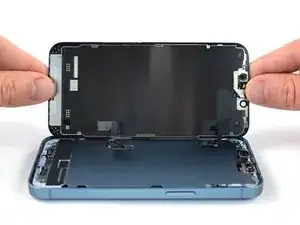
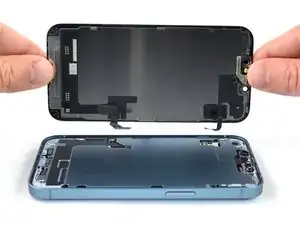
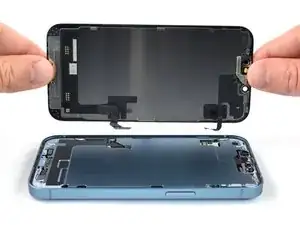
    • Remove the screen.

    • Apply new adhesive where it's necessary after cleaning the relevant areas with isopropyl alcohol (>90%).

    • During reassembly, pause here if you wish to replace the screen adhesives.

Conclusion

If possible, turn on your device and test your repair before installing new adhesive and resealing.

To reassemble your device, follow these instructions in reverse order.

The best way to secure the new screen is to apply a sheet of custom-cut double-sided tape to the frame and place the screen back in its original position.

Take your e-waste to an R2 or e-Stewards certified recycler.

Repair didn’t go as planned? Try some basic troubleshooting, or ask our Answers community for help.
Tobias Isakeit

Member since: 31/03/14

116775 Reputation

0 comments