Introduction

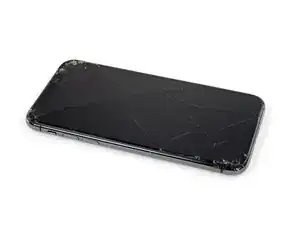
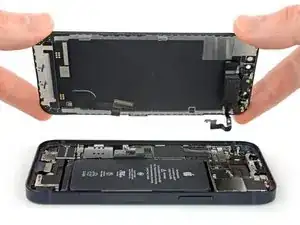
Use this guide to remove and replace the rear cameras in the iPhone 12 mini. Both camera modules are replaced as a single unit.

You’ll need replacement adhesive to reattach components when reassembling the device.

  1. JVwauFGp15pboki4
    JVwauFGp15pboki4
    6ZrVNyXTV2DYTb13
    • Before you begin, discharge your iPhone battery below 25%. A charged lithium-ion battery can catch fire and/or explode if accidentally punctured.

    • Power off your iPhone before beginning disassembly.

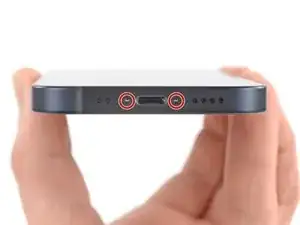
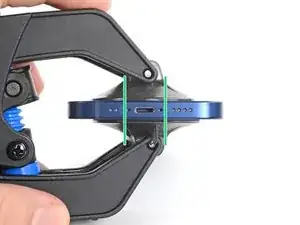
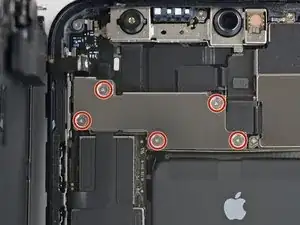
    • Remove the two 6.7 mm-long pentalobe screws at the bottom edge of the iPhone.

    is it oem apple battery, because at some photo shows(Ifixit) and another shows (apple) ... wait your answer?

    karim -

    BEWARE! This screen isn’t the same as older iPhone models’ screens. The iPhone mini 12-screen comes with a thin plastic frame around the screen on its back. Thus, make sure you don’t insert the pick in between the screen and its plastic frame, as you’ll seperate the screen and leave the plastic frame still sitting in the phone’s metal housing (this cost me 100 dollars…). Carefully heat the sides of the metal housing and do not heat directly on the glass, as doing so will potentially loosen the glue from the plastic frame stuck to the screen. My suggestion is that you watch a video of this repair as this step-by-step-guide is undercooked.

    Dan -

    This is an excellent comment. Following this step-by-step guide to the letter will break your screen; it's by far the worst iFixit guide I've seen to date.

    Dormouse -

  2. 6UPwoloGBO4tmVoS
    6UPwoloGBO4tmVoS
    BmSYPJmOy6dbHipF
    3EOdQPAGOmiuhoKU
    • If inserted too far, an opening pick can damage your device. Follow this step to mark your pick and prevent damage.

    • Measure 3 mm from the tip and mark the opening pick with a permanent marker.

    • You can also mark the other corners of the pick with different measurements.

    • Alternatively, tape a coin to a pick 3 mm from the tip.

    Got to step 2 and realized the fix kit doesn't include an opening pick! Looks like a guitar pick, and I have those lying around. Is that expected? Looks like the pick is used in many steps below. There's a little blue crowbar that isn't mentioned in the instructions. Perhaps that replaces the opening pick?

    Sloan Looney -

    Hi! I can't see which guide you were using when writing this comment. Can you reply here with which guide and fix kit you used?

    Clay Eickemeyer -

    I see you posted this in Meta. I hope it's resolved soon! In the meantime, a guitar pick may work well enough for your repair.

    Clay Eickemeyer -

    what fix kit?

    Meow Purr -

    My fix kit didn't include an opening pick either

    WILLIAM HARRIS -

    Make sure you check inside the black boxes after emptying them. My pick was stuck inside one of the boxes.

    AndyF -

    My AliExpress refurbished screen came with a pick that has a coin-like circle that pops out, so no modification was necessary

    Gijs Leegwater -

  3. 1CjogrubnNxIGvrd
    1CjogrubnNxIGvrd
    pXY5VoUJ1hFuERqR
    Q1eZoASRSIbOibcj
    • If your iPhone has a cracked screen, keep further breakage contained and prevent bodily harm during your repair by taping over the glass.

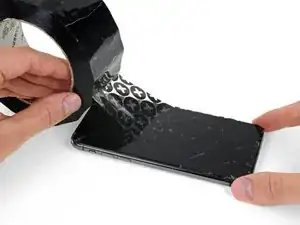
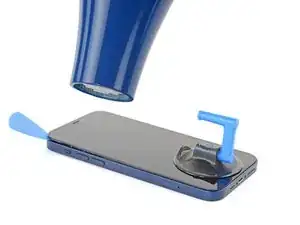
    • Lay overlapping strips of clear packing tape over the iPhone's screen until the whole face is covered.

    • Wear safety glasses to protect your eyes from any glass shaken free during the repair.

    • If you can't get the suction cup to stick in the next few steps, fold a strong piece of tape (such as duct tape) into a handle and lift the screen with that instead.

    • If all else fails, you can superglue the suction cup to the screen.

  4. 5SDAKLhJ2tKixZi2
    5SDAKLhJ2tKixZi2
    ptSQJmqMjcBBW1st
    Rb3dmudH5T5hUrmc
    • The next three steps demonstrate the Anti-Clamp, a tool we designed to make the opening procedure easier. If you aren't using the Anti-Clamp, skip down three steps for an alternate method.

    • For complete instructions on how to use the Anti-Clamp, check out this guide.

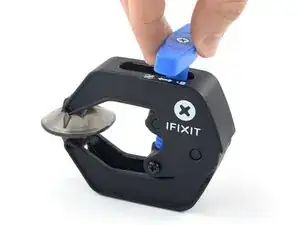
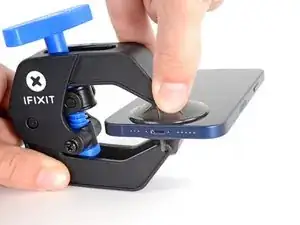
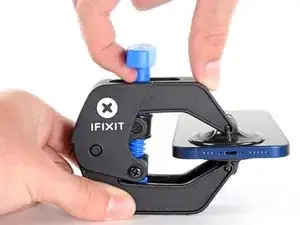
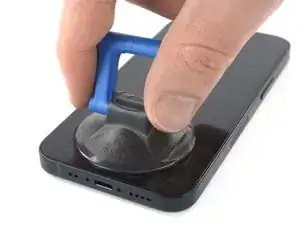
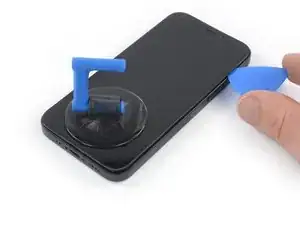
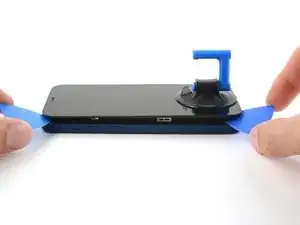
    • Pull the blue handle backwards to unlock the Anti-Clamp's arms.

    • Slide the arms over either the left or right edge of your iPhone.

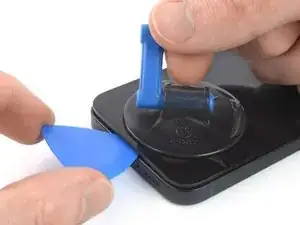
    • Position the suction cups near the bottom edge of the iPhone—one on the front, and one on the back.

    • Squeeze the cups together to apply suction to the desired area.

    • If you find that the surface of your iPhone is too slippery for the Anti-Clamp to hold onto, you can use tape to create a grippier surface.

  5. FsT3FA5QaEWxaiEg
    FsT3FA5QaEWxaiEg
    1idtRJHPlsFJBJES
    xf6uNSGb6GPTDJQd
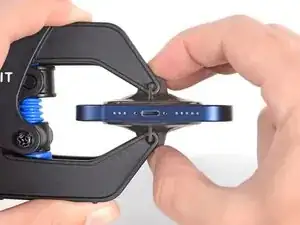
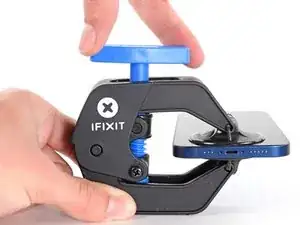
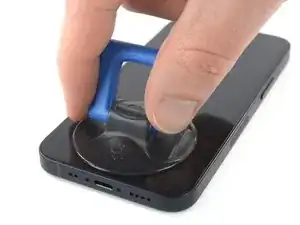
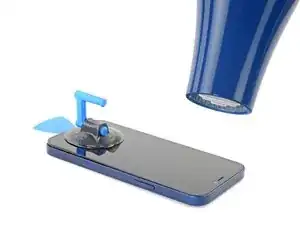
    • Pull the blue handle forwards to lock the arms.

    • Turn the handle clockwise 360 degrees or until the cups start to stretch.

    • Make sure the suction cups remain aligned with each other. If they begin to slip out of alignment, loosen the suction cups slightly and realign the arms.

  6. DpZCL6axAepLaTCc
    DpZCL6axAepLaTCc
    atEF2NMTghnIiSsM
    ALaITu6uDhQqZvXN
    • Support your iPhone on something sturdy such as a hardcover book so it rests hands-free and parallel to the ground; this makes it easier to work with in the following steps.

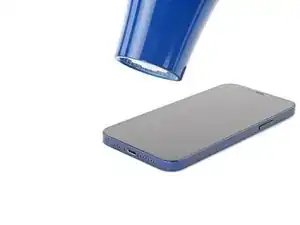
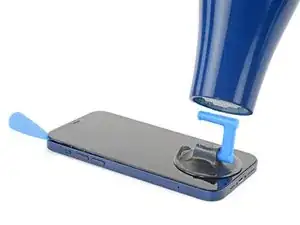
    • Use a hair dryer to heat along the bottom edge of the iPhone. The screen should feel slightly too hot to touch.

    • For complete instructions on how to use a hair dryer, check out this guide.

    • Wait one minute to give the adhesive a chance to release and present an opening gap.

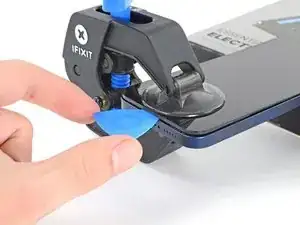
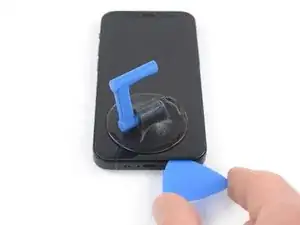
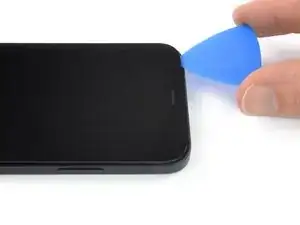
    • Insert an opening pick under the screen's plastic bezel when the Anti-Clamp creates a large enough gap.

    • If the Anti-Clamp doesn't create a sufficient gap, apply more heat to the area and rotate the handle a quarter turn.

    • Don't crank more than a quarter turn at a time, and wait one minute between turns. Let the Anti-Clamp and time do the work for you.

    • Skip the next three steps.

  7. qIfcdOsDsjmJl2VY
    • Opening the iPhone's display will compromise its waterproof seals. Have replacement seals ready before you proceed past this step, or take care to avoid liquid exposure if you reassemble your iPhone without replacing the seals.

    • Heating the bottom edge of the iPhone helps soften the adhesive securing the display, making it easier to open.

    • Use a hair dryer or a heat gun to heat the bottom edge of the iPhone for 90 seconds or until the screen is slightly too hot to touch.

    • Never leave your hair dryer in one spot for an extended period of time.

    • If you have trouble during the opening procedure, the adhesive most likely cooled down. Apply more heat to further soften the adhesive.

    you need to clarify that you're heating the metal frame, not the glass. I gently heated the glass front with a heat gun and proceeded to pull the display apart, destroying it. :-(

    Jim Harger -

  8. MKV3OGqZaxNHEhUc
    MKV3OGqZaxNHEhUc
    hHhDVWStBbPQpiZN
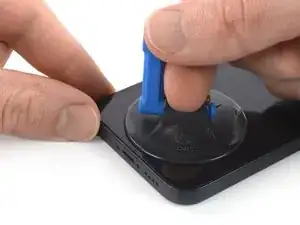
    • If you're using a single suction handle, apply it to the bottom edge of the phone, as close to the edge as possible.

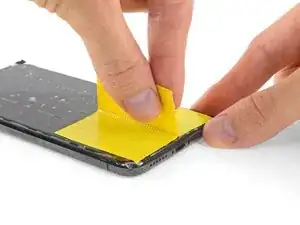
    • If your display is badly cracked, covering it with a layer of clear packing tape may allow the suction cup to adhere. Alternatively, very strong tape may be used instead of the suction cup. If all else fails, you can superglue the suction cup to the broken screen.

  9. nQTSoddbEVTMfZHR
    nQTSoddbEVTMfZHR
    KlrDYepF3DQrMwU5
    jdiUyLciFyBYDGOm
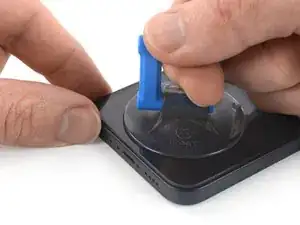
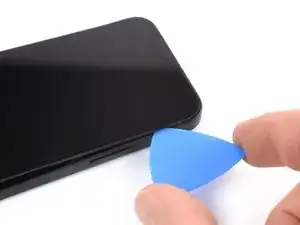
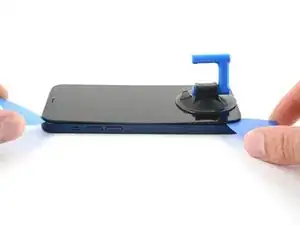
    • Pull up on the suction cup with firm, constant pressure to create a slight gap between the screen and the frame.

    • Insert an opening pick into the gap under the screen's plastic bezel.

    • The watertight adhesive holding the screen in place is very strong; creating this initial gap takes a significant amount of force. If you're having a hard time opening a gap, apply more heat, and gently rock the screen up and down to weaken the adhesive until you create enough of a gap to insert your tool.

    I ended up separating my screen rather than getting under the scren casing.. BE CAREFUL TO MAKE SURE YOU ARE UNDER THE PLASTIC PART - otherwise you just ruin your screen... No mention of this precaution here and as a result, my phone is more broken than when I started

    Tyler Ludwig -

    Hi, I don’t get it. Should the plastic part stay with the display or with the phone?

    Paul -

  10. bv1agNYR2AZSRh4i
    bv1agNYR2AZSRh4i
    QKZUYPEDGXwEWFW2
    • Use a hair dryer to heat the right edge of the iPhone (the edge with the power button) for 90 seconds or until the screen is slightly too hot to touch.

    The pictures show the left side. I know that the left side is the correct one to heat, but for others it might be confusing. 😊

    Donát Viosz -

    @dviosz You mean the right edge! The picture shows the left edge but the right edge is the correct one to heat. As described in the text next to it. Opening the phone from the left will damage it!

    catchMyException -

    Yeah, sorry, you are right! (tried to make something less confusing and created more confusion by accident… 😃 )

    Donát Viosz -

  11. A1oBwCyETfZ3eBwg
    A1oBwCyETfZ3eBwg
    nOJW3MH4vbghr4vJ
    kLNvCWTAVyBPWgjF
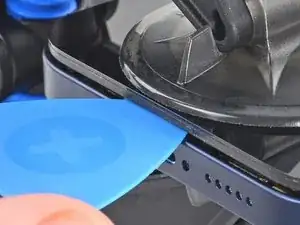
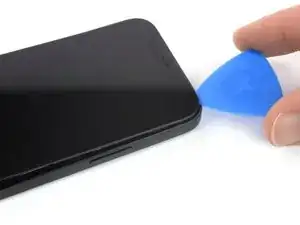
    • Slide the opening pick around the bottom right corner and along the right edge of the iPhone, slicing through the adhesive holding the display in place.

    • Don't insert your pick more than 3 mm, as you may damage internal components.

    Be very careful your tool does NOT go in between the screen and the screen frame but rather in between the screen frame and the phone frame. If not you will damage the screen and need a new one. This has happened to MANY people. The screen is attached to the screen frame with an adhesive that can also be accidentally pried apart if not done carefully. This is probably more likely if your tool is too thin, if you dont heat enough, or dont suction and pull enough to create a big enough separation between the screen frame and the phone frame.

    Ezra Gilbert -

  12. jlAuMwmQ6WRMXnpn
    • Use a hair dryer to heat the top edge of the iPhone for 90 seconds or until the screen is slightly too hot to touch.

  13. luVslv2EJDPHjdFY
    luVslv2EJDPHjdFY
    bhGJkCcPB6iwKJWR
    tMyUCZXybbOw6SsY
    • The top edge of the display is secured with both glue and clips.

    • Insert your pick underneath the top-right corner of the display panel.

    • Slide the pick around the top right corner. Because of the clips you might encounter some resistance.

    • Don't insert your pick more than 3 mm, as you may damage the front panel sensor array.

    • Gently pulling the front panel assembly towards the bottom edge of the phone simplifies this step a little.

    • Slide the pick along the top edge and cut any remaining adhesive securing the display.

  14. bn6svgDdnTZqo1Li
    bn6svgDdnTZqo1Li
    ZM3kLhdMRgUEI2rG
    • Use a hair dryer to heat the left edge of the iPhone for 90 seconds or until the screen is slightly too hot to touch.

  15. 2h6ZO1ahtoicpFKF
    • There's a delicate cable along the left edge of your iPhone. Don't insert your pick here, as you may damage the cable.

  16. uNtM2YKyVD2BKNwq
    uNtM2YKyVD2BKNwq
    OyXrlHMUOR2dqtME
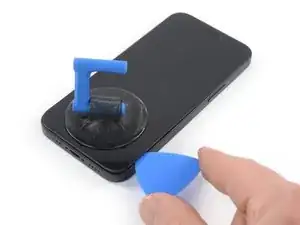
    • Insert a second opening pick in the bottom left corner of the iPhone.

    • Twist both picks simultaneously until the left edge clips release.

    • Apply the twisting force gradually.

    • If you're having trouble separating the adhesive, reheat the left edge.

    Don't go from just one corner (like on the right side). I've done that (forgot this step) and broke my screen.

    Donát Viosz -

  17. GKjjmXfhwhaIRErW
    GKjjmXfhwhaIRErW
    2JqHTqMrNqKn2oIC
    Bgygc1XwrnZIXYqP
    • Rotate your iPhone so the right edge faces you.

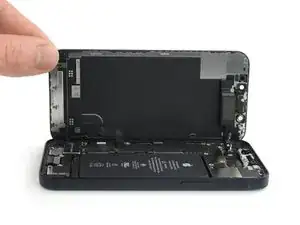
    • Open the iPhone by swinging the display up from the right side, like the front cover of a book.

    • Don't try to fully separate the display yet, as several fragile ribbon cables still connect it to the iPhone's logic board.

    • Lean the display against something to keep it propped up while you're working on the phone.

    • During reassembly, lay the display in position, align the clips along the top edge, and carefully press the top edge into place before snapping the rest of the display down. If it doesn't click easily into place, check the condition of the clips around the perimeter of the display and make sure they aren't bent.

  18. s32v5LyOyuYgWKwK
    s32v5LyOyuYgWKwK
    LZTDcUatrTtkQdMX
    • Remove the 1.25 mm-long Y000 screw securing the battery & display connector cover bracket.

    • Throughout this repair, keep track of each screw and make sure it goes back exactly where it came from to avoid damaging your iPhone.

    • During reassembly, this is a good point to power on your iPhone and test all functions before you seal the display in place. Be sure to power your iPhone back down completely before you continue working.

  19. sSx1WV2GJT4GTDvI
    sSx1WV2GJT4GTDvI
    XJvryN6fwJQrk14F
    • Use a pair of tweezers to remove the battery & display connector bracket.

    • There are two little hinges on the right edge of the connector bracket. Make sure to align them with their counterparts during reassembly.

  20. lQtM3wSEjFBP4bUT
    lQtM3wSEjFBP4bUT
    cAGmO4Gkg5y1sdJM
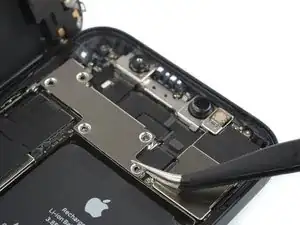
    • Use a spudger or a clean fingernail to pry the battery connector up from its socket on the logic board.

    • Try not to damage the black silicone seal surrounding this and other board connections. These seals provide extra protection against water and dust intrusion.

    • Bend the connector slightly away from the logic board to prevent it from accidentally making contact with the socket and providing power to the phone during your repair.

  21. Bg2WOTycx6pQSryg
    Bg2WOTycx6pQSryg
    IMpe3jXIrjPmFpZ3
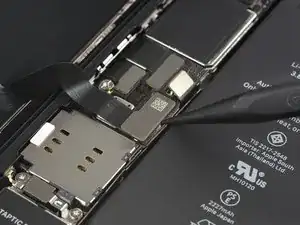
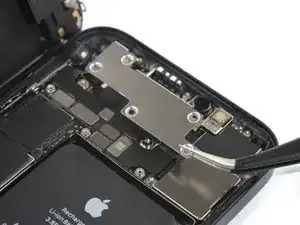
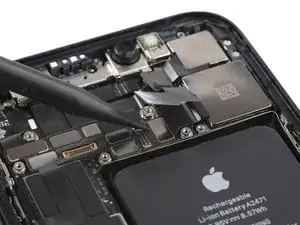
    • Use a spudger or a clean fingernail to pry the OLED panel cable connector up from its socket on the logic board.

    • To re-attach press connectors like this one, carefully align and press down on one side until it clicks into place, then repeat on the other side. Do not press down on the middle. If the connector is misaligned, the pins can bend, causing permanent damage.

  22. nPYF4uJRS6rlvqj5
    nPYF4uJRS6rlvqj5
    CvgjiiCJADpTTDXb
    • Remove the five 1 mm-long Y000 screws securing the front sensor assembly cover bracket.

    There is an error here. There are different screws. 2 large and 3 small.

    zeidin09 -

    what 3 are the small ones? I don't know anymore

    Thomas Klep -

    in case anyone else reads this, the 3 small ones screw directly onto the board. the two longer ones screw into standoffs (the two top screws, based on the picture above)

    Skyejobs -

  23. uQjgeWT2KXfFZYOA
    uQjgeWT2KXfFZYOA
    OTkQXcHJLAQwguIy
    • Use a pair of tweezers to remove the front sensor assembly bracket.

  24. GZpFOHpLepHvKBKQ
    GZpFOHpLepHvKBKQ
    bRxWP1dlhidDyEDy
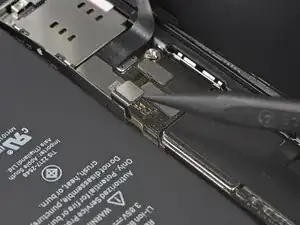
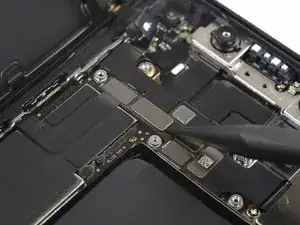
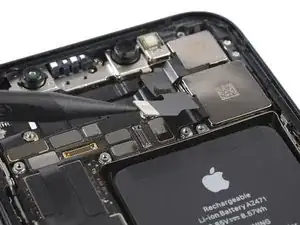
    • Use a spudger or a clean fingernail to disconnect the front sensor assembly cable connector.

  25. 6WvMQVuRTVALGms5
  26. XO2hccnyGHYf52v5
    XO2hccnyGHYf52v5
    NklrlOhjCDPHmsEs
    • Remove the two 1.6 mm-long Phillips #000 screws.

  27. gbaohFSRXsVgqXde
    gbaohFSRXsVgqXde
    oaXBSJsEc1uaxyfX
    • Use a pair of tweezers to remove the camera module cover bracket.

    • On the right side of the bracket are two little nibs which are tucked into the iPhone frame. Grab the bracket on its left edge and pull it in the direction of the volume buttons in order to remove it safely.

    • During reassembly make sure to align the two metal nibs with their appropriate slots in the iPhone frame.

  28. ik5Zfvt5dQcpILcR
    ik5Zfvt5dQcpILcR
    ZdtkvRIkoaygO3PY
    • The camera flex cables in the iPhone 12 mini are layered above each other and therefore need to be dis- and reconnected in correct order.

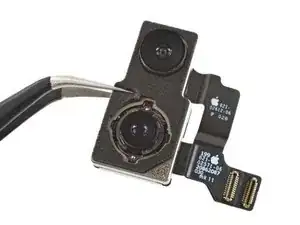
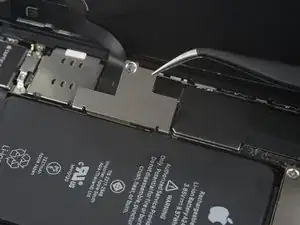
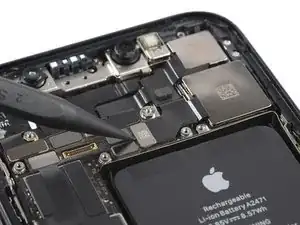
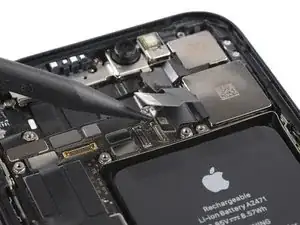
    • Use a spudger to disconnect the ultra wide angle camera flex cable by prying it straight up from its socket.

  29. vO22NBk4WttsrTFy
    vO22NBk4WttsrTFy
    NvyTNQSon14oSA2t
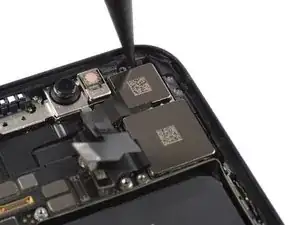
    • Use a spudger to disconnect the wide camera flex cable by prying it straight up from its socket.

  30. WUjw2xAxJjFZpF4I
    WUjw2xAxJjFZpF4I
    IoIRkPOrSGVOMPlC
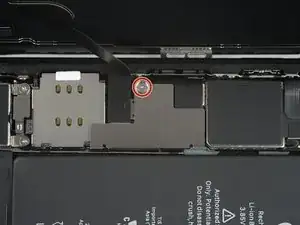
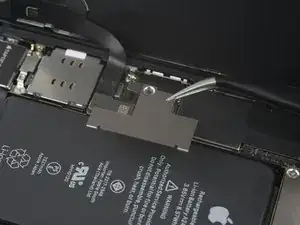
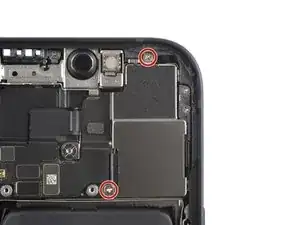
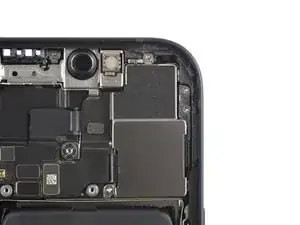
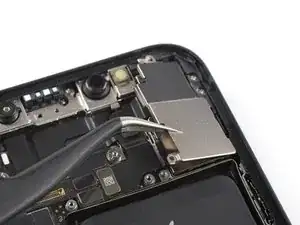
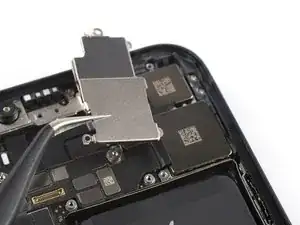
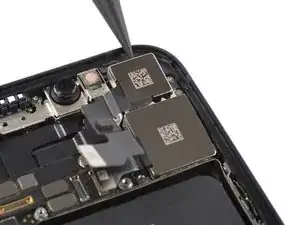
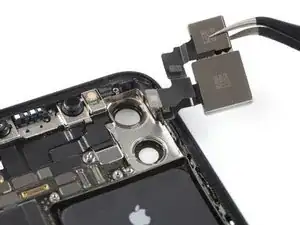
    • Insert the pointed end of a supdger between the upper edge of the camera module and the iPhone frame.

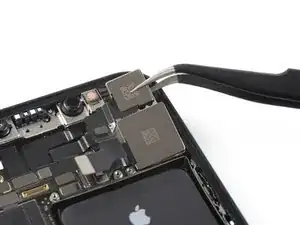
    • Use the spudger to pry the camera module out of its recess by tilting the spudger downwards.

  31. mWBrdUEDEjiOniDv
    mWBrdUEDEjiOniDv
    ZqenwxNKKPqFVeX5
    • Use a pair of tweezers to remove the camera module.

Conclusion

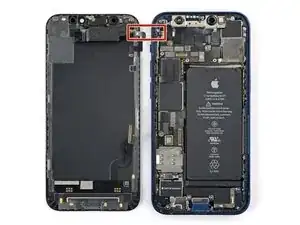
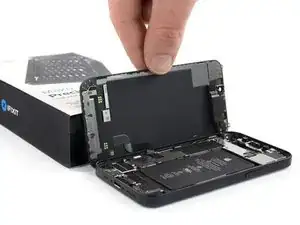
Compare your new replacement part to the original part—you may need to transfer remaining components or remove adhesive backings from the new part before installing.

To reassemble your device, follow the above steps in reverse order. Apply new adhesive where necessary after cleaning the relevant areas with isopropyl alcohol (>90%).

Take your e-waste to an R2 or e-Stewards certified recycler.

Repair didn’t go as planned? Try some basic troubleshooting, or ask our iPhone 12 mini Answers community for help.

Dominik Schnabelrauch

Member since: 23/11/16

201132 Reputation

2 comments

Removing these screens is no joke folks. There is a backing on the screen that is also adhered to the phone casing, and it is very easy to separate this from the front of the screen, destroying or at the very least damaging it in the process.

Hunter Strathman -

Once the stupid screen is off, it's an easy task. I wasn't able to get it off without the clamp. So I would order the clamp straight away with it!

Robertvo -