Introduction

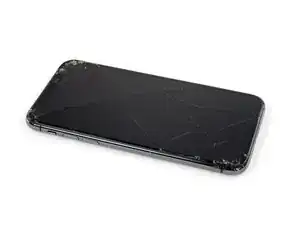
If your iPhone 11 Pro Max screen is cracked, not responding to touch, or not showing a picture when your phone is powered on, use this guide to restore your iPhone to working order with a new screen, a.k.a. display assembly.

The combined earpiece speaker + sensor assembly affixed to the back of the display is paired to your individual iPhone from the factory, so you must transfer it from your old display to your new one during any display replacement. It contains the flood illuminator, which is part of the biometric Face ID security feature. If it is damaged or replaced, Face ID will cease to function, so take extra care not to damage any of these components during this procedure. If damaged, only Apple or an Apple-authorized technician can restore Face ID function.

Note: True Tone functionality is disabled after a screen replacement, even when using an original Apple screen. Additionally, your iPhone may temporarily show a warning about the “genuineness” of the display.

  1. fnoVrkABTYSOR2K3
    fnoVrkABTYSOR2K3
    Nb3S1xoKwM2swfkL
    • Before you begin, discharge your iPhone battery below 25%. A charged lithium-ion battery can catch fire and/or explode if accidentally punctured.

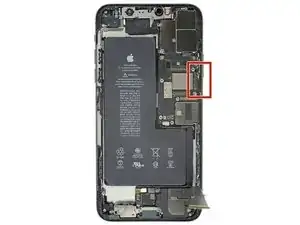
    • Power off your iPhone before beginning disassembly.

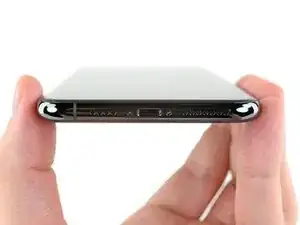
    • Remove the two 6.7 mm-long pentalobe screws at the bottom edge of the iPhone.

    • Opening the iPhone's display will compromise its waterproof seals. Have replacement seals ready before you proceed past this step, or take care to avoid liquid exposure if you reassemble your iPhone without replacing the seals.

    Wie soll mann das Handy ausschalten wenn das Display defekt ist oder nicht angeht?

    Elias_Will Diamondblock -

  2. 6UPwoloGBO4tmVoS
    6UPwoloGBO4tmVoS
    BmSYPJmOy6dbHipF
    3EOdQPAGOmiuhoKU
    • If inserted too far, an opening pick can damage your device. Follow this step to mark your pick and prevent damage.

    • Measure 3 mm from the tip and mark the opening pick with a permanent marker.

    • You can also mark the other corners of the pick with different measurements.

    • Alternatively, tape a coin to a pick 3 mm from the tip.

    Got to step 2 and realized the fix kit doesn't include an opening pick! Looks like a guitar pick, and I have those lying around. Is that expected? Looks like the pick is used in many steps below. There's a little blue crowbar that isn't mentioned in the instructions. Perhaps that replaces the opening pick?

    Sloan Looney -

    Hi! I can't see which guide you were using when writing this comment. Can you reply here with which guide and fix kit you used?

    Clay Eickemeyer -

    I see you posted this in Meta. I hope it's resolved soon! In the meantime, a guitar pick may work well enough for your repair.

    Clay Eickemeyer -

    what fix kit?

    Meow Purr -

    My fix kit didn't include an opening pick either

    WILLIAM HARRIS -

    Make sure you check inside the black boxes after emptying them. My pick was stuck inside one of the boxes.

    AndyF -

    My AliExpress refurbished screen came with a pick that has a coin-like circle that pops out, so no modification was necessary

    Gijs Leegwater -

  3. LkvCwNvm1MBQ6MYm
    LkvCwNvm1MBQ6MYm
    SAgdZOUuYNwSUciv
    EHCRtHAR5tJkSE5j
    • If your iPhone has a cracked screen, keep further breakage contained and prevent bodily harm during your repair by taping over the glass.

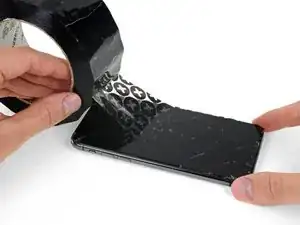
    • Lay overlapping strips of clear packing tape over the iPhone's screen until the whole face is covered.

    • Wear safety glasses to protect your eyes from any glass shaken free during the repair.

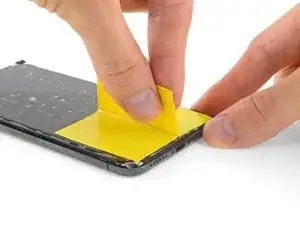
    • If you can't get the suction cup to stick in the next few steps, fold a strong piece of tape (such as duct tape) into a handle and lift the screen with that instead.

    • If all else fails, you can superglue the suction cup to the screen.

  4. pXLN1OawLgTsx1AW
    pXLN1OawLgTsx1AW
    ER5AgdZmJRLsB2FC
    fTHOvROIYbDb1F5t
    • The next three steps demonstrate the Anti-Clamp, a tool we designed to make the opening procedure easier. If you aren't using the Anti-Clamp, skip down three steps for an alternate method.

    • For complete instructions on how to use the Anti-Clamp, check out this guide.

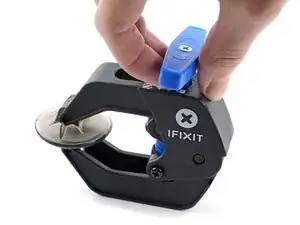
    • Pull the blue handle backwards to unlock the Anti-Clamp's arms.

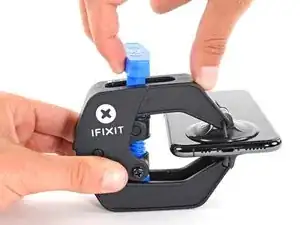
    • Slide the arms over either the left or right edge of your iPhone.

    • Position the suction cups near the bottom edge of the iPhone—one on the front, and one on the back.

    • Squeeze the cups together to apply suction to the desired area.

    • If you find that the surface of your iPhone is too slippery for the Anti-Clamp to hold onto, you can use tape to create a grippier surface.

  5. HOyrBJj2hfTcRBcs
    HOyrBJj2hfTcRBcs
    G4ZkGNp361GvdD6E
    UhFmpHIuvs1tUPUB
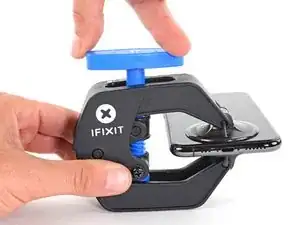
    • Pull the blue handle forward to lock the arms.

    • Turn the handle clockwise 360 degrees or until the cups start to stretch.

    • Make sure the suction cups remain aligned with each other. If they begin to slip out of alignment, loosen the suction cups slightly and realign the arms.

  6. nSQ2fXTVrTTPfqDv
    nSQ2fXTVrTTPfqDv
    6hHCB2Fe5lCQUtvV
    dsxChHl5NVKFZNZM
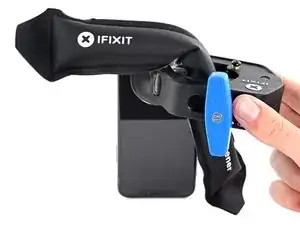
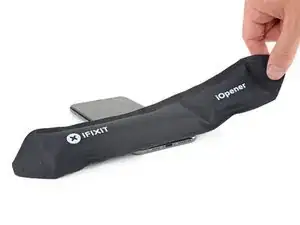
    • Heat an iOpener and thread it through the arms of the Anti-Clamp.

    • You can also use a hair dryer, heat gun, or hot plate—but extreme heat can damage the display and/or internal battery, so proceed with care.

    • Fold the iOpener so it lays on the bottom edge of the iPhone.

    • Wait one minute to give the adhesive a chance to release and present an opening gap.

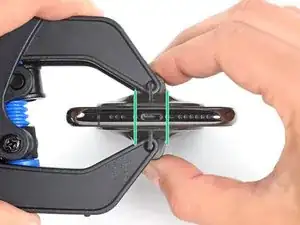
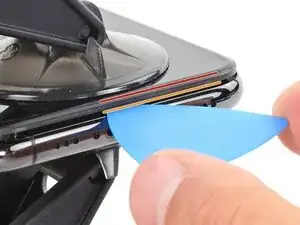
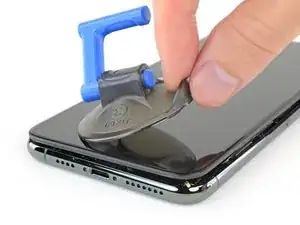
    • Insert an opening pick into the gap under the screen and the plastic bezel, not the screen itself.

    • If the Anti-Clamp doesn't create a sufficient gap, apply more heat to the area and rotate the handle a quarter turn.

    • Don't crank more than a quarter turn at a time, and wait one minute between turns. Let the Anti-Clamp and time do the work for you.

    • Skip the next three steps.

  7. B1ffRZyQYx3RvTG6
    • Heating the lower edge of the iPhone helps soften the adhesive securing the display, making it easier to open.

    • Use a hairdryer or heat gun or prepare an iOpener and apply it to the lower edge of the iPhone for about a minute in order to soften up the adhesive underneath.

  8. sPRlLcm1rWkQIxAK
    sPRlLcm1rWkQIxAK
    5THJLa52askoCJD6
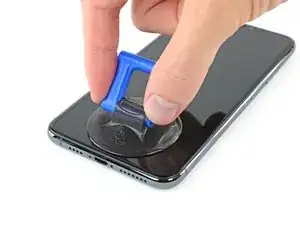
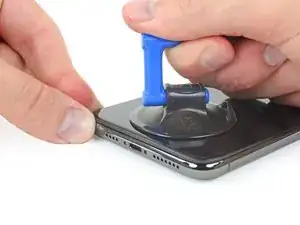
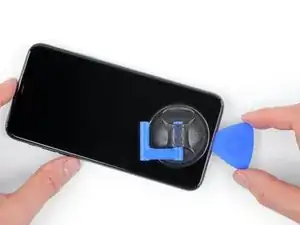
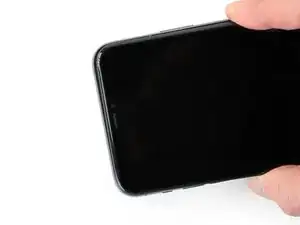
    • If you're using a single suction handle, apply it to the bottom edge of the phone, while avoiding the curved portion of the glass.

  9. uDdCJCtPpXEIoe2o
    uDdCJCtPpXEIoe2o
    YZselJ4Z2xhXEdis
    JAMvZBswEH4sXbBL
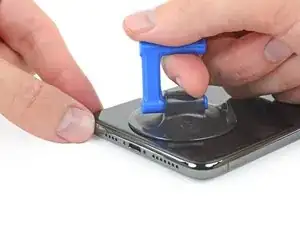
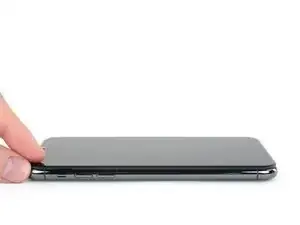
    • Pull up on the suction cup with firm, constant pressure to create a slight gap between the front panel and rear case.

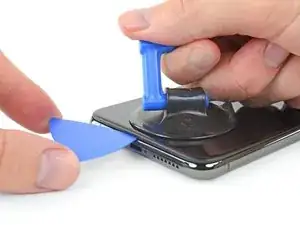
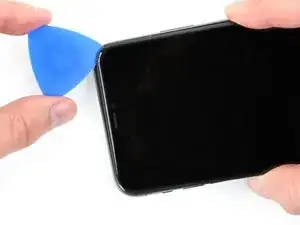
    • Insert an opening pick into the gap.

    • The watertight adhesive holding the display in place is very strong; creating this initial gap takes a significant amount of force. If you're having a hard time opening a gap, apply more heat, and gently rock the screen up and down to weaken the adhesive until you create enough of a gap to insert your tool.

  10. kRGRAyEundvXAeIb
    kRGRAyEundvXAeIb
    ANGRisptcD5FBQ3s
    DZwBJYCFZ2qQdHPH
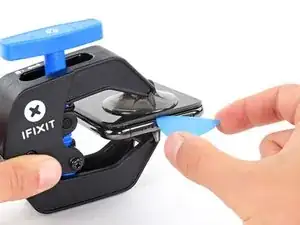
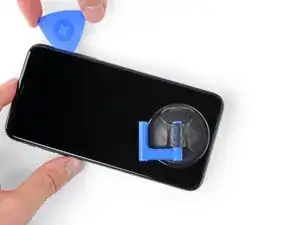
    • Slide the opening pick around the lower left corner and up the left edge of the iPhone, slicing through the adhesive holding the display in place.

    • Don't insert your pick more than 3 mm, as you may damage internal components.

  11. FUSCepTgYrVwbr5K
    • There's a delicate cable along the right edge of your iPhone. Don't insert your pick here, as you may damage the cable.

  12. iCAP1XgpuQftx1sP
    iCAP1XgpuQftx1sP
    viP6GMB2wWML25OZ
    TLILA3TNlvSRWNWm
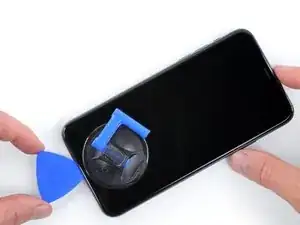
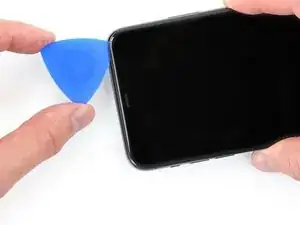
    • Re-insert your pick at the bottom edge of the iPhone, and slide it up the right side to continue separating the adhesive.

    • Don't insert your pick more than 3 mm, as you may damage the display cables.

  13. q2IFh2rrcPUFxeyv
    q2IFh2rrcPUFxeyv
    CHqF5SMDWLvWtGnY
    OfOIVDHopCcKPyHA
    • The top edge of the display is secured with both glue and clips.

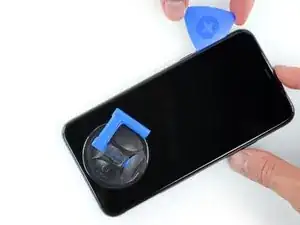
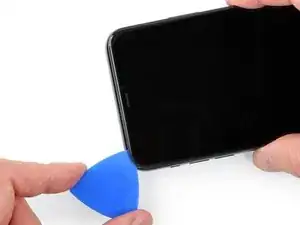
    • Gently pull the right edge of the display down slightly (in the direction of the Lightning port).

    • Insert your pick into the top-right corner of the phone.

  14. 1oPfs1uevfpfYLEe
    1oPfs1uevfpfYLEe
    3DoTMRrGLDWmq5hs
    • Continue pulling the display down (toward the Lightning port) as needed in order to make a gap large enough for the pick.

    • Slide the pick to the top left corner and cut any remaining adhesive securing the display.

    • Don't insert your pick more than 3 mm, as you may damage the front panel sensor array.

  15. lGkdVeFpWSVfaOie
    • Pull on the small nub on the suction cup to remove it from the front panel.

  16. HfYrYYYnL6qVgTWL
    HfYrYYYnL6qVgTWL
    gTnXMgoIPoJsGpmZ
    5FRPIqeg1XtytHPp
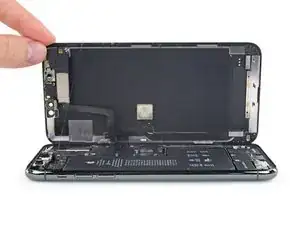
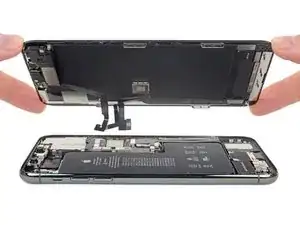
    • Open the iPhone by swinging the display up from the left side, like the back cover of a book.

    • Don't try to fully separate the display yet, as several fragile ribbon cables still connect it to the iPhone's logic board.

    • Lean the display against something to keep it propped up while you're working on the phone.

    • During reassembly, lay the display in position, align the clips along the top edge, and carefully press the top edge into place before snapping the rest of the display down. If it doesn't click easily into place, check the condition of the clips around the perimeter of the display and make sure they aren't bent.

  17. 6PnxLxG2BS6Kt2Yc
    6PnxLxG2BS6Kt2Yc
    OrVRrH4IJTc5CE1K
    • Remove two 1.3 mm long Y000 screws securing the battery cover bracket.

    • Throughout this repair, keep track of each screw and make sure it goes back exactly where it came from to avoid damaging your iPhone.

    • During reassembly, this is a good point to power on your iPhone and test all functions before you seal the display in place. Be sure to power your iPhone back down completely before you continue working.

    My Y000 didn’t work on my screws. Does anyone know why?!

    Ivan -

  18. uLdxHJrxwRyVV53E
    • Remove the bracket.

  19. vGmttThUEZfGxoV4
    vGmttThUEZfGxoV4
    LtqFUCRMfqLqElsR
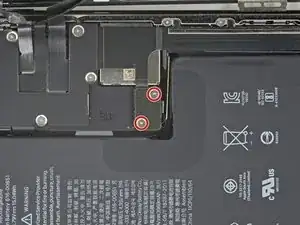
    • Use a spudger or a clean fingernail to pry the battery connector up from its socket on the logic board.

    • Try not to damage the black silicone seal surrounding this and other board connections. These seals provide extra protection against water and dust intrusion.

    • Bend the connector slightly away from the logic board to prevent it from accidentally making contact with the socket and providing power to the phone during your repair.

    The second connection from the battery to the daughterboard should also be disconnected even just as an extra precaution.

    Keegen Payne -

  20. baH2ypVBchGMPlfG
    baH2ypVBchGMPlfG
    5GRdBFOK2qqrPfXl
    • Use a Y000 driver to remove six 1.3 mm screws securing the logic board cover bracket.

    What do you do if one of the screws gets stripped? I can get it out.

    Zach -

    Solder a paper clip to it

    Akeem Scrubb -

  21. Rgo3lrRGbrXfgvHn
    • Remove the bracket.

  22. MZSBQinSFrEnZfik
    MZSBQinSFrEnZfik
    GVORGWhD22Bh26sO
    • Use a spudger or a fingernail to disconnect the OLED panel cable connector.

    • To re-attach press connectors like this one, carefully align and press down on one side until it clicks into place, then repeat on the other side. Do not press down on the middle. If the connector is misaligned, the pins can bend, causing permanent damage.

  23. CtXlGLDqcsxNWCNP
    CtXlGLDqcsxNWCNP
    vLe2ETBCKEkDKDFq
    YCHmHDGJJBuJB61b
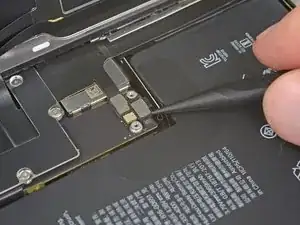
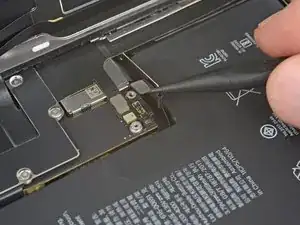
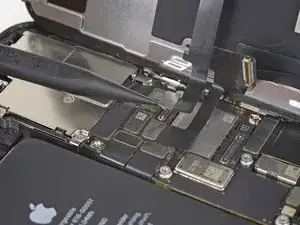
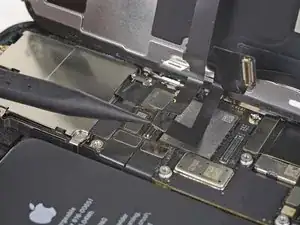
    • Use a spudger or a fingernail to disconnect the front sensor assembly cable connector.

    • Use a spudger or a fingernail to disconnect the digitizer cable connector.

    • If any part of your screen doesn't respond to touch after your repair, disconnect the battery and then re-seat this connector, making sure it clicks fully into place and that there's no dust or other obstruction in the socket.

  24. ihyIZmkPEMZH1xCW
  25. pRTeaIheODYXCPpT
    pRTeaIheODYXCPpT
    AkRxT51VZrBJxnwU
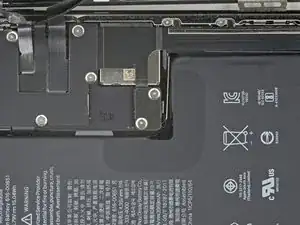
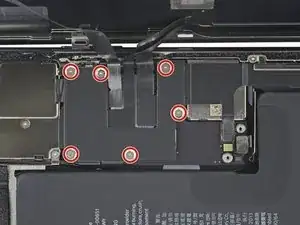
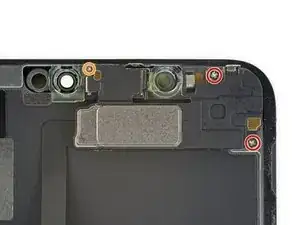
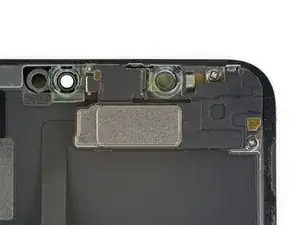
    • Remove the three screws securing the speaker/sensor assembly to the back of the display:

    • Two 1.6 mm Phillips screws

    • One 1.4 mm Y000 screw

  26. RI6hhZyyF2uFFfQg
    RI6hhZyyF2uFFfQg
    bZfUAoWdZMIDvtJh
    ckRJuNbKAUL1R64V
    • The earpiece speaker is lightly adhered in place.

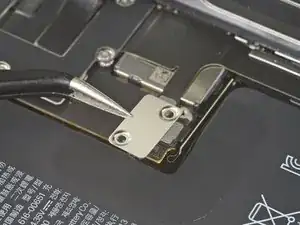
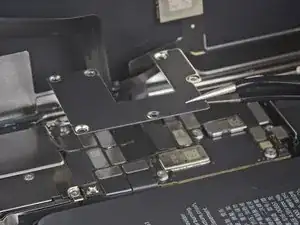
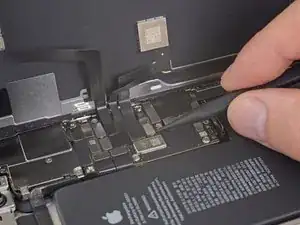
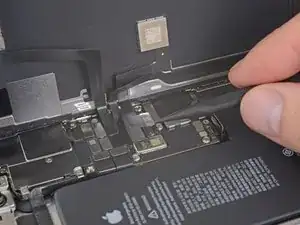
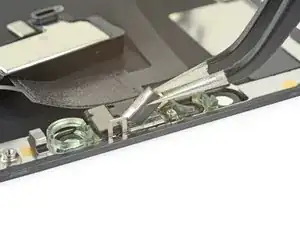
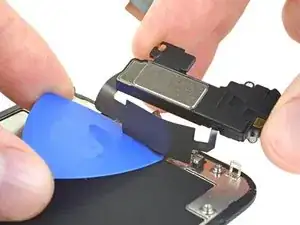
    • Use the point of a spudger to gently pry up the top edge of the speaker.

    • Flip the speaker assembly over—down and away from the top edge of the display.

    • The speaker remains attached via a very thin ribbon cable. Be careful not to strain or damage the cable.

  27. XYqe5EiTRFL1MOoa
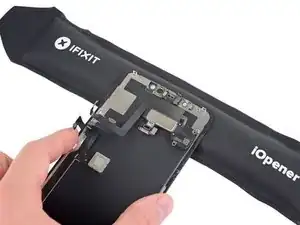
    • Use a hairdryer or heat gun or prepare an iOpener and apply it to the top front of the display for 1-2 minutes, in order to soften the adhesive securing the sensors.

  28. SRdLaXdASdn4AetN
    SRdLaXdASdn4AetN
    BUNmXOnoR6ZRNs1b
    1fJlHISinstsCVZU
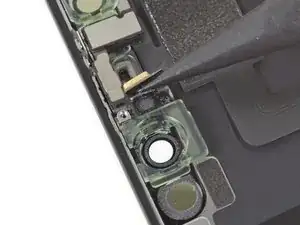
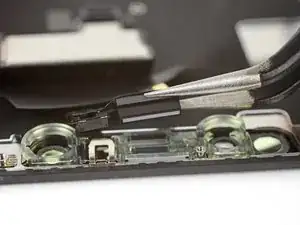
    • Use the point of a spudger to lift and separate the microphone from its notch in the front panel.

  29. PKcRkgdMmjPHawT6
    PKcRkgdMmjPHawT6
    QqnRYUWv1EZMtUHa
    • Use tweezers to wiggle the ambient light sensor and lift it from its notch in the display.

    • If the sensor does not wiggle free after a few seconds, apply more heat and try again.

    • The sensor remains attached to the rest of the sensor assembly via a very thin flex cable. Be careful not to strain or damage the cable.

  30. rv1wppZTGIOnqGLD
    rv1wppZTGIOnqGLD
    OdQYUM3Xc2S5YKrs
    i3mF5bpYJPJtnFEo
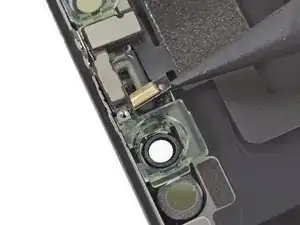
    • If you successfully removed the entire ambient light sensor, as shown in the first photo, continue to the next step below.

    • If the white diffuser strip detached and remains embedded in the display, as shown in the second photo, you will need to carefully lever it out along the top edge using a thin blade or pry tool. Re-applying heat first may make this task a bit easier.

    • During reassembly, install the diffuser into the display first, making sure it faces the right direction (the front-facing side is shown in the first image, and the rear-facing side is shown in the third).

    • Then, set the ambient light sensor on top of the diffuser. You will need to hold the sensor in position while installing the screws securing the earpiece/sensor assembly. Once the screws are tightened, the sensor will stay in place and work normally.

  31. TIsfNnXOYdpZvYUI
    TIsfNnXOYdpZvYUI
    hiWIlLhvbBSbI42Z
    Uk4DBnWUQ5KHEaXW
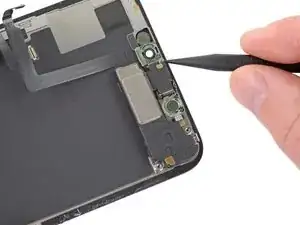
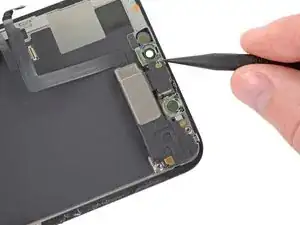
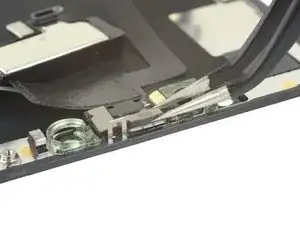
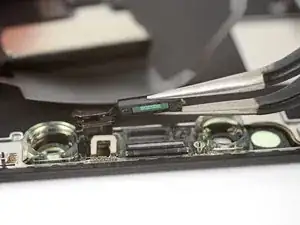
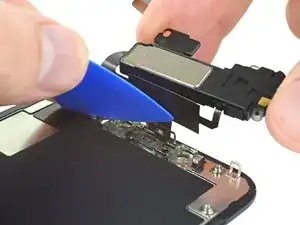
    • Working left to right, slide an opening pick beneath the flex cable and underneath the proximity sensor + flood illuminator module.

    • Gently wiggle and lift to separate the module from its notch in the front panel.

    • It's helpful to lift and hold the speaker out of the way for access. Just be careful not to pull on the thin flex cable while you work.

  32. u6yfYrIrxHtXEuOL
    u6yfYrIrxHtXEuOL
    LNTOrll4jQNLT2aM
    AQ2EGApIQOopQ53B
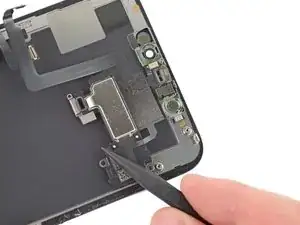
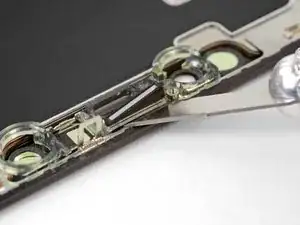
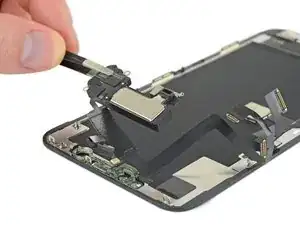
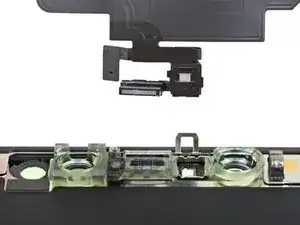
    • Remove the earpiece speaker and front sensor assembly.
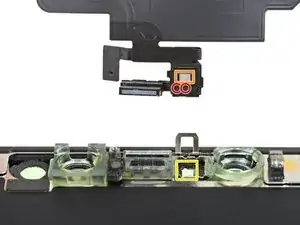
    • During reassembly, check the position of the black plastic module containing these components:

    • Proximity sensor

    • Flood illuminator

    • The module must be positioned so that these components are not obstructed by any adhesive.

Conclusion

Compare your new replacement part to the original part—you may need to transfer remaining components or remove adhesive backings from the new part before installing.

To reassemble your device, follow the above steps in reverse order.

Take your e-waste to an R2 or e-Stewards certified recycler.

Repair didn’t go as planned? Check out our iPhone 11 Pro Max Answers community for troubleshooting help.

Jeff Suovanen

Member since: 06/08/13

427153 Reputation

18 comments

There is no programmer yet for the 11 Pro as far as I can see, the YT clip is about older models. Anyone have a solution?

Fixandinstall -

So far the newest iPhone I have repaired is an iPhone 7 - should I give the 11 pro a go?

TheRe -

I just finished this repair and this guide was very easy and clear to follow. I had no issues with the parts from ifixit and my phone is back to fully operational. I just wish that OLED screen wasn’t so much money, but oh well…

Scott Hyder -

how do i return it back there is no how to put it back

ps_fan_1 -

Is it not necessary to disconnect the battery from that little “daughter-board” like component where the vibrator, and loudspeaker connect to as well? I have always done this but I am curious if anyone knows if there is actually any risk.

Keegen Payne -

shorting is still an issue I believe

Kaplan Akıncılar -

I have done several screen replacements and not done that secondary disconnect, and no issues so far. Only ever disconnected that when replacing the battery or for other purposes (replace charger port, etc.) that would require one or both of those components to be removed.

Justin Castle -

@keegenpayne

I disconnect both connectors every time because the current is also going into the daughter-board.

So I recommend you to disconnect both connectors.

Leon -

Good to hear, That is what I do as well

Keegen Payne -

Do you guys know how to get rid of the error that says that this iPhone part might be not from this phone?

Karol Lubicz-Grużewski -

If anyone has a solution please do advise because I get a dim screen light when I go in gallery only

Yasser Alghamdi -

I wish I had realised before I started/made the purchase that I should have rented the device to program the new screen. My wife isn’t loving the color not being as it was. I may have to find the device, and another new glue gasket and redo. I’d love to know is this is available other than as part of the full set, I had to other part & tools as the part only was unavailable…I returned the old screen and the tools…hopefully I’ll get at least my $10 back.

James Bowkett -

James, try going into Settings > Accessibility > Display & Text Size > Color Filters.. and you may be able to tweak the outputs to get it a bit better. I ended up cheaping out on a non-Apple display for my phone (SE First Gen) and fiddled with the 'honeycomb' filter and tweaked the intensity and hue and it's not that bad.

foodandart -

Clear and easy to follow. Doesn't mention removing the old adhesive around the case after screen removal. I felt like Jason Bourne disarming a bomb when removing the ribbon cables!

Chris Johnson -

What is the paper like material on back of the iPhone screen???

sonyagentry1 -

Heat dissipation material

Jeff Gest -

Very well performed easy to understand

Thanks

Isa Berisha -

Hi how many cables are atached to the screen of iphone-14 pro max thanks

Isa Berisha -