Introduction

Prereq used with iOpener.

  1. cbHhknNQZuH52rXR
    cbHhknNQZuH52rXR
    fxTQqMPurYGyRJx1
    RVcvcMZjrVloNAUQ
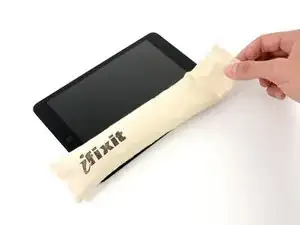
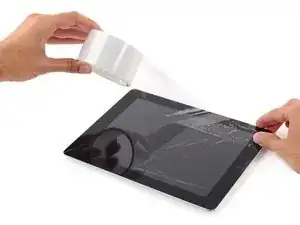
    • If your display glass is cracked, keep further breakage contained and prevent bodily harm during your repair by taping the glass.

    • Lay overlapping strips of clear packing tape over the iPad's display until the whole face is covered.

    • This will keep glass shards contained and provide structural integrity when prying and lifting the display.

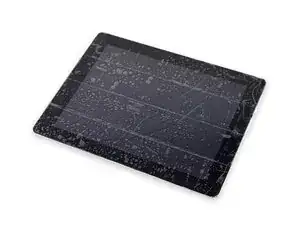
    • Do your best to follow the rest of the guide as described. However, once the glass is broken, it will likely continue to crack as you work, and you may need to use a metal prying tool to scoop the glass out.

    • Wear safety glasses to protect your eyes, and be careful not to damage the LCD screen.

    In case of broken glass, here are some hints:

    - I prefer 3M "3350" tape; a metalized polypropylene tape with an acrylic adhesive. It's a very thin, silvery HVAC tape, not your standard duct tape.

    - Test your tape to make sure it sticks really well to the glass.

    - Use isopropyl alcohol on a paper towel to remove fingerprints and other dirt to help the tape stick to the screen.

    - Use the widest tape you can find, and apply it evenly, without trapping bubbles, without crinkles: This greatly improves your chance of success with the suction cup later.

    - Cut tape pieces long enough and go over the (rounded) edge; afterwards carefully run a scalpel alongside the edge (between bezel and glass) to trim off any excess.

    - Don't overlap edges of the tape: butt-join them instead.

    - If needed: repeat in other direction.

    - If needed: Cut square piece of tape (size of suction cup) and place it where you want to lift the glass, so that the suction cup doesn't cover any butt-joins.

    Good luck, you brave person!

    volty -

    This is the second broken screen I’ve fixed. Overlapped package tape carefully stuck to the glass and trimmed to the edges will contain most of the shards. I found that a hair dryer works for softening the glue. After getting under an edge with the suction cup I carefully followed the opening sequence using a combination of plastic picks and a single edge razor blade to get under the small pieces. It was slow going with lots of reheating with the dryer (about 45 minutes), but the taped glass came off without glass everywhere.

    Bill Roughen -

  2. JTXNMU2mRHaO3VHM
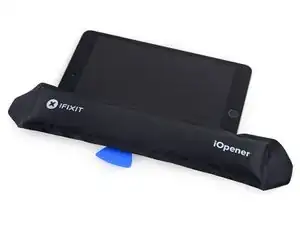
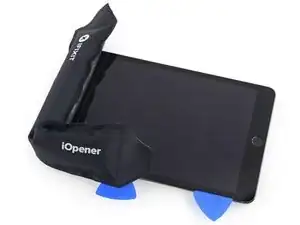
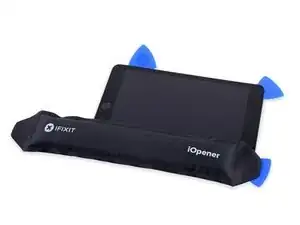
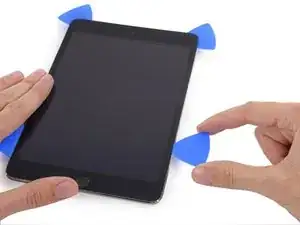
    • Handling it by the tab, place the heated iOpener on the side of the iPad to the left of the home button assembly.

    • Let the iOpener sit for about five minutes to soften the adhesive beneath the glass.

    I worked at it for over 2 hours before deciding to microwave the opener for 45 seconds at a time. That seemed to do the trick.

    jaromhyde -

  3. IcDren6BTpiUttKB
    IcDren6BTpiUttKB
    DK4YJPomRE1DXANh
    GGV46hLdgsrtBdqP
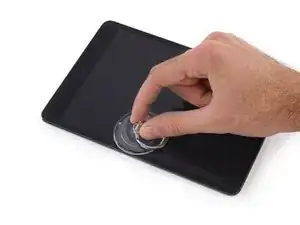
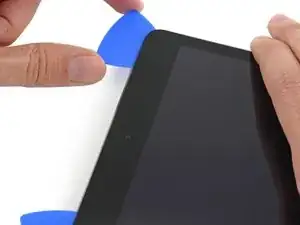
    • Carefully place a suction cup halfway up the heated side.

    • Be sure the cup is completely flat on the screen to get a tight seal.

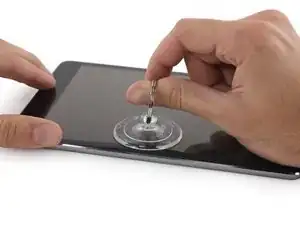
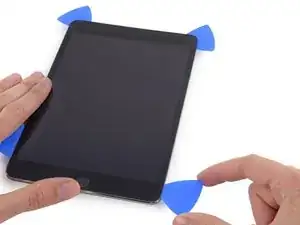
    • While holding the iPad down with one hand, pull up on the suction cup to slightly separate the front panel glass from from the rear case.

    • Be careful to only lift the glass enough to insert an opening pick—any more and you may risk cracking the glass.

    This step is totally pointless if you have a shattered screen. The suction cup is rendered useless. Any tips on what to do if you can't get any suction due to a shattered screen?

    robloomis -

    just pick out the glass shards if it is cracked that bad you are better off scrapping the digitizer

    echow2001 -

    for shattered screens I cover the screen with tape. I find packing tape works best for me.

    George -

  4. xdR4G2kpVpmVoWFx
    xdR4G2kpVpmVoWFx
    xQTLcgMQh4MZbtco
    shpcxsgNSc4GTuCR
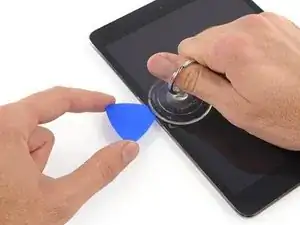
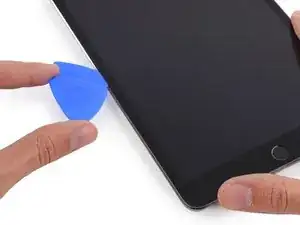
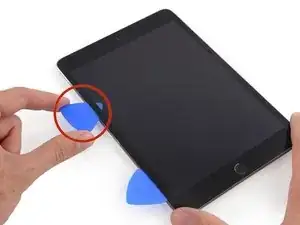
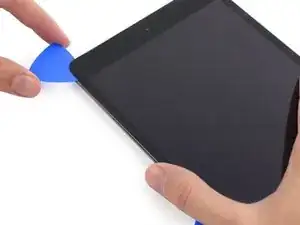
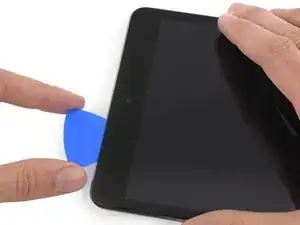
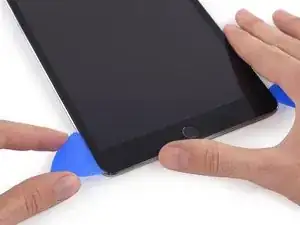
    • While holding the glass up with the suction cup, slide the point of an opening pick into the gap between the glass and body of the iPad.

    • Don't insert the opening pick any deeper than the black bezel on the side of the display. Inserting the pick too far may damage the LCD.

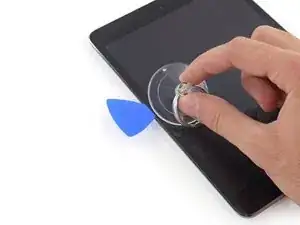
    • Pull the suction cup's plastic nub to release the vacuum seal and remove the suction cup from the display assembly.

    you have to pull up on the suction cup harder than you might be comfortable with!

    jfaulks1 -

    thanks jfaulks1 (I did not copy and paste lol)

    iliketrains kid -

  5. hnTrXWSgZRITDQGT
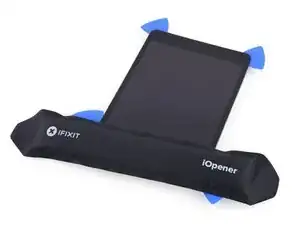
    • Reheat and reapply the iOpener.

    • Be careful not to overheat the iOpener during the repair procedure. Always wait at least ten minutes before reheating the iOpener.

    • Let it rest for a few minutes to reheat the left edge of the iPad.

  6. 1SNJmJ5QLCHNmoxD
    1SNJmJ5QLCHNmoxD
    Zo2QMtHXIHdcI25K
    GZmWxlRfQKsDBOLg
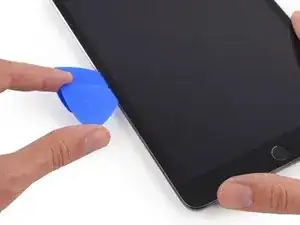
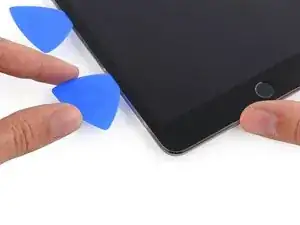
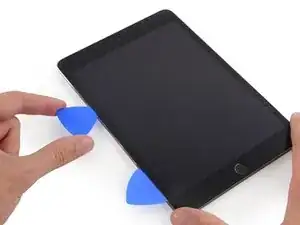
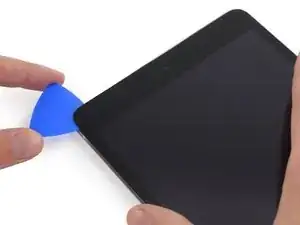
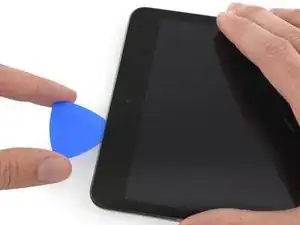
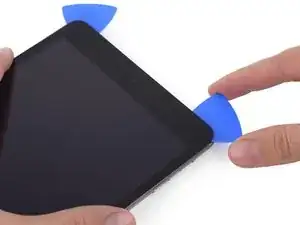
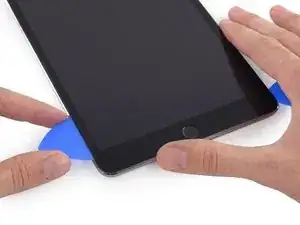
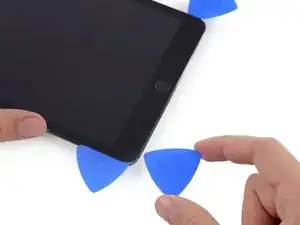
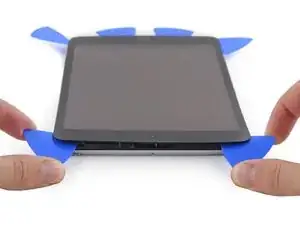
    • Place a second opening pick alongside the first and slide the pick down along the edge of the iPad, releasing the adhesive as you go.

    • Throughout the rest of the procedure, if you encounter significant resistance to sliding picks beneath the glass, stop and reheat the section you're working on. Forcing the picks risks cracking the glass.

  7. MQQJILRkA6hCIHSF
    MQQJILRkA6hCIHSF
    yRCgTHJxv2gvmPMr
    3xSoO5ID1OKpK6Xg
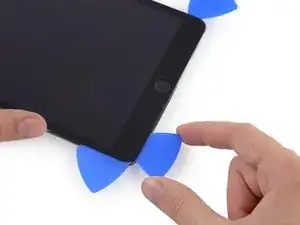
    • Continue moving the opening pick down the side of the display to release the adhesive.

    • If the opening pick gets stuck in the adhesive, "roll" the pick along the side of the iPad, continuing to release the adhesive.

  8. J2NyCSdkLdbXkWes
    J2NyCSdkLdbXkWes
    PLGWXbvQRMKqINgh
    Wo1Blkhkt3LIsDY1
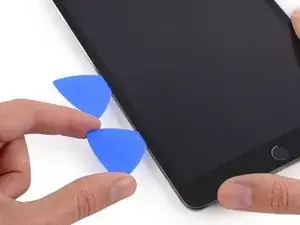
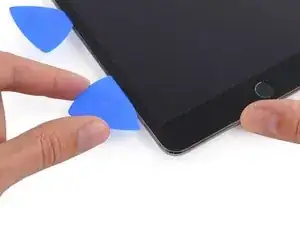
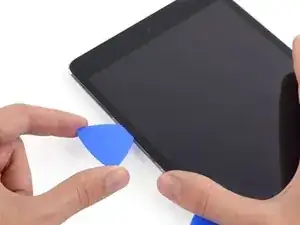
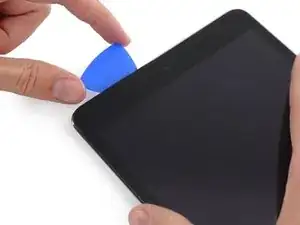
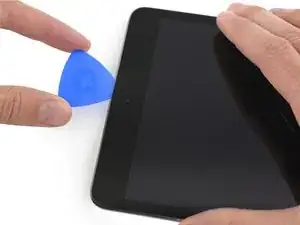
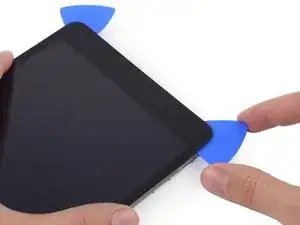
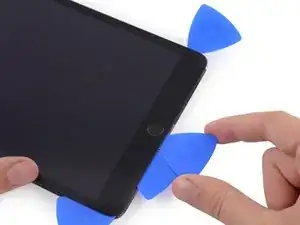
    • Take the first pick you inserted and slide it up toward the top corner of the iPad.

    • If you can see the tip of the opening pick through the front glass, don't panic—just pull the pick out a little bit. Most likely, everything will be fine, but try to avoid this as it may deposit adhesive on the front of the LCD that is difficult to clean off.

  9. FQPGUTFQrYRiZKmU
    • Reheat the iOpener and place it on the top edge of the iPad, over the front-facing camera.

    • Be careful not to overheat the iOpener during the repair procedure. Wait at least ten minutes before reheating the iOpener.

    • If you have a flexible iOpener, you can bend it to heat both the upper left corner and the upper edge at the same time.

    I left my iOpener on the bezel the entire time I slid picks in. worked great

    jfaulks1 -

  10. lujiMvxormXIDU26
    lujiMvxormXIDU26
    sQQTCde4Q3V1ciNr
    TNmwWFLZURKdolgB
    • Slide the opening pick around the top left corner of the iPad to separate the adhesive.

    Gezz this is though! Cracked the glass while replacing it.

    Padraic Hoselton -

    :( sad (rip glass lol)

    iliketrains kid -

  11. lJLMG3Ay6yfBPpQf
    lJLMG3Ay6yfBPpQf
    CR6HLmWxJaNTJ4GS
    aU15SLvVAYEmSTNt
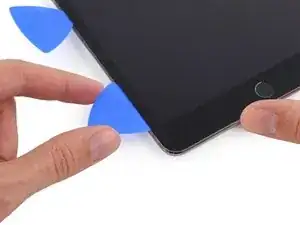
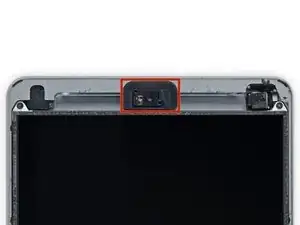
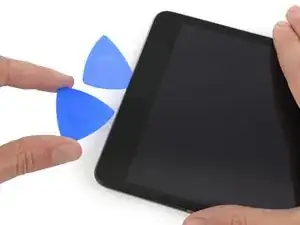
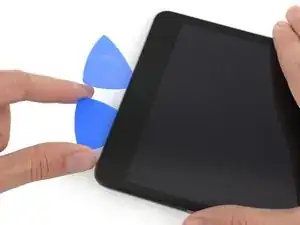
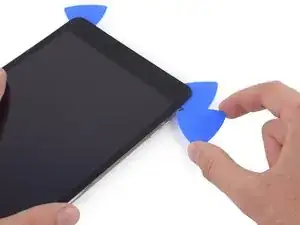
    • Slide the opening pick along the top edge of the iPad, stopping just before you reach the camera.

    • The third image shows where the front-facing camera and housing are in the iPad.

    • Avoid sliding the opening pick over the front-facing camera, as you may smear adhesive onto the lens or damage the camera. The following steps will detail how to best avoid disturbing the front-facing camera.

  12. IacYHeoIp1uGLHPB
    IacYHeoIp1uGLHPB
    5SgmAXiQtNxTBMfJ
    gam1PUEfWPvW2Us1
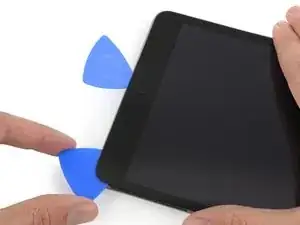
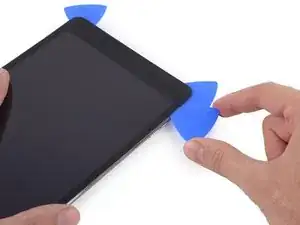
    • Pull the pick out slightly, and slide the very tip gently along the top of the front-facing camera section of the top edge.

  13. FUYufEfbXgIBBEDw
    FUYufEfbXgIBBEDw
    ahvu32nDE2TBE61g
    qxkIkjEgirYs1uh2
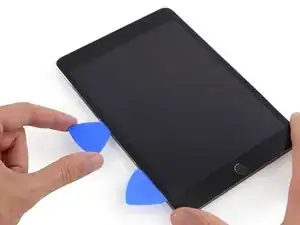
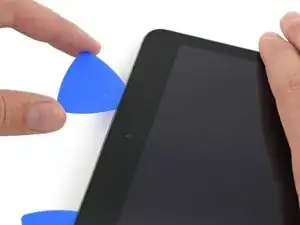
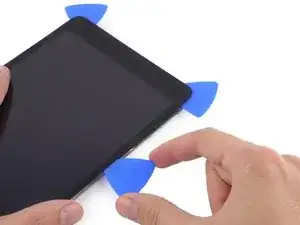
    • Leave the opening pick in the iPad slightly past the front-facing camera.

    • Take a second pick and insert it to the left of the camera, where the first pick just was. Slide it back to the corner to completely cut any remaining adhesive.

    • Leave the second pick in place to prevent the corner adhesive from re-sealing as it cools.

  14. 1Y4Xtw23PQkLFS5B
    1Y4Xtw23PQkLFS5B
    vgvbjXCsI6A4OamX
    n4YSDj5ToMmalJSA
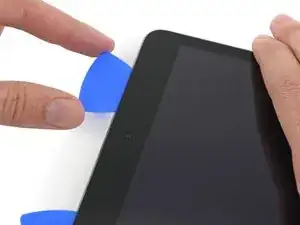
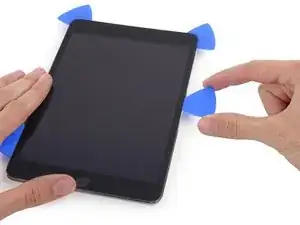
    • Insert the previous pick deeper into the iPad and slide it away from the camera toward the corner.

    Shattered my screen pretty bad here, making it so that whenever I continued to move the pick the glass separated and I couldn’t continue moving it. Be VERY gentle moving the pick; almost no force is required.

    Jasper Holden -

  15. xuGYowtmiIbT4YgX
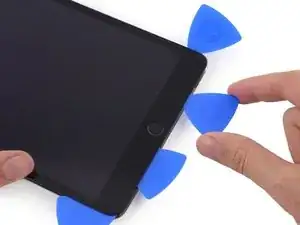
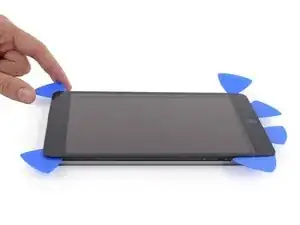
    • Leave the three picks in the corners of the iPad to prevent re-adhering of the front panel adhesive.

    • Reheat the iOpener and place it on the remaining long side of the iPad—along the volume and lock buttons.

  16. sqfAhxUXVyFfkHZe
    sqfAhxUXVyFfkHZe
    INfyKIdLBI2GpZLw
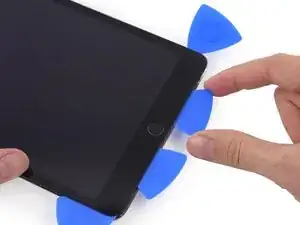
    • Slide the top right opening pick around the corner to fully release the top edge of the glass.

    • Leave this pick in place to keep the adhesive from re-sealing itself, and grab a new pick for the next step.

  17. TsxjgvU1QIAFFAiZ
    TsxjgvU1QIAFFAiZ
    UQcQY6Dxut2IwkOF
    X1kjp3YqeKPBXU3m
    • Insert a new opening pick and slide it to the middle of the right edge of the iPad, releasing the adhesive as you go.

  18. WuyJRhHOvCltXoIZ
    WuyJRhHOvCltXoIZ
    UexwnTumDH4sHBjN
    64RCwFrV2rHZo5B5
    • Continue to slide the pick down the right edge of the iPad, releasing the adhesive.

  19. rCdDXGBXQ6w311va
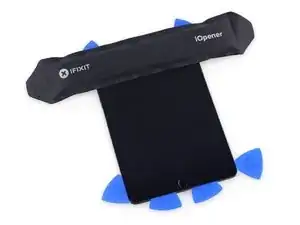
    • Leave the opening picks in place and reheat the iOpener.

    • Remember not to overheat the iOpener—no more than once every ten minutes.

    • Set the reheated iOpener on the home button end of the iPad and let it rest for a few minutes to soften the adhesive beneath the glass.

  20. vBnWthHm3ZgtlAim
    vBnWthHm3ZgtlAim
    uJUPAUOA1n2sieRs
    CFfkAZsJOLSk2bgo
    • Slide the lower left pick to the lower left corner to cut the adhesive on that corner.

    • Leave the pick at the corner. Do not pry any farther, and do not remove the pick from the iPad.

    • There are quite a few things to avoid beneath the lower bezel, so study the third image closely:

    • Antennas

    • Home button cavity

    • Digitizer cable

    • The following steps will direct you where to pry to avoid damage to these components. Only apply heat and pry where directed.

  21. rS3EXcDUWtSZCMYN
    rS3EXcDUWtSZCMYN
    1yWedd6EZxNMptpo
    YuQNn5PtjTUqRGDf
    • Leave the pick from the last step in place to prevent the adhesive from re-sealing.

    • With a new pick, slice gently over the left-hand antenna, stopping before the home button.

    • Only slide the pick from the outer edge toward the center of the iPad. Do not move the pick back toward the outer edge, as moving in this direction may damage the antenna.

    • If you need to slide the pick over the lower section more than once, remove it and re-insert at the outer edge, and slide inwards.

    • Leave the pick in place before moving on.

  22. iNDwARAADDdWXHdJ
    iNDwARAADDdWXHdJ
    UNp1etUebdkVlKSG
    ecvGPRphMxBUHIhR
    • Insert the tip of one last pick next to the previous step's pick, and slide it beneath the home button.

    • Stop about an inch from the right-hand side to avoid cutting the digitizer cable.

    • Insert the pick slightly deeper and work it back toward the home button.

    • Again, be sure to only slide the pick toward the center of the iPad when it is fully inserted; otherwise you may damage the antenna beneath the glass.

  23. qDrHeJXOw5C4wGWO
    • Reheat and reapply the iOpener to the top bezel of the iPad.

  24. UbqM2HpuccIer5HZ
    UbqM2HpuccIer5HZ
    SLjWQkyOsoDWdkNJ
    • Be very careful with this step. Take your time and ensure the adhesive is hot and soft, and that you've been through all of the adhesive with an opening pick. Don't be afraid to stop and reheat.

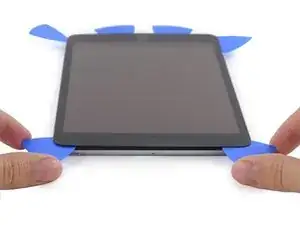
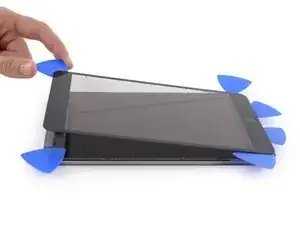
    • At the top of the iPad opposite the home button, you should have a pick lodged into each corner. Twist the picks to lift the glass slightly, separating the last of the adhesive along all four edges.

    • If you encounter a significant amount of resistance, stop twisting. Leave the picks in place, reheat, and reapply the iOpener to the problem areas, and run a pick through the sticking point one more time.

  25. VYhvMmFvpDTWOtK4
    VYhvMmFvpDTWOtK4
    iWUOi6fVuTVBnB3V
    • Lift slowly and gently to further detach the adhesive along the lower edge.

    Really, add a few more pics and a few more picks, see how long and difficult you can make this guide. 26 steps to get the top screen off is ridiculous.

    B. A. Computer Services -

  26. vwplaDO5A41e1FXn
    vwplaDO5A41e1FXn
    FHVgY6qDfwkbrF12
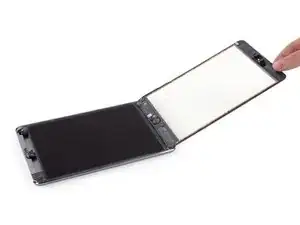
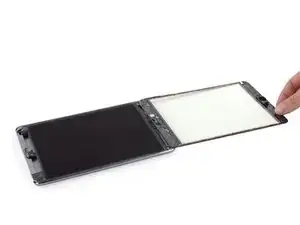
    • Once all of the adhesive has been separated, open the front glass like a page in a book and rest it on your workspace.

    • If reusing the front panel assembly during reassembly, you will need to replace the display adhesive. Use our display adhesive application guide to reapply your display adhesive and reseal your device.

    I recommend wearing latex gloves or be sure not to put too many finger prints on the front or back of this front glass when lifting it or completing the remainder of the steps. I made this mistake and upon installing the new LCD and putting the iPad back together I realized that I left a few finger prints on the inside of the front glass. After re-securing the adhesive strips putting the iPad back together there are now unremovable fingerprints visible when the LCD is turned off. Just a recommendation on the gloves or be sure to wipe both sides of the front glass clean before putting all back together.

    Christian Screen -

  27. DBENplxMDlIJqJym
    DBENplxMDlIJqJym
    dKYqaUFUQI6KoldJ
    SuMWOrWAI4au3JJZ
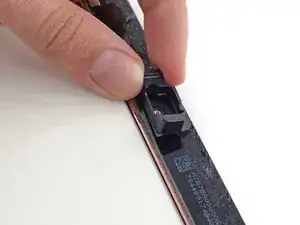
    • The front-facing camera housing may stick to the front panel; peel up the housing and place it back over the camera to protect it.

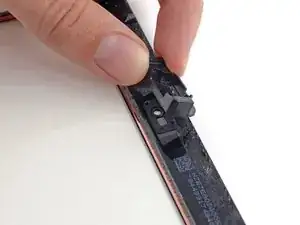
    • Rock the camera housing up on one edge to free it from the adhesive and remove it from the front panel.

    • Return the front-facing camera housing to its recess in the rear case.

    this didn’t happen to me BUT the glue was still sticking to the top of the glass because one pick had gone OVER the glue and the other under, so I had to pull the glue off and cut it with scissors

    jfaulks1 -

    OK this was glue, it was the tape from step 35!

    jfaulks1 -

Conclusion

To reassemble your device, follow these instructions in reverse order.

Andrew Optimus Goldheart

Member since: 17/10/09

502341 Reputation

0 comments