Introduction

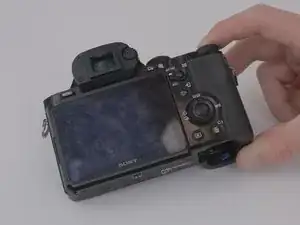
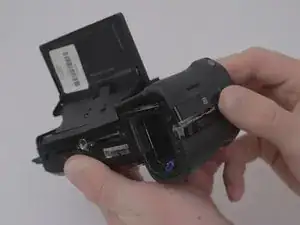
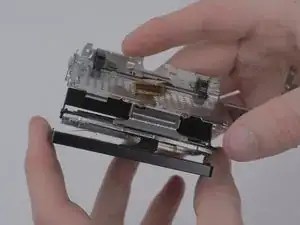
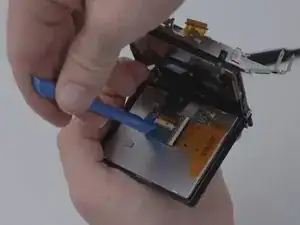
This replacement guide will address how to remove a faulty LCD screen from a Sony a7 model number ILCE-7 camera. The LCD screen is an essential part of the camera that allows the user to review pictures or access the settings menu and edit the photography quality settings. Here are the steps for you to replace the LCD screen.

If the camera screen turns black, or the screen is unresponsive to commands, then the LCD screen of the camera may have failed. Before proceeding, it may be helpful to refer to the troubleshooting page, which can help mitigate any easy to remedy problems before going through the LCD screen removal process.

Helpful Hint: The LCD screen is made of glass, therefore it is fragile. Handle it with caution.

  1. HwDN1DiDNJqUWomd
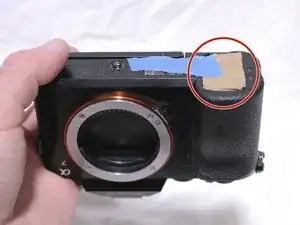
    • Flip the camera upside down, and observe where the battery door and switch are located on the camera.

    • This replacement guide is using a cardboard and tape placeholder to simulate the battery, battery door, and switch.

  2. gLEKOW6flwS5DyFP
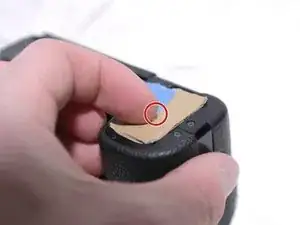
    • Slide the switch over to the right side to open the battery door.

    • This replacement guide is using a cardboard and tape placeholder to simulate the battery, battery door, and switch.

  3. YvPKSOlOp4RuiE6j
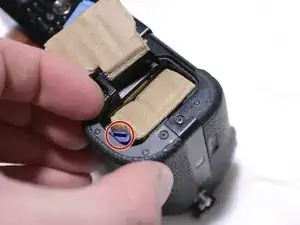
    • Depress the blue lever to allow the battery to pop out slightly.

    • This replacement guide is using a cardboard and tape placeholder to simulate the battery, battery door, and switch.

  4. SlyUFKURJKYRYXoX
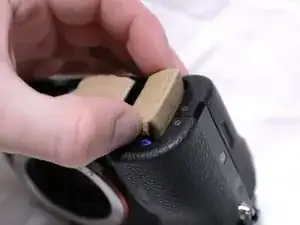
    • Remove the battery from the camera.

    • Make sure to hold onto the battery firmly when removing it from the camera, as it could slide out and fall.

    • This replacement guide is using a cardboard and tape placeholder to simulate the battery, battery door, and switch.

  5. Vo5kpt6JMq2LPxeS
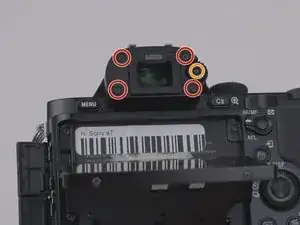
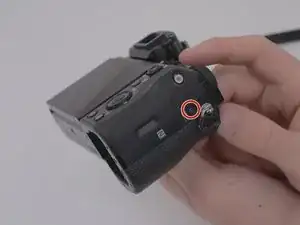
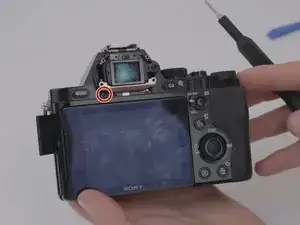
    • Remove the eyepiece cover by removing the four M1.5x4mm screws with a PH00 Phillips screwdriver.

    • Remove the M1.5x4mm screw that retains the adjustment wheel with a PH00 Phillips screwdriver.

  6. vLU12CluQWT5CiiW
    vLU12CluQWT5CiiW
    WRObwWOsl1OtLHOw
    CndfKhR1qoeiIAbe
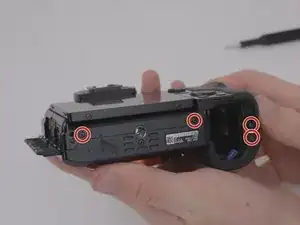
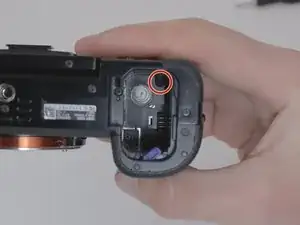
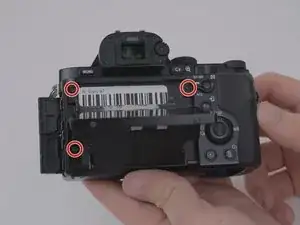
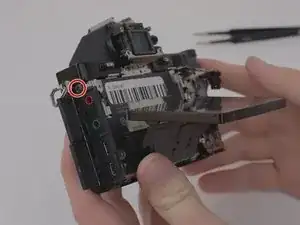
    • Remove the six M1.5x4mm screws with a PH00 Phillips screwdriver.

  7. fijRKykyyhiKUryR
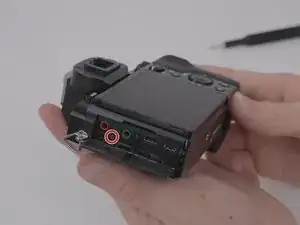
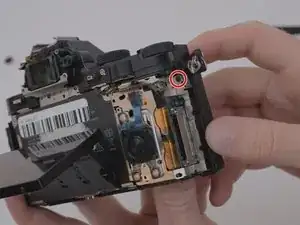
    • Remove one M1.5x4mm screw with a PH00 Phillips screwdriver.

  8. lpO6PICe6Mqp3joc
    lpO6PICe6Mqp3joc
    VKbQSAnxtfyVBCyQ
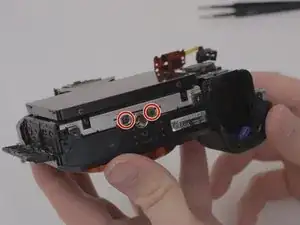
    • Remove the four M 1.5x2mm screws.

  9. LHfc15wR2yRNDcaG
    LHfc15wR2yRNDcaG
    peWocfUqirjJq36y
    4HYctUkQSjCvpJQS
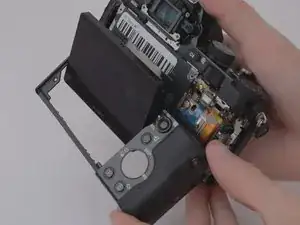
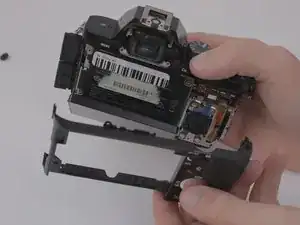
    • Once the screws have been removed, unsnap and lift the rear plastic cover off of the camera.

  10. FjCXMIDqKyCVNCGv
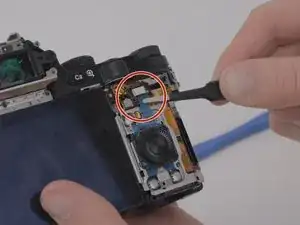
    • Using the blunt tweezers, remove the blue ribbon cable.

    • For additional guidance and tips on how to properly attach and detach connector cables, please reference iFixit's guide to connector cables here.

  11. nHeB4LAGHBJHafEX
    nHeB4LAGHBJHafEX
    qIoyyCJ6SElaBAWc
    • Place the tweezers on the side of the circuit board and lift it from underneath so as to free it from the three retaining tabs.

  12. ihZrHTBrpVKFnMgI
    ihZrHTBrpVKFnMgI
    qrVFRXZ3KNlDWiCx
    t46EKojOlK3CWO1g
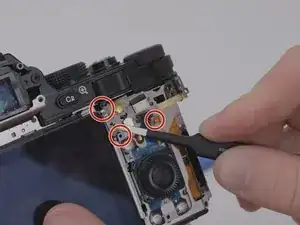
    • Remove four M1.5x4mm screws using a PH00 Phillips screwdriver.

    On my A7 the screw shown first top right was a different thread to the other three, take care to put back in the correct place

    David Zhecheva-Hamilton -

  13. rtdHGSIP4H4w42SK
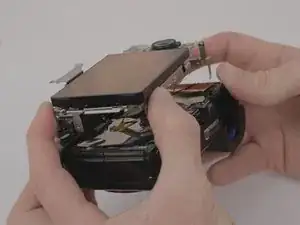
    • Lift the metal plate and LCD screen away from the camera body.

  14. jqcA42SOVEW5xH4s
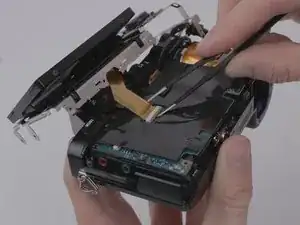
    • Detach the amber ribbon cable from the motherboard.

    • For additional guidance and tips on how to properly attach and detach connector cables, please reference iFixit's guide to connector cables here.

  15. ofXuJov1RJL4RJMd
    ofXuJov1RJL4RJMd
    vBQIpSE6MNUYvfJd
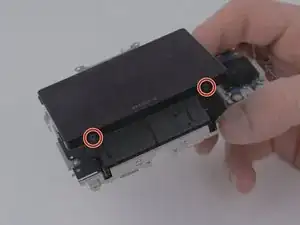
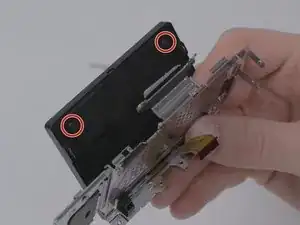
    • Remove four M1.5x2mm screws with a PH00 Phillips screwdriver.

  16. viMyG6svGXdcDVEB
    viMyG6svGXdcDVEB
    XPnYHXrMgyeipYLt
    • Using the iFixit opening tools, pry the plastic casing off the back of the LCD screen.

    • It may be difficult to remove the backing from the LCD, so it does require a fair amount of cautious pressure.

  17. 4WXNN1NVddeYgBPl
    • Seperate LCD screen from its metal backing.

  18. YcTcYLYnlAAaAfRC
    • Remove the ribbon cable that connects the LCD screen to the camera by using the iFixit opening tools.

    • In order to successfully remove the ribbon cable, it will be necessary to lift up on the connector.

    Where do I find a replacement screen

    Taslim Rahman -

Conclusion

To reassemble your device, follow these instructions in reverse order.

Jeffrey Coleman

Member since: 14/01/20

1322 Reputation

6 comments

this isn’t finished

Max Faulhaber -

Hello,

If by “isn’t finished” you mean that the instructions do not contain the steps to put the camera back together, this was done in the hope that the user would follow the steps in a reverse order to put the camera back in one piece.

Best.

Jeffrey Coleman -

completely-incomplete tutorial in 4 steps

I hope you never made a plane like this

Gue -

Hello there,

Thank you for your constructive comment. The criteria we needed to meet for this project was to provide instruction on iFixit guides for how to remove various parts on the device. We were being evaluated on the content pertaining to our writing and not the technical depth of the guide. Furthermore, we did not have a vested interest in replacing the screen nor did we have another screen to replace it with. In your rush to make a rude comment, you might have missed the end of the guide where it states that in order to reassemble you must follow the steps we provided in the reverse order. Reverse means doing something in the opposite direction.

Regards.

Jeffrey Coleman -

Thanks for the guide.
Tyler Steck -

Thank you! Appreciated the clear instructions.. I have one question is the new screen price range is around 20 to 30$ ? I find it cheap to be true but at the same time I hope it’s 😄

mohamedsayed7 -